Cleaning Checklist

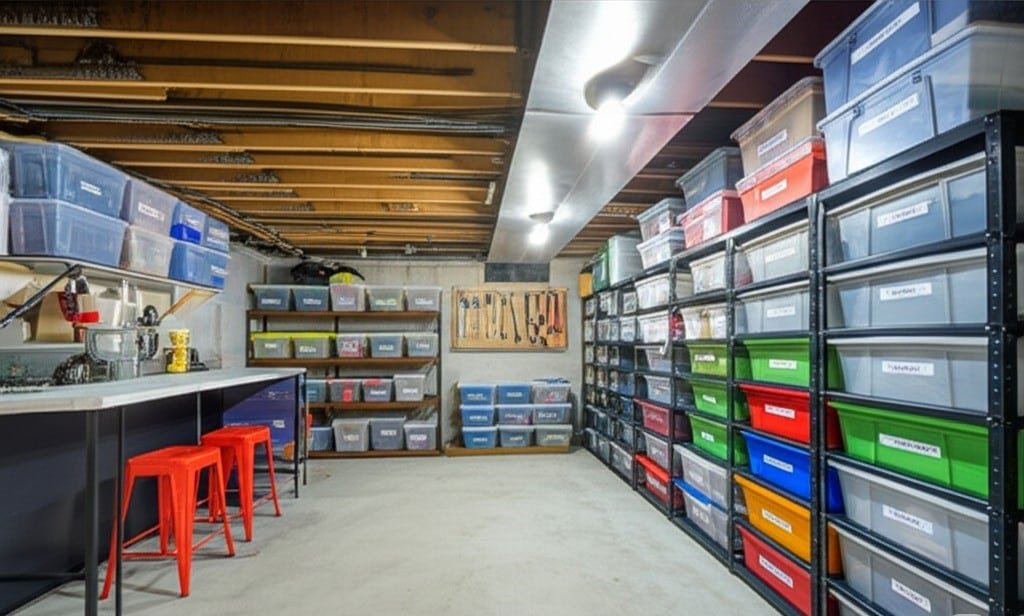
7 Best Tips To Make Your Basement Spotless

How to Make Your Basement Spotless: A Complete Cleaning Plan Basements earn their keep in Toronto homes as laundry rooms, storage space, workshops, and rec areas, but life below grade brings dust, clutter, and damp air together in one room. A truly clean basement needs more than a quick sweep: start with a safe setup, declutter hard, deep clean every surface, and keep moisture, mold, and pests in check. Follow these seven steps in order, or let our deep cleaning service do the heavy lifting. Step 1: Prep the Space and Gather Your Cleaning Kit Safety comes first because basements are often poorly ventilated. Open windows and doors, run fans to circulate air, and bring in portable work lights if the built-in lighting is weak. Wear heavy-duty gloves, safety glasses, and an N95 respirator to keep airborne dust, mold spores, and other particles out of your lungs, and choose sturdy, closed-toe shoes. Watch for spiders, insects, rodent droppings, and damp spots near outlets or wiring. Trash bags, sorting bins, labels, and markers for decluttering All-purpose cleaner, disinfectant, mold and mildew remover, and degreaser for oily stains Concrete cleaner, glass cleaner, and wood polish for the surfaces you actually have Vacuum with crevice and brush attachments, plus a shop vac for fine dust and damp debris Mop, bucket, scrub brushes in several sizes, microfiber cloths, sponges, and a squeegee Step ladder, broom, dustpan, and a dehumidifier for after the clean Clear a workspace first, then walk the room and note problem zones: visible mold, water stains, pest signs, or extreme clutter. Split the basement into manageable zones such as storage, laundry, and workshop areas. Step 2: Declutter With the Four-Box Method Work through furniture, stored boxes, clothing, toys, paperwork, hobby gear, holiday decorations, and tools one category at a time. Sort every item into one of four containers: Keep: items that stay in the basement or get stored properly Donate or sell: usable items you no longer want Trash or recycle: broken, expired, or damaged goods Relocate: things that belong upstairs or in another room Shred paperwork with personal information, and never pour old paints, solvents, or chemicals down the drain: check your municipality’s hazardous waste rules. For sentimental items, allow one or two labeled keepsake boxes and photograph the rest before letting go. Arrange bulk trash pickup, donation runs, or a weekend dumpster rental for the overflow. Step 3: Clean From the Ceiling Down, Floor by Floor Dust the ceiling, corners, ductwork, pipes, and light fixtures first with a long-handled duster, then move down the walls with a dry microfiber pad. Wash grimy painted walls with a squirt of dish soap in warm water, spot-test first, and rinse with a clean cloth. Small mold patches can be treated with a dedicated mold and mildew remover while you wear your mask, gloves, and eye protection; large growths need a professional remediation service. Floor type Cleaning approach Extra care tips Concrete Sweep, then shop vac the edges; scrub oily stains with a degreaser or concrete cleaner; mop with all-purpose cleaner or disinfectant White powdery residue is efflorescence from salts in the concrete; scrub it with a stiff brush, then seal the dry floor Vinyl or linoleum Sweep or vacuum, then mop with a cleaner made for vinyl Avoid abrasive pads and excess water, which can seep into seams Tile Vacuum, scrub grout with a grout brush or baking soda paste, then mop with tile cleaner Give grout lines extra passes in high-traffic paths Carpet Vacuum slowly in multiple directions, then treat spots with a carpet spot cleaner Use attachments along edges; a rental machine gives a deeper refresh Step 4: Windows, Fixtures, and Utility Areas Vacuum window sills and tracks, wash them with all-purpose cleaner, then spray and squeegee the glass; clear exterior window wells of leaves and check drainage Turn off the power before dusting light fixtures, and wash removable covers in the sink Empty shelves completely, dust them, and clean items before they go back Clear debris from the sump pump pit and test the pump before rainy season Dust the furnace and water heater exteriors only, and keep flammable clutter away from them Pull out the washer and dryer to clean behind them, wipe both machines, and clean the dryer lint trap after every load plus the full vent hose at least once a year Mold, Moisture, and Pest Checks Mold needs moisture and organic material to grow, so cleaning it without fixing the dampness guarantees a comeback. Keep basement humidity around 30-50 percent with a dehumidifier, ventilate the space, and repair leaks from pipes, foundations, or windows promptly. Check gutters and downspouts too: water should be carried at least six feet from the house. If mold keeps returning or covers a large area, bring in a remediation professional and follow Health Canada’s guidance on controlling moisture and mould. For pests, dispose of droppings and nests in sealed bags, then close entry points with caulk or steel wool; persistent infestations may need traps or a pest control service. The CDC overview of mold and health covers why moisture problems deserve fast action. Organize and Maintain Your Clean Basement Store belongings in clear plastic bins with tight lids instead of cardboard, install metal or heavy-duty plastic shelving to keep items off the floor, and label everything. Formal zones, such as storage, utility, workshop, and recreation areas, make the space easier to use and keep tidy. Regular upkeep is the secret to staying spotless: Weekly: sweep or vacuum traffic areas, empty the dehumidifier tray, and scan for leaks or pests Monthly: dust shelves and surfaces, and check the dehumidifier filter Seasonally: review stored items, check window wells, and inspect corners for mold Annually: repeat a full clean, rework your organization system, and clean the dryer vent Frequently Asked Questions How often should I deep clean my basement? A full clean once a year works for most homes, with lighter monthly dusting and seasonal checks in between; damp or high-use basements
7 Best Tips To Make Your Basement Spotless Read More »

various cleaning tools

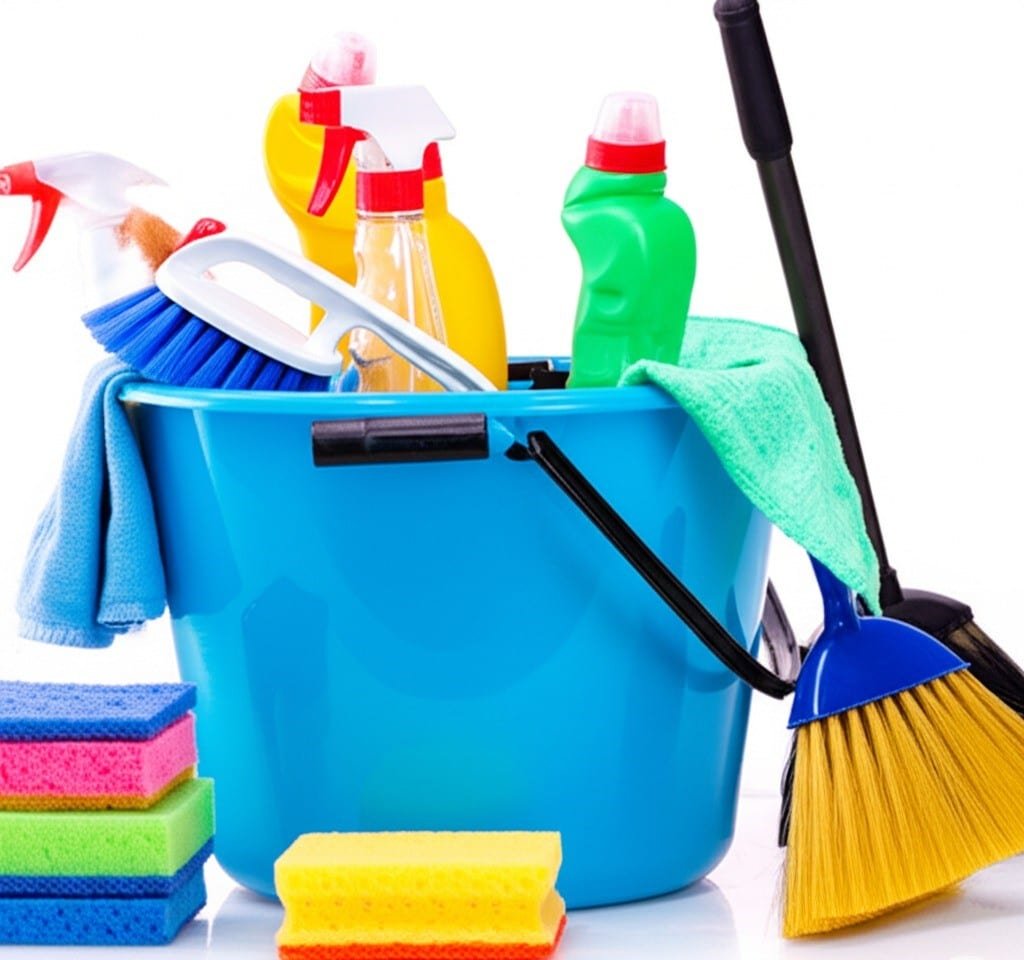
13 Essential Cleaning Tools Every Home Needs

13 Essential Cleaning Tools Every Home Needs A consistently clean home is not built on effort alone. It is built on having the right implement within reach, so each mess meets the tool built for it. With the correct kit, chores stop feeling overwhelming, and you stop leaving the film of dust and germs that cheap substitutes miss. Here are the thirteen tools worth owning and how to get the most from each. Why the Right Tools Matter Good tools save time, protect surfaces, and make the work lighter on your body: A poor cloth pushes dirt around instead of lifting it. A poor brush scratches a finish you cannot repair. A poor mop spreads grime from room to room. The right set repays you in every clean that follows. The 13 Tools at a Glance Tool What It Handles One Key Tip Microfiber cloths Dust, bacteria, spills on most surfaces Skip fabric softener and high heat in the wash Sponges Spills, stuck-on food, cookware Disinfect regularly and replace at the first off-smell Spray bottles Custom mixes and diluted concentrates Label each and choose chemical-resistant plastic Scrub and detail brushes Grout, faucets, tile, stove tops Match bristle stiffness to the surface strength Toilet brush and holder Bowl surfaces, including under the rim Choose a ventilated holder so the brush dries Broom and dustpan Crumbs, tracked-in dirt, dust bunnies Use a dustpan with a thin rubber lip Mop and bucket Washing and sanitizing hard floors A dual-compartment bucket keeps rinse water clean Vacuum cleaner Carpets, rugs, upholstery, hard floors Empty the bin and clean filters on schedule Squeegee Windows, mirrors, glass shower doors Wipe the blade after every stroke Extendable duster Ceilings, fan blades, tall furniture Choose a bendable, washable microfiber head Cleaning gloves Chemicals, hot water, dirt Keep separate pairs for bathrooms and dishes Cleaning caddy Carrying supplies Choose multiple compartments and a sturdy handle Paper towels and trash bags Spills, greasy messes, waste disposal Keep several bag sizes for cleanouts What Each Tool Does Best Cloths, Sponges, and Spray Bottles Microfiber cloths trap dust, dirt, and bacteria instead of moving them around, and their electrostatic fibres hold particles that cotton rags leave behind. Tighter weaves polish glass and mirrors streak-free, while plusher textures handle general wiping and light scrubbing, and a well-cared-for cloth lasts hundreds of washes. Sponges cover jobs needing absorbency plus a little abrasion, and dual-purpose versions pair a soft side with a scouring pad. Choose non-scratch pads for non-stick pans, glass cooktops, and ceramic dishes, and disinfect sponges often, since a damp, porous sponge is a favourite home for bacteria. Reusable spray bottles let you dilute concentrates and mix your own solutions, so keep several labelled bottles for all-purpose work, glass, and disinfecting, with nozzles that switch between a mist and a stream. Brushes, Brooms, and Mops For grime that resists gentler methods, build a set of brushes in different sizes and bristle strengths. A large stiff utility brush takes on concrete, tile, and outdoor furniture, a narrow angled grout brush dislodges mold and embedded dirt from grout lines, and small detail brushes, including retired toothbrushes, reach around faucets, drains, and window tracks. Every bathroom kit also needs a sturdy toilet brush with an under-rim extension, stored in a holder that lets it dry rather than sit in dirty water. A broom and dustpan remain the first line of defense on hard floors. Flagged bristles sweep fine dust on smooth surfaces, stiffer unflagged bristles move heavier debris, and an angled head reaches corners and baseboards. A mop and bucket finish the job: flat microfiber mops glide and pick up fine dirt, spin mops control how wet the floor gets for faster drying, and steam mops sanitize with heat alone, though they are not safe for unsealed wood. Vacuums, Squeegees, and Dusters A quality vacuum pulls dust, pet hair, and allergens from carpets, rugs, upholstery, and floors. Uprights suit large carpeted areas, canisters offer hoses and attachments for stairs and drapes, stick models handle quick cleanups, and handhelds suit spills and car interiors. A crevice tool, an upholstery tool, a soft dusting brush, and an adjustable floor head extend what one machine can do. Dirty filters choke suction, so empty the bin and clean or replace them as the manufacturer advises. A squeegee delivers streak-free glass when you overlap each stroke by about an inch and wipe the blade clean as you go, and it also pulls water off tiled shower walls to slow mildew and soap scum. An extendable duster with a washable microfiber head reaches ceilings, ceiling fans, and tall furniture without a ladder, catching dust instead of scattering it into the air. Gloves, Caddies, and Disposables Cleaning gloves create a waterproof barrier against chemicals, hot water, and bacteria, preventing irritation, dryness, and chapping. A pair that fits well, plus separate pairs per room, keeps cross-contamination down. A caddy or tote holds your sprays, cloths, sponges, and brushes in one portable place, cutting trips back to the supply closet. Paper towels still earn their spot for greasy spills, pet accidents, and anything you would rather throw away than launder. Finally, trash bags in several sizes, from small bathroom bins to heavy-duty cleanout bags, contain everything the other tools gather. Sponges, cloths, and gloves all touch food and bathroom surfaces, so the CDC guidance on cleaning and disinfecting your home is worth bookmarking, and handwashing habits matter just as much, as the CDC notes on hand hygiene. Homes with pets will appreciate the CDC tips on healthy pets for keeping animal gear and floors hygienic. Frequently Asked Questions How many microfiber cloths should I own? A practical starter set is eight to twelve, which lets you keep one per room, rotate through the laundry, and still have cloths ready for glass. When should I throw out a sponge? Replace it at the first sour smell, and disinfect it in between by microwaving a damp sponge or running it through a dishwasher cycle. Do I need

13 Essential Cleaning Tools Every Home Needs Read More »

cleaning toilet

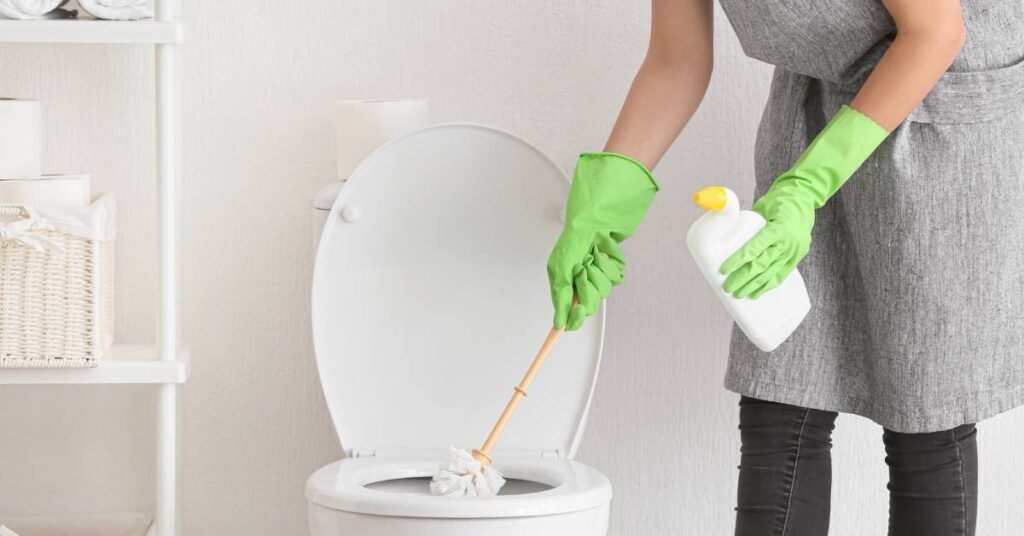
Keep Your Toilet Clean And Shiny – 4 Tricks You Need To Know

Keep Your Toilet Clean And Shiny A toilet that always looks and smells fresh is a realistic goal, but it takes structure rather than the occasional frantic scrub. Combining a proper deep clean with small habits that hold the results in place is what keeps a bathroom hygienic and far easier to maintain. Trick 1: Start With the Right Products Everything begins with what you buy. A thick, clinging gel bowl cleaner earns its extra cost because its viscosity holds it against the vertical walls of the bowl, giving the ingredients time to break down grime, bacteria, and stains instead of sliding into the water. Round out the kit with a disinfectant spray or wipes, a sturdy toilet brush, absorbent microfiber cloths, and durable rubber gloves. Toilet brush: choose an under-rim extension or a shaped head that reaches that neglected channel. Bristle brushes scrub hard, while silicone models trap less debris. Microfiber cloths: their fibres lift and trap dirt instead of pushing it around, and they are reusable. Pumice stone: a porcelain-safe stone lifts limescale and rust rings from a wet surface. Hard water stain remover: acidic formulas dissolve mineral deposits that scrubbing cannot shift. Baking soda and white vinegar: a mild abrasive and deodorizer, plus a gentle acid for soap scum, minerals, and odours. Trick 2: Master the Deep Clean Inside the Bowl Lower the water level so the cleaner has more surface to work on. Flush, then quickly close the supply valve behind the base before the bowl refills. Apply the gel generously under the rim and down the sides, then let it dwell for at least ten to fifteen minutes, longer for a heavily soiled bowl, so it can loosen waste and kill bacteria. When the dwell time is up, scrub from under the rim downward with firm pressure, focusing on visible rings. Use the under-rim feature for the hidden channel where odour-causing bacteria collect. For waterline or mineral stains that resist the brush, work gently with a wet pumice stone, keeping both the stone and the porcelain wet to avoid scratches. Flush, rinse the brush in the swirling water, then wedge the handle between the seat and the bowl so it drips dry instead of sitting in a soggy holder. Spray the dry brush and holder with disinfectant before storing them. The Exterior, Hinges, and Floor While the bowl cleaner works, spray every outside surface: the tank, the lid top and underside, the seat on both sides, the hinges, the flush handle, and the pedestal down to the floor. The hinges and seat joints trap urine, skin cells, and debris, so a retired toothbrush dipped in disinfectant is ideal there. Wipe everything with a clean microfiber cloth, swapping as it soils, and do not forget the floor around the base. Trick 3: Beat Odours at the Source When a smell lingers after a thorough clean, the cause usually sits below the surface. A failing wax ring under the base is a common source of sewer odour, and the warning signs are seeping water or a toilet that rocks; replacing it is plumber work. Urine can also soak into porous grout if the base is uncaulked or splashes stand, and a grout cleaner, or a paste of baking soda and hydrogen peroxide, neutralizes that smell. Sealing the base with silicone caulk, leaving a small gap at the back to reveal moisture, prevents future seepage, and less often a clogged plumbing vent pipe is the culprit. For everyday freshness, an open container of baking soda absorbs odours quietly. A few drops of essential oil such as tea tree, lavender, eucalyptus, lemon, or peppermint on the toilet paper roll core release scent with each turn, and a drop in the bowl works too. Activated charcoal bags are another strong natural option. Be careful with drop-in tank fresheners, since harsh additives like bleach degrade the rubber and plastic parts inside the tank and cause leaks. Clean the tank every year or two: shut off the supply, flush to empty, scrub the interior with diluted white vinegar or mild soap while avoiding the flush mechanism, then refill and flush twice. Trick 4: Stay Consistent Between Deep Cleans Consistency is what keeps a toilet truly clean. A full deep clean may be needed weekly, bi-weekly, or monthly depending on household size, usage, and water quality, but it stays quick when daily habits carry the load. A fast swish with the brush, even without cleaner, prevents biofilm and rings. Wipes kept nearby make seat, rim, and handle touch-ups easy in busy households with children. Run the exhaust fan during and after showers to cut humidity, which discourages mold and odour bacteria, and close the lid before flushing to contain the aerosol plume of droplets and microbes that would otherwise settle across the bathroom. Quick Reference Task How Often Why It Matters Quick swish with the brush Daily or every other day Stops biofilm and rings Full deep clean of bowl and exterior Weekly to monthly Removes buildup and odour Disinfect the brush and holder Frequently Stops the tools spreading bacteria Tool hygiene matters as much as technique. Soak the toilet brush in disinfectant or a diluted bleach solution for about thirty minutes, but only if the brush material is bleach-safe. Empty and disinfect the holder often, launder cloths in hot water with detergent, and store supplies dry, ventilated, and out of reach of children and pets. For the bleach step, review the CDC guidance on bleach safety and never combine it with another cleaner. Lower humidity helps against mildew, as the CDC explains in its material on moisture and mold, and a final handwash is covered in the CDC advice on hand hygiene. Frequently Asked Questions How often should I deep clean my toilet? Weekly for busy households, and never less than monthly. The deep task stays easier when a quick brush swish and regular wipe-downs happen in between. Can I use bleach tablets in the toilet tank? It is best avoided.

Keep Your Toilet Clean And Shiny – 4 Tricks You Need To Know Read More »

microfiber mop

Microfiber Mop Cleaning – 4 Tips You Should Know

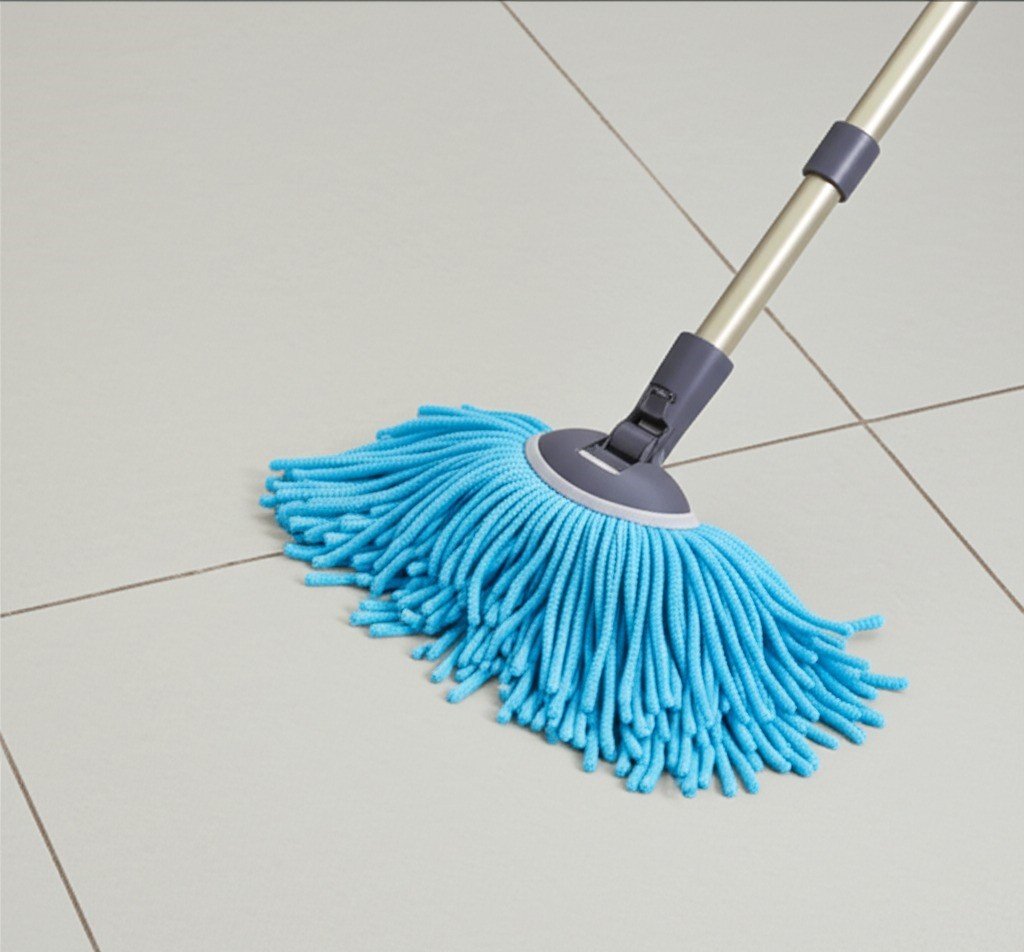
Microfiber Mop Cleaning: 4 Tips You Should Know Microfiber mops clean better than cotton mops because of how the material is built. The pads are made of ultra-fine polyester and polyamide fibers, split into strands thinner than a human hair, which gives them a huge surface area and a mild electrostatic charge that pulls dust and dirt in instead of pushing it around. Used correctly, a microfiber mop lifts more grime with less water and fewer chemicals, which makes it a smart choice for hardwood, laminate, tile, and vinyl alike. These four tips will help you get the most from your mop, and for homes that want professional results every week, our regular cleaning service covers floors throughout the house. Tip 1: Use a Dry Pad for Dusting and a Damp Pad for Mopping A microfiber mop is really two tools in one. Run a clean, dry pad over hard floors for daily dusting: the electrostatic action grabs fine dust and allergens that a broom would just launch into the air, so it is ideal for homes with allergy sufferers or pets. For wet cleaning, dampen the pad and wring it out until it is barely moist. Microfiber holds many times its weight in water but releases it evenly, so water-sensitive hardwood and laminate never get over-wet. Less moisture also means faster drying and less risk of slipping. Tip 2: Match the Pad to the Mess Not every pad is the same, and swapping pads for the task at hand makes cleaning faster and more effective. Pad style Best for Looped weave General-purpose damp mopping and dry dusting on most hard floors Scrubbing strips Sticky spills and stubborn dirt on resilient floors such as tile and vinyl Fringed edges Sweeping up larger debris and reaching into corners and along baseboards Dense, high-quality microfiber Maximum particle pickup and longer pad life for busy households Stock a spare pad or two so you can swap in a fresh one mid-clean instead of rinsing a single soiled pad again and again. Tip 3: Use the Right Technique and the Right Products For dry dusting, move the mop in a figure-eight or S pattern so debris gathers instead of streaking. For damp mopping, work in sections and replace the pad as soon as it looks visibly soiled. When you do need a cleaning agent, hot water alone often does the job, and a very dilute pH-neutral cleaner handles tougher spots without leaving residue that builds up on floors. Wring the pad until just damp: soaking wet pads streak and over-wet sensitive floors Clean in a figure-eight motion to trap dirt rather than push it Rinse or swap pads whenever they stop picking up efficiently Skip heavy chemicals: microfiber removes microbes effectively with water alone Tip 4: Wash Pads the Right Way So They Last Microfiber pads are built to survive hundreds of wash cycles, but only with the right care. Pre-rinse heavily soiled pads, then machine wash them separately from cotton towels and clothes, because cotton lint clogs the split fibers and kills their cleaning power. Use a mild detergent and never fabric softener, which coats the strands, kills their absorbency, and destroys the static charge; skip bleach, which degrades the material. Air drying is gentlest; if you use a dryer, keep it on low heat because high heat can melt the synthetic fibers. Stored clean and dry, a good set of pads keeps performing for years, which makes microfiber systems cheaper over time than disposable sheets despite the higher upfront cost. Microfiber mops also help the environment. Because they clean with minimal water, you use far less water per mop session, and the reduced reliance on chemical cleaners is easier on indoor air, pets, and waterways. Studies cited in cleaning research show microfiber traps bacteria more effectively than cotton even with plain water, which is why many professional cleaners, including the teams that provide deep home cleaning in Toronto, choose them for kitchens and bathrooms. When you do reach for a product, Health Canada’s advice on using household products safely helps you pick and handle it the right way. Frequently Asked Questions Can I use a microfiber mop on hardwood floors? Yes, if the pad is only damp, never soaking wet, and you use a pH-neutral cleaner made for hardwood; excess moisture is the main cause of warping and finish damage. Why did my microfiber pad stop picking up dirt? The fibers are probably clogged with fabric softener, bleach damage, or cotton lint from the wash; rewash the pad without softener and keep microfiber loads separate from cotton items. Should I use disinfectant with a microfiber mop? Microfiber physically captures a high percentage of bacteria with water alone, but for extra sanitation you can use a disinfectant suited to your floor type; the CDC’s guidance on cleaning and disinfecting your home explains when disinfecting is actually needed. How often should I replace microfiber mop pads? Quality pads last through hundreds of washes, roughly six months to a year of weekly use; replace them when the fibers feel matted, smell musty after washing, or visibly stop trapping dirt. Proper care and technique turn a humble mop into the most versatile tool in your cleaning closet. For hands-on help keeping every floor in your home spotless, Toronto Shine Cleaning offers bonded and insured service with equipment that respects delicate surfaces; browse our pricing to see if we serve your area, then call (647) 424-0355 to schedule a visit.

Microfiber Mop Cleaning – 4 Tips You Should Know Read More »

wooden items on top of a wooden table

Keep Your Wood Items Shining – 4 Best Tips

Keep Your Wood Items Shining: 4 Best Tips Wood furniture, floors, and decor add warmth to a Toronto home, but wood is a living material: it is porous, it breathes, and it reacts to humidity, heat, and sunlight. The finish, whether paint, oil, wax, varnish, lacquer, or polyurethane, acts as the real shield against damage, so care routines should match the finish. Follow these four tips and your wood pieces will keep their glow for decades. When life gets busy, a professional maid service can dust and polish wood surfaces on a schedule that suits your home. Tip 1: Dust Often and With the Right Fabric Dust looks harmless, but it is abrasive: left to build up, it causes microscopic scratches that dull a finish over time and wear it away. Dust wooden furniture once or twice a week, more often in busy or dusty homes, and always wipe along the grain so particles lift out of the texture instead of getting pushed deeper. Use a soft, lint-free cloth such as microfiber or a well-washed cotton T-shirt Choose real ostrich feather dusters for carved or delicate pieces, since they trap dust instead of scattering it Reach crevices with a soft-bristled brush such as a clean paintbrush Avoid silicone dusting sprays, which leave a greasy coating that pulls in more dust Tip 2: Clean Grime Gently, Never Soak the Wood Fingerprints, sticky stains, and everyday grime need more than dusting, but water is wood’s weak spot. For sealed finishes such as varnish, polyurethane, or lacquer, wring a cloth out until nearly dry, wipe the surface, and dry immediately with a clean cloth; never let water sit on wood, since it can seep into imperfect finishes and cause swelling, white spots, or discoloration. Add a tiny amount of mild dish soap to the water for stubborn grime, and always test any product, even plain water, on a hidden spot first. Oiled and waxed finishes are more vulnerable to moisture, so use a dry cloth or a cleaner made for those finishes. Blot spills the moment they happen, working from the outside in, because wiping spreads liquid deeper into the grain. Tip 3: Protect Wood From Sun, Heat, and Humidity Swings Environmental damage is slower than spills but just as real. Prolonged sunlight fades color and dries wood out until it cracks or warps, so keep valuable pieces out of direct sun, use UV-blocking blinds or film, and rotate furniture so light exposure stays even. Humidity matters even more: wood absorbs and releases moisture, so aim for a stable indoor range of 40-60 percent. When the air is too dry, joints loosen, floorboards gap, and surfaces crack; when it is too damp, drawers stick, veneer bubbles, and mold can take hold. Threat What it does Simple fix Direct sunlight Fades color, dries the wood, causes cracking UV-blocking curtains or window film; rotate pieces seasonally Low humidity in winter Shrinks wood, loosens joints, opens cracks Run a humidifier and track moisture with a hygrometer High humidity Swelling, sticking drawers, lifted veneer, mold risk Use a dehumidifier and improve ventilation Heat vents and radiators Localized drying, warping, and finish damage Keep furniture several feet away from heat sources Coasters, placemats, trivets under hot dishes, and felt pads under lamps and vases prevent most water rings and scratches, and lifting furniture instead of dragging it protects both the piece and your floor. Tip 4: Feed the Finish: Polish, Oil, or Wax Deeper treatments restore shine and add protection, but only the right product for the finish. Hard, sealed surfaces such as polyurethane or varnish need little more than a quality furniture polish used sparingly a few times a year; skip heavy silicone or wax polishes, which build up into a dull, hard-to-remove film, and always spray or apply polish to the cloth, never directly on the wood. Oiled pieces want re-oiling every six to twelve months with tung oil or boiled linseed oil, applied thinly and wiped down so excess never turns sticky; note that linseed-soaked rags can ignite, so dispose of them safely. Waxed finishes benefit from an annual coat of paste wax, allowed to haze and then buffed vigorously to a hard shine. Whatever the finish, start from a completely clean, dry surface. Caring for Floors, Cutting Boards, and Special Pieces Hardwood floors take the most abuse in a home. Vacuum or sweep regularly with a soft brush, then clean with a damp microfiber mop and a pH-neutral hardwood cleaner; skip steam mops and oil-based soaps, which force moisture into the wood or leave residue. Wood cutting boards need hand washing in hot, soapy water after every use, thorough drying, and periodic treatment with food-grade mineral oil to keep them from cracking and to seal pores against bacteria. Antiques and carved decor deserve gentle dusting and a spot away from heat and sun. For anything stubborn, test a small hidden area first, and remember that harsh chemicals such as ammonia, bleach, and scouring powders strip finishes. Health Canada’s household chemical safety tips are a useful reminder to read labels before using strong products, and its guide to using household products safely covers cleaning and care items. Frequently Asked Questions How do I remove white water rings from wood? Light rings sometimes lift when you press a dry cloth over the mark with a warm iron for a few seconds, or with a brief application of non-gel toothpaste or mayonnaise wiped off and polished; test any method in a hidden spot, since these tricks can alter the finish. Can I use vinegar to clean wood furniture? Avoid it on most finishes: vinegar is acidic and can dull varnish and polyurethane over time; a barely damp cloth or a cleaner matched to your finish is safer. Should I oil wood furniture even if it looks fine? Only oiled finishes need re-oiling, roughly every six to twelve months or when the surface looks dry; sealed finishes need polish, not oil, which would sit on top and

Keep Your Wood Items Shining – 4 Best Tips Read More »

ceiling fan

4 Ceiling Fan Cleaning Tricks You Need to Try

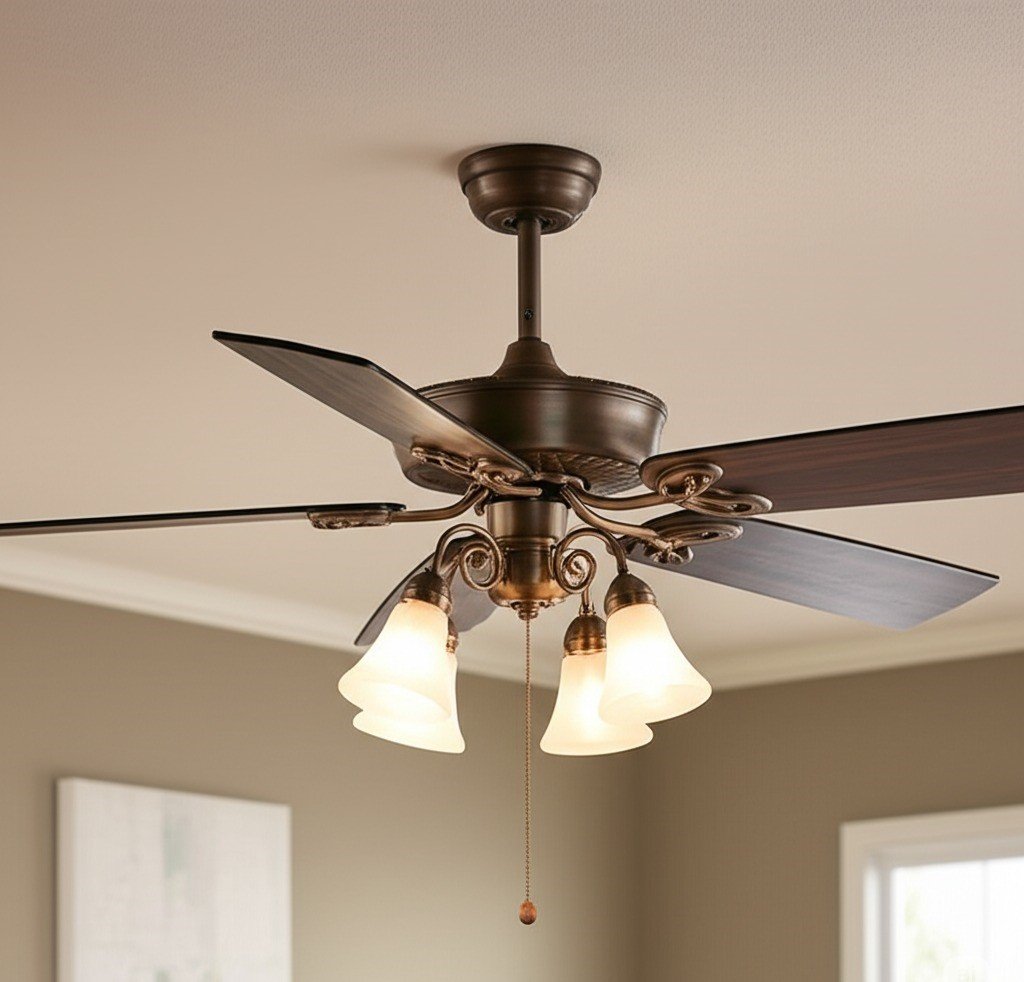
4 Ceiling Fan Cleaning Tricks You Need to Try A ceiling fan gathers dust on every blade, then throws it back into the air each time the fan spins, which is bad news for allergies and breathing. Heavy buildup can also unbalance the blades, causing wobble, noise, and strain that shortens the motor’s life. Cleaning the fan every two to three months keeps air fresher and the fan running smoothly, and these four tricks make the chore quick and tidy. If ceiling fans and other high spots are easy to overlook, a deep cleaning service can take them off your list entirely. Trick 1: Kill the Power Before You Touch Anything Safety first: turn off the fan with the wall switch or pull chain, then flip the circuit breaker that feeds the fan at your electrical panel so there is no chance of accidental start-up. Test the switch after you cut the power, and put a strip of tape over the breaker as a reminder. Use a sturdy A-frame or platform ladder that lets you reach the blades without overreaching, keep three points of contact, and have a spotter hold the ladder if you can. Set up your supplies before you climb: Drop cloth, painter’s tarp, or flattened cardboard to protect the floor and furniture below Safety glasses and a dust mask or N95 respirator for falling debris An old pillowcase for the blade trick below Vacuum with soft brush and crevice attachments Microfiber cloths plus a mild cleaner, or a half-and-half mix of white vinegar and water Trick 2: Slide a Pillowcase Over Each Blade The pillowcase method is the fastest way to remove loose dust without raining it down on the room. Climb up, slip the open end of a clean pillowcase over the full length of one blade like a sock, press the fabric gently against the top and bottom surfaces, then slide the case off: the dust and cobwebs stay trapped inside. Repeat for every blade, then take the case outside, away from windows and doors, and shake it out. A cotton pillowcase is ideal because its light texture grabs dust without scratching the blade finish. Trick 3: Follow Up With Vacuuming or a Damp Wipe For light residue, go over the top, bottom, and edges of each blade with a vacuum soft brush attachment, moving slowly so dust is captured rather than scattered, and use the crevice tool around the blade mounts. Heavier grime, like the oily film on kitchen fans, needs a damp microfiber cloth wrung out until barely moist. Excess moisture can damage the motor and warp wooden blades, so wring thoroughly, never spray anything near the fan, and wipe wooden blades in the direction of the grain using a wood-safe cleaner or plain water. Fan part Cleaning method How often Blades Pillowcase trick, then vacuum or damp-wipe residue Every 2-3 months; monthly with pets or allergy sufferers Motor housing Dry microfiber cloth; soft toothbrush for vents With every blade clean Light globes and bulbs Hand wash globes in warm soapy water, dry fully; wipe cool bulbs with a dry cloth With every blade clean Kitchen fans Degreaser applied to a cloth, not the blade; wipe and dry Monthly, since cooking grease builds up fast Never use abrasive powders, steel wool, or harsh solvents on blades, and test any new cleaner on an inconspicuous spot first, especially on wood finishes. Trick 4: Don’t Skip the Housing, Lights, and Grease Once the blades are clean, dust the motor housing’s exterior with a dry cloth or an extendable duster, and clear the air vents with a dry toothbrush; never let liquid near the motor’s openings or wiring. Removable glass globes wash easily in warm, soapy water, but dry them completely before reattaching so no moisture reaches the electrical parts. If blades carry sticky grease, apply a degreaser safe for the blade material to your cloth, let it sit briefly, then wipe with a clean damp cloth and dry. While you are up there, check for loose screws or wobble, and set the directional switch for the season: downdraft in summer, updraft in winter. Dust that stays airborne is a real indoor air concern, and Health Canada’s guide to indoor air contaminants explains why regular dust control matters; its information on dust and dust mites notes that dust mites thrive in carpets, furniture, and anywhere dust collects. Frequently Asked Questions How often should I clean my ceiling fan? Most homes can manage every two to three months, but clean monthly if you have pets, allergy sufferers, or visible dust buildup, and more often for kitchen fans exposed to cooking grease. Can I spray cleaner directly on ceiling fan blades? No: spray the cleaner onto a cloth instead, because mist can reach the motor and electrical connections, and excess liquid can stain or warp wooden blades. Do I need to turn off the circuit breaker to clean a fan? It is the safest habit, since the wall switch can be flipped accidentally while you work; tape over the breaker keeps everyone in the household aware. Why does my ceiling fan wobble after cleaning? A blade may have shifted out of alignment or a mounting screw may be loose; check and retighten the screws and gently straighten the blades, and if wobble continues, the motor or bracket may need professional attention. Once the fan is clean, fold the drop cloth inward to contain the dust, let every damp part dry completely, restore power, and test the fan on low speed: smooth and quiet means the job is done. For help with the rest of the home, Toronto Shine Cleaning offers regular cleaning visits that keep dust under control between deep cleans. Call (647) 424-0355 or visit our pricing page to book a service.

4 Ceiling Fan Cleaning Tricks You Need to Try Read More »

3 Best Tips How To Keep Your Living Area Clean

3 Best Tips to Keep Your Living Area Clean The living room is the hardest-working space in a Toronto home: it hosts family evenings, visitors, snacks, and pets, so it collects clutter, dust, and grime faster than any other room. A systematic routine keeps it welcoming without eating your whole weekend. Start with the three pillars below, then layer in small daily habits. If you would rather spend your free time relaxing than dusting, Toronto Shine Cleaning’s regular cleaning service keeps living areas fresh on a schedule you choose. Tip 1: Declutter Surfaces Before You Clean Anything Cleaning around clutter wastes time and misses spots, so clear the room first. Work one surface at a time, starting with the coffee table, then side tables, media cabinets, and shelves. As you handle each item, sort it into one of four destinations: trash, donate, another room, or a proper home in the living area. The usual suspects are mail, old magazines, stray remotes, and things carried in from other rooms, so give frequent-use items such as remotes and current reading a designated spot, and clear the rest away. Decluttering also makes the space feel calmer, and it reveals the true scope of the cleaning ahead. Tip 2: Dust Top to Bottom, and Don’t Skip the Details Dust falls, so always work from the ceiling down: start with fan blades, light fixtures, and the tops of tall shelving, then move to lower shelves, picture frames, and furniture. Microfiber cloths trap dust instead of moving it around, and an extendable duster reaches high corners. On shelves full of objects, lift the items off, dust the shelf, dust the items, and replace them. Electronics such as TVs, consoles, and speakers attract dust too: turn them off and unplug them, wipe screens with a dry microfiber cloth, and clear vents with compressed air, never liquid. Treat the rest of the room by surface type: Item Cleaning method Watch out for Lampshades Vacuum fabric shades with a brush attachment; wipe plastic or paper shades dry Rough handling can crease paper shades Blinds and shutters Wipe each slat with a microfiber cloth or blind tool Slats snap back if wiped too hard Wood furniture Dust with the grain; polish sparingly, applied to the cloth Excess polish and silicone sprays attract dust Glass tabletops Glass cleaner with a lint-free cloth Streaks appear when cleaner dries before wiping Tip 3: Refresh Sofas and Floors With the Right Routine Upholstered furniture traps dust, crumbs, pet hair, and odors. Vacuum sofas and armchairs regularly with the upholstery attachment, remove the cushions to reach the base and seams, and use the crevice tool along edges and under cushions. Act fast on spills: blot with a clean cloth from the outside in, never rub, and test any cleaning product on a hidden spot first, following the manufacturer’s care label when you can. For musty fabric, sprinkle baking soda lightly, let it sit for 15-30 minutes, and vacuum it up. Finish with the floor. Hardwood and laminate need a sweep or vacuum on the hard-floor setting, then a barely damp flat microfiber mop with a pH-neutral cleaner; a wet mop is the fastest way to damage wood. Tile tolerates more water and standard tile cleaners, vinyl is happy with mild all-purpose cleaner, and any hard floor benefits from extra passes in corners and under furniture. Carpets ask for slow, overlapping vacuum passes in two directions to lift embedded grit that grinds down fibers, plus the crevice tool along baseboards; treat stains by blotting and testing first, and rent a carpet machine or hire professionals for a periodic deep refresh. Health Canada’s dust and dust mites page notes that regular vacuuming keeps dust levels down in carpets, furniture, and bedding, while the CDC’s home cleaning and disinfecting guidance explains that plain cleaning with soap or detergent removes most germs from everyday surfaces. Small Habits That Keep the Room Guest-Ready Tidy surfaces for five minutes each evening: remotes back, mail sorted, cushions fluffed Deal with spills the moment they happen, blotting rather than rubbing Vacuum high-traffic zones weekly and the whole room every one to two weeks Open windows briefly when weather allows to air the room out Rotate decorative pillows and fold throws so the room always looks arranged A clean living area is a place people want to linger, and maintaining it is mostly about rhythm: quick daily tidying, weekly vacuuming, and a monthly top-to-bottom dusting keep deep cleaning sessions short. Frequently Asked Questions What order should I clean a living room? Declutter first, then dust from the ceiling down, refresh upholstery, and clean the floor last so you pick up everything that fell during the earlier steps. How often should I vacuum my sofa? Once a week for sofas in regular use, or every few days with pets; remove cushions and use the crevice tool to keep debris from working into the frame. Is it safe to use baking soda on upholstery? A light sprinkle left for 15-30 minutes and vacuumed up neutralizes odors on most fabrics, but test an inconspicuous spot first and avoid it on delicate materials. How do I stop my living room from getting dusty so fast? Use microfiber cloths for dusting, vacuum with a HEPA-equipped machine, wash throws and cushion covers regularly, and keep windows closed on high-pollen days. Consistent routines protect your investment in furniture and flooring, and a fresh living area makes every evening more relaxing. For a deeper reset, our deep cleaning service tackles baseboards, vents, and upholstery in one visit. Call (647) 424-0355 or see our pricing page to book your clean.

3 Best Tips How To Keep Your Living Area Clean Read More »

different types of carpets

How to Clean Different Types of Carpets – 4 Best Ways

How to Clean Different Types of Carpets: 4 Best Ways Cleaning carpet effectively depends on the material. Different fibers react differently to water, vacuuming, and cleaning solutions, and the wrong method can shrink, fade, or mat the pile. These four approaches cover the carpet types found in most Toronto homes, from durable synthetics to delicate natural fibers like wool and sisal. 1. Synthetic Carpets: Nylon, Polyester, and Olefin Synthetic carpets are popular for durability and stain resistance. Nylon is very resilient, polyester is soft with natural stain and fade resistance, and olefin (polypropylene) resists moisture and mildew, which makes it common in basements. Vacuum high-traffic areas daily or every other day and the whole carpet at least twice a week, using a beater bar or rotating brush to lift embedded dirt before it grinds down the fibers. For spills, scoop up solids with a dull knife or spoon, then blot liquids immediately with a clean white cloth, working from the outside in. Never rub. A quarter teaspoon of mild, non-bleach dishwashing liquid in one cup of lukewarm water handles most spills, but test any solution in a hidden spot first. Rinse with a light mist of cool water, blot dry, and leave weighted paper towels over the area overnight. For deep cleaning, hot water extraction (steam cleaning) is the most effective method, and drying usually takes 6 to 12 hours with good ventilation. 2. Wool Carpets: Gentle Care for Natural Fibers Wool is luxurious, durable, and naturally soil resistant, but it is sensitive to harsh chemicals, high pH levels, and excessive moisture. Vacuum with strong suction, and set the beater bar to its highest pile setting or use a suction-only attachment, because aggressive beater bars make wool fuzz or pill. Use only WoolSafe or pH-neutral cleaners; alkaline detergents or bleach can yellow and weaken wool fibers. Blot spills rather than rubbing, dry quickly with fans or a dehumidifier, and avoid direct heat. For deep cleaning, low-moisture methods such as dry foam cleaning are safer than traditional steam cleaning. 3. Cotton and Viscose Rugs: Handle With Care Cotton is soft and absorbent but can shrink, brown, or bleed color, while viscose (rayon) is extremely delicate when wet, losing up to 50 percent of its strength. Vacuum these rugs with the beater bar disengaged or on the highest setting. Before any spot treatment, run a colorfastness test in a hidden area. Use a highly diluted pH-neutral cleaner applied with a barely damp cloth, blot gently, and dry immediately with fans or a cool hairdryer. Deep cleaning is best left to professionals who specialize in delicate fibers, and steam cleaning viscose can cause irreversible damage. 4. Plant Fiber Carpets: Sisal, Jute, Seagrass, and Coir Natural plant fiber carpets are highly absorbent and extremely sensitive to water. Moisture can cause browning, water stains, shrinkage, and mildew. Vacuum frequently with a suction-only cleaner, at least twice a week, from different directions to remove grit trapped in the weave. Blot spills immediately and thoroughly, scrape off solids, and avoid water when possible. For stains, use a dry-cleaning solvent or dry carpet cleaning powder, brushed in and vacuumed up. Never steam clean these fibers; professional dry or very low-moisture cleaning is the safe choice. A quick spill response that works on most carpets: Blot liquids immediately with a clean white cloth, outside in Scoop solids with a dull knife or spoon, never rub Test any cleaning solution in a hidden spot first Use minimal moisture, then dry the area quickly Weight down paper towels overnight for stubborn damp spots Carpet Type Vacuuming Spot Cleaning Deep Cleaning Synthetic (nylon, polyester, olefin) Beater bar, twice weekly Mild dish soap and water Hot water extraction Wool High pile setting or suction only WoolSafe, pH-neutral cleaner Low-moisture professional cleaning Cotton and viscose Suction only, gentle Diluted pH-neutral, minimal water Professional delicate-fiber cleaning Sisal, jute, seagrass, coir Suction only, twice weekly Dry-cleaning solvent or powder Dry methods only, no steam Keep Carpets Clean Between Deep Cleans Vacuuming and quick spill response extend the life of any carpet, but dirt and allergens build up inside the fibers over time. Dust mites and pet dander are common indoor allergens linked to asthma symptoms, according to the CDC, and Health Canada also lists them among indoor air contaminants that affect respiratory health. Whenever moisture is involved, dry the carpet fast, because the CDC’s mold guidance stresses that moisture control prevents mold growth. When to Call Professional Carpet Cleaners Toronto Shine Cleaning handles all carpet materials with the care and specialized techniques they deserve. Our home deep cleaning service includes thorough carpet vacuuming and spot treatment as part of a full clean, and our regular maid service keeps high-traffic areas fresh between deep cleans. Check our pricing page or see if we serve your neighbourhood in the GTA. Call (647) 424-0355 to book. Can I steam clean a wool carpet? Traditional steam cleaning can introduce too much moisture for wool. Use low-moisture methods such as dry foam cleaning or low-moisture hot water extraction with minimal water and rapid drying, ideally handled by professionals experienced with wool. How long does carpet take to dry after steam cleaning? With good ventilation, most synthetic carpets dry in 6 to 12 hours, sometimes longer. Open windows, run fans, and use a dehumidifier to speed up drying and prevent musty odors or mold. What should I do about grease, ink, or wine stains? Use a stain remover designed for your carpet type and follow the product instructions carefully. Test it in an inconspicuous spot first, apply it to a cloth rather than the carpet, and blot from the outside in. Can wet viscose rugs be saved? Act immediately: blot with a clean white cloth, never rub, dry with fans or a cool hairdryer, and groom the pile back into place while drying. For set stains, contact a professional who specializes in delicate natural fiber rugs.

How to Clean Different Types of Carpets – 4 Best Ways Read More »

woman cleaning with bleach

6 Best Ways to Clean With Bleach – Diluted or Not?

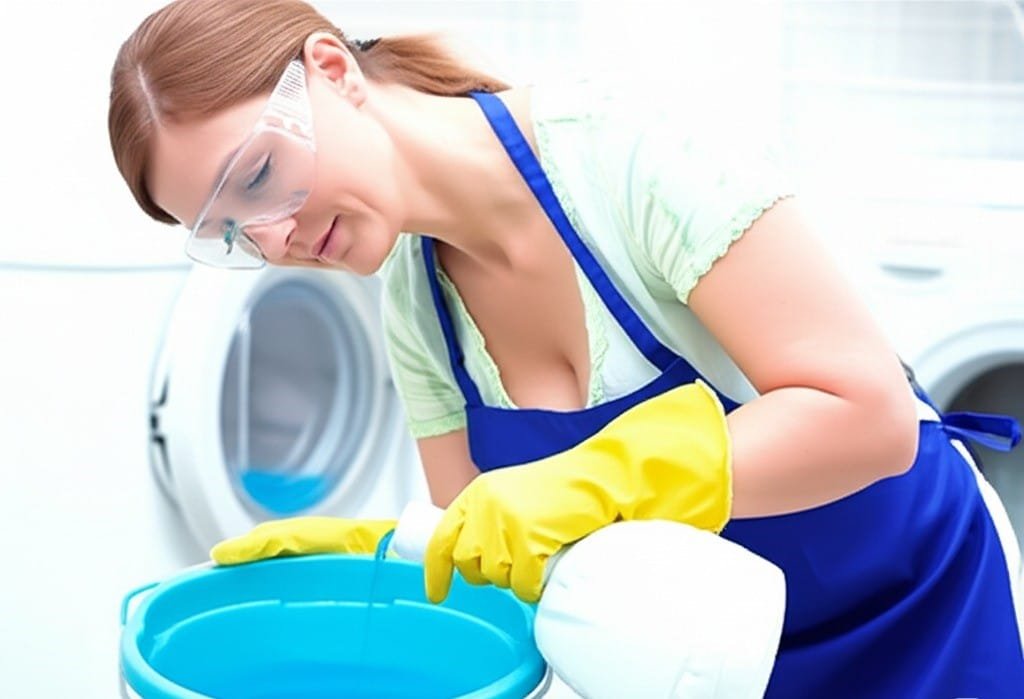
6 Best Ways to Clean With Bleach: Diluted or Not? Chlorine bleach, or sodium hypochlorite, is one of the strongest disinfectants a home can hold. It destroys bacteria, viruses and fungi, and its whitening action lifts stubborn stains out of white fabric. Used with care it is a remarkable tool. Used carelessly it can ruin a surface, a garment, or the air in the room. The six habits below cover ventilation, dilution, surface choice, mold treatment, fabric limits and storage. 1. Ventilate and Protect Yourself First Safety comes before the scrubbing. Open windows and doors so fumes cannot collect. Wear impervious gloves to shield your skin from irritation and chemical burns, add goggles against splashes, and put on old clothing you do not mind staining, because the chemical can discolor fabric. Never combine bleach with another cleaner. Products that contain ammonia react with it to form chloramine gas, which attacks the lungs and can be fatal. Acids such as vinegar or toilet bowl cleaners release chlorine gas, another dangerous irritant. Rinse every other product away before bleach touches the surface, and follow the CDC bleach safety guidance. 2. Dilute Properly and Spot Test Straight bleach is far too aggressive for everyday jobs. Always dilute with cool water at the ratio the task needs, and pour the bleach into the water rather than water into the bleach, which prevents splashing. Test any new surface in an inconspicuous corner and wait for discoloration before committing to the whole area. Keep both the concentrate and mixed solutions out of reach of children and pets. General disinfection of hard, non-porous surfaces: roughly one-quarter cup of 5-6% bleach per gallon of cool water. Heavy mold or mildew: up to one cup per gallon, with extra ventilation. White laundry loads: one-half to one cup, added to the machine dispenser. Never dilute with hot water, which breaks the active ingredient down and can release more gas. 3. Choose the Right Surfaces In the kitchen, a diluted solution suits laminate, Corian and sealed granite counters, plus stainless steel and porcelain sinks. Rinse food-contact areas with clean water afterward and let them air dry or wipe them dry. In the bathroom it handles toilets, tubs, showers and tile. Pour about a cup of diluted solution into a toilet bowl, scrub, leave it at least ten minutes, then flush. For tubs, showers and tiled walls, apply with a sponge or spray bottle, allow five to ten minutes of contact time, then rinse. Vinyl and ceramic or porcelain tile floors tolerate the solution. Skip hardwood, unsealed natural stone and porous tile, which can discolor or degrade. Keep children and pets away from wet floors until they are dry. 4. Treat Mold and Mildew Damp bathrooms, basements and window frames are mold territory, and bleach kills the spores as well as the stains they leave. A common mix is one part bleach to ten parts water; tough patches may need up to one part in three. Clean loose residue off with soap and water first, wet the area completely, and let it sit ten to fifteen minutes, or thirty for embedded growth. Scrub gently, rinse, and dry fully, since lingering moisture invites regrowth. Better airflow helps keep it gone, as the CDC mold guidance explains. 5. Know What Bleach Will Ruin Bleach brightens white cotton, linen and some synthetic whites, but it destroys color and delicate fibers. Colored fabric, wool, silk, leather, mohair and spandex should stay away from it unless the label says color safe or the product is oxygen bleach instead. Untreated wood absorbs it, marble and granite can etch or lose their sealant, aluminum pits and corrodes, and copper or brass tarnish quickly. Stainless steel survives short, dilute contact if you rinse well. Never wash food itself, and always check garment care labels before a laundry load. Adding bleach to laundry works best through the machine dispenser, which releases it after the drum fills with water and detergent. Without a dispenser, wait about five minutes into the cycle, dilute the measured amount in at least a quart of water, and pour it in slowly. Pouring concentrate onto dry clothes causes holes and heavy discoloration. Cold or warm water is the safer choice. 6. Store and Dispose Responsibly Job Dilution Contact Time Hard surface disinfection 1/4 cup per gallon 5 to 10 minutes Toilet bowl Prepared diluted solution At least 10 minutes Mold and mildew 1 part to 10 parts water 10 to 30 minutes White laundry 1/2 to 1 cup Full wash cycle Keep the bottle closed, upright and in its original packaging, stored somewhere cool and dark away from heat and direct sun, ideally a high cabinet in the laundry or utility room. Never decant bleach into a food or drink container, and keep it apart from ammonia and acids so vapors cannot meet. Potency fades about six months to a year after opening, so replace old bottles. Small amounts of diluted product can go down a household drain with plenty of running cold water. Never dump undiluted bleach or large volumes at once, and never pour it into soil, storm drains or waterways. Ask your municipality about hazardous waste drop-off for larger quantities, and rinse empty containers before recycling. Household cleaning and laundry routines benefit from the same care, as the CDC home cleaning page sets out. Frequently Asked Questions Can I mix bleach with vinegar to boost cleaning power? No. Vinegar is an acid, and combining it with bleach releases chlorine gas, which irritates eyes and lungs. Use one product at a time, and rinse the first one away completely before the second touches the surface. How long does diluted bleach stay effective? Mixed solutions lose strength quickly and should be used the same day. The concentrated bottle degrades roughly six months to a year after opening, especially when stored somewhere warm or bright. Is bleach safe for every white fabric? No. White cotton and linen usually tolerate it, but wool, silk, leather, mohair and

6 Best Ways to Clean With Bleach – Diluted or Not? Read More »

clean shower walls

How to Keep Your Shower Walls Shining – 5 Best Tips You Need to Know

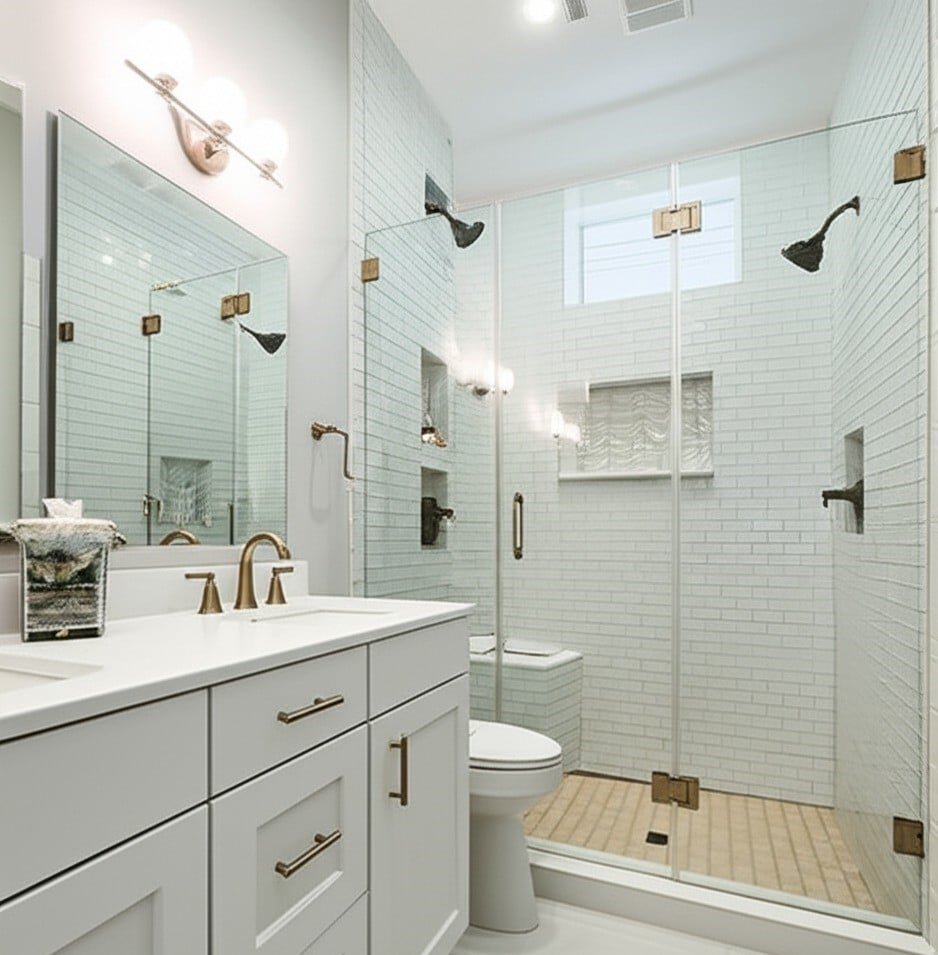
How to Keep Your Shower Walls Shining Shower walls take a beating every single day: soap, body oils, minerals, and constant moisture team up into films, crust, and black specks that make even a recently scrubbed bathroom look dingy. The fix is not one heroic Saturday battle but a short, repeatable system that matches the cleaner to the grime and the wall material, gives the chemistry time to work, and then prevents buildup from returning. The five tips below walk through exactly that, from diagnosis to daily habits, so your tile, fiberglass, or stone surround stays bright with far less effort. Tip 1: Know What You Are Cleaning Off the Walls Three offenders cause almost all shower-wall grime. Soap scum forms when fatty acids in bar soap react with calcium and magnesium in tap water, creating a sticky, grayish film that hardens into stubborn layers if ignored. Hard water stains are the chalky white spots or cloudy haze left behind when mineral-rich water evaporates, mostly calcium and magnesium carbonate, and they show up worst on dark tile and glass. Mold and mildew are fungi that love warm, damp, poorly ventilated enclosures; mold tends to sit on the surface as a powdery growth, while mildew can sink deeper into grout and corners as black, green, or pink spots. Beyond looking bad, these growths can trouble some people’s health, which is why the CDC keeps reference information on mold and health. Tip 2: Prep the Bay and Yourself Before Scrubbing Clear every bottle, loofah, and razor off the walls so nothing blocks your access, then assemble your kit. Good preparation makes the difference between a fifteen-minute wash and an hour of frustration. A spray bottle with your chosen solution, homemade or commercial Non-abrasive sponges, soft cloths, and microfiber towels, plus brushes with different bristle stiffness for your wall material An old toothbrush or dedicated grout brush for the lines between tiles Waterproof gloves, and safety glasses when working with strong sprays overhead The exhaust fan running or a window open for ventilation during and after Tip 3: Match the Cleaner to the Grime and the Surface For routine soap scum and light mineral haze, equal parts white vinegar and warm water works well because acetic acid dissolves both. Add a squirt of dish soap to help the mixture cling to vertical surfaces and cut oily residue, or make a baking soda paste when you need gentle abrasion. Hydrogen peroxide sprayed on mildew spots is an effective first-line attack. Commercial bathroom cleaners can handle the same jobs with more convenience; read the label for dwell times, safety warnings, and material compatibility before buying. Material choice matters most: ceramic and porcelain tolerate vigorous scrubbing and most cleaners, though their porous grout suffers from repeated harsh acid. Fiberglass and acrylic surrounds scratch easily, so use soft cloths and non-abrasive cleaners only. Natural stone such as marble, granite, limestone, or travertine needs a pH-neutral stone cleaner; vinegar, lemon, and bleach can all corrode or stain it. Wall material Safe cleaners Avoid Ceramic or porcelain tile Vinegar solution, baking soda paste, most bathroom sprays Repeated harsh acids on grout Fiberglass or acrylic Mild detergent, non-abrasive sprays, soft sponge Scouring powders, steel wool, stiff brushes Natural stone pH-neutral cleaner formulated for stone Vinegar, lemon juice, bleach Glass doors Vinegar spray or diluted lemon juice, squeegee finish Abrasive pads that scratch When trying any new product, test a small inconspicuous patch first to rule out discoloration or etching. Tip 4: Follow a Top-to-Bottom Wash Routine Rinse the walls with warm water to loosen surface dirt, then apply your cleaner from the top down so dirty runoff never crosses freshly treated areas. Let it dwell: 5 to 10 minutes for light cleaning, and 15 to 30 minutes or longer for heavy scum or mildew, because dwell time is what breaks the bond between grime and wall. Scrub in systematic strokes from top to bottom with a tool suited to your material, concentrating on corners, crevices, and fixture bases, and tackle grout lines with your toothbrush or grout brush, using hydrogen peroxide or a grout cleaner for discolored seams. Rinse thoroughly from the top down so no residue remains to attract fresh dirt, then squeegee each wall in overlapping downward strokes, wiping the blade as you go, or dry with an absorbent microfiber towel. Leave the fan on so the enclosure dries completely. Tip 5: Handle Stubborn Problems and Prevent New Ones Thick scum that survives a first round can take a stronger commercial remover with an extended dwell, and gentle plastic scraper work can lift heavy layers, never metal on delicate surrounds. Severe limescale on glass or hardy tile may call for a calcium, lime, and rust remover used exactly as directed with excellent ventilation. For persisting mildew on bleach-safe ceramic and grout, one part bleach to ten parts water, applied for 10 to 15 minutes before scrubbing and rinsing, kills spores that surface wiping misses. Never mix that bleach with ammonia or vinegar-based cleaners, since the combination releases dangerous gases. If mold keeps returning despite your best scrubbing, suspect a deeper moisture or airflow problem; Health Canada’s guide to air contaminants and health explains how to dry out damp spaces for good. Prevention is cheap and fast: squeegee the walls after every shower, mist with a daily shower spray, run the exhaust fan during showers and for 20 to 30 minutes afterward, and give the enclosure a quick weekly wipe with a mild cleaner. Frequently Asked Questions About Shower Wall Cleaning What removes soap scum from shower walls naturally? Equal parts white vinegar and warm water, optionally with a drop of dish soap so it clings, dissolved scum after a 15 to 30 minute dwell. Baking soda paste adds gentle abrasion for patches that resist wiping. How do I get black mold out of grout? Spray hydrogen peroxide first and scrub with a grout brush. On bleach-safe tile and grout, a ten-to-one water-and-bleach solution left for 10 to

How to Keep Your Shower Walls Shining – 5 Best Tips You Need to Know Read More »