Cleaning Checklist

Dishwasher

5 Common Dishwasher Cleaning Mistakes You Need to Stop Making

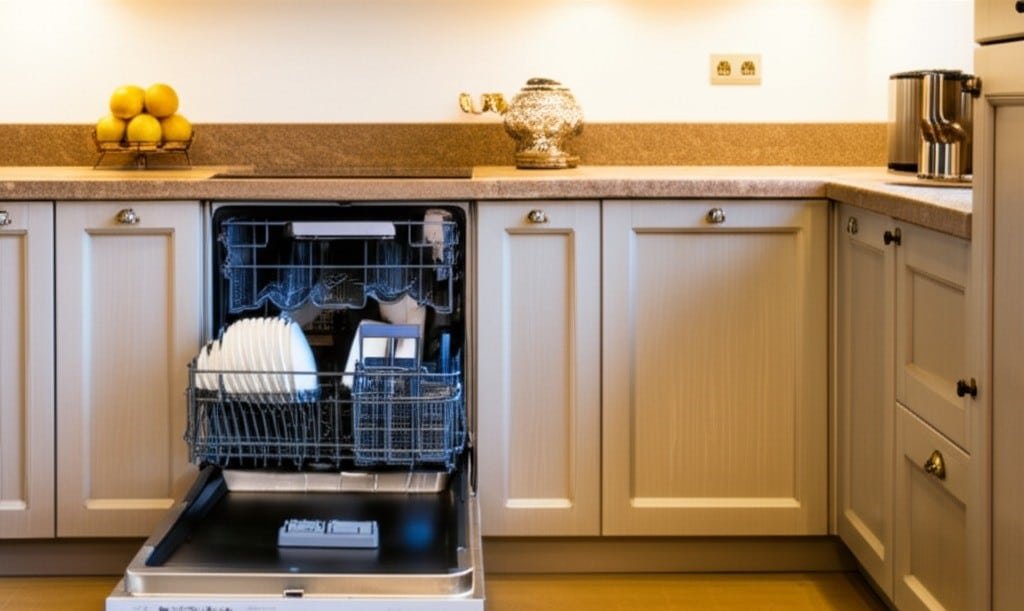
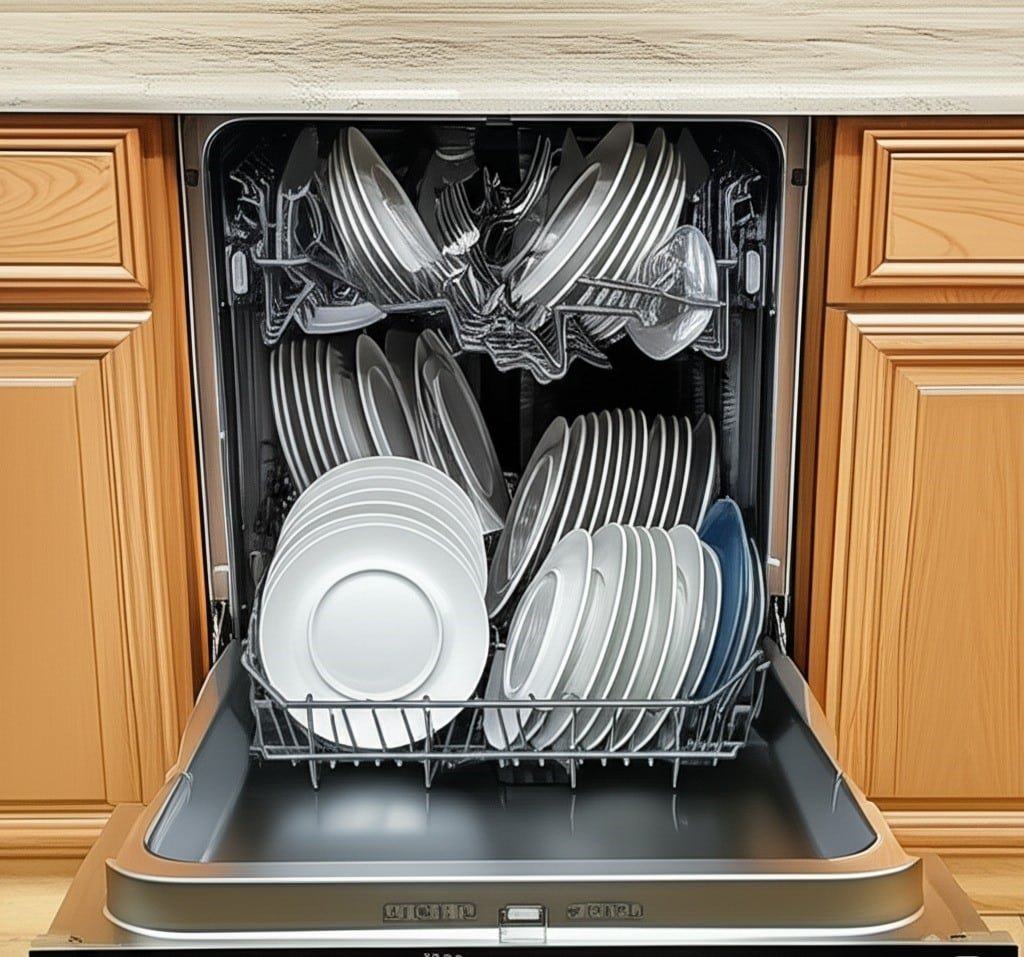
5 Common Dishwasher Cleaning Mistakes You Need to Stop Making A dishwasher is a precision instrument, not a brute-force cleaning bin. It delivers sparkling, sanitized dishes only when whoever loads it understands the spray pattern and the chemistry of detergent. When plates come out gritty, streaked, or wet, the fault usually lies with repeatable habits rather than the appliance. Fix these five and it becomes the dependable workhorse it was built to be. 1. Overloading and Blocking the Spray Cleaning depends on hot, detergent-laden water reaching every surface in the tub, so anything that blocks the spray guarantees a failed load. Squeezing in one extra plate creates what technicians call water shadows, and a single large bowl at the wrong angle can hide half a dozen smaller items behind it. Food loosened from those hidden dishes then gets thrown around during the rinse, leaving a gritty film on dishes that were never dirty. Leave clearance on all sides so water can circulate. 2. Loading Dishes the Wrong Way Round Spray arms sit at the bottom of the tub and often beneath the top rack, so most of the water travels upward. Soiled faces need to point down and angle toward the middle of the machine, where the jets are strongest. A bowl left standing upright stays a dry, dirty island. Place cups, glasses, and bowls on the top rack, tilted downward between the tines. Plates on the lower rack should face the central spray rather than all leaning the same way. Cutting boards and baking sheets belong along the sides or back of the bottom rack. A large flat item pushed to the front can block the detergent door or stop the lower spray arm from rotating, cancelling the whole wash. The rack split is deliberate. The bottom rack sits above the heating element in the path of the strongest jets, so it is reserved for ceramic plates, stainless steel pots, and sturdy pans. The top rack gives a gentler wash and is the safe home for delicate glassware and every plastic item, even those marked dishwasher safe. Direct heat warps or melts plastic placed below, and some plastics degrade and release chemicals. 3. Careless Cutlery and Items That Should Never Go In Dumping cutlery into the basket lets identical shapes nest together and form a watertight seal, so food never rinses away. Mix the load instead, alternating handles up and handles down and spreading pieces across compartments. Sharp knives belong blade-down for safety, but fine cutlery should be washed by hand rather than exposed to the harsh interior of a dishwasher. Some materials should stay out entirely. Wood absorbs hot water, swells, and cracks as the heat-dry cycle pulls the moisture back out. Cast iron loses the polymerized oil seasoning that keeps it non-stick, and the exposed iron rusts. High-carbon chef knives take a double hit, with detergent corroding the edge while the racks knock it dull. Non-stick coatings wear away, metallic trim and hand-painted china are stripped, and insulated travel mugs can lose their vacuum seal after repeated temperature swings. 4. Pre-Rinsing Everything and Getting Detergent Wrong Rinsing dishes to a squeaky finish backfires on modern machines. A turbidity sensor shines light through the wash water to measure how much soil it holds, so a nearly clean load triggers a short, light cycle that may not be enough for the greasy pans sharing that load. Enzyme detergents built with amylase and protease also need residue to work on, so rinsing it away wastes their cleaning power. Scrape off large chunks and stop there. Hand dish soap is the most destructive mistake of all. It foams heavily, overwhelms the tub, pours across the floor, and can damage pumps and water-level sensors. Only detergent labeled for automatic dishwashers belongs in the dispenser. Too much leaves a chalky film, too little leaves food behind, and the pack instructions settle the right dose. 5. Skipping Rinse Aid and Long-Term Maintenance Rinse aid is not a luxury. It is a surfactant that breaks the surface tension of water in the final hot rinse, so water sheets off instead of forming droplets that dry into mineral spots. The effect shows most on plastics, which do not retain heat like glass. Machine care matters just as much, because a dishwasher washes your dishes but never washes itself. Part How often What to do Filter Monthly Twist out the mesh screen and rinse it under hot water. Spray arms Every few months Clear the jet holes, then run an empty hot cycle with a cup of white vinegar on the top rack. Unloading Every cycle Pull the bottom rack out first, since mugs above hold water that would spill onto dry dishes below. A clogged filter forces the machine to recirculate food debris onto your dishes, the leading cause of grit and foul odors. Rinsing it monthly, plus an occasional vinegar cycle that dissolves buildup in the arms, hoses, and pump, keeps results consistent. After handling it, wash up: the CDC hand hygiene guidance recommends soap and running water, or a sanitizer with at least 60 percent alcohol when soap is unavailable. Never add bleach to a rinse cycle or mix it with vinegar and other cleaners, since the combination can release dangerous fumes. The CDC bleach safety guidance explains the safe rules, and the CDC routine cleaning advice shows what a hygienic kitchen surface really takes. Frequently Asked Questions Should I rinse dishes before loading them? Scrape off large scraps and skip the rinse. A turbidity sensor judges how dirty the wash water is, so a spotless load can trigger a short cycle that leaves greasy pans half cleaned. Enzyme detergents also need food residue to activate, so rinsing to a squeaky finish wastes water, detergent, and electricity. Is hand dish soap ever safe in a dishwasher? No. Hand soap produces heavy suds that flood the tub, spill onto the floor, and can damage the pump and water-level sensor. Use a detergent labeled for

5 Common Dishwasher Cleaning Mistakes You Need to Stop Making Read More »
Professional Floor Cleaning

5 Benefits of Professional Floor Cleaning

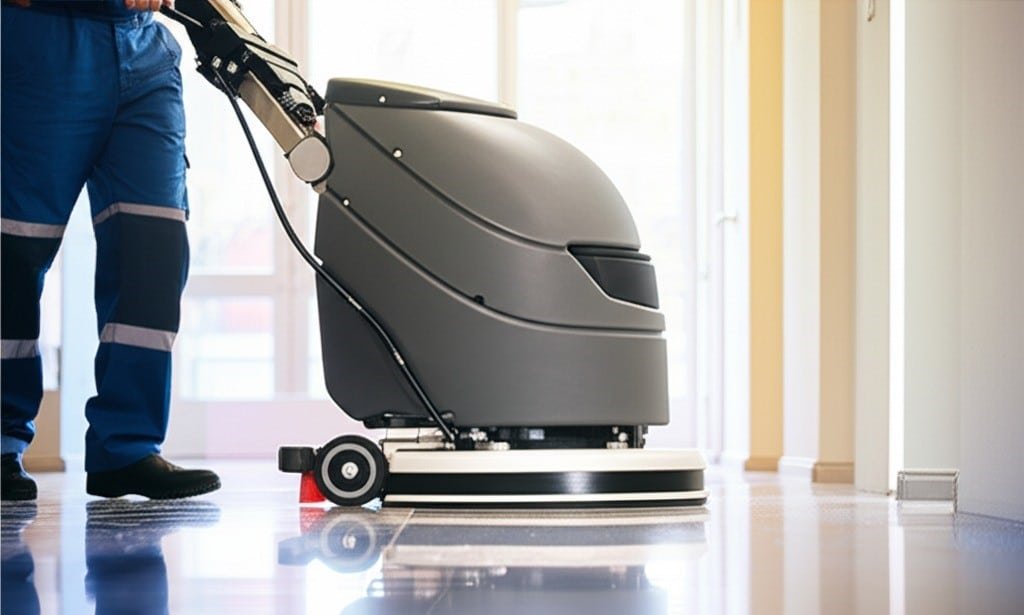
Why Professional Floor Cleaning Matters Floors bear the brunt of daily life: constant foot traffic, spills, furniture being dragged around, and the slow buildup of dust, soil, and allergens that ordinary sweeping and mopping leave behind. Routine maintenance cleans the surface, but deep-seated grime in grout lines, carpet fibers, and wood grain can damage flooring and worsen indoor air quality over time. Professional floor cleaning closes that gap with specialized equipment, professional-grade solutions, and trained technique. Here are five concrete benefits of bringing in experts, and what each service actually involves. Benefit 1: Hardwood and Laminate Stay Protected Hardwood floors need a delicate touch. Professionals start with dry soil removal using commercial vacuums with soft-bristle heads and HEPA filters that trap microscopic dust and allergens without scratching the finish. The next stage is a controlled damp clean, never a wet one: excess water seeps between planks and can cause swelling, warping, or cupping. Microfiber mops hold just enough solution to lift embedded dirt, and a pH-neutral cleaner formulated for wood protects the polyurethane or wax finish, which harsh all-purpose products can dull. For worn floors, low-speed buffing with a soft pad removes minor scuffs and restores an even sheen. Laminate is handled with the same care but with even less moisture, since its fiberboard core swells and blisters when water penetrates the seams. Steam mops are off the list for laminate: their heat and pressure can push moisture into the joints and delaminate the planks. Benefit 2: Tile and Grout Look New Again Ceramic and porcelain tiles wipe clean with ease, but the grout joining them is porous and soaks up cooking grease, food soil, soap film, and bacteria like a sponge. Everyday mopping can actually make things worse, driving dirty water down into the recessed grout lines. Professional tile and grout cleaning applies a high-alkaline solution that breaks down years of accumulated soil, lets it dwell so it penetrates the pores, and then agitates every line with specialized grout brushes or orbital scrubbers. The final step is extraction with a high-pressure hot water system that flushes the loosened grime and vacuums it away. A clear penetrating grout sealer is then applied to create an invisible barrier that keeps future spills from soaking in and makes routine maintenance much easier. Benefit 3: Carpets Are Deep Cleaned and Air Quality Improves Carpets function like a giant air filter, capturing dust, pollen, pet dander, and soil tracked in from outside. Everyday vacuuming lifts only the surface layer, while heavier soils and oily residues settle toward the base of the pile, where they can damage fibers and feed allergens. The industry standard for a deep carpet clean is hot water extraction, often called steam cleaning. Technicians pre-inspect the fiber type and treat stains individually, apply a pre-conditioner that breaks down oily soil, then inject hot water deep into the pile and extract it with a powerful vacuum. Commercial-grade machines recover far more water than rental units, which means a deeper clean and faster drying. Air movers speed the process and help prevent mold or mildew, and grooming the pile keeps fibers standing straight. Health Canada explains how dust and dust mites collect in carpets and bedding and can aggravate allergies and asthma, which is why removing trapped pollutants matters for everyone in the home. Keeping floors clean is one practical step toward fewer indoor air contaminants. Benefit 4: Resilient Floors Can Be Restored, Not Replaced Luxury vinyl tile and linoleum are durable and water-resistant, but they suffer from scuffs and from old layers of finish that yellow and trap dirt over time. Professionals restore these floors with stripping and waxing. A chemical stripper dissolves the old acrylic finish, and a rotary machine fitted with an aggressive pad works it into a slurry that a wet-vac lifts away. After a neutralizing rinse and full drying, fresh finish or wax goes on in several thin, even coats, each allowed to dry completely. The payoff is a glossy, protected surface that looks newly installed and shrugs off everyday wear. Benefit 5: Your Flooring Investment Lasts Longer Regular professional care extends the life of every floor type and keeps your home healthier in the process. What pros bring that daily mopping cannot: Commercial vacuums with HEPA filtration that trap allergens instead of recirculating them. pH-balanced and material-specific cleaners that protect finishes. Hot water extraction equipment that sanitizes carpet and cuts drying time. Sealing and finishing steps that guard grout, stone, and resilient floors. Professional Floor Cleaning by Surface Type Floor Type Professional Method Main Benefit Hardwood HEPA vacuum, damp microfiber, pH-neutral cleaner, buffing Finish protected, scuffs removed Laminate Dry vacuum, minimal-moisture clean No swelling or delamination Tile and grout Alkaline dwell, agitation, hot water extraction, sealer Grout restored and stain resistant Carpet Pre-conditioning and hot water extraction Allergens removed, faster drying LVT and linoleum Stripping and waxing Glossy finish restored Frequently Asked Questions How often should floors be professionally cleaned? Carpets usually benefit from hot water extraction every 12 to 18 months, while tile, grout, and hard surfaces can go 6 to 12 months depending on traffic. Homes with kids, pets, or allergy sufferers may need shorter intervals. Is steam cleaning the same as professional carpet cleaning? Steam cleaning is the common name for hot water extraction, the method professionals use. It injects hot water and rinsing agents into the pile and extracts them with powerful vacuum equipment, which delivers a deeper clean than rental machines. Can professional cleaning damage hardwood floors? Not when done correctly. Professionals use soft-bristle vacuums, damp rather than wet mopping, and pH-neutral wood cleaners. The risk of damage comes from excessive water and harsh chemicals, which trained technicians avoid by design. Why does grout stay dirty no matter how much I mop? Grout is porous and absorbs what mop water leaves behind. Only agitation with the right cleaning chemistry followed by hot water extraction removes soil from inside the pores, and a sealer then keeps it from returning quickly. Hiring professionals

5 Benefits of Professional Floor Cleaning Read More »

small office

Making Your Small Office a Pleasant Place to Work – 5 Expert Tips

Making Your Small Office a Pleasant Place to Work A tidy office does more than impress visitors; it protects staff health, lifts morale, and helps people focus. Clients and job candidates start forming opinions before a word is spoken, at the front door, and employees feel the difference every day in how the space looks, smells, and functions. Break the workload into five zones: Entrance and reception, where first impressions form. Workstations, where the team spends its day. The kitchen and breakroom, shared by everyone. Restrooms, which need daily sanitation. Periodic deep tasks that keep the whole office fresh. Tip 1: Make the Entrance and Reception Sparkle First impressions start at the door. Keep the glass panels free of fingerprints and smudges, and disinfect the handle daily, since it is the first thing everyone touches. Vacuum or mop the entryway floor every day so dirt, salt, and moisture stay at the threshold instead of traveling through the building. In the reception area, clear the desk of clutter, dust it thoroughly, and wipe it with a product that dries streak-free. Sanitize the telephone, keyboard, and mouse, arrange any brochures neatly, and wipe down guest chairs, including legs and armrests, vacuuming upholstery to remove dust and crumbs. Tip 2: Keep Workstations Clean and Disinfected The main workspace is where your team spends most of its day, so its condition directly affects health and productivity. Empty trash and recycling bins and replace the liners. Dust from high to low so dislodged particles land on surfaces you clean next, covering shelves, cabinet tops, picture frames, and partition ledges before desks. Wipe monitors with a dry microfiber cloth so they are not scratched. Then move everything on each desk and clean the surface with a pH-neutral product safe for wood, laminate, and glass. Disinfect the high-touch items: the phone handset and keypad, the mouse, and the keyboard, using compressed air to blow crumbs from between the keys first. Wipe chair armrests, adjustment levers, and bases, and vacuum fabric seats. Finish by vacuuming the floor around every desk, reaching underneath and behind the chair. The CDC’s guidance on when and how to clean and disinfect explains why regular cleaning of high-touch surfaces is usually enough to keep germs from spreading. Tip 3: Give the Kitchen and Breakroom Daily Attention The breakroom is the social heart of a small office and the hardest area to keep clean. Clear the counters and wipe them with a food-safe disinfectant so no crumbs or sticky coffee rings remain. Scrub the sink with a non-abrasive cleaner, then disinfect the basin and the faucet hardware. That microwave gets a daily wipe-down, inside and out; a few minutes of heating a bowl of lemon water loosens dried food so it wipes away easily. Sanitize the fridge handle and door, check the interior regularly for expired food, and clean the door seals. Wash the coffee maker carafe and filter basket and wipe the machine’s exterior. Clean breakroom tables and chairs, then sweep and mop the floor with a degreasing disinfectant. Handwashing is part of the same hygiene picture: the CDC’s handwashing guidance notes that clean hands are one of the best ways to prevent the spread of germs in shared spaces. Tip 4: Keep Restrooms Sanitized and Stocked A clean, well-stocked restroom signals a well-managed office. Check toilet paper, paper towels, and soap dispensers first, then empty and sanitize the trash receptacles and fit fresh liners. Clean mirrors with a glass cleaner so they stay free of spots, and scour sinks and faucets, focusing on the handles and the soap dispenser surround. For toilets, use a hospital-grade disinfectant and respect its dwell time, the period the product must stay wet on the surface to kill germs. Work from the handle and top of the tank down to the lid, both sides of the seat, the exterior of the bowl, and the base. Scrub the inside of the bowl with a dedicated brush and bowl cleaner. Keep separate cloth colors assigned to the toilet zone so they never double as sink or counter rags, wipe partitions from top to bottom, and finish by mopping the floor with a disinfectant cleaner. Tip 5: Schedule Deeper Cleaning for the Whole Office Beyond the daily routine, a small office needs periodic deep tasks that keep the space truly healthy. Meeting rooms should be presentation-ready at all times: wipe the table, clean chairs, erase whiteboards with a proper whiteboard cleaner to remove ghosting, dust televisions, projectors, and conference phones, and vacuum. Along hallways, vacuum carpets edge to edge, sweep and mop hard floors, and disinfect light switches and door handles while wiping railings and baseboards periodically. Then book the deeper work on a schedule: interior window cleaning for natural light, hot water carpet extraction to remove embedded dirt and allergens, and high dusting of ceiling fan blades, shelves, vents, and light fixtures. Small Office Cleaning Priorities at a Glance Zone Focus Points Suggested Routine Entrance and reception Glass, handles, desk, guest seating Daily wipe-downs and floor care Workstations Desks, phones, keyboards, chairs Daily tidy, weekly full clean Kitchen and breakroom Counters, sink, microwave, fridge Daily wipe-downs, weekly deep scrub Restrooms Toilets, sinks, mirrors, supplies Daily sanitation, stock checks Common areas Windows, carpets, vents, light fixtures Periodic professional deep clean Frequently Asked Questions How often should a small office be cleaned? High-touch surfaces such as door handles, kitchen counters, and restroom fixtures should be cleaned daily. Workstations and floors need attention several times a week, and deep tasks like carpet extraction and window cleaning are typically done quarterly or twice a year. What is the difference between cleaning and disinfecting? Cleaning removes dirt and most germs with soap or detergent, while disinfecting uses a product that kills remaining germs on the surface. In an office, clean first, then disinfect the high-touch areas where illness spreads most easily. Why does my office still look dusty after vacuuming? Dust settles on high surfaces such as shelves, vents, and light fixtures and

Making Your Small Office a Pleasant Place to Work – 5 Expert Tips Read More »

cleaning professional

4 Reasons Why You Should Hire a Cleaning Service

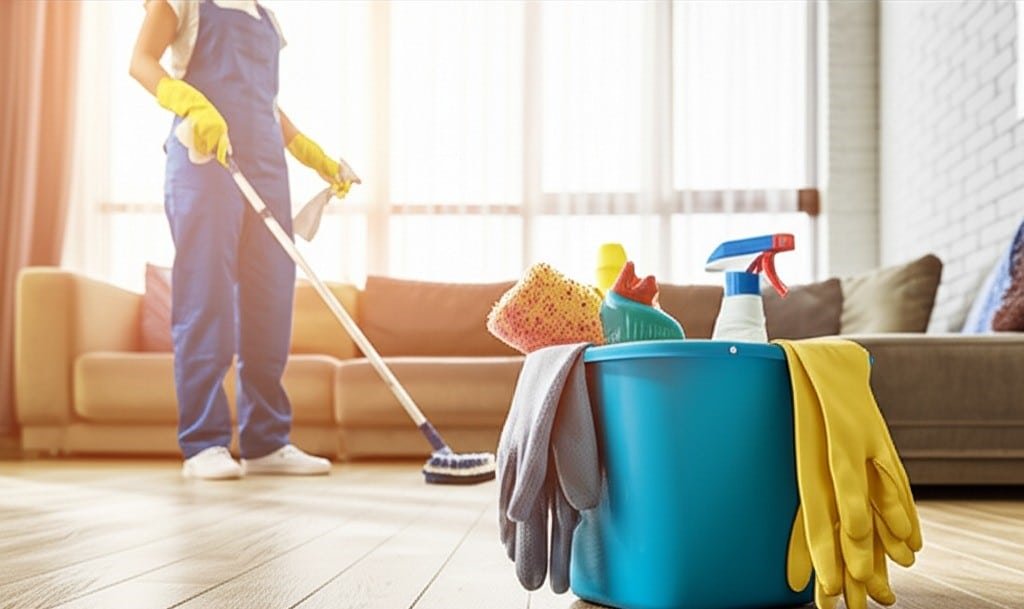
4 Reasons Why You Should Hire a Cleaning Service Hiring a cleaning service is usually framed as a simple trade of money for convenience. The real return runs much deeper than that. What you are actually buying is time you cannot manufacture, a healthier indoor environment, a calmer household, and a home whose floors, fixtures, and finishes last longer because someone maintains them properly. Here are four reasons that calculation usually tips in favour of hiring help. 1. You Get Your Time Back A home is meant to be a sanctuary, a place of rest after the demands of the day, yet keeping that sanctuary in shape can become a second job. Hours spent dusting, vacuuming, mopping, and scrubbing are hours that never come back. Those hours could go to family, personal interests, professional growth, or simply resting. Delegating the cleaning does not just buy clean floors; it buys back the most finite resource you own. Think of the weekend as two days to live rather than two days of catching up on chores. The quality gap matters too. A professional cleaner brings expertise and speed that most homeowners cannot match, having refined a system over hundreds of homes. They know which product is safe on which surface, how to lift stubborn soap scum without damaging tile, and how to leave glass genuinely streak-free. They also notice the details a hurried weekly wipe-down misses: dust gathering on baseboards, grime on cabinet doors, fingerprints on switch plates, and the forgotten corners behind furniture. 2. Professional Standards, Better Tools, Better Air That standard is backed by equipment. Instead of a household vacuum and a few all-purpose sprays, a service arrives with high-filtration vacuums that trap fine dust and allergens instead of blowing them back into the room, plus a color-coded microfiber system that stops cross-contamination between the bathroom and the kitchen. Task-specific solutions do their jobs faster and better, and you no longer have to research, buy, and store a shelf of chemicals that mostly sit unused. Health is where this pays off most. Looking clean and being hygienically clean are two different standards. Dust carries skin cells, fabric fibers, pollen, pet dander, and dust mites, and every one of those irritates allergies and asthma. Thorough professional dusting and vacuuming lowers those airborne irritants and improves indoor air quality. The kitchen and bathroom need special attention because they can become breeding grounds for bacteria, mold, and mildew. A good service does more than wipe counters; it sanitizes them, disinfects toilets, sinks, and showers, and spots the conditions that let mold take hold before it becomes a bigger repair. For pet owners, the CDC healthy pets guidance is a useful reminder of how much dander and tracked-in soil animals add to a home, and the CDC mold and moisture guidance explains why damp bathrooms and kitchens need consistent attention. 3. Less Stress, Calmer Household Living in a cluttered or dirty space raises levels of the stress hormone cortisol, and the low-grade awareness that chores are waiting wears on the mind. Stepping into a home that stays clean and orderly brings an immediate sense of calm and control. The relief is not limited to the hours the cleaner is present, because the task stops occupying your thoughts entirely once it is scheduled. Cleaning is also a frequent source of domestic friction. Arguments over whose turn it is, or over what the word clean even means, create tension between partners and family members. Outsourcing removes the dispute altogether. It becomes a neutral, scheduled service that holds one consistent standard for everyone in the household. Kitchens and bathrooms scrubbed, sanitized, and reset. Floors vacuumed and mopped on a set schedule. Dust removed from surfaces, sills, and vents. Supplies and scheduling handled for you. 4. Consistency That Protects Your Home Life gets busy, and cleaning is the first thing postponed. One skipped week becomes two, and grime settles in deeper and takes more effort to remove later. A scheduled service restores the home to a baseline on a regular rhythm, whether that is weekly, bi-weekly, or monthly, which prevents heavy buildup and preserves floors, fixtures, and surfaces over the long term. That proactive care can save money later on restoration or replacement work you would otherwise need. Certain life moments turn a cleaning service from a luxury into a near-necessity. Moving into a new home deserves a deep clean so you start with a fresh, sanitized space. A move-out clean is often required for renters to recover a deposit. Post-renovation work is its own specialty, since construction leaves a fine, pervasive dust that needs specific techniques and equipment. Hosting a holiday party or overnight guests is stressful enough without a top-to-bottom clean on the list. And for new parents, older adults, or anyone recovering from illness or injury, professional help makes daily life manageable and safe. Service Best for What it covers Regular cleaning Weekly, bi-weekly, or monthly upkeep Kitchens, bathrooms, floors, dusting, and the high-touch points that get dirty fastest. Deep cleaning First visits, seasonal resets, pre-event prep Baseboards, tile, grout, appliance interiors, vents, and the corners a routine clean skips. Move-in and move-out cleaning Tenancy changes and post-renovation work Empty-unit detailing, inside cabinets, construction dust, and deposit-standard finishes. For routine hygiene between visits, the CDC guidance on cleaning and disinfecting your home is a clear primer on where germs collect and which surfaces deserve daily attention. Frequently Asked Questions How often should I book a cleaning service? Most households do well with bi-weekly visits, which keeps dust and grime from building between appointments. Busy homes with pets or children often choose weekly service, while smaller homes or single occupants can stay comfortable on a monthly rhythm. A deep clean is worth adding for a first visit or after a long gap. Do I need to be home during the clean? No. Many clients provide access instructions and return to a finished home. If you would rather be present for the first visit, that works

4 Reasons Why You Should Hire a Cleaning Service Read More »

preparing for the July cleaning

How to Prepare for July Cleaning: 4 Steps Fast and Easy

How to Prepare for July Cleaning: 4 Steps Fast and Easy July puts a particular strain on a home. The days are longer, everyone is in and out more often, and guests arrive with sand, pollen, and outdoor grime on their shoes. Preparing for a thorough July clean is less about buying supplies than about setting up a system, because good preparation makes the work faster, calmer, and far more complete. 1. Prepare Your Mind Before You Start Begin by getting your head into the job, not just your calendar. Set aside real time and commit to steady, systematic effort rather than sporadic bursts. A significant clean takes energy and focus, so break the house into manageable zones instead of planning to do everything at once, which is the fastest route to burnout. Picture the finished, organized space and let that image drive the plan, and keep a rough written outline so important areas do not slip through. Think about who else can pitch in, even with small jobs. Drink water, wear comfortable clothing, and put on music that keeps your energy up. This mental preparation is the quiet, underestimated first step. 2. Declutter One Room at a Time Decluttering is not tidying. It is the deliberate removal of anything that blocks access or prevents a surface from being cleaned properly. Clutter traps dust, hides spills, and makes it impossible to vacuum a floor or wipe a counter completely. Work through one area at a time, starting with the busiest spaces such as the kitchen or living room. Clear every countertop, lifting small appliances rather than sliding them, and wipe beneath each one. Empty the sink of dirty dishes and load them into the dishwasher or wash them right away. Sort accumulated mail and papers into action, filing, and recycling piles. Check the pantry and fridge for expired food before it becomes a smell or a mess. Clear, unobstructed surfaces let your tools reach every corner and crevice, which is what makes the rest of the work effective. 3. Gather and Check Your Supplies First Nothing is more frustrating than starting a task and discovering the bottle is empty or the attachment is missing. Take inventory before you begin. Confirm you have all-purpose, glass, bathroom, and floor cleaners suited to your flooring, plus enough dish soap and hand soap. Count your microfiber cloths and separate them by job, one set for dusting, one for glass, and one for bathrooms, so cross-contamination never happens. Check that sponges, brushes, a toilet brush, and a squeegee are in good shape, and inspect the mop and bucket. Empty the vacuum canister or replace the bag, clear blockages, and make sure all attachments are present. Add a dustpan, brush, and gloves, and keep everything in a caddy so you can carry supplies from room to room. 4. Clear and Pre-Treat, Room by Room With clutter handled, remove what should not be there during a deep clean. In the kitchen, empty the toaster crumb tray, pre-wipe a splattered microwave or steam a bowl of water inside it to loosen grime, and clear the area around the sink. Greasy oven racks can soak in hot, soapy water before scrubbing. In the bathroom, lift the toilet lid and seat to wipe the exterior of the bowl, scrub around the fixture base and faucet fittings, take down a moldy shower curtain, and clear hair from the drains. In bedrooms, strip the beds, put personal items away in their proper places, push under-bed containers fully under or pull them clear for vacuuming, and empty or close open hampers. In living areas, pull furniture away from the walls, shake throws and cushions outdoors, and take down curtains due for a wash. In hallways, shake entry mats outside, and clear consoles of keys and mail. Finish by wiping the tops of the washer and dryer, which collect lint. Summer Conditions That Change the Plan July brings two specific challenges. The first is humidity, so open windows during and after cleaning to let surfaces dry fully and discourage mold and mildew; the CDC mold and moisture guidance explains how quickly damp indoor conditions turn into a growth problem. The second is traffic. More time outdoors means more dirt, dust, and pollen comes inside, so good doormats at every entrance and a no-shoes habit pay off. If guests are coming, prioritize the guest bedroom and bathroom, and schedule the heaviest work for the cooler morning or evening hours. Read product labels, wear gloves, and never mix bleach with vinegar or ammonia-based cleaners, as the CDC bleach safety guidance warns. Work from top to bottom and from the back of each room toward the door. The Four Preparation Steps at a Glance Step What it involves Why it helps 1. Prepare your mind Block time, set zones, plan breaks Prevents burnout and keeps the work systematic. 2. Declutter Clear counters, dishes, mail, and old food Removes barriers that trap dust and block access. 3. Check supplies Inventory cleaners, cloths, tools, and vacuum Avoids mid-job interruptions and wasted trips. 4. Clear and pre-treat Remove items and pre-treat stains and racks Lets cleaners work while you move to another room. For the routines that keep a home hygienic in between big cleans, the CDC guidance on cleaning and disinfecting your home is a good reference on where germs gather and what deserves regular attention. Frequently Asked Questions How long does a July deep clean take? Plan on three to five hours of active work for an average home, split across two days if your schedule allows. Preparation adds about an hour, but it saves more than that later by removing clutter and pre-treating stains before you start scrubbing. Should I open windows while cleaning in July? Yes, whenever the weather allows. Ventilation clears stale air and cleaning fumes, and it helps surfaces dry faster in humid conditions. Damp bathrooms and kitchens are where mold and mildew establish themselves most easily, so airflow there is especially valuable.

How to Prepare for July Cleaning: 4 Steps Fast and Easy Read More »

dishwasher

6 Easy Tips On How To Clean Your Dishwasher With Vinegar

How to Clean Your Dishwasher With Vinegar Your dishwasher works hard washing plates, glasses, and cutlery, but it never washes itself. Food particles, soap scum, and hard water minerals gradually build up inside the tub, on the filter, and in the spray arms. The first signs are cloudy spots or film on glasses, a musty smell, and loads that come out less clean than they should. A regular vinegar cycle dissolves that buildup with a product that is cheap, natural, and safe. These six tips cover the whole process, from prepping the machine to keeping it fresh between cycles. Why White Distilled Vinegar Works So Well The active ingredient in white distilled vinegar is acetic acid, typically at about 5 percent concentration. That mild acid dissolves limescale and hard water deposits, the chalky film you see inside the tub and on glassware. It cuts through grease and soap scum and neutralizes odors instead of covering them with fragrance. It also discourages mold and mildew in damp areas, is non-toxic and safe around food and pets, and biodegrades completely. Used as directed, it will not harm stainless steel interiors, plastic parts, or rubber seals. Stick with clear white vinegar; apple cider vinegar can stain the interior and leave a sugary residue. Tip 1: Empty the Dishwasher and Clean the Filter First Preparation decides how well the vinegar cycle works. Remove every dish and piece of cutlery so the solution reaches all internal surfaces. Then take out the filter, usually a removable cylinder or multi-part assembly at the bottom of the tub, and rinse it under hot running water. You will likely find food scraps, labels, and greasy buildup; loosen them with an old toothbrush or scrub brush, using a little dish soap for stubborn grime. Check the manual for how the filter locks back into place. A clogged filter blocks water circulation and keeps the vinegar from reaching the whole machine. While you are there, wipe the door edges, rubber gaskets, and lower spray arm. Tip 2: Run the Vinegar Cycle on the Hottest Setting Pour two cups of the white distilled vinegar into an open, dishwasher-safe glass or ceramic bowl, and set the bowl on the top rack. The open bowl lets the vinegar mix into the wash water while its vapors spread through the cavity. Make sure the detergent and rinse aid dispensers are empty; the vinegar cycle must run on its own. Select the hottest and longest cycle your machine offers, often labeled Heavy Duty, Sanitize, or Pots and Pans. Hot water makes the acid noticeably more effective at dissolving minerals and grease. Tip 3: Never Mix Vinegar With Bleach Never combine vinegar with chlorine bleach: mixing them releases chlorine gas, which can cause serious respiratory problems and eye irritation. Check that no bleach products or residues are in the machine first. For guidance on handling cleaning products safely, see Health Canada’s household product safety pages. When someone is sick, a sanitize cycle is a good extra step; the CDC’s cleaning and disinfecting guidance explains when sanitizing is worth the effort. Tip 4: Wipe Seals, Gaskets, and Spray Arms After the Cycle Once the cycle finishes and the machine cools, open the door and inspect; cloudy surfaces should look clearer and odors gone. The folds of the rubber door seals can still hide grime and mildew; wipe them with a damp cloth and diluted vinegar or dish soap, and check around both dispensers for residue. If the vinegar smell lingers, run a short rinse cycle to flush it out. Between vinegar cleans, keep the spray arms clear: their small nozzles clog with hard water deposits, leaving dishes with unwashed spots. Clear blocked holes with a toothpick, a straightened paperclip, or a small wire. Clean the filter manually every week or two, scrubbing it under hot water, since a neglected filter makes the machine work harder and shortens its life. Tip 5: Clean the Exterior and the Daily Details The outside deserves attention too. For stainless steel doors, use a microfiber cloth with a stainless cleaner or diluted vinegar, then rinse with plain water to prevent streaking. Other finishes clean well with an all-purpose product. Good daily habits reduce how often you need a deep cycle: Scrape leftover food off plates before you load them; heavy pre-rinsing is rarely needed. Do not overload the racks or block the spray arms so water reaches every surface. Run full loads to save water and energy. Give the bottom edge of the door a regular wipe; water and food settle there. Tip 6: Know How Often to Run a Vinegar Cycle Most households benefit from a vinegar clean every one to three months. If you have hard water or run the dishwasher several times a day, clean it monthly. Watch for film on glasses, a persistent odor, or declining performance; any of these means a vinegar cycle is due. Dishwasher Problems and Vinegar Solutions Sign Likely Cause Fix Cloudy film on glassware Hard water deposits Run a vinegar cycle monthly Musty odor Food and grime in filter or seals Clean filter, wipe seals, vinegar cycle Spots on dishes Clogged spray arm nozzles Clear holes with a toothpick Weak cleaning results Blocked filter or buildup Full filter clean plus vinegar cycle Frequently Asked Questions Is it safe to run vinegar through a dishwasher? Yes. White distilled vinegar is non-corrosive to dishwasher components when used as directed. Still, check your user manual for any model-specific warnings before starting. Why does my dishwasher smell like vinegar after cleaning it? A temporary vinegar smell means the cycle did its job and usually fades within a few hours or after the next wash. If it bothers you, run a short rinse cycle right after the vinegar clean. Dishes are still dirty after a vinegar cycle. What now? Confirm the filter is clean and seated properly, clear any blocked spray arm nozzles, and make sure your hot water tank delivers roughly 120-140 F (49-60 C). Detergent type

6 Easy Tips On How To Clean Your Dishwasher With Vinegar Read More »

dirty Air Conditioner

The Best Way To Clean Your Air Conditioner And You Need To Know

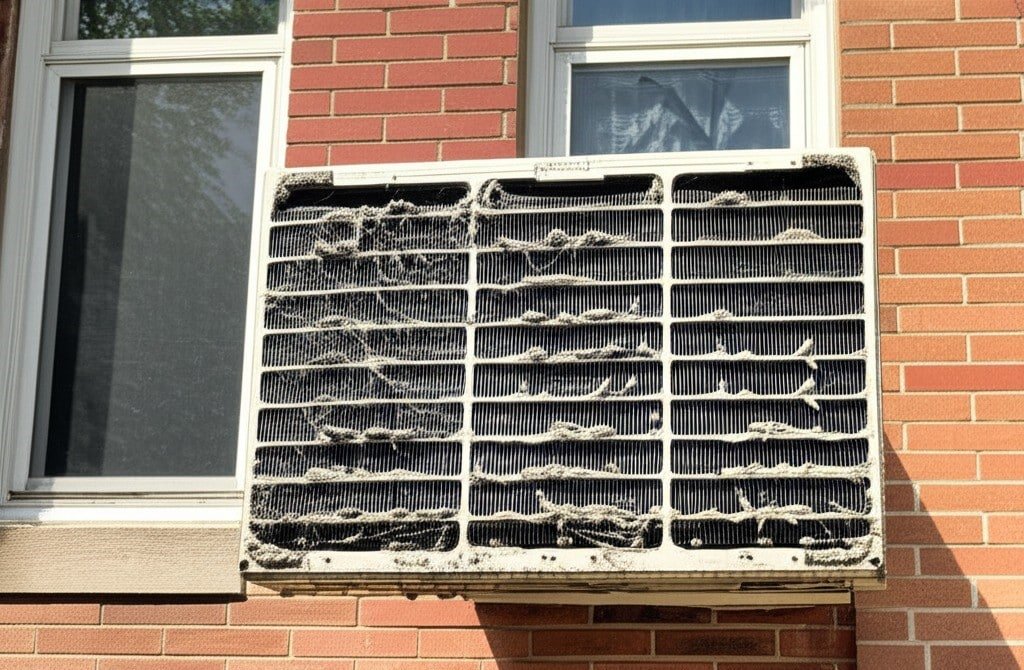
The Best Way To Clean Your Air Conditioner A dirty air conditioner costs you twice. It works harder to cool the room, which shows up on your utility bill, and it pushes dust, mold, and allergens into the air you breathe. Regular cleaning protects both. Safety Comes Before Anything Else Disconnect the power first. Unplug a window unit at the wall outlet. For split and central systems, switch off the matching breaker in your main panel, and turn off the extra disconnect switch beside most outdoor condensers. Gather your supplies first: A vacuum with a soft brush attachment, plus a stiffer brush for outdoor debris Screwdrivers and a fin comb for bent fins Coil cleaner matched to the job, evaporator or condenser A spray bottle, mild detergent, and several clean cloths Gloves and protective eyewear Cleaning a Window Air Conditioner Lift the unit onto a stable surface outdoors when you can, because the outer frame and rear coils clean up far better that way; if removal is impractical, work on the accessible parts in place. Remove the front panel or grille, checking the manual if the screws are not obvious. The Filter Slide the filter out from behind the panel. Most window filters are washable. Vacuum both sides with the brush attachment, rinse stubborn dirt with warm water and mild soap, and let it dry completely before reinstalling. A damp filter encourages mold and mildew inside the unit. The Coils and Drain Pan With the filter out, the evaporator coils appear as thin metal fins. Vacuum them along the fins rather than across them, and straighten bends with a fin comb, since bent fins restrict airflow and cut efficiency. For a deeper clean, spray a non-acidic foaming cleaner made for evaporator coils and let the foam carry dirt into the drain pan. If you removed the unit, treat the rear condenser coils, which collect leaves and grass. Brush off loose debris, then hose the coils from the inside out at moderate pressure so water pushes dirt away rather than deeper in. Clean slime and mold from the drain pan with a cloth and mild detergent, clear the drain port with a wire, wipe the fan blades and casing, and reassemble once everything is dry. Cleaning a Split or Ductless System Turn the system off at the breaker, then open the indoor unit’s front panel, which normally lifts upward. Wipe the housing with a soft damp cloth. Two or more reusable filter screens sit below the panel: unclip them, vacuum both sides, wash off grease with warm water and mild detergent, and dry them fully, because running the unit without filters lets dust clog the coils and fan rotor. Vacuum the evaporator fins with a soft brush, working toward the edges, or apply a no-rinse evaporator coil cleaner that foams, dissolves grime, and drains away with normal condensation. Straighten bent edges with a fine-toothed comb. The blower wheel sits deep behind the coils and gathers dust, mold, and grime that cuts airflow, harms air quality, and adds noise. A long flexible brush reaches it while you rotate the wheel by hand with the power off, and some kits include a runoff bag for a stronger clean, though a very dirty wheel is best left to a professional, since careless work damages the part. The condensate drain line can also clog with algae and slime and cause leaks, so clear small blockages with a drain line solution, a very dilute bleach or vinegar mix once you confirm it suits the materials, or a wet/dry vacuum at the outlet. Cleaning a Central System Shut off power to the air handler or furnace at the breaker. The filter sits in a slot on the return duct or the cabinet itself, so note the printed size and the airflow arrow before swapping it: disposable filters need replacing every one to three months, more often with pets or allergies, and the arrow always points toward the air handler. Washable filters are vacuumed, rinsed, and dried fully first. The evaporator coil, or A-coil, sits inside the air handler plenum, above the blower in an upflow system and below it in a downflow layout. With the power off, remove the access panel and vacuum the coil gently with a soft brush, or use a no-rinse evaporator coil cleaner. These coils are hard to reach and easy to damage, so if they look heavily soiled, call an HVAC technician. The outdoor condenser then follows the same routine as a mini-split: power off at the breaker and disconnect, clear leaves and grass, keep two to three feet of clear space around and above the unit, wipe the casing, hose the coils from the inside out, straighten bent fins, and check the fan and the level footing. A Simple Maintenance Schedule Unit Type Filter Care Deep Clean Window unit Every 1 to 3 months Coils and drain pan yearly Split or ductless Every 1 to 3 months Coils, blower, drain line yearly Central system Every 1 to 3 months Coils and drains before cooling season Check every filter monthly, and give homes with heavy dust, pets, or constant cooling a semi-annual deep clean instead. Moisture control matters as much as dust, and the CDC guidance on moisture and mold explains why a damp filter or pan deserves attention. Before using diluted bleach on a drain line, review bleach safety, and keep nearby surfaces in order with the CDC advice on cleaning and disinfecting your home. When to Call an HVAC Professional Call a qualified technician if mold has grown deep inside the unit, if the system is not cooling well, which can point to a refrigerant issue only a certified technician can fix, if you hear unusual noises, or if the blower wheel or evaporator coil is very dirty and hard to reach. Clean equipment uses less energy, lasts longer, and keeps air fresher. Frequently Asked Questions How often should I clean my air conditioner filter? Inspect it monthly and

The Best Way To Clean Your Air Conditioner And You Need To Know Read More »

disorganized home

Why Hiring A Professional Organizer Is Important – 5 Key Factors

Why Hiring A Professional Organizer Is Important Belongings pile up quietly. An item here, a stack there, and rooms that once felt open start to feel cramped and heavy. This is not simply untidiness. Clutter raises the background level of stress at home, makes ordinary tasks harder, and turns cleaning into a losing battle. When counters disappear under paper and floors become obstacle courses, real cleanliness stays out of reach. That is when many people realize the problem is not the cleaning at all. It is the sheer volume of stuff, and a professional organizer solves it with a methodical plan instead of another round of tidying. How Clutter Quietly Takes Over Dust settles in every gap between objects, so surfaces never feel clean. Cleaning takes longer because piles must be moved before anything can be wiped. Time disappears into hunting for keys, documents, or one ingredient. Duplicate purchases happen when you cannot find what you own. Stress builds from a space that feels out of your control. The work starts with an in-depth consultation. The organizer asks how you use each space, what frustrates you, and what a more functional home would look like, then assesses the scope of the clutter and the habits behind it. It is a judgment-free conversation that produces a plan to fit your life. 5 Key Factors That Make an Organizer Worth It 1. Do You Really Need All the Objects? Decluttering is the heart of the process and usually the hardest part. An organizer guides you through it calmly and objectively, one category at a time, so you can decide what stays and what goes. Three plain questions settle it: Is it useful? Do I love it? Do I need it? Sentimental pieces get respectful strategies, such as digitizing photos and letters or building one memory box, so memories are honoured without a room full of boxes. Anything left over leaves responsibly by way of charity donations, resale, recycling, or waste disposal. 2. Sorting and Categorizing With the excess cleared, remaining items are grouped by kind, a like-with-like principle that puts all baking supplies together, all stationery in one spot, and all cleaning products with each other. In a home where things have drifted for years, this step reveals what you own and where duplicates hide. The organizer then plans the space, studying closets, cabinets, shelves, drawers, and vertical room before designing storage that is efficient and easy to reach. In a kitchen that might mean reconfiguring pantry shelves, adding clear stackable containers, setting up a first-in-first-out rotation to cut food waste, and finding homes for pot lids and baking sheets. 3. Closets, Rooms, and Awkward Spaces In closets, uniform hangers save space and create visual calm, folding techniques expand drawer capacity, shoe storage keeps pairs visible, and accessories such as scarves, belts, and jewelry get their own systems, plus seasonal rotation so off-season clothing is stored properly. Home offices gain paper management for action, reference, and archive files, digital organization advice, an ergonomic desk layout, and supplies within reach. Children’s rooms work better with clear bins, picture labels, and toy rotation. Garages, basements, and attics get heavy-duty shelving, durable clear bins, and zones for tools, sporting gear, and holiday decorations. 4. Labeling and Maintenance Coaching Clear, consistent labels tell everyone in the household where things belong, and they keep a system from slowly collapsing. A good organizer does not simply set up shelves and leave. They coach you on daily or weekly resets and routines for handling mail and groceries, and often offer follow-up sessions to fine-tune the system as needs change. 5. Time and Money Reclaimed The benefits reach far beyond a tidier house. An organized space brings calm and control, and the minutes saved each week add up to hours for something you enjoy. Knowing what you own prevents duplicate buys, an organized pantry and fridge reduce food waste, and papers are less likely to be misplaced, so late fees are avoided. Best of all, organizers maximize the space you already have, so a small home feels bigger and you may skip the storage unit entirely. An orderly home is also far easier to clean, because dust and grime have fewer places to hide. Where Organizing Helps Most Situation Main Benefit Why It Matters Moving Only pay to transport what you need Systems are set up in the new home from day one New baby, empty nest, downsizing, blended household Guidance through changing space needs Transitions stay smooth, not chaotic Chronic disorganization Tailored, compassionate strategies Support where habits or ADHD have built a wall Preparing a home for sale Better photos, better showings Can command a higher price and sell faster After a renovation Resettling into the improved space Keeps the new layout functional and beautiful Three myths still stop people from asking for help. One is that organizing is a luxury for the wealthy, when it is really an investment in time and a home that works. Another is the fear that a stranger will force you to throw away cherished possessions, though the final decision always rests with you. The third is shame, the idea that you should manage alone, even though organizing is a specialized skill just like plumbing or electrical work. Frequently Asked Questions Will an organizer make me throw out things I love? No. Professional organizers work collaboratively, and every decision about what stays rests with you. Sentimental items get strategies for honouring them without keeping everything. How long does a typical organizing project take? It depends on the space and how much clutter has accumulated. A single closet can be finished in one session, while a whole home takes several visits plus follow-up coaching. Does an organized home really stay cleaner? Yes. Fewer objects mean fewer surfaces for dust to settle, fewer obstacles to move before cleaning, and easier access to floors and corners. Can I hire help for just one room? Absolutely. Single-project help is a common way to start, and many

Why Hiring A Professional Organizer Is Important – 5 Key Factors Read More »

5 Tricks How To Prevent Mold And Mildew In Your Home

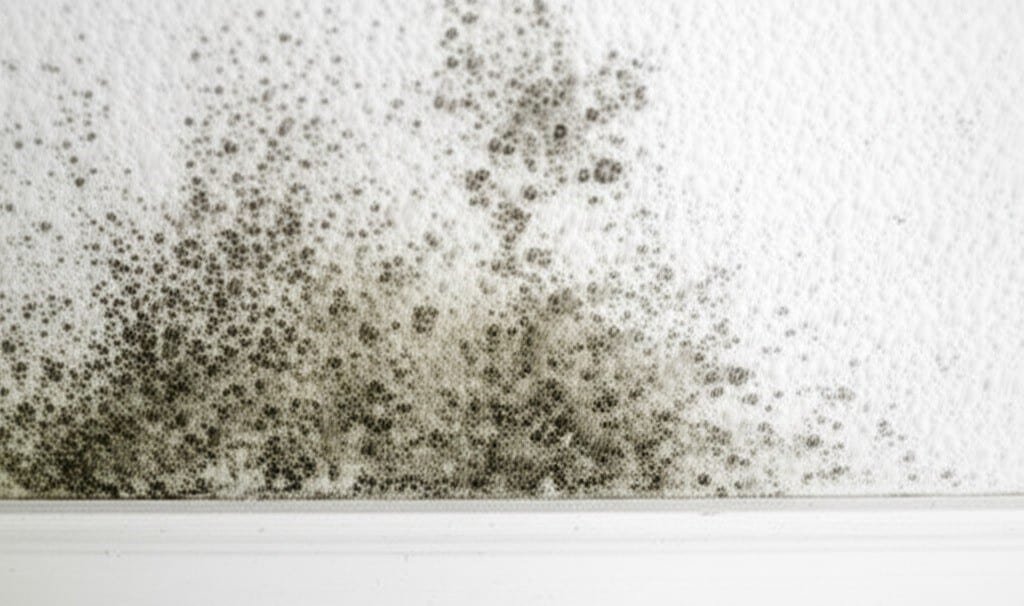
How To Prevent Mold And Mildew: Five Tricks That Work Preventing mold and mildew comes down to one thing: controlling moisture so these fungi never gain a foothold. Mold and mildew are more than unsightly; they release spores and volatile organic compounds that can affect respiratory health and worsen allergies or asthma, and the CDC’s mold information explains how exposure triggers symptoms. These five tricks cover the full defense: ventilation, moisture targets, leak response, food removal, and smart materials, finishing with the exterior water habits and inspection routine that catch problems early. Trick 1: Vent Out Moisture at Its Sources Bathroom exhaust fans should run before the shower starts and stay on for at least 20-30 minutes afterward so the moist air is fully vented outdoors; without a fan, crack a window briefly when the weather allows. In kitchens, use an outside-venting range hood whenever you cook, and clean or replace its filters regularly. Dryers must always vent directly outside; venting into an attic, crawl space, or interior room dumps huge moisture loads that invite widespread mold. Keep the vent hose unkinked, clean the lint trap after every cycle, and have the ductwork professionally cleaned periodically, since accumulated lint feeds mold and is a serious fire hazard. Whole-home ventilation helps too: opening windows on opposite sides creates cross-ventilation that swaps stale indoor air for cooler outdoor air, as long as outdoor humidity is not extreme. Trick 2: Hold Humidity Between 30% and 50% Aim for indoor relative humidity between 30% and 50%; levels consistently above 60% create an environment where mold thrives. A cheap hygrometer lets you monitor several rooms, and Health Canada’s guidance on reducing humidity and moisture mould backs the same target. Size a dehumidifier appropriately for basements, crawl spaces, and any poorly ventilated room, and either empty it regularly or plumb it to drain. Indoor relative humidity What it means Action needed 30-50% Target zone; mold cannot establish Maintain current habits: fans, venting, monitoring 50-60% Caution zone; damp corners suffer first Run a dehumidifier in problem rooms and recheck Above 60% Mold-friendly conditions Dehumidify aggressively and find the moisture source Trick 3: Fix Leaks Fast and Dry Within 24-48 Hours Even small, persistent leaks supply enough moisture for mold. Inspect the roof after severe weather for damaged shingles or flashing, and treat ceiling water stains as urgent. Check under every sink, around toilets, shower connections, washing machine hoses, and fridge icemaker lines for dampness, and insulate cold water pipes so condensation cannot form. Ensure windows and doors are properly sealed: condensation trapped between double-paned glass signals a failed seal, while staining or soft wood around frames means infiltration. Examine foundation walls for cracks or efflorescence, the white powdery deposit left by migrating water. When materials do get wet, mold can begin growing within 24-48 hours. Remove standing water with a wet-vac or pump, use fans, dehumidifiers, and heaters to dry carpets, drywall, and furnishings. Porous items saturated past that window often need to be discarded, because mold inside them is nearly impossible to eradicate. Never leave wet clothes in the washer or damp towels in a pile. Trick 4: Starve Mold of Food and Hiding Places Mold feeds on organic material, so routine cleaning is genuinely preventive. Dust frequently with a damp cloth or microfiber duster to capture particles that carry spores and organic debris, and vacuum with a HEPA-filter. Keep kitchen and bathroom surfaces free of residue, scrub tile grout and caulk around tubs and sinks regularly, and consider grout sealers to make grout less porous. Change your storage habits with these simple fixes: Skip cardboard boxes on basement or garage concrete, which absorb moisture and feed mold; use airtight plastic containers on shelves or pallets with airflow underneath. Do not over-pack closets, and pull furniture a gap away from exterior walls so air can circulate. Store firewood outdoors off the ground well away from the house, bring in only what you will burn soon, avoid overwatering indoor plants whose damp soil harbors mold, and take out organic waste regularly. Keep air moving with ceiling fans on low and occasionally opened closet doors. A consistent regular cleaning routine handles the surface food removal week in, week out. Trick 5: Build and Maintain With Mold-Resistant Choices Materials decide how forgiving a room is. In bathrooms, kitchens, and basements, use mold-inhibiting paint containing antimicrobial agents, and for new construction choose mold-resistant drywall, often called green board or purple board. Skip carpet in basements and bathrooms entirely; tile, vinyl, and sealed concrete are far better in damp areas. When caulk cracks, remove it completely, clean the area, and reapply a high-quality mold-resistant caulk; repair crumbling grout and reseal it periodically. Outside, keep gutters clear so water reaches the downspouts, and make sure downspouts discharge at least five to ten feet from the foundation. Grade soil away from the house, avoid dense shrubs pressed against siding, and aim sprinkler heads away from the exterior. If you have a crawl space with a dirt floor, cover it with a heavy-duty plastic vapor barrier. Book a seasonal deep clean in high-risk rooms if your home has a history of dampness. Mold Prevention FAQ How long does mold take to grow after a leak? On damp porous surfaces, growth can begin within 24-48 hours. That window is why professional drying starts immediately after water intrusion, and why saturated porous materials are often replaced rather than dried. What is the first sign of hidden mold? A musty or earthy odor is often the earliest clue, before anything is visible. Follow your nose to basements, closets on exterior walls, under sinks, and behind furniture against outside walls. Do exhaust fans really prevent shower mold? Yes, if used correctly: run the fan before the water starts and for at least 20-30 minutes after you finish. A fan that only runs during the shower leaves moisture behind in the room. Is a dehumidifier enough for a damp basement? Usually not alone. Pair it with the humidity

5 Tricks How To Prevent Mold And Mildew In Your Home Read More »

kitchen island

How To Clean Kitchen Islands – You Should Know

How to Clean Kitchen Islands the Right Way The kitchen island is often the busiest surface in a home: a prep station, a dining spot, and a gathering place all at once. Because islands are built from materials as different as granite, marble, quartz, wood, stainless steel, and concrete, no single cleaner suits them all, and the wrong product can etch stone, dull finishes, or leave streaks. This guide covers what to use on each surface, how to care for the details around the island, and which mistakes to avoid. Natural Stone Tops: Granite and Marble Granite is durable but porous and typically sealed after installation. Clean it daily with a pH-neutral stone cleaner or mild dish soap and warm water, applied with a soft microfiber cloth, then rinse and dry to prevent water spots. Never use abrasive powders or acidic cleaners like lemon juice or vinegar; they erode the stone and dull its polish. That protective seal weakens with daily use and typically needs renewal once or twice a year. For oil-based stains, apply a baking soda and water paste, leave it several hours or overnight, then wipe away. Coffee or wine stains respond to a hydrogen peroxide and flour poultice. Test any treatment on an inconspicuous spot first. Marble is softer and more delicate than granite. Even mildly acidic foods such as citrus, vinegar, and tomatoes can etch it, leaving dull marks; use only pH-neutral cleaners, wipe spills immediately, and reseal more often than granite. Oil stains call for a baking soda paste and organic stains for hydrogen peroxide, handled with extra care; abrasive scrubbing scratches the stone. Polished marble may need professional repolishing over time. Quartz and Laminate: Easy Care Surfaces Quartz is an engineered, nonporous stone that resists stains and needs no sealing. A soft cloth with warm water and a gentle detergent takes care of daily cleaning. Leave out bleach, oven cleaner, and abrasive pads; all of them can dull the surface or leave fine scratches. Wipe spills such as wine or coffee promptly anyway, and lift dried residue with a plastic spatula before cleaning with a quartz-safe or glass cleaner. Quartz can also be damaged by direct heat, so set hot pans on trivets or hot pads. Laminate is an economical choice that wipes clean with a soft cloth and mild soapy water, or a gentle all-purpose cleaner with no abrasives. The big rule: avoid excess water, especially near seams, where it can seep underneath and swell or delaminate the top layer. Skip steel wool and scouring pads, which scratch. For stubborn marks, use a baking soda paste, or denatured alcohol sparingly for ink and dye stains, rinsing well afterward. Wood and Butcher Block: Food-Safe Care Sealed wood needs only a lightly dampened cloth and a little mild detergent, dried thoroughly afterward. Unsealed or oil-finished butcher blocks, which often serve as prep surfaces, need more attention. Scrape away food debris, then wash the block with hot, soapy water and a mild detergent, drying it right away. To sanitize, spray a 1:1 mix of white vinegar and water, let it sit a few minutes, then wipe and dry. Because these surfaces touch food, keeping them clean is part of food safety; the CDC’s food safety basics page covers the habits that prevent foodborne illness. Wash your hands before prepping meals too; the CDC’s handwashing guidance explains why. Condition the wood monthly, or whenever it feels dry, with food-grade mineral oil or a butcher block conditioner; let it soak in for hours or overnight, then wipe off the excess. Never leave water standing on the surface. Heavy stains and scorch marks sometimes call for light sanding followed by fresh oil. Stainless Steel and Concrete Stainless islands look professional and resist heat but show fingerprints and water spots. Clean with a soft cloth and mild detergent in warm water, wiping with the grain, then rinse and dry with a microfiber cloth to prevent streaks. A stainless cleaner boosts shine and removes fingerprints; a baking soda paste handles sticky residue when rubbed with the grain. Never use steel wool or scrub against the grain. Concrete countertops are durable and stylish when properly sealed, but the material is porous underneath. Use mild, non-abrasive cleaners with a soft cloth, reseal every one to three years depending on the sealant, and consider waxing for extra protection and shine. Acidic cleaners and harsh solvents corrode the sealant, so treat spills immediately. For set-in stains, ask your installer or manufacturer what works with your sealer. Details That Matter: Sinks, Cooktops, and Cabinets Around the island, use the same care on: Stainless sinks: baking soda paste or Bar Keepers Friend, rinsed thoroughly. Porcelain sinks: non-abrasive powders or baking soda paste; avoid strong bleach soaks. Composite sinks: mild dish soap, or a 50/50 vinegar mix for hard water stains, rinsed well. Faucets: mild soap and water, dried well; wrap a vinegar-soaked cloth around mineral buildup briefly. Cooktops: ceramic cleaner and scraper once cool for glass tops; soak gas grates in hot soapy or degreasing water. Cabinets and hardware: mild wood or detergent cleaners for cabinet faces; all-purpose cleaner for pulls and knobs, dried after wiping. Vent hoods: wash wire mesh filters in hot soapy water or the dishwasher; replace charcoal filters on schedule. Kitchen Island Cleaning Cheat Sheet Surface Use Avoid Granite pH-neutral stone cleaner Vinegar, lemon, abrasives Marble pH-neutral cleaner Citrus, vinegar, abrasives Quartz Mild detergent Bleach, oven cleaner, abrasives Laminate Mild soap and water Excess water, steel wool Wood Mild detergent, mineral oil Standing water, harsh sanitizers Stainless steel Mild detergent with the grain Steel wool, against-grain scrubbing Concrete Mild non-abrasive cleaner Acidic cleaners, harsh solvents Frequently Asked Questions Can I use vinegar to clean my kitchen island? Only on the right surfaces. Diluted vinegar suits sealed wood and stainless steel, but never let it touch granite, marble, or concrete; the acid etches the surface and damages sealants. How often should granite and marble be resealed? Granite usually needs sealing once or

How To Clean Kitchen Islands – You Should Know Read More »