Cleaning Checklist

woman cleaning a leather sofa

Cleaning Leather Couch: How to Make Them Look Like New In 6 Steps

Cleaning a Leather Couch: The Six-Step Method That Makes It Look New A leather couch is the most handsome piece in most living rooms and the one easiest to ruin with the wrong cleaner. Leather is a coated, porous material, not a fabric, and treating it like one can cause permanent damage: stripped oils, white mineral haze, stiffened panels, lifted dye. The proper approach is methodical and gentle: identify your leather, dry-clean it, wash with foam, rinse, treat stains selectively, and condition. Follow these six steps and the result is furniture that looks, feels, and smells like new. Step 1: Identify Your Leather Before You Clean It Start with the manufacturer’s tag if it is still attached. If not, run the water drop test in a hidden spot under a cushion or on a back flap: a drop of water that beads up means protected leather, the coated, most common and durable type. A drop that soaks in and darkens the spot means aniline or semi-aniline leather, which is porous and delicate. A velvety material that absorbs water immediately is nubuck or suede, which needs a water-free method best left to professionals. This guide covers protected and aniline hides, the two types most couches are made from. Leather type Water drop result Cleaning approach Protected (pigmented) Beads on the surface Full six-step process below; can handle slightly more pressure Aniline or semi-aniline Soaks in and darkens the spot Same process with an exceptionally light touch; test every product first Nubuck or suede Absorbs instantly, velvety feel Water-free methods only; skip the liquid steps Step 2: Gather the Right Supplies Before touching the couch, collect the exact toolkit. Substitutions are where most damage happens. A vacuum with a soft brush attachment, which is crucial for avoiding scratches on the surface. Several clean microfiber cloths, which trap dirt without abrasion. Two buckets and distilled water: non-negotiable, because the minerals in tap water leave a white, chalky residue on leather. A pH-neutral, non-alkaline soap such as castile soap, or a dedicated leather cleaner; harsh chemicals strip natural oils and lead to dryness and cracking. Check labels carefully and follow Health Canada’s household chemical safety guidance when handling any cleaning product. A high-quality, water-based leather conditioner for the final step. Step 3: Dry Clean the Entire Couch Remove all loose debris before any moisture enters. With the soft brush attached, vacuum the whole couch from top to bottom, concentrating on seams, crevices, and areas between and under cushions where dust, crumbs, and pet hair collect. Wiping a dusty surface with a damp cloth creates a grime that gets pushed into the leather’s grain. Finish the dry phase with a pass of dry microfiber over everything so you are cleaning the leather itself, not moving dirt around. Step 4: Wash with Foam, Section by Section Fill one bucket with lukewarm distilled water, add a very small amount of your pH-neutral soap, and agitate it into generous suds; fill the second bucket with clean lukewarm distilled water for rinsing. You will clean with the foam, not saturated water, to minimize moisture exposure. Patch test first in the hidden spot: wipe with a nearly dry, sudsy cloth, rinse with a second cloth wrung almost dry, buff with a third dry cloth, then let it dry fully and inspect for discoloration or texture change. If the test area is perfect, work in sections about two feet by two feet, top of the couch down so dirty suds never drip onto cleaned panels. Dip the cloth into the foam, wring aggressively, and lift the dirt with light circular motions rather than scrubbing. Protected leather tolerates a little more pressure; aniline demands the gentlest possible touch. Step 5: Rinse, Dry, and Treat Stubborn Stains Immediately after washing each section, wipe it with the dedicated rinse cloth dipped in plain distilled water and wrung just damp. Leftover soap attracts new dirt and degrades the finish over time. Buff the section dry at once with the third cloth to prevent water spots and streaks, which show especially on aniline. Change the rinse water whenever it turns cloudy. Then handle what is left, testing any stain agent in the hidden spot first: Grease or oil stains from food or hair products: cover the spot with a generous layer of baking soda or cornstarch, let it sit for several hours to pull the oil from the leather’s pores, then vacuum it away with the soft brush. Ink on protected leather only: dab very carefully with a cotton swab dipped in isopropyl alcohol, working from the outside in, never rubbing, then wipe with a cloth dampened with distilled water and dry. This is a risky method and should be avoided entirely on aniline leather, which it can strip of colour. Step 6: Condition and Buff to a Lustrous Finish Once the couch is clean and has air-dried completely, conditioning is the step that keeps leather soft, flexible, and resistant to drying, fading, and cracking. Choose a water-based conditioner and avoid silicones or waxes, which clog pores, prevent breathing, and leave a sticky finish that attracts dirt. Apply a small amount to a clean microfiber cloth, never onto the furniture, and work it in with gentle circular motions as a thin, even coat over the whole surface, spending extra time on armrests, headrests, and seat cushions, which lose moisture fastest. Let it penetrate per the product label, typically 30 minutes to a couple of hours, then buff with a dry cloth to remove excess and restore natural lustre. The couch should feel nourished, not greasy. Let it cure a few hours before use, then dust weekly and repeat the full cycle once or twice a year. Leather Couch Cleaning FAQ Can I use baby wipes or all-purpose spray on leather? No. Most wipes are alkaline or contain alcohols and fragrances that strip the protective coating and natural oils, leading to stiffness and cracking. Stick to pH-neutral soap or a dedicated leather cleaner with distilled water,

Cleaning Leather Couch: How to Make Them Look Like New In 6 Steps Read More »
Island Cleaning Supplies: The Ultimate Guide for a Sparkling Space

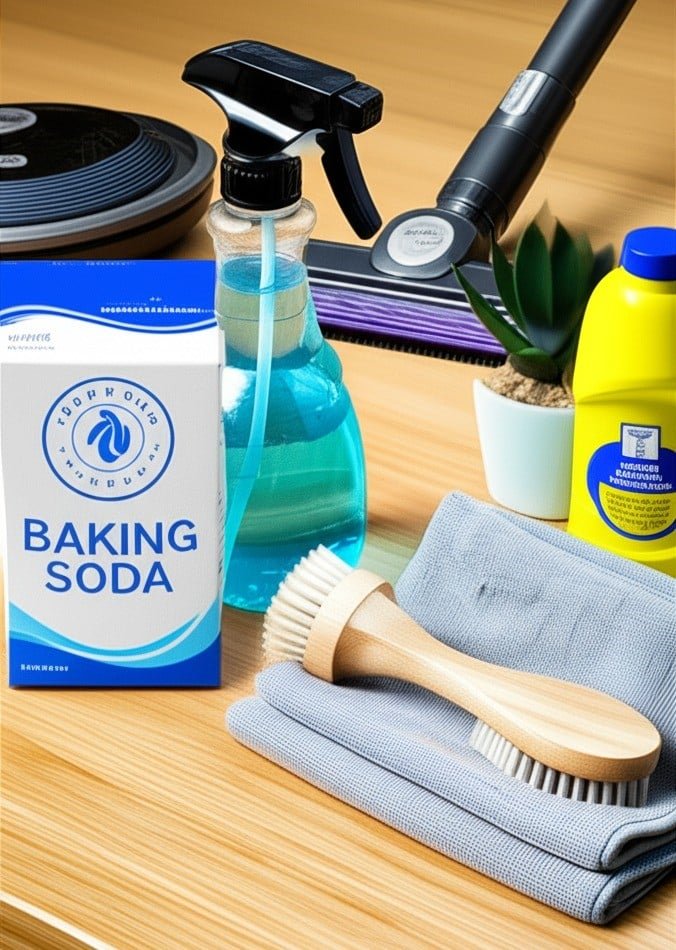
Island Cleaning Supplies: Build the Ultimate Portable Kit Island cleaning is a simple idea with powerful results: keep a compact, portable caddy stocked with versatile tools and multi-purpose products so you can handle any mess wherever it appears, without repeated trips to a supply closet. This approach saves space, time, and money by favouring a lean arsenal of proven products over a collection of single-use bottles. Here is what belongs in an island cleaning kit, and why each piece earns its place. The Microfiber Foundation No chemical outperforms a high-quality microfiber cloth. Millions of fine split fibres create an immense surface area that traps dust, grime, and bacteria instead of pushing them around like cotton rags do, and each cloth can absorb moisture equal to about seven times its own weight, drying surfaces without streaks or lint. Stock several types: general-purpose cloths for daily wiping, a tighter-weave glass and polishing cloth for mirrors and chrome, and waffle-weave cloths for spills and dish drying. Buy a dozen or more and colour-code them, blue for glass, green for the kitchen, red for the bathroom, so germs never travel from room to room. Bottles, Brushes, and Squeegees A professional-grade spray bottle with an adjustable nozzle gives you real control: a fine mist for damp dusting or a concentrated stream for grout lines, which flimsy dollar-store triggers cannot deliver. Alongside it, keep a palm-sized dish brush with nylon bristles for sinks and counters and a narrow, stiff-bristled grout brush for tile lines, tracks, and corners. A high-quality squeegee belongs in the kit too. Its best job is preventive: a 30-second wipe-down of shower glass and tile after every shower removes the water that soap scum and mildew need to form, drastically cutting future deep scrubbing. The Liquid Trio Three humble liquids cover nearly every cleaning need in the home: White distilled vinegar: its acetic acid dissolves hard water mineral deposits on faucets and shower heads and inside coffee makers, and diluted with water it becomes a streak-free glass cleaner and a natural deodorizer. Never use it on marble, granite, or travertine, where the acid etches the surface permanently Dish soap: a surfactant that breaks water’s surface tension so it can lift oils and grease. A few drops in a spray bottle of warm water make a safe all-purpose cleaner for counters, cabinets, painted walls, and sealed wood floors, and a thin coat left on a greasy stovetop for 10-15 minutes softens caked-on grime Isopropyl alcohol at 70% concentration: a fast-evaporating solvent and disinfectant. Sprayed 50/50 with water and wiped with microfiber, it leaves stainless steel fingerprint-free and gleaming, and it safely cleans electronics such as keyboards, remotes, and phones without moisture damage The Powders: Gentle and Heavy Duty Baking soda is the gentle abrasive: a mild alkali whose fine grit lifts stuck-on stains from porcelain, fiberglass, and enamel alike without scratching a thing. Sprinkled on a damp sponge, or mixed with water into a paste for burnt-on oven spills, it scrubs hard; an open box in the fridge absorbs odours, and a sprinkle on carpets before vacuuming neutralizes trapped smells. For jobs baking soda cannot touch, a powdered cleanser such as Bar Keepers Friend brings heavier artillery. Its active ingredient, oxalic acid, removes rust spots and tarnish from copper and brass, cutlery scuffs in sinks, and the dull film on stainless steel. Always wear gloves, work in a ventilated area, and never mix it with other cleaners, following the safe-use rules Health Canada sets out in its household chemical safety guide and its overview of household product hazards. The Machine That Makes It Work A vacuum with a HEPA filter and a full set of attachments is the engine of the system. A HEPA filter traps microscopic dust and allergens instead of blowing them back into the air, which matters for allergy sufferers. The attachments unlock the machine’s range: a crevice tool reaches corners and baseboards, a soft dusting brush handles blinds and lampshades, and an upholstery tool cleans fabric furniture. Vacuuming is always the first step of any deep clean, because dry soil left in place turns to mud the moment a liquid cleaner touches it. Kit item Primary job Watch out Microfiber cloths Traps dust, dries streak-free Colour-code by room White vinegar Dissolves hard water film Never on natural stone Dish soap Cuts grease anywhere Rinse food-contact surfaces Isopropyl alcohol 70% Streak-free shine, electronics Keep away from flames Baking soda Gentle scrubbing and odours Rinse thoroughly Bar Keepers Friend Rust, tarnish, set-in stains Gloves and ventilation Squeegee Prevents soap scum buildup Use after every shower HEPA vacuum Removes dust before wet cleaning Check filter regularly Island Cleaning Supplies FAQs What is island cleaning? It is the practice of keeping a self-contained portable caddy of versatile tools and products, so you can clean any room without returning to a central supply closet. The approach reduces clutter, saves time, and cuts the number of single-purpose products you buy. Which island cleaning products are truly essential? Start with microfiber cloths, an adjustable spray bottle, dish soap, white vinegar, baking soda, and a HEPA vacuum. Add 70% isopropyl alcohol, a grout brush, a squeegee, and a powdered cleanser for rust and tarnish as your needs grow. Is vinegar safe on all surfaces? No. Its acidity dissolves mineral deposits beautifully, but it etches natural stone such as marble, granite, and travertine. Test any unfamiliar surface in a hidden spot first, and dilute vinegar with water for most jobs. How do I clean safely with multiple products? Never mix cleaning products, especially bleach with anything acidic or ammonia-based, because the combination can release toxic gas. Read labels, use gloves where advised, and keep products out of children’s reach; Health Canada’s chemical safety pages explain the details. Your Kit, Plus a Professional Finish Building an island cleaning kit simplifies everyday maintenance, and when the whole home needs more than a caddy can deliver, a professional clean fills the gap. Toronto Shine Cleaning’s regular cleaning service and deep cleaning

Island Cleaning Supplies: The Ultimate Guide for a Sparkling Space Read More »

Organizing a Small Kitchen

Organizing a Small Kitchen in 5 Easy Steps

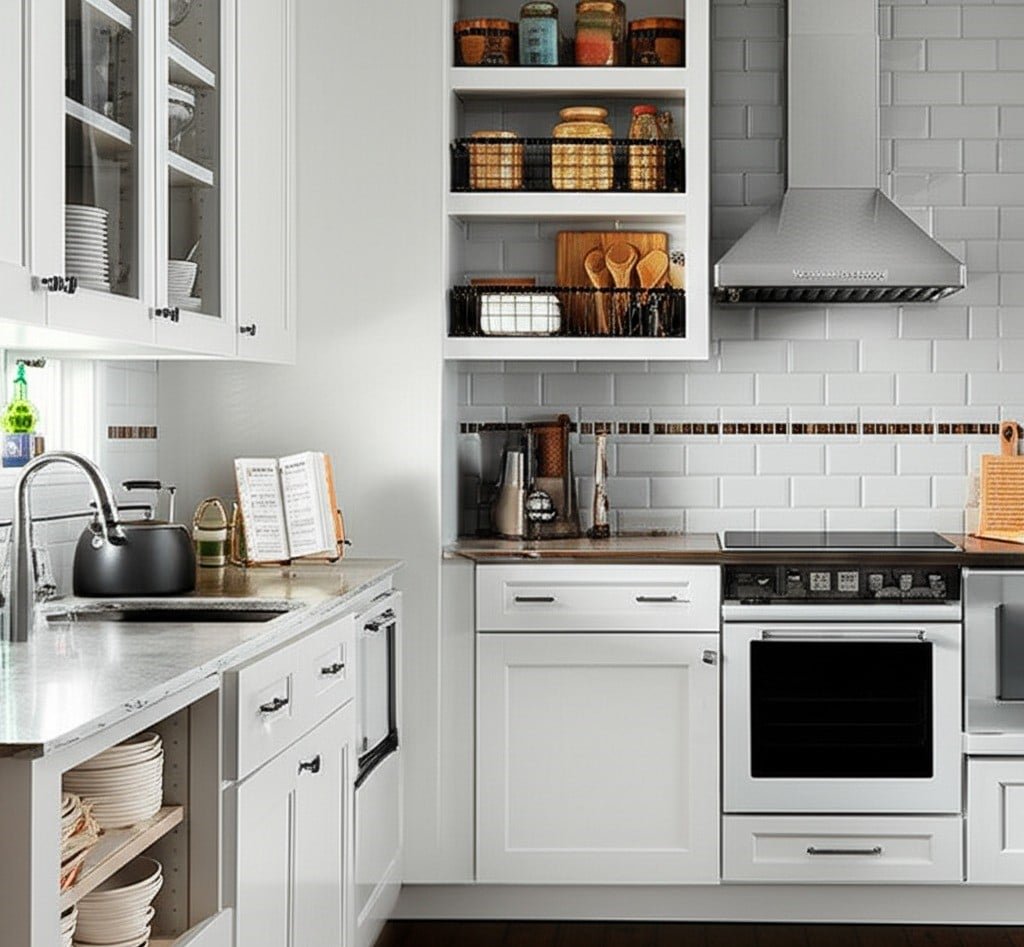
Organizing a Small Kitchen in 5 Easy Steps A small kitchen is not a problem to solve so much as a space to design. When every item has a logical home and the counters stay clear, even a tiny galley feels roomy and works fast. The secret is a five-step sequence: clear, purge, zone, store vertically, and maintain. Follow it once and your kitchen will stay organized for years. Step 1: Clear the Counters Counter space is the most valuable real estate in a small kitchen, so it cannot double as storage. Remove every appliance, crock, and decoration, then wash the surfaces thoroughly. Only items used multiple times a day earn their spot back: for most households that means a coffee maker or electric kettle and possibly a knife block. The toaster, blender, and stand mixer, used weekly, belong in an easy-to-reach cabinet, while monthly or occasional appliances go on a higher shelf or out of the kitchen entirely. A clear counter becomes your baseline, and returning to it after every cooking session keeps the kitchen feeling open. Step 2: Purge Cabinet by Cabinet Empty one cabinet completely onto the counter and sort everything by type, all the mugs together, all the glasses together, all the plates together. The duplicates become obvious fast: with two or three people in the home, twenty mugs make no sense, so keep the best six to eight and donate the rest. Apply the same logic to plates, bowls, and glassware, and discard anything chipped, cracked, or stained, because every item in a small kitchen must earn its space. In the drawers, keep one or two of each essential tool and let go of single-purpose gadgets you have not touched in six months. Then work through the pantry the same way. Check every expiry date and toss anything past it, and donate unopened in-date food you know you will never eat. Decant grains, pasta, cereal, sugar, and flour into clear, airtight, stackable containers with labels showing contents and dates. You will see your inventory at a glance, keep food fresher, and free up the bulky packaging space. The CDC’s food safety basics reinforce why checking dates and storing dry goods properly protects your household, and the CDC’s handwashing guidance is a good reminder to wash up before handling food in your newly organized kitchen. Step 3: Create Workflow Zones With the purge done, arrange cabinets by how you cook rather than by habit. The cabinets beside the stove hold pots, pans, baking sheets, oils, and the spices you reach for daily: that is the cooking zone. Under the sink, the cleaning zone, live dish soap, sponges, dishwasher detergent, and trash bags. The longest clear stretch of counter becomes the preparation zone, so the drawers and cabinets beneath it should hold cutting boards, mixing bowls, measuring cups, and knives. Finally, keep everyday dishes and cutlery closest to the dishwasher or draining board so putting them away takes seconds. A kitchen arranged this way feels intuitive because everything sits where you use it. Zone Where it lives What it stores Cooking Cabinets beside the stove Pots, pans, oils, daily spices Cleaning Under the sink Dish soap, sponges, trash bags Preparation Near the open counter Boards, bowls, knives, measures Everyday dishes Near dishwasher or drying rack Plates, glasses, cutlery Step 4: Think Vertically and Use Every Gap Small kitchens win by stacking. Inside cabinets, these tricks multiply every shelf and drawer: Under-shelf baskets create a second tier, and shelf risers double the usable height of each shelf A multi-tier lazy Susan rescues deep corner cabinets, and pull-out sliding shelves make the back row visible Vertical file sorters or tension rods store baking sheets, muffin tins, and cutting boards on their side, easy to grab On the walls, a magnetic knife strip empties a whole drawer, a rail with S-hooks holds utensils and mugs, and floating shelves display everyday dishes Under the sink, a tension rod across the cabinet top hangs spray bottles by their triggers and frees the floor for stackable bins The refrigerator sides take magnetic hooks, a paper towel holder, or a spice rack, and a slim rolling cart slides into the gap beside the fridge for bulk paper goods Step 5: Maintain the System Daily Organization lasts only as long as the return habit. After every use, wash an item and put it straight back in its designated home; never let clean dishes or appliances rest on the counter overnight. Keep the under-sink bin and pantry labels current, and once a month do a quick sweep for items that crept in without a home. This five-minute daily discipline is what keeps a small kitchen feeling dramatically larger and keeps you from ever needing a full reorganization again. Small Kitchen Organization FAQs How do I organize a small kitchen with no pantry? Convert one tall cabinet into pantry space using pull-out shelves or risers, decant dry goods into uniform clear containers, and store rarely used appliances elsewhere in the home. A slim rolling cart adds pantry storage in any gap. What should I keep on a small kitchen counter? Only items used several times a day, typically a coffee maker or kettle and a knife block. Everything else, including toasters and mixers, belongs in cabinets so the counter stays clear and the room feels larger. How many dishes does a small kitchen need? Keep six to eight of each everyday item when two or three people live in the home, plus a few serving pieces. Excess dishes and mugs are the fastest way to fill limited cabinets, so donate what you do not genuinely use. How do I keep my small kitchen organized once it is done? Return every item to its home immediately after use, clear the counters each evening, and label pantry containers. A few minutes of daily maintenance prevents the slow buildup that forces another full reorganization. A Sparkling Kitchen, Minus the Grime Once your small kitchen is organized, professional cleaning lifts

Organizing a Small Kitchen in 5 Easy Steps Read More »

organizing child's wardrobe

Organizing Your Child’s Closet: Stop Making These Mistakes

Why Kids’ Closets Become Chaos Zones Every child’s closet follows the same arc. It begins with a few shirts out of place and ends as a landslide of clothes that may or may not fit, orphaned shoes, forgotten toys, and objects that defy categorization. Restoring order is not about making a photo-worthy space; it is about building a system a child can understand and help maintain, so the closet simplifies the day instead of ambushing you with a sock crisis at 7:40 in the morning. Below is the full method, plus the mistakes that quietly undo good intentions. Step 1: Empty the Whole Thing and Sort Ruthlessly Remove absolutely everything: clothes, shoes, belts, stuffed animals, the baseball glove from last spring. Pile it in the open middle of the bedroom floor. The sight will be alarming, and that is the point, because seeing the true volume stops you from simply reshuffling clutter. Before touching a hanger, set out four labeled containers: Keep, Donate, Trash, and Outgrown. Then judge every item one at a time with strict honesty. Does it fit right now? If not, it does not go back in the closet. Is it stained, torn, or beyond reasonable repair? Into Trash. Good shape but never worn, itchy, or disliked? Into Donate. Quality pieces too small for hand-me-downs? Into Outgrown, selectively. The Outgrown box has a narrow job: keeping genuinely nice items for a younger sibling or relative. Be picky, or you have just moved the clutter to the attic. When the box fills, label the size and season, something like boys 3T summer, and store it under a bed or in the basement, never in the active closet. Step 2: Get the Child Involved Without Losing the Weekend A child old enough to have opinions should shape the Keep pile: ask whether they still love wearing a given shirt, and they gain ownership of the result. You still hold the veto on anything too small or damaged. The trap is the question itself. Never ask, do you want to get rid of this, because the answer is always no. Frame discarding as generosity instead: another kid needs the coat more. Loss becomes a gift, and the sort moves twice as fast. Step 3: Clean the Empty Closet Before Refilling It People skip this step constantly, and it is half the benefit. With nothing in place, wipe every surface: shelves, the hanging rod, walls, baseboards. Vacuum the floor properly, corners included. Take the blank-canvas moment to improve the space: a coat of light paint makes a dark closet feel bigger, and a battery-operated motion-sensor puck light helps a child actually see what they own. If the closet smells musty or you have spotted any fuzzy growth on drywall, deal with it now; the CDC’s mold information page explains why moisture and mildew get addressed early, and the CDC’s cleaning and disinfecting guidance covers the wipe-down itself. Step 4: Build the Closet Around the Child, Not the Adult Accessibility decides whether the system survives. The standard closet layout, one high rod and one high shelf, was designed by and for adults, which is why your child cannot dress themselves or tidy up. The single most impactful fix is dropping the main hanging rod to kid height. If the rod will not move, hang a closet doubler, an inexpensive second rod that clips onto the first, and everyday shirts, dresses, and jackets live on the low level while the high rod stores off-season and costume items. Next, abandon folded stacks. Children do not maintain neat piles, and bins remove the requirement: one open-top basket for pajamas, one for sweaters, one for shorts and athletic wear. The job is simply getting the item into the right bin, not folding it well. Socks and underwear fit in smaller bins or drawer dividers, and clear shoebox-size containers let kids see contents instantly. Make labels mandatory: printed photos of socks or t-shirts for pre-readers, label-maker text for kids who read. Labels delete all guesswork about where things belong. Shoes need their own address or they migrate across the floor: a small two-tier rack for daily pairs, or an over-the-door organizer with clear pockets that lifts everything off the ground and doubles as storage for hats, mittens, and scarves. Then use the walls: a row of hooks holds the bathrobe, backpack, favorite costume, and tomorrow’s outfit, laid out the night before to end the morning wardrobe negotiation. Step 5: Refill by Category, Then Hold the Line Put Keep items back strategically: shirts grouped together, then long sleeves, then sweaters and jackets, with color ordering inside each section if the kid will enjoy the rainbow. Frequently used things live at the most reachable spots. Maintenance is three habits. The one-in-one-out rule means every new purchase retires an old one. A two-minute closet check before bed puts shoes on the rack and floor clothes in the hamper. And twice a year, swap seasons in and out of labeled bins, which is also the natural moment for a mini-purge of anything unworn or outgrown. Container What goes in What happens next Keep Fits, good condition, actually worn Back in the closet by category Donate Good clothes outgrown or unwanted Out of the house this week Trash Stained, torn, beyond repair Straight to disposal Outgrown Select quality pieces for hand-me-downs Labeled and stored off-site Mistakes That Undo a Good Closet System Keeping the full Outgrown pile instead of only its best pieces. Leaving the hanging rod at adult height and wondering why nothing gets put away. Folding requirements into a child’s routine when a bin solves the same job. Skipping labels, which turns tidy for you into a mystery for them. Refilling the closet before the empty-space clean and repairs are finished. Parent Questions, Answered What age can a child really use this system? Toddlers can pull pajamas from a low open bin long before they can fold anything. The lower the rod and the simpler the bin logic, the

Organizing Your Child’s Closet: Stop Making These Mistakes Read More »

summer deep cleaning

Why Summer Is The Best Season To Do a Deep Cleaning At Home

Why Summer Is the Best Season for Home Deep Cleaning Summer brings longer days, warmer temperatures, and a natural opportunity to refresh your home. A home deep cleaning in summer is easier, faster, and more effective than at any other time of year. Open windows create cross-breezes, bright sunlight reveals grime that stayed hidden all winter, and warm air dries carpets and upholstery quickly. If you have been putting off a thorough clean, these summer advantages make now the right moment to start. 1. Better Ventilation Dries Surfaces Faster Ventilation is the biggest advantage of summer deep cleaning. When windows and doors stay open, fresh air quickly clears the fumes from cleaning products, so the process is more comfortable and safer. Moisture from mopping floors, steam cleaning carpets, or washing upholstery dries fast, and rapid drying prevents mold and mildew, which thrive in damp, stagnant spaces. The CDC’s mold prevention guidance stresses controlling moisture, and summer airflow makes that much easier than in winter, when closed windows trap dampness. 2. Sunlight and Warmth Boost Cleaning Power Sunlight is a natural disinfectant. Its ultraviolet rays kill bacteria and other microorganisms on surfaces, which is especially useful after months of closed-up rooms. Bright summer light also shows dirt that stays invisible in dim conditions: window streaks, wall smudges, and dust in corners all become obvious, so you clean more thoroughly. Warm temperatures help cleaning solutions break down grease and grime with less scrubbing, which means less product and less effort. The CDC’s cleaning and disinfecting guidance is a useful reference for building a healthy routine around these conditions. 3. Take Cleaning Outdoors Summer lets you extend the cleaning zone beyond the house. Rugs can be beaten and aired in the sun, cushions scrubbed and left to dry quickly, and mattresses refreshed with a few hours of sun exposure. Patios, decks, outdoor furniture, and BBQ grills collect grime all year, and warm water plus a hose makes them manageable now. Cleaning these spaces flows naturally into a deeper clean of the indoor areas beside them, creating a seamless reset from the interior to the exterior of your home. 4. Tackle Basements, Garages, and Closets Attics, basements, garages, and closets are less inviting in cold months. Summer warmth makes it comfortable to sort, declutter, and clean them, and items can be carried outside for cleaning or disposal. Clothing can be aired out, seasonal items laundered and stored, and closet shelves wiped down and organized without the rush of cooler weather. 5. Improve Indoor Air Quality Before Fall After a long, closed-up winter, dust, allergens, and stagnant air accumulate in the home. A comprehensive summer deep clean removes dust mites, pet dander, and other pollutants, which supports healthier indoor air quality as the cooler months approach and windows are sealed again. Health Canada notes that indoor air can hold contaminants that build up in tightly closed homes, so a seasonal reset makes a real difference. A practical summer deep cleaning plan covers the tasks that benefit most from warm, dry weather: Wash windows and screens, and let them dry in the sun Steam clean carpets and upholstery with windows open and fans running Scrub patio furniture, decks, and BBQ grills with a hose Beat and air rugs, cushions, and mattresses outdoors Declutter and wipe down the basement, garage, and closets Dust air conditioning units and vents while the weather is dry Task Why Summer Helps Windows and screens Streaks dry clear and screens dry fast in the sun Carpets and upholstery Open windows and fans speed drying and prevent musty odors Patio and deck Warm water and a hose make grime easy to remove Basement and garage Comfortable to work in, and items can be aired outside AC units and vents Dry weather suits dusting and maintenance When to Call a Professional Deep Cleaning Service Even with perfect summer conditions, a full home deep cleaning takes hours of strenuous work. Toronto Shine Cleaning handles the job with trained cleaners, professional equipment, and a systematic checklist, and the company is bonded and insured. Book a home deep cleaning for a thorough refresh, add regular maid service to keep it that way, review cleaning prices, or check whether we serve your neighbourhood in the GTA. Call (647) 424-0355 to book. Why is summer better than spring for deep cleaning? Summer offers longer daylight, warmer temperatures, and the ability to open windows wide. Moisture dries faster, cleaning products work better in warmth, and you can move rugs, cushions, and furniture outdoors. Spring often stays cool and damp, which slows drying and can leave carpets and upholstery at risk of mildew. Can sunlight really disinfect surfaces? Yes. The ultraviolet rays in sunlight kill bacteria and other microorganisms on surfaces, which is why airing rugs, cushions, and mattresses in direct sun is a traditional and effective practice. Sunlight also reveals dirt and streaks that are hard to see in dim winter light. How do I prevent mold after cleaning with water? Dry everything quickly. Open windows and doors for a cross-breeze, run fans, and use a dehumidifier in damp areas like basements. The CDC recommends controlling moisture to prevent mold, and summer ventilation makes that much easier than in winter. Does Toronto Shine Cleaning offer summer deep cleaning? Yes. Toronto Shine Cleaning provides professional deep cleaning across the GTA, and summer is a great time to book because windows can stay open while the team works. Call (647) 424-0355 or request a quote online, and the team brings all supplies and equipment.

Why Summer Is The Best Season To Do a Deep Cleaning At Home Read More »

closet

How To Organize Your Closet The Easy Way – 4 Incredible Tips

How to Organize Your Closet the Easy Way: 4 Proven Tips An organized closet is not about buying matching boxes and hangers. It is a simple four-step system: empty the space, screen every item, group what remains, and maintain the result. Each step takes decision-making off your shoulders, and when it is done you will see everything you own at a glance and start each day faster. Here is the easy way to get there. Tip 1: Empty the Closet and Start Clean Set aside a real block of time, a full afternoon for most closets, and gather supplies first: heavy-duty trash bags, donation bags or boxes, a box for items needing repair, microfiber cloths, an all-purpose cleaner, and a vacuum with its crevice and upholstery attachments. Then remove everything, every garment from the rod, every shoe from the floor, every shelf and drawer emptied, and pile it all on the bed. Seeing the full volume of your wardrobe in one place is the honest reality check that makes the next step easier. With the closet bare, deep clean it from top to bottom: dust the shelves and rod, wipe walls and baseboards, vacuum corners and floor with the crevice tool. This is also the moment to inspect for dampness, mould, or pests while everything is visible, because a clean, dry closet is the only foundation worth rebuilding on. Tip 2: Screen Every Item Into Four Piles Work through the mountain one item at a time with no shortcuts, sorting into four piles: keep, donate, trash, and repair. Ask these five questions for each piece: Have I worn it in the last year? Seasonal coats and holiday pieces count, but an everyday shirt untouched for twelve months is unlikely to be worn again Does it fit me right now? Store for the body you have today, not a future size; an aspirational piece you love can live in a separate box, not your main closet Is it in good condition? Permanent stains and irreparable damage mean trash or textile recycling, never donation, while a missing button or small tear goes to the repair pile with a two-week deadline Does it match my current life and style? Jobs, seasons, and tastes change, and the wardrobe should reflect the present How does it make me feel? Clothing that itches, pinches, or makes you self-conscious is not serving you Be ruthless with duplicates, keep the best black t-shirt and the favourite pair of jeans rather than six near-identical versions, and park truly sentimental pieces in a labelled memory box instead of the active wardrobe. When the piles are done, move the trash out immediately and load the donation boxes into the car the same day, before second-guessing starts. Tip 3: Group Like With Like and Assign a Home Sort the keep pile by category, all t-shirts together, all trousers together, all dresses together, and plan the layout around how you get dressed. The eye-level, easy-reach zone is prime real estate and belongs to frequently worn items; formal wear and off-season pieces go higher or further back. Then decide what hangs and what folds. Blouses, button-downs, dresses, skirts, trousers, jackets, and blazers wrinkle easily and belong on hangers. Heavy knit sweaters stretch out when hung, so fold them, along with t-shirts, jeans, and activewear. Switch to uniform slim velvet hangers: they grip clothes that wire and plastic hangers let slip, take far less rod space, and create the clean look that makes each item visible. Hang by category, and within each category from light to dark, for faster outfit choices. For folded items, file folding changes everything. Fold each piece into a rectangle and stand it upright like a file, so every shirt is visible at a glance without digging through a stack. Drawer dividers keep socks and undergarments contained, labelled baskets or clear bins hold scarves, belts, and hats, and transparent shoeboxes and a compact rack keep footwear off the floor. Add an over-the-door organizer for extras and wall hooks for robes, purses, and daily jackets to use every inch of vertical space. Tip 4: Maintain With Simple Daily Rules An organized closet maintains itself with three habits. First, one in, one out: every new purchase means an old item is donated or discarded. Second, a five-minute reset each evening or week that returns clothes, shoes, and accessories to their homes, so nothing piles up on a chair or the floor. Third, seasonal rotation: pack off-season clothing into sealed totes stowed under the bed, on high shelves, or in another dry spot, freeing prime closet space for what you wear now. Health Canada’s dust mite guidance recommends regular washing of clothing and bedding to control allergens, and the CDC’s mould overview notes that sealed storage in dry conditions keeps fabric safe from damp and mildew between seasons. A little weekly upkeep beats another full overhaul next year. Pile Rule of thumb Destination Keep Worn recently, fits now, feels great Back into the organized closet Donate Good condition, just not for you Charity drop-off within days Trash Stained, damaged beyond repair Bin or textile recycling Repair Small fix needed Mended within two weeks Memory box Sentimental, never worn Separate labelled storage Closet Organization FAQs How long does organizing a closet take? Plan for two to four hours for a standard closet, or a full day for a large walk-in. The sorting step takes the longest, so work in focused blocks and finish the donation drop-off the same day to avoid second-guessing. Should I fold or hang my clothes? Hang anything that wrinkles easily, such as blouses, dresses, trousers, jackets, and button-down shirts, and fold heavy knits that stretch on hangers, plus t-shirts, jeans, and activewear. Uniform velvet hangers save space and stop slipping. How do I stop my closet from getting messy again? Adopt one-in-one-out for new purchases, do a five-minute reset when clothes come off, and rotate seasonal items into sealed storage bins. These habits prevent the slow accumulation that created the

How To Organize Your Closet The Easy Way – 4 Incredible Tips Read More »

Labeling Kitchen Items – 4 Easy and Fast Tips

Labeling Kitchen Items: Four Fast Tips for a Safer, Faster Kitchen A label looks like a small thing until its absence causes a big one. In any space where food is prepared, stored, or cleaned, the words on a container decide whether a meal is safe, whether groceries are used or binned, and whether a cleaner helps or harms. Without clear labeling, a kitchen drifts into guesswork, and guesswork is where allergies, spoilage, and chemical mistakes live. These four tips take minutes to set up and pay for themselves the first time someone grabs the right jar without opening it. Tip 1: Label Every Container You Decant, Contents and Allergens Included Packaging labels do the heavy lifting for you while a product is sealed: “contains” and “may contain” statements protect people with allergies to gluten, dairy, soy, peanuts, tree nuts, eggs, fish, and shellfish, and skipping that step can turn a safe meal into a medical emergency. The responsibility does not end when you open the package. Transfer flour into a pretty canister and the gluten question disappears for whoever cooks next. Every decanted container needs its contents named and any relevant allergen noted. Store regular flour and gluten-free flour apart, each labeled, and sugar and salt can never be confused again. For the rules behind those warnings, the CDC’s food safety basics explain how contamination and misidentification put people at risk. Tip 2: Track Dates So Nothing Rots in the Back of the Pantry Expiry and best-before dates are not decorative. Manufacturers set them from product stability data, and eating past an expiry date raises the odds of foodborne illness, from mild digestive upset to infections like salmonella or E. coli. On dairy, meats, and prepared foods, the date marks the window of safest consumption; on shelf-stable goods, a best-before signals peak quality, and ignoring it costs you taste, texture, and nutrients. The trouble is that dates vanish the moment you open the package, so write a fresh one. When you prep homemade sauces, stocks, or chopped vegetables, label them with the contents plus the preparation date. That habit makes a First-In, First-Out rotation possible: older items move forward, spoilage drops, and you stop guessing whether that jar is three weeks or three months old. Bonus Tip: Storage Instructions Belong on the Label “Refrigerate after opening” and “store in a cool, dry place away from direct sunlight” are not suggestions; they reflect how ingredients respond to temperature, light, and air. Copy those conditions onto your own labels so the next person does not have to find the original box. Tip 3: Treat Every Cleaner Bottle Like a Mini Safety Manual Kitchens double as chemical storage, and a cleaning label carries the active ingredients, hazard class (corrosive, irritant, flammable), first-aid steps, required gloves or eye protection, ventilation needs, and compatible surfaces. Mistaking a strong oven cleaner for dish soap can hurt a person and a countertop in the same stroke, and mixing incompatible chemicals can produce toxic fumes. Keep cleaners in their original, labeled containers. If you must decant, label the new bottle with the exact product name and dilution, store it away from food zones, and follow Health Canada’s advice on using household chemicals safely, which also covers storage and disposal. Their wider hub on household product safety lists hazards for common items from cookware to craft materials. Tip 4: Read Nutrition Panels Before You Decide What Goes in the Cart Labels earn their keep at the shopping stage. The nutrition facts panel breaks down calories, fats, carbohydrates, sugars, sodium, and protein, which matters when you manage diabetes, heart disease, or hypertension, and it lists vitamins and minerals that reveal nutrient-dense choices. Ingredient lists support vegans avoiding animal products and anyone dodging specific additives, preservatives, or artificial colors. Governments mandate this disclosure, and manufacturers face penalties and recalls for inaccuracies, so the information is legally enforced and dependable. Knowing the rules were checked for you turns a label into a trust signal. What to Label, Zone by Zone Kitchen zone What gets a label Details to include Pantry Decanted dry goods: flours, grains, spices, baking soda and baking powder Contents plus allergen note; keeps lookalikes apart Fridge and freezer Leftovers, prepped veg, stocks, sauces, opened packages Contents, prep date, use-by window, storage condition Cleaning cupboard Any decanted cleaner or diluted mix Exact product name, dilution ratio, keep-from-food warning Countertop Jars and canisters in daily use Contents so anyone can grab the right one without opening Efficiency follows safety here. When every container states what it holds and when it was made, inventory checks take minutes, prep speeds up, and cross-contamination risks shrink: a baking soda and baking powder mix-up can collapse an entire cake. Clear labeling also spreads responsibility, since everyone in a busy family kitchen can find what they need and use it safely. The habit only takes four seconds per container, and the moments that demand it repeat themselves: Right after decanting a dry good into a new canister Whenever leftovers or prepped ingredients go into the fridge As soon as an opened package hides its printed date inside Every time a cleaner gets diluted into a spray bottle A Well-Labelled Kitchen, Every Week, Without the Labor Labels handle the knowing; cleaning still has to happen. Toronto Shine Cleaning pairs a tidy, labeled kitchen with surfaces that match, through our regular maid service or a seasonal deep clean, with rates on the pricing page. Call (647) 424-0355 to book, or read what other households say on our reviews. Kitchen Labeling FAQ What information should a homemade food label carry? Name the contents, add the preparation date, note any major allergen present, and include a storage instruction such as “refrigerate” or “use within 3 days.” For freezer items, add a best-by estimate so rotation stays honest. Four short lines on masking tape covers everything anyone in the house needs. What is the difference between an expiry date and a best-before date? An expiry date marks the safety

Labeling Kitchen Items – 4 Easy and Fast Tips Read More »

How Mental Health and House Cleaning are Completely Linked

How Mental Health and House Cleaning Are Completely Linked Your home spends most of its hours absorbing your inner weather. When stress, overwhelm, or low mood take hold, mail stacks up on the counter, laundry lingers in the basket, and dust settles on surfaces you no longer have the energy to notice. When you feel calm and in control, the rooms tend to follow. That mirror is not a coincidence; it is a two-way relationship. Cleaning, often dismissed as a chore, is one of the most accessible tools available for managing how you feel, because it is physical work with visible results that feeds back into your mind. Here is the mechanics of that loop. Cleaning Restores a Sense of Control Life is unpredictable at scale. You cannot steer global events, the economy, other people, or the surprises your career and personal life throw at you, and that helplessness feeds anxiety. A home is different: it is a small, manageable universe where your actions land with direct, immediate consequences. You pick the cleaner, you put in the effort, and the floor goes from grimy to gleaming because you decided it would. Sorting a chaotic pantry or closet offers a contained problem with a clear solution, a rare thing in a world of ambiguous ones. That feeling of efficacy does not stay in the kitchen; confidence earned on a small, winnable task ripples outward into bigger challenges. The Repetitive Motion Is an Active Meditation Scrubbing, wiping, sweeping, and folding are rhythmic, and rhythm grounds a racing mind. When anxious thoughts loop over past regrets or future worries, the sensory demands of cleaning pull attention into the present: warm soapy water on your hands, the back-and-forth hum of the vacuum, the scent of lemon polish, a cloth squeaking across glass. This is a core principle of mindfulness, anchoring you in the now and granting a break from mental chatter. Focused activity lets the nervous system settle, lowering cortisol and easing physical stress signs like a rapid heart rate and shallow breathing. Stay with it and you can slip into flow, that state where time fades and you surface feeling refreshed and centered. A Finished Room Is a Dose of Dopamine Brains are wired to enjoy accomplishment. Watching a filthy, cluttered room become an orderly one through your own effort releases dopamine, the neurotransmitter tied to pleasure, motivation, and satisfaction, so the before-and-after is chemically rewarding, not merely Instagram-worthy. It is evidence of your own competence. This is why making your bed each morning shifts an entire day: it is the first completed task, the first small win that sets a precedent. Every cleared counter and polished surface reinforces capability, which cuts directly against the lethargy, apathy, and futility that depression feeds on. Clutter Charges You Rent on Your Attention The flip side is real too. Clutter is excessive sensory input: every object in view sends a signal, and a crowded room bombards the brain. Paper piles whisper about unfinished tasks, an overflowing laundry basket nags about pending chores, and the visual noise drains focus even below conscious awareness. Living like this keeps stress mildly elevated, makes relaxation hard, and steals the cognitive resources you wanted for work, hobbies, or conversation. Decluttering removes the noise and hands your mind clear space. The benefits of moving your body while you do it stack on top, which the CDC documents in its research on the benefits of physical activity, including reduced short-term anxiety and a lower risk of depression and anxiety over time. Public Health Agency of Canada resources on mental health and wellness and being active for your health make the same connection from the Canadian side. What a Tidy Space Does for Focus, Ritual, and Sleep Beyond mood, order supports performance. A desk buried in old mugs and stray papers fractures attention, and minutes vanish hunting for a pen. A clear workspace minimizes distraction and smooths workflow, and the principle travels: a tidy kitchen makes cooking pleasant, a neat living room becomes actual rest rather than low-grade agitation. Cleaning also marks life transitions, which is why spring cleaning persists across cultures as a way to sweep out the old and make room for the new: Scrubbing after a breakup reclaims your space and closes a chapter Cleaning after an illness signals recovery and a fresh start Preparing a nursery or a home office is an act of hope and readiness Finally, there is sleep, which underpins mood regulation and cognitive function. A cluttered, dusty bedroom fights rest, while a clean sanctuary, fresh sheets pulled back, tells the brain the day is over. Waking rested makes stress easier to carry. Small Cleaning Habits and What They Give Back If you feel Try this What it returns Overwhelmed A ten-minute timer on one counter or shelf A finished task and proof you can start Anxious Rhythmic wiping or vacuuming, no phone Present-moment focus and calmer breathing Stuck or flat Make the bed, then one drawer An early dopamine win to build on Distracted Clear the desk you work at Fewer visual signals competing for attention Restless at night Tidy the bedroom before bed A cue that the day is done, better sleep If even the small version feels unreachable this season, that is exactly when outside help works best, because a professional reset removes the backlog so the habit can actually start. Toronto Shine Cleaning offers thorough, judgment-free service: a one-time deep cleaning restores the baseline, and regular maid visits keep it from sliding back, with rates on the pricing page and coverage across every GTA area listed in our locations. Mental Health and Cleaning FAQ Does a messy house mean I have a mental health problem? No. Homes get messy through busy seasons, illness, moves, and plain fatigue, and one messy weekend proves nothing. The connection runs both ways, but diagnosis belongs to professionals. If clutter consistently feels impossible to face and drains your mood for weeks, that is worth discussing with a

How Mental Health and House Cleaning are Completely Linked Read More »

Barbecue Grills

6 Tips on How to Keep Your Barbecue Grills Looking Like New

Six Tips to Keep Your Barbecue Grill Looking Like New The film clinging to your grates is residue from past meals: carbonized marinade sugars, polymerized fats from meat, and open-flame ash. It is not a badge of honor or a seasoning layer: that buildup adds bitter flavor to fresh food, fuels flare-ups, and can harbor bacteria, so a clean grill matters for taste, safety, and equipment life. Grates touch your food directly, and the routine is simpler than it looks once you learn the order of operations. Tip 1: Assemble the Right Tools First Preparation wins here. Buy a quality grill brush: wire bristles clean fast but can shed into food, so inspect yours before every use or choose a bristle-free coiled-steel design. Then keep these nearby: A long-handled scraper for thick, flat carbon deposits Heavy-duty rubber or nitrile gloves and a bucket Degreasing dish soap, distilled white vinegar, baking soda Microfiber cloths and a non-abrasive scour pad A barbecue degreaser or oven cleaner, only for extreme cases Tip 2: Burn-Off and Scrape After Every Cook The routine always starts with heat, and this one habit outperforms any deep clean. Set the grill to its highest setting, close the lid, and run it for 15 to 20 minutes until fresh residue incinerates into dry white or gray ash, which makes scraping dramatically easier. Then shut off the gas or extinguish the charcoal and, while the grates are still very hot, scrape along the bars with firm pressure. Repeat after every cook and deep cleans stay rare. Tip 3: Submerge the Grates in Hot Soapy Water For a deep clean, remove the grates once they are cool enough to handle. Submerge them in a sink, bucket, or heavy-duty trash bag filled with the hottest water you can handle plus a generous pour of degreasing dish soap. Soak at least 30 minutes, or several hours to overnight for neglected grates, so the polymerized grease the burn-off missed softens and dissolves. Scrub with a stiff non-abrasive brush, rinse away every trace of soap so it cannot flavor your next steak, and dry immediately, because cast iron especially will flash-rust if it sits damp. Tip 4: Fight Rust and Grime with Vinegar and Baking Soda For a detergent-free approach, place cool grates in a large heavy-duty trash bag and pour in a two to one mix of distilled white vinegar and water, using enough liquid to coat every bar. Close the bag and leave it to rest for several hours, ideally overnight, while the acetic acid breaks down grease and rust. Open it, sprinkle baking soda generously over the wet grates, and the acid-alkali reaction fizzes into a gentle abrasive foam. Close the bag for another 20 to 30 minutes, scrub, rinse thoroughly, and dry completely. Tip 5: Reach for Oven Cleaner Only in Extreme Cases When carbon has fused to grates over years of neglect, a commercial oven cleaner or barbecue degreaser is the last resort. Work outdoors with ventilation, away from children and pets, wearing gloves and eye protection, with the grates laid on newspaper. Spray evenly, follow the product instructions, and bag the coated grates for 30 minutes to several hours. Open the bag away from your face, then rinse with a hose obsessively and wash with soap, because leftover caustic residue is hazardous if ingested. Skip this route on porcelain-coated grates unless the label allows it, since harsh chemicals etch the coating. Health Canada’s rules for using household chemicals safely apply directly to degreasers like these. Tip 6: Clean the Cook Box, Then Season Before Reassembly While the grates soak, do not neglect the interior. Heat tents, also called flavorizer bars, catch drippings, vaporize them into flavor, and shield the burner tubes; they get just as filthy, so remove and scrape them or soak them in hot soapy water. Inspect the gas ports along the burner tubes, because clogs cause uneven heating and weak yellow flames; clear them with a paperclip, never anything that can break off inside. Scrape flaking carbon from the lid and basin so it cannot land on your food, then vacuum loose debris out with a wet/dry shop vacuum. Finish with the grease tray and catch pan, where rendered fat becomes a fire hazard: scrape out hardened grease, wash the tray in hot soapy water, replace disposable pans, and scrub reusable ones clean. With everything dry, reassemble the tray, burners, and tents, then season the clean grates: wipe a barely-there sheen of high-smoke-point oil (canola, grapeseed, or vegetable), pat off excess, and heat the closed grill on medium-high for 15 to 20 minutes until smoking stops. That polymerizes the oil into a hard, non-stick finish. Deep-Clean Methods Compared Method Best for Dwell time Watch out for High-heat burn-off and scrape Every cook, light residue 15 to 20 minutes heating Very hot grates; work along the bars Hot soapy soak Routine deep cleans 30 minutes to overnight Rinse all soap; dry fast to prevent rust Vinegar soak plus baking soda Surface rust, natural cleaning Hours plus 20 to 30 minutes fizzing The bag must be heavy-duty and sealed Oven cleaner or BBQ degreaser Years of fused carbon 30 minutes to several hours bagged Gloves, eye protection, outdoor air; skip on porcelain coating Scrape after every cook and you stretch the distance between full resets; deep clean at the start and end of grilling season and the equipment lasts for years. The same logic applies indoors, since food-contact surfaces deserve real cleaning, a point the CDC makes in its food safety basics. When your grill, or the kitchen beneath it, needs a professional reset, Toronto Shine Cleaning brings that care to GTA homes: a deep cleaning handles the big job, regular visits keep kitchens maintained, and the pricing page shows plans for every area we serve. Call (647) 424-0355 to book. Barbecue Cleaning FAQ How often should I deep clean my grill? Scrape and burn-off after every cook; deep clean the grates, burners, cook box, and grease

6 Tips on How to Keep Your Barbecue Grills Looking Like New Read More »

How to Clean Your Microwave – 6 Amazing Tips

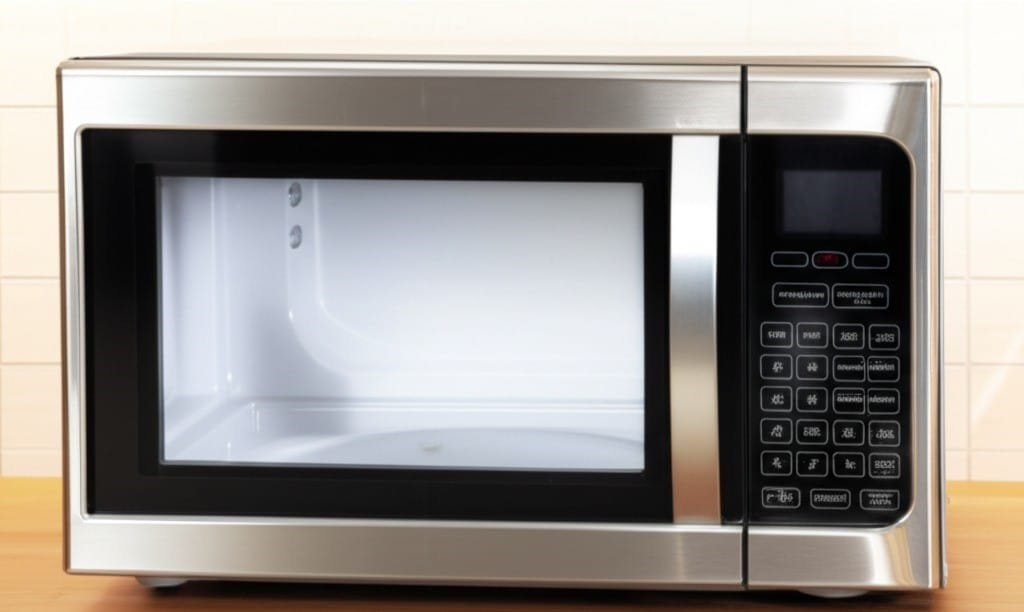
How to Clean Your Microwave Without Harsh Chemicals Few kitchen appliances see as much daily use as the microwave, and few collect grime as quickly. Reheated meals splatter, soups boil over, and sauces pop, leaving dried residue on the walls, ceiling, and door of the unit. Many people respond with abrasive scrubbers and strong chemical sprays, which risk scratching the interior coating and leaving fumes behind. A better approach relies on steam, mild acids, and gentle abrasives that dissolve messes without damaging the appliance. These microwave cleaning tips keep the process quick and safe. For homes that want every corner handled, Toronto Shine Cleaning offers a full deep cleaning package for the kitchen and beyond. Steam: The Gentle Way to Lift Stubborn Splatters Steam is the most effective weapon against baked-on messes because it softens residue so it wipes away with almost no effort. Fill a large glass measuring cup or another microwave-safe container with one cup of water, then stir in two tablespoons of white vinegar along with the juice squeezed from half a lemon. Drop in the squeezed lemon halves too, so their oils can freshen the air as the water heats. Run the microwave on high for three to five minutes, until the water boils and condensation covers the door window. Then leave the door closed for five to ten minutes. That pause holds the hot, acidic steam inside, where it loosens caked-on splatters everywhere. Do not rush: wiping too early is less effective and risks burns from hot steam. Wipe the Interior From Top to Bottom Once the steam has done its work, open the door carefully and remove the bowl with an oven mitt. Use a clean microfiber cloth to wipe from the ceiling down across the side walls, back wall, and floor, since loosened grime drips downward. Most splatters, even old ones, lift away easily. For spots that resist, dip the cloth into the warm vinegar or lemon water, or use the soft side of a non-scratch sponge. Never use steel wool, scouring pads, or abrasive metal scrubbers; they permanently scratch the interior surface. Don’t Forget the Turntable, Roller Ring, and Door The glass turntable and the plastic roller ring beneath it are prime hiding spots for drips and crumbs. Wash the glass plate by hand in warm, soapy water; most models also allow top-rack dishwasher cleaning. Scrub the roller ring the same way, using an old toothbrush on the small wheels where grease and particles get trapped and slow the rotation. Wipe the floor of the unit once more, then return the ring to its track and set the plate on top. Wipe the door’s interior with that same vinegar or lemon mixture, paying special attention to the mesh screen. Never spray cleaner straight at the control panel; liquid can work its way behind the buttons and ruin the electronics. Spray the cloth first instead. Stainless steel exteriors do best with a dedicated stainless cleaner wiped with the grain. Health Canada’s household product safety guidance also covers microwave ovens and the safe use of cleaning products. Baking Soda Paste for Burnt-On Food When steam alone cannot handle heavily carbonized spots, baking soda comes to the rescue. Stir roughly two parts of baking soda to one part of water until you get a thick, spreadable paste. Apply it only to the problem areas and let it sit for at least fifteen minutes so it can break down the burnt food. Gently scrub in circular motions with a damp cloth or a soft non-scratch sponge, rinsing the cloth often. Finish with a fresh, damp cloth to remove every trace of the paste. Over-the-Range Models: Clean the Grease Filters Over-the-range microwaves rely on grease filters underneath to trap airborne grease, and those filters are easy to forget. Slide the latch to remove them, then soak them for twenty minutes or more in a sink of very hot water with plenty of degreasing dish soap. For heavy buildup, sprinkle a quarter cup of the baking soda into the water. Scrub with a soft-bristled brush, rinse thoroughly with hot water, and let the filters air dry completely before sliding them back in. If your model has a charcoal filter for recirculated air, it is not washable and must be replaced on the manufacturer’s schedule. Odor Control and Everyday Prevention Lingering smells such as burnt popcorn usually vanish after a steam clean with lemon or vinegar. For a stubborn smell, leave a small dish of baking soda uncovered in the unit overnight, or set out a bowl of coffee grounds. Keeping the microwave clean also supports safe food handling; the CDC’s food safety basics page explains how germs spread through food. Prevention is the best maintenance strategy: Cover food with a splatter guard or a paper towel before heating. Wipe fresh spills right away, before they bake on during the next use. Do a quick damp-cloth wipe-down weekly to stop buildup. Microwave Cleaning Methods at a Glance Problem Best Method Key Detail Light splatters Vinegar or lemon steam Wait 5-10 minutes before wiping Burnt-on food Baking soda paste Let the paste sit for 15 minutes Greasy filters Hot soapy water soak Add baking soda for heavy grease Bad odors Baking soda or coffee grounds Leave inside overnight, door shut Frequently Asked Questions How often should you clean your microwave? A full steam clean once a week keeps most kitchens fresh, while the turntable and interior can be wiped more often if you use the microwave daily. Grease filters on over-the-range models need attention every few weeks depending on how much you cook. Is vinegar safe for the inside of a microwave? Yes. Distilled white vinegar is a mild acid that cuts grease and neutralizes odors without harming the interior coating, and it is safe around food. Just keep vinegar away from unsealed natural stone surfaces; microwave interiors are not a concern. Can you use baking soda in a microwave? Yes, as a gentle abrasive paste for burnt-on spots.

How to Clean Your Microwave – 6 Amazing Tips Read More »