Cleaning Checklist

cobwebs being cleaned

Spider Webs: How to Completely Get Rid of the Webs That Appear Out of Nowhere in August

Why Spider Webs Seem to Appear Out of Nowhere in August Late summer in Canada changes the quality of the morning light. The sun sits lower, the air carries a first hint of coolness, and morning dew suddenly illuminates something that has quietly accumulated all season: a blanket of webs across porch railings, shrubs, window frames, and eaves. It feels like an overnight invasion, but there is a real reason: orb-weavers and other common spiders mature over spring and summer, so August is when their populations, and their silk, hit their peak. Getting webs gone for good takes a system that removes what exists and makes rebuilding a losing proposition. Collect the Webs, Do Not Just Tear Them Down Start with a methodical sweep of every visible web. Outside, your best tool is a long-handled duster or a clean broom with soft bristles. A plain swipe snaps the silk and leaves sticky anchor strands that catch dust within days. Instead, press the tool’s head into the web’s center and roll it gently: the silk wraps around the bristles like cotton candy, coming off in one pass and often catching the spider. Work the full perimeter, skipping no corners, eaves, porch lights, window and door frames, or deck railings, all sheltered spots rich in the flying insects spiders hunt. Rinse Stubborn Webs and Wash Away the Anchor Residue For clusters in awkward places, a garden hose with a spray nozzle blasts the silk away. Aim carefully: driving water into vents, under siding, or at window seals invites moisture trouble. A pressure washer works only at its lowest setting with a wide fan tip, since high pressure strips paint, gouges wood, and forces water behind cladding at costly damage. For most homes, a plain hose is the safer call. Once webs are down, a faint sticky outline marks where the anchor threads met the surface, and new spiders treat it as a ready-made foundation. Scrub painted surfaces, siding, and frames with warm water, a little dish soap, and a sponge or soft brush; on glass, window cleaner or equal parts water and white vinegar lifts residue without streaks. This clears both the structural remnants and the cues that signal an open building site. Handle the Interior With a Vacuum, Not a Duster Inside, a vacuum with hose and attachments beats any duster: the crevice tool reaches ceiling corners, baseboards, and spaces behind furniture, while a brush attachment spares lampshades, curtains, and bookshelves. Suction matters beyond tidiness, removing spiders and egg sacs whole, since one sac can hold hundreds of spiderlings that a careless swat can rupture into your room. Do not overlook basements, garages, and attics, the quiet cluttered corners spiders favor; move boxes, vacuum behind them, and trace each room’s upper and lower edges during your regular cleaning routine so fresh webs never establish. Prevention: Make the House a Bad Bet Removal is temporary; changing the conditions is the long-term fix. Spiders follow their food, and their food follows your lights: moths and gnats swarm a bright white porch bulb nightly, and web builders camp nearby to harvest them. Switch exterior bulbs to yellow bug lights or sodium vapor lamps, which insects track poorly, or fit motion-activated fixtures so the light is no reliable buffet. Then build barriers: Caulk cracks in the foundation and gaps around pipes and utility lines, and repair torn window screens. Add weather stripping around doors and windows, and check every exterior door sweep. If daylight shows underneath, spiders see it too. Trim bushes and branches to at least a foot of clearance from walls; plants touching the house are bridges. Move firewood stacks and compost bins away from the foundation rather than against it. Swap cardboard boxes for sealed plastic totes and clear paper clutter from storage areas. Vacuum and dust low-traffic rooms on a schedule, sticking to the surface basics in the CDC home cleaning guidance, and wash your hands well afterward, as the CDC handwashing page recommends. Natural repellents for the finishing layer Spiders taste and smell through sensors on their legs, so strong scents discourage crossing. Add 15 to 20 drops of peppermint essential oil to water in a spray bottle, with a drop of dish soap to blend the oil, then treat window frames, door frames, corners, and baseboards, reapplying about weekly as the scent fades. Equal parts white vinegar and water doubles as a residue remover that leaves behind a smell spiders hate, but keep it off marble and granite, which acid can etch. Citrus peels or citrus oil along sills work similarly, and cedar blocks in closets, attics, and basements repel spiders and moths alike. A Weekly Rhythm That Keeps August Webs in Check One deep session plus a light maintenance loop beats fighting a re-infestation every month. Hotspot What to do How often Eaves, corners, porch lights Roll webs onto a duster; wipe anchors with soapy water Weekly walk-around Frames and sills Scrub residue; reapply peppermint or vinegar spray Every week or two Ceiling corners, baseboards indoors Crevice-tool vacuum before webs turn visible Each vacuum session Basement, garage, attic; seals, screens Vacuum behind boxes; re-close new gaps Monthly Tidy as a DIY system can be, an equipped crew clears the whole web belt and its dust in one visit; compare the scope on our deep cleaning page. Toronto Shine Cleaning is bonded and insured, with rates on our pricing page, client feedback on the reviews page, or call (647) 424-0355. Frequently Asked Questions Why do spider webs suddenly show up all at once in August? They did not appear overnight. Orb-weavers and similar species grow through spring and summer, so late summer is when mature spiders are most numerous and spin the most silk. The lower sun angle and morning dew simply make webs already under construction far more visible. What is the right way to take a web down without leaving sticky strands? Press a long-handled duster or soft broom into the center of the web and

Spider Webs: How to Completely Get Rid of the Webs That Appear Out of Nowhere in August Read More »

Carpets Cleaning: 12 Mistakes You Need to Stop Making

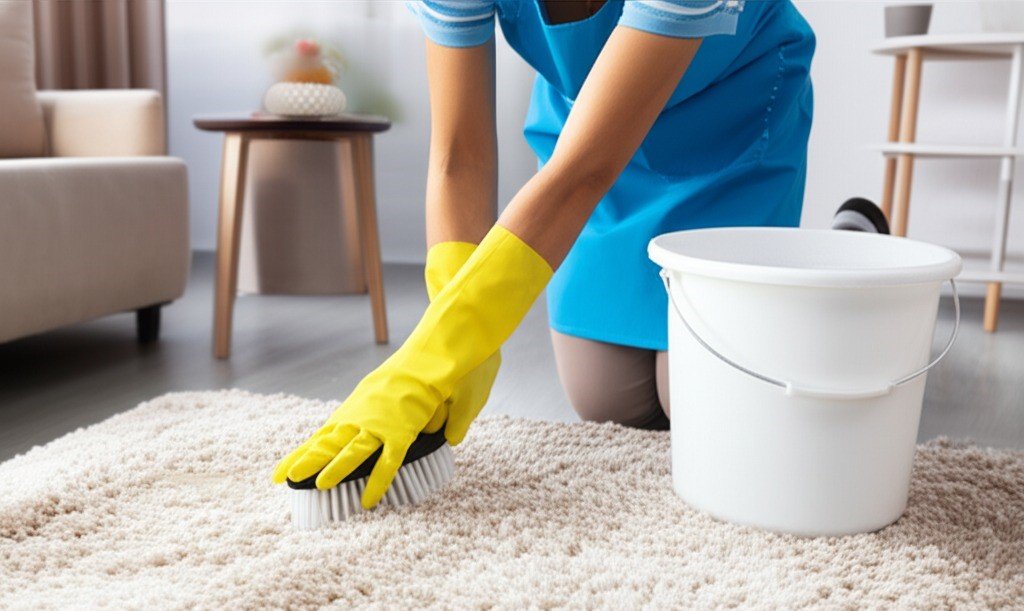
Carpet Cleaning: 12 Mistakes You Need to Stop Making Your carpet is a textile made of specific fibers, dyes, and backings, not a surface for any cleaner you grab from under the sink. Many household cleaners contain bleach that can permanently strip color, while others are so alkaline or acidic they can burn synthetic fibers or dissolve natural ones like wool. Dish soap is a frequent culprit: it cuts grease but leaves a sticky residue that attracts dirt faster than the surrounding carpet. The twelve mistakes below quietly destroy carpets, and all of them are avoidable. Mistakes That Damage Carpet Fibers Rubbing a stain is the most natural, and most destructive, impulse. Vigorous scrubbing pushes the spill deeper into the fibers and the padding beneath, can create a breeding ground for mildew, and frays the fibers so they look fuzzy and worn forever. Always blot with a clean, white cloth, working from the outside of the spill inward. Never apply cleaning solution directly to the carpet, either: pouring it on oversaturates the area, spreads the stain under the surface, and risks water damage to your subfloor. Instead, apply a small amount of solution to a cloth and blot with that. Excess water is the most damaging mistake of all, especially with rented machines, where multiple wet passes are tempting. Overwetting can dissolve the glue between the carpet backings, causing ripples and buckling, and it can trigger wicking, where old stains rise back to the surface as the carpet dries. A properly cleaned carpet should feel only slightly damp and dry within 6 to 12 hours; if it stays wet for 24 hours or more, it has been overwetted, and damp carpet and padding can grow mold. Mistakes That Make Stains Permanent Waiting too long turns a minor spill into a permanent stain, because dyes and acids in wine, coffee, juice, and pet urine chemically bond with the fibers over time. The golden rule is to act immediately: blot the excess, identify the stain, and treat it right away. Never skip the spot test. Even a reputable product can react unpredictably with your carpet’s specific dyes, so test any cleaner on a hidden area such as inside a closet or under a large piece of furniture before treating a visible stain. And always rinse. Any solution left in the fibers dries into a sticky, stiff residue that acts like flypaper for dirt, which is why spots darken and reappear shortly after cleaning. After blotting a stain, mist the area with clean water and blot again with a dry cloth. Mistakes That Wear Carpets Out Early Infrequent vacuuming is the silent destroyer of carpets. Fine, abrasive grit settles deep in the pile, and every footstep grinds it against the fibers like sandpaper, dulling them and creating traffic lanes. Vacuum high-traffic areas at least twice a week and the rest of the home at least once. Use a beater bar or rotating brush for cut-pile carpets, a suction-only vacuum for loop-pile styles like Berber to avoid snagging, and keep the bag or canister no more than two-thirds full for maximum suction. Deodorizing powders are another well-intentioned mistake: they coat fibers with fragrance, and most household vacuums cannot fully remove the fine powder, which builds into a paste-like layer at the base of the pile and can clog your vacuum. Fix odors at the source with proper cleaning, and remember that a cleaner home means better indoor air quality for everyone in it. Mistakes That Undo Your Hard Work Walking on a wet carpet crushes the weakened pile, leaving matted footprints, and shoe soles transfer dirt and oils onto freshly cleaned fibers. Stay off the carpet until it is completely dry, and speed drying with fans, a dehumidifier, or the HVAC system. Ignoring the padding is another costly error: the pad acts like a sponge, and liquid from spills or pet accidents wicks back up to the surface for weeks, returning stains and odors no matter how well you clean the surface. Significant spills often need professional subsurface extraction to flush the pad. Be careful with homemade solutions, too. Vinegar is an acid that can damage natural fiber carpets like wool or silk, baking soda is a fine particulate that builds up over time, and mixing vinegar with a bleach-containing cleaner can release toxic chlorine gas. Commercial carpet cleaners are pH-balanced and formulated with surfactants and rinsing agents that rinse away cleanly. Mistakes in Maintenance Planning Waiting until the carpet looks visibly filthy is the costliest mistake of all, because by then it holds pounds of deep-seated abrasive grit that is actively wearing down the fibers. Schedule professional cleanings as preventative care: for a typical household, an annual professional cleaning is recommended, with more frequent cleanings for homes with pets, children, or high traffic. Keeping up with cleaning routines is part of the everyday hygiene practices that protect your family’s health. The 12 Carpet Cleaning Mistakes at a Glance Mistake Consequence Fix Using the wrong product Color loss, burned fibers, sticky residue Use carpet-specific, fiber-appropriate cleaners Rubbing stains Frayed fibers, stain pushed deeper Blot from the outside in Applying products directly Oversaturation, subfloor damage Apply to a cloth, then blot Using too much water Buckling, mold, wicking Dry within 6 to 12 hours Not rinsing Residue attracts dirt Rinse with clean water and blot dry Vacuuming too rarely Abrasive grit wears fibers down Vacuum high-traffic areas twice a week Skipping professional cleanings Embedded soil becomes permanent Book an annual deep cleaning Frequently Asked Questions How long should carpet take to dry after cleaning? A properly cleaned carpet should feel only slightly damp and dry completely within 6 to 12 hours. If it remains wet for 24 hours or more, it has been overwetted, which risks mold and mildew in the padding. How often should I vacuum my carpets? Vacuum high-traffic areas at least twice a week and the rest of the home at least once a week. Frequent vacuuming removes the abrasive grit

Carpets Cleaning: 12 Mistakes You Need to Stop Making Read More »

Why is My House So Dusty in August? – 8 Professional Tips For a Flawless Home

Why Is My House So Dusty in August? Eight Professional Fixes You wipe the coffee table, and an hour later the familiar film is back. Run a hand over a bookshelf and you come away grey. In August it feels like a losing battle, and that is not imagination: several environmental and lifestyle factors converge to turn your home into a fine particulate collector. 1. Dry Summer Air Carries the Outdoors Inside August ranks among the driest months on the calendar. Without rain, garden beds, park lawns, and construction sites go dry and powdery, and any gust of wind, passing car, or set of footsteps on the driveway sends fine soil, sand, and dried plant matter swirling upward. Because windows and doors tend to stand open for the breeze, that grit is practically invited in: it drifts through the screens and settles on every surface. Much of what you dust is the outside world imported into your living room. 2. Late-Summer Pollen Adds to the Load The botanical calendar compounds the problem. Late summer is peak season for wind-borne pollen, most notably ragweed. These grains are microscopic, lightweight, built to travel for miles, and small enough to pass through standard window screens, so once indoors they add volume to house dust and often trigger allergic reactions. That film on your television is dried soil, silica, pollen, and neighbourhood pollutants delivered by the breeze you are enjoying. 3. Your HVAC System Can Circulate Dust Around the Clock Your cooling system is both a defense and a possible culprit. With the air conditioner running almost constantly, air keeps cycling toward the return vents, and the only thing standing between that dust and your rooms is the filter. A cheap, old, or clogged filter traps little, and moving air can dislodge older trapped dust and blow it back into your rooms. Constant cycling keeps particles in perpetual motion, so they rarely settle long enough to stay gone. Add the dehumidifying effect of air conditioning: in humid air, dust absorbs moisture, grows heavier, and settles quickly, but in dry conditioned air it stays light and buoyant, floating longer and drifting further before landing. 4. Pets, Carpets, and Summer Activity Stir Everything Up People and pets add their own dust in August: summer holidays mean more foot traffic, and every walk across a carpet or drop onto a sofa kicks settled dust back into the air. Many dogs and cats also shed heavily in late summer, releasing dander, essentially dead skin flakes; dander is a leading dust component, a top allergen, and light enough to stay airborne for hours while binding other particles together. Carpets, rugs, upholstery, and curtains are the reservoirs: a carpet can hold pounds of dirt deep in its pile while still looking clean, and each footstep works like a small bellows puffing it back into the room. 5. Ditch the Feather Duster The feather duster is among the least effective tools for August dust: it flicks particles into the air, where they float until they settle elsewhere, often on the floor you just cleaned. The goal is removal, not relocation, so swap it for tools that actually capture dust. 6. Dust with a Damp Microfiber Cloth, Top to Bottom A slightly damp microfiber cloth is the most effective dusting tool you own: its split fibers carry a static charge that attracts and traps particles, and moisture keeps them from becoming airborne. Work top-down: ceiling fans, the tops of tall furniture, and picture frames first so dislodged dust falls on surfaces you have not cleaned yet, then tables and counters, and floors last. 7. Vacuum with a HEPA Filter, Slowly A standard vacuum without proper filtration can behave like a feather duster on a grand scale: the finest particles pass through the bag or canister and blast out of the exhaust into the air you breathe. HEPA, short for high-efficiency particulate air, traps 99.97% of airborne particles down to 0.3 microns, a certified standard that keeps pollen, dander, dust mite debris, and fine soil locked inside the vacuum. On carpets, make slow passes so the brush roll and suction can agitate the pile and pull up embedded grit, and use the attachments on upholstery, curtains, and baseboards. Health Canada’s indoor air contaminants hub explains why fine particles deserve this level of attention. 8. Block Dust at the Door and Filter the Air Prevention multiplies the effect of better cleaning tools. Simple habits add up: Scrape shoes on a coarse mat outside, then catch finer dirt and moisture on an absorbent mat inside. Keep a no-shoes policy indoors to cut tracked-in soil dramatically. Run a MERV 8-13 HVAC filter and check it more often in heavy-use months. Place a HEPA air purifier in bedrooms and main living areas as a second layer of defense. Humidity matters too: very damp rooms invite mould and dust mites, so pair your dusting routine with Health Canada’s moisture and mould guidance. How August Dust Builds Up, At a Glance Source Why It Peaks in August Best Countermeasure Outdoor soil and pollen Dry ground and ragweed season enter through open windows Doormats, no-shoes policy, window screens HVAC system Constant cooling cycles recirculate particles and dry the air MERV 8-13 filter, changed more often Pets and people Late-summer shedding and extra indoor activity HEPA vacuum and damp microfiber dusting Carpets and soft furnishings Stored dust is pumped out by every footstep Slow vacuum passes and attachment use Win the Battle Against August Dust August dust is a perfect storm of dry, windy weather, recirculating HVAC air, pollen, pets, and busy households. The fix is methodical: capture dust with the right tools, filter the air, and block dirt at the door. When you want a reset that reaches dust hidden deep in carpets and upholstery, Toronto Shine Cleaning serves the GTA with regular cleaning and thorough deep cleaning. See our locations, compare pricing, or call (647) 424-0355 to book your appointment. Frequently Asked Questions About Dusty Houses in August

Why is My House So Dusty in August? – 8 Professional Tips For a Flawless Home Read More »

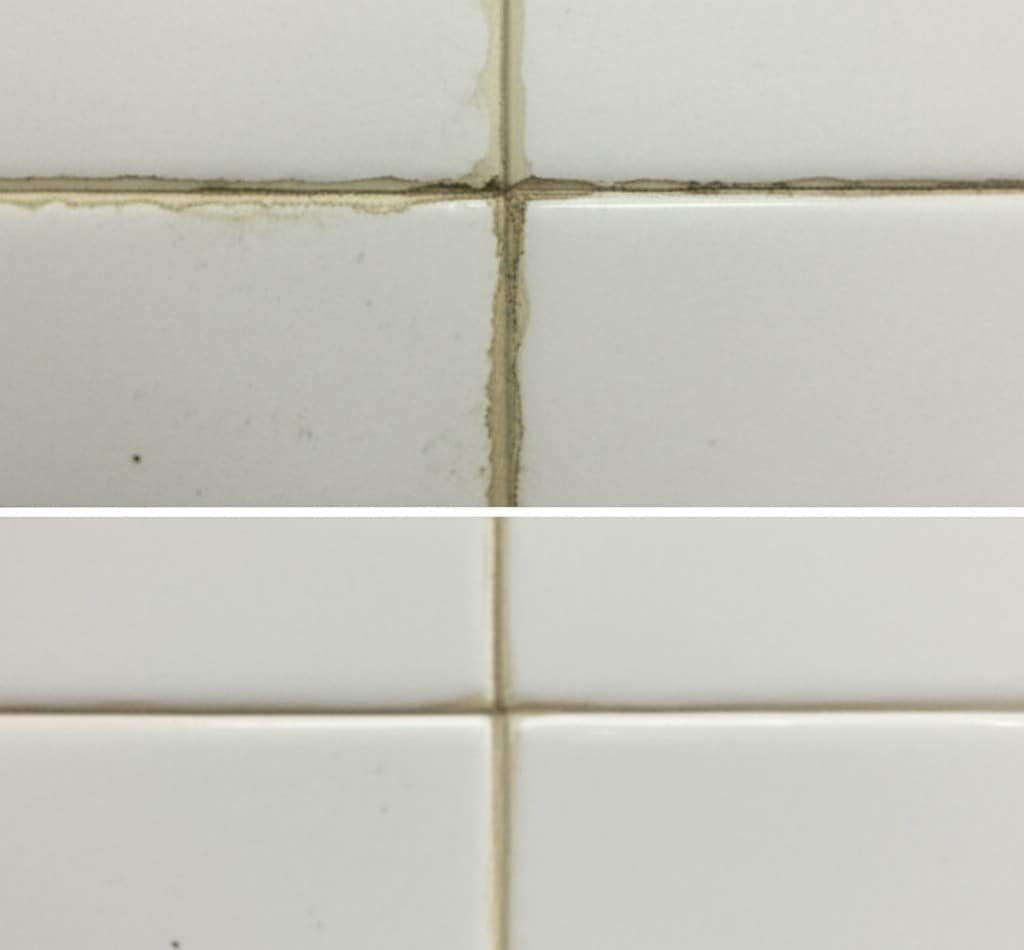
before and after grouting

Grout Cleaning: Essential Products for a Sparkling Home

Grout Cleaning: Essential Products for a Sparkling Home Grout lines lock your tiles in place, but their porous, cement-based composition makes them a magnet for water, dirt, soap scum, and oils. Over time, that absorption causes discoloration, staining, and the growth of mold and mildew. Cleaning grout properly means penetrating those pores to lift embedded grime, and the right products make all the difference. Prepare Before You Clean Before any intensive cleaning, ensure good ventilation by opening windows and doors and using a fan, because commercial cleaners and even vinegar can produce irritating fumes in a confined space. Wear waterproof gloves and safety glasses or goggles to protect your skin and eyes, and good airflow protects indoor air quality. Then clean the tile surface itself: sweep or vacuum loose debris, and mop with warm water and a pH-neutral cleaner, because applying grout cleaner to dirty tiles simply pushes surface dirt into the lines. DIY Grout Cleaning Products For routine maintenance and light discoloration, a baking soda paste is the best starting point. Baking soda is a mild abrasive that scrubs away surface stains without scratching tile or eroding grout. Make a thick paste with water, apply it to the lines, let it sit for 10 to 15 minutes, and scrub with a stiff-bristled grout brush in a circular motion. Never use a wire brush, which is too harsh. For stubborn dirt and soap scum, spray the paste with equal parts white vinegar and water; the fizzing reaction helps dislodge dirt from deep in the pores. Let it bubble for several minutes, then scrub and rinse. Skip vinegar on natural stone tiles like marble, travertine, or limestone, because the acid can etch and dull the surface, and always test in an inconspicuous area first. Hydrogen Peroxide for Mold and Mildew For mold, mildew, or grout that has yellowed, hydrogen peroxide is the more effective agent. Make a paste with baking soda and hydrogen peroxide instead of water, let it sit for at least 15 minutes so the oxidizing action can work, then scrub and rinse. For stronger whitening, apply 3 percent hydrogen peroxide directly to the lines. Unlike chlorine bleach, it is less harsh and does not produce toxic fumes, making it a safer choice for deep cleaning. Mold in damp areas like showers can affect health, and the CDC advises removing mold promptly and preventing moisture buildup. Steam Cleaning A handheld steam cleaner uses high-pressure, high-temperature steam to blast away dirt, kill mold, and sanitize without chemicals. The heat loosens embedded grime and the pressure forces it out of the pores. Move the nozzle slowly along the lines and wipe away the loosened dirt with a clean cloth. Steam is safe for most tile types, including ceramic, porcelain, and granite, but avoid it on loose or crumbling grout, where the pressure could dislodge sections. Commercial Grout Cleaners: Alkaline and Acidic When DIY methods fall short, commercial grout cleaners are formulated for the job. Alkaline cleaners, with a high pH, break down organic stains like grease, soap scum, and grime, and are generally safer for most tile and grout. Acidic cleaners, with a low pH, remove mineral deposits such as rust, efflorescence, and hard water stains, but they are powerful and can severely damage natural stone. Always wear full protective gear, ventilate the room, and never mix an acidic cleaner with an alkaline cleaner or one containing bleach, because the reaction can release toxic gas. Why Chlorine Bleach Is a Bad Idea Chlorine bleach whitens grout temporarily, but it erodes the grout structure, making it more porous and prone to future staining. It can also strip color from colored grout and damage tile glaze, and leftover residue can react with other cleaners later. Oxygenated bleach, a powder activated by water, is a much safer and more effective alternative for whitening. Rinse, Dry, and Seal Rinsing is never optional. Leftover cleaner dries into a sticky film that attracts dirt faster than before, so rinse with a sponge and clean water, changing the water often, then dry completely. Sealing is the single most important step for long-term results. Wait at least 24 hours after cleaning so the grout is fully dry, then apply a penetrating sealer with a brush-tip applicator, tracing the lines carefully and wiping any excess off the tile face. One or two coats are typical, and the sealer needs 24 to 48 hours to cure, during which the area should stay dry and free of traffic. Clean, dry surfaces are also the foundation of good hygiene in bathrooms and kitchens. Essential Grout Cleaning Products Baking soda for a gentle scrubbing paste. White vinegar for extra fizzing power on stubborn soil, never on natural stone. Hydrogen peroxide for mold, mildew, and whitening. A stiff-bristled grout brush, never a wire brush. A handheld steam cleaner for chemical-free deep cleaning. Alkaline and acidic commercial cleaners for tough or mineral-based stains. A penetrating grout sealer to protect your work. Grout Cleaning Products at a Glance Product Best For Caution Baking soda paste Light stains, routine maintenance Use a grout brush, not a wire brush White vinegar Soap scum and stubborn soil Never on marble, travertine, or limestone Hydrogen peroxide Mold, mildew, yellowed grout Test on a hidden area first Steam cleaner Chemical-free deep cleaning Avoid loose or crumbling grout Alkaline cleaner Grease, soap scum, grime Follow dwell time instructions Acidic cleaner Rust, efflorescence, hard water Never mix with bleach or alkaline cleaners Penetrating sealer Long-term protection Wait 24 hours after cleaning, cure 24 to 48 hours Frequently Asked Questions Can I use vinegar to clean grout? Yes, on ceramic or porcelain grout: equal parts white vinegar and water react with a baking soda paste to lift stubborn soil. Do not use vinegar on natural stone tiles like marble, travertine, or limestone, because the acid can etch them. How do I whiten yellowed grout? Make a paste with baking soda and 3 percent hydrogen peroxide, let it sit for at least 15 minutes, scrub

Grout Cleaning: Essential Products for a Sparkling Home Read More »

cleaning services in Edmonton

Edmonton Move-Out Cleaning: Common Mistakes to Avoid

Edmonton Move-Out Cleaning: The Mistakes That Cost Tenants Their Deposits Moving is a study in controlled chaos: boxes stacked into fortresses, furniture wrapped and disassembled, every day a countdown to a new beginning. In that whirlwind, one critical task looks backward, and it is not your average weekly tidy. A move-out clean is a forensic-level deep clean, the final act of stewardship for a space you once called home, and often the single most important factor in getting your full security deposit back from your Edmonton landlord. Lost deposits trace back to a handful of predictable mistakes. Here is how to avoid every one of them. Mistake 1: Reading “Broom-Swept” Too Literally The rental agreement, signed and filed away, suddenly becomes the most important document in the move. Clauses describing the condition the property must be left in are no longer fine print; they are your departure checklist. The phrase “broom-swept condition” is dangerously misleading. To a tenant, it can sound like a quick vacuum and a wipe of the counters. To a property manager preparing to show the unit to prospective tenants, it means a property that is not just empty but immaculate, as close as possible to the day you moved in. The gap between those interpretations is where deposits are lost. Every move-out clean begins with one mindset shift: you are cleaning for someone else’s inspection, so you need the critical eye of a landlord who is financially motivated to find fault. Mistake 2: Washing the Floors and Missing Everything Else Mistake 2 covers the details landlords actually inspect. Work high to low, and skip nothing on this list. Ceiling corners cleared of cobwebs; light fixtures and fans wiped down, because they are dust magnets. Walls, doors, and doorframes washed: scuffs, switch-plate fingerprints, and smudges visible only in certain light all count. Baseboards on hands and knees, every inch, since they trace every room and collect surprising grit. Windows cleaned inside and out where accessible, with real effort on sills and tracks, where dust and dead insects collect; a brush and vacuum attachment signals a thorough job. Closets fully emptied, with shelving, rods, and walls wiped, then floors vacuumed and mopped. Carpets: a professional steam clean is often stipulated in the lease or simply expected, since a household vacuum cannot lift deep-set dirt, allergens, and odors from a year of foot traffic. Mistake 3: Going Soft on the Kitchen The kitchen is the heart of the move-out challenge: a zone of grease, food splatter, and built-up grime. Every cabinet and drawer gets emptied and cleaned inside out, including interior shelves, drawer bottoms, handles, and cabinet faces, with special attention to the sticky film of aerosolized grease above and around the stove. Then the appliances, the main event. The refrigerator is emptied completely, its shelves and drawers washed separately in warm soapy water, its interior scrubbed, its exterior wiped including the top, and the unit pulled from the wall to clear the forgotten landscape of dust and crumbs behind and beneath it, vacuuming the coils so the next tenant inherits an efficient fridge. The oven draws the most dread: baked-on grease and carbonized food need a powerful cleaner, serious scrubbing, soaked racks, scraped interior walls, and door glass cleaned until transparent. Burners get cleaned, drip pans scrubbed or replaced, and the surface degreased. The range hood is degreased and its filter cleaned or replaced per the manufacturer’s instructions. The dishwasher gets its filter cleared of food debris and a cleaning cycle with a dishwasher-specific product to break down soap scum and hard water deposits. Finally, sink, faucet, countertops, and backsplash are scrubbed, disinfected, and polished to the CDC’s cleaning and disinfecting standard. Mistake 4: Treating the Bathroom as a Five-Minute Wipe-Down Bathrooms are judged on soap scum, hard water stains, and sanitation. The toilet is cleaned and disinfected top to bottom: tank, exterior bowl, seat and its hinges, and the base where it meets the floor, a notorious collection point for dust and grime. The shower and tub need heavy-duty work to lift soap scum from walls and glass doors and mineral deposits from fixtures, and grout lines usually demand a stiff brush and a dedicated cleaner to clear mildew and discoloration. The vanity and sink are cleared out and cleaned inside and out like the kitchen cabinets, the sink and faucet scrubbed and polished free of toothpaste residue and water spots, the mirror cleaned to a streak-free shine, and the exhaust fan cover taken down and washed to remove its thick dust coating. The floor is swept and mopped meticulously, including the corners and behind the toilet. Mistake 5: Assuming DIY Is the Cheap Option Once the checklist above lands, the do-it-yourself question becomes practical. DIY looks cost-effective at first glance, then the hidden costs appear. Hidden cost of DIY What it actually takes Supplies Degreasers, oven cleaner, glass cleaner, grout cleaner, floor polish, and disinfectants, plus cloths, brushes, a good mop, and a powerful vacuum; see Health Canada’s household products guidance before buying chemical cleaners Time One person can easily spend one or two full days of hard physical labour, exactly when your energy belongs to the move itself Inadequacy risk Deposit deductions for missed details can easily exceed the cost of hiring professionals Professionals run this checklist daily. They bring industrial-strength products and efficient systems, they know what landlords look for, they accomplish in a few hours with a team what takes one person a full weekend, and they are insured and often guarantee the work, returning to fix anything flagged at the final walkthrough. Edmonton Move-Out Cleaning FAQ What does “broom-swept condition” really require? In practice, landlords expect a clean close to move-in ready: spotless floors, wiped walls and baseboards, empty and cleaned cabinets and closets, and sanitized appliances. Assume the strict reading, because the lenient one is how deposits get deducted. Do I really need to steam clean the carpets? Check your lease. Steam cleaning is frequently stipulated in writing, and where

Edmonton Move-Out Cleaning: Common Mistakes to Avoid Read More »

Airbnb Cleaning Service

How to Choose The Best Airbnb Cleaning Services in Toronto: 5 Key Factors

Airbnb Cleaning Services in Toronto: 5 Key Factors for a Five-Star Turnover A successful short-term rental lives or dies by one process: the turnover. This is not a simple tidy-up; it is a complete, systematic reset of the guest experience. In a world-class city the standards are exceptionally high, and the smallest oversight, a stray hair or a sticky spot on the counter, can compromise an entire stay. If you are choosing between companies offering Airbnb cleaning services in Toronto, here are the five factors that separate a professional reset from a rushed wipe-down. Factor 1: A Systematic Process That Starts at Checkout The moment a guest departs, the clock begins. The first action is ventilation: all windows and balcony doors open to flush out stale air and lingering odors from cooking or fragrances, creating a neutral, fresh canvas while the space airs out. During this window, a professional crew runs a preliminary walkthrough for assessment, not cleaning, scanning each room for new damage such as scuffs on walls, carpet stains, or broken items. Issues are documented immediately with clear, time-stamped photographs and reported to the host, standard operating procedure for any reliable service. Beds are stripped completely, and all towels, bathmats, and kitchen cloths go into laundry bags to prevent cross-contamination. Factor 2: Bedroom and Bathroom Detail Work The bedroom is a guest’s sanctuary, and its cleanliness must be absolute. After the linens come off, the mattress protector and pillows are inspected for staining and laundered or replaced as needed, and the mattress itself is vacuumed with an upholstery attachment to lift dust, allergens, and skin cells. Fresh linens go back on with intent: taut sheets, hotel-style corners, and a wrinkle-free duvet, because the bed is a presentation. Headboards, nightstands, and dressers are wiped down, drawers and closets are opened and checked for items left behind, and picture frames, lamps, and window sills are dusted before the floor is vacuumed under the bed and behind furniture. Nowhere is cleanliness scrutinized more intensely than the bathroom. A quality disinfectant goes on the shower, bathtub, toilet, and sink, then sits for several minutes to dissolve soap scum, grime, and bacteria, following the CDC’s logic for cleaning and disinfecting surfaces at home. The shower and tub are scrubbed wall to wall with special brushes for grout lines and drains, and glass doors are squeegeed to a streak-free finish. The toilet is disinfected inside and out, from bowl and seat to tank and the entire base down to the floor. Once sanitized, the space is restocked: ample toilet paper, fresh hand soap, full shampoo, conditioner, and body wash bottles, and three freshly laundered towels per guest, a bath towel, hand towel, and washcloth, folded neatly. The floor is mopped last, and light switches, door handles, and the exhaust fan cover get a final wipe. Factor 3: Kitchen Disinfection and Restocking The kitchen is where guest trust is won or lost. Turnover cleaning starts by emptying the refrigerator and freezer of any food left behind, then wiping every interior shelf, drawer, and door seal with a food-safe disinfectant. Appliance exteriors and handles are polished, the microwave is cleared of splatters, the oven is inspected for spills, and the stovetop is degreased until it shines. Countertop items like the coffee maker and toaster are lifted so the surfaces underneath can be fully sanitized. The sink is scoured, the faucet polished, and cupboards and drawers spot-checked, with all provided dinnerware, glassware, and cutlery inspected. When it is a DIY job, follow Health Canada’s advice on using household chemicals safely; a professional crew handles those products for you. Restocking is part of the service: fresh paper towels, a new sponge, dish soap, dishwasher pods, a cleaned and full coffee station, and bins emptied, wiped, and relined before the floor is swept and mopped. Factor 4: Living Areas and the Extra-Mile Details The living room is where first impressions form, so every surface from coffee tables to the television stand and bookshelves is dusted. Upholstery is vacuumed with cushions removed to clean the frame beneath, cushions are fluffed and arranged, and throw blankets are folded. Books and magazines are organized, rugs are straightened and vacuumed, and the floor is finished with attention to corners and baseboards. Then come the details that elevate a clean from standard to exceptional: Baseboards wiped down to remove scuffs and dust. Door frames, doorknobs, and light switches sanitized as high-touch points. Interior windows checked for fingerprints and smudges. Every light bulb checked so none are burnt out for the arriving guest. Factor 5: The Final Walkthrough and Handoff The last step is quality control with fresh eyes: a supervisor or the cleaner tours the property as a newly arriving guest would, checking that pillows are perfectly arranged, the welcome mat is straight, and the air smells neutrally clean. The thermostat is set to a comfortable temperature, blinds are adjusted to a uniform position, and only then is the property securely locked and a confirmation message sent to the host. For hosts aiming for Superhost status, this level of turnover is not a luxury; it is a strategic necessity. Toronto Shine Cleaning serves properties across the city and the GTA, which you can confirm on our locations page. The Turnover at a Glance Area Reset essentials Restocking and checks Bedroom Vacuumed mattress, hotel-style bed-making, wiped surfaces Fresh linens, lost-item sweep of drawers Bathroom Disinfected and scrubbed tub, shower, toilet; squeegeed glass Three fresh towels per guest, soap and TP stocked Kitchen Disinfected fridge, degreased stove, scoured sink Coffee station, dish supplies, relined bins Living areas Dusted surfaces, vacuumed upholstery, finished floors Bulbs, blinds, thermostat, final walkthrough Airbnb Cleaning FAQs How quickly can a turnover crew reset my unit? Professional crews work from a fixed checklist and arrive fully equipped, built around tight turnover windows between late checkouts and evening arrivals. Book a company that treats those windows as non-negotiable and confirms completion after every visit. Do Airbnb cleaners handle laundry as well? A

How to Choose The Best Airbnb Cleaning Services in Toronto: 5 Key Factors Read More »

Laundry Room Cleaning 101: The Ultimate Guide to a Sparkling Space

Laundry Room Cleaning 101: The Ultimate Guide to a Sparkling Space A laundry room only works well when it is clean, decluttered, and logically arranged. The fastest route to that goal is a full reset: empty the room, deep clean every surface, and rebuild the space around the way you actually do laundry. This guide walks through the whole process so the room stops being a chore and starts being a calm, efficient workspace. Step 1: Empty the Room Completely Pull out every bottle of detergent, every box of dryer sheets, every hamper, and every stray sock. Move furniture aside until the room is bare. Only then can you see the space you truly have and break the habits that created the clutter. Sort everything into three groups as you go: keep, donate or discard, and relocate. That half-empty fabric softener you never reach for? Pour it out and recycle the bottle. The pile of wire hangers from the dry cleaner? Recycle them. Tools that wandered in by accident? Return them to the garage or toolbox. This ruthless purge is the foundation of every later step. Step 2: Deep Clean From the Top Down With the room empty, clean it properly, starting high and working low. Dust ceiling corners and light fixtures, then wash walls and baseboards with warm water and an all-purpose cleaner. Pay special attention behind the washer and dryer, where lint, dust, and lost items accumulate. Then tackle the appliances: Pull the machines away from the wall and vacuum the dryer vent hose and wall opening with a long attachment or vent brush; impacted lint here is a fire hazard, not just an eyesore Wipe down the exterior of both machines Run an empty cleaning cycle in the washer with a washing machine cleaner or a vinegar and baking soda mix to remove soap scum and mildew odours Wash the dryer lint trap with soap and water to clear the fabric softener film that restricts airflow Scrub the now-accessible floor, reaching the corners behind the machines Moisture control matters in this room: Health Canada’s mould and humidity guidance explains why damp, poorly ventilated spaces grow mould, and its dust mite advice notes how regular hot washing of bedding and towels keeps allergens down. A vented dryer, an open window, or a small dehumidifier keeps the room dry between loads. Step 3: Plan Zones That Follow the Workflow Think of laundry as a production line: dirty clothes arrive and get sorted, move to the washer, pass through the dryer, land on a clear folding surface, and finally leave the room. Arrange the room to follow that flow so clean items never mix with dirty ones and you never backtrack. Every laundry room benefits from four zones: sorting, washing and drying, folding and stain treatment, and supply storage. Zone Purpose Key items Sorting Separate loads as they come in Multi-bin hamper on wheels, labelled bins Washing and drying Run the machines Detergent, softener, stain remover within reach Folding Clear surface for warm laundry Countertop over front-loaders or a sturdy table Supply storage Keep products tidy and visible Uniform containers, shelves, labelled baskets Step 4: Use Vertical Space and the Walls Most laundry rooms are compact, so build upward. Wall-mounted shelving positioned over the pair of machines holds daily-use products in clear containers or uniform baskets, while closed cabinets hide less attractive stock. If you have front-loading machines, a countertop across them creates the single most useful surface in the room: a dedicated spot for sorting, treating stains, and folding straight from the dryer, which prevents the mountain of clean laundry that lives in a basket for days. A freestanding table works just as well when a built-in counter is not possible. Wall-mounted, collapsible drying racks fold flat for delicates and athletic wear, a pegboard holds small baskets, hooks, and a lint roller in endlessly adjustable arrangements, and a wall-mounted ironing board holder frees a corner completely. Step 5: Tame the Supplies and the Sorting Mismatched, brightly coloured bottles make any room feel chaotic. Decant detergents, softeners, and stain removers into a matching set of clear containers with waterproof labels; glass beverage dispensers suit liquids, while large canisters with scoops work for powders. You see at a glance when a product is running low, and the shelves instantly look calmer. Group like items together, all stain treatments in one tray, all wash products in another, so nothing is ever hunted for. For dirty clothes, replace the single hamper with a three-bin sorter on wheels, one bin each for whites, darks, and colours, or add a fourth for delicates and heavily soiled workwear. Labelling the bins means clothes are pre-sorted as they are dropped in, and wash day becomes simply grabbing a full bin. Step 6: Add the Finishing Details Small systems prevent the room from sliding back into chaos. Keep a lidded trash can beside the dryer for lint and used dryer sheets. Set a visible dish or basket as a lost-and-found for pocket finds and the inevitable lone sock. Mount a small whiteboard for the shopping list or a stain removal cheat sheet. Good lighting is worth the upgrade, too: a brighter LED fixture or under-cabinet strip over the folding surface makes stains easier to spot and the room feel larger. Finally, build a five-minute reset into the end of every laundry day: put supplies back, wipe the folding surface, empty the lint trap and trash, and return lost-and-found items. That small routine is what keeps the system working for years. Laundry Room Cleaning FAQs How often should I clean my washing machine? Run a cleaning cycle once a month, or more often in hard water areas or homes with heavy use. Leave the door ajar between loads so the drum dries out and never smells musty. Why is dryer vent cleaning so important? Lint is highly flammable, and a blocked vent traps heat inside the dryer, raising the risk of fire. Vacuum the hose and vent opening

Laundry Room Cleaning 101: The Ultimate Guide to a Sparkling Space Read More »

housekeeper deep cleaning

Deep Cleaning Services in Toronto, We Do It Right!

Deep Cleaning Services in Toronto: The Complete Reset Your Home Needs A regular cleaning keeps surfaces tidy, but the grime that accumulates below the surface quietly builds up over the months. That is the domain of specialized deep cleaning services in Toronto. Unlike standard housekeeping, a deep clean is a comprehensive, methodical process that tackles dirt in every often-overlooked, hidden corner of your home: a fundamental reset that restores your space to a truly pristine state. What Makes a Deep Clean Different? Professional deep cleaning focuses on a thorough, top-to-bottom reset of every room, targeting buildup that routine visits simply do not reach. It goes far beyond the surface and into the details: grease on cabinet fronts, dust in air vents, limescale on fixtures, and grime in grout lines. The scope demands expertise and specialized equipment, and more and more Toronto homeowners and businesses are investing in it, whether for a spring reset or as part of ongoing maintenance. For a fuller breakdown of what a session covers, see our guide to deep cleaning services in Toronto. Kitchen Deep Cleaning: Degreasing and Appliance Interiors In kitchens, the work is all about degreasing and disinfecting, starting inside your cupboards. Crews empty cupboards and pantries to inspect for spills, sticky residue, forgotten food, and signs of pests, then degrease and sanitize every interior surface. Handles and cabinet fronts get attention too, because repeated hand contact leaves a sticky film. Appliances receive treatment they almost never get at home: Oven: racks soaked, interior carbon buildup scrubbed, door glass cleaned for a like-new view. Stovetop: grates and burner caps removed and cleaned, boiled-over residue scrubbed from the surface. Range: pulled out so the sides, the floor behind it, and the wall are reached and wiped clean. Refrigerator and freezer: emptied, shelves and drawers washed, door gaskets detailed with a small brush, condenser coils vacuumed of dust to support efficiency and lifespan. Small appliances: toaster crumb trays emptied, coffee makers and kettles descaled, microwave interiors scrubbed, including the often-splattered ceiling. Bathroom Deep Cleaning: Soap Scum, Limescale, and Grout Bathrooms are scrubbed and sanitized top to bottom, dissolving soap scum and body residue from tubs and showers with specialized agents made for stubborn film. Shower doors and glass enclosures are cleaned until streak-free, the tracks at the base are cleared of accumulated gunk, and tiles and grout lines are meticulously scrubbed to lift mildew and dirt from porous grout. Stubborn mold and mildew in damp bathrooms are common culprits, and the CDC’s guidance on mold and your health explains why proper removal matters. Health Canada also recommends keeping indoor humidity low and fixing moisture sources so mould cannot take hold in the first place. Fixtures get their shine back as limescale and mineral deposits are removed from faucets and showerheads, and chrome is polished. Toilets are cleaned inside the bowl and across the entire exterior, from the tank lid and handle to the seat, hinges, base, and surrounding floor, plus the often-ignored overflow hole inside the tank, flushed clean with disinfectant. Vanity and medicine cabinets are emptied and wiped inside, and exhaust fan covers are removed and washed, because a dusty fan cannot ventilate properly and traps the humidity that leads to mildew. Living Areas and Bedrooms: A Top-to-Bottom Reset Crews work from the ceiling down to the floor in every room. Cobwebs are removed from corners and ceiling edges, light fixtures and ceiling fan blades are dusted, and the tops of bookcases, wardrobes, and cabinets are reached. Walls are spot-cleaned of scuffs and splatters, and baseboards, door frames, window frames, and switch plates are hand-wiped one by one. The process continues behind and beneath the obvious. Furniture is moved so the floors underneath are reached, and upholstery is vacuumed with crevice tools to extract dust, skin cells, and allergens from fabric. Wood furniture is polished, lampshades and blinds are dusted, and the air system itself is addressed: vents and grilles are vacuumed and wiped, and HVAC return air covers are pulled and dusted out. Professional crews rely on HEPA-filter vacuums that capture microscopic allergens rather than recirculating them, and steam cleaners that sanitize without harsh chemicals. When Toronto Homes Need a Deep Clean Most Deep cleaning requests tend to follow life events: Moving into or out of a home, when deposits and first impressions are at stake. Post-renovation cleanup after the construction dust settles in every crack. Seasonal refreshes, especially the annual spring clean. Before hosting an event or gathering, such as a wedding at home or the holidays. Preparing a space for a new baby or toddler who will crawl across every floor. Allergy season, when dust, dander, and pollen accumulate indoors. How to Choose a Professional Deep Cleaning Company Not all services are created equal, so choose carefully. Look for a company that offers a range of deep cleaning options with a detailed, transparent list of what each package includes. Prioritize experienced, trained professionals who understand the right products and techniques for different surfaces, and verify that the company is insured and bonded to protect your home and belongings. What to check Why it matters Transparent scope and checklist You can compare packages and know what is covered before booking. Trained, vetted crew Correct products and techniques protect finishes instead of damaging them. Insurance and bonding Toronto Shine carries a $1,000,000 insurance policy and a $10,000 accidental breakage and surety bond. Flat, upfront pricing Our deep clean starts at $270.38 before HST for a studio or one-bedroom, shown on our pricing page. Deep Cleaning Service FAQs What is included in a deep cleaning service in Toronto? A full reset of each room: kitchen cabinets and appliances inside and out, bathrooms degreased and descaled with grout scrubbed, walls spot-cleaned, baseboards and switch plates wiped, vents dusted, furniture moved, and floors and carpets thoroughly cleaned. How is deep cleaning different from regular housekeeping? Regular visits maintain cleanliness on visible surfaces. A deep clean restores the areas maintenance skips, which is why many homes pair

Deep Cleaning Services in Toronto, We Do It Right! Read More »

August cleaning preparation

How to Prepare for August Cleaning: 7 Steps, Fast and Easy

Why August Deserves Its Own Cleaning Reset Toronto air in late August has a particular weight. Summer peaks just before it starts retreating, and every room shows it: pollen-dusted glass, grit ground into entryway tile, a fridge stuffed with barbecue leftovers. An August clean is not ordinary tidying. It is a systematic reset that strips out the season’s specific grime and lays a clean foundation for the indoor months ahead. The seven steps below cover the whole arc. Step 1: Deal With the Air First Open windows let pollen, city dust, and allergens drift into every room, and the HVAC system has run nearly nonstop all season. Its filter is your first line of defense: a grey, clogged unit wastes energy and pushes right back the particles you are trying to evict, so replacing it is the opening move. Once the new filter is in, vacuum every intake and exhaust vent with a brush attachment. As you work through the rest of the plan, the CDC’s home cleaning and disinfecting guidance is a sound baseline for surface work. Step 2: Windows, Screens, and Tracks Screens have spent the season intercepting bugs, leaves, and dirt. Pull them and wash each one with a soft brush, mild soap, and a spray from the garden hose. While they dry, attack the channels they came from: window tracks and sills are small graveyards for dust and insects, so vacuum the loose debris and scrub the caked residue with an old toothbrush. Then wash the glass on both sides, choosing an overcast day, because sun bakes cleaner onto the pane and leaves streaks. This step brightens the house immediately. Step 3: Floors Carry the Season’s Story The floors hold the record of summer: sand from the Beaches, garden soil, grass tracked in from the park. Mop hard floors thoroughly and expect high-traffic lanes to need a second pass. Wall-to-wall carpet and area rugs are due for a real extraction clean with a rented or owned carpet machine, because ordinary vacuuming never reaches the settled grit and allergens; the murky water you dump out is proof of that. Pull furniture aside and clean underneath, where three months of dust bunnies and lost hair clips have gathered quietly. Step 4: Cut the Kitchen’s Grease Film The refrigerator has been a revolving door all summer. Empty it shelf by shelf, wash the shelves and drawers in warm soapy water, wipe the interior with a food-safe cleaner, and check expiration dates as you go. Handles and doors get wiped in the same motion. Summer cooking leans on frying and grilling, which leaves a sticky film on cabinets, backsplash, and especially the range hood: spray a degreaser, let it sit a few minutes, then wipe it clean. Finish by pulling the oven and stove forward to wash the exposed sides and the floor behind them, the most forgotten grease traps in any home. Step 5: Reset the Living Room’s Soft Surfaces Dust and dander settle into fabric, so give upholstery real attention. Launder any sofa cushion covers marked machine-washable; for everything else, vacuum slowly with the right attachment, working into every seam and crevice. To pull odors, scatter baking soda over the fabric, let it sit for half an hour, then vacuum it off. Wash throw blankets and pillows per their care tags. Dust with a damp microfiber cloth, which traps particles instead of scattering them, and reach the spots daily cleaning skips: picture-frame tops, ceiling fan blades, and lamp shades. Step 6: Bathrooms After a Humid, High-Traffic Season Bathrooms absorb summer humidity and a steady stream of guests in swimwear, so scrub grout lines on floors and in showers where soap scum and mineral deposits have hardened; a baking soda and vinegar paste handles them well. Wash the shower curtain and its liner. Then remove the exhaust fan cover, usually caked with dust, and clean it so the fan can genuinely pull moisture from the air. That detail matters because damp, stagnant air invites mildew, and the CDC’s page on mold explains why controlling moisture is the real defense. Empty medicine cabinets and vanities, tossing expired products. Step 7: Retire the Summer Gear and Reclaim Storage Seasonal belongings need a clean exit. Wash pool toys and inflatables, dry them fully, deflate, and store them for next year. Give the barbecue grill its post-season service: scrape the grates, empty the grease trap, wipe the exterior, then cover it for cooler months. Wipe the pollen layer off patio furniture, and make sure cushions are completely dry before boxing them, since damp cushions in storage grow mildew. Finish with the declutter: Sort summer clothes into keep, donate, and toss piles. Organize the garage and basement so sports equipment, camping gear, and garden tools each have a designated home. This is the step that turns chores into an actual season handoff. The August Reset at a Glance Zone Core tasks Why now Air system Replace filter, vacuum vents Pollen and dust loaded every room Windows Wash screens, scrub tracks, clean glass Brighter rooms before light fades Floors Double mop, carpet extraction, move furniture Settled grit holds allergens vacuums miss Kitchen Fridge reset, degrease hood and cabinets Old grease invites odor and pests Upholstery Launder covers, baking soda pass, damp dust Fabric collects dander all season Storage Wash, dry, and box seasonal gear Protects belongings and reclaims space August Cleaning Questions, Answered How long does a full reset take? Split it across two weekends: one for air, windows, floors, and upholstery, another for the kitchen, bathrooms, and storage. Doing the filter swap first means you are never blowing last season’s dust onto surfaces you just cleaned. What should I cut if I only have one day? The air step and the floors. Allergens drawn in through open windows end up in the filter and ground into carpet pile, so clearing those two gives the health payoff even when everything else waits. Is renting a carpet cleaner worth it? If sandy feet crossed the

How to Prepare for August Cleaning: 7 Steps, Fast and Easy Read More »

housekeeper

What Is a Housekeeper? 3 Reasons Why You Should Hire One

A Housekeeper Is a Manager, Not Just a Visitor With a Vacuum Most people picture a housekeeper with a duster or a vacuum, but the actual role runs far deeper. A professional housekeeper maintains the order, cleanliness, and function of a household as a whole system, which is why busy families and professionals treat the position as backbone rather than luxury. The job is not to perform one task and leave; it is to sustain an environment where the people who live there can thrive. Here is what the role genuinely covers, how it differs from standard cleaning, and three reasons households hire for it. What a Housekeeper Actually Handles Deep and routine cleaning: kitchens, bathrooms, floors, careful dusting, vacuuming, and laundry. Organization: clutter control, storage systems, tidy play spaces, and orderly shelves. Light management: stocked supplies, small errands, pet care, plants, and vendor coordination. The duties fall into three broad categories. The first is cleaning of every depth: kitchen and bathroom sanitizing, grout scrubbing, fixture polishing, and floor care matched to hardwood, tile, carpet, or laminate so each material lasts longer. Dusting reaches baseboards, light fixtures, ceiling fans, blinds, and decor rather than stopping at tabletops, and vacuuming and mopping go under furniture and into forgotten corners. Laundry is commonly part of the role too: washing, drying, folding, ironing, and putting away clothes, linens, and towels, plus beds made with real care. The second category is organization. A housekeeper reduces clutter and builds storage systems for closets, pantries, and common areas, tidies children’s play spaces, and straightens bookshelves and paperwork. The payoff is fewer hours hunting for things and a home that flows through the day instead of fighting you. The third is light household management: keeping cleaning products, toiletries, and pantry staples stocked, running small errands like groceries or dry cleaning, handling basic pet-care tasks such as feeding or tidying pet areas, and watering indoor plants. In larger homes, a housekeeper can also coordinate plumbers, electricians, and gardeners, acting as the single point of contact so maintenance actually happens while you are at work. Cleaner or Housekeeper: Know What You Are Hiring The distinction matters when you book. A cleaner arrives for a set number of hours, completes defined tasks, and leaves; the focus is the condition of the space that day. A housekeeper holds an ongoing relationship with the home, handling continuous upkeep, proactive organization, and the daily rhythm of the place, and learns its quirks and your preferences over time. That accumulated knowledge is what turns a service into a partnership. Dimension Standard cleaner Housekeeper Relationship Scheduled visit, task list Ongoing steward of the household Scope Cleaning the space Cleaning, organizing, light management Knowledge General best practice Your routines, materials, and preferences Typical result A clean house today A smoothly run house every week Reason 1: You Buy Back Your Time The first case for hiring is arithmetic. Careers, family, social commitments, and personal goals all compete with chores, and cleaning hours accumulate quietly, swallowing weekends and evenings. A housekeeper liberates that time for what actually enriches your life: people you love, hobbies, exercise, or genuine rest. Coming home to a finished sanctuary instead of a to-do list is not indulgence; it is a transfer of the day’s least rewarding hours to someone whose job it is to do them well. If reclaimed hours go toward movement, the CDC summary of the benefits of physical activity is a good reminder of what that time is worth. Reason 2: Less Stress and a Genuinely Healthier Home An untidy space runs a constant background process in your mind: the guilt, the planning, the nagging awareness of what still needs doing. A housekeeper closes that process. The mental load lifts when you know professionals care for the home consistently, chore arguments in shared households evaporate, and the space is always ready for impromptu guests or for your own enjoyment. The hygiene side is just as real. Housekeepers are trained in technique and product use, and they sanitize in ways that limit germs, dust, and allergens, which matters most in homes with children, pets, or anyone with allergies or respiratory sensitivities. Consistent cleaning improves indoor air quality, slows the spread of illness, and handles trouble spots like bathroom mildew or pollutant-loaded carpet. Hand-in-hand with that, reliable habits like the ones in the CDC’s handwashing guidance protect a household most when the surfaces around them are kept clean too. Reason 3: Expertise That Pays for Itself Professional knowledge of surfaces, materials, and agents means contents are preserved, not just wiped. Housekeepers work fast with systematic methods, and they spot what you might miss: a small repair before it grows, early signs of pests, a failing seal. That extra pair of watchful eyes extends the life of furnishings, appliances, and finishes, which defers replacement costs you would otherwise pay later. The role also flexes to household type. Dual-career parents get hours back with their kids. Elderly or mobility-limited residents keep their independence in a safe, comfortable home. Frequent travelers return to a place that kept running. And for people who simply dread cleaning, the dread itself is removed. Consistency builds trust, and trust is the product. What the Investment Really Covers Yes, there is a cost, and yes, it buys more than square footage. Toronto Shine Cleaning’s regular housekeeping visits start at $212.63 before HST for a studio or one-bedroom and $273 for a typical two-bedroom home, with deeper resets priced from $270.38; the full menu sits on our pricing page. We are bonded and insured under a $1,000,000 policy with a $10,000 accidental breakage and surety bond, and you can read what clients say on our reviews page. Weigh that against the value of your evenings and your peace of mind, and the math tends to favor the hire. Compare it with a one-off deep clean or book recurring help through our regular maid service, and call (647) 424-0355 when you are ready. Housekeeper Questions, Answered Do I need a

What Is a Housekeeper? 3 Reasons Why You Should Hire One Read More »