Cleaning Guide

clean oven

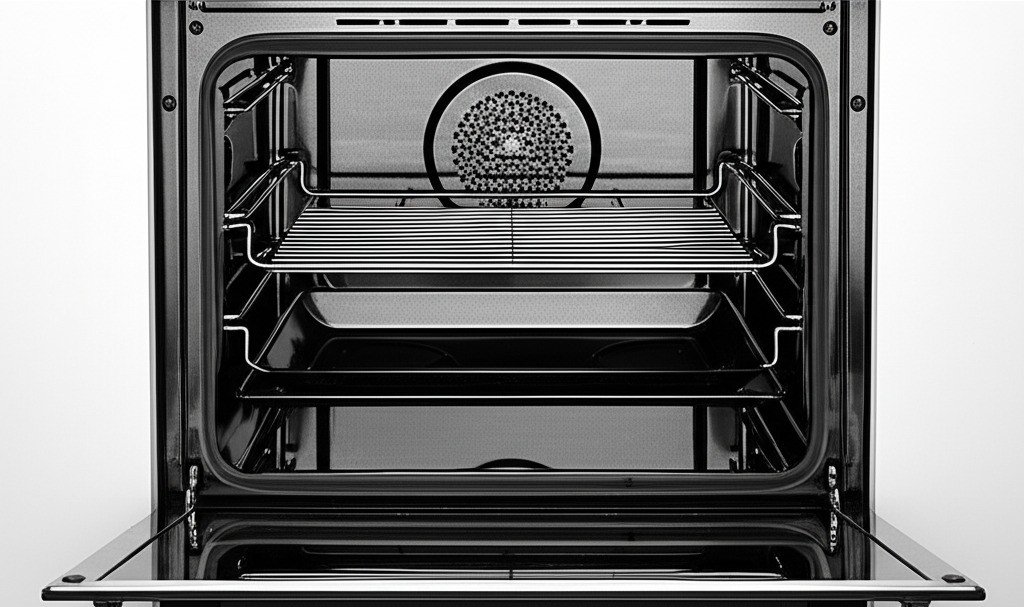
The Best Way To Clean Your Oven And Make It Shine In 5 Steps

The Best Way To Clean Your Oven: Five Steps To a Spotless Interior Facing a filthy oven can feel like gearing up for a battle. The baked-on grime and mystery splatters look invincible, but with a clear plan you can conquer them and get your oven genuinely sparkling again. This is not only about appearance: a clean oven heats more evenly, cooks better, and keeps your whole kitchen smelling fresh. Roll up your sleeves and work through these five steps in order. Done methodically, the chore that takes most people an exhausting weekend becomes a manageable hour or two, with the waiting time doing the heavy lifting for you. Step 1: Prep Work, Safety, and Protection Safety and setup decide whether this job goes smoothly. Make absolutely sure the oven is completely cold before you begin, no exceptions: cleaning a warm or hot oven risks burns and makes cleaning fumes noticeably more intense. Then do the following preparation: Pull out the oven racks, which usually carry the worst grime, and set them in the sink or a bathtub lined with an old towel to prevent scratches. Clear everything else out: pizza stones, oven thermometers, and that forgotten baking tray. Remove loose debris with a small brush and dustpan, or the crevice tool on your vacuum, sweeping crumbs, ash, and charred food particles from the oven floor. Getting this out now prevents turning it into a muddy paste later. Lay newspaper or old towels on the kitchen floor in front of and beneath the oven door to catch drips, and set up ventilation by cracking a window or switching on the extractor fan. Step 2: Apply Your Chosen Cleaner Evenly With the oven prepped, bring in your cleaning solution, whether a heavy-duty commercial oven spray formulated for tough grease or a homemade paste of baking soda and water. Before you start, put on sturdy rubber gloves to protect your skin, and consider safety glasses if you are using a strong chemical spray, because these products are potent; Health Canada’s guidance on household chemical safety is worth following for any caustic cleaner. Coat every interior surface evenly and thoroughly: the sides, the back panel, the bottom, and the inside of the door. Avoid spraying cleaner directly onto visible heating elements or internal fans, which are sensitive components. Do not be shy with product on the really stubborn baked-on spots. A generous, even coat now means dramatically less elbow grease later. Step 3: The Waiting Game, Where the Real Cleaning Happens Now let patience do the work. This is not wasted time: the solution is busy penetrating and breaking down the caked-on grease and food residue. Check your product’s label for the manufacturer’s recommended dwell time, and see the table below for typical ranges. Whatever the recommendation, do not rush this stage, because the full, uninterrupted dwell is what makes the next step dramatically easier. Think of it as your secret weapon against excessive scrubbing, and use the downtime productively on the racks. Cleaner option Best for Typical dwell time Commercial oven spray Regular cleaning and moderate grease From around 30 minutes, always per the label Heavy-duty chemical cleaner Long-neglected, baked-on grime Several hours to overnight, per the label Baking soda and water paste A gentler homemade approach Several hours or overnight for tough messes Hot soapy water soak The removed racks While the cleaner dwells inside the oven Step 4: Scrub, Wipe, and Watch the Transformation The wait is over, and the cleaner has done the heavy lifting, so the grime should be significantly looser. Gather a non-scratch abrasive pad, a heavy-duty sponge, and a few clean rags. For spots that refuse to budge, a plastic scraper helps; an old credit card works in a pinch if used carefully. Wipe and scrub the interior systematically, starting at the top and working down, or finish one section before moving on, and do not forget the glass panes in the door. The deposits come away far more easily now than they would have with cold water and muscle alone. Rinse your sponge or rag frequently in a bucket of clean water so you are not simply spreading loosened dirt around the cavity, and pay special attention to corners, crevices, and recesses where grease loves to hide. Step 5: Rinse, Dry, and Reassemble On the home stretch. Now remove every last trace of cleaning product, because residue can produce nasty fumes or alter the taste of your food the next time you bake. Wipe all interior surfaces multiple times with clean, damp cloths, rinsing one often if that is what it takes, until no soapy or slippery feel remains. For an effective final rinse, many people wipe the surfaces with a cloth dampened in water mixed with a little white vinegar, which helps neutralize remaining cleaner residue and adds a nice sparkle. Then air-dry the oven with the door open for a few hours, or dry it thoroughly with a clean towel or microfiber cloth. Give the soaked racks a final rinse, dry them completely, and slide them back into position. Remove your floor protection and take a moment to admire the work. Oven Cleaning FAQ Can I use the self-cleaning cycle instead? A self-clean burns off soil with extreme heat, but it still cannot handle thick grease piles or loose debris, and many manufacturers advise against additional chemical cleaners with the cycle. The five manual steps above work on any oven and give you control over stubborn spots. What about the oven door glass? Clean it as part of Step 4 rather than skipping it. With the interior surfaces degreased during the dwell time, the panes wipe far more easily, and a dry microfiber buff at the end keeps the view into the oven streak-free. How often should an oven be cleaned? A light wipe after big spills keeps grime from carbonizing, and pairing it with a scheduled regular cleaning visit prevents the multi-hour buildup described in this post. Kitchens that roast or

The Best Way To Clean Your Oven And Make It Shine In 5 Steps Read More »
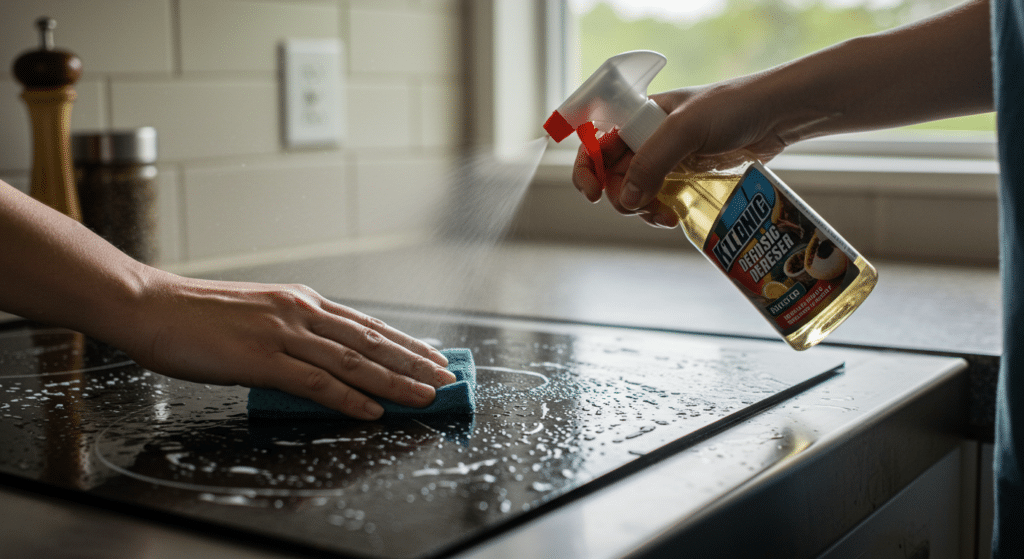
2 people using a kitchen degreaser to clean

5 Best Ways to Use a Kitchen Degreaser for Kitchen and Home Cleaning

5 Best Ways to Use a Kitchen Degreaser, at the Stove and Beyond Ordinary cleaners slide right off old grease, but a degreaser is formulated to dissolve it, which changes what you can finish in one afternoon. Stovetop spatter, tacky cabinet fronts, a range hood filter you stopped thinking about, and the oil track on the garage slab all respond when the product gets the dwell time it needs. The five techniques below show where to spray, how long to wait, and when to rinse, so the bottle earns its place under your sink instead of being reserved for emergencies. Way 1: Deep-Clean the Stovetop and Cooktop Cooktops collect bubbling sauces and frying oil until the surface looks dull even after a wipe. Once the burner is cool, spray the degreaser across the cooktop and leave it for several minutes before wiping with a damp cloth. That pause is the entire method: the chemistry lifts the hardened film so heavy scrubbing, and the scratching risk that comes with it, becomes unnecessary. On a gas range, pull the burner grates and soak those too, since they quietly collect the thickest buildup of anything on the stove. Finish with a rinse cloth, dry the surface, and fold the routine into your weekly kitchen pass so the grime never gets a head start. Way 2: Clear the Range Hood and Its Metal Filter Steam and cooking fat combine above the stove into a sticky layer on the hood and a nearly invisible mat inside the filter. Spray the housing, wait around five minutes, and wipe it down. For the metal grease filter, pull it free and let it soak in the sink filled with hot water and a squirt of degreaser for ten to fifteen minutes; the released grease is genuinely alarming. After a gentle scrub and a thorough rinse, the fan pulls air the way it did when new, kitchen odors disperse faster, and the fan blades, motor cover, and light covers stay in better shape between cleanings. Way 3: Degrease Cabinet Fronts Without Lifting the Finish Cabinet doors near the cooktop feel slick or sticky long before they look dirty, from cooking aerosols plus the oil on human hands. Spray the degreaser onto your cloth rather than directly onto the cabinetry, then wipe in gentle passes, focusing on handles, hinges, and the row of doors above the stove. Follow with a clean damp cloth to rinse, and always test an inconspicuous area first, because some finishes are temperamental even with quality products. White cabinets, which reveal every smudge, respond especially well and come back bright rather than blotchy. For cabinetry that has hardened into a sticky film over years, a professional deep cleaning is often faster than a weekend of arm work. Way 4: Reset the Trash Can Inside and Out Bin walls collect leaky bag juice and greasy ring residue at the rim. Coat the interior and exterior with degreaser, let it sit about ten minutes, then scrub with a sponge or brush and rinse completely before the liner goes back. Give the lid, pedal, and handle the same treatment, since those surfaces are touched constantly and skipped during quick wipe-downs. A weekly pass keeps the can odor-free, stops the sticky rim feeling, and removes the grime that bacteria enjoy, which matters for kitchen hygiene in any home. Way 5: Attack Garage Floors and Utility Areas Oil drips, greasy footprints, and the tracked-in slush line near the door are jobs that mop water cannot win. Flood the affected patch with degreaser, wait at least ten minutes, then agitate with a stiff brush and rinse. Tough stains usually take a second round, and the method works on concrete, tile, and sealed floors in laundry corners and utility rooms alike. Ventilate any enclosed space while you work, since concentrated cleaner fumes hang low, and check Health Canada’s guidance on safe use of household chemical products for storage and handling habits that protect kids and pets. The same household products resources also cover reading the label dwell times most degreasers print in small type. A degreased floor stops feeling slippery underfoot and keeps less grease walking itself back into your hallway, a real win in homes with kids running in from the driveway. How Long Should a Degreaser Sit? Surface Dwell time Technique Cool stovetop Several minutes Spray, wipe with damp cloth, rinse Range hood housing About 5 minutes Spray and wipe, repeat heavy spots Metal filter 10-15 minutes soaked Hot water plus degreaser, scrub, rinse Cabinet fronts Short passes Apply to cloth, wipe, rinse with second cloth Trash bin About 10 minutes Coat, brush, rinse fully, dry Garage slab At least 10 minutes Saturate, stiff brush, rinse, repeat Simple habits that cut grease buildup down Wipe splashes beside the cooktop while the surface is still warm rather than waiting for Friday. Run the hood fan whenever you fry, so less aerosol grease settles on cabinets. Dedicate one cloth to grease jobs so oily rags never touch your glassware. Soak burner grates and filter meshes on the same day you wipe the hood. Keep a degreaser bottle near the garage door for fresh oil drips, when they lift easiest. Degreaser Questions, Answered Can I use degreaser on laminate countertops? Spot-clean carefully after testing a hidden section, and never let the product dry on the surface. Laminate seams can lift with repeated saturation, so a quick spray-and-wipe is safer than a long dwell. Does degreaser need rinsing? Yes. Left behind, most degreasers dry into their own sticky film that attracts fresh dust and grease, which is why every method above ends with a clean damp cloth. Is a natural option like vinegar strong enough? For light, fresh grease, a diluted acid wipe often works. Cured, amber-colored buildup is where a purpose-made degreaser saves you real labor. How often should the hood filter come out? Roughly monthly in a home that fries often, quarterly for lighter cooking. The soak test is quick: water beading

5 Best Ways to Use a Kitchen Degreaser for Kitchen and Home Cleaning Read More »

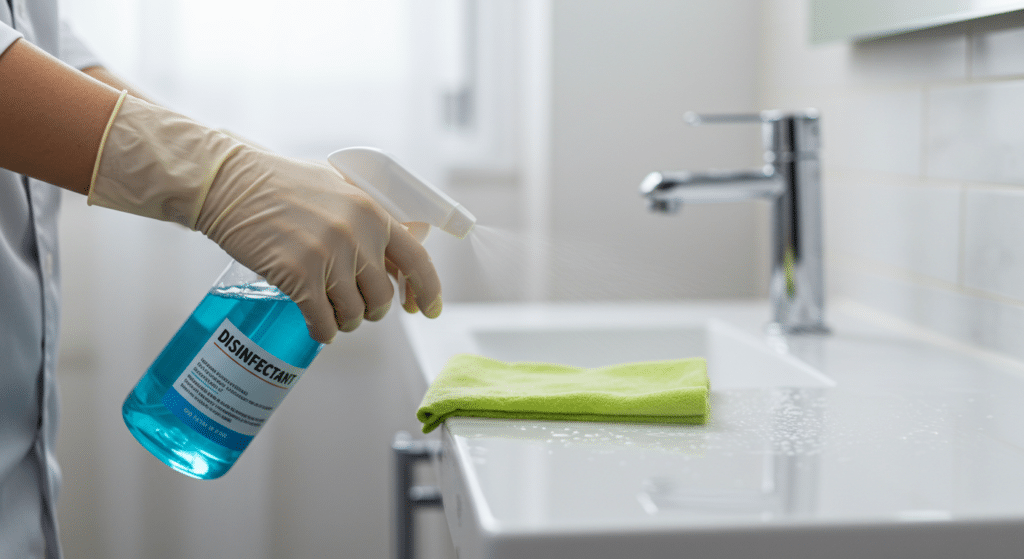
Blue disinfectant inside a bottle while some using it to clean

5 Disinfectant Cleaning Tips Every Toronto Home Should Follow

5 Disinfectant Cleaning Tips Every Toronto Home Should Follow In a city where transit platforms, offices, and school hallways pass germs around all day, disinfecting at home is the habit that breaks the chain. But there is a gap between spraying a bottle around and actually killing bacteria. Most homes clean the wrong way without realizing it: too fast, too casually, on surfaces that are still dirty underneath. These five tips close that gap, and each one takes minutes once it becomes routine. Tip 1: Always Clean Before You Disinfect The most common mistake is spraying disinfectant straight onto a grimy surface. Disinfectants are engineered to kill germs on clean surfaces; grease, crumbs, and dust physically shield the bacteria underneath, so you burn product and keep the germs. Wipe the surface first with warm water and a general-purpose cleaner or soap, then apply the disinfectant. Health authorities are explicit about this order, and the CDC’s clean then disinfect guidance explains the logic in detail. The extra two minutes are the difference between a surface that looks clean and one that is actually germ-free, which matters most on kitchen counters after food prep and on the bathroom sink the whole household shares. Tip 2: Let the Disinfectant Sit, Do Not Wipe It Off Too Fast Spray and instant wipe is nearly the same as spraying and nothing else. Disinfectants need to stay visibly wet for a specific period, the dwell time on the label, usually 5 to 10 minutes, for the active ingredients to actually kill bacteria and viruses. Wiping too soon short-circuits the chemistry. Read the label on your product, apply it generously enough to keep the surface wet, and if it dries early, reapply a little to complete the full dwell time. Patience is the whole technique: pick the surfaces, spray, walk away, come back, then wipe. Tip 3: Hit the High-Touch Areas Daily High-touch surfaces are the ones everyone contacts without thinking. The daily round should cover: Doorknobs and cabinet pulls Light switches Fridge, oven, and microwave handles TV remotes and game controllers Faucet handles and toilet flush buttons They rarely look dirty, and they are among the dirtiest spots in any home, which is exactly why a daily disinfectant pass matters so much, especially when someone in the house has been sick. Keep wipes or a spray with a cloth in an accessible spot and make the round once a day; it takes a couple of minutes. In busy Toronto households with kids or roommates, this single habit does more for household health than any weekend deep clean. Tip 4: Match the Disinfectant to the Job Not every disinfectant is safe or effective everywhere. Products designed for hard surfaces like counters and tile can damage screens, and the wrong formula on soft furnishings either does nothing or worse. Choose products approved to kill the viruses and bacteria you care about, and where kids or pets roam, favor non-toxic options without harsh fumes. For touchscreens, keyboards, and remotes, use wipes explicitly rated safe for electronics. Read labels before you buy and before you apply, a habit Health Canada’s household chemical safety guidance reinforces: the label is where dwell times, dilution, and surface warnings live, and mixing products is never part of the plan. Tip 5: Do Not Forget the Shared Items Shared households multiply touchpoints: bathroom faucets, microwave buttons, kettle handles, game controllers, the coffee machine everyone operates half-asleep. These items pass between multiple people daily and carry germs efficiently between them. A quick wipe-down a few times a week, daily when someone is under the weather, keeps the household’s shared machinery from becoming its germ exchange. Consistency beats intensity here; a standing wipe routine, plus a spray bottle that lives where the items are, is what makes it stick. Surface Right Product Cadence Counters and tables Clean first, then disinfectant with full dwell time Daily, after food prep Doorknobs and switches Disinfectant wipes or spray Daily pass Bathroom sink and faucet Bathroom disinfectant Daily in flu season Remotes and keyboards Electronics-safe wipes A few times a week Kettle and microwave handles Household disinfectant A few times a week Disinfecting FAQs What is dwell time, exactly? The duration a disinfectant must stay wet on a surface to kill the germs it claims to kill, printed on the label. It usually runs 5 to 10 minutes. Skip it, and you have cleaned the surface but disinfected nothing. Are disinfectant wipes as good as spray? For high-touch points and shared items, yes, as long as the surface stays wet for the full dwell time. Wipes excel at convenience and consistency; sprays with a cloth are more economical for large surfaces like counters. Do I need to disinfect if I clean every day? Cleaning removes the grime that shelters germs, but it does not reliably kill them. The combination is the standard: clean to clear the surface, disinfect to kill what remains, with daily disinfecting reserved for the high-touch and shared spots. Can professionals handle the disinfecting routine? Yes. Toronto Shine Cleaning’s crews follow clean-then-disinfect best practices with attention to exactly these high-touch and shared surfaces, which is why households with kids, pets, or frequent guests lean on regular housekeeping to keep the standard up without thinking about it. Take Disinfecting Off Your To-Do List Between a deep clean to reset the whole home and recurring visits to keep it that way, professional help makes the germ-smart standard permanent. We serve neighbourhoods across the city, listed on our locations page. Call (647) 424-0355 to book, and enjoy a home that is not just spotless, but genuinely hygienic.

5 Disinfectant Cleaning Tips Every Toronto Home Should Follow Read More »

Floor wax, white package and background

Floor Wax Cleaning Guide: 5 Easy Steps for a Glossy Finish

Floor Wax Cleaning Guide: 5 Easy Steps to a Glossy, Lasting Finish A good coat of floor wax turns tired vinyl, tile, or sealed hardwood from dull to glowing, and the film it leaves behind takes the daily abuse of foot traffic, toys, and furniture so the actual floor does not have to. Getting a smooth, professional-looking result is less about products and more about sequence: one skipped step shows up later as cloudiness, streaks, or a finish that peels at the edges. This guide walks the full process from bare, clean boards to a hardened, glossy coat, with the timing details that decide whether your work lasts a week or a season. Step 1: Sweep and Vacuum Like the Finish Depends on It Wax seals whatever sits on the floor, which means dust, pet hair, and crumbs get fossilized under your new coat if you start early. Sweep first, then vacuum with the corner attachments out, because the grit hiding along baseboards is exactly what scratches a fresh finish later. Follow with a dry microfiber mop to collect the fine dust a vacuum leaves swirling. Skip oily or soapy floor cleaners before the job: residue from them prevents the wax from bonding, so a dry, clean, chemical-free surface is the goal. A few minutes here is the difference between glass and grit. Step 2: Strip the Old Wax Where It Has Failed If the floor already shows hazy, layering buildup, adding more on top only deepens the cloud. Apply a wax remover or floor stripper rated for your flooring type, work in manageable sections, and let the product sit the time printed on the label before lifting the softened old layers with a scrub pad. Mop the slurry away and wipe the section clean. Fresh wax grips properly only to a strip-clean surface; skipping this step is the most common floor wax mistake, and it produces streaks, blotchy color, and edges that peel in sheets. Step 3: Give the Floor Time to Dry Completely Wax will not bond to damp boards. Even a trace of moisture causes bubbles, streaking, or whole patches that release later. Leave the floor for at least 30 minutes, or until it feels fully dry underfoot, and set fans across the room if you want to hurry the process. The wait is also your inspection window: view the floor from several angles and run a hand low over the surface, checking for leftover wax patches, sticky spots, or residue that will fight the new coat. Fix what you find now, because every flaw shows brighter once the gloss goes on. Step 4: Apply Thin, Even Coats of Wax Shake or stir the can before opening, since product separates in storage and an unblended pour dries blotchy. Pour a modest path for a clean mop or applicator rather than flooding the room, and spread thin coats in smooth overlapping strokes, starting at the far corner and working toward the exit so you never paint yourself in. Thin layers look better and dry harder than one thick attempt. Let each coat dry fully, typically 20 to 30 minutes, though the label is the final word. Two coats serve most homes; a third adds insurance for hallways and other high-traffic runs. For broader guidance on using finish products safely around the house, Health Canada’s page on household products covers labeling, ventilation, and storage. Step 5: Cure Without Footprints, Then Maintain Gently Resist the floor afterward. Keep traffic off for 30 to 60 minutes, longer if you can spare it, and remember that some formulas need up to 24 hours to reach full hardness. One early footprint or dragged chair can scar the entire section, so park kids, pets, and furniture elsewhere until the cure completes. A properly hardened coat resists scuffs, stains, and everyday wear far better than a rushed one. From then on, protect your work: neutral pH cleaners and a damp mop only, never abrasive scrubs or strong chemicals, a rule our crews follow during every regular maid visit so the coating survives months of weekly cleaning. Between recoats, a few habits keep the gloss alive: Use only neutral-pH floor cleaner with a well-wrung damp mop Skip acidic or harsh all-purpose mixes, which can dull the film over time Put felt pads under furniture legs so chairs slide instead of scratch Lay mats at entry doors so street grit never reaches the gloss Buff by hand when the shine fades before reaching for another coat When the gloss fades months later, a quick buff or one fresh coat over a clean floor brings it right back. Timing Cheat Sheet for Each Waxing Stage Stage Plan for Why it matters Sweep, vacuum, microfiber mop 10-15 minutes Trapped debris ruins smoothness and scratches fresh coats Strip old wax Label dwell plus scrub time New layers bond to clean floors, not cloudy ones Final drying At least 30 minutes Moisture causes bubbling, streaks, and peeling Coat application 20-30 minutes between coats Thin coats cure even; thick ones stay soft Curing Off-foot traffic 30-60 minutes, full hardness up to 24 hours for some products Early traffic leaves permanent marks Floor Wax Questions, Answered Can I wax engineered or solid hardwood? Only finishes designed for that floor type. Many modern hardwood coatings are urethane-based and repel wax instead of holding it, so confirm your floor accepts wax before buying a can. Why does my new coat look cloudy? Almost always trapped moisture, leftover stripper, or a coat applied before the previous one dried. Let everything dry fully, and if haze persists, strip and reapply thinner. How often should floors get a fresh coat? In average homes, once or twice a year in busy zones, with a light buff in between whenever the shine dims. Is the smell dangerous while it dries? Ventilate the room with open windows and fans and keep children and pets out of the space until the floor is fully dry, in line with general precautions on

Floor Wax Cleaning Guide: 5 Easy Steps for a Glossy Finish Read More »

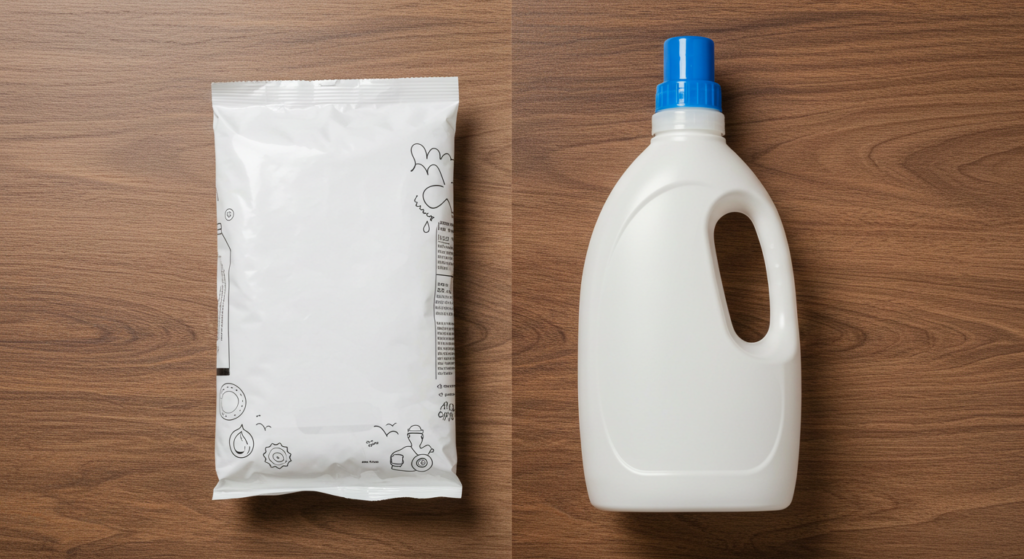
Washing Powder and Liquid detergent in a half splited image

Washing Powder vs Liquid Detergent: Which One Should You Use?

Get the facts before your next laundry day Laundry might seem simple, but choosing between washing powder and liquid detergent can actually make a big difference in how clean your clothes get. Whether you’re doing a quick midweek wash or a full family laundry day in your Toronto home, knowing which detergent works best will save time, money, and even your favourite clothes. So, let’s break it down. What’s the difference between washing powder and liquid detergent? And more importantly-which one should you actually be using? Washing Powder: A Classic Choice with Strong Cleaning Power Washing powder has been around for ages, and there’s a good reason it’s still a popular option. It’s affordable, has a long shelf life, and is super effective at removing dirt, mud, and other outdoor stains. If you’ve got kids who love the playground or pets that bring in messes, powder can tackle those tough stains easily. Powder detergent is especially effective in warm or hot water. It breaks down grime and helps lift stains from fabrics, making it perfect for white clothes, towels, and bed sheets. It often contains built-in oxygen-based bleach, which helps brighten whites and fight bacteria-ideal if you’re washing gym clothes or cloth diapers. But there are a couple of downsides. Washing powder doesn’t dissolve as well in cold water, which can leave chalky residue on clothes or inside your washer. This is especially true in Toronto’s winter months, when most people wash in cold water to save on energy bills. Still, if you regularly do hot washes or use a top-loading machine, powder detergent can definitely get the job done right. Liquid Detergent: Convenient, Cold-Water Friendly & Gentle On the flip side, liquid detergent is a go-to choice for many Toronto households, especially those using high-efficiency (HE) machines. It’s convenient, easy to measure, and dissolves fast-no matter the water temperature. One of the biggest pros of liquid detergent is that it’s perfect for cold water washes. That means it’s energy-efficient and less likely to leave residue behind on your clothes. It’s also great for dark fabrics because it won’t leave white streaks or build-up like powder sometimes can. Liquid detergent is also easy to use for spot-treating stains. Got a bit of grease on a shirt or ketchup on your jeans? Just pour a drop right on the stain before tossing it in the wash. Powder can’t really do that. The trade-off? It usually costs a bit more, and it’s easy to overuse if you don’t measure carefully. That can lead to detergent buildup inside your machine over time, which might cause smells or even affect how clean your laundry gets. Washing Powder vs Liquid Detergent: A Side-by-Side Comparison Here’s a quick comparison to help you see the differences more clearly: Feature Washing Powder Liquid Detergent Best for Whites, muddy clothes, warm/hot water Darks, delicates, cold water Stain removal Excellent for outdoor stains Great for greasy and oily stains Water temperature Works best in warm/hot water Works in all temps, especially cold Machine compatibility Traditional machines Great for HE washers Price More affordable Slightly more expensive Residue Possible in cold water Rare in cold water Eco impact Cardboard box (more recyclable) Plastic bottle (harder to recycle) Common Laundry Mistakes to Avoid Whether you stick with washing powder or prefer liquid detergent, your laundry results can still go sideways if you’re making some classic mistakes. One big one? Overloading your machine. Cramming too many clothes in stops detergent from circulating properly, which means dirt and residue stay trapped. Another common slip-up is using way too much detergent-especially liquid. More soap doesn’t mean cleaner clothes. It can actually leave buildup and make clothes feel stiff or itchy. Using the wrong water temperature for your fabric is another issue. Hot water works for powder, but can shrink delicates or fade darks. Cold water is perfect for liquid, but not all stains come out if the water’s too cold. Also, if you’re not sorting laundry by color and fabric type, your clothes will wear out faster, and you might see color bleeding or pilling. The good news? These mistakes are easy to fix. A few small tweaks-like measuring detergent properly, sorting laundry better, and not overstuffing the drum-can help you get better results, no matter what product you use. And if you ever want to skip laundry day altogether, remember that Toronto Shine Cleaning has pros ready to do it for you. Choosing Based on Your Lifestyle Now, let’s talk real life. If you’re doing laundry for a busy family in a Toronto suburb, dealing with sports uniforms, muddy clothes, and big weekly loads, washing powder might make more sense. It offers strong cleaning at a lower cost, and it can handle the heavy-duty messes. If you’re a single person or a couple in a downtown condo using an HE front-loader, and you mostly wear dark clothes or wash in cold water, liquid detergent could be the smarter pick. It’s easier to store in small laundry closets and better for delicate cycles. Live in an older building with hard water? Washing powder often works better in these cases. Hard water can reduce the effectiveness of some liquid detergents, but powder formulas usually include water softeners to help combat that.

Washing Powder vs Liquid Detergent: Which One Should You Use? Read More »

Cleaning with proper ventilation

Why Ventilation Matters More Than You Think When Cleaning

Better Ventilation Makes a Big Difference in Your Cleaning Routine When you think about a clean home, fresh air might not be the first thing that comes to mind-but it should be. Better ventilation is key to removing airborne particles, odours, and moisture that get stirred up while cleaning. If you skip this step, you could end up with a house that looks clean but doesn’t actually smell or feel fresh. Ventilation supports every cleaning task, making it more effective and longer lasting. In many Toronto homes, especially during colder months, windows stay shut and the air inside becomes stale. Without ventilation, that trapped air holds on to dust, cleaning chemical residues, and humidity. Over time, this can make your space feel stuffy-even if you’ve just deep cleaned. By opening a few windows or turning on fans while you clean, you let that stale air escape and make room for fresh air to circulate throughout your home. Adding airflow also helps speed up drying times for things like freshly mopped floors, steam-cleaned furniture, or bathroom tiles. This prevents moisture buildup, which can lead to mold or mildew-especially in closed-off areas. Whether you’re cleaning your kitchen or your whole house, better ventilation creates a safer, healthier environment. It’s one of those cleaning tips that’s easy to overlook, but makes a big difference in results. Say Goodbye to Lingering Smells with Proper Ventilation Strong cleaning product smells can hang in the air long after the job is done. Whether it’s bleach in the bathroom or disinfectants in the kitchen, those fumes can cause headaches or irritate sensitive lungs. Better ventilation helps flush out those harsh odours fast, so your home smells fresh instead of “chemical clean.” It’s a quick way to improve the comfort and air quality of your space, especially if you’re cleaning regularly. In tightly sealed Toronto apartments or condos, smells tend to get trapped indoors. Without a proper exit path, those odours settle into your furniture, curtains, and carpets. Even eco-friendly products can leave behind a scent that lingers too long without airflow. Keeping a fan running or cracking open a few windows while cleaning will help refresh the entire room and stop smells from sticking around. If you’re cleaning multiple rooms, open up interior doors as well to create a cross breeze. This helps air move freely through the space and cuts down on stuffiness. Better ventilation during cleaning doesn’t just help with odours-it also improves your mood and energy levels. You’ll notice the difference right away. A home that feels clean starts with air that’s fresh and breathable. Ventilation Helps Cut Down on Dust and Allergens When you clean, you stir up dust, pollen, pet dander, and other allergens that have settled on surfaces. Without proper ventilation, all those particles just float around and resettle elsewhere. Better ventilation helps clear the air so allergens don’t have a chance to stick around. This is especially helpful if you or your family members suffer from allergies or asthma. In many older Toronto homes, poor airflow can make dust problems worse. Even after a good vacuum or wipe-down, allergens can stay trapped in the air unless you’ve got some ventilation going. Opening windows while dusting or sweeping helps move those particles out of your home completely. It turns regular cleaning into a real health boost, not just a cosmetic fix. Air purifiers can also help, but they work best when combined with natural ventilation. Don’t underestimate the power of a cracked window and a breeze. It’s a low-tech solution with high-impact results. Better ventilation helps every part of your cleaning routine work better-from vacuuming to scrubbing-so your space stays fresher, longer. Cleaning Small Spaces? Ventilation Is Even More Important Small areas like bathrooms, laundry rooms, and closets can easily become hot spots for poor ventilation. These spaces often collect moisture during cleaning, especially when you’re using hot water or steam. Without airflow, that moisture sticks around and creates the perfect environment for mold and mildew. Proper ventilation helps prevent these issues before they even start. In many Toronto homes, these small rooms don’t always have windows, making ventilation a bit trickier. But there are still ways to boost airflow. Use a portable fan, turn on an exhaust fan, or keep the door open while you clean. Even just a few minutes of fresh air can help remove the steam and dry out damp surfaces faster. If you’re doing a deep clean, leave the door open afterward to let air circulate for a while. This helps reduce any chemical build-up from cleaning products and keeps humidity in check. Small spaces may be compact, but they’re just as important when it comes to better ventilation. A little fresh air goes a long way in keeping them fresh and safe. Ventilation and Cleaning: A Habit Worth Building Making better ventilation a habit doesn’t require fancy equipment or big changes. It just takes a little bit of planning before you start cleaning. Open windows, set up a fan, and let the air flow freely as you work. Over time, you’ll notice that your home not only looks cleaner-it smells and feels fresher, too. In Toronto, where homes face every type of weather, it’s easy to forget about airflow during the winter months. But even cracking a window for a few minutes makes a difference. Ventilation helps every step of your cleaning process work better, whether you’re wiping down surfaces, vacuuming rugs, or scrubbing the shower. It’s one of the simplest and most effective cleaning tips you can add to your routine. Fresh air improves indoor air quality, prevents build-up of moisture and chemicals, and helps your home stay clean longer. It’s a win across the board. If you want your space to feel truly clean-not just look the part-don’t skip this step. Better ventilation is your secret weapon for healthier, more effective cleaning. Want a Truly Fresh and Clean Home? Call Toronto Shine Cleaning Keeping up with deep cleaning and proper ventilation can

Why Ventilation Matters More Than You Think When Cleaning Read More »

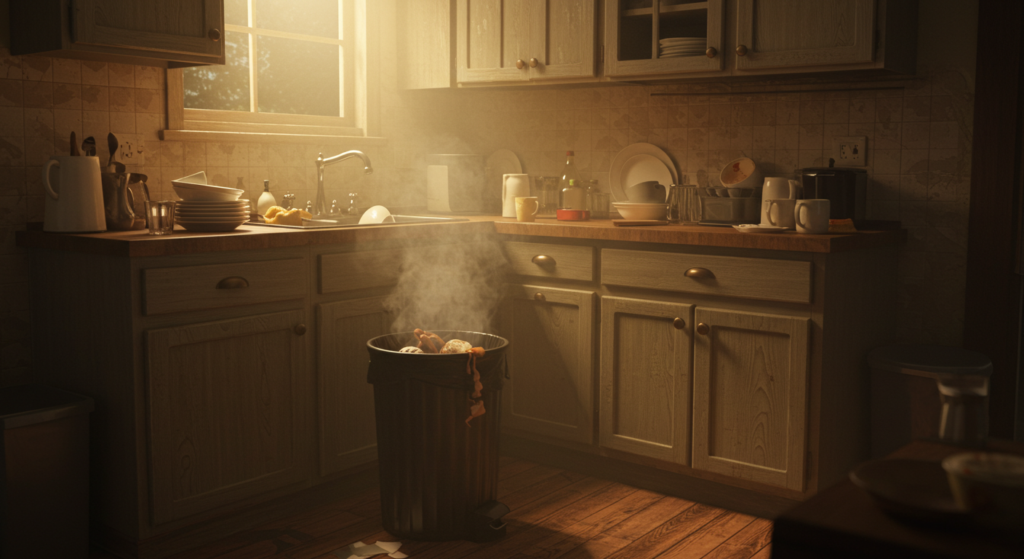
Desorganized kitchen smelling bad

6 Tricks to Get Rid of Kitchen Smells After Cooking

6 Tricks to Get Rid of Kitchen Smells After Cooking You finish a great meal, and a few hours later the room still carries the aroma of garlic, fish, or whatever was sizzling in the pan. Kitchen odors cling to the air, soft surfaces, and greasy spots, so even a tidy kitchen can smell stale. The solution is not heavy perfume sprays; it is a handful of simple habits that stop smells at their source. These six tricks to get rid of kitchen smells after cooking use ventilation, natural ingredients, and a little routine to keep your kitchen fresh from dinner until breakfast. Turn On the Ventilation Before the Pan Gets Hot Fresh air is your first defense against cooking odors. Switch on the range hood or an exhaust fan before you start heating oil, and keep it running while you cook. That simple habit pulls steam, grease vapor, and tiny food particles away from cabinets, curtains, and countertops before they have a chance to settle. No range hood? Open a couple of windows and set a box fan near one of them to push the air outdoors. A cross breeze does the same job, flushing cooking fumes out while you work. After the meal, leave the fan or windows open for another stretch of time so any remaining smells can escape. Health Canada’s guidance on indoor air contaminants explains why moving fresh air through the home matters so much. Simmer Lemon Peels and Cinnamon for a Natural Freshener When odors are already in the air, a simmering pot can replace them with something welcoming. Fill a saucepan with water, drop in a handful of lemon peels and a cinnamon stick or two, and keep it on a low simmer for 10-20 minutes. The natural citrus and spice oils help neutralize lingering smells rather than just covering them up, which makes this a favorite trick after fish, onions, or fried meals. You can switch up the scent by adding cloves or orange peels, and the whole process costs almost nothing and uses no synthetic fragrances. As a bonus, the room fills with a warm, spiced aroma, like a bakery at closing time, rather than the ghost of yesterday’s stir-fry. Empty Trash, Recycling, and Compost Bins the Same Night The garbage can is one of the biggest odor culprits in any kitchen. After cooking with meat, fish, or dairy, take food scraps, wrappers, and packaging straight out instead of letting them sit until morning. A bag does not need to look full to smell; trapped moisture and food residue start working quickly. Tie the bag and carry it outside after a big cooking session, and do not overlook compost pails and food-waste containers. Rinse them regularly and line them so smells do not soak into the plastic. Clean bins make a noticeably fresher kitchen. Wipe Down Surfaces and Refresh the Sink and Disposal Grease and splatter land on counters and stovetops the moment you cook, so take two minutes after the meal to wipe them with an all-purpose cleaner. Reach the spots that usually get skipped: corners, the area behind knobs, under burners, the backsplash, the microwave exterior, and cupboard handles. Odors stick to every surface, not just the air. Following the CDC’s advice on when and how to clean and disinfect your home keeps these daily wipe-downs effective. The sink deserves the same attention. Scrub the basin with dish soap, especially around the edges and the drain opening, then drop a few ice cubes and lemon peels into the disposal and run it for about 30 seconds. The ice knocks off food bits stuck to the blades while the citrus leaves a clean scent behind. Doing this a few times each week prevents drain smells from creeping back. Here is a quick guide to the most common kitchen odor sources and the fix that works for each: Odor Source Where It Lingers Best Quick Fix Fish, garlic, and onions Air and soft surfaces Ventilate early, then simmer lemon peels and cinnamon Fried food Grease on counters and stovetop Wipe hot surfaces right after cooking Meat and dairy scraps Trash and compost bins Tie the bag and take it out that evening Drain smells Sink and garbage disposal Run ice cubes and lemon peels through the disposal Absorb Lingering Odors With Baking Soda or Coffee Grounds For smells that survive the evening, set out an open bowl of baking soda or coffee grounds on the counter overnight. Coffee grounds contain nitrogen, which helps neutralize odor in the air, while baking soda traps odor molecules in its fine particles. By morning, most lingering kitchen smells are gone or dramatically weaker. You can also sprinkle a little baking soda into the garbage can or beside the sink for extra freshness. One caution: skip the popular baking soda and vinegar combo, since the fizz stops quickly and dry absorbents give better results for stubborn cooking smells. Keep this checklist handy for a consistently fresh kitchen: Switch on the range hood before the pan heats up. Open windows or use a box fan to create cross-ventilation. Simmer lemon peels and cinnamon for 10-20 minutes after strong meals. Take out trash, recycling, and compost waste the same evening. Wipe counters, stovetops, handles, and the backsplash after cooking. Leave a bowl of baking soda or coffee grounds out overnight. Refresh the disposal with ice cubes and lemon peel a few times a week. Frequently Asked Questions About Kitchen Smells Why does my kitchen still smell after I have cleaned it? Odors hide in places a quick wipe misses, such as the drain, the disposal, behind stove knobs, under burners, and inside the microwave. Clean those spots regularly and finish with an overnight absorbent. Does baking soda really absorb cooking smells? Yes. Baking soda traps odor molecules in its fine powder, which is why an open bowl on the counter works overnight. You can also sprinkle it in the trash can, but avoid mixing it with vinegar,

6 Tricks to Get Rid of Kitchen Smells After Cooking Read More »

Steam cleaning, a zoom focusing on the steam

Steam Cleaning 101: The Safe and Simple Way to Clean Any Surface

Steam Cleaning Is a Game-Changer for Safe and Chemical-Free Cleaning Steam cleaning is quickly becoming a go-to cleaning method for homeowners who want a safer, more eco-friendly way to clean. Unlike traditional cleaning methods that rely heavily on chemicals, steam cleaning only uses water. The high temperature of the steam is powerful enough to break down grease, grime, and bacteria without any harsh substances. This is especially great for homes with young children, pets, or anyone sensitive to strong cleaning products. Another reason steam cleaning is gaining popularity in Toronto is that it’s incredibly effective at disinfecting. The steam reaches temperatures high enough to kill most germs, bacteria, and even some viruses. This makes steam cleaning an excellent option for maintaining a hygienic home environment, especially during cold and flu season. It’s a cleaning method that’s not only thorough but also provides peace of mind. If you’re trying to reduce your household’s chemical use or just want a more efficient cleaning method, steam cleaning is a solid choice. It’s gentle on your surfaces but tough on dirt. You don’t have to worry about chemical residue left behind, which can be an issue with some store-bought cleaners. Plus, steam cleaning leaves your home feeling fresh and clean without any artificial scents. What Can You Clean with Steam? Almost Everything in Your Home One of the biggest advantages of steam cleaning is its versatility. Steam cleaning can be used on a wide variety of surfaces, making it ideal for whole-home cleaning. You can use it on tile floors, sealed hardwood, bathroom fixtures, kitchen counters, and even certain types of upholstery. Steam cleaning easily loosens stuck-on messes, lifts grime from grout lines, and refreshes fabrics without soaking them. Steam cleaning is especially handy in the kitchen and bathroom, two areas that tend to build up the most bacteria. It cuts through greasy messes around stoves, sanitizes countertops, and even refreshes garbage bins. In the bathroom, steam cleaning blasts away soap scum from shower doors, sanitizes sinks, and even cleans around the toilet without any scrubbing. It’s a powerful tool for deep cleaning those tough spots. Even appliances like ovens and microwaves can benefit from a good steam cleaning. It softens baked-on food, making it easier to wipe away. Plus, steam cleaning doesn’t scratch surfaces the way some abrasive cleaners can. Just be sure to check the manufacturer’s guidelines before using steam on delicate surfaces or electronics. When in doubt, a professional cleaning service like Toronto Shine Cleaning knows exactly what can and can’t be safely steam cleaned.     Steam Cleaning Floors: A Quick Way to Refresh and Sanitize Steam cleaning is an excellent option for floors, especially if you’re looking to sanitize without using harsh chemicals. It’s perfect for tile, vinyl, and sealed hardwood, where steam cleaning can lift dirt and grime while killing bacteria. Since it uses only water, there’s no sticky residue left behind, and your floors will dry much faster compared to mopping. That makes steam cleaning a great option for busy households. High-traffic areas can really benefit from regular steam cleaning. Entryways, kitchens, and hallways tend to collect dirt, grime, and germs, and steam cleaning can help keep these areas fresh and clean. If you’ve got kids crawling on the floors or pets lounging everywhere, steam cleaning is a hygienic way to keep those surfaces safe without resorting to heavy chemicals. It’s important to note that not all flooring is suitable for steam cleaning. Avoid using steam cleaning on unsealed wood or laminate, as the moisture can cause damage. If you’re unsure, test a small hidden area first. Or better yet, let the pros at Toronto Shine Cleaning handle it-we know exactly which floors can take the heat and which need a gentler approach. Why Steam Cleaning Beats Traditional Cleaning Methods Traditional cleaning methods often rely on harsh chemicals and a lot of elbow grease. Steam cleaning offers a faster, cleaner, and more effective alternative. It lifts and removes dirt rather than just spreading it around, which is sometimes the case with mops and wipes. The high temperature of the steam also helps kill bacteria and allergens, making your home not just cleaner but healthier with every steam cleaning session. People with allergies often notice a big improvement after switching to steam cleaning. That’s because steam cleaning penetrates soft surfaces and removes dust mites, pet dander, and other allergens from carpets and upholstery. Unlike sprays that can trigger allergies or leave lingering smells, steam cleaning sanitizes without leaving anything behind. Another benefit is how environmentally friendly steam cleaning is. There are no plastic bottles, no need for disposable wipes, and no harsh runoff going down the drain. All you need is water and a steam cleaner. Steam cleaning is a small switch that makes a big difference for your home and the planet. For those who want a green, efficient way to clean, steam cleaning is the way to go.     A Few Tips Before You Start Steam Cleaning Your Home Before you dive into steam cleaning, a little prep can go a long way. Start by vacuuming or sweeping the area. Steam cleaning is most effective on surfaces that are free of loose dirt and debris. This helps the steam focus on the deep grime and bacteria rather than just pushing crumbs around. It also protects your steam cleaner from getting clogged. Always test a small, hidden area first-especially if you’re steam cleaning upholstery, painted surfaces, or delicate flooring. While steam cleaning is safe for many materials, it can cause damage if the surface isn’t sealed or designed to handle moisture. When in doubt, check the manufacturer’s guidelines or call a professional who specializes in steam cleaning. Lastly, go slow and steady. Let the steam do the work. You don’t need to push hard or go over the same spot a dozen times. The heat will naturally loosen dirt and kill bacteria. And if you’re short on time or don’t want to risk damaging anything,

Steam Cleaning 101: The Safe and Simple Way to Clean Any Surface Read More »

Brown dog bed inside a house

5 Easy Steps to Clean Dog Beds Without Harsh Chemicals

If your dog’s bed smells like drool, dirt, and fur, it’s time for a serious refresh. But reaching for harsh cleaning products isn’t the safest choice for your pup. Dogs lie, chew, and nap on their beds for hours-so how you clean their bed matters. Let’s talk about simple ways to clean dog beds without harsh chemicals that still get results and keep your furry friend comfortable. We’ll walk through five easy and pet-safe ways to clean dog beds naturally. These tips use things you probably already have at home, and they work without leaving behind strong smells or toxic residue. They’re perfect for dog owners who want a cleaner home without compromising their dog’s health. By following these steps, you’ll be able to keep your dog’s bed fresh and odor-free while avoiding ingredients that could irritate their skin or paws. Here’s how to clean a dog bed the safe way. 1. Vacuum the Dog Bed Weekly A simple way to clean a dog bed is by vacuuming it regularly. Pet hair, dried dirt, and dander build up fast, and if you don’t stay on top of it, your dog bed becomes a smell trap. Use a handheld vacuum or a brush attachment to get into seams and corners, where gunk tends to hide. This helps prevent odor and keeps allergens to a minimum. Vacuuming once a week is a great routine to help clean dog beds without much effort. It won’t remove deep grime, but it takes care of the surface mess and keeps the bed looking tidy. Think of it as preventative maintenance. The cleaner you keep the surface, the easier it is to deep clean later on. Plus, vacuuming helps extend the life of the dog bed. Dirt and fur trapped in the fabric can wear it out faster. So a quick vacuum doesn’t just help you clean the dog bed-it helps preserve it, too. 2. Wash with Mild, Fragrance-Free Detergent The best way to clean a dog bed thoroughly is by washing it with a mild, fragrance-free detergent. Many standard laundry products are loaded with perfumes and chemicals that can irritate your dog’s skin. Look for something gentle-something you’d use for a baby or someone with allergies. If the Clean Dog Bed has a removable cover, take it off and throw it in the washer. If the whole bed is machine washable, even better. Wash on a warm cycle to kill bacteria and remove grime. This is a super effective way to clean dog beds while keeping your home pet-friendly. When drying, use low heat or hang the bed to air dry. High heat can damage the fabric or shrink the bed. Washing is one of the easiest and most effective methods to clean a dog bed without using anything harsh-and it’ll leave your pup’s space smelling fresh and feeling comfy. 3. Sprinkle Baking Soda to Deodorize Sometimes, you don’t need to do a full wash to clean a dog bed-you just need to get rid of that smell. Baking soda is a natural deodorizer that’s totally safe for pets. Sprinkle a good layer over the bed and let it sit for 30 minutes or more. It soaks up bad odors and freshens things up without any fragrance or chemicals. After it sits, just vacuum it up. You’ll notice the Clean Dog Bed smells cleaner and feels fresher. This trick is perfect between washes, especially if your dog tracks in dirt or has a habit of rolling in questionable things. It’s a fast, easy way to clean dog beds naturally. You can do this weekly or anytime the bed starts smelling off. Baking soda is cheap, safe, and works wonders-plus, it gives your vacuuming routine a little boost. It’s one of the best low-effort ways to clean a dog bed without needing detergent or special tools. 4. Spot Clean with Castile Soap and Water Some messes don’t need a full wash-just a spot clean. To clean a dog bed after a small spill or muddy paw print, mix a little warm water with unscented castile soap. It’s gentle, plant-based, and doesn’t leave behind any harsh residue. Perfect for sensitive pups. Dab the stained area with a cloth dipped in the soap solution. Gently blot-don’t rub-to avoid spreading the mess or pushing it deeper into the fabric. Once the stain is lifted, use a damp cloth to rinse the area, then pat dry with a clean towel. This is a simple way to clean dog beds without tossing the whole thing in the wash. Spot cleaning is great for quick touch-ups in between regular washes. You can stay on top of little accidents, and your dog’s bed stays cleaner overall. If you’re trying to clean a dog bed without harsh chemicals, castile soap is a safe, pet-friendly staple to keep on hand. 5. Use a Steam Cleaner for Deep Cleaning A steam cleaner is an excellent tool when you need to clean a dog bed deep down. The high temperature lifts dirt, kills germs, and refreshes fabric-all without any cleaning products. It’s perfect for Clean Dog Beds that can’t go in the washer or for homes with dogs who have allergies. Start by vacuuming the bed to remove loose dirt. Then, slowly pass the steam cleaner over the entire surface. The heat will sanitize and help remove embedded smells and bacteria. This is one of the most effective ways to clean dog beds without introducing any chemicals at all. Let the bed dry fully before letting your dog back on it. Steam cleaning is powerful, safe, and doesn’t require any special soaps. If you’re serious about finding ways to clean a dog bed naturally and effectively, this is one method worth trying regularly. Need Help Keeping Things Clean? Call Toronto Shine Cleaning It’s easier than you think to clean dog beds without harsh chemicals. Whether you’re vacuuming weekly, washing with gentle detergent, or using natural deodorizers like baking soda, your dog’s bed can stay fresh without

5 Easy Steps to Clean Dog Beds Without Harsh Chemicals Read More »

Plush animal toy yellow and blue for dogs

How to Clean Dog Toys Safely and Naturally

Dog toys get gross fast – and if you don’t clean dog toys regularly, they can collect bacteria, mold, and bad smells. Learning how to clean dog toys safely and naturally helps protect your pet’s health and keeps your home fresher. Most dogs chew, lick, and drag their toys everywhere, so they need frequent cleaning to stay safe. Using natural methods to clean dog toy collections avoids exposing your pup to harsh chemicals. You don’t need to overcomplicate things. The best way to clean dog toy surfaces is with hot water and a bit of gentle soap. Whether it’s a plush squeaky or a tough rubber chew, you can clean every type of dog toy using simple, safe ingredients. This guide breaks it down by toy type and helps you create a routine that’s easy to stick to – and your pup will thank you for it. Let’s go over how to clean dog toys step-by-step, using natural methods that work without leaving any harmful residue behind. Clean Plush Dog Toys in the Washing Machine If your dog loves soft, plush toys, you’ll want to know how to clean dog toy fabric safely. Most plush dog toys can be tossed right in the washing machine. Use a gentle cycle with warm water and skip the harsh detergents. Stick with a pet-safe laundry soap or something like Castile soap to avoid any irritating chemicals. For extra protection, place the toys in a laundry bag or pillowcase before washing. This helps prevent damage, especially if your dog’s favorite toy has a squeaker or delicate stitching. After the wash, always inspect the toy to make sure it hasn’t torn open. The last thing you want is your dog chewing on loose stuffing or a broken squeaker. Dry the toy thoroughly before giving it back to your pup. You can air-dry it or use a dryer on low heat. Drying is key – moisture inside a plush toy can cause mildew. By washing and drying regularly, you’ll clean dog toys effectively and help them last longer. Wash Rubber and Hard Dog Toys with Hot Water and Soap Rubber, nylon, and plastic dog toys get just as dirty – especially the ones your pup uses for fetch or food. To clean dog toy surfaces like these, soak them in hot water with a small amount of pet-safe dish soap. Let them sit for about 10 to 15 minutes to loosen drool, dirt, and any sticky food bits. After soaking, use a brush or sponge to scrub every groove and surface. This step is super important for puzzle toys or treat dispensers. You’d be surprised how much grime builds up. Rinse each toy well under warm water to remove all traces of soap before giving it back to your dog. That’s a simple and safe way to clean dog toys without using anything harmful. Let the toys dry completely before letting your dog play with them again. Air drying works best. Making this a weekly habit helps maintain your dog’s health and keeps your home from smelling like old chew toys. Regularly cleaning dog toys also cuts down on bacteria and allergens. Use a Toothbrush for Hard-to-Reach Spots Some toys have tricky grooves, holes, or raised textures that need more attention. If you want to really clean dog toys thoroughly, an old toothbrush is your best tool. Dip it in warm soapy water and use it to scrub those hard-to-reach areas where dirt and drool love to hide. This is perfect for toys with ridges or built-in treat holders. Focus on textured surfaces or spots where food might get stuck. Take your time and make sure to get into every corner. A quick toothbrush scrub can make a huge difference when you’re trying to completely clean dog toy surfaces without leaving behind germs. It’s also a good moment to check the toy for cracks or signs of wear. Once you’re done scrubbing, rinse the toy under warm water until it’s squeaky clean. Let it dry all the way before your dog gets it back. Doing this every week or so is a smart way to keep toys safe, clean, and fun for your pup. Skip the Bleach and Harsh Disinfectants If you’re tempted to use bleach or strong cleaners, don’t! These are not safe when you’re trying to clean dog toys – even a small leftover amount can make your dog sick. Your pet chews, licks, and carries their toys around, so anything left behind from cleaning goes straight into their system. Stick with gentle, pet-safe cleaners that do the job without the risks. Many common cleaners are packed with artificial scents and chemicals that are way too harsh for anything your dog touches. Even “green” cleaners aren’t always safe for pets. That’s why we always recommend warm water, mild soap, or Castile soap when you clean dog toys. It’s safer, cheaper, and gets the job done just as well. If you want an extra-deep clean, you can boil certain rubber toys – but make sure they’re heat-safe first. Check the packaging or manufacturer’s website. Boiling is a great chemical-free way to sanitize. Whatever method you choose, always think pet-safe first when you need to clean dog toy collections. Make Cleaning Dog Toys Part of Your Routine Just like washing dishes or vacuuming pet hair, taking time to clean dog toys should be part of your weekly routine. Toys collect bacteria, dirt, and even allergens. If your dog drags them around the house, those germs get everywhere. Regular cleaning not only helps your dog stay healthy but also keeps your home fresher. You don’t have to clean everything at once. Rotate toys – while some are being cleaned, others can stay in the toy bin. Focus on the ones your dog plays with the most. Weekly washing keeps the grime from building up too much. Once you get in the habit, it only takes a few minutes to clean dog toys every week. Clean toys

How to Clean Dog Toys Safely and Naturally Read More »