Cleaning Guide

Shovels and Snow Blowers testing who is better

Shovels or Snow Blowers: Which Is the Best for Snow Removal?

Winter in Toronto brings heavy snowfall, making snow removal an essential task for homeowners. Deciding Shovels or Snow Blowers depends on various factors, such as property size, snowfall frequency, and the level of physical effort required. Each method has its advantages and drawbacks, and understanding them will help you choose the best tool for keeping your driveway and walkways clear. A shovel is a traditional and budget-friendly method of clearing snow, but it requires physical effort and can be time-consuming. On the other hand, a snow blower is faster and more efficient but requires an upfront investment and regular maintenance. By evaluating your specific needs, you can determine which option is best suited for your winter snow removal routine. For homeowners who prefer a hassle-free solution, professional snow removal services in Toronto offer a reliable alternative. Hiring a team of experts can save time and effort while ensuring that your property remains clear and safe throughout the winter season. The Benefits and Drawbacks of Using a Snow Shovel A snow shovel is one of the most affordable and widely used tools for snow removal. It requires no electricity, fuel, or maintenance, making it a cost-effective and eco-friendly option. With a shovel, homeowners have greater control over where the snow is placed, which is particularly useful for clearing narrow walkways, stairs, and small driveways. For those who enjoy a winter workout, shoveling can also serve as a form of physical exercise. However, using a shovel can be physically demanding, especially after a heavy snowfall. Lifting and pushing snow can strain the back and shoulders, increasing the risk of injuries such as muscle pulls or joint pain. This is especially concerning for individuals with pre-existing health conditions or limited mobility. Additionally, the process of manually shoveling a large driveway or sidewalk can take a significant amount of time and energy, making it impractical for those with busy schedules. Another major drawback of shoveling is its inefficiency when dealing with wet, heavy snow. When snow accumulates quickly, it can become compacted and difficult to remove with a standard shovel. In extreme weather conditions, shoveling alone may not be sufficient to keep up with ongoing snowfall, requiring frequent and exhausting efforts throughout the day. Shovels or Snow Blowers and the Better Option A snow blower is a powerful and efficient tool designed to clear large areas quickly. Unlike a shovel, which requires manual effort, a snow blower uses a motorized system to lift and throw snow off driveways and sidewalks. This significantly reduces the strain on the body, making snow removal a faster and more manageable task. For homeowners with large properties, a snow blower can save hours of labor during the winter season. The efficiency of Shovels or Snow Blowers is particularly evident after a heavy snowfall. While shoveling may take multiple sessions to fully clear a driveway, a snow blower can complete the job in a fraction of the time. This is especially useful for individuals who need to clear their driveways quickly before heading to work or running errands. With different models available, from single-stage to three-stage snow blowers, homeowners can choose a machine that best suits their snowfall conditions. Despite its advantages, a snow blower does come with some downsides. The initial purchase cost is significantly higher than a shovel, and the machine requires regular maintenance, such as oil changes, fuel refills, and blade replacements. Additionally, storing a snow blower can be challenging, especially for homeowners with limited garage space. However, for those dealing with frequent heavy snowfalls in Toronto, the benefits of a snow blower often outweigh the costs. Understanding the Different Types of Snow Blowers Not all snow blowers are created equal, and choosing the right one depends on the amount and type of snowfall in your area. Single-stage snow blowers are ideal for light snowfall and work best on paved surfaces. They are lightweight, easy to maneuver, and suitable for small driveways and sidewalks. However, they may struggle with deep or heavy snow. Two-stage snow blowers are more powerful and designed for moderate to heavy snowfall. They feature an auger and impeller system, allowing them to handle deeper snow and clear larger driveways efficiently. Unlike single-stage models, they can work on both paved and gravel surfaces, making them a versatile choice for homeowners who experience frequent snowfall in Toronto. For the most extreme winter conditions, a three-stage snow blower provides the highest level of performance. These machines are built to handle deep, wet, and icy snow, making them perfect for large properties and areas with intense winter storms. While they are the most expensive option, they offer maximum efficiency and reduce the need for additional snow removal efforts. Dealing with Ice Buildup During Winter While Shovels or Snow Blowers are effective for clearing snow, ice buildup can still pose a safety hazard. Slippery driveways and sidewalks increase the risk of falls and injuries, making proper ice removal techniques essential for winter maintenance. Using the right de-icing methods can help keep surfaces clear and prevent accidents. One of the most effective ways to combat ice is by using calcium chloride or magnesium chloride-based ice melt. These products work by breaking down ice and preventing refreezing, making it easier to remove with Shovels or Snow Blowers. Unlike rock salt, which can damage concrete and harm plants, calcium chloride is a safer alternative for both your property and the environment. Another method for improving traction on icy surfaces is by spreading sand or kitty litter. These materials do not melt the ice but provide a rough surface that helps prevent slips and falls. Regularly clearing snow before it has a chance to compact and freeze is also an effective way to minimize ice formation. However, for those who want a more thorough approach, hiring a professional snow and ice removal service in Toronto is the best way to ensure safety throughout the winter. Choosing the Best Snow Removal Option Selecting between a Shovels or Snow Blowers depends on your property size, snowfall frequency,

Shovels or Snow Blowers: Which Is the Best for Snow Removal? Read More »
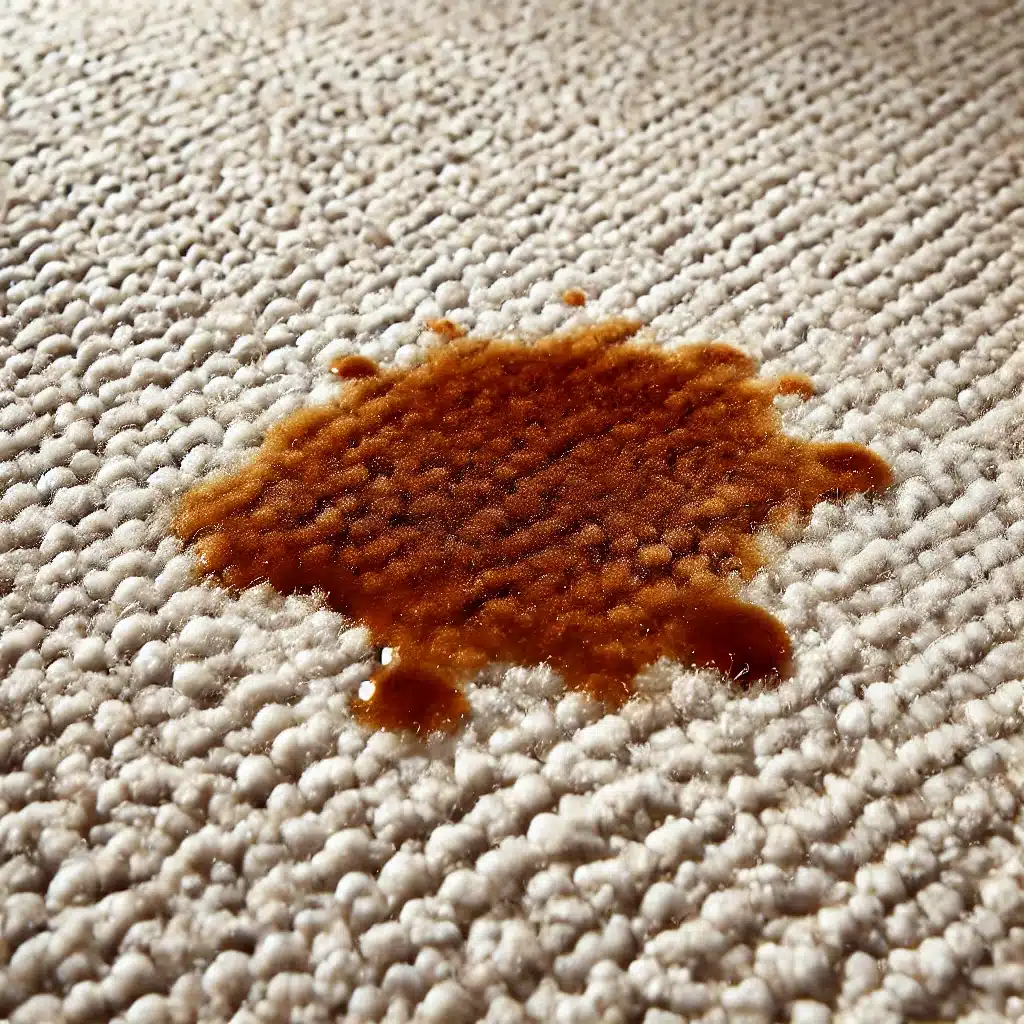
Brown stain on a carpet

7 Methods to Remove Stains from Carpet and Upholstery

Why You Should Remove Stains from Carpet Right Away Carpets and upholstery take a daily beating from coffee spills, red wine, pet accidents, ink marks, and greasy food splatters. The longer a stain sits, the deeper it sets into the fibres and the harder it becomes to remove. Acting fast with the right technique protects the fabric and keeps your home looking fresh. These seven proven methods cover the most common carpet stains, and knowing how to remove stains from carpet and upholstery properly can extend the life of your flooring and furniture. Seven Methods to Remove Stains from Carpet and Upholstery Match the method to the stain, test any solution on a hidden area first, and blot instead of rubbing for the best results. 1. Blot, Do Not Rub As soon as a spill happens, blot the stain with a clean microfiber cloth or paper towel. Blotting with light pressure absorbs the liquid instead of pushing it deeper into the fibres. Work from the outside of the stain inward so it does not spread. Avoid using excessive water, because trapped moisture can lead to mold and mildew growth in carpet and upholstery, as the CDC explains about mold in the home. Let the area dry completely before walking on it. 2. Use a Mild Dish Soap Solution Mix a few drops of mild dish soap with warm water to create a gentle cleaning solution for juice, coffee, and greasy spills. Dip a clean cloth into the mixture and dab the stain in small sections instead of scrubbing, which can damage the fibres. Keep blotting with a fresh section of the cloth until the stain lifts, then rinse the area with a damp cloth to remove soap residue and let it air dry completely. 3. Try Hydrogen Peroxide on Stubborn Stains Hydrogen peroxide is highly effective on tough organic stains such as blood and red wine, because its oxidizing action breaks down stain particles. Apply a small amount directly to the stain and let it sit for 10-15 minutes; you will see it fizz as it works. Blot the area with a clean cloth, repeating if needed. Always patch test on a hidden spot first, since peroxide can lighten some fabrics. Rinse with water and dry thoroughly once the stain is gone. 4. Sprinkle Baking Soda for Odors and Stains Baking soda is a natural deodorizer that works particularly well on pet stains and food spills. Sprinkle a generous layer over the affected area and let it sit for at least 15 minutes to absorb moisture and neutralize odors; for deeper stains, leave it for a few hours. Vacuum the baking soda, inspect the spot, and repeat the process if the stain or smell remains. 5. Lift Ink Stains with Rubbing Alcohol Ink from pens and markers is one of the hardest stains to remove, but rubbing alcohol breaks down the ink pigments. Dampen a cotton ball or clean cloth with rubbing alcohol and blot the stained area gently. Rubbing can spread the ink, so keep blotting until the colour lifts. Rinse with a damp cloth, then let the carpet or upholstery dry completely before use. 6. Absorb Grease with Cornstarch Greasy stains from food and cooking oil respond well to cornstarch, which pulls the grease out of the fibres. Sprinkle it generously over the stain and let it sit for 15-20 minutes, then vacuum thoroughly. If any residue remains, dab the area with a mild dish soap and warm water mixture and blot until the stain disappears. Let the area air dry completely afterwards. 7. Use a Commercial Carpet and Upholstery Cleaner For deep stains or large areas, a commercial carpet and upholstery cleaner formulated for your fabric type can be highly effective. Choose a product designed for your specific carpet or upholstery, follow the manufacturer’s instructions, and let it sit for the recommended time before blotting or scrubbing. Rinse the area properly to remove leftover solution and allow it to dry fully to prevent moisture-related damage. Which Method Fits Which Stain Red wine and blood: hydrogen peroxide, blotted gently after a patch test. Coffee and juice: mild dish soap solution dabbed in small sections. Pet accidents: baking soda first, then a mild cleaning solution if needed. Ink and marker: rubbing alcohol blotted with a cotton ball. Grease and cooking oil: cornstarch, vacuumed after 15-20 minutes. Unknown or set-in stains: commercial cleaner matched to the fabric. Stain Type Best Method Key Tip Red wine, blood Hydrogen peroxide Patch test a hidden area first Coffee, juice Mild dish soap solution Dab, never scrub Pet stains Baking soda Let it sit for 15 minutes or more Ink, marker Rubbing alcohol Blot from the outside inward Grease, oil Cornstarch Vacuum after 15-20 minutes Frequently Asked Questions About Carpet Stain Removal Can I remove old, set-in carpet stains? Yes, but they take longer. Start with a commercial cleaner matched to your carpet type, let it sit for the recommended time, and repeat the treatment. Stubborn residue may respond to hydrogen peroxide or a baking soda paste, always after a patch test. If the stain still will not lift, professional deep cleaning is the most reliable option. Why should I blot instead of rubbing a stain? Rubbing pushes the stain deeper into the carpet fibres and can damage the pile, making the mark larger and harder to remove. Blotting with light pressure lifts the liquid out of the carpet. Work from the outside of the stain toward the centre so it does not spread, and use a fresh section of cloth as you go. Is baking soda safe for all carpets? Baking soda is gentle and safe for most carpet and upholstery fibres, which makes it a good first choice for pet accidents and food spills. Vacuum it up completely after it has done its work. As with any cleaning product, test a small, hidden area first to confirm there is no discoloration before treating the visible stain. When should I call a

7 Methods to Remove Stains from Carpet and Upholstery Read More »

Person preparing a move out cleaning

5 Reasons Why Move-In & Move-Out Cleaning is a Must

Why Move-In and Move-Out Cleaning Is a Must for a Smooth Move Skipping move-in and move-out cleaning can lead to unwanted stress, lost security deposits, and even health risks. Whether you are buying, selling, or renting, a professional reset of an empty home is what separates a chaotic move from a smooth transition. Here are five reasons the deep clean before and after a move is not optional. Reason 1: A Fresh, Hygienic Start in Your New Home Moving into a new place should feel refreshing, but leftover dirt, dust, and bacteria from previous occupants can create an unsanitary environment. A thorough move-in clean eliminates allergens, germs, and unpleasant odors so you start in a genuinely spotless home. Neglecting it can trigger respiratory issues and allergic reactions from accumulated dust and pet dander, and even if the previous residents cleaned superficially, deep sanitization is still necessary for peace of mind. Professional cleaners use specialized tools and products to target hidden bacteria and mold. There is a practical bonus, too: cleaning an empty house is significantly easier than maneuvering around furniture and boxes, so tackling it before unpacking saves time and effort in the long run. Reason 2: Increase Your Chances of a Full Security Deposit For renters, leaving a home in pristine condition is crucial to getting the deposit back. Many landlords require professional move-out cleaning to ensure the property is rental-ready for the next tenant, and they conduct detailed inspections before releasing funds. Stains on carpets, grease buildup in kitchens, and soap scum in bathrooms all invite deductions and disputes. A thorough move-out clean, covering carpet care, kitchen scrubbing, and bathroom sanitizing, minimizes that financial risk. There is a longer game as well: leaving a clean space enhances your rental history, future landlords often ask for references, and a positive review from your previous landlord improves your chances of securing the next rental. Reason 3: Save Time and Reduce Moving Stress Moving is already a stressful process of packing, organizing, and setting up, and handling a deep clean on top of it is overwhelming. Cleaning a home thoroughly takes hours, from scrubbing floors to washing windows and dusting every surface, and adding that burden to a packed schedule leads to exhaustion and delays. Professional cleaners handle the workload efficiently, so every corner goes spotless without costing you a weekend. Outsourcing also frees you for the other critical tasks of moving week: Setting up and transferring utilities. Coordinating with movers and scheduling truck access. Addressing mail forwarding and change-of-address steps. Unpacking and settling in without a chore list hanging over you. A clean home eases the transition and provides a real sense of relief at both ends of the move. Reason 4: Enhance Property Value and Appeal For homeowners selling, a deep move-out clean makes a lasting impression on potential buyers. Sparkling floors, sanitized bathrooms, and dust-free surfaces create an inviting atmosphere, while lingering odors, dusty corners, and grimy kitchens deter buyers and slow the sale. First impressions are crucial in real estate, and buyers are more likely to place competitive offers on a home that appears move-in ready. A well-cleaned property also showcases responsible homeownership: buyers appreciate a home maintained with care, which increases their confidence in the purchase and speeds up the selling process. Reason 5: Eliminate Hidden Dirt, Germs, and Stale Air The spots routine cleaning misses Move-in and move-out cleaning reaches what daily habits overlook: grime behind appliances, residue inside cabinets, and dirt deep within carpets. Hidden buildup accumulates over years and can invite pest infestations and mold growth, especially in kitchens, under sinks, and around air vents where dirt and moisture collect unnoticed. Addressing those neglected areas prevents long-term damage and keeps the space safer for families with children or allergy sufferers, since dust mites, pet dander, and bacteria thrive in unclean environments and can be targeted with the right approach to mold cleanup and health. The air you breathe Indoor air quality directly affects health and well-being. Dust, pet dander, mold spores, and other airborne particles accumulate over time, and Health Canada’s guide to indoor air contaminants and health covers the respiratory and allergy effects of that buildup, including volatile organic compounds (VOCs) that linger from harsh cleaning products. Carpets, curtains, and upholstery trap those particles, so a comprehensive move clean with deep carpet cleaning and dusting of hard-to-reach areas significantly improves the air, which matters most for people with asthma or allergies. Proper ventilation during the clean and eco-friendly product choices keep the result even healthier. Move Clean vs. Regular Housekeeping Task Regular cleaning Move-in or move-out clean Cabinets and drawers Exterior wipe-down Emptied, interior degreased and sanitized Appliances Surface polish Ovens, fridges, and microwaves cleaned inside and out Floors and carpets Quick sweep and vacuum Deep carpet cleaning, edges, and under furniture Why it happens Maintenance of a lived-in home Deposit protection, sale appeal, or a fresh start Move-In and Move-Out Cleaning FAQs Is move-out cleaning really required by landlords? Many leases require the property returned in rental-ready condition, and landlords run detailed inspections before returning deposits. Even where professional cleaning is not explicitly demanded, a documented thorough clean minimizes deduction risk and protects your rental reputation. What is the best time to schedule each clean? Book the move-out clean for the final days of your tenancy, once the home is empty, and the move-in clean before you unpack, so crews can work wall to wall, floor to ceiling, around nothing but the space itself. Does a move-in clean help with allergies? Yes. Removing the previous occupants’ dust, pet dander, mold spores, and bacteria before you settle in reduces common indoor triggers, and a healthier home is a genuine, noticeable perk of the service. How much does move-in and move-out cleaning cost in Toronto? Toronto Shine Cleaning charges flat rates before HST, starting at $242.63 for a studio or one-bedroom, with the full list on our pricing page. Larger homes and add-on services scale the quote from that base. Can one

5 Reasons Why Move-In & Move-Out Cleaning is a Must Read More »

Automatic cleaning utencils for time saving cleaning

6 Easy Time Saving Cleaning Hacks You Need to Try

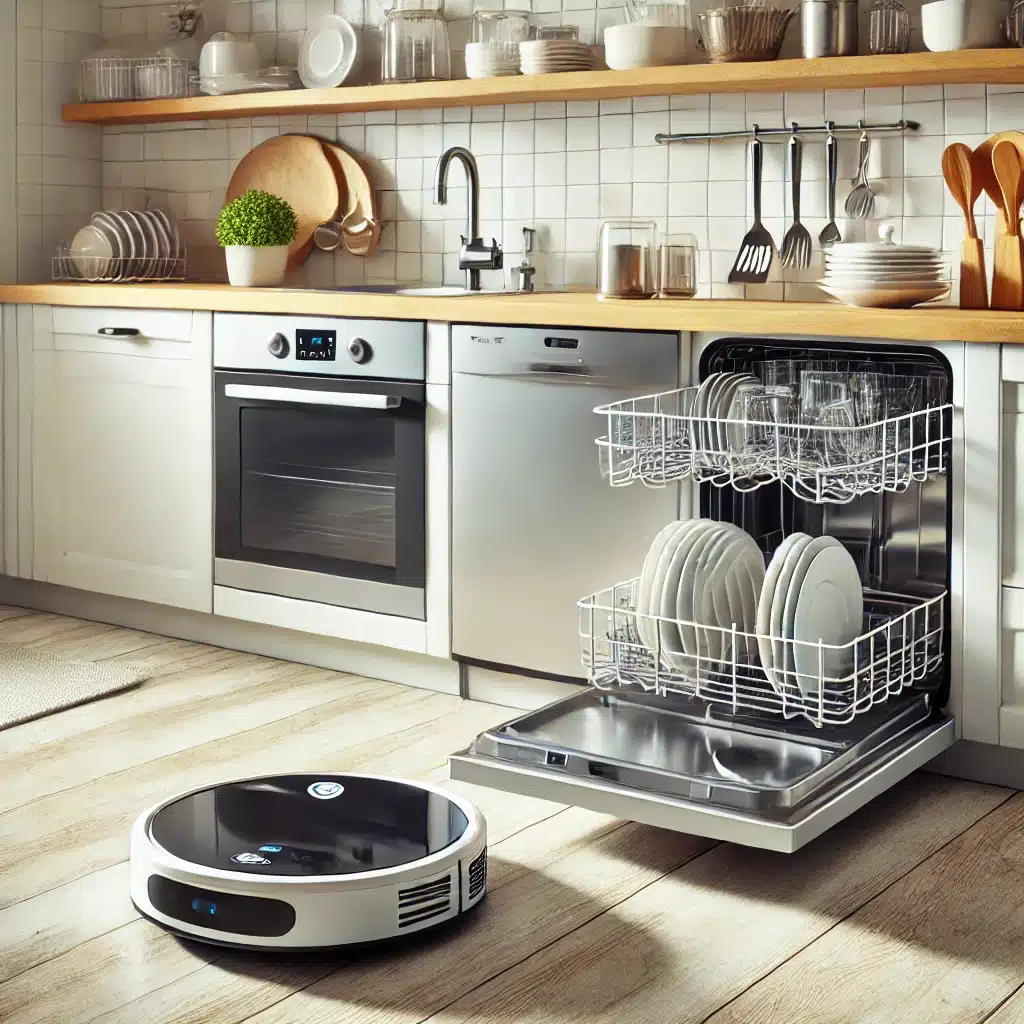
Keeping your home clean doesn’t have to be a time-consuming task. With these smart time saving cleaning hacks, you can maintain a spotless home while reducing effort. These quick and effective tricks will make time saving cleaning easier, allowing you to enjoy a tidy space without dedicating hours to chores. Try them today and experience the benefits of a well-maintained home with minimal effort. 1. Clean as You Go Avoid spending hours cleaning by tidying up throughout the day. Wipe down counters after cooking, put things away immediately, and do small time saving cleaning tasks instead of letting messes build up. Taking a few seconds to wipe up spills and crumbs prevents dirt from accumulating, making deep cleaning less frequent and much easier. Another great way to clean as you go is to use multitasking techniques. While waiting for food to cook or water to boil, quickly wipe down kitchen surfaces, organize utensils, or take care of small time saving cleaning tasks. Using these idle moments effectively helps maintain a cleaner space effortlessly. Developing a habit of putting things away immediately after use also contributes to a more organized and clutter-free environment. Whether it’s hanging up coats, putting dishes directly into the dishwasher, or folding laundry right away, these simple steps prevent messes from piling up.     2. Set a Timer for Speed Cleaning Set a 10–15 minute timer and challenge yourself to clean as much as possible. Focusing on one room at a time prevents overwhelm and helps maintain a consistently tidy home. By setting a short time limit, time saving cleaning feels more manageable, making it easier to stay motivated. Breaking down cleaning tasks into small, timed sessions prevents procrastination and ensures no single task feels too daunting. You can even make it a fun challenge by racing against the clock or involving family members to see who can tidy up the fastest. This method is especially helpful for daily maintenance. Instead of waiting for clutter to accumulate, dedicate a few minutes each day to targeted time saving cleaning. Over time, this habit keeps your home looking fresh without requiring hours of deep cleaning. 3. Keep Cleaning Supplies in Every Room Store essential time saving cleaning products where you use them most. Having a small set of supplies in the kitchen, bathroom, and living room saves time and encourages quick cleanups. Instead of searching for cleaning sprays or cloths, having them within reach ensures you can tackle messes immediately. For example, keeping disinfectant wipes under the bathroom sink allows you to quickly wipe down counters and sinks every day, preventing grime buildup. Similarly, storing dusting tools in the living room makes it easy to freshen up furniture and shelves in seconds. Consider using caddies or organizers for easy access. A well-organized time saving cleaning station in each area of your home eliminates wasted time and encourages consistent upkeep. 4. Steam Clean Your Microwave in Minutes Place a bowl of water with lemon slices in the microwave and heat for three minutes. The steam loosens stuck-on food, making it easy to wipe clean with a cloth. This method eliminates the need for scrubbing, saving you time and effort. Using natural ingredients like lemon not only breaks down grease and stains but also leaves a fresh scent. If you don’t have lemons, white vinegar works just as effectively. Once the microwave’s interior is steamed, simply wipe down the walls, removing all residues effortlessly. To maintain a clean microwave, make it a habit to cover food before heating to prevent splatters. Regularly using this steam-cleaning method keeps your microwave fresh and ready to use without any buildup.     5. Keep a Shoe-Free Home Encourage family members and guests to remove their shoes at the door. This reduces dirt and dust buildup, keeping your floors cleaner for longer and cutting down on mopping time. Shoes track in dirt, bacteria, and allergens, making your home harder to maintain. Placing a designated shoe rack or mat near the entrance makes it convenient for everyone to leave their shoes at the door. Offering indoor slippers can also encourage compliance while keeping feet comfortable. By enforcing this simple rule, you’ll notice a significant reduction in dust and debris on your floors. This small change results in cleaner carpets, less frequent vacuuming, and a healthier indoor environment. 6. Use a Dishwasher for More Than Just Dishes Your dishwasher isn’t just for plates and utensils-it can clean a variety of household items. Throw in sponges, plastic toys, oven knobs, and even certain types of shoes for a deep clean without extra effort. It saves time and ensures a thorough time saving cleaning, making household chores easier and more efficient. Many small household items, like toothbrush holders, soap dishes, and even pet bowls, can benefit from a cycle in the dishwasher. Cleaning these objects regularly helps eliminate germs and bacteria that accumulate over time. The heat and steam provide a deep time saving cleaning effect that hand washing might not achieve. Before placing any item in the dishwasher, always check the manufacturer’s recommendations to ensure it is dishwasher-safe. Avoid putting delicate or electronic components in the dishwasher, as high temperatures and water pressure may cause damage. By incorporating this hack into your time saving cleaning routine, you can maintain a cleaner home with less effort.     Time Saving Cleaning With Toronto Shine Cleaning! These time saving cleaning hacks will help you maintain a tidy home without spending hours scrubbing. By incorporating these practical strategies, you can enjoy a cleaner, more organized space with minimal effort! If you’re looking for a hassle-free way to keep your home spotless, consider hiring Toronto Shine Cleaning. Their professional time saving cleaning services ensure every corner of your home is deeply cleaned and maintained, saving you even more time and effort. With expert cleaners and customized service plans, Toronto Shine Cleaning makes it easy to enjoy a pristine home without lifting a finger. Contact Toronto Shine Cleaning today to schedule

6 Easy Time Saving Cleaning Hacks You Need to Try Read More »

Cleaning wooden furniture with microfiber cloth

5 Best Ways to Clean Wooden Furniture and Keep It Looking New

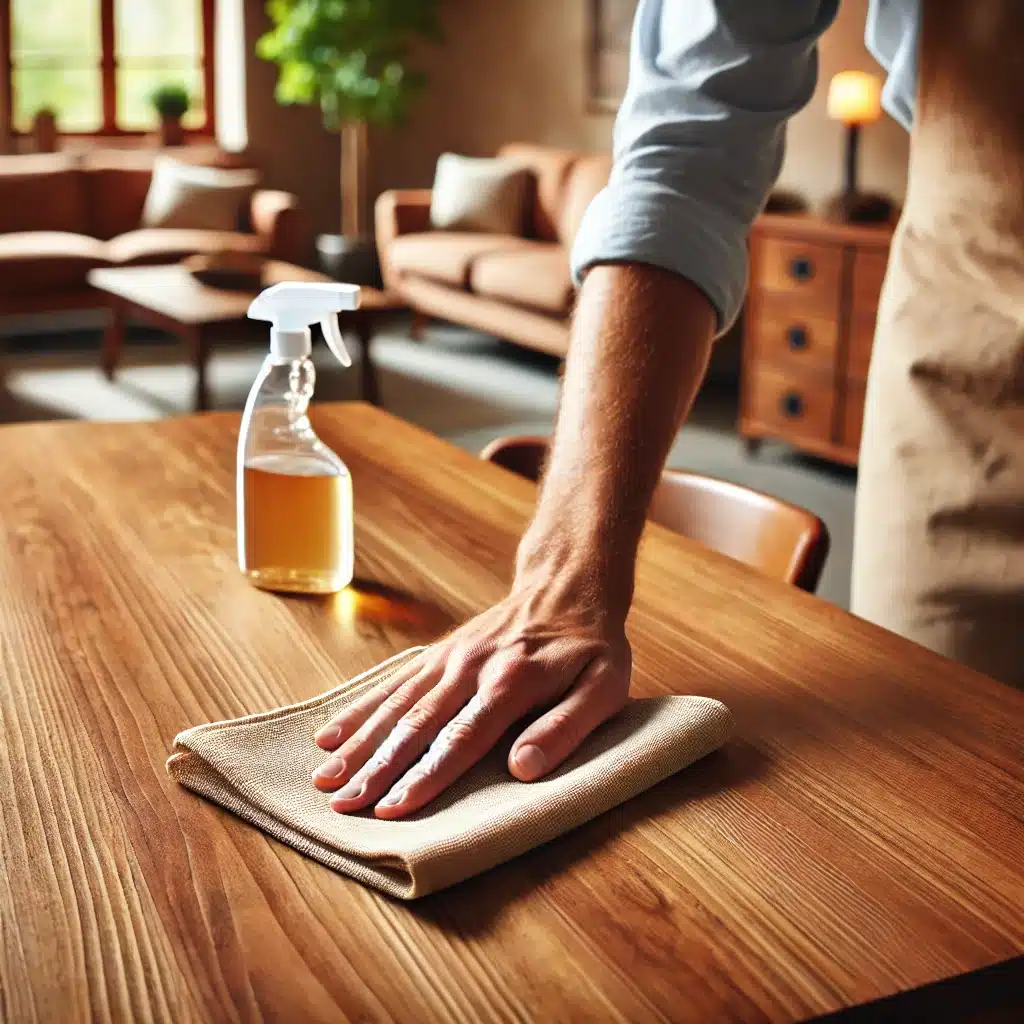
5 Best Ways to Clean Wooden Furniture and Keep It Looking New Wooden furniture adds warmth to any room, but it only keeps its glow with the right care. The wrong cleaner can strip the finish, and the wrong cloth can leave fine scratches that dull the surface over time. These five ways to clean wooden furniture protect your investment: dusting with the right tools, washing gently, polishing with natural oils, guarding against scratches and spills, and controlling the environment around each piece. 1. Dust Weekly With a Microfiber Cloth Dust is the most common enemy of wood furniture. Left alone it settles into a film that mixes with humidity and turns sticky, and wiping it with paper towels or rough fabrics leaves micro-scratches that show up in the light. Use a soft microfiber cloth and move in the direction of the wood grain, which lifts dust without harming the finish. Dust each piece at least once a week, including table legs, cabinet tops, and chair rungs. For carved details and tight corners, a soft brush or clean paintbrush reaches crevices a cloth cannot. A vacuum with a brush attachment also keeps dust from collecting under and behind larger furniture. 2. Wash With a Gentle Wood-Safe Cleaner When dust alone is not enough, clean wooden furniture with mild dish soap mixed into warm water. Dip a soft cloth into the suds, wring it out well, and wipe the surface; never soak the wood or let water pool on it, since excess moisture causes warping, clouding, and mould. Follow immediately with a dry cloth to keep the finish polished. Skip harsh formulas: ammonia, bleach, and silicone-based polishes damage wood finishes over time. If you buy a commercial wood cleaner, choose one made for finished furniture and read the label first; Health Canada’s household chemical safety guidance covers using cleaning products safely around your home and family. 3. Polish With Natural Oils Oiling restores the rich tone that daily wear fades. Mineral oil and lemon oil penetrate the surface, nourishing the wood and guarding against dryness and cracking, while wax-based polishes sit on top and attract buildup. Every few months, dab a little oil on a soft cloth, rub it in with the grain, let it sit briefly, then buff with a clean dry cloth. Never use vegetable or olive oil from the kitchen: they turn rancid, darken the wood, and attract dust. Stick to oils and polishes designed for furniture, and test any new product on an unseen spot first to confirm the colour and finish react well. 4. Protect Against Scratches and Spills Prevention keeps furniture looking new longer. Set coasters under glasses, placemats under plates, and felt pads under vases, lamps, and decorative objects so nothing scratches the surface. Wipe spills the moment they happen with a dry cloth, before liquid has time to reach the wood. For light scratches, rub a shelled walnut over the mark: the nut’s natural oils darken the scratch and help it blend in. Deeper marks respond to furniture wax or wood repair markers in a matching shade, and a small touch-up kit is worth keeping on hand for accidents. Water rings usually lift with a light re-polish once the area is fully dry. 5. Control Sunlight and Humidity Around Wood Environment shapes how wood ages. Direct sun fades finishes and dries the surface, so keep pieces away from south-facing windows or filter the light with curtains and blinds. Where that is not possible, UV-protective sprays add a layer of defence for your furniture. Humidity swings are just as damaging: too much moisture makes wood swell and warp, while very dry air leaves it brittle and prone to cracks. Keeping indoor humidity around 40-50 percent protects both wood and comfort; Health Canada’s indoor air contaminants information explains how moisture levels affect your home. Use a humidifier during dry heating months and a dehumidifier in humid weather, and reapply wood conditioner seasonally so pieces adjust as temperatures change. Build a Simple Wood Furniture Care Kit Microfiber cloths for dusting and buffing Mild dish soap and a dedicated spray bottle Mineral or lemon oil for seasonal polishing Coasters, placemats, and felt pads for protection Wood repair markers and wax for scratch touch-ups Wooden Furniture Care at a Glance Task Tool or product How often Dusting Soft microfiber cloth, moving with the grain Weekly Cleaning Mild dish soap and warm water, well wrung out Monthly or as needed Polishing Mineral or lemon oil, buff with a dry cloth Every 2-3 months Scratch repair Walnut, furniture wax, or matching repair marker As needed Environment check Humidifier or dehumidifier, curtains and blinds Seasonal Frequently Asked Questions About Cleaning Wooden Furniture Can I use vinegar to clean wooden furniture? Vinegar is acidic and can strip or cloud finishes over time, so warm water with mild dish soap is the safer everyday choice for finished wood. How do I remove water rings from wood? Once the area is completely dry, buff it gently with a soft cloth and a little wood polish; stubborn rings may need a light re-oiling or professional refinishing. What should I never use on wood furniture? Ammonia, bleach, silicone polishes, abrasive pads, and soaking amounts of water all damage finishes, while cooking oils turn rancid and attract dust. How often should wooden furniture be polished? Every two to three months with mineral or lemon oil is plenty for most homes; too-frequent polishing simply adds buildup that dulls the surface. Does sunlight really damage wood furniture? Yes: prolonged direct sun fades the finish and dries the wood, causing cracks, so position pieces away from windows or use curtains and UV-protective treatments. Wood furniture rewards consistent, gentle care, and it stays beautiful for decades when the routine is right. Toronto Shine Cleaning can handle the rest of your home while you protect your favourite pieces: our regular cleaning visits keep dust levels down, deep cleaning refreshes the whole house, and our pricing page makes booking simple. Call (647)

5 Best Ways to Clean Wooden Furniture and Keep It Looking New Read More »

Cleaning a keyboard with microfiber cloth

How to Safely Clean Plastic Electronics Without Causing Damage: 5 Expert Tips

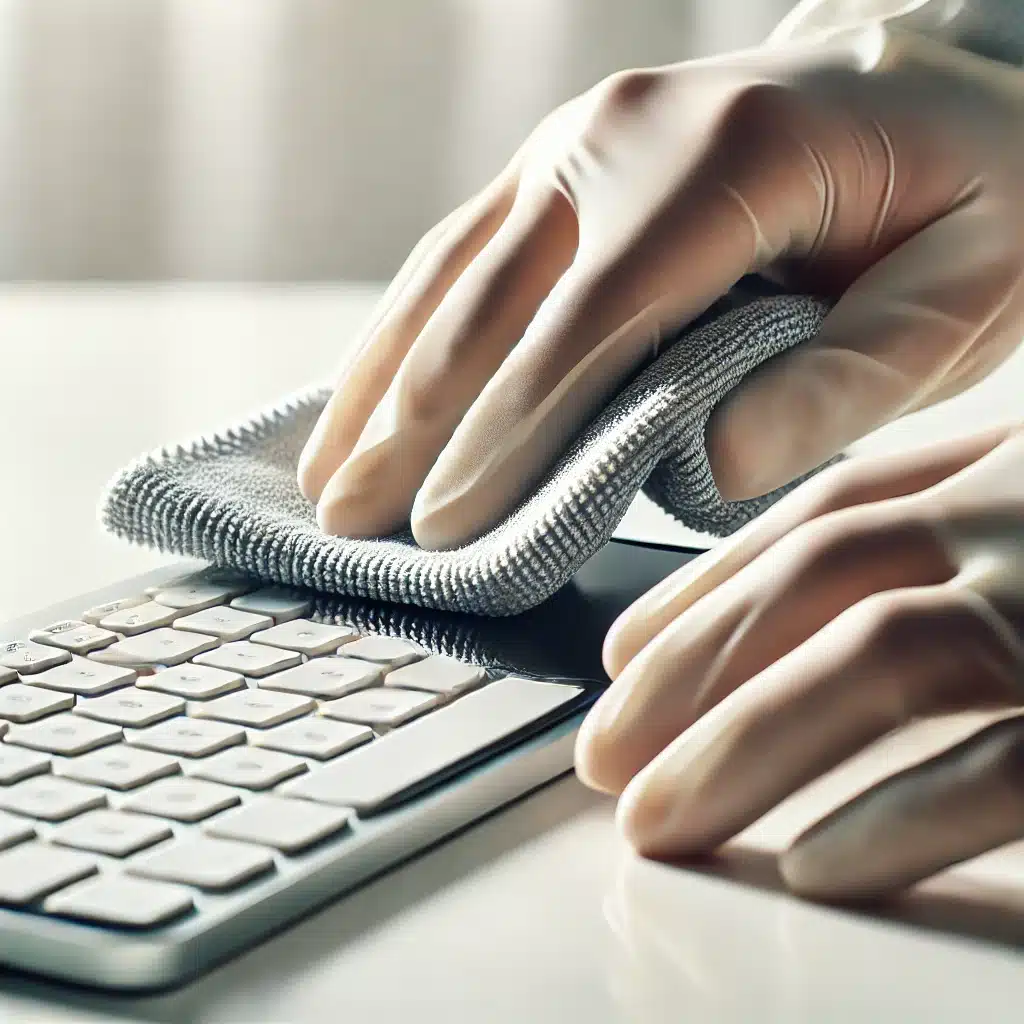
How to Safely Clean Plastic Electronics Without Causing Damage Plastic electronics, from phone cases and keyboards to monitors, routers, and game consoles, collect dust, fingerprints, and grime no matter how clean the room is. The danger is cleaning them wrong: soaking wet cloths, harsh solvents, and abrasive scrubbing can ruin casings, streak screens, or push liquid into vents. These five expert tips show you how to clean plastic electronics safely so your devices stay functional and looking new. 1. Dust Regularly With a Microfiber Cloth A microfiber cloth is the single best tool for routine cleaning. Its fine fibres trap dust and lift fingerprints without scratching plastic or leaving lint behind, unlike paper towels and rough fabrics. Wipe casings, keyboards, and screens with gentle circular motions once a week, and start each session with a clean cloth so you are not simply moving dust back onto the device. For smudges left by skin oils, lightly dampen the cloth with water or an electronics-safe cleaner and wipe again. Keep the cloth barely damp: enough moisture to break down oils, never enough to drip into seams, ports, or buttons. 2. Use Isopropyl Alcohol for Stubborn Stains When sticky residues, ink marks, or built-up grime will not lift with a damp cloth, isopropyl alcohol at 70 percent concentration or higher dissolves them safely. Dampen a microfiber cloth with a small amount and wipe the affected area gently; never pour or spray alcohol directly onto a device, where it can pool in openings and reach internal components. Wipe in light circular motions, let the surface air dry for a few minutes, and repeat with a slightly firmer touch if a stain lingers. Avoid heavy pressure, which can leave fine scratches in the plastic. The CDC’s home cleaning guidance covers everyday care for electronics such as phones, keyboards, and remote controls. 3. Blow Out Ports and Vents With Compressed Air Dust collects where cloths cannot reach: USB ports, headphone jacks, cooling fans, and vent grilles. Compressed air clears these areas without any contact. Hold the canister upright, keep the nozzle a few inches from the device, and fire short bursts; tilting or shaking the can releases liquid propellant that can condense inside sensitive parts. Use compressed air monthly on desktop towers, consoles, keyboards, and anything with a cooling fan. Keeping vents clear helps devices run cooler and last longer, since dust buildup forces fans to work harder and can shorten the life of internal components. 4. Skip Harsh Chemicals and Abrasive Cleaners Ammonia, bleach, and acetone attack plastic: they cause yellowing, cracking, and warping over time. Avoid window cleaners, multipurpose sprays with harsh solvents, and any product not labelled safe for electronics. Stick to isopropyl alcohol, electronics-safe wipes, and barely damp cloths. Abrasive sponges and scrub pads scratch plastic casings permanently, so choose microfiber or soft cotton only. Read labels before use and keep cleaning products out of children’s reach; Health Canada’s household chemical safety guidance explains how to handle and store them safely. 5. Power Down and Unplug Before Cleaning Always turn the device off and unplug it before cleaning. That simple step removes the risk of electrical shock, short circuits, and accidental button presses while you wipe. Remove batteries, cables, and other detachable parts so you can clean connectors and reach hidden dust without liquid touching live contacts. Let everything dry fully before reassembling and powering back on. Waiting those extra minutes protects internal circuits from stray moisture, which is the difference between a clean device and a damaged one. Your Electronics-Safe Cleaning Kit Microfiber cloths, kept clean and lint free Isopropyl alcohol at 70 percent or higher Compressed air canister for ports and vents Electronics-safe wipes for quick touch-ups Soft cotton pads for delicate surfaces Safe Cleaning Methods for Plastic Electronics Task Tool Key rule Dusting Microfiber cloth Wipe with light circular motions Fingerprints and smudges Barely damp cloth or electronics wipe Never let liquid drip into openings Sticky stains 70 percent isopropyl alcohol on a cloth Apply to the cloth, never the device Ports and vents Compressed air Keep canister upright, use short bursts Heavy grime Mild soap and water on a damp cloth Dry the surface right after wiping Frequently Asked Questions About Cleaning Plastic Electronics Can I use rubbing alcohol on plastic electronics? Yes, isopropyl alcohol at 70 percent or higher is safe for most plastic casings when applied to a cloth first, and it evaporates quickly without leaving residue. Why can I not spray cleaner directly onto my devices? Spraying pushes liquid into vents, ports, and seams where it can short-circuit components; always apply the cleaner to the cloth instead. What should I avoid when cleaning electronics? Ammonia, bleach, acetone, abrasive sponges, paper towels, and soaking wet cloths all risk scratching, yellowing, or cracking plastic surfaces. How often should I clean my keyboard and other devices? Dust weekly with a microfiber cloth and blow out ports monthly; deeper cleaning is only needed when grime or sticky residue appears. Clean electronics last longer, run better, and look newer, and the right tools make the job quick. Keeping the whole home dust-free slows buildup on your devices too: Toronto Shine Cleaning offers regular cleaning visits and thorough deep cleaning that cut household dust at the source, with transparent rates on our pricing page. Call (647) 424-0355 to book your clean.

How to Safely Clean Plastic Electronics Without Causing Damage: 5 Expert Tips Read More »

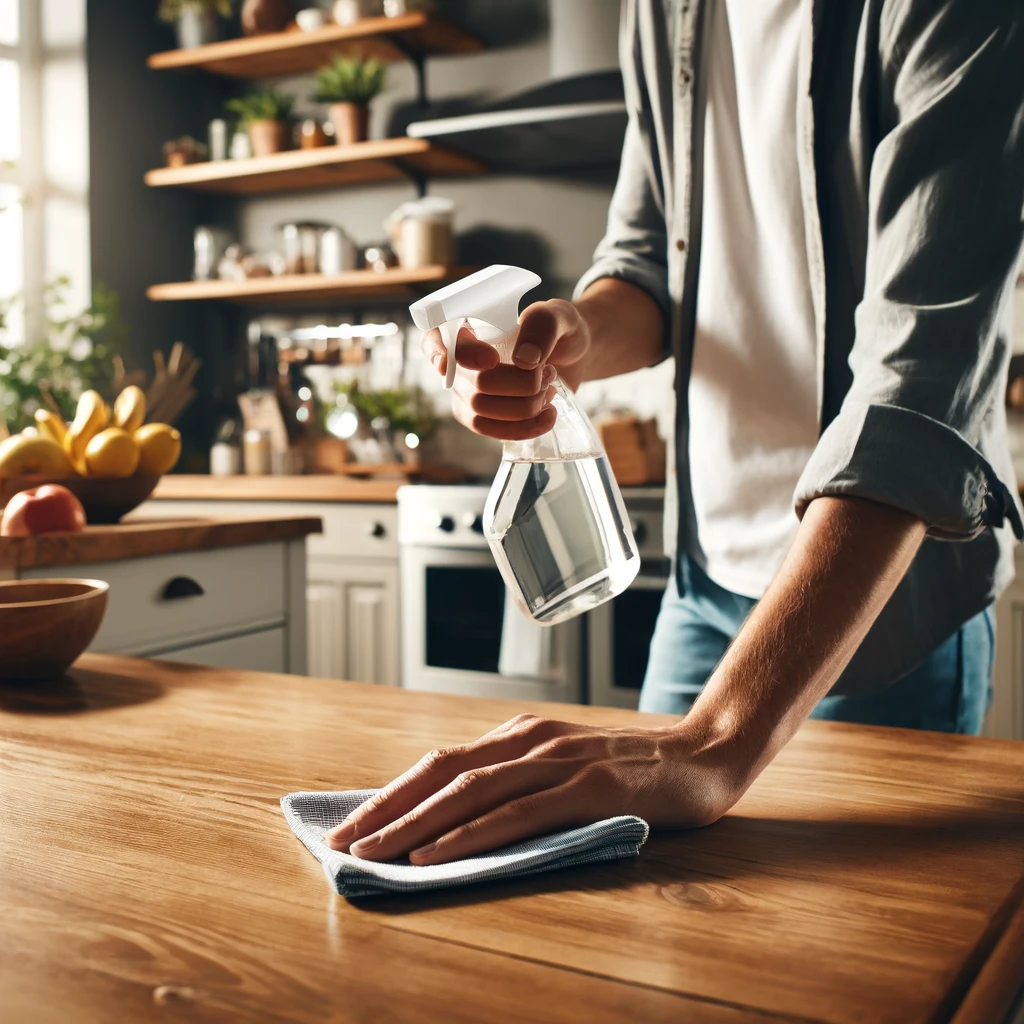
Person cleaning kitchen table with vinegar spray in casual attire.

How to Clean High-Traffic Areas in 5 Easy Steps

Why High-Traffic Areas Need Extra Care Entryways, hallways, and living rooms see the most foot traffic in any home, so they collect dirt, dust, and grime faster than anywhere else. Mud, shoe scuffs, pet hair, and everyday spills build up quickly, and these are also the first spaces guests see. A simple five-step routine keeps them fresh without turning cleaning into a full-day project. Step 1: Gather Your Cleaning Supplies Having everything ready before you start saves time and keeps the flow smooth. For cleaning high-traffic areas, you will need: A vacuum with strong suction and a brush roll A mop, bucket, and floor cleaner matched to your flooring Microfiber cloths and an all-purpose cleaner A scrub brush for stubborn spots Rubber gloves Read product labels and never mix cleaning products: the National Capital Poison Center warns that mixing household cleaners can create poisonous fumes, and its safe spring cleaning tips apply all year round. Step 2: Declutter the Area Shoes, bags, coats, and mail pile up fast in high-traffic zones. Start by removing any objects that do not belong in the area, and give each item a home. A clutter-free entryway is easier to clean and looks more inviting, and clearing the space first means every corner is reachable. Regular decluttering also prevents dust and dirt from hiding under scattered items. Step 3: Vacuum Thoroughly Move slowly and make multiple passes over carpet and rugs so the brush roll can lift embedded dirt. Vacuum under furniture and along baseboards, where dust settles out of sight. Regular vacuuming protects carpets from the wear caused by grinding dirt and keeps dust and allergens from building up in the busiest rooms. The EPA’s guide to indoor air quality covers practical ways to control dust and allergens at home. For homes with pets, vacuuming twice a week in busy areas makes a visible difference, and using the crevice tool along baseboards and corners catches the hair and grit that settles at the edges. This habit also keeps dirt from being tracked into quieter rooms. Step 4: Mop the Floors For tile, laminate, and hardwood, mopping removes the fine dust and grime the vacuum misses. Use a cleaner suited to your floor type, wring the mop well so you do not oversaturate hardwood or laminate, and use a scrub brush for stuck-on marks. A clean mop is essential, otherwise you are spreading dirt rather than removing it. Step 5: Wipe Down High-Touch Surfaces Light switches, door handles, railings, and baseboards collect fingerprints and germs in busy areas. Wipe them with a microfiber cloth and all-purpose cleaner, spraying the cloth rather than the surface to avoid over-wetting. Microfiber traps dust and dirt instead of spreading it. For illness season, the CDC recommends cleaning surfaces first, then sanitizing or disinfecting when needed. Surface Best Tool Technique Carpet and rugs Vacuum with brush roll Multiple slow passes, including edges Hardwood and laminate Damp mop, floor-appropriate cleaner Wring well, avoid standing water Tile Mop and scrub brush Scrub grout lines for embedded grime Light switches and handles Microfiber cloth, all-purpose cleaner Spray the cloth, then wipe Keep Busy Areas Fresh Between Cleans Place doormats inside and outside every entrance, consider a no-shoes rule, and sweep or spot-clean entryways a couple of times a week. A short weekly routine beats a monthly marathon, and it keeps dirt from travelling into the rest of the home. A simple weekly rhythm works well: vacuum twice, mop once, and do a five-minute wipe-down of handles and switches. Set a reminder on your phone for the same day each week, and the routine becomes automatic. Twice a year, pair this routine with a deeper reset: move the furniture, clean behind it, and wash the doormats. That way buildup never gets a chance to settle in for long. When to Call in the Professionals If high-traffic areas need a deeper reset, Toronto Shine Cleaning can help. Our regular cleaning service keeps busy homes on schedule, and our deep cleaning service tackles floors, baseboards, and high-touch surfaces top to bottom. We are insured and background-checked, and we serve Toronto and surrounding areas. Call (647) 424-0355 or check our customer reviews to get started. High-Traffic Area Cleaning FAQ How often should I clean high-traffic areas? Vacuum entryways and living rooms once or twice a week, mop hard floors weekly, and wipe high-touch surfaces every few days. Adjust the pace for pets and kids. What counts as a high-traffic area? Entryways, hallways, staircases, living rooms, and kitchens are the usual culprits: any space people pass through or gather in daily. How do I remove scuff marks from hardwood? Use a microfiber cloth with a floor-appropriate cleaner, or a soft scrub brush for stubborn marks, working gently to avoid damaging the finish. Should I disinfect high-touch surfaces every day? Daily disinfecting is not usually needed. The CDC recommends cleaning regularly, and disinfecting when someone is sick or at higher risk of illness.

How to Clean High-Traffic Areas in 5 Easy Steps Read More »

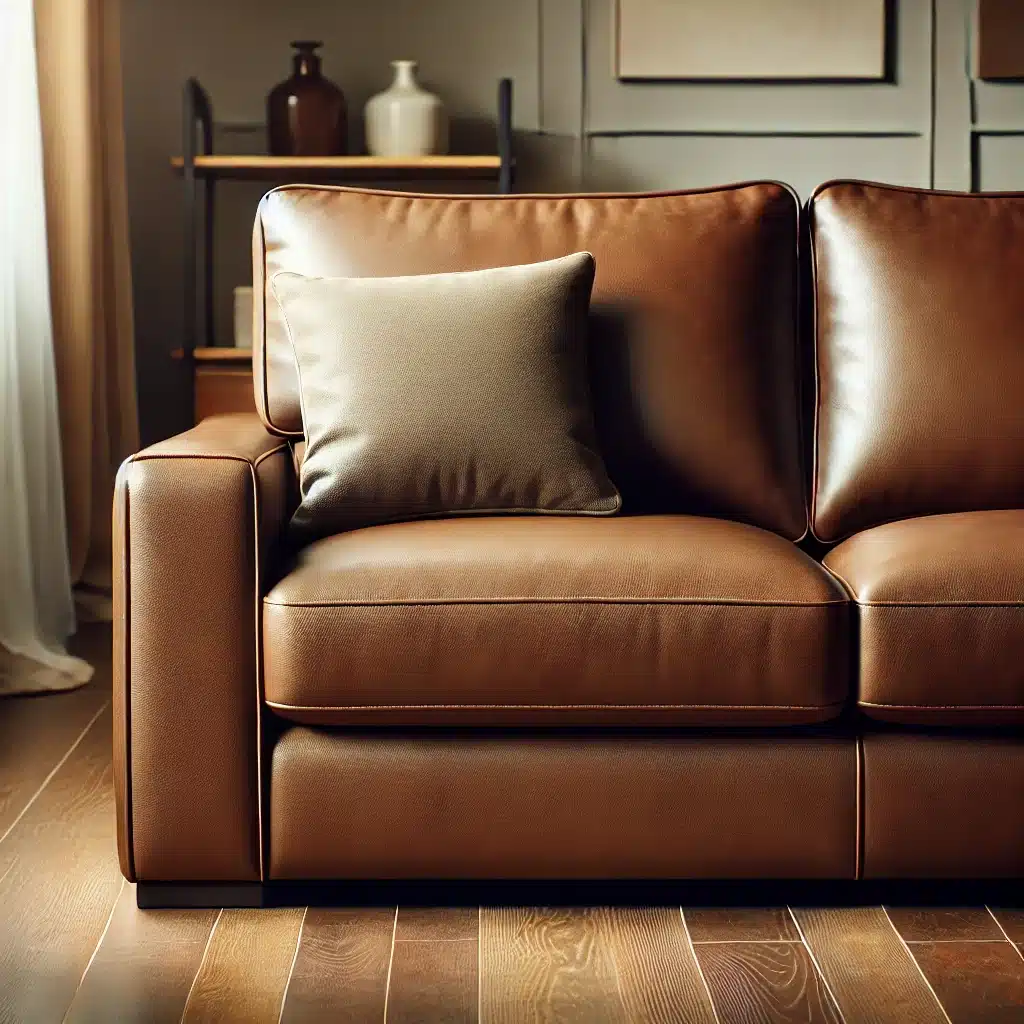
Spotless brown leather couch with cushions in a polished living room setting.

How to Clean Upholstery: 5 Simple Methods

Keeping your upholstery looking fresh and clean can be a bit of a challenge, especially with the daily wear and tear it goes through. But don’t worry! Here are five simple methods to help you clean your upholstery effectively and maintain its beauty. 1. Vacuum Regularly Vacuuming regularly is the simplest and most efficient method for maintaining the cleanliness of your upholstery. The upholstery attachment on your vacuum cleaner is specifically designed to handle the delicate fabrics and intricate details of your furniture. By consistently using this tool, you can easily remove dust, crumbs, and pet hair that tend to accumulate on your sofas, chairs, and other upholstered items. To start, remove any loose cushions to ensure you can access every part of your furniture. This step allows you to reach areas that are often neglected and where dirt and debris tend to settle. Using the upholstery attachment, begin cleaning the surface of the fabric with gentle, even strokes. This method ensures that you lift away dust and dirt without damaging the material. Pay special attention to the crevices and seams, as these are common spots where grime can build up over time. The attachment’s design helps you navigate these tight spaces effectively. If your cushions are removable, take the extra time to vacuum both sides. This thorough approach guarantees that no part of your upholstery is overlooked. Regular vacuuming not only enhances the appearance of your furniture but also extends its lifespan by preventing the accumulation of dirt and allergens. By making vacuuming a routine part of your cleaning schedule, you ensure that your upholstery remains fresh and inviting, providing a clean and comfortable environment in your home.     2. Spot Cleaning Spot cleaning is an essential technique for maintaining the beauty and longevity of your upholstery. Given the inevitability of spills and stains, knowing how to address them promptly can prevent permanent damage. The key to effective spot cleaning is quick action and the use of appropriate cleaning solutions. When a spill occurs, the first step is to blot the area immediately with a clean, dry cloth. This initial action helps absorb as much liquid as possible, reducing the risk of the stain setting into the fabric. Avoid rubbing the spill, as this can cause the liquid to penetrate deeper into the upholstery, making it harder to remove and potentially damaging the fabric fibers. By gently blotting, you can manage the spill more effectively and preserve the integrity of your furniture. Before applying it to the stained area, it’s crucial to test this solution on a small, inconspicuous section of the upholstery. This precaution ensures that the cleaning agent does not discolor or damage the fabric. After confirming the solution is safe, use a soft cloth to gently dab the stain. The key is to dab, not rub, as rubbing can spread the stain and embed it further into the fabric. After treating the stain, blot the area with a clean, damp cloth to remove any soap residue. Finally, allow the upholstery to air dry completely, ensuring no moisture is left behind, which could lead to mold or mildew growth. By incorporating these spot-cleaning techniques into your routine, you can effectively manage accidental spills and stains on your upholstery. This not only maintains the aesthetic appeal of your furniture but also extends its lifespan. 3. Use a Steam Cleaner Steam cleaning is an excellent method for giving your upholstery a deep and thorough clean. Unlike other cleaning techniques that rely on harsh chemicals, steam cleaning uses the power of hot water vapor to lift dirt, stains, and allergens from the fabric. This makes it a more environmentally friendly option and safer for households with children and pets. To begin, it’s essential to vacuum the upholstery thoroughly. This step removes loose dirt and debris that could interfere with the steam cleaning process. By ensuring the surface is free from particles, you allow the steam cleaner to penetrate deeper into the fabric, effectively removing embedded dirt and grime. Once the upholstery is prepped, fill the steam cleaner with water and a suitable upholstery cleaning solution. This combination will enhance the cleaning power of the steam and help break down tough stains. When using the steam cleaner, it’s crucial to follow the manufacturer’s instructions to achieve the best results and avoid damaging your upholstery. Work in small sections to ensure each area is cleaned evenly. It’s important to avoid over-wetting the fabric, as excessive moisture can lead to mold and mildew growth. By carefully controlling the amount of steam applied, you can effectively clean the upholstery without soaking it. After steam cleaning, allow the upholstery to dry completely before using it again. This drying period is essential to prevent any lingering dampness, which can attract more dirt and compromise the cleanliness you’ve just achieved. Regular steam cleaning not only revitalizes the appearance of your upholstery but also promotes a healthier living environment by eliminating allergens and bacteria. This method keeps your furniture looking fresh and extends its lifespan by maintaining the integrity of the fabric.     4. Baking Soda Deodorizer Using baking soda as a deodorizer is an effective and natural way to refresh your upholstery and eliminate lingering odors. This common household item is known for its ability to absorb and neutralize smells, making it an ideal choice for keeping your furniture smelling fresh without the need for harsh chemicals. To deodorize your upholstery, begin by evenly sprinkling a generous amount of baking soda over the entire surface. This allows the baking soda to come into contact with all areas of the fabric, ensuring a thorough deodorizing effect. Let the baking soda sit for at least 15-20 minutes. During this time, it will absorb any unwanted odors trapped in the upholstery fibers. If your furniture has particularly stubborn smells, you might consider leaving the baking soda on for a longer period, even overnight, for maximum absorption. For a more intensive clean, especially if there are stains involved,

How to Clean Upholstery: 5 Simple Methods Read More »

Modern microfiber mop with wringer bucket, long handle, and flat head.

Essential Tools and Supplies for Cleaning Jobs

Keeping your home sparkling clean with a cleaning job can be a breeze if you have the right tools and supplies. Whether you’re tackling a deep clean, regular maintenance, or preparing for a move-in/move-out cleaning job, having 1. Microfiber Cloths Microfiber cloths are a game-changer for any cleaning job. These versatile cloths, made from synthetic fibers, are highly absorbent and can be used either dry or damp. Their unique construction allows them to trap dust, dirt, and even bacteria effectively, making them a staple in any cleaning arsenal. Unlike traditional cloths or paper towels, microfiber cloths can clean surfaces without leaving streaks or scratches, ensuring a spotless finish every time. This makes them ideal for a variety of tasks, from dusting delicate surfaces like electronics and furniture to wiping down kitchen counters and polishing mirrors and windows. What sets microfiber cloths apart in any cleaning job is their ability to handle different types of surfaces with ease. When used dry, they excel at dusting, thanks to their electrostatic properties, which attract and hold onto dust particles rather than just pushing them around. When dampened, these cloths become even more effective, lifting and absorbing spills and grime without the need for harsh chemicals. This dual functionality not only makes cleaning more efficient but also more environmentally friendly, as it reduces the reliance on disposable products and chemical cleaners. In addition to their versatility and efficiency, microfiber cloths are also incredibly durable. They can be washed and reused hundreds of times without losing their cleaning power, making them a cost-effective solution for any household. For anyone tackling a cleaning job, whether it’s routine maintenance or a deep clean, microfiber cloths are an essential tool that can handle everything from everyday dusting to intensive scrubbing. 2. All-Purpose Cleaner An all-purpose cleaner is a must-have for any cleaning arsenal, serving as the backbone for tackling a wide range of cleaning jobs. Its versatility is one of its greatest strengths, allowing you to use it on multiple surfaces and stains with ease. From greasy kitchen counters to grimy bathroom tiles and even certain types of flooring, an all-purpose cleaner can handle it all. This means you don’t need to clutter your cleaning cupboard with multiple specialized products. Instead, you can rely on a single, powerful solution to maintain the cleanliness and hygiene of your home efficiently. When choosing an all-purpose cleaner for your cleaning jobs, it’s crucial to consider products that are safe for both the environment and your family. Eco-friendly cleaners made from natural ingredients can be just as effective as their chemical-laden counterparts, without the harsh side effects. These cleaners reduce the number of toxins released into your home, ensuring a healthier living space for everyone. Additionally, they are often biodegradable, minimizing environmental impact. 3. Vacuum Cleaner A good vacuum cleaner is essential for maintaining clean carpets and floors, making it a cornerstone tool for any cleaning job. The right vacuum can significantly reduce the time and effort required to keep your home tidy, ensuring that every nook and cranny is free from dust, dirt, and debris. Modern vacuum cleaners come equipped with various features and attachments designed to handle different surfaces and hard-to-reach areas, from plush carpets to hardwood floors and narrow crevices. These attachments enhance the vacuum’s versatility, allowing you to switch between different cleaning tasks seamlessly and efficiently. For those with pets, a vacuum cleaner equipped with a HEPA filter is particularly beneficial. Pet hair and dander can be challenging to manage, but a HEPA filter traps these tiny particles, preventing them from being recirculated into the air. This is especially important for maintaining good indoor air quality and reducing allergens, which can be a significant concern for allergy sufferers.     4. Broom and Dustpan For quick clean-ups and daily maintenance, a sturdy broom and dustpan are indispensable tools in any cleaning job. These simple yet effective items are perfect for swiftly sweeping up crumbs, dirt, and debris from your floors, making them essential for keeping your home tidy on a day-to-day basis. Unlike vacuum cleaners, which can be cumbersome for smaller messes, a broom and dustpan offer a lightweight and portable solution. They are especially handy in high-traffic areas like kitchens and entryways, where dirt and debris accumulate rapidly. A broom with angled bristles is particularly effective for thorough cleaning jobs, as it can easily reach into corners and under furniture where dust and dirt often hide. These bristles are designed to adapt to the contours of your floors, ensuring that every sweep captures as much debris as possible. This makes them not only efficient but also versatile, suitable for a variety of surfaces from hardwood and tile to linoleum. 5. Mop and Bucket A mop and bucket are essential for keeping your floors spotless, making them vital tools for any cleaning job. The right combination ensures that you can effectively remove dirt, spills, and stains, maintaining the overall cleanliness and appearance of your home. Whether you opt for a traditional string mop or a more modern microfiber mop, it’s important to choose one that’s suitable for your specific flooring type. For example, a string mop is excellent for heavy-duty cleaning jobs, while a microfiber mop is perfect for delicate surfaces and daily maintenance. The versatility of these tools allows you to adapt your cleaning approach based on the needs of different areas in your home. A bucket with a wringer is an invaluable addition to your mopping setup, providing you with better control over the amount of water used during your cleaning job. This feature is particularly important for preventing water damage to sensitive flooring materials like hardwood or laminate, which can warp or buckle when exposed to excessive moisture. By wringing out the mop thoroughly, you can ensure that your floors are cleaned efficiently without being overly saturated. Additionally, using a mop and bucket combination can significantly reduce the physical strain of mopping, as it minimizes the need to bend over and manually wring out

Essential Tools and Supplies for Cleaning Jobs Read More »

Immaculate laundry room with bright lights, organized shelves, and modern appliances.

How to Clean Your Laundry Room: 6 Easy Steps for a Sparkling Space

How to Clean Your Laundry Room in 6 Easy Steps The laundry room works harder than almost any other space in the house: it processes every load of clothes and stores bottles and jugs of product, while each cycle adds lint, dust, and moisture to the air. Over time that adds up to grimy machines, cluttered counters, and stale smells. A thorough clean, followed by a simple weekly routine, keeps the space fresh, safe, and pleasant to use. These six steps work whether you have a closet-sized laundry nook or a full room. 1. Clear Out Clutter and Expired Supplies Start with an empty room. Remove everything that does not belong: stray shoes, forgotten items, and products meant for other rooms. Then go through the detergents, softeners, and stain removers, and throw out anything expired, dried out, or half used, since old products lose their effectiveness and only take up space. Group what remains into zones: detergents near the machines, dryer sheets and stain pens on a shelf, cleaning cloths in a basket. Give each category its own bin and label the containers so everyone in the household puts things back where they belong. Keep laundry detergent packets in their original container and out of children’s reach, following Health Canada’s household chemical safety guidance for storing household products safely. 2. Clean the Washing Machine and Dryer The machines themselves need the most attention. Wipe the washing machine exterior with a damp cloth and mild detergent to remove dust and dried spills, then run an empty hot-water cycle with vinegar to clear built-up grime and odours from the drum. The detergent drawer and the rubber door gasket need extra care, since both trap water and turn into prime mould habitats; the CDC’s mould guidance notes that mould grows wherever moisture lingers. For the dryer, empty the lint trap after every single load: lint buildup is a leading fire hazard and also makes the dryer work harder. Every few months, vacuum the lint trap housing, wipe the drum with a damp cloth and a mild cleaner, and check the vent hose for blockages so warm air can escape freely. 3. Wipe Down Counters, Shelves, and Floors Countertops, shelves, and cabinet fronts collect detergent spills and dust, so wipe them with a multipurpose cleaner as part of the routine. For stubborn dried-on spots, a paste of baking soda and water breaks the grime down without harsh chemicals; apply it, let it sit briefly, then rinse with a damp cloth. Floors come next: sweep or vacuum to lift dust and lint, then mop with a cleaner suited to your flooring type. If you have tile, scrub the grout lines too, since they trap dirt that regular mopping misses. 4. Freshen the Air and Cut Humidity Every drying cycle releases moisture, so ventilation is the key to a fresh-smelling laundry room. Open the window when you have one, run the exhaust fan during and after cycles, and consider a small air purifier if the room tends to stay stuffy. When humidity is a problem, a dehumidifier keeps the space dry and discourages musty odours. For lingering smells, set out an open box of baking soda or several activated charcoal pouches on a shelf; both absorb odours naturally. Add a light scent with a few drops of essential oil on a cotton ball or a fabric refresher spray if you like, and the room will feel as clean as it looks. 5. Maintain It With a Weekly Reset A ten-minute weekly reset stops grime from ever becoming a project. Wipe the counters and machine tops, empty and brush the lint trap housing, sweep the floor, return stray products to their labelled spots, and leave the washing machine door open between loads so the seal dries out. Monthly, add the vinegar cycle, wash any floor mats, and check behind the machines for lint or dust buildup. 6. Add Personal Touches That Make the Room Work for You Once the room is clean, make it a place you do not mind spending time. Framed art, a cheerful rug, or a wall clock adds personality for almost no effort. Low-light plants such as snake plants or pothos tolerate laundry room conditions and brighten the space, while a windowsill can hold sun-loving succulents or herbs. A small speaker for music or podcasts turns folding time into the most pleasant part of laundry day. Weekly Laundry Room Reset Checklist Wipe counters and the tops of both machines Empty and brush out the lint trap housing Sweep or vacuum the floor Return supplies to their labelled spots Leave the washer door open and run the fan for an hour Laundry Room Cleaning Schedule Area Task Frequency Lint trap Remove lint and wipe the housing After every load Counters and shelves Wipe with a multipurpose cleaner Weekly Washing machine Clean the drawer and door seal, run a vinegar cycle Monthly Dryer vent Check the hose and vent opening for blockages Every few months Floors Sweep, mop, and scrub grout lines on tile Weekly floors, monthly grout Frequently Asked Questions About Cleaning a Laundry Room How often should the washing machine be cleaned? Run an empty hot cycle with vinegar monthly and wipe the door seal after every use; front loaders need the most attention because their seals hold water. Is dryer lint really a fire hazard? Yes: lint is highly flammable, and a blocked trap or vent lets heat build up while the dryer works harder, so empty the trap after every single load. How do I get musty smells out of my laundry room? Cut moisture with ventilation and a dehumidifier, run the exhaust fan during cycles, and set out baking soda or activated charcoal to absorb lingering odours. What is the best way to prevent mould in a laundry room? Keep air moving, dry the washing machine seal and leave the door open between loads, and fix any leaks right away, since mould grows wherever moisture lingers. Do plants really

How to Clean Your Laundry Room: 6 Easy Steps for a Sparkling Space Read More »