
Cleaning Guide

Pristine marble kitchen countertop gleaming in natural sunlight.

7 Tips for Keeping Your Apartment Clean: A Comprehensive Guide | Toronto Shine Cleaning

A Realistic System for a Spotless Apartment Keeping an apartment clean stops being daunting the moment you replace heroic weekends with a system. Small spaces actually work in your favor, because a few smart routines cover the whole home in minutes rather than hours. These seven tips, refined for apartment living, turn chores into habits you barely notice, whether you are juggling a busy schedule or simply refuse to spend Saturdays scrubbing. 1. Build a Cleaning Schedule You Can Keep A schedule is the foundation. Split tasks into daily, weekly, and monthly buckets and commit to each one. Handle dishes right after dinner and wipe kitchen counters every evening so crumbs and spills never pile up, which keeps the kitchen inviting for cooking. Assign fixed days to weekly work, for example vacuuming on Saturday and dusting on Sunday, and the chores become predictable instead of looming. Then reserve monthly slots for bathroom deep work, closet organization, and clearing out the refrigerator. Scheduled tasks never snowball into a terrifying marathon, because upkeep arrives in small pieces. 2. Declutter as a Habit, Not an Event Clutter makes even a clean apartment feel messy, because it multiplies the surfaces dust lands on. Spend a few minutes daily returning items to their homes and accumulation never gets a head start. A minimalist mindset accelerates this: keep what you need or love, and the fewer objects you own, the fewer you dust, wash, and move around before cleaning a surface. Treat decluttering as an ongoing commitment rather than a one-time project, and the space stays open, calm, and much easier to maintain. 3. Buy the Right Tools Once Good tools cut the time and effort of every session. The apartment starter kit is short: Microfiber cloths that trap dust and grime without streaks or lint, on counters and glass alike A reliable vacuum matched to your floors, powerful on carpet yet gentle on hardwood, compact enough for small storage An extendable duster for ceilings and corners A squeegee for shower doors and tiles, which prevents water marks and mildew Quality rubber gloves to protect hands and grip slippery items Product choice matters as much as equipment. Eco-friendly, non-toxic cleaners keep the air safe for you, your family, and pets while still handling real grime, and Health Canada’s household products guidance explains how to choose and use consumer cleaning chemicals responsibly. 4. Let One Cleaner Do Many Jobs A capable multi-purpose cleaner replaces a shelf of single-use bottles. One product that moves from countertops to bathroom tiles declutters your storage, trims your shopping list, and keeps you from switching solutions mid-task. Modern eco-friendly formulas are gentle on surfaces yet tough on dirt, and concentrated versions stretch further, since you dilute to the strength each job needs. Fewer bottles, less packaging waste, and a lighter monthly bill, all without sacrificing results. 5. Prioritize the Rooms That Wear Out First High-traffic areas collect the most dirt because they see the most life. The living room is where guests look first and where dust settles into sofas and curtains, so regular dusting, vacuuming, and spot cleaning keep it welcoming. The kitchen absorbs spills, crumbs, and grease that attract pests if ignored, so wipe counters, stove tops, and appliance faces daily and give them a deeper pass weekly. The bathroom sees constant moisture and use, so squeegee the shower after bathing and disinfect fixtures weekly. If household members touch shared surfaces constantly, the CDC cleaning and disinfecting recommendations are a sensible baseline. And if you notice fuzzy patches or a musty smell in the shower or behind the toilet, treat bathroom mold as a health topic, not a cosmetic one, using the CDC mold and health guidance to handle it safely. 6. Sweep In Clean: A No-Shoes Policy Most apartment filth walks in on shoes. A bowl of slippers by the door and a good floor mat keep street grit, melted salt, and tracked-in grime outside, which lightens vacuuming and protects floors. Guests happily accept the trade when the alternative is obvious. 7. Close the Day With a Ten-Minute Reset Before bed, run one timer for ten minutes: dishes into the dishwasher, clothes off the floor, surfaces cleared, and a fast sweep of the main living area. Waking up to a reset apartment removes the visual noise that makes mornings stressful, and the habit makes daily upkeep almost automatic. The Seven Tips at a Glance Tip Cadence Effort per session Daily, weekly, monthly schedule Fixed days Varied, planned Declutter as you go Daily A few minutes Right tools and products Buy once Upfront cost, saved time Multi-tasking cleaners Every clean Fewer bottles, fewer steps High-traffic focus Daily plus weekly Targeted attention No-shoes entry Always Zero Nightly reset Every evening Ten minutes Apartment Upkeep, Shared or Rented Systems beat intensity, but every apartment eventually rewards professional help. A regular cleaner covers the routine, a deep clean resets stuck-in grime, and a move out service protects deposits when the lease ends. Toronto Shine Cleaning covers neighborhoods across the city, listed on the locations page. Frequently Asked Questions How often should I deep clean my apartment? Work through one deep-clean zone each month, such as the bathroom, fridge, or closets, while daily and weekly habits handle the rest. Renters often schedule a full deep clean before moving out. What is the best vacuum for a small apartment? A compact upright or stick model with strong suction and a soft-floor setting. Lightweight matters more than tank size when storage is limited, and a good filter helps with dust and pet hair on upholstery. Are eco-friendly cleaners strong enough for kitchens and baths? Modern non-toxic formulas handle everyday grease and soap scum well. Let them dwell on the surface for a minute or two, then wipe. Concentrates let you mix stronger solutions for stubborn jobs. Do I need a cleaning schedule if I clean whenever I notice mess? Reacting to visible mess misses slow accumulation: dust in corners, grease behind the stove, mildew building

7 Tips for Keeping Your Apartment Clean: A Comprehensive Guide | Toronto Shine Cleaning Read More »
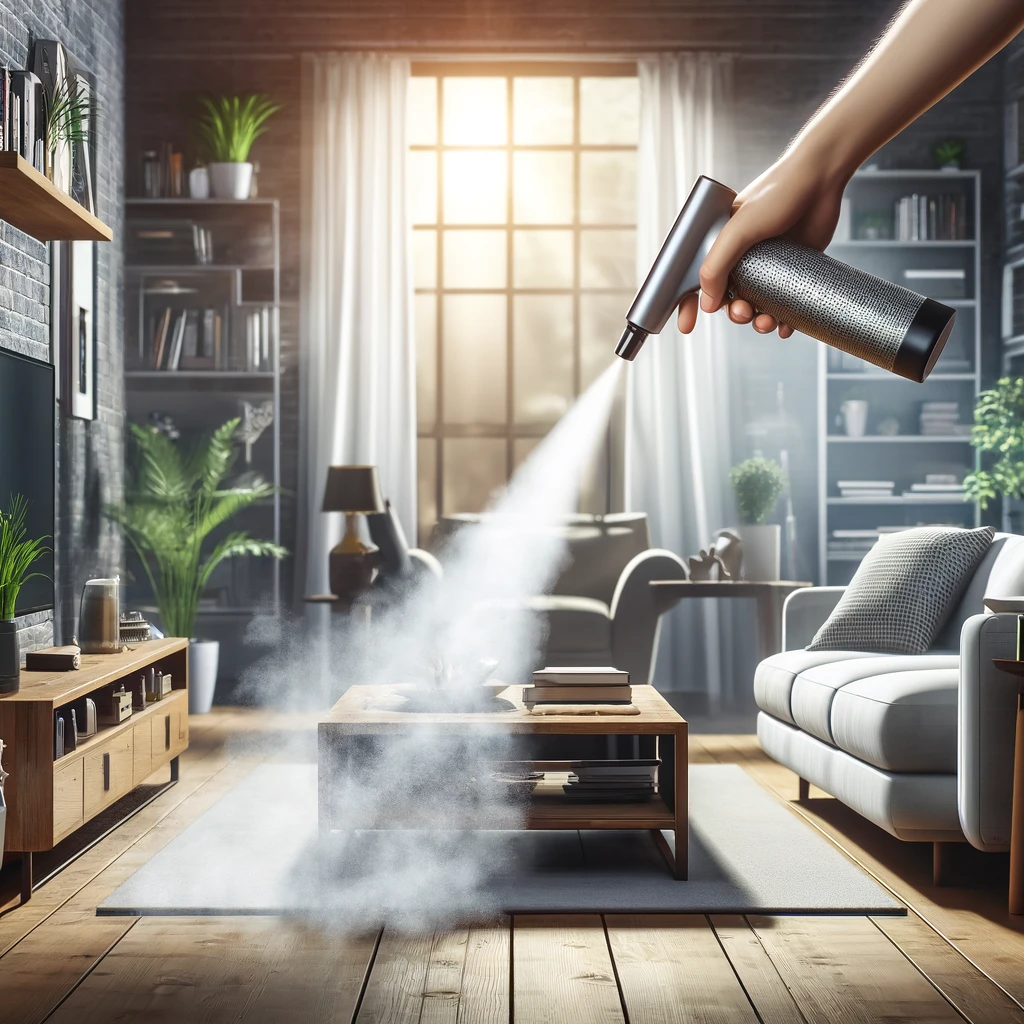

Modern living room cleaned with compressed air, showing dust particles in sunlight.

5 Surprising Benefits of Cleaning with Air Compressed: A Healthier Home Awaits | Toronto Shine Cleaning

A Mini Tornado for Your Hardest Corners Compressed air cleaning works like a pocket tornado: a focused blast that lifts dirt from places a cloth cannot reach. It is more than a satisfying way to watch dust bunnies scatter. Used thoughtfully, the method genuinely improves home health, from allergen levels to the lifespan of your electronics. Here are five surprising benefits and the safety habits that make the technique work for you. 1. It Evicts Allergens From Their Hiding Places Wiping and vacuuming can push allergens around instead of removing them, leaving fine particles to resettle. A controlled air stream targets the unseen stuff that lodges in deep crevices: under heavy furniture, inside upholstered couch seams, between the leaves of decorative objects, across window sills, bookshelves, and electronics that attract dust like magnets. You aim and set the intensity, so even delicate items get cleaned without contact damage. Dislodging irritants at their sources, with windows open so they exit rather than recirculate, supports easier breathing for everyone, especially people with respiratory conditions. 2. No Chemicals, No Residue, No Problem Compressed air relies on force alone, so nothing is sprayed onto surfaces and nothing lingers afterward. For households managing asthma, allergies, or chemical sensitivities, that absence matters, and it also keeps phosphates and similar additives out of your home and waterways. There is no stockpile of specialty bottles either, just one tool that moves from a keyboard to upholstery to a vent. That makes it gentle on modern electronics, where liquid cleaners risk damage, and a minimalist’s shortcut to a dust-free gadget shelf. 3. It Takes the Fight to Dust Mites Dust mites are microscopic occupants that feed on shed skin flakes in warm, fibrous places, and they are a leading driver of indoor allergies and asthma. Mattresses, sofas, and carpets shelter them where ordinary cleaning falls short. A strong air blast flushes mites, their waste, and their food supply out of deep seating and mattress piping that a surface wipe never touches, lowering the overall allergen load. Disturbing their habitat regularly makes the home less hospitable over time, so populations cannot rebound between sessions, and because the method is non-toxic, it suits bedrooms and living areas where families spend hours. 4. It Extends the Life of Household Items Beyond tidiness, air cleaning is preventive maintenance. Electronics, computers, TVs, consoles, and kitchen appliances pull dust into fans and vents, and buildup there causes overheating and eventual failure. A short burst clears vents without disassembly or risk to sensitive components, which keeps performance steady and usable life longer. The same logic covers hidden infrastructure: dryer vents, HVAC returns, and plumbing fixtures collect debris that breeds inefficiency, wear, and in extreme cases fire hazards. Blowing these out proactively avoids costly repairs. For a broader refresher on which household cleaning habits protect surfaces and belongings, Health Canada’s household products and home safety resources pair well with the technique. 5. It Reaches What Cloths and Brushes Miss The fifth benefit is pure access. Canister filters, camera lenses, accordion window tracks, the guts of a vacuum, and the fins of a radiator all defeat soft tools, yet a narrow nozzle handles them in seconds. Precision means you clean the object instead of working around it, which turns Sunday projects into quick routines. Kitchen exhaust hoods, window air conditioners, and car dash vents are other candidates. One caveat: anything greasy deserves a degreaser first, otherwise the blast simply relocates oil instead of removing it. Cleaning Smarter With Compressed Air: Safety First The blasts that rescue your electronics can also launch particles across the room, so treat the air like a broom rather than a leaf blower: aimed, controlled, and finished with a damp wipe. Follow these habits: Work outdoors, at an open window, or in a well-ventilated room so dislodged dust leaves the house Wear a simple face mask and eye protection, and give sensitive people and pets a clear room Use short bursts at moderate distance instead of one long, forceful stream Never aim at moldy surfaces: disturbing mold spore colonies spreads them, and the CDC guidance on mold and health explains why containment and proper cleanup come first Follow with damp wiping or vacuuming so floating particles are captured, not redeposited Where Compressed Air Fits Your Routine Target How often Watch out for Keyboards, consoles, vents Monthly Hold cans upright; short bursts Window tracks and blinds Seasonally Work with windows open Dryer vent and HVAC returns Seasonally Power equipment off first Upholstery seams and mattress edges Monthly Follow with a vacuum pass The CDC’s household cleaning and disinfecting guidance makes the same larger point: dust removal is how you keep surfaces genuinely clean, and how you keep the air you breathe honest. Frequently Asked Questions Is compressed air safe for electronics? Yes when used in short bursts from a reasonable distance, with devices powered off and cans held upright. The method is standard for clearing keyboard and console dust without liquids. Does blowing dust count as removing it? Only if the dust exits your home. Pair blasts with open windows or outdoor work, then damp wipe or vacuum what settles, so allergens leave instead of landing elsewhere. Can compressed air replace dust mite treatments? It helps flush mites, their waste, and skin flakes from deep seams, which lowers allergen load. For ongoing control, combine it with encasements, regular washing, and vacuuming. When should I call professionals instead? For whole-home allergen resets, baked-in grime, and upholstery beyond a blast’s reach, book a deep cleaning. Toronto Shine Cleaning also offers regular maid service for homes in every neighborhood they cover. Breathe Easier This Weekend Try one vent, one track, and one sofa seam with the window open and see how the room feels afterward. For the heavy lifting behind the blast, call Toronto Shine Cleaning at (647) 424-0355. The bonded and insured team carries a $1,000,000 insurance policy and a $10,000 accidental breakage and surety bond, operating from 140 Yonge St Suite 285, Toronto ON M5C

5 Surprising Benefits of Cleaning with Air Compressed: A Healthier Home Awaits | Toronto Shine Cleaning Read More »
Modern, clean computer keyboard on an organized desk with soft lighting.

How to Clean Your Keyboard Like a Pro in 5 Simple Steps

Clean Your Keyboard to look like it’s just come out of the box doesn’t have to be as complicated as cracking a secret code. Whether you’re a gamer whose keys have seen better days, a busy professional whose keyboard is a breadcrumb museum, or just someone looking to spruce up their workspace, these five simple steps will have your keyboard looking and feeling fresh in no time. 1. Unplug and Flip Starting off with the basics, turning off your keyboard is not just about safety, it’s about preparing for a mini adventure. Think of it as setting the stage for a deep clean operation. Whether it’s a trusty wired keyboard that’s been with you through countless late-night projects or a sleek wireless one that’s seen more than its fair share of coffee spills, turning it off ensures you won’t accidentally send a string of gibberish to your boss or start an unintended video call. Plus, it’s about protecting the electronics from any static discharge or accidental short-circuits while you clean. Now, the flipping part is where the magic begins. It’s not just a gentle overturn; it’s an act that reveals the hidden secrets of your keyboard’s life. As you cautiously flip it over, tapping gently on the back like you’re coaxing secrets out of a friend, you’ll find yourself on a little archaeological dig right at your desk. The crumbs, the dust, and who-knows-what-else that start to tumble out are the remnants of quick lunches, midnight snacks, and those times you just couldn’t step away from the screen. But here’s a pro tip: don’t just stop after one flip and shake. Give it a few gentle taps on the back, rotate it, and shake it again. You want to approach it from multiple angles, ensuring that you’re not just moving the debris around, but actually getting it out. It’s a bit like finding the best angle to tap a ketchup bottle; there’s a sweet spot that gets everything moving. As the bits of debris start to fall away, you might find yourself reflecting on the memories each crumb and speck of dust represents. That’s the beauty of this step-it’s not just cleaning; it’s a trip down memory lane, reminding you of the many hours you’ve spent at your desk. And with each shake, you’re not just getting rid of physical debris; you’re setting the stage for a fresher, cleaner, and more inviting workspace. 2. Compressed Air is Your Best Friend Diving into the realm of compressed air as a cleaning tool for your keyboard, it’s worth emphasizing just how transformative this step can be. Imagine holding a miniature cyclone in your hands, one that has the power to reach where no cloth or hand can. The can of compressed air isn’t just a tool; it’s your ally in the battle against the unseen forces of grime that have settled in the hardest-to-reach places of your keyboard. When you begin, consider the angle at which you’re holding the keyboard. This isn’t merely about convenience; it’s about strategy. By tilting the keyboard, you’re not just preparing for a surface clean; you’re setting up the conditions for a thorough excavation of debris. The angle allows the force of the air to dislodge particles from their hiding spots, ensuring they’re not just pushed deeper into the crevices of your keyboard. As you wield the can, the importance of controlled bursts cannot be overstated. This technique ensures that the air’s force is directed precisely where it’s needed, minimizing the risk of damage to the delicate mechanisms beneath the keys. It’s akin to using a scalpel instead of a sword; precision is key. The short, controlled bursts act as targeted strikes against the buildup of debris, ensuring that each press is both effective and safe. Moreover, navigating the keyboard’s landscape with compressed air is an exercise in patience and coverage. It’s not just about the spaces between the keys; it’s also about the edges, the underside of the keys, and even the USB port or wireless connection points. Each area requires attention to ensure that the keyboard is not just clean on the surface but also free from potential problems that could arise from accumulated dust and dirt. The satisfaction of this process is immediate. As the air flows, you can almost see the keyboard breathe a sigh of relief, its pathways cleared, and its operation smoothed. This isn’t just about aesthetics; a clean keyboard can significantly affect functionality, reducing the risk of sticky keys or unresponsive presses that can frustrate even the most patient users.     3. The Gentle Swipe Taking the concept of the “Gentle Swipe” to the next level involves not just swabbing the surface of each key, but treating this process as a meticulous labor of love, ensuring that every keypress thereafter is as satisfying as the first. The use of isopropyl alcohol isn’t arbitrary; it’s chosen for its effectiveness in disinfecting without harming the electronics that lie beneath the keys. This is where the science of cleaning meets the art of maintaining the tools we use daily. When you select a cotton swab or a soft cloth, you’re choosing tools that are gentle yet effective. The cotton swab, with its pointed end, becomes a precision instrument, allowing you to navigate the contours and edges of each key with the finesse of a painter touching up a masterpiece. The soft cloth, on the other hand, offers a broader canvas, allowing for quicker work over the flat surfaces, absorbing and wiping away the grime that dulls the shine of your keyboard. The technique of dipping the swab or cloth in alcohol requires a careful balance. Too much liquid, and you risk seepage beneath the keys, potentially harming the delicate circuits below. Too little, and you might not capture all the germs and oils that have accumulated. The goal is to moisten the tool just enough to clean effectively without leaving any residue. This balance ensures that each swipe not only cleans

How to Clean Your Keyboard Like a Pro in 5 Simple Steps Read More »

Wet shower tiles in bathroom

7 Effective Ways to Clean Up Water-Based Stains from Every Surface | Toronto Shine Cleaning

Seven Effective Ways to Clean Water-Based Stains From Every Surface Coffee on the couch, finger paint on the hallway wall, rain tracked across the floor: water-based spills look harmless and still set in fast. Almost every one lifts cleanly when you match technique to material. These seven methods cover the surfaces your household touches all day, with supplies you likely own. One rule comes before every step, and the CDC’s home cleaning guidance backs it: clean promptly, before soil has a chance to set. Blot with a clean cloth the moment the spill lands; rubbing grinds it in. Start with cool or lukewarm water, because heat sets most water-based marks. Work from the outside edge inward so the stain cannot grow. Rinse every trace of soap away, then dry the area fully. Quick Reference Table Surface First move Skip this Fabric and upholstery Blot, then mild detergent in cool water Rubbing and hot water Carpet Baking soda, vinegar spray, then blotting Walking on wet pile Hardwood Blot dry, hardwood cleaner on a cloth Soaked mops, pouring cleaner on the floor Tile and grout Lemon-and-salt paste, soft brush Steel wool, harsh abrasives Painted walls Damp microfibre, drop of dish soap Scouring pads Vinyl and laminate Sweep, well-wrung damp mop Puddles at seams and baseboards Clothing Pre-treat, wash per the care label Drying before the stain is gone 1. Fabric and Upholstery: Blot First, Then Mild Detergent Blot the moment the spill lands so liquid cannot sink into the fibres. Mix a squirt of gentle detergent into cool or lukewarm water, since hot water can set the mark. Dip a colourfast soft cloth, wring it until barely damp, and dab from the outer edge inward so the stain cannot spread. When it lifts, dab again with clean cool water until no soap remains. Let the area air dry: skip direct heat, and if the fabric allows, press a cool iron through a clean cloth to draw out the last moisture. 2. Carpets: Baking Soda and White Vinegar Cover the damp patch with baking soda and give it about ten minutes to pull up moisture and odour. Spray a half-and-half mix of white vinegar and water over the top; the fizz signals the reaction at work. Vinegar’s acidity lifts the mark while the dilution keeps the colour safe. Wait for the bubbling to stop, then blot with a clean dry cloth, dabbing and never rubbing. Let it dry completely: damp carpet invites mold and mildew, a risk the CDC’s mold and health pages explain. Vacuum last to lift the fibres back up. Delicate or specialty carpets belong with professionals. 3. Hardwood Floors: Immediate Wipe, Then a Floor-Specific Cleaner Wood warps and discolours when liquid slips into the seams, so blot any spill with a soft dry cloth the moment you notice it, pressing rather than rubbing so moisture cannot travel along the grain. If a mark stays, choose a cleaner made for hardwood and matched to your finish; the Health Canada household products pages are a good label-reading reminder. Pour it onto the cloth or mop instead of the floor so the wood never soaks, wipe along the grain, let the product sit briefly on stubborn spots, then dry with a clean cloth so no moisture lingers. 4. Tile and Grout: Lemon Juice and Salt Paste Lemon juice earns its place for more than smell: its acidity acts as a natural bleach against food, soap scum, and mildew, and helps sanitise. Salt adds a soft abrasive that breaks stains down without gouging the tile. Stir the two into a paste, spread it over the mark, and work it in with an old toothbrush. Leave it five to ten minutes, longer on old marks, then scrub lightly and rinse with warm water, which dissolves the mixture better than cold. Towel dry so new moisture does not soak into porous grout. 5. Painted Walls: Damp Microfibre and Patience Rain marks and splashes on painted drywall respond well to a microfibre cloth wrung out in warm water with a drop of dish soap. Wipe in light circles, working outward from the edge of the mark, and rinse the cloth often. Skip scouring pads and strong cleaners, which polish dull streaks into the paint. 6. Vinyl and Laminate: A Damp Mop, Never a Wet One These floors tolerate water better than hardwood, but liquid creeping into seams can lift edges and swell planks. Sweep first, then mop with a pad wrung nearly dry using a laminate-safe product or diluted vinegar solution. Towel up dampness along baseboards and seams, where moisture hides longest. 7. Clothing: Pre-Treat Before the Wash Water-based marks on laundry usually vanish with one extra step. Work a drop of liquid detergent, or a dab of vinegar-and-water mix, into the stain, let it sit ten to fifteen minutes, then wash at the temperature the care label permits. Check the spot before the dryer runs: machine heat sets any stain left behind. Frequently Asked Questions Do water-based stains really need same-day attention? Fresh marks sit on the surface, where blotting lifts them easily. Once dry, a stain bonds with fibres and grout, so the same job takes stronger products and several rounds. Speed is the cheapest protection there is. Can I reach for bleach to speed things up? Not on every material. Bleach can strip fabric colour, harm wood finishes, and dull coloured grout. Reserve it for bleach-safe surfaces, diluted as the label directs, in a ventilated room. Why does my carpet look clean but smell damp? Moisture lingers in the pad beneath the pile long after the surface feels dry. Point a fan at the area, open a window, or run a dehumidifier until fully dry. A lasting damp smell means professional extraction is the right call. When should I stop scrubbing and call for help? If a mark survives two or three rounds of the correct method, more scrubbing endangers the fibre rather than the stain. A deep cleaning visit extracts what household

7 Effective Ways to Clean Up Water-Based Stains from Every Surface | Toronto Shine Cleaning Read More »

Vibrant cityscape at sunset by Ceyda Ciftci.

Macrame Wall Hanging Clean: 5 Steps to Perfectly Take Care | Toronto Shine Cleaning

Macrame Wall Hanging Care: Five Steps to Keep It Perfectly Clean Macrame wall hangings have claimed a permanent spot in modern homes, layering boho texture and knotted pattern over bare walls. Like anything built from kilometres of cord, they also catch dust faster than a flat shelf ever could. The five steps below take you from routine dusting to a full bath and a refresh ritual, without fraying a single fringe in the process. Step 1: Dust It Off, Gently Dust is the first battle, and the easiest to win. Take the piece outside and give it a good shake: the motion frees settled dust and wakes up the knots at the same time. When a shake is not enough, run a soft-bristle brush along the contours of the weaving, letting each stroke comb grit out of the deepest crevices. The modern shortcut is a hand vacuum on its lowest power setting, glided slowly through the weaves with a soft nozzle so suction lifts dust without grabbing fibres. The guiding principle through all three options is gentleness. Knotted cord is durable and delicate at once, and heavy pressure or harsh tools will distort the shape and fray the strands. Step 2: Spot Clean Stains Calmly A stain on macrame is an inconvenience, not a disaster. Mix a small squirt of mild detergent into a bowl of water and treat it as your first-aid kit for the piece. Dip a soft cloth, wring it well, and dab at the mark with a light hand, coaxing it out rather than demanding its departure. Skip harsh chemicals entirely: they promise speed and deliver frayed, discoloured fibres. For a mark that fights back, sprinkle baking soda on a damp cloth and work it in softly, letting the gentle abrasive break the stain down where chemicals should not go. Buying tips for safer cleaners, including how to read labels, are on the Health Canada household products pages. Step 3: Wash Gently When It Is Time A full wash is a slow ritual, and that is the point. Fill a basin or tub with lukewarm water and a whisper of mild detergent, then submerge the hanging and let it soak so the water can travel into every twist and loosen accumulated grime. Swish the piece softly through the bath, a near-meditative motion that releases dirt while the structure holds its shape. Rinse under a gentle but thorough stream of clean water until no soap remains, because detergent residue dulls the fibres and attracts fresh dust. Nothing here should be hurried or aggressive. Step 4: Dry It Properly Drying decides whether the piece comes back to life or comes back misshapen. Start by squeezing gently, cradling the wet macrame and pressing out water without twisting the form. Lay the piece flat on a clean towel, which acts as a sponge while supporting the whole hanging so nothing stretches out of shape. Large pieces can hang outside to dry for the fresh-air bonus, but keep them out of direct sun, whose rays fade colour as surely as they brighten a room. Before anything goes back on the wall, confirm the piece is dry through and through: trapped moisture breeds mildew, and the CDC’s overview of mold and health explains why damp textiles are worth taking seriously indoors. Step 5: Maintain and Refresh Between Washes Long life comes from small, repeated gestures. Give the hanging an occasional shake to dislodge new dust before it settles. When fibres start to droop and lose their crispness, a gentle spritz of water acts like morning dew: the cords tighten and regain elasticity as they dry. Follow the mist with a pass of your fingers through the fringe to untangle knots and re-fluff the pattern. This routine is less about cleaning and more about conversation with the piece, reading its needs before problems appear. A Simple Care Schedule Task How often What you need Outdoor shake Weekly or fortnightly Just your hands Brush or low-power vacuum Monthly Soft-bristle brush or hand vacuum Spot treatment As soon as a mark appears Mild detergent, soft cloth, baking soda Full gentle wash Yearly, or when visibly dull Lukewarm water, mild detergent, clean towels Refresh spritz and finger-comb Whenever fibres droop Water spray bottle Keep the routine light by doing only what the piece asks for: Shake and brush before any wet step, since dry dust turns to mud when it meets water. Test every cleaning mixture on a hidden knot before it touches the front of the work. Never wring, scrub hard, or use a high-suction nozzle on loose fringe. Dry flat and fully, away from direct sun, before rehanging. Frequently Asked Questions Can a macrame hanging go in the washing machine? Hand washing is the safer habit for knotted, textured work. A machine agitates exactly what makes the piece: the loops and twists that hold the pattern. A basin soak with mild detergent gets the same refresh with none of the distortion risk. Is baking soda really enough for stubborn spots? On most household marks, yes. Its mild abrasiveness lifts grime without stripping colour the way solvent cleaners can. Work it on a damp cloth in soft circles, let the area dry, and brush the residue away before evaluating once more. How long does a washed piece need to dry? Flat drying on towels commonly takes a day or more depending on thickness and room humidity. Thicker cords hide dampness long after the surface feels dry, so press a towel into the densest knots and wait for a fully dry result before rehanging. Can I skip washing and only dust? Regular shaking and brushing carries a lightly used piece for years. When the whole hanging looks grey or feels gritty despite dusting, the fibres have collected more than surface dust and the gentle bath is due. Handing the Busy Households a Break Caring for handmade art deserves time, and life often does not hand out extra hours. That is where a helping routine earns

Macrame Wall Hanging Clean: 5 Steps to Perfectly Take Care | Toronto Shine Cleaning Read More »

Spotless modern balcony with sleek furniture at dusk.

7 Tricks to Keep Your Balcony Clean and Inviting

Keeping your balcony clean and inviting is essential, especially if you love spending time outdoors, basking in the sun, or enjoying a quiet evening under the stars. Whether you’re in the heart of Toronto or enjoying the outskirts, a clean balcony can serve as your personal oasis. Here are seven tricks to make your balcony the envy of the neighborhood and a cozy retreat for yourself. 1. Start with a Deep Clean Starting with a deep clean really sets the stage for a balcony that feels like a breath of fresh air. First things first, sweeping the floor is crucial. You’d be surprised at how much dust, leaves, and random bits can accumulate over time. It’s like giving your balcony a fresh canvas to work with. Next, tackling the floor and railings with a mild soap solution can do wonders. A soft scrub brush is your best friend here, helping you get rid of any stubborn spots or grime that’s decided to make your balcony its home. But it’s not just the floors and railings that need attention. Those light fixtures and outdoor furniture can harbor dust and cobwebs, making your outdoor retreat less than inviting. Wiping them down with the right cleaners can make them shine and feel new again. And here’s a little tip: for glass surfaces or mirrors, a vinegar and water solution works miracles for that streak-free shine. 2. Opt for Easy-to-Clean Furniture Opting for easy-to-clean furniture for your balcony can significantly lighten your maintenance load, letting you focus more on relaxation and less on upkeep. When selecting pieces, consider materials like metal, teak, and all-weather wicker. These materials are not just durable against various weather conditions, but their maintenance is as simple as a quick wipe down. Whether it’s an unexpected rain shower or a dust storm, furniture made from these materials can be easily cleaned and ready for use in no time. Incorporating outdoor cushions adds another layer of comfort to your balcony setup. However, the trick to keeping things low-maintenance even with cushions is to ensure they are covered in weather-resistant fabric. These fabrics are designed to repel water, resist stains, and fend off fading under the sun. So, even after a summer of bright, sunny days or a damp, rainy season, your cushions will still look vibrant and inviting without requiring extensive cleaning efforts. The choice of easy-to-clean furniture is not just about practicality; it’s about creating a balcony space that’s always ready for you to enjoy. Imagine being able to spontaneously decide to have your morning coffee or an evening glass of wine outside without first having to clean or dry your furniture. This simplicity keeps your balcony looking fresh and inviting with minimal effort, ensuring it’s always a place of retreat and relaxation. 3. Incorporate Weather-Resistant Décor Incorporating weather-resistant décor into your balcony setup is a game-changer for both aesthetics and functionality. By choosing accents that can withstand the elements, you minimize upkeep and ensure your outdoor space remains inviting, regardless of the season. Durable outdoor rugs are a perfect example; they can add a splash of color and pattern to your balcony while being designed to resist fading and mold. This means they look great all year round, even after being exposed to the sun’s harsh rays or the occasional rain. Solar-powered lights are another fantastic addition, offering a sustainable lighting solution that enhances your balcony’s ambiance without adding to your electric bill. These lights charge during the day and illuminate your space automatically as the sun sets, creating a cozy atmosphere that’s perfect for evening relaxation. The best part? They require virtually no maintenance and are designed to endure outdoor conditions. Synthetic plants bring the beauty of greenery to your balcony without the upkeep associated with real plants. They stay vibrant and lush through extreme temperatures, require no watering, and won’t attract insects. This means you can enjoy the aesthetic benefits of plants without the hassle of regular care or the disappointment of seeing them wilt. Adding these weather-resistant décor elements to your balcony not only reduces the need for regular cleaning and maintenance but also ensures your outdoor space remains a beautiful, inviting extension of your home.     4. Regular Maintenance is Key Emphasizing the importance of regular maintenance for your balcony cannot be overstated. Consistent upkeep ensures that your outdoor space remains a welcoming retreat at all times. Setting aside just a few minutes each week for basic chores like sweeping the floor, wiping down surfaces, and organizing can significantly impact the overall cleanliness and appeal of your balcony. This routine prevents the accumulation of dirt, dust, and debris, which, if left unattended, can turn into stubborn grime that’s much harder to clean later on. Moreover, incorporating these simple maintenance tasks into your weekly routine can vastly extend the life and appearance of your balcony furniture and decorations. By promptly addressing spills, stains, and potential rust spots on metals, you avoid long-term damage that could otherwise lead to costly replacements or repairs. Regular cleaning also helps in identifying any minor issues before they become major problems, such as loose fittings or early signs of wear and tear on your outdoor textiles. This proactive approach to balcony maintenance not only saves you time and energy in the long run but also enhances your outdoor living experience. Knowing that your balcony is always ready for use, whether for a morning coffee, an impromptu get-together with friends, or a quiet evening enjoying the city lights, brings a sense of peace and satisfaction. 5. Protect Your Space from the Elements Protecting your balcony space from the elements is a proactive measure that can greatly extend the lifespan and maintain the appearance of your outdoor oasis. Utilizing protective covers for your furniture and grill is a simple yet effective strategy to shield these items from rain, snow, sun, and wind. These covers are designed to fit snugly over your outdoor pieces, keeping them dry and preventing damage from UV

7 Tricks to Keep Your Balcony Clean and Inviting Read More »

Pristine marble or granite kitchen countertop with reflective surface.

How to Tackle Stubborn Stains on Countertops in 4 Steps | Toronto Shine Cleaning

How to Tackle Stubborn Countertop Stains in Four Simple Steps A coffee bloom on the island, a sauce splash beside the stove: countertop stains are inevitable in a kitchen that gets used. What separates a stressed twenty minutes from a clean five is method rather than muscle. Four steps, plus one preventative bonus, have your counters looking installed-new again without an accidental renovation. Step 1: Identify Your Countertop Material Reaching for a cleaner before knowing your surface is like grabbing soap without knowing whether it is for hands, dishes, or laundry. Granite, marble, quartz, and laminate differ far more in chemistry than in looks. Marble drinks up liquids almost like a sponge, so common pantry acids such as vinegar or lemon juice can stain or dull it. Granite is sturdy but sulks around harsh chemicals. Quartz behaves like the superhero of the group, resisting most stains and damage, yet high-pH cleaners are its kryptonite. Laminate is the easygoing friend that tolerates many cleaners but never forgives an abrasive scrub, which leaves it scratched and permanently dull. Naming your material first is how you avoid converting a cleaning session into a countertop replacement. Step 2: Prepare the Right Cleaning Solution The mix depends entirely on what the surface is made of, so craft a solution that answers the stain without offending the material. For granite or marble, warm water with mild dish soap lifts most marks gently, and when a stain digs in, a paste of baking soda and water applied with care coaxes it out without harshness. Quartz asks only for a soft touch: glass cleaner or a squirt of dish soap in water handles daily spills, and a stain that laughs at both can face a gentle degreaser, used sparingly, as the secret weapon that spares the quartz’s integrity. Laminate accepts a vinegar-and-water mix, or baking soda dissolved in water for persistent spots, cleaning within its limits without harm. Whatever the recipe, apply it with a soft cloth or sponge in gentle circles, imagining a fine paintbrush rather than a scouring pad. Step 3: Rinse, Dry, and Repeat If Needed Once the solution has talked to the stain, wash away every trace. A thorough rinse with clean water is the cool-down after the workout, because sticky, soapy, or gritty residue will dull the very surface you just saved. Dry with a soft towel: this is not only about water marks, but about denying lingering moisture any chance to sit into the material. If the stain survives the first round, that is not defeat but part of the plan. Repeat the cycle with the same care, because persistence beats force. Some marks simply need several application, rinse, and dry cycles. Step 4: Use Natural Light and a Keen Inspection The step that separates clean from pristine is seeing. Open the curtains and let daylight flood the counter, because natural light exposes hidden smudges, streaks, and dull patches that artificial lighting happily hides. Then inspect slowly from several angles, with purpose rather than a glance. Any area that still looks flat or shadowed gets a targeted touch-up: a little more solution, a soft cloth, a second pass of paste where a mark lingers. The detail pass costs minutes and decides the final result. Bonus Step: Prevent Tomorrow’s Stains Today Coasters are not politeness but a shield against the rings that etch into material over years. Trivets and heat mats do the same job against the heat that discolours and cracks natural stone and laminate alike. Accidents still happen in any lived-in kitchen, so the real secret weapon is speed: wiping a spill the moment it lands is the difference between a two-second habit and a future stain-removal campaign. For marble and granite owners, sealing the stone once a year works like armour, an invisible barrier that repels spills and resists stains before they ever start. Match the Cleaner to the Stone Material Safe first choice Never reach for Marble Mild dish soap in warm water; baking soda paste for marks Vinegar, lemon juice, other acids Granite Soapy warm water, gentle baking soda paste Harsh or abrasive chemicals Quartz Glass cleaner or soapy water; mild degreaser sparingly High-pH cleaners Laminate Vinegar-water mix; dissolved baking soda for spots Scouring pads and abrasive scrubs Keep the kit soft and the results bright: Two soft cloths: one for solution, one for clean-water rinsing. A soft towel for drying, so no water marks get an invitation. Baking soda on hand for every stone-friendly paste moment. Coasters, trivets, and a sealant schedule for natural stone. For broader guidance on choosing and using surface cleaners safely, Health Canada publishes practical references on household products. And when a recipe does call for bleach elsewhere in the kitchen, the CDC’s bleach cleaning guidance covers the dilution and ventilation basics worth following. Frequently Asked Questions How do I know what my countertop is if nobody told me? Natural stone feels cool and shows veins or speckle patterns, quartz looks consistent with fine aggregate, and laminate has a printed layer with a visible seam edge. When still unsure, ask your installer or test a hidden section with a drop of water and watch how it behaves. Is baking soda safe on every countertop? As a soft paste with water, it is the gentle option for stone and laminate alike. The risk is concentration and pressure, so keep the paste wet, work softly, and rinse fully rather than scrubbing dry powder across the finish. My stain is gone but a dull patch remains. What now? Dullness usually means residue or a tired seal rather than leftover stain. Re-rinse thoroughly, dry completely, and inspect in daylight. On natural stone, an annual sealant refresh is often what the surface is actually asking for. Do I really need to seal stone every year? For marble and granite, yes, an annual sealant is the routine maintenance that keeps spills beading instead of soaking. It is prevention priced far below a refinishing job, and it makes every

How to Tackle Stubborn Stains on Countertops in 4 Steps | Toronto Shine Cleaning Read More »

Powerful eco-friendly symbol with green elements for sustainability.

5 Easy Eco-Friendly Tips for Making Your Cleaning Routine More Green | Toronto Shine Cleaning

5 Easy Eco-Friendly Tips for a Greener Cleaning Routine Greener cleaning is the rare upgrade that is good for the planet, easier on the wallet, and gentler on the people and pets who live with the smells and residues. It does not take a shelf of specialty products, either: a few pantry staples and smart swaps carry most of the work. 1. Build Cleaners From Everyday Ingredients Vinegar and water shine glass and leave it streak-free, and the same mix loosens soap scum on tiles and bathroom fixtures. For tougher grime, warm the vinegar before mixing and let it cool a little before scrubbing. Baking soda is a mild abrasive that lifts stains from hard surfaces; mixed to a paste with water, it brightens dull stainless steel sinks and cookware, and sprinkled dry on carpets before vacuuming it neutralizes pet odors. Essential oils round out the kit. A few drops of lavender, lemon, or tea tree oil add more than scent, since these oils carry natural antibacterial and antifungal properties that boost a homemade mix. Pantry pairings stretch further as well: lemon juice and salt make a gentle paste for rust stains and brass, and a cup of white vinegar added to the rinse cycle softens laundry and strips soap residue without synthetic softeners. Treat homemade mixes with the same respect as store-bought products by labeling the bottles and following Health Canada’s tips for using household products safely. 2. Retire Single-Use Plastic Bottles Durable spray bottles refilled from concentrates shrink both your plastic habit and your spending: one bottle can be refilled countless times, so you buy less often and throw away almost nothing. Concentrates add a second win. They ship small and light because you add the water at home, which cuts packaging per clean and the emissions of hauling heavy, water-filled bottles around. Choose concentrates from companies that keep formulas free of harsh chemicals and kind to children and pets, often built on plant-based ingredients. The CDC’s home cleaning guidance is a useful reminder here: soap or detergent alone removes most germs from surfaces, so a simple, gentler kit usually covers everyday cleaning, and heavy disinfecting can stay in reserve for when someone in the home is sick or was recently. 3. Choose Tools That Last Washable microfiber cloths beat paper towels on every count: more absorbent, useful for dusting, wiping, windows, and polishing, and able to survive hundreds of laundry cycles, so lifetime cost and waste both drop. For sweeping and dusting, look for bamboo or recycled plastic. Bamboo grows fast with minimal water and no pesticides, and it is naturally antimicrobial; recycled plastic gives old material a second life instead of a landfill sentence. 4. Save Water While You Clean Water disappears without you noticing. Run full laundry loads instead of small frequent ones, and use the eco setting when the machine has one. In the bathroom, fill a spray bottle to rinse cleaner from tiles and shower doors rather than running the shower, and let a cleaner sit on the toilet bowl instead of flushing again and again to rinse it. A conservation mindset produces its own ideas. Greywater from baths, showers, and laundry can go to plants or toilet flushing instead of down the drain, and rainwater collected for outdoor washing stretches the savings further. 5. Put Your Money Behind Eco-Friendly Brands Every green purchase is a vote. Brands worth backing go beyond biodegradable ingredients and recyclable packaging: many source raw materials responsibly, run production on renewable energy, and hold fair labor standards, and they invest in labels and resources that explain sourcing, use, and disposal. Demand does the rest, because as green sales grow, even traditional companies start reformulating and redesigning. Look for certifications such as EcoCert, Green Seal, or B Corporation when you want outside assurance, choose refill options where they exist, and favor local companies using organic ingredients. If you would rather leave the greener cleaning to a team that does it daily, a recurring cleaning service can handle it with eco-conscious products. Green Swaps at a Glance Task Conventional pick Greener swap Glass and windows Bottled glass spray Vinegar and water in a reusable bottle Stains on hard surfaces Harsh scouring powder Baking soda paste Laundry softening Synthetic softener A cup of white vinegar in the rinse cycle Dusting and wiping Paper towels Washable microfiber cloths Sweeping and dusting Disposable plastic tools Bamboo or recycled plastic Washing the car Running hose A bucket of soapy water Quick Green Habits to Keep Refill spray bottles from a concentrate instead of buying new bottles. Run full laundry loads on the eco setting. Sprinkle baking soda on carpets before vacuuming. Rinse tiles and shower doors with a spray bottle, not the shower. Squeegee windows instead of flooding them. Frequently Asked Questions Do homemade cleaners actually work? The staples earn their reputation. Vinegar mixed with water leaves glass streak-free and loosens soap scum, warm vinegar takes on tougher grime, baking soda paste lifts stains and brightens stainless steel, and a few drops of lavender, lemon, or tea tree oil add natural antibacterial and antifungal power. Lemon juice with salt handles rust stains and brass. Do I need disinfectants for everyday cleaning? Usually not. Cleaning alone with soap or detergent removes most germs from surfaces, so it covers normal days at home. Stronger products have their place when someone is sick, and if you do use them, follow the label and never mix bleach with other cleaners, as CDC guidance warns, because the vapors can be dangerous to breathe. How do concentrates cut waste? They arrive in smaller, lighter packages because you add the water at home, so each clean uses less plastic and shipping burns less fuel. Paired with a durable spray bottle that refills countless times, they cut both trash and repeat purchases, and many concentrate makers build on plant-based ingredients. What is the easiest water-saving swap? Start in the bathroom, where waste is constant: rinse tiles and shower doors from a

5 Easy Eco-Friendly Tips for Making Your Cleaning Routine More Green | Toronto Shine Cleaning Read More »

Morning-lit living room with polished plywood floors.

How to Keep Your Plywood Floor Sparkling: 5 Easy Steps | Toronto Shine Cleaning

How to Keep Your Plywood Floor Sparkling: 5 Easy Steps Plywood floors deliver the warmth of wood at a friendlier price, but water and grit are their sworn enemies. A handful of consistent habits keeps the surface smooth and the finish intact for years. These five steps, from daily dusting to a periodic refresh, cover everything a plywood floor needs to stay in top shape. Step 1: Dust Daily With a Soft, Electrostatic Tool Gentle daily dusting is the foundation of plywood care. Choose a microfiber mop or a dust mop made for wood floors: the fibers lift dust, pet hair, and everyday debris without dragging scratchy grit across the finish. Electrostatic sweepers such as the Swiffer Sweeper work especially well, because their charged cloths act like a dust magnet that catches even fine particles. The CDC’s cleaning guidance takes the same line: regular cleaning is what keeps dust and dirt under control in the first place. Step 2: Mop Weekly With Barely Any Water Water is the one thing plywood layers cannot forgive: let it seep between them and you risk swelling, warping, and mold growth. That makes your mop and solution the real tools of the job. A flat mop with a microfiber pad spreads moisture evenly instead of leaving wet pools, and its soft surface lifts dirt without scratches or streaks. For the solution, use a pH-neutral cleaner such as Bona Hardwood Floor Cleaner, mixed with water as the label directs. Dampen the pad until it is moist but not dripping, then work across the floor in sections with smooth, even strokes. Going section by section keeps the moisture controlled, so nothing is missed and nothing gets soaked. The CDC’s information on mold explains why the caution is worth it: mold grows wherever moisture lingers, and wood is on its menu. Step 3: Treat Spills on Contact A spill starts a clock, and dabbing with a clean, damp cloth is the fastest way to stop it. Press and blot rather than rub, since rubbing spreads the liquid and pushes it deeper into the wood. Grease and oil need one extra step: mix a drop of dish soap into a cup of water, apply the mild solution, and let it cut the grease before you wipe it away. For a stain that shrugs off the first attempt, use a dedicated wood floor cleaner such as Method Squirt + Mop Wood Floor Cleaner. Apply it to a soft cloth rather than pouring it onto the floor, and dab gently until the mark lifts. Keep abrasive pads and scrubbers away entirely, because they scratch the finish and open the surface to worse damage. Products work best when used as directed, and Health Canada’s guidance on using household products safely is a solid reference for cleaning and storing them. Step 4: Put Mats Where Traffic and Water Land Mats at every entry point stop grime and moisture before they reach the floor. Choose versions made for hardwood, with a non-slip backing that holds them steady and a design that lets air flow underneath so trapped dampness cannot harm the plywood. Extend the strategy indoors: hallways, the stretch in front of the kitchen sink, and any spot where feet travel often. Under heavy furniture, area rugs and protective pads spread the weight more evenly, which curbs indentations and scratches. Step 5: Refresh the Top Coat Every Few Years A new coat of polyurethane every few years restores the original luster and adds a layer of protection against daily life. Pick a water-based product: it dries fast, so the floor is out of service for less time, and it releases far fewer odors and volatile organic compounds than oil-based finishes, which matters in homes with children, pets, or sensitive noses. The order of work matters. Clean the floor thoroughly first, then sand it lightly with fine-grit paper, working evenly so the fresh coat has a surface to grip. Apply the polyurethane in thin, even layers with a quality brush or roller, following the grain and starting at the farthest corner so you can walk out without touching the wet finish. Several thin coats usually beat one thick one, with the label’s drying time between rounds. The payoff is a floor that looks refreshed and resists scratches, scuffs, and stains. Plywood Floor Care at a Glance Task How often The critical detail Dusting Daily Microfiber or electrostatic cloth, gentle strokes Mopping Weekly Microfiber pad moist, not dripping; pH-neutral cleaner Spill care Immediately Dab, never rub; dish soap solution for grease Mats and rugs Ongoing Clean them regularly; airflow backing prevents trapped damp Refinishing Every few years Water-based polyurethane in thin coats Five Rules That Prevent Damage Never wet-mop; keep the pad moist, not dripping. Never rub a spill; dab it the moment it happens. Never pour cleaner directly onto the floor. Never use abrasive pads or scrubbers on the finish. Never skip the light sanding before a new top coat. Frequently Asked Questions Can plywood floors handle a wet mop? No, so keep water to a minimum. A microfiber pad that is moist but not dripping, paired with a pH-neutral cleaner, cleans the floor without letting moisture seep between the layers. Excess water is what causes swelling, warping, and mold, so the weekly mop should leave the surface nearly dry. What is the best cleaner for plywood floors? A pH-neutral floor cleaner mixed with water as directed is the safe default. For grease, a drop of dish soap in a cup of water cuts through it. For stubborn stains, reach for a dedicated wood floor cleaner applied to a cloth, not the floor itself. How do I stop spills from staining? Speed and technique. Blot with a clean, damp cloth right away, pressing instead of rubbing so the liquid does not spread or sink deeper. Grease gets the dish soap treatment; anything stubborn gets a wood floor cleaner dabbed on gently. Abrasive scrubbers only make the damage worse. When does a plywood floor

How to Keep Your Plywood Floor Sparkling: 5 Easy Steps | Toronto Shine Cleaning Read More »

Homemade natural cleaning solutions displayed on a sunny kitchen countertop.

How to Refresh Your Home: 5 Essential Oil Recipes for Natural Cleaning

Hey there! Ready to give your home that Essential Oil Recipes for Natural Cleaning? inviting vibe without resorting to harsh chemicals? Let’s dive into the world of essential oils and whip up some natural cleaning solutions that not only cleanse but also leave your space smelling divine. Essential oils are not just about the aroma; they come packed with powerful cleaning properties too. Here are 5 essential oil recipes to refresh your home naturally: 1. All-Purpose Lemon Lavender Cleaner Let’s expand further on the All-Purpose Lemon Lavender Cleaner with a detailed breakdown that highlights each component and step in the process, providing you with a deeper understanding and appreciation for this natural, aromatic cleaner: 1 cup of water: Acts as the base for the cleaner, diluting the vinegar and essential oils to make them safe for use on various surfaces. Water helps in spreading the cleaning solution evenly. 1 cup of white vinegar: A powerful natural disinfectant, vinegar cuts through grease, grime, and dirt with ease. Its acidic nature makes it effective against bacteria and viruses, ensuring your surfaces are not just clean but sanitized. 15 drops of lemon essential oil: Known for its refreshing scent and strong antibacterial properties, lemon essential oil is a key ingredient in combating kitchen messes and brightening surfaces. It leaves behind a clean, invigorating aroma that uplifts the mood. 15 drops of lavender essential oil: Adds a calming, floral scent to the mix, transforming cleaning into a more pleasant, stress-free experience. Lavender’s natural antiseptic properties complement the lemon and vinegar, enhancing the cleaner’s effectiveness. A spray bottle: The perfect container for your homemade cleaner, making it easy to mix, store, and use. A spray bottle allows for convenient application, ensuring you cover the desired areas with just the right amount of cleaner. How to Make It: Begin by pouring water, vinegar, and the carefully measured drops of essential oils directly into your spray bottle. This method ensures that the blend achieves a harmonious balance, maximizing both the cleaning capabilities and the aromatic benefits of the ingredients. Given the natural tendency of essential oils to separate from the vinegar and water mixture, it’s crucial to give the bottle a good shake prior to each use. This step guarantees that the oils are evenly dispersed throughout the solution, allowing for consistent application and effectiveness. When it comes to using this cleaner, its versatility truly shines. Designed for hard, non-porous surfaces, it works wonders on countertops, kitchen tables, appliances, and bathroom fixtures. The application process couldn’t be simpler: just spray the mixture onto the surface in question and wipe it down with a cloth or sponge to achieve a clean and shining finish. The benefits of this homemade cleaner extend far beyond its surface-cleaning prowess. The lemon essential oil and vinegar join forces to offer robust antibacterial and antiviral properties, forming a formidable barrier against the spread of common household germs. Meanwhile, the lavender essential oil envelops your space in its calming scent, transforming routine cleaning into a more pleasant and stress-relieving activity. This concoction is not only effective but also non-toxic and eco-friendly, ensuring it’s a safe choice for homes with children, pets, and a preference for green living solutions. 2. Peppermint Window and Mirror Cleaner Diving into the Peppermint Window and Mirror Cleaner, let’s unfold each element and the crafting process that combines to form a sparkling, pest-repellent marvel for your glass surfaces: 1 ½ cups of water: Serves as the foundation of this cleaner, effectively diluting the vinegar and essential oil to ensure they’re gentle yet effective on glass surfaces. Water facilitates the even distribution of the cleaning mixture, ensuring a streak-free shine. ½ cup of white vinegar: This ingredient is a cleaning powerhouse, renowned for its ability to dissolve grime, combat streaks, and leave a crystal-clear finish. Its natural acidity is hostile to germs, making it an excellent disinfectant for windows and mirrors. 10 drops of peppermint essential oil: Far more than a fresh scent, peppermint oil is a natural deterrent against spiders and ants. Its inclusion turns this cleaner into a dual-threat against dirt and unwanted critters, leaving behind a refreshing minty aroma that revitalizes your home environment. A spray bottle: An essential tool for this homemade concoction, the spray bottle ensures easy mixing, storage, and application. It allows for a fine mist that evenly coats windows and mirrors without over-saturating them, making your cleaning efforts more efficient and effective. How to Make It: Initiate the process by combining the water and white vinegar in your spray bottle, followed by the peppermint essential oil. This preparation strategy ensures a well-balanced mix, leveraging the cleaning strength and aromatic benefits of the components in equal measure. Because essential oils can separate from their water and vinegar base, a vigorous shake before use is imperative. This action guarantees the essential oil’s thorough integration, offering consistent cleaning power and fragrance with every spray. In application, the Peppermint Window and Mirror Cleaner shines with versatility. It’s specifically formulated for use on glass, making it your go-to for leaving windows and mirrors without smudges or streaks. Simply spray a light coating on the glass surface and wipe away with a cloth or sponge for an immediate gleam. But the advantages of this homemade cleaner go beyond mere aesthetics. The peppermint essential oil’s inclusion serves a dual purpose, not only imparting a clean, uplifting scent but also acting as a natural repellant against common household pests like spiders and ants. Additionally, the non-toxic and environmentally friendly nature of this cleaner makes it a safe and responsible choice for households, ensuring cleanliness doesn’t come at the cost of health or the planet. Equally effective in enhancing the ambiance of your living space, the Peppermint Window and Mirror Cleaner introduces a minty freshness that can energize and refresh. This blend doesn’t just clean; it transforms the act of cleaning into an enjoyable, beneficial task. Its utility extends across the home, from living room windows to bathroom mirrors, making it an

How to Refresh Your Home: 5 Essential Oil Recipes for Natural Cleaning Read More »