
Cleaning Guide

Clean laminate flooring with light wood finish reflecting natural light.

How to Clean Laminate Floor: 7 Simple Steps for a Shiny Finish | Toronto Shine Cleaning

How to Clean Laminate Floors: 7 Simple Steps for a Shiny Finish Laminate flooring looks its best for years when you treat it gently. The surface is tough but not indestructible: too much water, gritty dirt, and harsh products all leave their mark. Follow these seven steps to keep the shine without scratches, streaks, or swollen seams. 1. Gather the Right Supplies Good results start before the cleaning does. Pick up a microfiber mop, which grabs dust without scratching the finish, plus a soft-bristle broom or a vacuum with a soft brush attachment. Add a spray bottle, a bottle of white vinegar, and a supply of soft, dry cloths. Vinegar earns its place in the kit because it breaks down everyday grime without leaving residue behind. Skip harsh chemicals and soap-based cleaners at the store; they can damage the protective finish over time. A cleaner made specifically for laminate is also a fine choice, as long as you read its label before use. 2. Sweep or Vacuum Before Anything Else Loose dirt is the enemy of a shiny floor. Tracked-in grit grinds against the surface like fine sandpaper, dulling the shine and adding small scratches with every step. Removing it first protects the floor’s appearance and lifespan, so keep a broom or vacuum handy for a regular pass between deeper cleanings. It also makes the washing that follows far more effective, since the mop is not dragging particles around the room. It follows the same rhythm the CDC recommends: clean surfaces before dirt builds up. 3. Mix a Simple Cleaning Solution Fill your spray bottle with one part white vinegar and three parts warm water. The mild acidity loosens grime, and the warm water boosts its cleaning power, all without the sticky film that soap leaves behind. That residue matters more than it sounds: soapy cleaners build up on laminate, dull the finish, and cause long-term damage that no amount of polishing can fix. A commercial product works too, if it is formulated for laminate; follow its directions closely. Health Canada’s tips for using household products safely are worth checking while you stock up. 4. Mop With a Damp Mop, Section by Section Spray your solution over a small section and wipe it with the microfiber mop, working along the grain of the planks to avoid streaks. The word to remember is damp, never soaking. Wring the mop out thoroughly before it touches the floor, because excess water seeps into the seams between planks and causes the edges to swell. Work in sections rather than flooding the whole floor at once, keeping the moisture under control. 5. Dry the Floor Straight Away Go over each freshly mopped area with a soft dry cloth or a dry mop head. Standing moisture is what leaves water spots and streaks behind, and it is also what finds its way into the seams and starts the swelling that ruins laminate edges. Drying as you go takes less than a minute per section and delivers the even, polished finish you are after. 6. Spot Clean Spills and Stains Promptly Treat whatever lands on the floor right away rather than waiting for cleaning day. Spritz the spot with your vinegar solution, let it sit for a few minutes to break the stain down, then gently rub it away with a soft cloth or sponge. Skip abrasive scouring pads and stiff brushes entirely; they scratch the protective layer and do more harm than the stain ever would. Handling spills quickly keeps the floor pristine instead of permanently blemished. 7. Keep Up With a Simple Routine Consistency protects the shine more than any single deep clean. Sweep or vacuum regularly so grit never gets a chance to settle, and mop weekly with the vinegar solution to lift the film that ordinary traffic leaves behind. Place doormats at entryways to cut tracked-in dirt, and fit pads under chair and table legs so furniture glides instead of scratching. Your Laminate Cleaning Kit A microfiber mop plus a dry mop head or soft cloths A soft-bristle broom or a vacuum with a soft brush attachment A spray bottle for the vinegar and water solution White vinegar, plus a laminate-specific cleaner if you prefer Doormats and furniture pads for everyday protection Quick Reference: Do It Right Task Do this Why it matters Routine clean Sweep or vacuum with a soft brush Grit acts like sandpaper and dulls the finish Mopping Damp microfiber mop, working along the grain Avoids streaks and keeps water out of the seams Drying Follow straight away with a dry cloth Stops water spots, streaks, and edge swelling Spills Blot and spot clean with vinegar solution Stains lift easily before they set Protection Doormats at entries, pads under furniture Fewer scratches and less tracked-in dirt Frequently Asked Questions Can I use vinegar to clean laminate floors? Yes. One part white vinegar to three parts warm water lifts everyday dirt without residue, avoiding the sticky film that soap-based products leave. Keep the mop damp rather than wet, dry each section as you finish, and the mix is both safe and effective for regular use. How often should I mop laminate floors? Weekly mopping with the vinegar solution keeps them looking fresh, supported by sweeping or vacuuming on a more regular rhythm so grit never settles in. Prompt spot cleaning of spills matters more than any schedule. A spill left waiting sets and takes permanent hold, so treat it the day it happens. Why do my floors look streaky after mopping? Streaks usually come from too much water on the mop, a dirty mop head, or wiping across the planks instead of along the grain. Wring the mop out thoroughly before each pass, follow the direction of the planks, and finish each section with a dry cloth so no moisture is left to dry unevenly. Can water damage laminate flooring? It can. Laminate tolerates a damp mop, but standing water slips into the seams and makes the edges swell, damage

How to Clean Laminate Floor: 7 Simple Steps for a Shiny Finish | Toronto Shine Cleaning Read More »
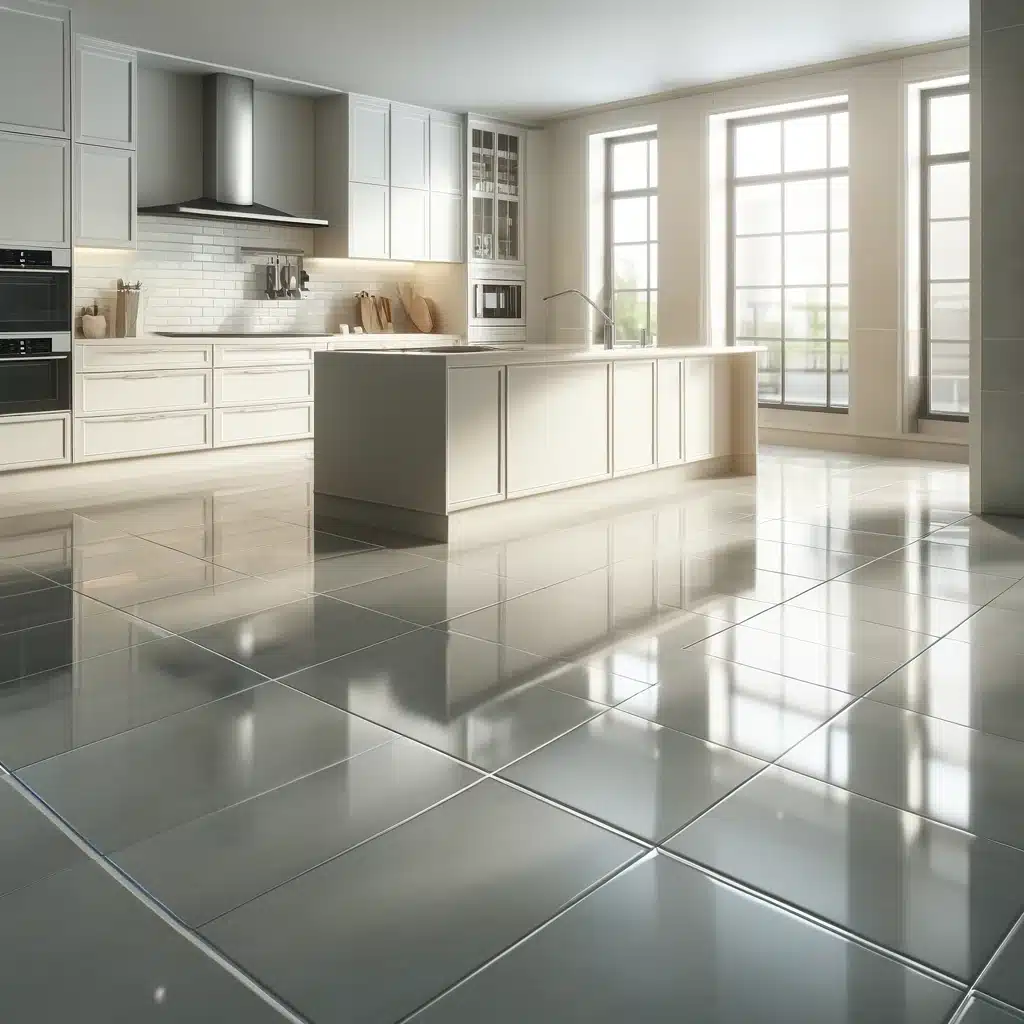

Modern kitchen with gleaming light ceramic tiles and natural illumination.

How to Clean Ceramic Floors: 7 Easy Steps for a Sparkling Home | Toronto Shine Cleaning

Ceramic tile rewards a gentle, repeatable routine Ceramic flooring stays bright for decades when you clean it with the right tools and skip anything aggressive. A broom, a mop, a bucket, warm water, and a mild detergent handle nearly every mess a household throws at tile. This seven-step routine takes you from prep to the final dry pass, leaving floors polished instead of streaky. The approach matches public-health guidance, too. The CDC treats floors as hard surfaces that do well with soap and water or a suitable product, and notes that regular cleaning removes most germs, so consistency beats chemical strength. If a weekly mop keeps slipping off your calendar, a regular cleaning plan can carry the routine for you. Step 1: Gather everything before water hits the tile Assemble your kit up front to avoid mid-mop scavenger hunts. You will need: A broom or vacuum to lift loose debris before washing A mop and bucket for the wet pass A mild detergent or a cleaner made specifically for ceramic tile Warm water to help dissolve stuck-on residue A microfiber cloth or towel that soaks moisture fast without streaks A scrub brush for spots the mop cannot shift Skip harsh chemicals. Strong products can damage both tile and grout surfaces, so a gentle formula is the smarter pick. Step 2: Sweep or vacuum to protect the glaze Clearing dust, crumbs, and grit first is not just a warm-up. Loose particles act like abrasives, and a wet mop drags them across the surface, causing scratches that dull the tiles and lead to long-term damage. A broom handles open floor well, while a vacuum pulls tiny particles out of grout lines where they hide. Daily sweeping also keeps buildup low, turning weekly or bi-weekly mop sessions into quick jobs. Step 3: Mix a cleaning solution that is kind to tile Fill the bucket with warm water and add a few drops of mild detergent or a cleaner formulated for ceramic floors. Warmth helps break down clinging residue so it mops away easily. Harsh chemicals, by contrast, can discolor tiles and wear down the protective sealant, leaving the floor dull and tired over time. Stir until the detergent is fully dispersed: an even mix cleans consistently and lifts dirt without leaving a film. Health Canada keeps a helpful reference on using household products safely if you want guidance on handling the liquids under your sink. Step 4: Mop with a figure-eight, not a scrub Dip the mop, then wring out the excess: a soaking-wet floor slows the job and invites streaks and water spots. Start at one corner and work toward the opposite side so every stretch gets covered. Push the mop in a figure-eight pattern rather than circles or straight passes. That motion lifts soil and traps it in the mop head instead of smearing it into cleaned areas. Give high-traffic lanes extra passes and ease over grout lines, where dirt packs into the crevices. Rinse and wring the mop often so you never spread grey water. Step 5: Spot-treat stubborn marks by hand Even a well-kept floor develops stubborn spots. Apply extra cleaner straight onto the mark and work it in with a scrub brush in small circles, helping the solution penetrate the stain. Keep pressure light and bristles soft: hard scrubbing can scratch or dull the finish. If a stain refuses to budge, let the cleaner sit a few minutes to break down the dirt. Once the spot lifts, wipe the area with a damp cloth; leftover cleaner attracts fresh dirt and can discolor the tile over time. Step 6: Rinse away the invisible film Empty and rinse the soapy bucket, then refill with clean warm water. This pass matters because detergent left behind dries into a dull, sticky residue that grabs dirt. Mop the same corner-to-corner path with water only, rinsing and wringing the mop often so you never reintroduce soap. Warm water lifts the last of the residue, leaving the ceramic’s natural shine visible instead of hazy. Step 7: Dry the floor for a true sparkle Dry it the moment rinsing ends. Microfiber drinks water fast and finishes streak-free, preventing the spots that spoil an otherwise pristine floor. Work section by section and check edges and corners where moisture collects. Thorough drying also removes the slip hazard wet tile creates. If you own a floor protector, apply it now, while the surface is clean and bare. It adds shine and forms a barrier against future spills and stains, keeping the luster and making later clean-ups easier. Ceramic floor care at a glance Task When to do it Why it matters Sweep or vacuum Daily Keeps grit from scratching the glaze and shortens mop days Mop with mild solution Weekly or bi-weekly Removes ground-in dirt before it dulls the tiles Spot-treat stains As they appear Stops marks from setting in tile or grout Rinse with clean water Every wash Removes sticky soap film that attracts dirt Dry with microfiber Every wash Prevents water spots and slip hazards Apply floor protector After deep rinses, as needed Shields the surface from spills and future stains Frequently asked questions What cleaner is safest for ceramic floors? Mild detergent diluted in warm water, or a product formulated for ceramic tile. Harsh chemicals discolor the surface and wear down the sealant over time, so the gentle option is also the one that protects your investment. Why do my tiles look dull after mopping? Leftover soap is the usual culprit. Residue dries into a sticky film that attracts dirt and clouds the shine. Fix it with a rinse pass of clean warm water and no cleaner, then dry with a microfiber towel. Can I let the mop soak the floor? No. Oversaturation slows drying and leaves streaks and water spots without cleaning any better. Wring the mop until damp rather than dripping, and rinse it often so you never reapply dirty water. Do I really need to dry the floor by hand? It is

How to Clean Ceramic Floors: 7 Easy Steps for a Sparkling Home | Toronto Shine Cleaning Read More »

Dusty attic interior with visible beams and sunlit window.

6 Essential Tips for Efficient Attic Cleaning | Toronto Shine Cleaning

A Tidy Attic Pays for Itself in Space, Air, and Peace of Mind An attic that has drifted into chaos quietly taxes the whole house. Boxes lean against rafters, dust blankets every surface, and a search for one bin of holiday lights can swallow an entire Saturday. A focused attic clean fixes far more than appearances. It frees storage, improves air quality above your ceilings, and exposes leaks, pests, or mold while those problems are still small and cheap to repair. The six tips below follow the same sequence a seasoned crew uses, from the first plan to year-round upkeep. 1. Begin With a Written Plan Decide your mission before you pull down the ladder. Are you decluttering, hunting for a specific box of keepsakes, or attempting a full deep clean? That answer shapes every later choice. Next, break the space into zones: one corner for sorting boxes, another for stored furniture, a third for items that need repair or a deeper scrub. Working one zone at a time keeps a mountain of stuff from feeling like a mountain, and visible progress in each zone keeps you moving when the dust starts to test your patience. 2. Dress Like the Attic Is a Job Site Attics rarely receive the care that living rooms do, so expect dust, debris, and insulation fibers floating in still air. Wear long sleeves and long pants to keep those abrasives off your skin and reduce the chance of irritation or an allergic reaction. Sturdy gloves guard your hands against splinters, sharp metal edges, and whatever the last decade left behind. A dust mask filters the fine particulates you will inevitably stir loose, which matters extra if mold or mildew spores are anywhere in the space. 3. Carry Every Tool Up Before You Start Trips back downstairs kill momentum and stretch a half-day job into a full weekend. Load up first with everything you will need: Heavy-duty garbage bags tough enough for broken items, old cardboard, and dusty textiles without tearing on sharp edges Sorting boxes labeled keep, donate, sell, and toss so every object lands in its fate immediately A vacuum with a HEPA filter, which traps fine dust and allergens instead of puffing them back into the enclosed air A mold and mildew cleaning spray for moisture-prone corners and rafters A sturdy step ladder for high shelves and deep corners, so you never over-reach from the joists 4. Sort Every Item Into Four Buckets The fastest way through the piles is a ruthless four-way decision on every single object. Keep covers things you use regularly, hold real sentimental value, or will genuinely need later. Donate takes items that are usable but no longer serve you; someone else will thank you. Sell is for pieces with resale value that can return some cash for the effort. Toss is the home for anything damaged beyond repair or refused by charities. A sorted attic is not just easier to walk through. Less clutter means fewer hiding spots for pests and a much better chance of noticing a leak stain or mold patch early. 5. Clean From the Rafters Down With the clutter gone, work top to bottom. Dust the overlooked spots first: rafter undersides, door frame tops, window sills, and light fixtures, all of which collect cobwebs and grey fur. Then vacuum the floor, pressing into crevices and corners where insects and rodents like to nest and breed. Watch closely for mold or mildew, which thrives where ventilation is poor and moisture settles. Treat any patch right away with a labeled mold-killing product and follow the instructions exactly. The CDC guide on mold health explains why disturbing or breathing mold is worth avoiding, particularly for children, older adults, and anyone with a sensitive airway or weakened immune system. Before buying any heavy-duty disinfectant for the job, skim Health Canada’s household products guidance on reading labels and using cleaners without wrecking your indoor air. 6. Protect Your Work With Light Yearly Upkeep A spotless attic left alone slowly reverts. A simple maintenance rhythm keeps clutter and dust from rebuilding, protects the things you store up there, and gives you regular chances to spot roof leaks or pest entries before they become expensive repairs. Task Frequency Why It Matters Visual scan for stains, damp, and pests Every season Catches costly damage while it is tiny Quick dust and cobweb sweep Twice a year Keeps air quality and light levels up Full sort and vacuum session Once a year Stops clutter from stacking back up Label and log stored boxes At first store Future searches take minutes, not hours Hand Over the Ladder When the Attic Wins Some attics outgrow a weekend: decades of accumulation, large suspected mold areas, or an access hatch that worries you alone with a ladder. Toronto Shine Cleaning brings bonded, insured crews, backed by a $1,000,000 insurance policy plus a $10,000 accidental breakage and surety bond, to homes across the city. The deep cleaning service starts at $270.38 for a studio or one-bedroom home before HST, with every rate listed on the pricing page. Frequently Asked Questions How long does an attic clean take? For a moderately loaded attic, plan roughly half a day with a helper. Denser accumulations stretch into a full weekend because sorting decisions, not dusting, eat the clock. Zoning the space and using the four-bucket method are the two biggest time-savers. Do I really need a dust mask up there? Yes. Attics trap fine dust, insulation fibers, and sometimes mold spores in still air with little ventilation. A mask filters what you would otherwise breathe in a closed space while you agitate months or years of settled particles. Can I store my belongings right after cleaning? Once the space is fully dry, yes. Prefer sealed bins over open piles so dust cannot settle back onto your things, and leave walking paths clear to the walls so future inspections and vacuuming stay easy. What signs mean I should call a professional?

6 Essential Tips for Efficient Attic Cleaning | Toronto Shine Cleaning Read More »

Spotless living room window sills adorned with colorful plants.

7 Easy Steps to Maintain and Clean Window Sills Easily | Toronto Shine Cleaning

Window Sills Catch Everything. Here Is How to Beat Back. Window sills sit at the intersection of dust, sunshine, condensation, and whatever you set on them, which makes them one of the fastest grime collectors in a house. Left alone, they drift from dusty to stained to genuinely moldy. The good news: keeping them clean takes everyday supplies and a short, repeatable routine. These seven steps work on wood, vinyl, and plastic sills and keep the whole process gentle on your frames and glass. Step 1: Stage Your Supplies First Rounds to the cupboard mid-job turn a fifteen-minute task into an hour. Before touching a single sill, set out everything you will reach for: A vacuum cleaner with a brush attachment, which lifts dust off sills without scratching them Two microfiber cloths, which trap particles, skip the lint, and stay kind to glass and surfaces alike Mild soap and a bucket of warm water for the everyday wash White vinegar for stubborn spots and early mold, thanks to natural acidity that breaks down stains A wood-specific cleaner if your sills are timber, since it cleans while protecting the finish Step 2: Clear the Debris Sweep the sill bare first. Sun-loving plants, small decorations, and the bottoms of blinds or curtains all need to move so you have the full surface in reach. Then run the vacuum’s brush attachment over every sill before any liquid touches it. Vacuuming first lifts loose dust and grit instead of turning it into mud under your cloth, and it keeps particles from redepositing on freshly wiped surfaces later. Step 3: Wipe Down Methodically Dampen a microfiber cloth in the warm soapy water, wring it thoroughly, and wash each sill with care, slowing down at corners and outer edges where grime loves to park. The mild soap lifts dirt and oily film without harsh chemistry, so it suits nearly any sill material, and vinyl or plastic sills usually come back to a clean shine with this pass alone. Keep the cloth well wrung: excess water that seeps into seams can damage finishes, swell wood, and invite mold or mildew, the trio of problems you are cleaning to prevent. Step 4: Attack Tough Stains and Mold For stubborn rings, grey film, or the first fuzzy signs of mold, reach for white vinegar. Its acidity loosens stains and spores without the burn of aggressive chemical cleaners, and it stays safe on most sill materials. Apply it directly to the affected spot and let it dwell for a few minutes so it can penetrate and unbind the grime from the surface. Then wipe with a soft cloth and watch the stain lift far more easily than scrubbing ever achieved. If mold keeps returning to one window, that usually signals excess moisture worth investigating; the CDC’s mold health page covers who is most sensitive to mold and why prompt cleanup matters. Step 5: Dry Every Inch Cleaning is only finished when the sill is bone dry. Lingering water slips into pores and seams, and on wood it eventually causes swelling, warping, or rot; on any surface, dampness is an open invitation for mold and mildew. Take a clean, absorbent towel and pat the whole sill, pressing into nooks where moisture pools. Complete dryness protects both the structure and the look of your sills for years. Step 6: Treat Wooden Sills Timber sills earn a little extra devotion. Use a cleaner formulated for wood so you clean without stripping natural oils, apply a small amount to a soft cloth, and wipe along the grain to avoid marks while enhancing the pattern underneath. If the wood looks dry or tired afterwards, a wood conditioner puts moisture and vitality back. For sills that take heavy sun or wear, a wood sealant adds a shield against moisture and UV damage, stretching the life of the sill and keeping its appearance sharp. Step 7: Hold the Line With Regular Maintenance A short routine is what keeps the deep clean from ever being necessary again. Dust each sill lightly with a soft cloth or duster once a week before grit can cement into grime, then repeat the full vacuum-wipe-dry sequence once a month. This schedule defends both the look and the structure of the material, whatever it is. If weekly upkeep keeps slipping, folding sill and window care into a regular house cleaning service makes the consistency automatic, and Health Canada’s household products guidance is a smart read on choosing and storing the cleaners your team brings inside. Sill Material Weekly Care Monthly Deep Clean Vinyl or plastic Quick dry dust or swipe Soapy wipe, vinegar on stains, dry fully Painted wood Soft duster, check paint seams Gentle soap, thorough drying, touch-up checks Natural wood Dust along the grain Wood cleaner, conditioner or sealant as needed Frequently Asked Questions and Answers How often should window sills actually be cleaned? A weekly light dust plus a monthly full clean keeps most sills looking new. Homes near busy roads, with pets, or with plants on the sills may want the deep pass every two or three weeks instead. Is vinegar safe on every sill type? Vinegar handles mold and stains on most materials, but natural stone and some delicate finishes dislike acid. Test a hidden spot first, and for wooden sills follow with the proper wood cleaner and conditioner rather than vinegar alone. Why do my sills get moldy every winter? Cold glass meets warm indoor air, and condensation runs down onto the sill. Wipe condensation early, keep a gentle airflow near the window, and dry the sill fully after every clean so spores never get a damp footing. Can a cleaning service keep up with this for me? Yes. Regular visits cover dusting and wipe-downs, and a seasonal deep clean resets sills, tracks, and glass together. Current rates are on the pricing page. Book Sill-Savvy Cleaning in Toronto Toronto Shine Cleaning serves homes across the city; find your area on the locations page. Call (647) 424-0355

7 Easy Steps to Maintain and Clean Window Sills Easily | Toronto Shine Cleaning Read More »

Caucasian hand meticulously cleans miniature house model with cloth.

7 Steps to a Thorough Home Cleaning: From Top to Bottom

Home Cleaning can feel like a daunting task, but with the right strategy, it doesn’t have to be! Whether you’re prepping for guests, tackling spring cleaning, or just giving your space a much-needed refresh, follow these seven steps to ensure your home shines from top to bottom. 1. Plan and Prepare When planning your home cleaning, it’s also smart to check the inventory of your cleaning products to ensure you have enough supplies to avoid any interruptions. For instance, make sure your cleaning solutions are full, check that your mop heads are clean, and see if your vacuum cleaner bags or filters need replacing. This kind of preparation not only streamlines the cleaning process but also prevents the frustration of having to stop midway to run to the store. Additionally, consider the logistics of your home cleaning. For example, if you live in a multi-story home, plan to start from the top floor and work your way down to efficiently manage the dust and dirt without tracking it back into cleaned areas. This approach saves time and energy, making your cleaning more effective. By taking the time to thoroughly plan and prepare, you can transform what might seem like an overwhelming chore into a series of manageable tasks, making the entire home cleaning process less daunting and more productive.     2. Start at the Top When you begin your home cleaning by starting at the top, it’s efficient to also tackle the cobwebs that might be lurking in the upper corners of your rooms and any dust that has settled on high shelves or ledges. This strategy ensures that you capture all the loose particles before they have a chance to settle elsewhere after you’ve cleaned the lower areas. After dusting the ceiling fans and light fixtures, move on to cleaning any wall hangings, such as picture frames or mirrors, which also tend to accumulate a surprising amount of dust. This top-down approach in home cleaning means that by the time you reach the surfaces and floors, much of the preliminary dust and debris has already been dealt with. 3. Dust and Wipe Surfaces Once you’ve effectively managed the higher areas of your home, continue your home cleaning by focusing on all remaining surfaces. Extend your attention to other furniture pieces, such as tables, chairs, and desks. Utilize your microfiber cloth or duster to pick up dust from these areas, ensuring you reach under any objects and into the corners where dust tends to gather. In your living room and bedrooms, remember to wipe down electronics and appliances, as these can also gather dust that affects their performance and appearance. For fabric surfaces like sofas and armchairs, use an upholstery attachment on your vacuum cleaner to remove dust and allergens, which can significantly freshen up the space. As you move into the kitchen and bathrooms, switch to more robust cleaners designed to handle grease and grime. In the kitchen, make sure to clean the fronts of cabinets, the stovetop, and any counters, particularly around appliances where crumbs and food residues can accumulate. For the bathrooms, give extra care to disinfecting surfaces like faucets, handles, and countertops to ensure they are not just clean but also hygienic. By systematically dusting and wiping from one room to the next, you ensure that no surface is overlooked, contributing to a comprehensive and effective home cleaning session. 4. Tackle the Bathrooms When it comes to home cleaning, giving extra care to the bathrooms is crucial because of the high potential for germ accumulation. Start by applying cleaners to the sink, bathtub, and toilet, allowing them to sit for a few minutes to break down the dirt and grime. During this waiting period, you can tackle other parts of the bathroom such as the mirrors and windows. Use a glass cleaner to ensure these surfaces are streak-free and clear. After allowing the cleaning agents to soak, scrub each area thoroughly with a suitable brush or sponge. For tough grime and lime scale in the toilet or around fixtures, consider using a pumice stone or a specialized cleaning tool that can handle these challenges without damaging the surfaces. Additionally, turn your attention to the grout between tiles, which can often become discolored and moldy. Using a grout brush with a bleach-based cleaner can restore the whiteness and prevent mold from spreading. Once you have scrubbed and rinsed all the major fixtures, finish up by cleaning the floor. The bathroom floor can harbor bacteria and dirt, especially in corners and around the toilet base. Use a disinfectant cleaner and, if possible, a steam mop to ensure the floor is not only clean but also sanitized.     5. Clean the Kitchen Giving the kitchen detailed attention is vital because this space is a central hub of activity and requires hygiene and cleanliness for safety and health. Begin with deep-cleaning the appliances, which involve not just wiping the exteriors but also tackling the interiors. For instance, remove any food particles and grease from the microwave with a cleaning solution designed for appliances. For the oven, use a dedicated oven cleaner to cut through baked-on grime, and consider running a self-cleaning cycle if it’s available. For your refrigerator, take out all items and removable shelves or bins to wash them separately with warm soapy water. Wipe the inside of the fridge with a baking soda solution to remove odors and stains, ensuring all surfaces are dry before replacing the items back neatly. This is also an excellent opportunity to discard any expired or spoiled food, helping to keep the fridge organized and functional. Moving on to the countertops, use a disinfectant cleaner suitable for the material, whether it’s granite, laminate, or stainless steel, to ensure they are not only clean but also germ-free. Don’t forget to clean the backsplash, which can accumulate splatters from cooking. A degreaser can be particularly effective here, especially around the stove area. Cleaning cabinets is another crucial part of kitchen maintenance. Wipe

7 Steps to a Thorough Home Cleaning: From Top to Bottom Read More »

Family Enjoying Spring Cleaning in Sunny Home Illustration, Easy Spring Cleaning Tasks

How to Tackle House Cleaning: 6 Essential Tips

How to Tackle House Cleaning: 6 Essential Tips House cleaning can seem like a daunting task, especially when you are looking at a week’s worth of dishes, dust, and disorder. But with the right approach and a few expert tips, the process can be efficient and even enjoyable. Whether you are gearing up for a spring clean or just trying to keep things tidy, these six tips will help you sweep through your house cleaning chores and leave your living space spotless and inviting. 1. Set Clear Cleaning Goals Before you pick up a sponge, make a detailed plan. Decide exactly what you need to accomplish: is this a quick tidy-up to freshen the space, or a thorough deep clean? Knowing your objectives up front helps you prioritize the most important tasks and allocate your time wisely. If you are expecting guests, focus on the living areas and bathrooms they will see and use. A clear plan reduces the feeling of being overwhelmed and delivers better results in less time. 2. Declutter First Clutter is one of the biggest roadblocks to efficient house cleaning. Before you dive into the actual cleaning, walk through each room and return items to the places they belong. Cleaning around clutter is inefficient, and removing it right away makes the space look tidier instantly. An organized home is also a safer one, since the Canadian Centre for Occupational Health and Safety identifies clutter and spills among the leading causes of slips, trips, and falls in the home. 3. Tackle One Room at a Time Trying to handle every room at once can feel overwhelming and actually slow you down. Work through one space at a time, starting with the kitchen or bathroom, and complete it fully before moving on. This focused approach produces visible results quickly, which keeps you motivated, and it ensures no room is left half-cleaned. You can fit the work into your schedule easily, whether you clean one room a day or dedicate a full day to going through the house systematically. 4. Keep Your Tools Handy Nothing disrupts a cleaning flow like stopping every few minutes to hunt for supplies. Gather everything you need before you start and carry it in a portable caddy: gloves, scrub brushes, rags, and cleaning solutions matched to the surfaces you will clean. A well-stocked caddy keeps the right tool within arm’s reach at the right moment, which significantly speeds up the process. When you shop for products, labels such as EPA Safer Choice can help you identify cleaners with safer ingredients, and always follow the directions on the label. 5. Use High-Efficiency Methods High-efficiency methods maximize results with the least wasted effort. When dusting, start at the top of the room and work your way down, so particles that fall are collected by the later steps. When vacuuming, do the whole house in one continuous session, moving quickly and seamlessly from room to room to avoid repeated setup and breakdown of equipment. Keeping a steady rhythm means no area gets overlooked and the total time spent shrinks. 6. Regular Maintenance Goes a Long Way Small daily habits dramatically reduce the workload on big cleaning days. Wipe surfaces down immediately after use, address spills the moment they happen to prevent stains and slip hazards, and keep floors clear by sweeping or vacuuming regularly, which also protects flooring from grit and hard particles. In damp areas such as bathrooms and kitchens, control moisture to discourage mould, because the EPA recommends fixing moisture problems as the first step in mould control. When DIY Isn’t Enough Even with the best routine, busy weeks happen, and some projects are simply too big for an afternoon. Toronto Shine Cleaning offers regular maid cleaning to keep your home maintained between deep cleans, and a deep cleaning service for the top-to-bottom reset your home needs a few times a year. Transparent house cleaning prices make it easy to plan ahead, and service is available across Toronto and the GTA. Frequently Asked Questions What order should I clean rooms in? Start with the kitchen or bathroom, the two rooms that take the most effort, then move through bedrooms and living spaces. Finish with floors so the final pass collects all the dust and debris from the earlier steps. How do I clean a whole house without getting overwhelmed? Break the work into individual rooms, set a timer for each one, and complete a space before moving to the next. A clear plan and a stocked caddy keep you moving from start to finish. How often should I deep clean my home? Most homes benefit from a deep clean every three to six months, with light maintenance in between. High-traffic homes with pets or young children may need it more often. What cleaning supplies do I actually need? A good all-purpose cleaner, glass cleaner, microfiber cloths, scrub brushes, gloves, and a vacuum cover most jobs. Add surface-specific products for stone, wood, and stainless steel as needed. House cleaning does not have to be a dreaded chore. Apply these six tips, and your home will stay fresher and more inviting with less effort all year round.

How to Tackle House Cleaning: 6 Essential Tips Read More »

Kitchen rust, rust, oven rust

How to Remove Rust and Corrosion from Metal: 5 Best Methods

Dealing with rust and corrosion on metal surfaces can be a real headache, especially when it starts affecting the functionality or aesthetics of your items. Whether it’s tools, outdoor furniture, or any metal object, knowing how to effectively remove rust can prolong the life of your belongings and keep them looking great. Here, we’ll walk through five effective methods to get rid of rust and corrosion from metal. Grab your gloves, and let’s get started! 1. White Vinegar Bath: The Natural Soak White vinegar isn’t just a staple for your salad dressing-it’s also a highly effective natural rust remover for metal objects. The key ingredient here is acetic acid, which actively reacts with rust to help dissolve it, clearing the way for a cleaner, shinier metal surface beneath. This method is especially suitable for those who prefer eco-friendly cleaning solutions over harsh chemicals. To start, if you’re dealing with smaller metal items, simply find a container large enough to fully submerge them in white vinegar. Allow these items to sit in the vinegar bath overnight. This extended soak gives the acetic acid ample time to penetrate and break down the rust. For larger metal pieces that can’t be easily submerged, you don’t need to worry about finding an oversized container. Instead, grab some rags or even old towels, soak them in vinegar, and wrap them around the rusted areas of the metal. The goal is to keep the rusty spots thoroughly moistened with vinegar, so sometimes it might be helpful to re-soak the rags periodically to keep them wet throughout the soaking period. Once the soaking time has elapsed, it’s time to tackle the loosened rust. Using a metal brush or a piece of crumpled aluminum foil, scrub the treated areas vigorously. The abrasive action of the brush or foil helps to lift and remove the rust particles from the metal surface. After you’ve scrubbed the metal clean, the final step is to rinse the items with water. This not only removes any remaining vinegar and rust residue but also stops the acetic acid from further acting on the metal. Be sure to dry the metal thoroughly after rinsing. Leaving the metal wet could potentially lead to new rust formation, undoing all your hard work. Dry it off with a clean cloth or towel to ensure that every nook and cranny is moisture-free.     2. Baking Soda Paste: The Gentle Scrub When faced with less aggressive rust or when you need to treat delicate metal surfaces, baking soda emerges as an excellent, mild alternative to harsher chemical rust removers. This common household item is not only accessible but also gentle on metal while being tough on rust. To utilize baking soda for rust removal, start by preparing a thick paste. This is done by mixing baking soda with a small amount of water until you achieve a consistency that’s substantial enough to cling to vertical surfaces without dripping. This paste formation is crucial as it ensures that the baking soda stays in contact with the rusted areas long enough to facilitate the cleaning process. Once your paste is ready, apply it generously over the rusted portions of the metal. Spread the paste evenly, covering all rusty spots thoroughly. After applying, let the paste sit on the rust for a couple of hours. This dwelling time is vital as it allows the baking soda to chemically interact with the rust, breaking it down and making it easier to scrub away. Following the resting period, take a brush and gently scrub the treated areas. The texture of the baking soda paste helps to exfoliate the rust from the metal surface without scratching or damaging it. Scrubbing should be done with enough pressure to remove rust but gentle enough to preserve the integrity of the metal underneath. The final step in this rust removal process is to rinse and dry the metal. Washing off the baking soda paste with water not only cleans away the loosened rust particles but also any residual baking soda. It’s important to thoroughly dry the metal after rinsing. Any lingering moisture could potentially lead to new rust formation, which would counteract your cleaning efforts. Use a clean, dry cloth to wipe down the metal, ensuring that it is completely dry and free of moisture.     3. Potato and Dish Soap: The Surprising Trick It might sound unconventional at first, but using a potato combined with dish soap is a surprisingly effective method for removing rust from metal surfaces. This technique leverages the natural oxalic acid found in potatoes, an organic compound that interacts with rust to dissolve and loosen it, making removal a breeze. To start this rust-removal process, simply take a regular potato and slice it in half. The fresh cut surface of the potato will be used as your ‘applicator’. Apply a liberal amount of dish soap to this cut end of the potato. The dish soap not only helps in lubricating the surface but also enhances the rust removal process due to its degreasing properties. Next, use the soapy potato half just as you would a brush. Rub the cut end with the dish soap directly onto the rusted areas of the metal. As you do this, the oxalic acid from the potato interacts with the rust, breaking it down, while the dish soap aids in gently scrubbing the rust away without damaging the metal underneath. This method is especially useful for dealing with small patches of rust or for treating areas that are typically hard to reach with conventional tools. After thoroughly scrubbing the rusted areas, the next step is to rinse the metal. This step is crucial as it washes away the residual potato juices and soap, along with the loosened rust particles. Make sure to rinse the metal thoroughly to ensure that no soapy or acidic residues remain, as these could cause further corrosion if left on the metal. Finally, drying the metal effectively is key to prevent any

How to Remove Rust and Corrosion from Metal: 5 Best Methods Read More »

Person stretching at sunset outdoors

How a Clean Home Improves Your Mental Health: 5 Psychological Benefits

How a Clean Home Improves Your Mental Health: 5 Psychological Benefits Ever wonder why you feel lighter when you walk into a tidy room? It is not just the visual pleasure of everything in its place. A clean, organized home has real effects on stress, mood, focus, sleep, and daily habits. Here are five psychological benefits of keeping your space clean, plus simple ways to build the habit on a busy Toronto schedule. 1. A Tidy Home Reduces Stress and Anxiety Clutter bombards your brain with stimuli. Every pile of mail, stack of dishes, and scattered pair of shoes is a visual reminder of unfinished work, keeping your mind in a low-level alert state even when you want to relax. Clearing the visible chaos removes those triggers, which is why decluttering feels like exhaling after a long day. 2. Cleaning Boosts Your Mood Completing a task, especially one that visibly improves your surroundings, produces a genuine sense of accomplishment. Finishing a cleaning session gives you an immediate, tangible win, and the fresh, orderly result keeps reinforcing that positive feeling every time you walk into the room. It also helps to frame cleaning as self-care rather than a chore: a short session with music or a podcast turns maintenance into a mood reset. 3. A Clean Space Enhances Focus and Productivity If you work from home in Toronto, your desk is your office. Disorganization competes for your attention: your brain works overtime to filter out visual distractions, which leads to mental fatigue. A clear desk and tidy room free up cognitive resources for the work in front of you. This is one reason so many remote workers schedule a 10 minute tidy-up before they start the day. Even clearing a single surface before a meeting can sharpen your focus, because your brain no longer has to track loose ends in the background. 4. An Orderly Bedroom Supports Better Sleep Your bedroom should signal rest, not chores. Clutter keeps your mind processing tasks while you try to wind down, and a bed covered in laundry does not invite relaxation. Making the bed in the morning, putting clothes away, and keeping surfaces clear help your brain shift into rest mode at night. The National Heart, Lung, and Blood Institute explains why quality sleep is so important: it supports mood, memory, and emotional resilience, exactly what you need to handle a stressful week. 5. Clean Surroundings Encourage Healthier Habits An organized kitchen invites cooking; a cluttered one invites takeout. When counters are clean and ingredients are visible, preparing a meal feels easier, and cooking at home supports healthier eating overall. A clean home also keeps allergens, dust, and mould in check. The National Institute of Environmental Health Sciences notes that common indoor allergens like dust mites can trigger allergy and asthma symptoms that disrupt sleep and energy, and Asthma Canada’s guide to common asthma triggers is a helpful reference for sensitive households. The EPA’s indoor air quality guide covers reducing dust, moisture, and fumes at home. Quick Wins for a Calmer Home Make your bed every morning, it takes 60 seconds and sets the tone for the day. Do a 10 minute evening reset: clear counters, fluff pillows, put shoes away. Keep one landing zone for keys, mail, and bags near the door. Wash sheets weekly and open windows for 10 minutes a day. When You Need a Helping Hand Maintaining a calm home takes time, and time is exactly what a busy week never has enough of. If the state of your space is weighing on you, outsourcing the cleaning is a legitimate mental health move. Toronto Shine Cleaning offers regular residential cleaning and deep cleaning services across the GTA, with transparent pricing starting at $212.63 for a studio or 1 bedroom home before HST and a 15 percent discount on weekly and bi-weekly schedules. Clients rate us 4.9 out of 5 on Google, as shown on our reviews page. Call 647-424-0355 to book your first visit and see how much lighter home feels. Start with one room: clear a single surface and notice how it feels. Small wins build momentum, and momentum is what turns a clean home into a lasting mental health habit. How quickly does decluttering reduce stress? Most people notice a calmer feeling within minutes of clearing a visible space, because visual clutter is removed as a stress trigger. The effect compounds over days as the tidy habit becomes routine. Can cleaning replace therapy or medication? No. A clean home supports mental wellness, but it is not a treatment for anxiety, depression, or other conditions. Use these habits alongside professional support from a doctor or therapist, not instead of it. Does a messy bedroom really affect sleep? Yes, for many people. Visual clutter keeps the brain processing unfinished tasks, which delays relaxation. An orderly, dark, cool bedroom makes it easier to fall asleep and stay asleep. What is the best cleaning routine for mental health? Small daily habits beat marathon sessions: make the bed, do a 10 minute evening reset, and keep surfaces clear. Weekly tasks like laundry and vacuuming prevent buildup, and a monthly deep clean keeps the whole home feeling fresh.

How a Clean Home Improves Your Mental Health: 5 Psychological Benefits Read More »

Person hanging laundry in peaceful backyard for natural drying.

A Step-by-Step Guide to Dry Cleaning: How It Works | Toronto Shine Cleaning

Why Your Wardrobe Secretly Thanks the Dry Cleaner Pull a wool blazer out of the wash and it may fit a ten year old by the time it dries. That one shrink is exactly the disaster the dry cleaning process exists to prevent. The name is a little misleading, because the method is not literally dry. What it does avoid is water, and that single choice is what protects silk, wool, tailored suits, and every embellished piece you own. This step by step guide walks through each stage of the process and explains why professionals reach for a solvent instead of a detergent. What Dry Cleaning Really Is Dry cleaning is a specialized method for cleaning clothing and textiles in which a chemical solvent takes the place of water. The garment is flooded with liquid, but that liquid is engineered to dissolve grease, oil, and everyday grime without saturating fibers the way water does. Materials that react badly to a washing machine, such as silk, wool, and certain delicate synthetics, often shrink, distort, or change texture when wet, because water swells the fibers. A solvent skips that swelling entirely, so color, texture, and shape survive the cycle. The result is closer to preservation than laundering: luxury evening wear and business suits keep their appearance far longer, which is why this gentle process remains the preferred option for specialty textiles. The solvents themselves are regulated chemical products, and Health Canada maintains general guidance on household product safety that is worth knowing even when a professional handles the chemistry for you. The Dry Cleaning Process in Five Steps Step 1: Tagging and inspection Every item receives a unique identifier the moment it arrives, so nothing gets mixed up or lost in a shop that handles hundreds of pieces a week. A technician then inspects the garment closely, noting each stain, its type and severity, plus any tears or loose threads. Care labels and special requests, such as starch preferences or color preservation concerns, are logged at this stage. That early review shapes the entire treatment plan that follows. Step 2: Pre-treatment Stubborn spots get targeted attention before the main cycle. An oil-based mark on a silk blouse calls for a different product than a wine splash on wool, so technicians choose pre-treatment agents based on the chemistry of the stain and the fabric around it. Proper pre-treatment loosens the soil so the solvent can carry it away later, which protects the garment and raises the odds that the stain disappears completely. Step 3: The cleaning cycle Finished prep, the clothes go into a large machine built specifically for solvent cleaning. As the garments tumble, the fluid circulates through filters that strip out dirt and impurities continuously, so nothing settles back onto the fabric. This is what makes the cycle uniform and gentle at the same time, avoiding the agitation wear that a water washer inflicts on tailored pieces and anything with delicate decoration. Step 4: Post-spotting After the cycle, each garment is examined again. Any survivor of the first round gets a second, more precise treatment matched to its stain type and fabric. This re-evaluation is the step that separates true dry cleaning from a simple laundry service, because no item moves forward until the technician signs off on it. Step 5: Finishing touches The final stage restores the piece to wear-ready condition. Steaming and pressing relax the fibers into a crisp look that home ironing rarely matches, seams are aligned, pleats are sharpened, and collars and cuffs are set. Small repairs, a loose button or a minor tear, are handled in house. Each item is then hung, covered in protective material, and kept pristine until pickup. Which Items Belong in the Dry Cleaning Bag As a rule of thumb, send anything to the process that matches one of these descriptions: Silk and satin pieces that water spots or textures easily Wool suits, blazers, coats, and knitwear that can felt or shrink Structured garments with canvassed chests, shoulder pads, or interlining Beaded, sequined, or otherwise embellished outfits Leather, suede, and specialty fabrics Any label that says dry clean only Fabric group Water risk Why the solvent helps Silk Water spots, texture change Cleans without saturating the fiber Wool Shrinking and felting No swelling, so shape is held Tailored synthetics Distortion, seam warping Gentle tumbling preserves structure Embellished textiles Loosened decoration Precise handling plus pre-treatment Beyond the Closet: The Rest of Your Home Dry cleaning protects what you wear, but the same logic applies to what surrounds you. Upholstery, drapes, and rugs collect the same oily residues that make clothes dull, and a deep cleaning service reaches those surfaces during a full home refresh. Pair it with a regular maid service and small messes never have a chance to settle in. A good habit, straight from CDC hand washing guidance, is washing your hands after handling anything brought in from outside, including laundry bags and dry cleaning packaging. Frequently Asked Questions Is dry cleaning actually dry? No. Garments are soaked in a liquid solvent during the cycle. The word dry refers only to the absence of water, which is what protects fabrics that swell, shrink, or distort when wet. Can I wash a dry clean only item at home? Occasionally a gentle cold cycle survives testing on a hidden seam, but structured and embellished pieces rarely recover from the experiment. Tagging, pre-treatment, and post-spotting exist because each stain and fabric needs a different approach. Does the process remove every stain? Oil, wine, ink, and grass respond well when pre-treated and revisited during post-spotting. Very old or chemically set stains may fade rather than vanish, which is why inspection happens before cleaning begins. What does Toronto Shine Cleaning charge for home visits? Regular cleaning starts at $212.63 for a studio or one bedroom, $273 for two bedrooms, and $327 for three bedrooms, all before HST. The current pricing page lists every service, including deep cleaning and move in or out packages. Book Care

A Step-by-Step Guide to Dry Cleaning: How It Works | Toronto Shine Cleaning Read More »
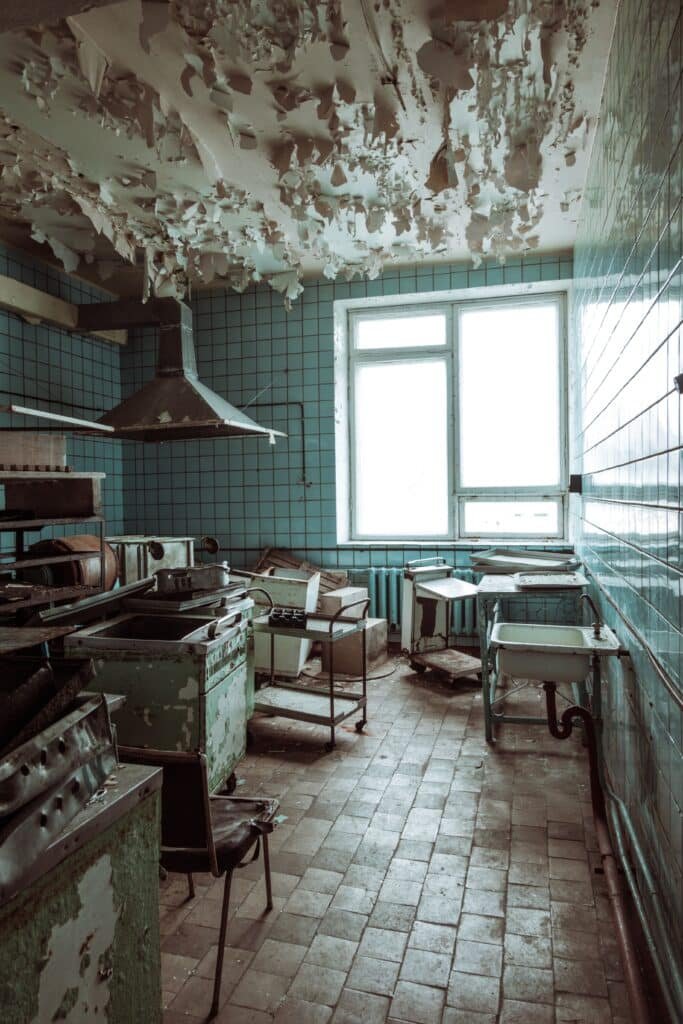
deep cleaning toronto

5 Quick Home Cleaning Tips for a Healthier Living Space | Toronto Shine Cleaning

Five Small Habits That Do Big Work for Your Home Walking into a spotless space feels effortless for other people, but the truth is that a genuinely clean home comes from a handful of small, boring habits repeated often. You do not need a weekend marathon or a van full of products. The five quick home cleaning tips below shorten the process, lower the stress, and leave your rooms healthier for the people in them. Pick one to start with today. 1. Declutter Before You Scrub Decluttering is the secret weapon that most routines skip. Clutter is not just an eyesore. Piles of paper, stacks of books, and shelves of knick-knacks trap dust mites, give pests somewhere to hide, and turn dusting into an obstacle course. The mess also taxes your mental well-being, adding stress to the one place that should feel like a sanctuary. You do not have to empty the house in a weekend. Choose a single drawer, closet, or room and handle one item at a time, asking whether you truly need, use, or love it. If the answer is no, let it go. With fewer objects in the way, vacuuming and dusting stop being a shuffle of moving things around and become actual cleaning, reaching corners that clutter used to guard. Many people find the lift in mood surprising, because a calmer space tends to produce a calmer head. 2. Make the Bed Every Morning The connection between your bed and the cleanliness of your home is real. A made bed is an anchor of order in the bedroom, and scattered clothes suddenly look wrong next to it, so you pick them up. Dust on the nightstand becomes visible, so you wipe it. If you work from home, the effect compounds all day, because your eyes keep returning to one tidy surface that quietly raises the standard for everything around it. There is a psychological layer too. Finishing one task early is a small win that sets a constructive tone, and momentum built before breakfast often carries into the rest of your routines, especially on days when motivation is thin. 3. Set a Cleaning Timer Cleaning feels impossible when it looms as an open-ended afternoon. Shrink it instead. Set a timer for fifteen minutes, or five if the day is packed, and work only until it rings. Racing the clock concentrates effort, cuts procrastination, and turns a dreaded chore into a manageable daily habit. One day the focus is the coffee table and sofa cushions, the next it is kitchen counters and the pantry. Because the sessions rotate, no area goes neglected long enough to become a mountain. 4. Wipe High-Touch Surfaces Every Day Door handles, light switches, remote controls, and phone screens get touched constantly, which makes them prime real estate for germs. A quick daily wipe with a disinfectant interrupts the chain of transmission, and the habit matters most during cold and flu season or any public health worry. The CDC explains the mechanics, including the difference between cleaning and disinfecting, in its guidance on cleaning and disinfecting your home. Consistency beats intensity here, so keep a cloth and solution where you will actually grab them. Doorknobs, cabinet pulls, and light switches Remote controls and shared electronics Faucet taps and toilet flush handles Countertops and table edges Finishing the round, wash your hands properly, following the CDC hand washing recommendations, because clean hands are what keep the mess from racing back. 5. Handle Small Messes the Moment They Happen The fifth habit is the cheapest: deal with little messes while they are little. A splash on the stove wipes off in seconds when fresh and needs a scrub and a curse the next day. Spills on upholstery set into permanent marks. Chasing tiny messes as they appear keeps every future session short, and it is the single biggest difference between homes that stay clean and homes that swing between scrubbing marathons and shame. How the Five Tips Fit a Week Habit Frequency Time cost Main payoff Declutter one spot Weekly rotation 10 minutes Less dust, faster cleaning Make the bed Every morning 2 minutes Order and momentum Timer bursts Daily 5 to 15 minutes No task pileups High-touch wipes Daily 5 minutes Fewer germs circulating Instant spill fixes As needed Seconds No stains to fight later Physical movement is part of the deal too, and brisk wiping, vacuuming, and stair climbing contribute to your activity total, a bonus the CDC outlines for regular physical activity. When to Hand It to Professionals Five habits keep a home healthy between visits, but they do not replace a deep clean of baked-on grease, grout, and neglected corners. Toronto Shine Cleaning brings deep cleaning for the reset days and a regular maid service for maintenance, with visits from $212.63 for a studio or one bedroom before HST, two bedrooms at $273, and three bedrooms at $327, all shown on the pricing page. Frequently Asked Questions How long should a daily cleaning timer run? Anywhere from five to twenty minutes works. The point is a defined finish line, not the length. Start with a number you will not skip on a busy day, then let the habit grow. What counts as a high-touch surface? Anything multiple people contact several times a day: handles, switches, remotes, taps, shared screens, and appliance buttons. Wipe them daily, and more often when someone in the household is sick. Does decluttering really make cleaning faster? Yes, because surfaces clear of objects can be wiped in one pass, and floors and shelves expose the dust that piles normally hide. Every item removed is one item you no longer dust around. Will making my bed actually keep the room tidy? It sets a visual standard that messier corners stand out against, which nudges small corrections all day. It also counts your first completed task of the morning, and people tend to keep finishing what they start. Can habits replace scheduled cleaning services? They keep the

5 Quick Home Cleaning Tips for a Healthier Living Space | Toronto Shine Cleaning Read More »