Furniture Cleaning

A cheerful spring scene featuring a broom leaning against a bucket with a cloth draped over it. The setting is an outdoor porch with warm sunlight, su

Preparing for Spring Cleaning: What to Do Before You Start

Preparing for Spring Cleaning: What to Do Before You Start Spring cleaning is a wonderful way to refresh your home after a long winter, but diving in without a plan can quickly become overwhelming. Proper preparation makes the entire process more efficient and far less stressful. By following a few simple steps before you pick up a sponge, you set yourself up for a successful and satisfying clean. Toronto Shine Cleaning shares these preparation tips to help you get started on the right foot. Declutter Your Space First Before you can deep clean, you need to clear out the clutter. Go through closets, drawers, cabinets, and shelves to identify items you no longer use. Sort everything into four piles: keep, donate, recycle, and trash. If you have not used something in over a year, it is probably time to let it go. A clutter-free home not only looks better but also makes cleaning faster and more effective. Tackle one room at a time, starting with high-clutter areas like pantries, storage closets, and home offices, to keep the task manageable. Gather Your Cleaning Supplies Nothing slows down spring cleaning like hunting for supplies mid-task. Stock up on essentials before you begin. Here is a quick checklist of what you will need for a thorough spring clean: Category Recommended Items Surface Cleaners Microfiber cloths, all-purpose cleaner, glass cleaner, disinfectant spray Floor Care Vacuum with attachments, mop, bucket, hardwood or tile cleaner Tools & Accessories Sponges, scrub brushes, squeegee, duster with extension handle Specialty Products Degreaser for kitchen, grout cleaner for bathroom, stain remover for carpets and upholstery Safety & Disposal Rubber gloves, garbage bags, masks if using strong cleaners Consider using eco-friendly cleaning products to protect your home and the environment. Many conventional cleaners contain harsh chemicals that can irritate skin and lungs. The Government of Canada provides resources on using household products safely to help you choose wisely. Make a Room-by-Room Checklist A detailed checklist keeps you organized and ensures no area gets missed. Write down tasks for each room and prioritize areas that need the most attention. Breaking the work into manageable sections makes the job feel less daunting and helps you track your progress. Include tasks like dusting ceiling fans, wiping baseboards, cleaning windows, washing curtains, vacuuming under furniture, and disinfecting high-touch surfaces like light switches and door handles. The CDC recommends cleaning surfaces first with soap and water before disinfecting for the most effective results. Pre-Treat Stubborn Stains Tough stains on carpets, upholstery, and kitchen surfaces need time to break down. Apply stain remover or pre-treatment solutions before you start cleaning so they can work while you tackle other tasks. For kitchen grease, use a degreaser on stovetops and range hoods. In the bathroom, apply grout cleaner to tile and let it sit before scrubbing. Carpet stains should be treated with an appropriate remover and left to absorb before blotting. These pre-treatment steps make deep cleaning much more effective and save you from scrubbing later. Set a Schedule and Enlist Help Spring cleaning does not have to be a one-day marathon. Spread tasks over several days or a weekend to avoid burnout. Assign specific chores to each household member to speed things up: Kitchen — Degrease stovetop, wipe cabinets, organize pantry, clean refrigerator shelves and drawers. Bathroom — Scrub tiles and grout, disinfect toilet and sink, descale showerhead, wash bath mats. Living Areas — Dust ceiling fans and light fixtures, vacuum upholstery, wash windows and curtains, wipe baseboards. Bedrooms — Flip mattress, wash bedding and duvet covers, organize closets, vacuum under furniture. Floors — Vacuum carpets and area rugs thoroughly, mop hard floors, spot-treat any stains. Children can help with dusting, sorting laundry, and wiping surfaces. If spring allergies are a concern, the Health Canada recommends cleaning to reduce indoor allergens during spring as part of your seasonal refresh. If you need help with the heavy lifting, consider booking professional deep cleaning services. Toronto Shine Cleaning offers thorough deep cleaning for your home that covers the tasks you might not have time or energy for, such as carpet cleaning, window washing, and upholstery care. Frequently Asked Questions What is the best order to clean a room? Always work top to bottom. Start with ceiling fans and high shelves, then move to counters and furniture, and finish with floors. This way dust and debris fall onto surfaces you will clean last. How long should spring cleaning take? For a typical home, plan on 6-12 hours spread over a weekend. If you break it into room-by-room sessions of 1-2 hours each, the work feels much more manageable. Do I need to wash my curtains during spring cleaning? Yes, curtains and drapes collect dust, pet dander, and allergens over time. Check the care label and launder or steam clean them as part of your spring refresh. Should I hire professional cleaners for spring cleaning? If you are short on time or dealing with tough jobs like deep carpet cleaning, oven cleaning, or post-winter grime, professional help can be a smart investment. Contact Toronto Shine Cleaning at (647) 424-0355 to discuss your needs. How do I maintain a clean home after spring cleaning? Establish a weekly routine of quick tidying, dusting, and vacuuming. Book a regular cleaning service to keep everything fresh between deep cleans. Spring cleaning does not have to be stressful. With the right preparation, you can transform your home efficiently and enjoy the fresh, clean results. For expert help with the hardest tasks, call Toronto Shine Cleaning at (647) 424-0355 or visit our pricing page to learn more.

Preparing for Spring Cleaning: What to Do Before You Start Read More »

A clean and bright spring scene featuring a broom standing upright next to a bucket with a cloth draped over it. The background showcases a garden wit

How to Prepare for March Cleaning: 6 Easy and Fast Tips

How to Prepare for March Cleaning: Six Fast Tips That Actually Stick March is the sweet spot for a reset. Winter has spent months sealing windows, tracking in salt, and parking dust in corners, and spring cleaning season is about to open. The households that get through it without burnout do the same thing: they prepare before they scrub. These six tips cover planning, supplies, decluttering, and the sanitation work that matters most, so your March cleaning finishes on schedule instead of dragging into May. 1. Build a Room-by-Room Cleaning Checklist Write down every room, then split tasks into categories: decluttering, dusting, vacuuming, and disinfecting. Prioritize the spaces that collect the most grime and germs, especially kitchens and bathrooms. A step-by-step plan keeps you moving and stops the wasted time of wandering from room to room deciding what to do next. Break the list into weekly or daily goals with soft deadlines, and hand pieces of it to other household members so one person is not carrying the whole month. Checking finished tasks off a page is also unfairly motivating, and it keeps steady progress visible. 2. Gather Your Cleaning Supplies First Nothing kills momentum like hunting for a sponge mid-session. Before day one, collect microfiber cloths, disinfectant, a multi-surface cleaner, sponges, and a mop, and match products to surfaces: an all-purpose cleaner for general work, dedicated formulas for stainless steel, wood, and glass. Weak DIY mixtures that leave residue or streaks cost more time than they save. If your family reacts to strong fumes, plant-based options clean well while keeping the indoor atmosphere gentler, and Health Canada’s hub on using household products safely is a good refresher on reading labels and storing chemicals. A stocked caddy means zero interruptions. 3. Declutter Before You Deep Clean Cleaning around clutter doubles the work. Sort each room first and make fast calls: keep, donate, recycle, or toss. Storage bins, labeled containers, and drawer dividers give everyday items a home so mess has nowhere to land. Once surfaces are clear, clean the spots the clutter was hiding: dust bunnies behind furniture, crumbs under beds, and cabinet interiors nobody opened all winter. A clear floor and clear counters also mean every minute you spend after this buys real cleaning, not moving stuff around. Three rules keep the purge moving: Never hold a “maybe” item twice; give it one minute and a shelf. Fill donation bags room by room so they actually leave the house. Keep seasonal gear in labeled bins instead of loose piles. 4. Scrub the High-Touch Surfaces Doorknobs, light switches, remote controls, countertops, and appliance handles collect germs faster than anywhere else in the house, and flu season is still running in March. Wipe them down daily with a disinfectant spray or antibacterial wipes. The CDC recommends cleaning first and then disinfecting, since dirt can shield germs from the product. Use a fresh microfiber cloth or disposable wipe per area instead of dragging one sponge across the whole house, and give fridge handles and cabinet knobs attention after meal prep. Electronics count too: phones, keyboards, and remotes get touched constantly, so clean them with a soft cloth and a little rubbing alcohol or an electronics-safe disinfectant. 5. Refresh Fabrics and Upholstery Textiles hoover up dust, allergens, and winter odors all season. Vacuum upholstered furniture, carpets, and rugs first to pull out settled dirt and dust mites, then bring back what needs more with a steam cleaner or fabric-safe shampoo. Wash curtains, pillow covers, and bed linens; curtains gather airborne particles for months and deserve a wash or dry clean every few months. For carpets, sprinkle baking soda, let it sit for 15 minutes to absorb odors, then vacuum it up. A light fabric spray at the end makes the whole room feel new. 6. Lock In a Cleaning Schedule March cleaning should not be a one-day heroic event. Split the work: quick daily tasks like counters and a vacuum pass in busy rooms, weekly jobs like bathroom scrubs and closet tidy-ups, and monthly projects like the deep fabric refresh above. Set phone reminders if you drift, and post a shared schedule so everyone knows their lane. A routine is what turns one good month of cleaning into a home that stays fresh all spring. A Four-Week March Cleaning Plan Week Focus What Gets Done Week 1 Plan and purge Write the checklist, stock supplies, declutter every room Week 2 Kitchen and high-touch Inside appliances, cabinet fronts, daily knob and switch wipes Week 3 Bathrooms and bedrooms Grout, fixtures, linens, curtains, under-bed cleaning Week 4 Fabrics and floors Steam or shampoo upholstery, vacuum and mop all floors March Cleaning Questions Answered What should you clean first during March cleaning? Declutter first, then work top to bottom in each room: dust high surfaces, wipe counters and high-touch points, and finish with floors so nothing lands on a cleaned surface. How long should spring cleaning take? Spread over the month, plan on a focused weekend plus 20-30 minutes a day. Compressing everything into one marathon Saturday is how most people quit by lunch. Is March too early for spring cleaning? No, it is ideal. You clear winter buildup before open-window season brings pollen inside, and the home is ready when the actual spring rush starts. Do I need special products for March cleaning? A disinfectant for high-touch points, a multi-surface cleaner, microfiber cloths, and something safe for your floors cover almost everything. Match specialty surfaces with dedicated products rather than improvised mixtures. Short on Time This March? If the plan looks good but the calendar disagrees, Toronto Shine Cleaning can run the deep work for you, from high-touch disinfection to full fabric refreshes, and spring is also the busiest moving season, so our move out cleaning gets a lot of March bookings. Browse deep cleaning packages and rates, or see the areas we cover across Toronto and the GTA. Call (647) 424-0355 and start your spring fresh.

How to Prepare for March Cleaning: 6 Easy and Fast Tips Read More »

Cold Weather Cleaning

Cold Weather Cleaning in 7 Days: A Toronto Winter Plan

Cold Weather Cleaning in 7 Days: A Toronto Winter Reset Salt stains, slush, and grit follow every pair of boots through a Toronto doorway between November and March. Because windows stay shut for months, dust and cooking odours keep recycling through the same indoor air. One planned week of cold weather cleaning solves both problems room by room without eating a whole weekend. Each day below stays short. If you would rather skip the work, call (647) 424-0355 and book a crew instead. Gather Your Supplies First Assemble everything before day one so you never stop mid-task to hunt for a cloth. A single caddy that travels with you from room to room saves more time than any one product. Microfibre cloths, plus a second set reserved for glass pH-neutral cleaner for sealed wood, stone, and laminate Vacuum with a crevice tool and an upholstery brush Bucket, mop, and a tray or rack for wet boots Labelled bins for donation, storage, and recycling The Week at a Glance Day Zone Main job 1 Entryway Salt control and boot storage 2 Living room Textiles, dusting, cable tidy 3 Kitchen Degrease, pantry, fridge audit 4 Bedroom Closet swap and under-bed dust 5 Bathroom Grout, fixtures, towel refresh 6 Home office Desk, cables, paper purge 7 Whole home Touch-ups and a new routine Day 1: Entryway and Mudroom The front hall absorbs the heaviest punishment, so begin there. Empty the closet, sort footwear into keep, donate, and store piles, then place a boot tray and a low rack near the threshold. Vacuum the corners, launder the mat, and mop tile with a solution that lifts dried salt film rather than dragging it around. A bench plus two hooks stops the pile from rebuilding itself by Saturday. Day 2: Living Room and Textiles Refresh every throw and cushion cover, then dust shelves from the top down so debris lands on a floor you have not vacuumed yet. Pull the sofa forward, run a crevice tool along its frame, and clip loose media cables together behind the television. Condensation on cold glass encourages mildew on sills, so wipe them dry with a barely damp cloth. Day 3: Kitchen Deep Pass Winter cooking throws far more grease onto cabinet fronts than a summer salad ever does. Degrease the doors, clear the counters, and lift every jar off the pantry shelf so expired items become obvious. Work through the refrigerator one shelf at a time, and wipe the door gasket, where crumbs break the seal and waste hydro. Cleaning the range hood filter delivers the most visible change for the least effort. Day 4: Bedroom Reset Trade light summer bedding for warmer layers and rotate the closet so knitwear sits at eye level. Dust beneath the bed and behind the headboard, since dry indoor air lets dust mites build up quickly. Rotate the mattress unless it is a pillow-top model, then wash everything that touches skin, including pillow protectors and the chair blanket. Day 5: Bathroom Scrub and Disinfect Cold and flu season turns this room into the priority rather than an afterthought. Work grout lines with a small brush, disinfect the toilet, taps, and light switches, and launder the bath mat and shower liner. A damp towel spreads odour, so hang fresh ones and wipe the exhaust fan grille. Hand hygiene after handling laundry matters here, and the CDC handwashing guidance covers the basics. Day 6: Home Office and Paper Trail A cluttered workspace quietly drains focus when daylight is short. Clear the desktop, wipe the keyboard and monitor with a dry microfibre cloth, and route cables through one channel so nothing tangles. Shred outdated paperwork, scan what you must keep, and file the rest into labelled folders before the stack returns in February. Day 7: Finishing Touches and Maintenance Carry a basket through the whole home and collect whatever drifted out of place during the week. Restock the caddy, schedule a five-minute daily reset for the kitchen and entry, and pencil in a monthly deeper pass for floors and appliances. Small consistent habits protect a winter home far better than one exhausting marathon. Keep the Air and Fabrics Fresh Indoors Sealed windows trap moisture along with dust, and a home that never airs out develops a stale smell that no spray can hide. Run the kitchen and bathroom fans longer than feels necessary, crack a window for ten minutes on a mild afternoon, and rotate area rugs so damp patches dry through instead of souring. Winter is also cold and flu season, so a habit of washing up at the kitchen and bathroom sinks pays off, and the CDC home cleaning and disinfecting guide explains which surfaces truly need disinfecting and which only need soap and water. When to Bring In a Professional Team Some winter jobs need more than a cloth and a free afternoon: salt-dulled hardwood, upholstery that swallowed months of grit, or a rental turning over mid-season. Toronto Shine Cleaning works across Toronto and the GTA, and a deep clean reaches baseboards, vents, grout, and appliance interiors that a weekly tidy misses. Rates begin at $212.63 before HST for a studio or one-bedroom, with two-bedroom homes from $273 and three-bedroom homes from $327 shown on the pricing page. Every cleaner is bonded and insured, backed by a $1,000,000 policy and a $10,000 accidental breakage and surety bond. Residents often pair that visit with regular cleaning through the rest of winter. Frequently Asked Questions How long should each day take? Allow 30 to 45 minutes for a one-bedroom condo and up to 90 minutes for a larger house. Set a timer so the task ends when the time does. Can I merge the seven days into one weekend? Yes, though four to six hours with real breaks is more realistic. Pairing days one and five in the same session works best because both involve wet floors. Which day matters most in a Toronto winter? Day one, because the entryway feeds dirt into

Cold Weather Cleaning in 7 Days: A Toronto Winter Plan Read More »

Bedroom Cleaning with brush, microfiber cleaning and others cleaning tools

6 Bedroom Cleaning tips for a Dust-Free and Fresh Space

6 Bedroom Cleaning Tips for a Dust-Free and Fresh Space Your bedroom should be the easiest room to relax in, yet it quietly collects more dust than any other part of the house. Dead skin cells, dust mites, and fabric fibers build up in bedding, carpets, and upholstery, and all of it affects the air you breathe while you sleep. These six bedroom cleaning tips will keep your space dust-free, fresh, and genuinely restful. Declutter Regularly to Cut Down Dust A messy room is harder to clean, and every unused object gives dust another place to settle. Remove old magazines, unworn clothes, and unused accessories, then store what stays in baskets, shelves, and drawers so surfaces stay clear. Keep daily habits simple: make the bed each morning, put clothes away, and tidy nightstands for a few minutes every day. Fewer knickknacks means fewer dust traps, so choose wooden or metal pieces over fabric decor and rotate seasonal decorations to limit buildup. Dust All Surfaces Weekly Dust settles fast on furniture, electronics, and decor, so a full dusting pass at least once a week is non-negotiable. A microfiber cloth traps particles instead of pushing them around like a feather duster does. Work top to bottom and cover the easy-to-miss spots: Tops of bookshelves, headboards, and bedside tables. Electronics such as lamps, alarm clocks, and TVs, which attract dust through static. Under the bed, behind furniture, and ceiling fan blades. Follow up with a slightly damp cloth or a dust-repellent spray so particles do not resettle quickly. Health Canada explains why keeping dust levels down matters on its dust and dust mites page, since mites and allergens ride along in household dust. Wash Bedding Weekly in Hot Water Your bed is the biggest dust collector in the room. Sheets, pillowcases, and blankets absorb sweat, dead skin cells, and bacteria, so give them a hot-water wash every week, which is the routine that keeps dust mites and allergens under control. Hypoallergenic pillowcases and mattress covers add a protective barrier, and washing pillows every few months keeps them fresh. Vacuum the mattress regularly to lift embedded dirt, flip and rotate it every few months, and launder blankets and comforters every two to four weeks. Breathable, washable fabrics make the whole routine easier. Vacuum Carpets and Rugs Thoroughly Carpets are major dust traps, so vacuum them at least twice a week, especially with pets or allergies in the house. A HEPA-filter vacuum captures fine dust, pet dander, and allergens instead of blowing them back into the air. On hardwood or laminate, sweeping alone is not enough; finish with a damp microfiber mop and minimal water so the wood is never damaged. Every few months, steam clean carpets and rugs to pull out deeply embedded dirt and improve air quality. Shake washable rugs out weekly and launder them regularly so trapped dust does not work its way back into the carpet underneath. Clean Curtains and Upholstery Monthly Curtains, upholstered headboards, and accent pillows are fabric sponges that gather dust month after month. Machine-washable curtains go straight into the wash, while the rest get a monthly pass with the vacuum’s upholstery nozzle, and upholstered furniture is vacuumed weekly because dust mites thrive in fabric. Spot-clean stains right away so they never set, and use a fabric refresher or antibacterial upholstery cleaner for extra freshness. Air Out the Room and Run an Air Purifier A stuffy bedroom traps dust and odors. Open windows regularly to let fresh air cycle through, and on milder days even ten minutes of ventilation clears stale air without chilling the room for long. Let in natural light, which helps prevent mold and mildew. An air purifier with a HEPA filter removes dust, pollen, and other allergens, and letting it run for several hours daily, with evenings a priority, keeps the air breathable overnight. Health Canada’s overview of indoor air contaminants covers the pollutants that build up in closed rooms. Indoor plants such as snake plants, peace lilies, and spider plants add a natural filter while boosting the room’s appeal. Bedroom Cleaning Frequency at a Glance Task How Often Method Make the bed and tidy surfaces Daily Quick 5-minute reset Dust all surfaces Weekly Microfiber cloth, top to bottom Wash sheets and pillowcases Weekly Hot-water laundry cycle Vacuum carpet or rugs Twice a week HEPA-filter vacuum Wash curtains or vacuum upholstery Monthly Machine wash or upholstery attachment Steam clean carpets Every few months Steam cleaner Bedroom Cleaning FAQ How often should bedroom sheets be washed? At least once a week in hot water, because sheets absorb sweat, dead skin cells, and dust mites that multiply quickly in a warm bed. Does vacuuming really reduce bedroom dust? Yes, especially with a HEPA-filter vacuum on carpets and rugs, which captures fine particles that ordinary vacuums recirculate into the air. Can indoor plants replace an air purifier? No. Plants such as snake plants and spider plants help filter the air naturally, but a HEPA air purifier does the heavy lifting for allergy and asthma sufferers. What is the fastest way to freshen a mattress? Vacuum the surface, sprinkle baking soda, leave it for a few hours, then vacuum again; rotating the mattress every few months also keeps it clean and even. Let Toronto Shine Cleaning Handle Your Bedroom These six bedroom cleaning tips will create a cleaner, healthier space for better sleep, but keeping up with dust and allergens takes real time. Toronto Shine Cleaning offers expert regular cleaning and deep cleaning services that leave every room fresh and dust-free. See what customers say in our reviews and explore pricing, then call (647) 424-0355 for a sparkling clean home.

6 Bedroom Cleaning tips for a Dust-Free and Fresh Space Read More »

Automatic cleaning utencils for time saving cleaning

6 Time-Saving Cleaning Hacks for Busy Toronto Households

6 Time-Saving Cleaning Hacks for Busy Toronto Households Nobody wants to spend a Saturday scrubbing when the weekend is short and the weather is good. The six habits below shave minutes off routine chores without buying anything exotic, and they work equally well in a downtown condo, a rental walk-up, or a family house in Scarborough. Pick two, run them for a fortnight, and the rest of the routine gets easier. If time is the real problem, (647) 424-0355 reaches a team that does the work for you. 1. Clean as You Go Small messes are cheap; accumulated ones are expensive. Wipe the counter while the pasta boils, rinse the pan before the sauce dries, and return the coat to its hook instead of the chair. Each action takes seconds, yet it prevents the layer of grime that turns a quick tidy into a full afternoon of scrubbing. The kitchen and front hall reward this approach more than any other rooms in the house. 2. Run a Short Timed Sprint Set a timer for ten or fifteen minutes and clean one room only. The limit forces decisions, stops perfectionism, and makes the task feel finishable on a weekday evening. Music helps, provided you keep your hands moving instead of skipping tracks. Put the phone face down and work until the alarm sounds, then stop even if a shelf remains. Repeated over a week, these short bursts cover more ground than a single long session, and they are easier to repeat. 3. Keep a Supply Kit in Every Zone Walking to a central closet for spray costs more time than the wiping itself. A small caddy per bathroom, plus one in the kitchen and one upstairs, keeps the tool within arm’s reach of the mess. All-purpose spray, glass cleaner, and a folded microfibre cloth Disinfecting wipes for taps, handles, and switches A duster or extendable wand for shelves and blinds A mini vacuum or handheld for crumbs and pet hair Refill bottles so the caddy never runs dry High-touch surfaces such as handles, switches, and taps deserve a regular wipe, and the CDC guidance on cleaning and disinfecting your home explains when a simple clean is enough and when disinfection is worth it. 4. Steam the Microwave Clean Fill a microwave-safe bowl with water and a squeeze of lemon, then run it for three minutes and leave the door shut for a few minutes afterwards. The loosened steam turns baked-on splatter into something a cloth lifts in one pass. No lemon on hand is fine, since plain water or a splash of white vinegar does the same job. Wipe the walls, the turntable, and the door seal, then leave the door open to dry. 5. Run a Shoe-Free Entry Outdoor footwear carries grit, road salt, and allergens across every floor it touches in a Toronto winter. A rack or tray by the door, plus a pair of indoor slippers for guests, keeps most of it outside. Sweep the mat twice a week and shake it outdoors rather than into the hallway. Floors stay visibly cleaner for longer, mopping happens less often, and carpeted rooms stop absorbing grey salt trails. This is the cheapest change on the list and often the one with the biggest visible payoff. 6. Let the Dishwasher Work Harder That appliance handles far more than dinner plates. Sponges, soap dishes, toothbrush holders, pet bowls, plastic toys, and removable range hood filters all come out fresher after a hot cycle. Check the manufacturer’s label for a dishwasher-safe mark first, and keep delicate or electronic items out entirely. Do not run a cycle for three mugs either, since waiting for a reasonably full load keeps the shortcut from wasting hydro. Loading these small items alongside the dishes means one run does two jobs, which is the whole point of a shortcut. Habit Where it pays off most Clean as you go Kitchen counters, sinks, entryway Timed sprint Bathrooms and bedrooms Zone caddies Multi-storey homes Microwave steam Appliances and interiors Shoe-free entry Floors, rugs, stair landings Dishwasher cycle Small hard goods and bowls Two Supporting Habits Dry microfibre does most of the work in a fast clean, so a stack of clean cloths beats a bottle of spray on glass, stainless steel, and screens. The second habit arrives at the very end: wash your hands once the bin liner and the bathroom cloth are finished, because hands are the quickest route for germs to travel from a tap or a waste bin to a snack. The CDC handwashing guidance takes a minute to read and applies to every kitchen in the city. When Hiring Out Saves the Most Time Some weeks there is no ten-minute window, and that is where professional help pays for itself. Toronto Shine Cleaning serves homes across Toronto and the GTA, and a scheduled regular cleaning visit covers kitchens, bathrooms, floors, and dusting on a repeatable checklist. Rates begin at $212.63 before HST for a studio or one-bedroom, with two-bedroom homes from $273 and three-bedroom homes from $327 as listed on the pricing page. Seasonal deep cleaning sessions handle ovens, grout, baseboards, and vents when the shortcuts are not enough. Every cleaner is bonded and insured under a $1,000,000 policy and a $10,000 accidental breakage and surety bond. Frequently Asked Questions Which hack saves the most time overall? The shoe-free entry, because it reduces how often floors and rugs need work at all. Cleaning as you go is a close second once it becomes automatic. Is a ten-minute clean actually worthwhile? Yes, if you keep it to one room and start with the dirtiest surface. Ten focused minutes on a bathroom beats an hour of drifting between tasks. Can I put everything in the dishwasher? No. Check for a dishwasher-safe marking, and never load electronics, cast iron, or delicate hand-painted items. Do I still need deep cleaning if I use these tricks? Eventually, yes. Daily habits slow the buildup, but ovens, grout, and vents still need

6 Time-Saving Cleaning Hacks for Busy Toronto Households Read More »

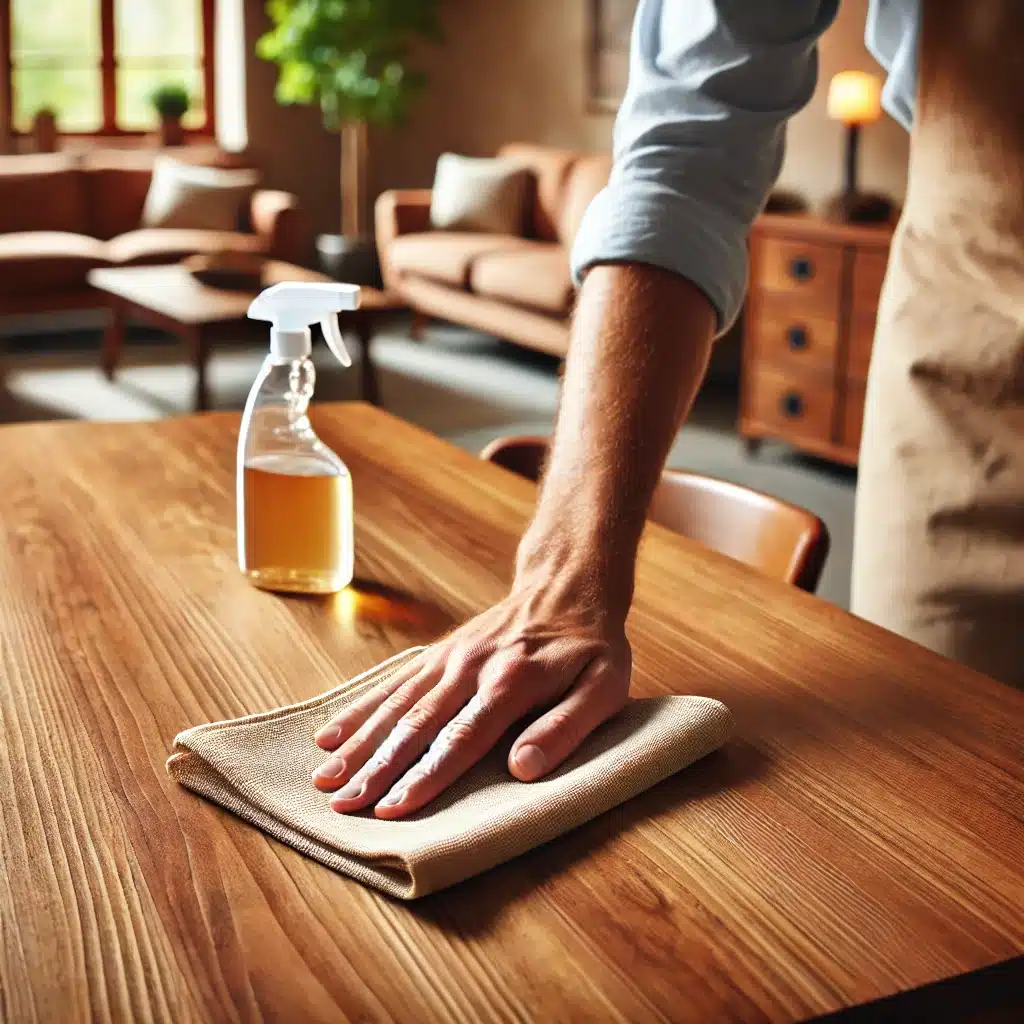
Cleaning wooden furniture with microfiber cloth

5 Best Ways to Clean Wooden Furniture and Keep It Looking New

5 Best Ways to Clean Wooden Furniture and Keep It Looking New Wooden furniture adds warmth to any room, but it only keeps its glow with the right care. The wrong cleaner can strip the finish, and the wrong cloth can leave fine scratches that dull the surface over time. These five ways to clean wooden furniture protect your investment: dusting with the right tools, washing gently, polishing with natural oils, guarding against scratches and spills, and controlling the environment around each piece. 1. Dust Weekly With a Microfiber Cloth Dust is the most common enemy of wood furniture. Left alone it settles into a film that mixes with humidity and turns sticky, and wiping it with paper towels or rough fabrics leaves micro-scratches that show up in the light. Use a soft microfiber cloth and move in the direction of the wood grain, which lifts dust without harming the finish. Dust each piece at least once a week, including table legs, cabinet tops, and chair rungs. For carved details and tight corners, a soft brush or clean paintbrush reaches crevices a cloth cannot. A vacuum with a brush attachment also keeps dust from collecting under and behind larger furniture. 2. Wash With a Gentle Wood-Safe Cleaner When dust alone is not enough, clean wooden furniture with mild dish soap mixed into warm water. Dip a soft cloth into the suds, wring it out well, and wipe the surface; never soak the wood or let water pool on it, since excess moisture causes warping, clouding, and mould. Follow immediately with a dry cloth to keep the finish polished. Skip harsh formulas: ammonia, bleach, and silicone-based polishes damage wood finishes over time. If you buy a commercial wood cleaner, choose one made for finished furniture and read the label first; Health Canada’s household chemical safety guidance covers using cleaning products safely around your home and family. 3. Polish With Natural Oils Oiling restores the rich tone that daily wear fades. Mineral oil and lemon oil penetrate the surface, nourishing the wood and guarding against dryness and cracking, while wax-based polishes sit on top and attract buildup. Every few months, dab a little oil on a soft cloth, rub it in with the grain, let it sit briefly, then buff with a clean dry cloth. Never use vegetable or olive oil from the kitchen: they turn rancid, darken the wood, and attract dust. Stick to oils and polishes designed for furniture, and test any new product on an unseen spot first to confirm the colour and finish react well. 4. Protect Against Scratches and Spills Prevention keeps furniture looking new longer. Set coasters under glasses, placemats under plates, and felt pads under vases, lamps, and decorative objects so nothing scratches the surface. Wipe spills the moment they happen with a dry cloth, before liquid has time to reach the wood. For light scratches, rub a shelled walnut over the mark: the nut’s natural oils darken the scratch and help it blend in. Deeper marks respond to furniture wax or wood repair markers in a matching shade, and a small touch-up kit is worth keeping on hand for accidents. Water rings usually lift with a light re-polish once the area is fully dry. 5. Control Sunlight and Humidity Around Wood Environment shapes how wood ages. Direct sun fades finishes and dries the surface, so keep pieces away from south-facing windows or filter the light with curtains and blinds. Where that is not possible, UV-protective sprays add a layer of defence for your furniture. Humidity swings are just as damaging: too much moisture makes wood swell and warp, while very dry air leaves it brittle and prone to cracks. Keeping indoor humidity around 40-50 percent protects both wood and comfort; Health Canada’s indoor air contaminants information explains how moisture levels affect your home. Use a humidifier during dry heating months and a dehumidifier in humid weather, and reapply wood conditioner seasonally so pieces adjust as temperatures change. Build a Simple Wood Furniture Care Kit Microfiber cloths for dusting and buffing Mild dish soap and a dedicated spray bottle Mineral or lemon oil for seasonal polishing Coasters, placemats, and felt pads for protection Wood repair markers and wax for scratch touch-ups Wooden Furniture Care at a Glance Task Tool or product How often Dusting Soft microfiber cloth, moving with the grain Weekly Cleaning Mild dish soap and warm water, well wrung out Monthly or as needed Polishing Mineral or lemon oil, buff with a dry cloth Every 2-3 months Scratch repair Walnut, furniture wax, or matching repair marker As needed Environment check Humidifier or dehumidifier, curtains and blinds Seasonal Frequently Asked Questions About Cleaning Wooden Furniture Can I use vinegar to clean wooden furniture? Vinegar is acidic and can strip or cloud finishes over time, so warm water with mild dish soap is the safer everyday choice for finished wood. How do I remove water rings from wood? Once the area is completely dry, buff it gently with a soft cloth and a little wood polish; stubborn rings may need a light re-oiling or professional refinishing. What should I never use on wood furniture? Ammonia, bleach, silicone polishes, abrasive pads, and soaking amounts of water all damage finishes, while cooking oils turn rancid and attract dust. How often should wooden furniture be polished? Every two to three months with mineral or lemon oil is plenty for most homes; too-frequent polishing simply adds buildup that dulls the surface. Does sunlight really damage wood furniture? Yes: prolonged direct sun fades the finish and dries the wood, causing cracks, so position pieces away from windows or use curtains and UV-protective treatments. Wood furniture rewards consistent, gentle care, and it stays beautiful for decades when the routine is right. Toronto Shine Cleaning can handle the rest of your home while you protect your favourite pieces: our regular cleaning visits keep dust levels down, deep cleaning refreshes the whole house, and our pricing page makes booking simple. Call (647)

5 Best Ways to Clean Wooden Furniture and Keep It Looking New Read More »

Spotless brown leather couch with cushions in a polished living room setting.

5 Tips on How to Clean Home Furniture

How to Clean Home Furniture: A Material-by-Material Guide Knowing how to clean home furniture properly does more than keep your living room presentable. The right routine removes dust, lifts spills before they set, and protects wood, leather, and fabric so your favourite pieces last for years. Whether you own a leather sofa, wooden dining chairs, or a fabric armchair, these five furniture cleaning tips will keep every surface looking its best. 1. Match Your Cleaning Method to the Material Wood. Dust wooden furniture with a soft cloth, then wipe it with a barely damp cloth and dry it immediately with a second cloth. For a deeper clean, mild soap and water work well, but the wood must be dried thoroughly afterward so moisture cannot soak in and cause warping. A gentle routine keeps the finish fresh and the wood strong. Leather. A soft, damp cloth is ideal for weekly maintenance and lifts dust and light marks without damaging the surface. For tougher stains, use a leather cleaner recommended by the manufacturer, since these products are formulated to clean without stripping natural oils. Regular conditioning keeps the hide supple and prevents cracking, so your leather furniture stays comfortable and luxurious. Fabric. Upholstered pieces collect dust and dirt faster than any other material, so vacuum them weekly to stop grit from settling deep in the fibres. For spots, use a fabric cleaner or mild detergent mixed with water, and always test the solution on an inconspicuous area first to rule out discoloration. Catering to each material’s needs is the heart of cleaning home furniture well. 2. Dust Weekly With the Right Tools Dust is abrasive: left alone, it dulls finishes, scratches polished and varnished surfaces, and can aggravate allergies and respiratory issues. Health Canada’s overview of indoor air contaminants explains why keeping household dust under control matters for your home’s air quality. A microfiber cloth or soft duster captures particles with static rather than pushing them around, so furniture actually comes out clean. Microfiber cloth or soft duster for flat, polished surfaces Vacuum cleaner with a soft brush attachment for seams, carvings, and crevices Furniture polish only on pieces whose care label recommends it 3. Blot Spills Immediately, Never Rub Accidents happen, whether a glass of wine tips over or a mug of coffee misses the coaster. The moment a spill lands, blot it with a clean, dry cloth to absorb as much liquid as possible. Rubbing spreads the stain and pushes it deeper into the material, so blot, press, and repeat until the cloth comes up dry. For fabric, dab the spot with a mild detergent solution on a clean cloth, then rinse with a cloth dampened with plain water and blot dry to remove soap residue. Stubborn stains may need several rounds. On leather, reach for a cleaner suited to your leather type and follow the manufacturer’s instructions. On wood, wipe gently with a damp cloth and dry immediately so moisture cannot damage the finish. 4. Protect High-Use Pieces With Covers Households with kids or pets put furniture through a lot. Removable, washable covers act as a first line of defense against spills, stains, and daily wear, and they come in waterproof and machine-washable styles that fit almost any decor. When a cover gets soiled, toss it in the washing machine instead of scrubbing upholstery, and swap in a spare so the room always looks polished. This simple layer meaningfully extends the life of your most-used pieces. 5. Deep Clean Every Few Months Weekly care handles surface dirt, but deep cleaning every few months tackles the grime that builds up over time, especially on high-traffic items. Polish wooden furniture with a quality wood polish to restore shine and seal the surface against moisture. Steam clean or shampoo fabric upholstery to pull out embedded dirt and allergens, refresh colours, and reduce dust mites; the CDC’s guidance on cleaning and disinfecting your home notes that regular cleaning of soft surfaces is enough in most situations. And keep conditioning leather so it never dries out or cracks. Material Weekly care Deep care Wood Dust, wipe damp, dry right away Polish every few months Leather Wipe with soft damp cloth Clean and condition regularly Fabric Vacuum and blot spills fast Steam clean or shampoo Furniture Cleaning FAQ How often should I dust my furniture? Dust high-traffic rooms weekly and less-used rooms every couple of weeks. If you have pets or allergies, weekly vacuuming of fabric pieces is also worth adding to your routine. Can I use the same cleaner on wood, leather, and fabric? No. Each material needs its own approach: mild soap and water for wood, a manufacturer-recommended cleaner for leather, and a fabric-safe detergent for upholstery. Test any new product on a hidden spot first. What if a stain has already dried? Re-wet the spot lightly with the appropriate cleaning solution, let it soften for a few minutes, then blot. If a set-in stain remains on fabric or leather, professional cleaning is the safest way to remove it without damage. If furniture care is one task too many on your list, Toronto Shine Cleaning can help. Our regular maid service keeps dust and grime from building up week to week, while a deep home cleaning refreshes upholstery and hard-to-reach surfaces. Call (647) 424-0355 for a quote, or check our house cleaning pricing online.

5 Tips on How to Clean Home Furniture Read More »

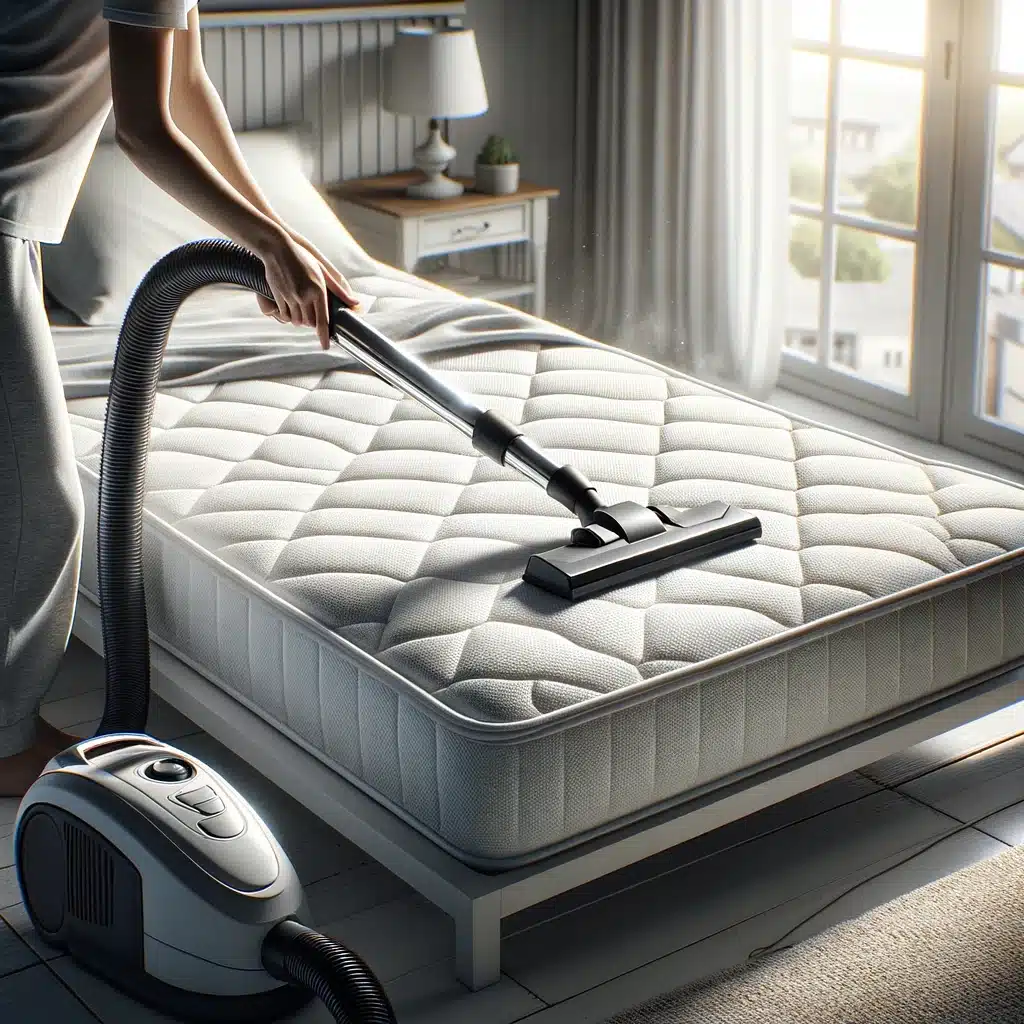
Person cleaning mattress with vacuum in sunny bedroom.

6 Easy Steps on How to Clean with Vacuum Cleaner

How to Vacuum Your Home Properly: A Complete Guide A vacuum works harder than any other tool in the cleaning cupboard, yet most people use it far below its potential. Better technique lifts embedded grit, keeps indoor air cleaner and adds years of life to floors. This guide covers machine choice, six steps, a surface-by-surface reference, the habits that rob suction, and when to call a professional. Match the Machine to Your Home No single model suits every floor plan. Start with the mix of carpet, bare floor and stairs you actually own, then weigh filtration, weight and bin size. Upright: the strongest pick for wall-to-wall carpet, with a wide path that clears a hallway in two or three passes. Canister: the flexible choice for mixed flooring, because the hose reaches under beds, behind doors and along baseboards. Stick: light enough for a daily tidy in a condo, though the bin fills quickly on plush carpet. Robot: useful for crumbs between real passes, never a substitute for a full-size machine. Bagged or sealed models: steady airflow and tidier dust handling for allergy households. Sealed bodies and HEPA media matter most where asthma or allergies shape daily life, since fine particles need to be trapped rather than blown back into the room. The CDC explains when and how to clean and disinfect your home, and a thorough vacuum pass belongs in that same routine alongside wiping high-touch surfaces. The Six Steps of a Complete Vacuuming Pass Step 1: Fit the Right Attachment Swap tools as you move. A motorised brush roll for carpet, a felt or bristle head for tile and engineered wood, a crevice tool for the strip beside the baseboard, and an upholstery nozzle for sofas and mattresses. Changing heads takes seconds and saves a second pass. Step 2: Clear the Floor Toys, charging cables, socks and pet bowls choke the intake or tangle the roll. Pick them up first, and dust shelves and tabletops before you work the floor, so falling particles land where the vacuum is about to go. Step 3: Give the Machine a Once-Over Check the bin, the filter and the brush roll before you plug in. A half-full canister and a hair-matted roll turn a strong machine into a weak one. Step 4: Work in a Deliberate Pattern Begin in the corner farthest from the door and retreat toward the exit, so you never tread on clean floor. Use slow, overlapping lanes, and reset height and suction as you cross from carpet onto hardwood. Step 5: Slow Down Where Feet Land Most Hallways, entryways and the strip in front of the sofa carry the heaviest soil load. Two directions, lengthwise then across, pull grit out of the pile instead of skating over it, and a third slow pass on a traffic lane pays for itself. Step 6: Finish, Empty and Store Walk the room and check the edges you missed. Empty the bin before it packs solid, wipe the housing, clear the roll, and coil the cord loosely on its hooks. Surface-by-Surface Cheat Sheet Surface Tool Technique How Often Plush or frieze carpet Motorised brush roll Slow overlapping lanes, two directions Weekly, twice in busy homes Hardwood and engineered wood Bare-floor head, brush off Straight lanes, low suction, felt pad only Weekly, more in road-salt season Tile and stone Hard-floor head plus crevice tool Lanes first, then grout lines and corners Weekly, then a damp mop Area rugs Brush roll or delicate head Back and forth, then flip and repeat Every one to two weeks Sofas, mattresses, stairs Upholstery and stair tools Slow passes, then crevice along seams Monthly Roughly one minute of suction per square metre of carpet is a workable pace, so a typical Toronto two-bedroom takes fifteen to twenty minutes with edges, stairs and rugs included. Habits That Quietly Rob Suction Letting the bin fill to the brim, which strangles airflow before the machine looks full. Ignoring the brush roll until hair winds into a solid ring around the bar. Racing across carpet at walking speed, which lifts only surface soil. Skipping the edge pass, so baseboards collect a permanent grey line. Filter and Maintenance Rhythm Every use: glance at the bin and the roll. Weekly: empty the bin outdoors and rinse the pre-motor filter. Monthly: cut hair off the brush roll and check the hose for clogs. Quarterly: clean or replace the main filter; bagged models need a new bag too. Yearly: replace the HEPA cartridge and have the belt checked. HEPA Filters, Allergies and Indoor Air If someone in the house sneezes through spring or wakes with a blocked nose, filtration deserves extra attention. A true HEPA filter captures the fine particles a standard foam sleeve passes straight through, so dust mite debris, pollen and pet dander land in the bin instead of the air. The CDC’s overview of home hygiene makes the same point from the other side: small habits beat one marathon clean. When a Professional Deep Clean Beats DIY Home vacuuming keeps floors presentable, but it cannot reach under a king bed, behind the fridge or deep into a sofa frame. A deep cleaning service brings commercial filtration and the attachments to pull that buildup out, along with baseboards, vents and the tops of cupboards. Between visits, a regular maid cleaning keeps every room on a schedule, with entryways and bathrooms handled each time. A recurring maid visit begins at $212.63 for a studio or one-bedroom home, and every rate sits on the house cleaning prices page. Frequently Asked Questions About Vacuuming How often should I vacuum? Busy zones such as entryways, kitchens and hallways deserve two or three passes a week, while bedrooms and formal rooms can wait until the weekend. Homes with pets, or anyone with allergies, do better with more frequent work and a sealed HEPA machine. Why has my vacuum lost suction? The cause is usually airflow rather than the motor. Check the bin level, look for a clog in the

6 Easy Steps on How to Clean with Vacuum Cleaner Read More »

Inviting bedroom with clean white sheets and soft natural light.

5 Steps to Perfectly Clean Sheets

5 Steps to Perfectly Clean Sheets Nothing changes the feel of a bedroom faster than fresh linen, and clean bedding does more than look tidy. Sheets collect sweat, body oils, skin cells and dust mites all week long, so a rushed or harsh wash leaves fabric stiff, faded or still faintly soiled. The five steps below cover detergent choice, stain treatment, water temperature, washer loading and storage, so every load comes out soft, bright and genuinely clean. 1. Choose a Detergent That Suits the Fabric Detergent is the first decision and it shapes everything that follows. A well chosen product lifts soil while staying mild enough that fibres survive many washes. If anyone in the house has sensitive skin, pick a hypoallergenic formula, because those are made without the aggressive additives and heavy perfumes that can irritate skin overnight. For silk, high thread count cotton and other fine bedding, use a detergent built for delicates, since those products protect the finish and the soft hand of the cloth. Harsh bargain formulas strip fibres over time and shorten the life of a good set. 2. Pre-Treat Stains Before the Drum Starts Check every sheet before it goes into the machine. Body oils, hand cream, makeup and spilled drinks are the usual culprits, and they rarely lift on a short cycle alone. Dab stain remover onto the mark, or use a little of your regular detergent when that is all you keep on hand. Work it into the fabric with your fingertips or a soft brush, then leave it a few minutes so the product can loosen the soil. Treating marks first gives you an evenly clean sheet instead of pale patches where a stain only half came out. 3. Set a Water Temperature the Care Label Allows Warm water dissolves oils and lifts dirt more effectively, which is why most cotton and linen performs well in a warm wash. Read the care label first, always. Silk, fine synthetics and some blends want cooler water, and a hot cycle can shrink them, fade the colour or weaken the fibres for good. Matching the temperature to the material protects both the appearance and the lifespan of your bedding. 4. Load the Washer Lightly and Pick the Right Cycle Sheets need space to move. A packed drum stops water and detergent from circulating, so soil stays put and deep creases set in. An overloaded machine also works harder, which wears on the appliance and the fabric at once. Run one set per load where you can. Choose a normal cycle for cotton and a gentle cycle for linen and delicate blends, so agitation cleans without punishing the cloth. 5. Dry and Store With Care Low heat in the dryer is the safe default, and line drying on a sunny day freshens fabric at no cost. Take sheets out while they are still slightly damp, because that prevents over-drying, set-in wrinkles and a stiff feel, and it makes ironing much easier when you want that crisp hotel finish. Once dry, fold them neatly or put them straight back on the bed. Store spares in a cool, dry, ventilated closet or drawer so mildew and mustiness never get a foothold. Two Habits That Keep Bedding Fresh Wash bedding roughly once a week. That rhythm keeps grime, allergens and dust mites under control and helps the fabric last longer. Add a gentle fabric softener, ideally hypoallergenic and free of synthetic fragrance, for softness and a light scent. Skip it on towels and on any moisture-wicking fabric. A steady weekly routine also cuts down on the irritants that trigger sneezing and itchy skin, which is why allergy sufferers often notice a real difference once their bedding schedule is tight. Pillowcases and fitted sheets take the most wear because they rest against skin and hair. Turn duvet covers and pillowcases inside out before the wash so detergent reaches the soiled inner face, and close zips and buttons to stop them snagging the rest of the load. Keeping a spare set in the closet makes the weekly change quick, so you are never waiting on laundry before you can make the bed. If a set still smells faintly after washing, run it again on a smaller load rather than adding more detergent, because oversudsing traps soil instead of removing it. Frequently Asked Questions About Cleaning Sheets How often should sheets be washed? About once a week for most households. Wash more often if you sweat heavily at night, sleep without pyjamas, share the bed with pets, or if someone in the home has asthma or allergies. Two weeks between washes is the practical outer limit for a healthy adult. Is hot water always best for sheets? No. Hot water sanitises well but it damages silk, fine synthetics and some blends. Check the label, then use the warmest setting the fabric allows. Warm water handles most cotton and linen comfortably. Can I use fabric softener on every wash? It is fine on cotton and most blends and it keeps bedding feeling soft. Avoid it on towels, since it reduces absorbency, and on moisture-wicking sheets. Choose a fragrance-free option if skin is sensitive. What causes yellowing on white sheets? Body oils, perspiration and leftover detergent are the common causes, along with an overloaded washer that cannot rinse properly. Pre-treat marks, keep the drum loose, and use the correct dose of detergent rather than extra. When to Bring In a Professional Clean Delicate bedding, guest rooms that sit unused for months and whole-home resets are easier with help. Toronto Shine Cleaning provides deep cleaning and regular maid service across the city, so bedrooms, laundry areas and the rest of the house get attention in one visit. See what clients say on the reviews page or check current rates on the pricing page, where regular cleaning starts at $212.63 before HST for a studio or one bedroom. Call (647) 424-0355 to book. For background on how often household textiles and surfaces need attention,

5 Steps to Perfectly Clean Sheets Read More »

Luxurious white pillow and pastel duvet on a serene bed setting.

7 Easy Steps for a Pillow Deep Clean

7 Easy Steps for a Pillow Deep Clean Your pillows go through a lot. Every night they absorb sweat, skin oils, dust, and allergens that can affect your sleep quality and health. Regular pillow cleaning not only keeps your bedding fresh but also extends the life of your pillows. Follow these seven easy steps to get your pillows clean, fluffy, and ready for a great night sleep. For professional help with all your bedding and home cleaning needs, Toronto Shine Cleaning is just a call away at (647) 424-0355. 1. Check the Care Label Before you start, locate and read the care label on your pillow. This tag tells you everything you need to know about cleaning your specific pillow type. Most synthetic fiber and down pillows are machine washable, while memory foam and latex pillows usually require spot cleaning only. Following the label instructions prevents damage and keeps your warranty valid. If the label says dry clean only, or if you prefer a deeper clean than home machines can achieve, consider professional deep cleaning services instead. 2. Remove Pillow Covers and Protectors Take off all pillowcases and protective covers. These accessories collect the bulk of oils, sweat, and dirt that accumulate through nightly use. Wash them separately according to their care labels to keep them in good condition. Cleaning both the cover and the pillow at the same time means you can reassemble your bed with everything fresh and ready to use. This simple step makes a big difference in overall bedding hygiene. 3. Prep Your Pillows With Baking Soda Prepping your pillows before washing helps the cleaning process work better. Give each pillow a vigorous shake to fluff the fibers and loosen embedded dust. For an extra freshness boost, lightly sprinkle baking soda over the surface of each pillow. Baking soda is a natural deodorizer that absorbs odors rather than masking them. Let it sit for about 15 minutes, then brush or vacuum off the excess before moving to the wash step. 4. Machine Wash on Gentle Cycle For machine-washable pillows, place two pillows in the washer to keep the machine balanced during the spin cycle. Select a gentle cycle with warm water and use a mild detergent. Harsh detergents can break down pillow fibers over time, so stick to something gentle. Avoid overloading the machine — pillows need room to move around for effective cleaning. If you are unsure about washing your pillows at home, professional cleaners have commercial-grade equipment that handles bedding safely and thoroughly. 5. Rinse and Spin Thoroughly After the wash cycle completes, run an extra rinse cycle to ensure all detergent residue is removed. Soap left inside pillows can attract dirt and cause skin irritation. Follow the rinse with a robust spin cycle to extract as much water as possible. Excess moisture is the main cause of mold and mildew growth inside pillows, so this step is essential for long-term freshness. The CDC emphasizes cleaning and drying surfaces thoroughly to prevent germ growth, and the same principle applies to your bedding. 6. Dry Completely Drying pillows thoroughly is the most critical step. Damp pillows are a breeding ground for mold and mildew. If weather permits, air drying in direct sunlight is excellent because sunlight acts as a natural disinfectant. If using a dryer, set it to low heat and add a couple of clean tennis balls (placed inside socks) to the drum. The tennis balls bounce around and fluff the pillows as they dry, preventing the filling from clumping. Check periodically and fluff by hand if needed. Drying can take 1-2 cycles depending on pillow thickness. Here are key drying tips: Use low heat — High heat can damage pillow fibers and cause shrinkage. Keep the setting on low or air fluff. Add tennis balls — Two clean tennis balls in sock covers keep pillow filling evenly distributed and prevent clumping. Check for dampness — Stop the dryer every 30 minutes and squeeze the pillow to test for remaining moisture inside. Sun dry when possible — Direct sunlight naturally disinfects and helps whiten pillows. Bring them in once fully dry. Allow full drying time — Thick pillows may need two full dryer cycles. Never put a damp pillow back on your bed. Pillow Care at a Glance Pillow Type Wash Method Drying Tips Synthetic Fiber Machine wash gentle, mild detergent Low heat dryer with tennis balls, or air dry Down/Feather Machine wash gentle, mild detergent Low heat dryer with tennis balls, fluff often Memory Foam Spot clean only, no machine wash Air dry away from direct heat Latex Spot clean with damp cloth Air dry, keep out of direct sunlight Frequently Asked Questions How often should I wash my pillows? Wash pillows every three to six months. Pillowcases and protectors should be washed every one to two weeks. Regular washing keeps allergens and dust mites under control. The CDC emphasizes handwashing to reduce germ spread, and keeping clean bedding supports that goal. For a complete refresh, pair pillow cleaning with professional deep cleaning for your home. Can I put memory foam pillows in the washing machine? No, memory foam should never go in a machine. The agitation and spin cycle will damage the foam structure. Spot clean with a damp cloth and mild soap instead. How do I get yellow stains out of pillows? Yellow stains are usually from sweat and body oils. Pre-treat with a mixture of baking soda and hydrogen peroxide before washing. For stubborn stains, professional cleaning is often more effective. What is the best way to dry pillows without a dryer? Hang pillows on a clothesline in direct sunlight. The UV rays naturally disinfect and bleach minor stains. Fluff them periodically and bring them inside once fully dry to avoid dew. When should I replace my pillows instead of cleaning them? Replace pillows every 1-2 years, or sooner if they no longer hold their shape, have persistent odors after cleaning, or trigger allergy symptoms. A good test is

7 Easy Steps for a Pillow Deep Clean Read More »