Furniture Cleaning

Dusty attic interior with visible beams and sunlit window.

6 Essential Tips for Efficient Attic Cleaning | Toronto Shine Cleaning

A Tidy Attic Pays for Itself in Space, Air, and Peace of Mind An attic that has drifted into chaos quietly taxes the whole house. Boxes lean against rafters, dust blankets every surface, and a search for one bin of holiday lights can swallow an entire Saturday. A focused attic clean fixes far more than appearances. It frees storage, improves air quality above your ceilings, and exposes leaks, pests, or mold while those problems are still small and cheap to repair. The six tips below follow the same sequence a seasoned crew uses, from the first plan to year-round upkeep. 1. Begin With a Written Plan Decide your mission before you pull down the ladder. Are you decluttering, hunting for a specific box of keepsakes, or attempting a full deep clean? That answer shapes every later choice. Next, break the space into zones: one corner for sorting boxes, another for stored furniture, a third for items that need repair or a deeper scrub. Working one zone at a time keeps a mountain of stuff from feeling like a mountain, and visible progress in each zone keeps you moving when the dust starts to test your patience. 2. Dress Like the Attic Is a Job Site Attics rarely receive the care that living rooms do, so expect dust, debris, and insulation fibers floating in still air. Wear long sleeves and long pants to keep those abrasives off your skin and reduce the chance of irritation or an allergic reaction. Sturdy gloves guard your hands against splinters, sharp metal edges, and whatever the last decade left behind. A dust mask filters the fine particulates you will inevitably stir loose, which matters extra if mold or mildew spores are anywhere in the space. 3. Carry Every Tool Up Before You Start Trips back downstairs kill momentum and stretch a half-day job into a full weekend. Load up first with everything you will need: Heavy-duty garbage bags tough enough for broken items, old cardboard, and dusty textiles without tearing on sharp edges Sorting boxes labeled keep, donate, sell, and toss so every object lands in its fate immediately A vacuum with a HEPA filter, which traps fine dust and allergens instead of puffing them back into the enclosed air A mold and mildew cleaning spray for moisture-prone corners and rafters A sturdy step ladder for high shelves and deep corners, so you never over-reach from the joists 4. Sort Every Item Into Four Buckets The fastest way through the piles is a ruthless four-way decision on every single object. Keep covers things you use regularly, hold real sentimental value, or will genuinely need later. Donate takes items that are usable but no longer serve you; someone else will thank you. Sell is for pieces with resale value that can return some cash for the effort. Toss is the home for anything damaged beyond repair or refused by charities. A sorted attic is not just easier to walk through. Less clutter means fewer hiding spots for pests and a much better chance of noticing a leak stain or mold patch early. 5. Clean From the Rafters Down With the clutter gone, work top to bottom. Dust the overlooked spots first: rafter undersides, door frame tops, window sills, and light fixtures, all of which collect cobwebs and grey fur. Then vacuum the floor, pressing into crevices and corners where insects and rodents like to nest and breed. Watch closely for mold or mildew, which thrives where ventilation is poor and moisture settles. Treat any patch right away with a labeled mold-killing product and follow the instructions exactly. The CDC guide on mold health explains why disturbing or breathing mold is worth avoiding, particularly for children, older adults, and anyone with a sensitive airway or weakened immune system. Before buying any heavy-duty disinfectant for the job, skim Health Canada’s household products guidance on reading labels and using cleaners without wrecking your indoor air. 6. Protect Your Work With Light Yearly Upkeep A spotless attic left alone slowly reverts. A simple maintenance rhythm keeps clutter and dust from rebuilding, protects the things you store up there, and gives you regular chances to spot roof leaks or pest entries before they become expensive repairs. Task Frequency Why It Matters Visual scan for stains, damp, and pests Every season Catches costly damage while it is tiny Quick dust and cobweb sweep Twice a year Keeps air quality and light levels up Full sort and vacuum session Once a year Stops clutter from stacking back up Label and log stored boxes At first store Future searches take minutes, not hours Hand Over the Ladder When the Attic Wins Some attics outgrow a weekend: decades of accumulation, large suspected mold areas, or an access hatch that worries you alone with a ladder. Toronto Shine Cleaning brings bonded, insured crews, backed by a $1,000,000 insurance policy plus a $10,000 accidental breakage and surety bond, to homes across the city. The deep cleaning service starts at $270.38 for a studio or one-bedroom home before HST, with every rate listed on the pricing page. Frequently Asked Questions How long does an attic clean take? For a moderately loaded attic, plan roughly half a day with a helper. Denser accumulations stretch into a full weekend because sorting decisions, not dusting, eat the clock. Zoning the space and using the four-bucket method are the two biggest time-savers. Do I really need a dust mask up there? Yes. Attics trap fine dust, insulation fibers, and sometimes mold spores in still air with little ventilation. A mask filters what you would otherwise breathe in a closed space while you agitate months or years of settled particles. Can I store my belongings right after cleaning? Once the space is fully dry, yes. Prefer sealed bins over open piles so dust cannot settle back onto your things, and leave walking paths clear to the walls so future inspections and vacuuming stay easy. What signs mean I should call a professional?

6 Essential Tips for Efficient Attic Cleaning | Toronto Shine Cleaning Read More »

Middle-aged woman organizing living room table, casual attire.

7 Easy and Quick Cleaning Hacks Every Homeowner Needs to Know

7 Easy and Quick Cleaning Hacks Every Homeowner Needs to Know Housework can feel like a second job, and the chores that drag hardest are usually the small ones. A handful of ordinary items already sitting in your cupboards can cut that time sharply. The seven tricks below need no specialist products, no costly equipment and very little effort, and each one targets a job homeowners put off the longest. 1. Steam the Microwave With Lemon Splatters and baked-on food inside a microwave are stubborn, but they loosen fast with steam. Fill a microwave-safe bowl with water, drop in a few slices of lemon and run the appliance on high for about five minutes. The water boils, the steam softens whatever has dried onto the walls, and the lemon adds a fresh scent while its acid nibbles at residue. Let it stand a moment, then lift the bowl out with oven mitts because it will be hot. One wipe with a cloth clears the mess, with no scrubbing and nothing harsh left behind. 2. Keep White Vinegar Handy White vinegar is the most versatile cleaner in a typical kitchen cupboard. Mix equal parts vinegar and water in a spray bottle and you have a glass cleaner that leaves windows and mirrors streak-free when you buff them with a lint-free cloth. The same acid dissolves the lime and mineral scale that dulls kettles and coffee makers. Fill the reservoir with a half vinegar, half water mix, run a brewing cycle, then rinse with plain water until the smell clears. Your appliances run better and last longer for it. 3. Refresh the Sofa With Baking Soda Odours and light stains in upholstery respond well to baking soda. Sprinkle a generous layer over the fabric and leave it for around twenty minutes. It draws out smells and lifts soil while it sits, then you vacuum the powder away using the brush attachment, which also pulls up the loosened dirt. The sofa looks and smells fresher without a chemical spray or a professional visit, which makes this a practical routine for pet owners and busy family homes. 4. Dust With Dryer Sheets Dryer sheets attract dust through static rather than pushing it around, so they work on wood furniture, electronics, skirting boards and baseboards. The sheet also leaves a light scent and reduces static on the surface, which stops dust settling back as quickly. Fewer passes with a duster means less time on the job, and the surface stays cleaner for longer than it would after a dry cloth. 5. Lift Pet Hair With Rubber Gloves Pet hair on upholstery comes away easily with a damp rubber glove. Dampen the gloves slightly, then run your hands over the sofa, chairs and cushions. The hair clings to the rubber and pulls free of the weave with far less effort than a lint roller, and you can rinse the gloves under the tap and carry on. No sticky sheets to peel and no vacuum canister to empty halfway through. 6. Reach for White Toothpaste White toothpaste handles small marks that resist normal wiping, including scuff marks on painted walls and grime between piano keys. Put a small dab on a soft cloth and rub gently, using only light pressure so you do not dull the paint or the finish. Wipe the area afterwards with a damp cloth to remove residue. It is a cheap, gentle fix for spots that would otherwise mean repainting. 7. Drag a Squeegee Over the Carpet A window squeegee is an unexpected but effective carpet tool, especially in homes without a vacuum. Drag the rubber edge over the pile using steady, even strokes. That friction rakes out hair and ground-in soil from deep in the fibres, material a broom misses entirely. Pet owners and anyone with a busy hallway will be surprised how much comes up. Quick Reference Microwave: lemon slices in water, five minutes on high, then wipe. Glass, kettles and coffee makers: equal parts white vinegar and water. Sofa: baking soda for twenty minutes, then vacuum with the brush attachment. Dusting, pet hair, scuffs and carpets: dryer sheets, damp rubber gloves, white toothpaste and a squeegee. Most of these fixes take only a few minutes once the supplies are within reach, so store the vinegar, baking soda, gloves and squeegee together in one caddy and carry it from room to room instead of hunting for each item as you go. Frequently Asked Questions Is vinegar safe on every surface? It is safe on glass, stainless steel and most sealed tile, but the acid can etch natural stone such as marble, travertine and limestone, and it can dull some factory finishes on wood over time. Test an out of sight patch first and use a pH-neutral product on stone instead. How often should a microwave be cleaned? A quick steam and wipe once a week keeps spills from baking on. Deep clean it whenever splatters build up or food smells linger after cooking, and always wipe immediately after a boil-over. Do dryer sheets damage electronics? Use them on the case and around vents, never on screens, ports or lenses, where the residue can smear or interfere with coatings. A dry microfibre cloth is safer for a monitor or a television. Can baking soda be left on a sofa longer? Twenty minutes is enough for most odours. Leaving it overnight does no harm on dry fabric, but a longer sit helps stubborn smells or damp pet accidents, provided you vacuum thoroughly afterwards. When a Quick Hack Is Not Enough These tricks keep a home tidy between deeper sessions, but grease film in a kitchen, build-up in bathrooms and dust in vents need more than a spray bottle. Toronto Shine Cleaning covers deep cleaning and recurring home cleaning, and the team works through every room rather than the visible surfaces only. Check the pricing page for rates, where regular visits begin at $212.63 before HST for a studio or one bedroom, and

7 Easy and Quick Cleaning Hacks Every Homeowner Needs to Know Read More »

Caucasian hand meticulously cleans miniature house model with cloth.

7 Steps to a Thorough Home Cleaning: From Top to Bottom

7 Steps to a Thorough Home Cleaning: From Top to Bottom A full house clean feels overwhelming only when it is tackled without a plan. With a sensible order of work, the same effort produces a far better result. Whether you are getting ready for guests, running a seasonal reset, or simply catching up after a busy month, the seven steps below take a home from the ceiling corners down to the floors without spreading dust back over areas you have just finished. 1. Plan and Prepare Before You Start Begin by checking your supplies so nothing stops you halfway through. Confirm your cleaning solutions are full, your mop heads are clean, and your vacuum bags or filters do not need replacing. Then think about the route. In a multi-storey home, work from the top floor downward so dust and dirt travel with you instead of being tracked back into finished rooms. Fifteen minutes of planning turns a daunting chore into a series of manageable blocks. 2. Start at the Top of Each Room Work on the upper zone first. Deal with cobwebs in corners, dust that has settled on high shelves and ledges, and the blades of ceiling fans and light fixtures. Then move to wall hangings such as picture frames and mirrors, which gather a surprising amount of dust. Handling these areas early means loose particles are captured before they drift down onto surfaces you have already wiped. 3. Dust and Wipe Every Surface With the heights done, work through the remaining surfaces room by room. Use a microfibre cloth or duster on tables, chairs and desks, reaching under objects and into corners where dust collects. Wipe electronics and appliances, which lose performance and looks when dust builds up. On fabric pieces such as sofas and armchairs, switch to the upholstery attachment on your vacuum to pull out dust and allergens. In the kitchen, clean cabinet fronts, the stovetop and counters, paying attention to the space around appliances where crumbs gather. In bathrooms, disinfect contact points like faucets, handles and countertops so they are hygienic as well as clean. 4. Give the Bathrooms Extra Care Bathrooms deserve attention because germs build up quickly there. Apply cleaner to the sink, bathtub and toilet and let it sit for a few minutes to break down grime, using that waiting time on the mirrors and windows with a glass cleaner. Then scrub each area with a suitable brush or sponge. For stubborn limescale around fixtures or in the toilet, a pumice stone or a purpose-made tool shifts it without scratching. Grout between tiles discolours and can turn mouldy, so a grout brush and a bleach-based cleaner restore the whiteness and stop the spread. Finish with the floor, disinfecting the corners and the area around the toilet base and using a steam mop where you have one. 5. Work Through the Kitchen in Depth The kitchen is the busiest room in most homes, so it earns a closer pass. Clean appliance interiors, not just the fronts. Lift food and grease out of the microwave, use a dedicated oven cleaner on baked-on grime, and run a self-cleaning cycle if the oven has one. Empty the refrigerator and wash the shelves and bins in warm soapy water, wipe the inside with a baking soda solution to kill odours and stains, dry everything, and throw out expired food while you are at it. Use a disinfectant suited to the material on countertops, whether that is granite, laminate or stainless steel, and treat the backsplash with a degreaser, especially near the stove. Wipe cabinet doors and handles, using a gentle wood cleaner on timber. 6. Vacuum and Clean the Floors Vacuum carpets and rugs thoroughly, then look them over. Deep-seated dirt or staining calls for steam cleaning, which also sanitises the fabric and, in homes with pets or allergies, removes dander that a vacuum alone leaves behind. On hard floors, sweep or dust mop before you wet mop so loose grit cannot scratch the surface. Match the solution to the floor: pH-neutral for hardwood, something stronger for tile and linoleum. Pay extra attention to corners and edges, where grime hides, and use a scrub brush or an old toothbrush in the tightest spots. 7. Final Touches and Fresh Air Finish by softening the space rather than scrubbing it. Nudge furniture into a slightly better arrangement, tidy decorative pieces, and add fresh flowers or a scented candle. Lavender and vanilla calm a room while citrus and mint lift it, and both help neutralise any leftover cleaner smell. Last of all, empty the bins in every room and take out the recycling, which stops odours creeping back into the rooms you just finished. Top to Bottom at a Glance Up high: cobwebs, ledges, ceiling fans, light fixtures and wall hangings first. Mid level: dust furniture and electronics, vacuum upholstery, disinfect kitchen and bathroom surfaces. Down low: scrub fixtures and grout, mop floors from the far corner toward the door. Finish: rearrange, freshen the air, and clear all waste out of the house. Frequently Asked Questions Why clean from the top down? Dust and debris fall as you work. Starting at the ceiling and finishing on the floor means every loose particle lands on a surface you have not cleaned yet, so you avoid repeating the same job twice. How long does a thorough home clean take? A one bedroom apartment usually takes two to three hours, while a three bedroom home can take five or more. Preparing supplies in advance and working room by room keeps the time down. How often should deep cleaning happen? Twice a year suits most households, with a pass in spring and another in autumn. Homes with pets, allergies or young children benefit from a quarterly deep clean alongside weekly upkeep. Can one person clean an entire house in a day? Yes, if you follow the order above and resist jumping between rooms. Splitting the work over two days, or bringing in

7 Steps to a Thorough Home Cleaning: From Top to Bottom Read More »

Person polishing wooden island with essential oils in sunny kitchen.

7 Natural Ways to Clean and Polish Wood for a Lasting Shine

7 Natural Ways to Clean and Polish Wood for a Lasting Shine Wood brings warmth and character to a home, and keeping it looking rich takes less effort than most people expect. The seven methods below rely on kitchen staples rather than harsh solvents, so they condition timber without stripping its finish or leaving residue behind. Each one suits a slightly different job, from greasy kitchen tables to scratched heirloom pieces. 1. Vinegar and Olive Oil This is the simplest all round treatment for finished wood. Mix one part white vinegar with three parts olive oil and stir so the two combine properly. The vinegar dissolves dirt and grime sitting on the surface while the oil feeds the timber and brings back its natural lustre. Dip a soft, lint-free cloth into the mixture, wring out the excess, and rub it in slowly along the grain of the wood. Working with the grain lets the oil penetrate evenly and avoids cross-grain scratches. Finish by buffing with a clean cloth to lift any surplus oil and sharpen the shine. It is a good choice for pieces handled often, since the oil leaves a light protective layer behind. 2. Lemon Juice and Olive Oil Lemon juice cuts through dirt and greasy film without harsh chemicals, which makes this pair ideal for kitchen tables and cabinets. The fresh citrus also leaves a pleasant scent. Blend two parts olive oil with one part juice pressed from a fresh lemon, avoiding the bottled kind, because the natural enzymes in fresh fruit break grime down more effectively. Dampen a soft cloth with the mixture, taking care not to soak it, then rub along the grain. The oil restores moisture and guards against the drying that heating and air conditioning cause, while the lemon brightens the colour and sheen. 3. Beeswax Polish Beeswax does more than clean. It builds a protective barrier that resists scratches, moisture and daily wear. Melt natural beeswax in a double boiler until liquid, then blend in a carrier oil such as jojoba or coconut oil at roughly one part wax to three parts oil. Jojoba has a long shelf life and mimics the oils naturally present in wood, while coconut oil adds a faint sweetness and mild antibacterial action. Let the blend cool until warm but still workable. Rub it into the surface in circular motions with a soft cloth so it fills tiny pores and scratches, leave it a few minutes, then buff hard with a second cloth. The buffing hardens the wax into a durable seal that repels dust, water and stains. 4. Strong Black Tea Black tea is a gentle cleaner for wood and a subtle colour restorer. The tannins that give tea its colour also lift dirt and residue without the aggression of chemical products. Brew a pot stronger than you would drink, using an extra bag or two, and let it cool completely so heat does not affect the finish. Dip a soft cloth into the cooled tea, wring it out until it is damp rather than dripping, and wipe the furniture down. Dust comes away with the cloth, and older, dulled pieces often recover some of their original depth of colour. 5. Essential Oils A few drops of essential oil upgrade any of the mixtures above. Lemon oil degreases naturally, which suits wood in the kitchen where cooking grease and food particles settle, and its clean scent neutralises food odours. Lavender oil is calming and mildly antibacterial, making it a sensible addition for dining tables and chairs that hands touch constantly, and it is gentle enough for regular use. Add three to five drops to a vinegar and oil blend or to the beeswax polish, stir well, and the oil distributes evenly through the mix while leaving a lasting, subtle fragrance. 6. Walnut Rub A shelled walnut is a surprisingly effective remedy for light scratches. The oils inside resemble those used in commercial polishes, and rubbing a walnut over a scratch works them into the fibres so the mark blends with the surrounding wood. Move the walnut along the grain, and repeat as needed on deeper scratches until the area is saturated and the tone matches. This works best on light and medium tones, where the walnut colour blends in naturally. 7. Coconut Oil Dry, tired looking wood often just needs moisture back. Coconut oil is solid at room temperature and melts in your hands, which makes it easy to control. Make sure the surface is clean and dust free, then rub a thin layer into the grain with a soft cloth. The oil sinks in and replenishes what heating and air conditioning have drawn out. Buff with a separate clean cloth to remove the excess, and the piece takes on a healthy natural sheen with a protective film that slows future drying. It is especially useful for furniture and floors near radiators or in air-conditioned rooms. Recipes at a Glance General cleaning: one part white vinegar to three parts olive oil. Kitchen grease: one part fresh lemon juice to two parts olive oil. Protective finish: one part beeswax to three parts jojoba or coconut oil, melted together. Colour revival: strong black tea, cooled, wiped on with a damp cloth. Extra benefit: three to five drops of lemon or lavender essential oil in any mixture. Frequently Asked Questions Can vinegar damage wood furniture? Diluted as described and used on a finished surface, it is fine for occasional cleaning. Do not leave it standing on the wood or use it on bare, unwaxed timber, where acidity can raise the grain. Always buff the surface dry afterwards. How often should wood be polished? Every four to eight weeks suits most furniture. Pieces in dry rooms or near heating vents may need conditioning more often, since the air pulls moisture out of the timber. Is olive oil safe on all wood finishes? It works well on sealed and oiled surfaces. Avoid it on pieces that are still sticky or

7 Natural Ways to Clean and Polish Wood for a Lasting Shine Read More »

Kitchen rust, rust, oven rust

How to Remove Rust and Corrosion from Metal: 5 Best Methods

How to Remove Rust and Corrosion from Metal: 5 Best Methods Rust rarely announces itself. It appears as an orange bloom on a garden trowel, a gritty film across patio furniture, or a bolt that refuses to turn. Corrosion takes a metal part apart a molecule at a time, so the sooner a rusted surface is treated, the more of the original item you save. The five methods below run from pantry staples to a small science experiment, and each one suits a different level of damage. Match the method to the job, work in a ventilated space, and always finish by drying the metal completely. 1. White Vinegar Bath: The Natural Soak Acetic acid is what makes white vinegar work, and it reacts with iron oxide to loosen the bond between rust and the metal underneath. Households that prefer to skip harsh chemistry reach for vinegar first. Small parts such as screws, hand tools, or bicycle hardware can be dropped into a container of vinegar and left overnight, which gives the acid time to work into the corrosion. Large pieces that will not fit in a bucket can be wrapped instead. Saturate rags or old towels with vinegar, press them over the rusted areas, and re-wet them now and then so the surface stays damp right through the soak. Once the bath is finished, scrub with a metal brush or a ball of crumpled aluminum foil to lift the softened rust. Rinse in water afterwards to stop the acid from acting on good metal, then dry every crevice. Moisture left behind simply restarts the cycle. 2. Baking Soda Paste: The Gentle Scrub Baking soda is the milder option, and it suits delicate surfaces where a strong product would do more harm than the rust itself. Mix a thick paste with a small amount of water. It needs to cling to a vertical surface without dripping, because the paste has to stay in contact with the corrosion long enough to break it down. Spread it generously across the affected area and leave it for a couple of hours. Then scrub gently with a brush. The grit of the paste exfoliates rust from the surface while the metal underneath is left intact. Rinse the residue away with water and wipe the piece with a clean, dry cloth. 3. Potato and Dish Soap: The Surprising Trick This one sounds like a joke until you try it. Potatoes contain oxalic acid, and that organic compound attacks rust in much the same way a formulated remover does. Slice a raw potato in half, then apply a liberal amount of dish soap to the cut face. The soap lubricates the surface and adds degreasing power while the oxalic acid goes to work. Rub the soapy end directly onto the rust, using the potato the way you would use a brush. It reaches small patches and awkward shapes that a wire brush struggles with. Rinse thoroughly afterwards, because soap or acid left on the metal invites fresh corrosion. Dry the surface with a clean cloth to close the job out. 4. Chemical Rust Remover: The Powerful Solution When corrosion is thick, pitted, or well established, a formulated rust remover is the realistic choice. These products cut through heavy oxidation far faster than a kitchen remedy can. Safety comes first. Wear protective gloves, work in a well-ventilated area, and avoid breathing the fumes. Read the manufacturer’s instructions and follow them exactly, since removers come as sprays, gels, and liquids, and each type has its own application method. Cover every affected spot with the product and let it dwell for the recommended time, often a few hours. During that window the chemistry keeps working, reaching into pits that a brush cannot touch. Scrub the metal afterwards to lift what the remover has loosened, rinse with water so no corrosive residue stays behind, and dry it thoroughly. Do not rush the dwell time, and do not skip the rinse. 5. Electrolysis: The Science Project Electrolysis sends an electric current through the metal to reverse the oxidation process, which makes it the strongest option for heavily rusted tools and hardware. Gather: A plastic container large enough to submerge the item Washing soda, also called sodium carbonate, as the electrolyte Water A piece of sacrificial metal, such as an old spoon or a steel plate you do not mind corroding A battery charger Fill the container with enough water to cover the rusty object, add a few tablespoons of washing soda, and stir until it dissolves. Place the rusty item and the sacrificial metal in the solution so that the two do not touch. Connect the positive lead of the charger to the sacrificial metal, which acts as the anode, and the negative lead to the rusty item. As current flows, rust particles leave your tool and collect on the sacrificial piece. Switch the charger on and let it run for a few hours, then disconnect it carefully and lift the parts out. Scrub the metal to clear leftover impurities, rinse off the washing soda, and dry it completely, or leave it in a dry, well-ventilated spot to air dry. When Rust Wins: Call a Professional Home remedies handle small jobs well. Extensive corrosion, oversized items, and delicate metals that need a careful touch are a different story, and a failed attempt can cost you the piece. Toronto Shine Cleaning provides professional cleaning services that include specialized treatment for rust and corrosion on metal surfaces, and the team can also protect a treated item so that it does not corrode again. A deep cleaning resets the rest of the home, and regular cleaning keeps it that way. Call (647) 424-0355 to talk through a stubborn item, or see current rates before you book. Two habits make any of these jobs safer: work with ventilation, and wash up well afterwards. The CDC home cleaning guidance covers safe practice around the house, its page on cleaning and disinfecting with bleach explains why

How to Remove Rust and Corrosion from Metal: 5 Best Methods Read More »

Hand cleaning shiny surface with microfiber cloth and water droplets.

How to Clean Plastic Surfaces: 6 Effective Ways to a Deep Clean

6 Effective Ways to Deep Clean Plastic Surfaces Plastic surfaces are everywhere in your home — kitchen storage containers, outdoor furniture, children’s toys, bathroom organizers, and countless everyday items. Knowing the right cleaning method makes a big difference in how your plastics look and how long they last. Here are six effective ways to deep clean plastic surfaces using common household ingredients and professional-grade techniques. For the toughest jobs, Toronto Shine Cleaning offers expert services to restore your home’s plastic items to like-new condition. Vinegar and Salt for Grease and Grime White vinegar is a natural degreaser that cuts through built-up grease on plastic surfaces without harsh chemicals. Dampen a clean cloth with undiluted white vinegar and wipe down the plastic to remove everyday dirt and residue. For stubborn sticky spots or baked-on grease, sprinkle a small amount of salt over the area before applying the vinegar. The salt acts as a gentle abrasive that lifts grime without scratching the surface. Let the mixture sit for a few minutes, then wipe clean. Rinse with water and dry with a soft towel for a streak-free finish. This method is ideal for kitchen containers, cutting boards, and food storage lids. Baking Soda Paste for Tough Stains Baking soda’s mild abrasive properties make it perfect for tackling stubborn stains on plastic without causing scratches. Mix a few tablespoons of baking soda with a small amount of water to form a thick paste. Apply the paste directly to stained areas and scrub gently with a soft brush or sponge. The natural abrasive action lifts discoloration and built-up residue effectively. Rinse thoroughly with clean water to remove all traces of baking soda, then dry with a soft cloth. This method works well on plastic tupperware, garden furniture, and children’s toys that have seen better days. Bleach Solution for Disinfecting For plastic surfaces that need serious disinfection — such as bathroom items, pet bowls, or secondhand finds — a diluted bleach solution is highly effective. Mix one tablespoon of bleach into one gallon of water. Apply the solution to the plastic surface and let it sit for 5 to 10 minutes. Ensure the area is well ventilated and wear protective gloves during application. After the dwell time, rinse thoroughly with clean water and dry completely. This approach kills mold, mildew, and bacteria on contact. The CDC provides guidance on safely disinfecting with bleach to ensure effective germ removal without damaging surfaces. For guidance on choosing the right approach, the CDC explains when to clean and when to disinfect surfaces in your home. Cleaning Method Best For Key Tip Vinegar + Salt Grease, sticky residue, food containers Use undiluted vinegar for best results Baking Soda Paste Tough stains, discoloration, toys Use a soft brush to avoid scratches Bleach Solution Disinfecting, mold, secondhand items Ventilate area and wear gloves Isopropyl Alcohol Label adhesive, sticky residue Test on a small area first Soap + Essential Oils Daily cleaning, light grime Rinse to avoid soap film Commercial Cleaners Outdoor furniture, weathered plastic Spot test before full application Isopropyl Alcohol for Sticky Residues Sticky residue from labels, tape, or spilled adhesives can ruin the look of plastic items. Isopropyl alcohol dissolves these adhesives quickly without damaging the underlying surface. Apply a small amount of 70% or higher isopropyl alcohol to a cloth or paper towel and gently rub the affected area. The alcohol breaks down the adhesive, allowing it to wipe away cleanly. After removing the residue, rinse the surface with water to eliminate any alcohol trace, then dry thoroughly. This method is particularly useful for removing price tag glue from new containers or tape marks from plastic storage bins. For help with large cleaning projects around your home, Toronto Shine Cleaning offers regular maid cleaning to keep everything pristine. Soap and Essential Oils for Daily Cleaning For routine maintenance, a gentle solution of mild dish soap and water is all you need. Add a few drops of essential oil such as lemon, lavender, or tea tree for natural antibacterial properties and a fresh scent. Dip a soft cloth into the warm soapy mixture and wipe down plastic surfaces. Rinse with clean water to remove soap film and dry with a soft towel. This method is perfect for daily or weekly cleaning of plastic items that see regular use, such as bathroom organizers, desk accessories, and kitchen tools. It is safe, gentle, and leaves a pleasant fragrance behind. Tools You Will Need for Plastic Cleaning Having the right tools on hand makes cleaning plastic surfaces faster and more effective. Stock your cleaning kit with these essentials: Microfiber cloths — Gentle on plastic and lift dirt without scratching. Use separate cloths for cleaning and drying. Soft-bristle brushes — Ideal for scrubbing textured plastic surfaces like outdoor furniture or storage containers with ridges. Spray bottles — Fill one with diluted vinegar solution and another with plain water for rinsing as you work. Protective gloves — Wear rubber gloves when using bleach, alcohol, or commercial cleaners to protect your skin. Baking soda and white vinegar — Keep these pantry staples handy for quick stain treatment and degreasing between deep cleans. Commercial Cleaners for Outdoor Plastic For outdoor plastic furniture, storage bins, and items exposed to weather, commercial plastic cleaners are formulated to handle the extra dirt and UV exposure. Always follow the product label instructions and perform a spot test on an inconspicuous area first to check for discoloration. These cleaners often include protective agents that reduce dust buildup and restore shine. Use a soft sponge or cloth to apply the cleaner, scrub gently, and rinse thoroughly. For extensive outdoor cleaning needs, professional deep cleaning services can save you time and effort. Frequently Asked Questions Can I use vinegar on all types of plastic? Vinegar is safe for most hard plastics but avoid using it on delicate or coated plastics. Test on a small hidden area before applying broadly. Will bleach damage plastic surfaces? Diluted bleach (1 tablespoon per gallon of water) is

How to Clean Plastic Surfaces: 6 Effective Ways to a Deep Clean Read More »

Person sneezing indoors as sunlight reveals dust particles in the air.

5 Cleaning Tips to Reduce Asthma Triggers in Your Home | Toronto Shine Cleaning

A Home That Breathes Easy Starts With How You Clean It For someone living with asthma, a house can flip from sanctuary to hazard zone without warning. Dust, pet dander, mold, and strong fumes lurk in plain sight, and each one can escalate a quiet afternoon into an attack. The leverage point is your cleaning routine: done deliberately, it removes the triggers instead of aerosolizing them. These five core tips, plus two deeper dives on soft furnishings and pets, build a home where lungs of every sensitivity can relax. 1. Chase Dust Before It Settles Dust mites are among the most notorious asthma aggravators, so a dust-controlled home is step one. Ditch the feather duster and wipe surfaces with a damp cloth: moisture captures and removes dust rather than launching it back into the air you breathe. Vacuum faithfully with a machine fitted with a HEPA filter, because those filters capture the finest particles instead of puffing them out the exhaust. Then wash bedding weekly in hot water, which kills the mites thriving in warm, fibrous linens and strips out the allergens they leave behind. 2. Keep Humidity Below Fifty Percent Mold and dust mites both throw parties when indoor air turns humid, and both are major asthma escalators. Holding indoor humidity under 50 percent suppresses both at the source. The direct tool is a dehumidifier, which pulls excess moisture from the air and holds the house at a healthier level, ideally checked with a simple hygrometer. Ventilate the wet rooms: exhaust fans in bathrooms and kitchens, or a cracked window, move air before mold and mildew can colonize. Fix every leak the moment you spot it, because damp surfaces are mold’s launchpad, and unchecked mold is exactly the kind of trigger the CDC’s mold health resource warns sensitive airways about. 3. Choose Gentle, Low-Fume Products The cleaner you spray is itself a potential trigger. Many commercial formulas lean on strong fragrances and harsh chemistry that irritate reactive airways, so choose unscented or naturally scented products made for sensitive households. Skip aerosol cans entirely: the fine mist they launch is built for deep inhalation. Liquid concentrates and pump sprays do the same cleaning work with far less airborne payload, and a DIY mix of vinegar and baking soda handles surface grime and bathroom mildew without adding any synthetic trigger to your air. Health Canada’s household products hub is the right reference for reading labels and choosing safer chemistry. If you do reach for bleach occasionally, follow the CDC’s bleach guidance: dilute properly, ventilate hard, and never mix it with other products, because bleach fumes are a textbook asthma trigger. 4. Respect Your Filters Your heating and cooling system circulates whatever its filters fail to catch: pollen, dust, dander, all of it, straight into every room. Change or clean HVAC filters on the manufacturer’s schedule, which protects both your air and the system’s efficiency. Then add a HEPA air purifier in the rooms where you actually spend your hours, especially the bedroom, since you cannot breathe clean air selectively while asleep for eight hours. 5. Declutter Without Mercy Every knickknack, stack, and pile is a dust exhibition with extra surfaces. Clear surfaces shrink the places allergens can camp, which is why regular decluttering sessions, parting with what you no longer use, pay off in easier cleaning all year. Store what stays inside closed containers instead of leaving it open to the air, so dust never accumulates on the things themselves. A starter shopping list for an asthma-focused cupboard: A vacuum sealed with a true HEPA filter for weekly whole-floor sessions A hygrometer and dehumidifier for any basement or damp-prone room Unscented, dye-free surface cleaners and pump sprays instead of aerosols Zip-seal storage bins for off-season clothes, books, and keepsakes Bonus Focus: Soft Furnishings and Carpets Carpets, sofas, and curtains are allergen reservoirs the daily eye never sees. Vacuum carpet with your HEPA machine regularly to drag out embedded dust and dander, and steam clean carpets and upholstery periodically to cook off dust mites and lift what vacuuming misses. If asthma runs severe in the house, trade heavy drapes for washable curtains or blinds, and where you can, trade carpet for hard flooring; each swap permanently shrinks the home’s allergen load. Bonus Focus: Pets and Their Passengers Pets deliver joy and allergens in the same package: dander, fur, and the dust they trail in. Brush them outdoors where possible so loose fur never becomes indoor air, and keep animals off furniture and out of the bedroom so sleeping hours stay low-exposure, which matters because sleep is when airways recover. Vacuum more often in the pet’s favourite zones, run a purifier there too, and wash pet bedding and toys frequently so dander never piles up. Trigger Where It Hides Your Counter-Move Dust mites Bedding, upholstered furniture Hot-water weekly wash, HEPA vacuum Mold spores Bathroom, leaks, humid corners Humidity under 50 percent, fix leaks fast Pet dander Sofas, pet beds, carpets Outdoor grooming, purifier, off the bed Fumes and aerosols Cleaning cupboard Unscented liquids, pump sprays, ventilation Frequently Asked Questions and Answers How often should an asthmatic home be cleaned? Dust and vacuum weekly at minimum, wash bedding weekly in hot water, and deep-clean soft furnishings a few times a year. During pollen season or flare-ups, add sessions rather than stretching them. Are natural cleaners always safe for asthma? Not automatically. Vinegar has strong fumes too, so dilute it, ventilate while using it, and patch-test your reaction. Unscented, dye-free formulas designed for sensitive users remain the safest default. Does a HEPA filter really matter in a vacuum? Yes. Without one, the vacuum exhausts the finest particles straight back into the room air, which is precisely the fraction that reaches deep lungs. Sealed HEPA systems are the standard for allergen households. Can professional cleaning genuinely help? Regular visits keep dust, dander, and clutter from rebuilding between your own sessions, and a seasonal deep clean hits the reservoirs people miss. Toronto Shine Cleaning’s regular service

5 Cleaning Tips to Reduce Asthma Triggers in Your Home | Toronto Shine Cleaning Read More »

Person stretching at sunset outdoors

Improved Mental Health: Benefits of a Clean Home

How a Clean Home Improves Your Mental Health: 5 Psychological Benefits An orderly room changes the mood of a day, and the effect is not only visual. A tidy, clean home lowers the number of things competing for your attention, which shows up in how stressed, focused and rested you feel. Here are five psychological benefits of keeping your space clean, plus a reset routine that fits a busy Toronto week. How Mess Affects Stress and Sleep Every pile in view is an unfinished task. Mail on the counter, dishes in the sink, shoes by the door: each one quietly reminds the brain that something is still pending, so you stay a little on guard instead of relaxing. In a compact Toronto condo the effect is sharper, because less floor to look across means a few misplaced items fill the whole frame. Bedrooms feel it first, where laundry on the bed keeps the mind in task mode during the hour you meant to wind down. Clearing those cues turns a tidy room into a long exhale. The Five Psychological Benefits of a Clean Home 1. Lower Stress and Anxiety Visual noise keeps the nervous system busy. When counters, floors and tables are clear there is less for attention to track, and the sense of not being done yet fades. That is why clearing one surface calms you within minutes: the trigger is gone, not hidden. 2. A Better Mood and a Sense of Accomplishment Finishing something you can see delivers an immediate, tangible win, and the fresh result rewards you again each time you walk back into the room. Framing the work as self care helps too: music or a podcast on, twenty minutes of effort, and the space behaves like a reset button. 3. Sharper Focus and Productivity If you work from home, your desk is the office. Stray objects compete for attention, and filtering them out spends mental energy that should go to the task in front of you. A clear desk leaves fewer loose ends to track, which is why many remote workers tidy for ten minutes before the first call. 4. Better Sleep A bedroom should signal rest, not chores. Making the bed, putting folded clothes away and clearing nightstands tell the brain the room is finished for the day. A dark, quiet, clutter free room helps you fall asleep faster and stay asleep longer, and quality sleep supports mood, memory and resilience. A genuinely clean home also holds less dust, which matters for anyone whose breathing gets irritated overnight. 5. Healthier Everyday Habits An organised kitchen invites cooking while a crowded one invites takeout. With clear counters and visible ingredients, a real meal becomes the easy choice. Routine cleaning also keeps dust, allergens and moisture in check; the CDC explains how household hygiene limits the germs on the surfaces you touch most, and the CDC outlines the mental health benefits of physical activity for adults. The Five Benefits at a Glance Benefit Why It Happens Quick Win Lower stress Fewer visual reminders of unfinished work Clear one counter before bed Better mood A visible result creates a small win you can repeat Set a twenty minute timer and finish one room Sharper focus Less visual competition for attention Tidy the desk before your first call Better sleep A finished bedroom signals rest and holds less dust Make the bed and clear the nightstand Healthier habits A clear kitchen makes cooking easier than ordering Wipe counters and put food away nightly A Realistic Fifteen Minute Daily Reset Marathon cleaning is hard to sustain. Fifteen focused minutes at the same time each evening keeps a home manageable without eating the night. Minutes 1 to 3: clear the counters, the sink and the stove. Minutes 4 to 6: return anything that belongs in another room. Minutes 7 to 9: fold blankets, reset cushions and tidy the sofa. Minutes 10 to 12: sweep or vacuum the main traffic path. Minutes 13 to 15: set out tomorrow’s items in one landing zone by the door. Add weekly sheets, a bathroom wipe down and a vacuum of the whole unit, and the home never reaches the point where it needs a rescue mission. Small Condos and Shared Homes In a compact Toronto condo every surface does double duty, so clutter travels from the entry to the kitchen fast. One landing zone for keys, mail and bags stops the drift, and keeping the entry floor clear makes the whole apartment feel larger. In a shared home mess becomes friction. Written expectations remove the emotion: who takes out the recycling, who cleans the bathroom, and by when. A shared checklist and one common laundry day end most arguments. How a Recurring Clean Protects the Routine A calm home depends on time, the resource busy weeks run out of first. Handing the heavy work to a team is a practical wellbeing decision, not an indulgence. A recurring residential clean keeps kitchens, bathrooms and floors at a steady baseline, so your fifteen minutes goes to tidying instead of catching up, and deep cleaning a few times a year handles build up weekly upkeep cannot reach. Toronto Shine Cleaning works across the GTA and is bonded and insured, and every rate is published before you book: the smallest regular visit is listed at $212.63 before HST, and households that pick a weekly or bi-weekly slot take 15 percent off. Clients score the team 4.9 out of 5 on Google, and the locations page names the neighbourhoods covered. Frequently Asked Questions How quickly can tidying lift stress? Most people feel calmer within minutes of clearing a surface they can see, because the reminder of unfinished work disappears rather than moving aside. Repeating a short session daily lets the effect build. Can a clean home replace therapy or medication? No. A tidy home supports day to day wellbeing, but it does not treat anxiety, depression or any other condition. Use these routines alongside a doctor’s or therapist’s

Improved Mental Health: Benefits of a Clean Home Read More »

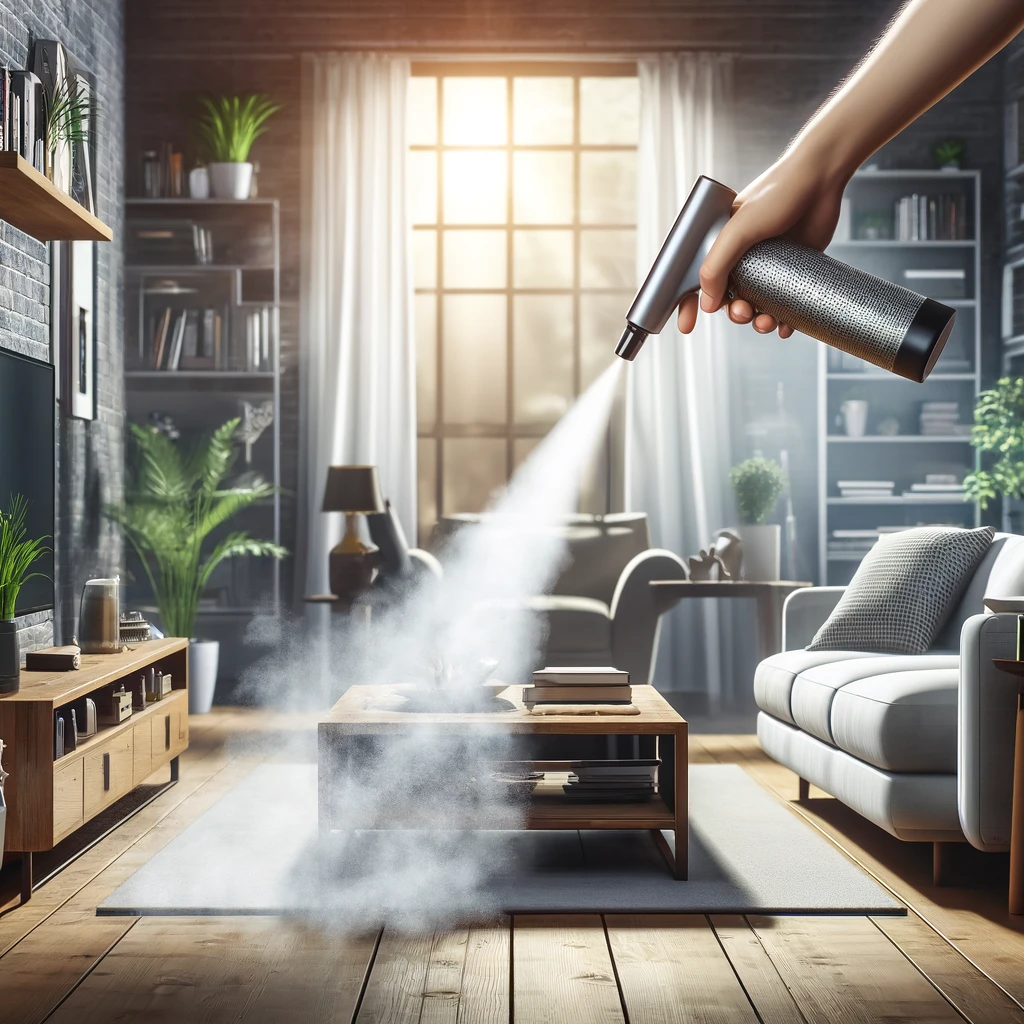
Modern living room cleaned with compressed air, showing dust particles in sunlight.

5 Surprising Benefits of Cleaning with Air Compressed: A Healthier Home Awaits | Toronto Shine Cleaning

A Mini Tornado for Your Hardest Corners Compressed air cleaning works like a pocket tornado: a focused blast that lifts dirt from places a cloth cannot reach. It is more than a satisfying way to watch dust bunnies scatter. Used thoughtfully, the method genuinely improves home health, from allergen levels to the lifespan of your electronics. Here are five surprising benefits and the safety habits that make the technique work for you. 1. It Evicts Allergens From Their Hiding Places Wiping and vacuuming can push allergens around instead of removing them, leaving fine particles to resettle. A controlled air stream targets the unseen stuff that lodges in deep crevices: under heavy furniture, inside upholstered couch seams, between the leaves of decorative objects, across window sills, bookshelves, and electronics that attract dust like magnets. You aim and set the intensity, so even delicate items get cleaned without contact damage. Dislodging irritants at their sources, with windows open so they exit rather than recirculate, supports easier breathing for everyone, especially people with respiratory conditions. 2. No Chemicals, No Residue, No Problem Compressed air relies on force alone, so nothing is sprayed onto surfaces and nothing lingers afterward. For households managing asthma, allergies, or chemical sensitivities, that absence matters, and it also keeps phosphates and similar additives out of your home and waterways. There is no stockpile of specialty bottles either, just one tool that moves from a keyboard to upholstery to a vent. That makes it gentle on modern electronics, where liquid cleaners risk damage, and a minimalist’s shortcut to a dust-free gadget shelf. 3. It Takes the Fight to Dust Mites Dust mites are microscopic occupants that feed on shed skin flakes in warm, fibrous places, and they are a leading driver of indoor allergies and asthma. Mattresses, sofas, and carpets shelter them where ordinary cleaning falls short. A strong air blast flushes mites, their waste, and their food supply out of deep seating and mattress piping that a surface wipe never touches, lowering the overall allergen load. Disturbing their habitat regularly makes the home less hospitable over time, so populations cannot rebound between sessions, and because the method is non-toxic, it suits bedrooms and living areas where families spend hours. 4. It Extends the Life of Household Items Beyond tidiness, air cleaning is preventive maintenance. Electronics, computers, TVs, consoles, and kitchen appliances pull dust into fans and vents, and buildup there causes overheating and eventual failure. A short burst clears vents without disassembly or risk to sensitive components, which keeps performance steady and usable life longer. The same logic covers hidden infrastructure: dryer vents, HVAC returns, and plumbing fixtures collect debris that breeds inefficiency, wear, and in extreme cases fire hazards. Blowing these out proactively avoids costly repairs. For a broader refresher on which household cleaning habits protect surfaces and belongings, Health Canada’s household products and home safety resources pair well with the technique. 5. It Reaches What Cloths and Brushes Miss The fifth benefit is pure access. Canister filters, camera lenses, accordion window tracks, the guts of a vacuum, and the fins of a radiator all defeat soft tools, yet a narrow nozzle handles them in seconds. Precision means you clean the object instead of working around it, which turns Sunday projects into quick routines. Kitchen exhaust hoods, window air conditioners, and car dash vents are other candidates. One caveat: anything greasy deserves a degreaser first, otherwise the blast simply relocates oil instead of removing it. Cleaning Smarter With Compressed Air: Safety First The blasts that rescue your electronics can also launch particles across the room, so treat the air like a broom rather than a leaf blower: aimed, controlled, and finished with a damp wipe. Follow these habits: Work outdoors, at an open window, or in a well-ventilated room so dislodged dust leaves the house Wear a simple face mask and eye protection, and give sensitive people and pets a clear room Use short bursts at moderate distance instead of one long, forceful stream Never aim at moldy surfaces: disturbing mold spore colonies spreads them, and the CDC guidance on mold and health explains why containment and proper cleanup come first Follow with damp wiping or vacuuming so floating particles are captured, not redeposited Where Compressed Air Fits Your Routine Target How often Watch out for Keyboards, consoles, vents Monthly Hold cans upright; short bursts Window tracks and blinds Seasonally Work with windows open Dryer vent and HVAC returns Seasonally Power equipment off first Upholstery seams and mattress edges Monthly Follow with a vacuum pass The CDC’s household cleaning and disinfecting guidance makes the same larger point: dust removal is how you keep surfaces genuinely clean, and how you keep the air you breathe honest. Frequently Asked Questions Is compressed air safe for electronics? Yes when used in short bursts from a reasonable distance, with devices powered off and cans held upright. The method is standard for clearing keyboard and console dust without liquids. Does blowing dust count as removing it? Only if the dust exits your home. Pair blasts with open windows or outdoor work, then damp wipe or vacuum what settles, so allergens leave instead of landing elsewhere. Can compressed air replace dust mite treatments? It helps flush mites, their waste, and skin flakes from deep seams, which lowers allergen load. For ongoing control, combine it with encasements, regular washing, and vacuuming. When should I call professionals instead? For whole-home allergen resets, baked-in grime, and upholstery beyond a blast’s reach, book a deep cleaning. Toronto Shine Cleaning also offers regular maid service for homes in every neighborhood they cover. Breathe Easier This Weekend Try one vent, one track, and one sofa seam with the window open and see how the room feels afterward. For the heavy lifting behind the blast, call Toronto Shine Cleaning at (647) 424-0355. The bonded and insured team carries a $1,000,000 insurance policy and a $10,000 accidental breakage and surety bond, operating from 140 Yonge St Suite 285, Toronto ON M5C

5 Surprising Benefits of Cleaning with Air Compressed: A Healthier Home Awaits | Toronto Shine Cleaning Read More »
Organizing living room with basket for toy and magazine clutter.

How to Declutter and Clean Your Home in 5 Easy Steps

How to Declutter and Clean Your Home in 5 Easy Steps Decluttering and cleaning is the task that keeps landing on tomorrow’s list. The good news is that the method is straightforward wherever you live, whether you are bracing against a brisk Toronto wind or enjoying a sunnier climate. Work through the five steps below in order, and the reward is a home that feels calmer, cleaner, and easier to keep that way. 1. Set Your Goal and Make a Plan Start with a picture of the finished space. Maybe it is a pared-back room with clean surfaces and a few well-placed pieces, or a warm, book-filled corner with soft lighting and plush pillows. Hold that image, because it becomes the test for what stays and what goes. Then break the work into pieces. Sorting one drawer or one shelf at a time is far less intimidating than facing an entire house, and a sequence that flows logically from one area to the next stops you from simply moving clutter around. Write the plan down and keep it where you can see it, so every session starts with a known task instead of a decision. Set timelines you can actually meet; a couple of hours every Saturday will finish a home sooner than an ambitious weekend that never arrives. Finally, plan for the difficult parts. If sentimental items are hard to release, or motivation fades, arrange support from a friend or a small reward after each section. 2. Use the Four-Box Method Four containers turn an overwhelming chore into a sorting game. Every object gets a verdict: Keep: items with a practical role or real emotional value, from favourite kitchen gadgets to photographs and cozy sweaters. Donate or sell: clothes that no longer fit, books you have finished, duplicate kitchen tools, and anything else that someone else could use. Recycle: things that should not go to landfill but can become something new, such as old magazines, tired electronics, and glass jars from finished condiments. Trash: worn-out shoes, broken electronics, and expired medications that have no further use. Set the four boxes in the room you are working on and sort as you go. If more than one room is in play, label each container so nothing gets mixed up, and empty the donate box within the week so it does not become permanent furniture. The bin is the least pleasant destination, but it is a necessary one, because some items have reached the end of their useful life. 3. Deep Clean Once the Clutter Is Gone With surfaces clear, clean from the top down so that falling dust does not settle on work you have already completed. Ceilings, ceiling fans, light fixtures, and crown moulding hold more dust than most people expect, which is why they come first. In Toronto, the changing seasons add their own mess: humidity, rain, and snow leave windows grimy, and washing them brightens a room immediately. Furnace filters deserve attention as well, because a clogged filter reduces efficiency and can push dirty air back through the house. Areas that stay damp, such as bathrooms, basements, and the space under sinks, need extra care, since moisture encourages mould that damages materials and can affect health. Scrub those spots, dry them thoroughly, and treat them if needed. Wash walls and baseboards while you are up there, then vacuum and mop the floors last, emptying the canister or changing the bag when you finish. 4. Organize What Is Left Storage should match both the room and the way you live. Modular shelving, boxes that fit under a bed, drawer dividers, and over-the-door racks are solid starting points, and the aim is a system that blends into your decor while using the space well. Tall open units suit display, while closed cabinets hide the messier categories. Then place things where your routines need them. If mornings are rushed, keeping breakfast items and coffee mugs in one spot saves time; keeping cleaning supplies together in one accessible place means spills get handled the moment they happen. Once every item has a home, tidying gets easier, because putting things back becomes a habit rather than a chore. An organized room also does quiet work for your mood and your focus, cutting stress and freeing time for what you actually want to do. 5. Maintain the Result Crossing the finish line feels wonderful, and holding the result takes only a modest routine. A short daily pass is enough: wipe the kitchen counters after dinner, sweep the living areas, make the beds in the morning. Keep a small caddy of supplies in each bathroom and one in the kitchen, and a quick pass takes seconds rather than an afternoon. Small actions repeated often stop mess from spiralling out of control. Share the load too. When everyone in the household owns a task or an area, nothing gets overlooked and cleaning stops being one person’s solo battle. Review your belongings regularly as well, ideally before a seasonal change or after the holidays, since a year changes what a household needs. That habit keeps clutter from creeping back and makes every future cleaning session shorter. Bringing In Help Some weeks the plan does not survive contact with work and family commitments. Toronto Shine Cleaning offers regular household upkeep and deep cleaning for exactly those weeks, with rates listed on the pricing page and bookings taken by phone at (647) 424-0355. Two reliable references help set the standard for the cleaning itself: the CDC guidance on cleaning and disinfecting your home and the CDC page on mould and health, which is worth reading before you tackle a damp basement. Everyday hygiene basics cover the rest. Frequently Asked Questions What should I do first when the whole house feels overwhelming? Shrink the job. Pick a single drawer or shelf, finish it, and move to the next area in a logical order. Small completed sections build the momentum that carries you through the rest of the home.

How to Declutter and Clean Your Home in 5 Easy Steps Read More »