Furniture Cleaning

Toronto apartment cleaning

How to Tackle Allergens in Your Home with 6 Simple Changes

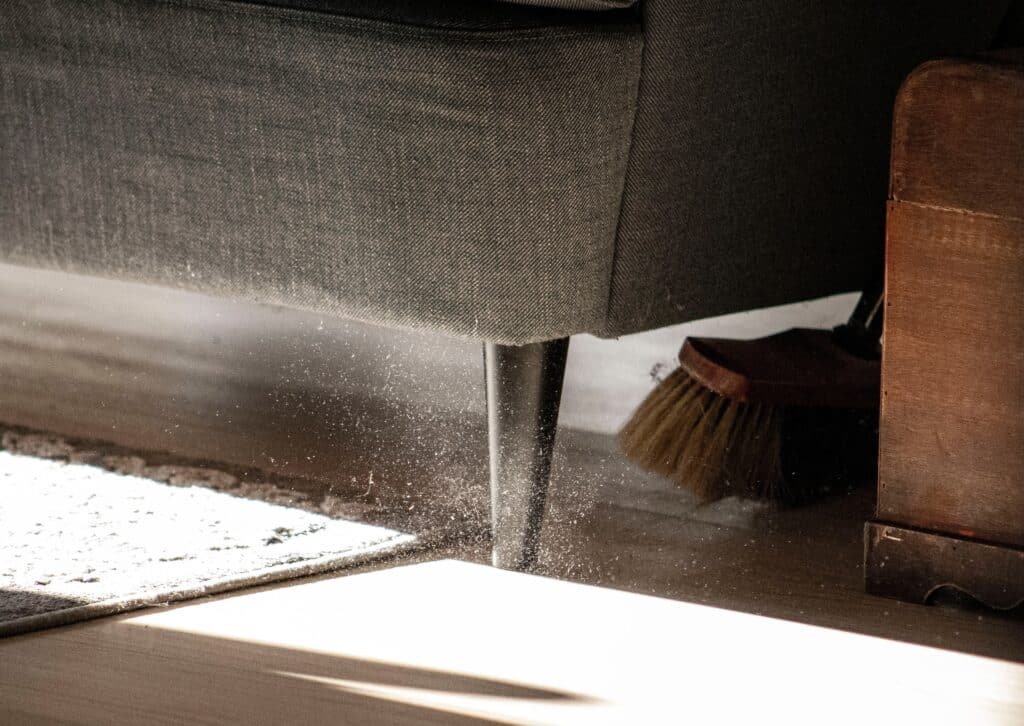
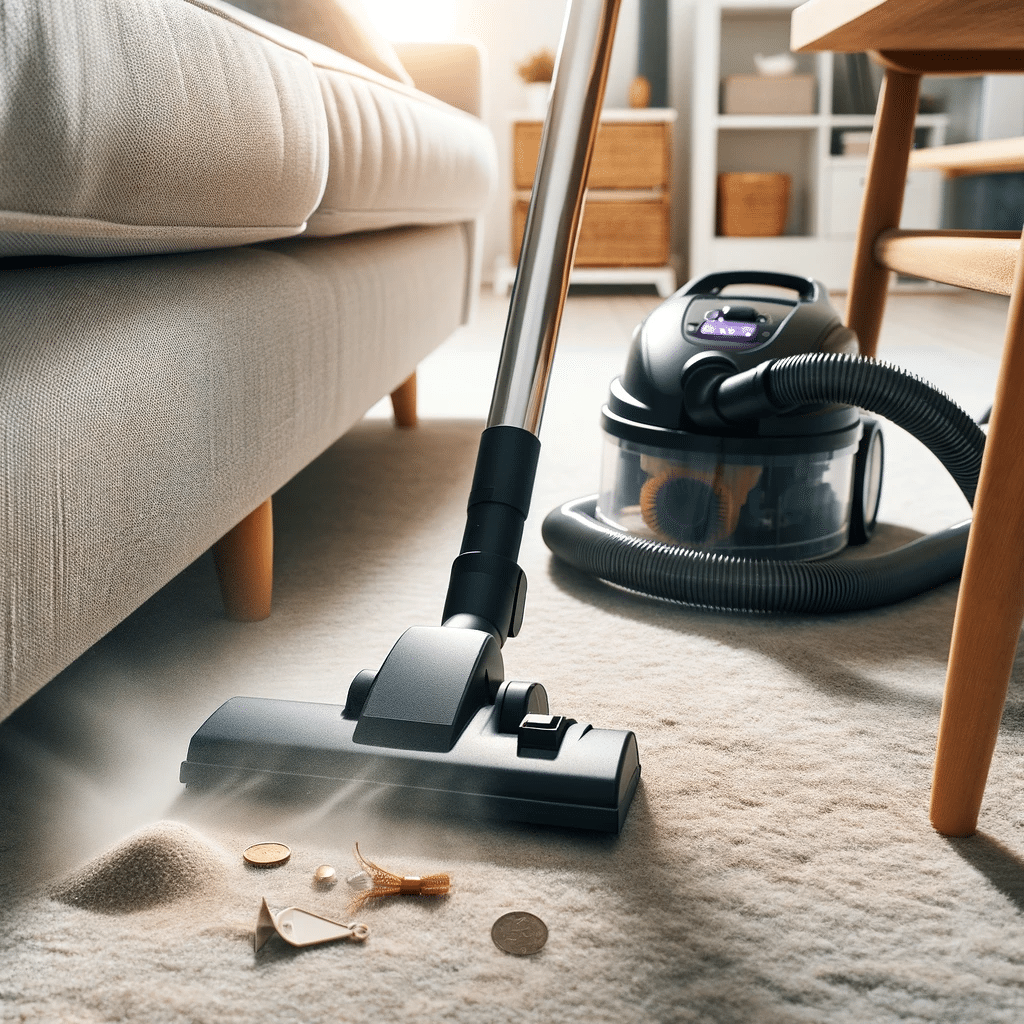
Tackle Allergens in your home doesn’t have to feel like a never-ending battle against invisible enemies. With a few simple changes, you can significantly reduce your exposure to common allergens and enjoy a cleaner, healthier living space. Let’s dive into six easy steps you can take to keep those sneeze-inducing culprits at bay, making your home a sanctuary for comfort, not sniffles. 1. Regular Dusting and Vacuuming First off, understand that dust mites are tiny creatures that aren’t just chilling in the corners; they’re pretty much partying it up all over your home. They particularly adore fabrics and upholstered furniture, where they can burrow deep and multiply. This is why simply moving a duster around on the surface isn’t enough. To really kick these gatecrashers out, you need to be a bit more strategic. When you’re dusting, start from the top of a room and work your way down. This method ensures that any dust you’ve dislodged from higher places doesn’t settle on freshly cleaned lower surfaces. Ceiling fans, bookshelves, and picture frames are often overlooked havens for dust. Using a microfiber cloth can be a game changer here. These cloths are designed to trap dust rather than just moving it around. They can be used dry or slightly dampened with water or a suitable cleaning solution, depending on the surface you’re tackling. Now, about vacuuming – this is where you can really make a significant impact. Vacuuming isn’t just for carpets and rugs; it’s also crucial for floors, sofas, and even curtains. If your vacuum comes with attachments, use them. They’re not just fancy extras; they’re designed to help you reach into nooks and crannies where dust mites and their allergen-packed droppings like to hide. For households particularly sensitive to allergens, vacuuming once a week might not cut it. High-traffic areas might need a run-over more frequently, and don’t forget to vacuum under furniture and in other out-of-sight areas where dust bunnies like to multiply. Speaking of vacuums, HEPA filters are indeed your best friend in the fight against indoor allergens. These filters can capture particles as small as 0.3 microns – that’s way smaller than the average dust mite. However, to keep them performing at their best, you need to maintain them. Follow the manufacturer’s guidelines for cleaning or replacing the HEPA filter. A clogged filter won’t just fail to trap allergens; it can also reduce the efficiency of your vacuum cleaner, making your cleaning efforts less effective. 2. Keep the Windows Closed High pollen seasons can vary depending on where you live, but they typically occur during spring, summer, and fall. During these times, trees, grasses, and weeds release tiny grains into the air to fertilize other plants, and unfortunately, these grains can wreak havoc on allergy sufferers. Opening windows, even for a short while, can invite these pollen particles inside, where they settle on surfaces and linger in the air, waiting to trigger your allergies. It’s not just pollen you have to worry about either. Urban areas can have additional pollutants and particulates from traffic and industry, while rural areas might introduce mold spores and other agricultural allergens into your home. So, what’s the alternative? Air conditioning can be a lifesaver. It allows you to keep your indoor environment comfortable without opening your home to outdoor allergens. However, this is where it gets a bit more technical. Air conditioning systems circulate air through filters that can trap pollen and other particulates, but these filters need attention to keep working effectively. Regular maintenance is key. Replacing or cleaning air conditioner filters as recommended by the manufacturer is critical. A dirty or clogged filter not only reduces the efficiency of your air conditioning system but can also become a source of air pollution inside your home. Some filters are reusable and can be cleaned with water, while others need to be replaced altogether. Investing in high-quality filters can also make a significant difference in improving indoor air quality. Consider the use of air purifiers with HEPA filters in rooms where you spend a lot of time, such as bedrooms or home offices. These devices can further reduce the concentration of pollen and other allergens in indoor air, complementing the work of your air conditioning system. For those exceptionally sensitive to indoor air quality, monitoring outdoor air quality reports can be beneficial. On days when the pollen count or pollution levels are particularly high, you can take extra precautions, such as running air purifiers more frequently and avoiding opening doors unnecessarily.     3. Use Allergen-Proof Bedding Investing in allergen-proof covers is a proactive step toward creating a healthier sleeping environment. These covers are designed with tightly woven fabric that dust mites and their allergens cannot penetrate. Encasing your mattress, pillows, and duvets in these barriers effectively locks out mites, denying them the cozy habitat your bedding offers. It’s a simple solution that can significantly reduce your exposure to these allergens. However, it’s not just about blocking allergens out; maintaining a clean sleeping area is equally critical. Regular washing of your bedding in hot water (at least 130°F or 54°C) is essential for killing dust mites and removing the allergens they leave behind. While allergen-proof covers protect your mattress and pillows, your sheets, pillowcases, and duvet covers are still exposed and can accumulate allergens. Weekly washing, therefore, becomes a crucial part of your allergen reduction strategy. It’s also beneficial to extend this cleaning regime beyond just your bedding. Consider curtains, area rugs, and any fabric-based decorations in your bedroom as potential allergen accumulators. Washing or cleaning these items regularly can further reduce the overall allergen load in your sleeping environment. For those with severe allergies, additional steps can be taken to minimize exposure. Replacing upholstered furniture with non-upholstered alternatives, opting for hardwood floors over carpets, and using air purifiers with HEPA filters can all contribute to a cleaner, less allergen-rich bedroom. 4. Control Indoor Humidity Controlling indoor humidity, therefore, isn’t just a recommendation; it’s a necessity for a

How to Tackle Allergens in Your Home with 6 Simple Changes Read More »

Homemade natural cleaning solutions displayed on a sunny kitchen countertop.

How to Refresh Your Home: 5 Essential Oil Recipes for Natural Cleaning

Hey there! Ready to give your home that Essential Oil Recipes for Natural Cleaning? inviting vibe without resorting to harsh chemicals? Let’s dive into the world of essential oils and whip up some natural cleaning solutions that not only cleanse but also leave your space smelling divine. Essential oils are not just about the aroma; they come packed with powerful cleaning properties too. Here are 5 essential oil recipes to refresh your home naturally: 1. All-Purpose Lemon Lavender Cleaner Let’s expand further on the All-Purpose Lemon Lavender Cleaner with a detailed breakdown that highlights each component and step in the process, providing you with a deeper understanding and appreciation for this natural, aromatic cleaner: 1 cup of water: Acts as the base for the cleaner, diluting the vinegar and essential oils to make them safe for use on various surfaces. Water helps in spreading the cleaning solution evenly. 1 cup of white vinegar: A powerful natural disinfectant, vinegar cuts through grease, grime, and dirt with ease. Its acidic nature makes it effective against bacteria and viruses, ensuring your surfaces are not just clean but sanitized. 15 drops of lemon essential oil: Known for its refreshing scent and strong antibacterial properties, lemon essential oil is a key ingredient in combating kitchen messes and brightening surfaces. It leaves behind a clean, invigorating aroma that uplifts the mood. 15 drops of lavender essential oil: Adds a calming, floral scent to the mix, transforming cleaning into a more pleasant, stress-free experience. Lavender’s natural antiseptic properties complement the lemon and vinegar, enhancing the cleaner’s effectiveness. A spray bottle: The perfect container for your homemade cleaner, making it easy to mix, store, and use. A spray bottle allows for convenient application, ensuring you cover the desired areas with just the right amount of cleaner. How to Make It: Begin by pouring water, vinegar, and the carefully measured drops of essential oils directly into your spray bottle. This method ensures that the blend achieves a harmonious balance, maximizing both the cleaning capabilities and the aromatic benefits of the ingredients. Given the natural tendency of essential oils to separate from the vinegar and water mixture, it’s crucial to give the bottle a good shake prior to each use. This step guarantees that the oils are evenly dispersed throughout the solution, allowing for consistent application and effectiveness. When it comes to using this cleaner, its versatility truly shines. Designed for hard, non-porous surfaces, it works wonders on countertops, kitchen tables, appliances, and bathroom fixtures. The application process couldn’t be simpler: just spray the mixture onto the surface in question and wipe it down with a cloth or sponge to achieve a clean and shining finish. The benefits of this homemade cleaner extend far beyond its surface-cleaning prowess. The lemon essential oil and vinegar join forces to offer robust antibacterial and antiviral properties, forming a formidable barrier against the spread of common household germs. Meanwhile, the lavender essential oil envelops your space in its calming scent, transforming routine cleaning into a more pleasant and stress-relieving activity. This concoction is not only effective but also non-toxic and eco-friendly, ensuring it’s a safe choice for homes with children, pets, and a preference for green living solutions. 2. Peppermint Window and Mirror Cleaner Diving into the Peppermint Window and Mirror Cleaner, let’s unfold each element and the crafting process that combines to form a sparkling, pest-repellent marvel for your glass surfaces: 1 ½ cups of water: Serves as the foundation of this cleaner, effectively diluting the vinegar and essential oil to ensure they’re gentle yet effective on glass surfaces. Water facilitates the even distribution of the cleaning mixture, ensuring a streak-free shine. ½ cup of white vinegar: This ingredient is a cleaning powerhouse, renowned for its ability to dissolve grime, combat streaks, and leave a crystal-clear finish. Its natural acidity is hostile to germs, making it an excellent disinfectant for windows and mirrors. 10 drops of peppermint essential oil: Far more than a fresh scent, peppermint oil is a natural deterrent against spiders and ants. Its inclusion turns this cleaner into a dual-threat against dirt and unwanted critters, leaving behind a refreshing minty aroma that revitalizes your home environment. A spray bottle: An essential tool for this homemade concoction, the spray bottle ensures easy mixing, storage, and application. It allows for a fine mist that evenly coats windows and mirrors without over-saturating them, making your cleaning efforts more efficient and effective. How to Make It: Initiate the process by combining the water and white vinegar in your spray bottle, followed by the peppermint essential oil. This preparation strategy ensures a well-balanced mix, leveraging the cleaning strength and aromatic benefits of the components in equal measure. Because essential oils can separate from their water and vinegar base, a vigorous shake before use is imperative. This action guarantees the essential oil’s thorough integration, offering consistent cleaning power and fragrance with every spray. In application, the Peppermint Window and Mirror Cleaner shines with versatility. It’s specifically formulated for use on glass, making it your go-to for leaving windows and mirrors without smudges or streaks. Simply spray a light coating on the glass surface and wipe away with a cloth or sponge for an immediate gleam. But the advantages of this homemade cleaner go beyond mere aesthetics. The peppermint essential oil’s inclusion serves a dual purpose, not only imparting a clean, uplifting scent but also acting as a natural repellant against common household pests like spiders and ants. Additionally, the non-toxic and environmentally friendly nature of this cleaner makes it a safe and responsible choice for households, ensuring cleanliness doesn’t come at the cost of health or the planet. Equally effective in enhancing the ambiance of your living space, the Peppermint Window and Mirror Cleaner introduces a minty freshness that can energize and refresh. This blend doesn’t just clean; it transforms the act of cleaning into an enjoyable, beneficial task. Its utility extends across the home, from living room windows to bathroom mirrors, making it an

How to Refresh Your Home: 5 Essential Oil Recipes for Natural Cleaning Read More »

Ergonomic Gaming Chair in Sleek White Room Design

How Often Should You Clean a Gaming Chair? A Detailed Schedule

Hey, fellow gamers and cleanliness enthusiasts! Ever wondered how often you should Clean a Gaming Chair to keep it in prime condition? Well, you’re in luck because I’ve got a detailed schedule just for you. Let’s keep that throne of yours looking and feeling fresh, so you can focus on those epic gaming sessions without any distractions. Immediate Clean-ups: Spills and Smudges When it comes to immediate clean-ups for spills and smudges on your gaming chair, acting fast is key to preventing any long-term damage. It’s all about having the right tools and products at your disposal to effectively tackle whatever mess comes your way, ensuring your chair remains in top-notch condition. For spills that are water-based-like sodas, energy drinks, or just plain water-a clean, damp cloth is your first line of defense. It’s important to blot the spill rather than rubbing it, as rubbing can push the liquid deeper into the fabric or upholstery, making it harder to remove. For these types of spills, microfiber cloths are particularly effective. They’re super absorbent and gentle on all types of materials, from leather to fabric. In cases where water alone isn’t enough, a mild detergent solution can be used. Mixing a small amount of dish soap with water creates a gentle cleaning solution that can lift more stubborn stains. Always use the solution sparingly to avoid saturating the chair too much. Oil-based spills, which can come from foods, lotions, or other greasy substances, require a different approach. For these, you’ll need a cleaner that’s specifically designed to break down oils. Krud Kutter Original Concentrated Cleaner/Degreaser is a great option here. It’s a versatile, water-based cleaner that can tackle grease, oil, and grime without harsh chemicals. Apply it to a cloth and gently dab at the spill, ensuring not to spread the stain further. As always, doing a spot test on a hidden part of your chair before using any new product is crucial to ensure it won’t damage the material. One of the most important steps in dealing with any spill or smudge is to consult the manufacturer’s cleaning guidelines for your specific gaming chair. These guidelines can provide valuable insights into what products and methods are safe to use on the chair’s material, whether it’s leather, mesh, fabric, or a synthetic blend. Ignoring these recommendations can lead to discoloration, material breakdown, or other types of damage, compromising the look and lifespan of your chair. To make future spills easier to handle, consider using a fabric protector on your gaming chair, if the material and manufacturer’s guidelines allow it. Products like Scotchgard Fabric & Upholstery Protector can create a repellent barrier on fabrics, making it more difficult for spills to penetrate the material and cause stains. This can be a game-changer, especially for those who frequently snack or drink at their gaming setup.     Weekly Wipe-downs Starting with the basics, the microfiber cloth stands out as an essential tool in your cleaning kit. Its super-fine fibers are perfect for picking up dust, dirt, and even microscopic debris without the need for chemical cleaners or leaving any scratches on your chair’s surface. For the best results, lightly dampen one corner of the cloth with water to tackle any stubborn spots or smudges, then use the dry part to buff the area to a shine. This method ensures you’re not introducing too much moisture to your chair, which could seep into the cushioning and potentially cause damage over time. When it comes to products, especially for those with leather chairs, choosing the right leather conditioner is crucial. Leather Honey Leather Conditioner is a highly recommended option, known for its long-lasting formula that penetrates deep into the leather to protect it from drying out and cracking. Another great choice is the Weiman Leather Cleaner and Conditioner, which offers a dual-action formula that cleans and conditions in one step, making it a time-saver during your cleaning routine. For fabric chairs, a gentle fabric cleaner like Scotchgard Fabric & Upholstery Cleaner not only cleans but also adds a protective layer to repel future spills and stains. Remember, whatever product you choose, always perform a spot test in an inconspicuous area to ensure there’s no adverse reaction to the material. In addition to these products, consider incorporating a soft-bristled brush into your routine for fabric chairs. This can help loosen any particles trapped in the weave of the fabric, making them easier to vacuum or wipe away. It’s a gentle yet effective way to deep clean without resorting to harsh chemicals or vigorous scrubbing, which could damage the fabric. Monthly Deep Cleans When the calendar flips to a new month, it’s the perfect reminder for a deeper dive into cleaning your gaming chair, going beyond the surface to ensure every part of your throne is pristine. This monthly ritual is about giving your chair the spa treatment it deserves, ensuring longevity and maintaining that brand-new feel. Kicking off your monthly deep clean, a vacuum cleaner equipped with a brush attachment becomes your best tool. This setup is ideal for coaxing out the dust, crumbs, and other debris hiding in the chair’s crevices, seams, and under the cushions. The brush attachment is gentle enough not to damage the fabric or leather but effective in dislodging particles that have settled over the month. A vacuum like the Dyson V15 Detect, known for its powerful suction and soft brush attachment, can make light work of this task, ensuring no corner is left untouched. For those with fabric gaming chairs, finding a cleaner that can handle spots and odors without harming the material is crucial. The Bissell Pet Stain Eraser is a portable and effective option, designed to tackle stains and smells with ease. Its formula is gentle on fabrics, making it a safe choice for your chair. Another great option is the Folex Carpet Spot Remover, which is celebrated for its ability to remove tough stains without the need for rinsing or vacuuming after application, making it a

How Often Should You Clean a Gaming Chair? A Detailed Schedule Read More »

Powerful vacuum deep cleans mattress, highlighting the cleaners head in action.

5 Simple Steps to Clean Mattress: How to Refresh Your Bed Easily

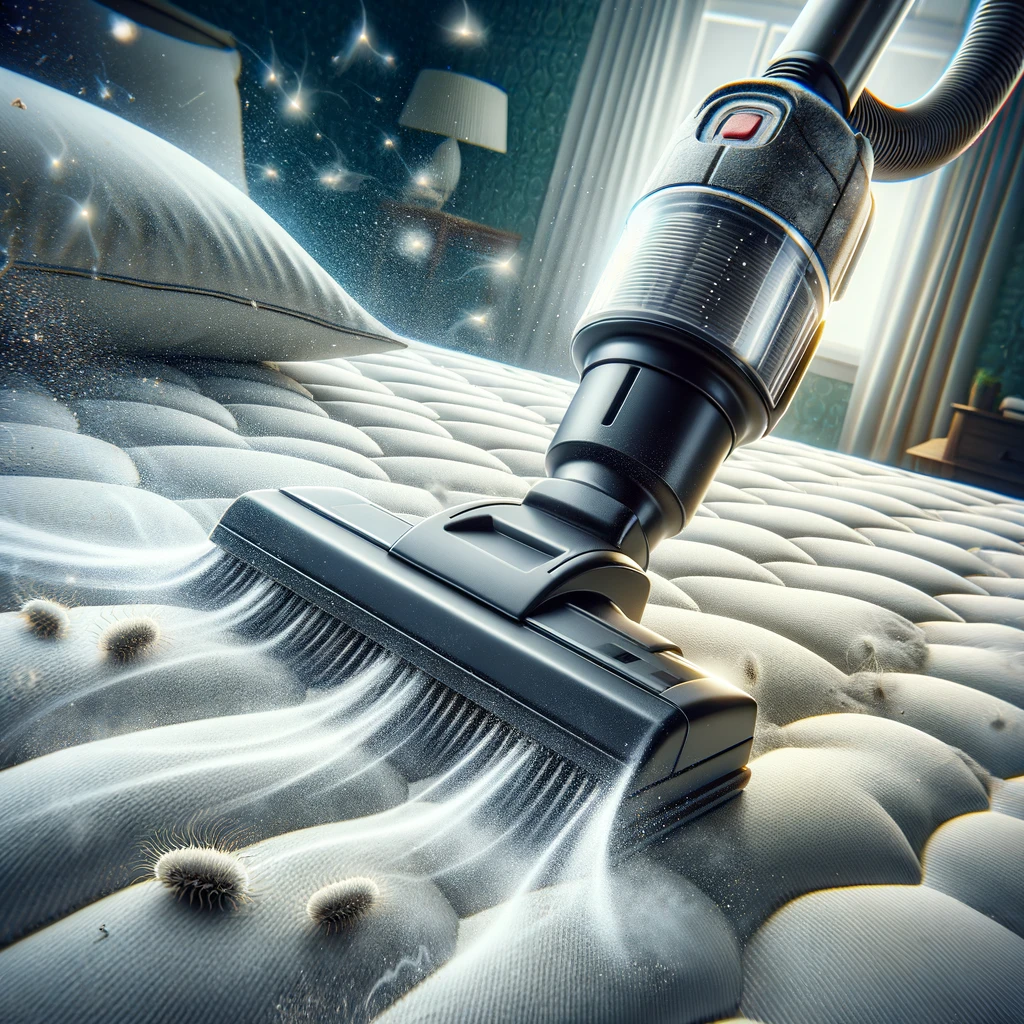
Oh, the joy of jumping into a fresh, clean mattress at the end of a long day! But when was the last time you gave your mattress a little TLC? If you can’t remember, it’s probably overdue for a refresh. Not to worry, though! I’ve got a super simple 5-step guide to help you make your mattress feel brand new again. Trust me, it’s easier than you think, and you don’t need any fancy gadgets or harsh chemicals. Let’s dive in and get your bed feeling like a dreamy cloud! 1. Strip and Wash When you start with stripping your bed, it’s not just about removing the sheets and covers; it’s about setting the stage for a thorough clean. Begin by peeling away every layer, including any decorative items like throw pillows and blankets that often get overlooked. These items collect dust and allergens just as much as your regular bedding, so giving them a clean (according to their care instructions) can really freshen up the whole bed. As you load your washing machine, make sure to separate items by color and material type. This is important because different fabrics require different washing temperatures and settings to avoid damage. For example, cotton sheets can generally handle a hot wash, which is great for killing germs, but more delicate materials might need a gentler approach. If your washing machine has a sanitize cycle, using it for your bed linens can be particularly effective in eliminating dust mites and other allergens. If you’re concerned about using too much heat or have items that are too delicate for hot temperatures, adding a laundry sanitizer to your wash can offer a similar level of deep cleaning without the risk. For duvets and comforters, consider their size and material before deciding whether to wash them at home or take them to a professional. Large or particularly bulky items might not fit properly in a standard washing machine and could benefit from the larger capacity of commercial machines at laundromats or from professional cleaning services that know how to handle them without causing damage. Drying your bedding is just as crucial as the washing process. Make sure to thoroughly dry sheets, pillowcases, and mattress covers to prevent any mildew or mustiness. Again, pay attention to fabric care labels. While many items can go in the dryer, others might be better off air-dried to preserve their quality and shape. 2. Vacuum the Mattress When you start vacuuming, it’s best to do so in a methodical manner. Begin at the top of the mattress and work your way down in overlapping, narrow paths to ensure you’re covering every inch of the surface. This systematic approach helps to make sure no spot is missed, especially since it’s easy to overlook areas that don’t seem dirty at first glance. The sides of your mattress are just as important as the top. Many people forget about this part, but the sides can harbor just as much dust and debris, particularly if you have a bed frame that allows dust to settle from the floor onto the mattress edges. Use the same careful, overlapping strokes here, and don’t rush. It’s these often-ignored areas that can make a significant difference in the overall cleanliness of your bed. Seams and crevices are indeed hotspots for dust and allergens. These areas provide the perfect hiding spots for particles to accumulate undisturbed. When you reach these parts, slow down and use the vacuum’s crevice tool if available. This attachment is specifically designed to get into tight spaces and remove debris that other tools might miss. Sometimes, giving these areas an extra pass or two can lift out dust that’s been compacted over time. If your mattress has any buttons, fabric folds, or embroidery, these are areas where dust can easily be trapped. Carefully vacuum around these decorations, being careful not to damage the mattress. The goal is to remove dust without harming the mattress’s structure or appearance. This vacuuming process not only helps in removing visible dust and particles but also aids in reducing the number of allergens, such as dust mites and pet dander, that can cause nighttime allergies and affect sleep quality. Moreover, removing dead skin cells lessens the food supply for dust mites, contributing to a healthier sleeping environment.     3. Spot Clean Stains When mixing your cleaning solution, it’s important to consider the type of stain you’re dealing with. A general mixture of dish soap and water is a great starting point for most stains, as it’s gentle enough not to damage the fabric but effective enough to tackle light to moderate stains. However, the ratio of soap to water should be low to avoid creating too much suds, which can be difficult to rinse out. A teaspoon of dish soap to two cups of water is a good guideline. For more stubborn stains, such as blood or urine, you might need a different approach. Hydrogen peroxide, for example, can be effective for blood stains, but it should be used sparingly and tested on a small, inconspicuous area of your mattress first to ensure it doesn’t bleach the fabric. Always dab the stain rather than rub, as rubbing can spread the stain further or embed it deeper into the mattress fibers. Applying the cleaning solution should be done with a light hand. Use a clean, white cloth to avoid any color transfer from the cloth to the mattress. Dab the stain gently, working from the outside in to prevent the stain from spreading. Allow the solution to sit for a few minutes to break down the stain, then dab again with a dry cloth to absorb the solution and lifted stain. This may need to be repeated several times for tougher stains. For oil-based stains, such as makeup or greasy food, a solution of baking soda and water can be effective. Make a paste and apply it directly to the stain, letting it sit for 30 minutes to an hour.

5 Simple Steps to Clean Mattress: How to Refresh Your Bed Easily Read More »

Spring Cleaning in a Sunny Room Illustration, Easy Spring Cleaning Tasks

7 Easy Spring Cleaning Tasks You Can’t Afford to Skip

Spring Cleaning Tasks is here, and that means it’s time to shake off the winter blues and give your home a fresh start with a thorough spring cleaning. But let’s be real: not all cleaning tasks are created equal. Some are absolutely crucial to ensure your home not only looks sparkling clean but also becomes a healthier environment for you and your family. So, grab your gloves, and let’s dive into the 7 spring cleaning tasks you really can’t afford to skip. 1. Dusting Off the Forgotten Spots It’s easy to remember to swipe a cloth over the surfaces we see and use every day, but it’s those out-of-sight places that can secretly impact the freshness and healthiness of our living spaces. Take the top of your fridge, for example. It’s a prime real estate for dust bunnies and kitchen grime, thanks to its warm, elevated location. This spot can easily become a hidden dust magnet, collecting particles that can eventually circulate back into your kitchen. Using a step stool, give this area a thorough wipe-down with a damp cloth or an extendable duster to capture and remove the grime. For an added sparkle, consider using a mild cleaning solution that can cut through kitchen grease and leave the surface clean and hygienic. Ceiling fans, on the other hand, are notorious for spreading dust throughout the room every time they’re switched on. It’s ironic, isn’t it? A device meant to circulate air and keep you cool can also be distributing dust particles. Before the warmer weather kicks in and you find yourself reaching for that fan switch more often, ensure you clean the blades. A pillowcase can be a handy tool here: slip it over each blade in turn to trap the dust as you wipe, minimizing the mess. And then there’s the matter of baseboards. These low-lying ledges can gather a surprising amount of dust and are often overlooked during regular cleaning sessions. However, they play a significant role in the overall cleanliness and appearance of your home. A quick run along these surfaces with a damp cloth or duster can make a big difference. For those stubborn spots, a gentle cleaning agent can help remove scuffs and marks, leaving your baseboards looking as good as new. 2. Window Washing Window washing is one of those spring cleaning tasks that can truly rejuvenate your home, making it feel more open, airy, and full of life. But let’s delve deeper into why and how giving your windows a thorough cleaning can make such a significant difference, and some additional tips to make this task easier and more effective. First off, consider the psychological impact of clean windows. They not only improve the aesthetic appeal of your home but also have a profound effect on your mood and well-being. Natural light has been shown to boost mood, enhance productivity, and even improve sleep by helping to regulate our natural circadian rhythms. By removing the layers of dirt, dust, and grime that have built up over the colder months, you’re allowing more sunlight to penetrate your home, which can help shake off the winter blues. When tackling window washing, it’s important to choose the right day. A cloudy, but dry day is ideal because direct sunlight can cause the cleaning solution to dry too quickly, leaving streaks. Start with removing any dust from the window frame and screen with a brush or vacuum, to prevent dirt from mixing with your cleaning solution. For the cleaning solution, you can either use a commercial window cleaner or make your own with a mixture of water and vinegar. This eco-friendly alternative does a fantastic job of breaking down grime without leaving streaks. Apply the solution with a sponge or soft cloth, and then use a squeegee for a smooth, streak-free finish. Wipe the squeegee blade with a clean cloth after each pass to avoid transferring dirt back onto the window. Don’t forget the importance of cleaning both the inside and outside of the windows. Accessing the exterior side of windows can be more challenging, especially for those on higher floors. Safety should be your top priority, so use a long-handled squeegee for hard-to-reach spots or consider hiring professionals for those areas that are too risky to tackle on your own. While it’s easy to focus on the glass, paying attention to the window frames and sills is equally important. These areas can harbor mold and mildew, particularly in older homes. Wipe them down with a damp cloth and, if necessary, a mild detergent. This not only completes the clean look of your windows but also contributes to the overall upkeep and longevity of the window frames.     3. Deep Clean the Carpets Deep cleaning the carpets is indeed a crucial step in your spring cleaning routine, not just for aesthetic reasons but also for the health and longevity of your carpeting. Let’s explore further the significance of this task and provide some additional insights and tips to make your carpet cleaning efforts more effective. The accumulation of dirt, salt, and debris over the winter months can not only dull the appearance of your carpets but also wear down the fibers, leading to premature aging and the need for replacement sooner than expected. More importantly, carpets can trap allergens, dust mites, and other pollutants, potentially affecting the air quality in your home and the health of your family, especially those with allergies or respiratory issues. While vacuuming is an excellent routine maintenance step, it often only removes surface dirt and debris. A deeper clean is necessary to extract the grime that has settled deep within the carpet fibers. This is where renting a steam cleaner or hiring a professional carpet cleaning service comes into play. Steam cleaning, also known as hot water extraction, uses high temperatures to loosen dirt and a powerful vacuum to remove it from the carpet. This method not only cleans more effectively but also kills bacteria and dust mites, providing

7 Easy Spring Cleaning Tasks You Can’t Afford to Skip Read More »

Modern living room with sleek synthetic couch centerpiece.

5 Essential Tips on How to Keep Your Synthetic Couch Spotless

Keep Your Synthetic Couch Spotless Synthetic couches are the unsung heroes of the living room: durable, pet-friendly, and often more affordable than natural fabrics. But they still need regular care to stay looking their best. Whether you are binge-watching your favourite series or hosting game night, these 5 essential tips will keep your synthetic couch spotless for years. Best of all, most of these habits take only a few minutes a week, so you can protect your furniture without turning couch care into a second job. 1. Vacuum Weekly With a Soft Brush Attachment Dust and dirt do not just sit on the surface; they work their way into the weave of the fabric. Vacuum your couch weekly using the soft brush attachment, which lifts grit without damaging the fibres. Do not forget the spots that hide the most debris: lift the cushions and vacuum the base and crevices underneath, where crumbs, pet hair, and the occasional lost remote collect. Adjust the suction for delicate fabrics, and make couch vacuuming part of your regular cleaning routine. 2. Blot Spills Immediately When a spill happens, speed is your best friend. Blot the liquid with a clean, dry cloth, pressing gently so the fabric absorbs it instead of rubbing it deeper. For water-based spills, a slightly damp cloth usually finishes the job. For tougher marks like food, ink, or coloured drinks, dab with a solution of mild detergent and water. Always test any cleaning solution on a hidden area first, like the back of a cushion, to confirm it will not cause discoloration. 3. Choose Couch-Safe Cleaning Products Harsh chemicals and abrasive cleaners can break down synthetic fibres, causing fading, weakening, and even disintegration over time. Reach for products designed for synthetic upholstery, or keep it simple with water and a mild detergent used sparingly. Over-wetting is the bigger risk: too much moisture soaks into cushions and the frame, where it can lead to odours, mildew, and structural damage. The CDC’s mold overview explains what mold is and how to prevent it, and its mold clean up guidelines cover safe removal if damp fabric ever becomes a problem. 4. Freshen Up Between Cleanings Keep your couch smelling fresh without fabric sprays. Sprinkle baking soda over the upholstery, let it sit for 15 to 30 minutes to absorb odours, then vacuum it up. For a custom scent, stir a few drops of essential oil, like lavender or citrus, into the baking soda before applying. This natural trick neutralizes odours and leaves a subtle fragrance, and you can switch scents with the seasons. 5. Protect Your Couch From Everyday Wear Prevention beats cleanup. A washable couch cover or a few well-placed throws take the brunt of spills, pet paws, and daily wear, and they come off for a quick machine wash. Waterproof covers offer maximum protection for homes with kids or pets, while decorative throws add style. Pair your covers with house rules like no food on the couch and you will dramatically cut down on stains. A Quick Couch Care Checklist Vacuum weekly, including under the cushions. Blot spills within minutes, never rub. Test cleaning products on a hidden spot first. Use baking soda monthly to absorb odours. Keep a washable cover or throw on high-use seats. Task Frequency What to Use Vacuum and dust Weekly Soft brush attachment Blot spills Immediately Dry cloth, then mild detergent and water Deodorize Monthly Baking soda, optional essential oils Deep clean Every 6 to 12 months Professional upholstery cleaning Keep Your Couch Looking Like New With consistent care, your synthetic couch will stay clean, comfortable, and stylish. When life gets busy or a stain is too stubborn, the professionals at Toronto Shine Cleaning can handle all your upholstery needs with fabric-friendly methods. Add a home deep clean or regular maid service to your routine, and check our pricing page for transparent rates. Call (647) 424-0355 to book, or browse our locations to find service near you. Synthetic Couch Care FAQ Can I use bleach on a synthetic couch? No. Bleach and other harsh chemicals can fade, weaken, or damage synthetic fibres. Use products labelled for synthetic upholstery, or a mild detergent and water solution, and always test on a hidden area first. How do I get pet hair off a synthetic couch? Vacuum with a soft brush attachment, or use a damp rubber glove or lint roller to gather hair from the surface. Washing machine-safe couch covers make cleanup even easier. Is baking soda safe for couch fabric? Yes. Baking soda is a gentle, natural deodorizer that is safe for most synthetic upholstery. Sprinkle it on, let it sit for 15 to 30 minutes, and vacuum thoroughly. When should I call a professional upholstery cleaner? Call a professional for set-in stains, odours, or a yearly deep clean. Professional equipment lifts dirt and allergens from deep in the fibres without the risk of over-wetting your couch.

5 Essential Tips on How to Keep Your Synthetic Couch Spotless Read More »

Spring cleaning concept with open window and billowing curtains.

The 2-Day Spring Cleaning Sprint: How to Easy Get It Done Fast and Effectively

The 2-Day Spring Cleaning Sprint: How to Get It Done Fast and Effectively Spring cleaning can feel overwhelming, especially when you only have a weekend to spare. The good news is that a focused 2-day plan can transform your home without burning you out. Whether you live in Toronto, Mississauga, or anywhere else in the GTA, this sprint breaks the work into two manageable days so your space feels fresh and organized by Sunday night. Day 1: Declutter and Dust Top to Bottom The living room, kitchen, and bedrooms are the main battlegrounds of any spring clean. These high-traffic zones collect the most clutter, so start there with the three-box method: one box for items you keep, one for donations, and one for things to toss. If you have not used something in over a year, it is likely safe to let it go. Keep decisions quick and keep your momentum, because decluttering is the foundation every other step builds on. Once rooms are decluttered, dust from the top down. Start with ceiling fans and light fixtures, then work down to furniture and floors, so dust that falls never lands on a surface you already cleaned. Pay special attention to neglected spots such as windows and under furniture, and use a damp cloth to capture dust instead of spreading it around. Dusting and vacuuming are also the core of the EPA’s indoor air quality advice, which links regular cleaning to fewer allergens in the home. Kitchen and Bathroom Deep Clean The kitchen deserves a thorough pass: empty the fridge and wipe it down, check expiration dates, and toss anything past its prime. Tackle countertops, cabinets, and appliances, and degrease the stove and microwave, which accumulate built-up grime over time. In the bathroom, scrub the shower, sink, and toilet until they sparkle, clear cabinets and drawers of expired products, and finish with mirrors and fixtures. When you use products such as bleach in these rooms, never mix them with other cleaners, because the Canadian Centre for Occupational Health and Safety warns that mixing bleach with other chemicals can release dangerous gases. Day 2: Floors, Bedrooms, and Finishing Touches Start the second day with sweeping, vacuuming, and mopping every inch of floor space, not just the visible areas. Move light furniture to reach the spots underneath, because that is where dust and debris hide. For carpets, a good vacuum pulls up embedded dirt and hair, and spot cleaning handles fresh stains. For a deeper refresh, renting a carpet cleaner can make carpets look, feel, and smell like new again. Bedrooms should feel like a sanctuary: change the sheets, dust the furniture, and organize closets if time allows. Gather all the washable items in the house, such as curtains, towels, and bed linens, and aim to have everything washed, dried, and put away by the end of the day. Finish with a walk-through, basket and cloth in hand, to catch missed spots, tidy remaining clutter, and give surfaces a final wipe. Outdoor Spaces and Entryways: Make the First Impression Count The entryway sets the tone for the whole home. Sweep patios, porches, and decks to remove debris and prevent slip hazards, wipe down outdoor furniture, and wash detachable cushions so the space is ready for entertaining. Inside, shake out or vacuum the welcome mat, polish the front door and hardware, and declutter the shoe and coat area so the transition into your home feels calm and ordered. In the evening, do a quick weeding and trimming session, and wash exterior windows so more natural light fills every room. When to Call in the Professionals A 2-day sprint is achievable, but some jobs are better left to a team. If the deep clean feels too big, a professional deep cleaning service can handle the heavy lifting in a single visit, and regular maid cleaning keeps the results going all year. Moving in or out? Move-in and move-out cleaning covers the transition, and Toronto Shine Cleaning serves homes across Toronto and the GTA. For a safer, smoother clean, follow the National Capital Poison Center’s spring cleaning safety tips, which cover product storage, ventilation, and keeping chemicals out of reach of children. Frequently Asked Questions What is the three-box method for decluttering? Sort every item into one of three boxes: keep, donate, or toss. The method forces quick decisions, prevents second-guessing, and keeps you moving through the home instead of getting stuck on any single item. Can I really finish a whole-house spring clean in two days? Yes, if you follow a plan: declutter and dust on day one, then floors, bedrooms, and laundry on day two. Focus on one room at a time and do not stop to deep-organize every drawer. Do I need to rent a carpet cleaner? Only if your carpets are heavily soiled or stained. Regular vacuuming plus spot cleaning handles most maintenance, while a rented machine is worth it once a year for a full refresh. How often should I do a spring cleaning sprint? Once a year is the classic rhythm, but a lighter version every season keeps dust, allergens, and clutter from building up between major cleans. With a clear two-day plan, spring cleaning stops being a chore and becomes a satisfying refresh. And when you need backup, the professionals at Toronto Shine Cleaning are one call away.

The 2-Day Spring Cleaning Sprint: How to Easy Get It Done Fast and Effectively Read More »

Shiny Polished Stainless Steel Surface

5 Tips to Perfectly Clean Stainless Steel Appliances

Hey there, folks! Today, we’re diving into a shiny topic – keeping those stainless steel appliances in your kitchen looking absolutely fabulous! A clean Stainless Steel is sleek, modern, and oh-so-classy, but let’s face it, it can be a bit of a diva when it comes to cleaning. Streaks, fingerprints, and smudges – we’ve all been there. But worry not, I’ve got some easy-peasy tips to make your stainless steel appliances sparkle like new! 1. Start with the Right Tools First up, let’s give a big shoutout to microfiber cloths. These aren’t your ordinary rags. Microfiber cloths are the secret stars of the cleaning world. They’re made of super fine fibers that are softer than silk. When you use a microfiber cloth, you’re not just wiping the surface; you’re giving it a gentle hug. This means they won’t leave any scratches or marks on your stainless steel, which is crucial because who wants a scratched-up fridge or dishwasher? Not me! Microfiber cloths are like dirt and grease magnets. They pick up and hold onto grime, so you’re not just moving dirt around, you’re actually lifting it off the surface. Plus, they’re reusable – just toss them in the wash and they’re good as new. Eco-friendly and economical? Yes, please! Moving on to cleaners, there’s a common misconception that you need strong, harsh chemicals to get stainless steel clean. But in reality, it’s the complete opposite. Stainless steel responds best to gentler, more loving care. Often, all you need is a mix of warm water and a mild dish soap. This combo is gentle yet effective enough to tackle everyday grime without damaging the surface. For those tougher spots – you know, the ones that make you think they’re going to live on your toaster forever – white vinegar is your go-to. White vinegar is like the unsung hero of the natural cleaning world. It cuts through grease and grime without being too harsh. It’s also great for dealing with water spots that tend to make stainless steel look dull. Just mix it with some water, and you’ve got yourself a powerful cleaner that’s still gentle on your appliances.     2. Follow the Grain When we think of stainless steel, we often imagine a smooth, uniform surface. However, if you take a moment to look a little closer, you’ll notice that just like wood, stainless steel has its own unique grain. This grain is essentially the subtle lines or striations that you can see on the surface. They might be vertical, horizontal, or even diagonal, depending on the appliance. Why does this matter? Well, when you’re cleaning, always wiping in the direction of this grain is like going with the flow of the river rather than against it. This approach is not just about being thorough; it’s about being smart. By aligning your cleaning strokes with the grain, you’re ensuring that every swipe of your cloth is maximally effective. It’s like each stroke is guided by the grain, allowing you to pick up and remove every bit of dirt and grime along the way. You might wonder if this extra attention to detail really makes a difference. The answer is a resounding yes! Firstly, following the grain helps to eliminate all the unwanted gunk more efficiently. This is because the grooves of the grain can trap particles, and wiping against the grain might just leave some behind. But when you wipe along the grain, you’re essentially guiding the dirt along the path of least resistance, right off the appliance. This method also plays a big role in preventing scratches. Stainless steel, despite its name and sturdy feel, can actually be quite susceptible to scratching. These scratches can be more visible if you clean in a haphazard manner. By following the grain, you reduce the risk of leaving behind those unsightly marks that can catch the light and show up like little battle scars on your otherwise pristine appliance. 3. Spot Treatment Let’s talk about fingerprints first. If you have stainless steel appliances, you know the struggle. It seems like all it takes is one glance in their direction, and poof! Fingerprints everywhere. These little reminders of our daily life can be quite the eyesore on otherwise pristine surfaces. But don’t despair, there’s a surprisingly simple solution: olive oil. Yes, the same stuff you use in your salad dressing can actually help with fingerprints on stainless steel. Remember this: moderation is key. You only need a tiny dab of olive oil on a soft cloth. Gently rub this over the fingerprints in a circular motion. What happens next is almost like magic. The oil helps to lift and remove these greasy smudges, leaving behind a clean, smudge-free surface. Plus, it adds a little bit of shine, making your appliance look even better. It’s like giving your fridge or dishwasher a mini spa treatment! Then there are those tough, baked-on messes that seem to cling on for dear life. Maybe it’s a splash of sauce that went unnoticed or a drip of something sticky that decided to make your oven its permanent home. For these, you’ll need something stronger than just soap and water. Enter the dynamic duo of baking soda and water. Mixing baking soda with a little water creates a gentle yet effective paste. This paste is kind of like an exfoliating scrub for your appliances. Apply it gently with a cloth to the stubborn spots. The mild abrasive nature of baking soda helps to lift the grime without scratching the surface. After a few minutes, wipe it off with a damp cloth, and you should see a noticeable difference. This method is especially great for areas that see a lot of action, like around the handles or control panels. 4. Shine It Up You might wonder, why glass cleaner? Well, it turns out that the same product that gives your windows and mirrors that streak-free sparkle can work wonders on stainless steel too. The beauty of glass cleaner

5 Tips to Perfectly Clean Stainless Steel Appliances Read More »

Kitchen refrigerator brimming with fresh veggies and meals.

How to Eliminate Refrigerator Odors: 5 Simple Steps

How to Eliminate Refrigerator Odors: 5 Simple Steps A fridge that smells off can quietly spoil every meal you plan. The tricky part is that the source is rarely obvious: a forgotten jar, a spill under a drawer, or crumbs trapped in the door seal can keep the whole kitchen smelling stale. The good news is that you do not need special products to fix it. These five steps take one afternoon and leave your refrigerator genuinely fresh, not just perfumed. Why Refrigerator Odors Happen Most fridge smells trace back to three causes: expired food, hidden spills, and moisture. Expired items shed odor compounds into the enclosed air, sticky spills breed bacteria in warm spots, and condensation around the door gasket invites mold. Because the cavity is sealed, those compounds keep recirculating every time the door opens. Cleaning is only half the job; removing the source and managing moisture is what makes the fresh smell last. Step 1: Empty and Sort Everything Take every jar, bottle, and container out, including the ones hiding at the back. Lay everything out so you can see it all, then check dates. Be ruthless: if something is past its prime or you cannot remember when you bought it, toss it. Soft, overripe fruit and wilted vegetables are frequent hidden odor sources, so inspect produce closely too. As you sort, group similar items together, with condiments in one zone and dairy in another. An organized fridge not only smells better, it cools more efficiently because air can circulate around the food. Step 2: Deep Clean with White Vinegar Your cleaning solution is simple: equal parts water and white vinegar. Vinegar is a natural deodorizer that leaves no harmful residue, and it is gentle enough for every interior surface. Wipe the walls, the ceiling, and the floor of the cavity, then remove the shelves and drawers and wash them separately, since spills love to hide underneath. Dip an old toothbrush in the solution and scrub the nooks, crannies, and the rubber door seal, which is notorious for trapping crumbs and mildew. Show the outside some care as well, especially the handles and the top of the unit. Health agencies recommend cleaning surfaces first and disinfecting second, and that order matters in the fridge too: cleaning and disinfecting guidance follows the same logic. Finish by going over everything with a clean, damp cloth to lift lingering vinegar, then dry all surfaces with a towel. Moisture left behind becomes a breeding ground for bacteria and mold, which undo your work. Step 3: Add a Baking Soda Backup Once the interior is clean and dry, place an open box of baking soda at the back of a shelf. Unlike air fresheners that mask smells, baking soda neutralizes them by balancing pH, so it works on both acidic and alkaline odors. Large or busy fridges benefit from two boxes, one on each side. Shake the box occasionally to expose fresh absorbing surfaces, and replace it every three months, or sooner if pungent foods have worn it out. Bonus tip: sprinkle a little on a damp sponge to lift stuck-on stains without scratching. Step 4: Keep a Maintenance Rhythm Weekly, give shelves and bins a quick wipe with a damp cloth and scan for spills and expired items; it takes five minutes and prevents most odor problems from ever starting. Monthly, go a level deeper: check the door seals, clear debris from corners, and rearrange items so nothing migrates to the back for good. Also keep the temperature between 37°F and 40°F. Food stays fresh longer and bacteria grow far more slowly at that range, which means fewer odors in the first place. Step 5: Deploy Natural Fresheners With the source removed, a gentle freshener keeps the cavity pleasant between cleanings: Coffee grounds: place a bowl of dry, used grounds inside and replace every two weeks. Lemon slices: the citric acid neutralizes odors and leaves a clean scent; refresh every few weeks. Vanilla extract: soak a couple of cotton balls and set them in a small dish. Fresh herbs: a small jar of water with mint, basil, or rosemary adds a light aroma. Activated charcoal: tuck a few chunks in a mesh bag in a corner for silent odor trapping. Odor Source Quick Fix Refresh Every Expired leftovers Toss them and wipe the shelf with vinegar solution Weekly scan Spills under drawers Remove drawers and scrub the nooks with a soft brush Monthly Musty door seal Gentle scrub of the rubber gasket with a toothbrush Monthly Lingering smell after cleaning Open box of baking soda at the back of a shelf Every 3 months Refrigerator Odor FAQs How long does it take to remove fridge odors? A thorough clean plus an open box of baking soda usually shows results within a day. Stubborn smells from old spills can take two or three days of absorbing, so keep the box in place and check the seals while you wait. Can I use bleach inside my refrigerator? It is better not to, since food-contact surfaces call for gentle products, and bleach fumes linger in a sealed cavity. Vinegar and baking soda handle the job safely. Whatever product you choose, follow label directions and never mix cleaners, as Health Canada’s household chemical safety guidance warns against dangerous combinations. Why does my fridge still smell after cleaning? Check the spots the quick clean misses: the drip pan underneath the unit, the drain hole at the back of the cavity, and the folds of the door gasket. Those hidden reservoirs hold odor compounds and keep releasing them until they are scrubbed. How often should I replace the baking soda box? Every three months is the reliable rhythm. Mark the date on the box when you open it, and replace sooner if you have stored something especially pungent, since strong odors shorten its working life. When the Schedule Wins, Call Toronto Shine Cleaning Sometimes the week simply does not leave room for a fridge deep clean,

How to Eliminate Refrigerator Odors: 5 Simple Steps Read More »

Mopping floor with organized cleaning supplies.

Mississauga’s Move-Out Cleaning: Common Mistakes to Avoid

Ah, Move-Out Cleaning – it’s that bittersweet symphony of excitement for the new and nostalgia for the old. And, whether you’re relocating across Mississauga or venturing beyond, leaving your place spotless is crucial, not just for getting your deposit back but also for peace of mind. However, amidst the chaos of packing and planning, many fall prey to common cleaning missteps. Let’s dive into what these are and how to dodge them, ensuring your move-out cleaning is nothing short of sparkling. Looking for professional house cleaning in Mississauga? Toronto Shine Cleaning provides regular, deep, and move-in or move-out cleaning across Mississauga and the GTA. 1. Procrastinating the Clean-Up The act of procrastination in your clean-up efforts can sneak up on you like a silent deadline. Many of us might chuckle at the thought of starting to clean weeks in advance, but this chuckle quickly turns into a sigh of overwhelm as moving day looms closer. The mistake often lies in underestimating the sheer volume of tasks that need to be done before handing over the keys. Between sorting what to keep and what to say goodbye to, packing up years of memories into boxes, and ensuring every surface shines, cleaning can suddenly become a monumental task. To sidestep this common pitfall, the strategy is simple yet effective: start early and break down the task. Instead of viewing the clean-up as a colossal, one-day event, consider breaking it into manageable chunks. Perhaps dedicate one weekend to decluttering, another to deep cleaning the living room and kitchen, and so on. This approach not only makes the task less daunting but also allows for more thorough cleaning. Plus, starting early means you have the flexibility to tackle unexpected cleaning challenges without the pressure of a ticking clock. Additionally, consider integrating cleaning into your daily routine as moving day approaches. Even setting aside just 15-30 minutes a day for cleaning can make a significant difference. Focus on one area or task each time-maybe today you clean the bathroom mirrors and countertops, and tomorrow you tackle the kitchen backsplash. This way, you gradually chip away at the workload, and it becomes part of your daily routine rather than an overwhelming obstacle. This methodical approach also allows for better stress management. Knowing that you’re progressively making headway can significantly reduce the anxiety that often accompanies moving. Plus, it gives you the chance to address areas you might have otherwise overlooked in a last-minute rush. For instance, cleaning behind appliances or touching up wall scuffs becomes feasible rather than wishful thinking.     2. Overlooking Rental Agreements Overlooking the rental agreement is a slip-up that can easily happen amidst the whirlwind of moving activities. It’s not just about packing boxes and figuring out logistics; it’s also about ensuring you’re leaving your space in accordance with the expectations set forth by your landlord or property management. This oversight can lead to unpleasant surprises, especially if your landlord expects more than just a surface-level clean. Imagine the scenario where, after a day spent scrubbing and cleaning, you find out that your efforts don’t meet the specific criteria outlined in your lease. This can lead to deductions from your security deposit or even additional charges to cover the cleaning services mandated by your agreement. The trick to avoiding such a predicament lies in the power of preparation and knowledge. Before you even unscrew the first lightbulb or pack away your dishes, take a moment to revisit your rental agreement. Look for any clauses that outline the condition in which the property should be returned. Landlords or property managers sometimes require professional cleaning for certain areas, such as carpets, which can accumulate dirt and debris in ways that standard vacuuming just can’t handle. They might also have requirements for steam cleaning, wall washing, or even specific repairs. If your agreement specifies such conditions, you’ll want to schedule these services well in advance of your move-out date. Waiting until the last minute could leave you scrambling to find available professional services, particularly during busy moving seasons. Moreover, having a clear understanding of these requirements enables you to budget accordingly. Professional cleaning services come at a cost, and it’s better to anticipate these expenses than to be caught off guard. If anything in the agreement seems unclear or you find certain stipulations unreasonable, it’s not too late to discuss these with your landlord. Communication can often lead to compromises or clarification that can ease your moving process. Perhaps a quick chat could reveal that your landlord is only concerned with the carpets being cleaned to a professional standard due to allergies, and they might recommend affordable services they’ve used in the past. 3. Skimping on Cleaning Supplies Skimping on cleaning supplies is a common misstep that can drastically reduce the effectiveness of your move-out clean. Many of us might think that a single all-purpose cleaner and a rag are sufficient to tackle all the dirt and grime accumulated over years of living in a place. However, this approach often leads to subpar cleaning results and can double your work when you find that tough stains and buildup don’t budge with a one-size-fits-all solution. The variety of surfaces in your home-from glass and laminate to stainless steel and ceramic tiles-each has its own cleaning needs. For instance, the cleaner that works wonders on your kitchen countertops might not be the best choice for your bathroom tiles or the hardwood floors. By not using the right tools for the job, you not only risk leaving behind dirt and grime but also potentially damaging sensitive materials with harsh chemicals not suited for them. Investing in a set of quality cleaning supplies tailored to different surfaces and purposes can make a world of difference. For example, a glass cleaner can leave your windows and mirrors streak-free, while a tile scrub can effectively clean the grout in your bathroom, making it look almost new. Wood polish can revive the natural beauty of your hardwood floors, and stainless

Mississauga’s Move-Out Cleaning: Common Mistakes to Avoid Read More »