Furniture Cleaning

Essential cleaning tools and products

5 Essential Cleaning Products for a Sparkling Spring Clean

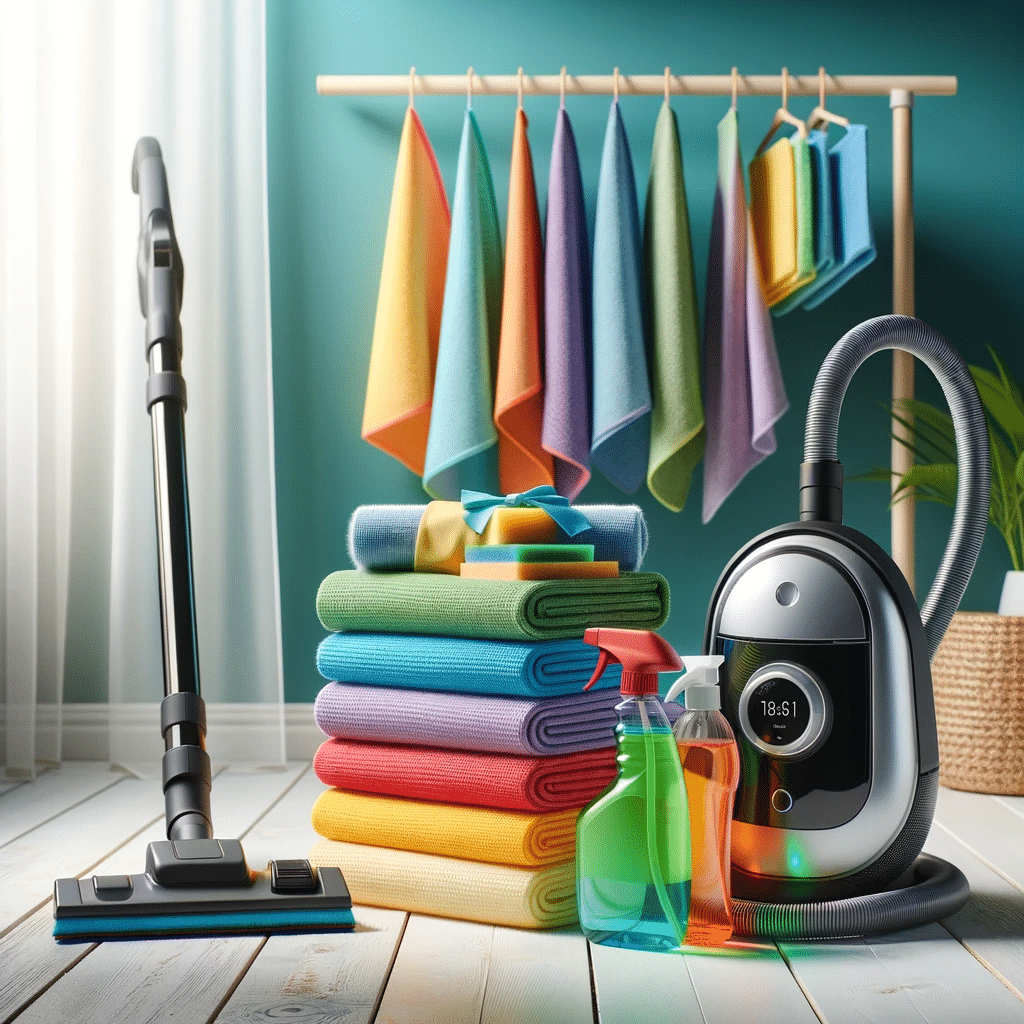
Hey there, fellow clean freaks! Spring is in the air, and you know what that means – it’s time for a good old-fashioned spring cleaning! But before you pull on those rubber gloves and crank up the tunes, let’s chat about the essential cleaning products you’ll need to make your home sparkle like a diamond. Whether you’re gearing up for a deep clean or just a quick touch-up, these are your must-haves. Let’s dive in! 1. Cleaning products: The Almighty All-Purpose Cleaner When we call an all-purpose cleaner the MVP, we’re not exaggerating! This handy cleaner is a real game-changer when it comes to sprucing up your home. Its versatility is unmatched – you can use it in every room of your house. Whether it’s tackling a sticky spill on the kitchen counter, wiping down the greasy stovetop after a cooking session, or giving the bathroom sink a quick refresh, the all-purpose cleaner is up for the task. But what really makes it stand out? It’s the balance of strength and gentleness. You want a cleaner that’s tough enough to cut through dirt, grease, and grime without breaking a sweat. At the same time, it’s important to choose one that won’t harm your surfaces. Some cleaners can be too harsh, leading to damage or dullness, especially on delicate materials. The best all-purpose cleaners strike the perfect balance, keeping your surfaces safe while leaving them sparkling clean. And let’s not forget about the sensory experience! A good cleaner doesn’t just clean; it leaves a pleasant, fresh scent that makes your entire home feel refreshed. Imagine opening your windows to a gentle spring breeze and your home is filled with the aroma of blooming flowers or a fresh citrus grove. That’s the kind of atmosphere a great-smelling cleaner can create. It turns cleaning from a chore into a rejuvenating experience for your senses. 2. Microfiber Cloths: Your Cleaning BFFs Microfiber cloths are a true unsung hero in the world of cleaning. These versatile cloths are a huge step up from traditional cleaning rags and paper towels. Why? Well, it’s all in the microfibers. These fibers are incredibly fine – much finer than a strand of human hair. This allows them to reach into the tiniest nooks and crannies, picking up dust and dirt that other cloths might just skim over. But that’s not all. These cloths are amazing at absorbing liquids too. Spilled some coffee on the counter? No problem! A microfiber cloth can absorb several times its weight in liquid, making cleanup a breeze. This absorption power also makes them fantastic for drying dishes, wiping down wet surfaces, or even mopping up spills on the floor. Now, let’s talk about the eco-friendly aspect. In our world today, being conscious of our environmental impact is crucial. Microfiber cloths are washable and reusable, meaning you can say goodbye to the endless cycle of buying and throwing away paper towels. This not only saves you money in the long run but also reduces waste, making it a win-win for you and the planet. Their gentle nature is another huge plus. Whether you’re cleaning a delicate TV screen, polishing your favorite wooden furniture, or dusting off fragile knick-knacks, microfiber cloths do the job without leaving scratches or marks. They’re safe to use on virtually any surface, including stainless steel, granite, and even your car’s exterior.     3. A Trusty Scrub Brush The scrub brush is the unsung hero when it comes to deep cleaning. Sure, gentle cleaners and cloths are great for everyday messes, but when you’re faced with stubborn dirt, a scrub brush is what you need. Its superpower lies in its bristles – tough enough to battle the most stubborn of stains, yet designed to not damage your surfaces. Think about those times when you’re staring down a dirty bathtub ring, or when the kitchen sink is coated with food remnants that just won’t budge. Or how about the grout between your bathroom tiles that’s turned a shade you don’t even recognize anymore? This is where your scrub brush comes in, transforming seemingly impossible cleaning tasks into something manageable. What’s really great about a good scrub brush is the ergonomic design. Cleaning can be tough on the wrists and arms, especially when you’re scrubbing away at a tough spot. A brush with a comfortable grip makes this task much more manageable. It allows you to apply the necessary pressure without straining your hand, making your cleaning routine that much easier. And it’s not just about the tough stuff. A scrub brush can be a versatile tool for a variety of cleaning tasks. Use it for scrubbing vegetables, refreshing your outdoor furniture, or even giving your muddy boots a good cleaning. With the right brush, the possibilities are endless. When choosing your scrub brush, consider the bristle stiffness and the shape of the brush. Some brushes are designed for specific tasks – like a curved brush for getting into the corners of a bathtub, or a brush with a pointed tip for reaching into narrow spaces. Having the right tool for the job can make a big difference. 4. Disinfectant Spray: The Germ Buster In our quest for a clean and healthy home, a reliable disinfectant spray stands as a frontline defender. It’s not just about making surfaces look clean; it’s about ensuring they are free from harmful germs and bacteria that can affect our health. This is particularly crucial in high-traffic areas like the kitchen and bathroom, where the potential for germ transfer is high. Think about all the different surfaces in your home that hands touch regularly: doorknobs, light switches, countertops, faucet handles. These areas are hotspots for germs and bacteria. A good disinfectant spray tackles these unseen culprits effectively, reducing the risk of spreading illnesses. It’s a simple yet powerful tool in maintaining a healthy living environment. But it’s not just about spraying and wiping away. To get the most out of your disinfectant spray, it’s essential to use

5 Essential Cleaning Products for a Sparkling Spring Clean Read More »

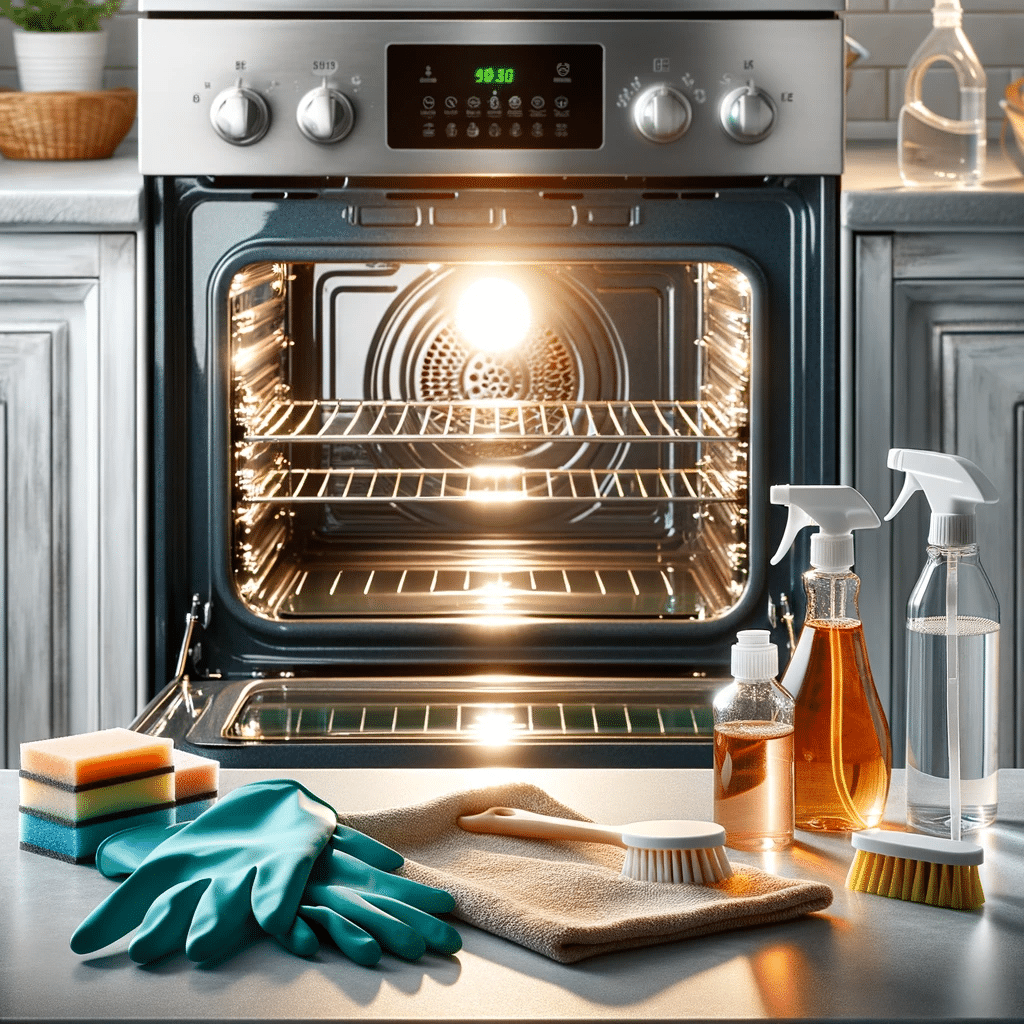
Clean oven, cleaning products, gloves and sponges.

How to Clean Your Oven Quickly and Efficiently: A Step-by-Step Guide

How to Clean Your Oven Quickly and Efficiently: A Step-by-Step Guide An oven hides its mess in plain sight. Every roast, pizza, and pie leaves a thin layer of baked-on grease, and layer by layer it turns into the smoke smell that greets you at preheat. The method below is the low-effort classic: a baking soda paste that works overnight while you sleep, then a fast wipe down the next day. No harsh fumes, no heroic scrubbing, and no commercial cleaner required unless you want one for the racks. Gather Your Supplies First Everything you need fits in one drawer: Half a cup or more of baking soda White vinegar in a spray bottle A damp dishcloth and a few rags A plastic or silicone spatula Rubber gloves, because oven grime is grim Why baking soda instead of a commercial oven cleaner? Those products often contain harsh, caustic chemicals with strong odors that linger in the kitchen. Baking soda is non-toxic, inexpensive, and already in your pantry, which makes it the friendlier choice for households with pets, kids, or sensitive noses. Step 1: Empty the Oven Completely Pull out the racks, pizza stones, baking sheets, and any thermometer so you can reach every surface. Give each item the care it needs: racks do best soaking in soapy water while you work, pizza stones are porous and should just be brushed out and baked dry at high heat, and gadgets stay gentle. Before anything else, sweep out loose crumbs with a dry cloth or handheld vacuum. With the cavity bare, also take a second to inspect for issues such as a worn heating element, which you would rather discover now than mid roast. Step 2: Mix the Paste Start with about half a cup of baking soda and add water gradually until you have a spreadable consistency, something like frosting. Too runny and it slides off the walls; too thick and it will not spread or penetrate. The paste is the perfect medium because it clings to vertical surfaces and stays where you put it, holding the mild abrasive and the alkaline chemistry right against the baked-on grime for hours. Step 3: Coat the Cavity and Wait Gloves on. Spread the paste over every interior surface you can reach, but keep it off the heating elements; baking soda can corrode them, and they rarely need cleaning anyway. Do not be surprised when the paste turns brown as you work. That discoloration is the reaction doing its job, lifting grease and carbonized spills out of the surface. Close the door and leave the paste for at least 12 hours, or overnight. This is the efficient part of the method: the chemistry works for you while you do nothing at all. Step 4: Handle the Racks While the paste sits, deal with the racks. After a couple of hours in hot, soapy water, the grease softens enough that a stiff brush takes it off without much fight; scrub both sides, rinse, and dry. If a rack is truly encrusted, a commercial oven cleaner is an acceptable last resort. Use it in a well-ventilated space with gloves on and follow the label exactly, since those formulas are strong. The same rule applies to any chemical you use for housework: Health Canada’s household chemical safety page is a good pre-job read. Step 5: Wipe It All Down The next day, use a damp cloth to wipe out the dried paste; the moisture rehydrates it, and it comes away carrying the loosened grime with it. For stubborn patches, scrape gently with the plastic or silicone spatula, never metal, which can scratch enamel or protective coatings. Finish by spritzing a little vinegar over any white residue: it fizzes on contact with the baking soda and wipes clean. Give everything a final rinse with a fresh damp cloth and let the cavity dry with the door open. Task Time Effort Empty and sweep the cavity 10 minutes Light Mix and spread the paste 15 minutes Light Wait for the chemistry 12 hours, hands off None Soak and scrub the racks 45 minutes, mostly soaking Moderate Wipe out and vinegar rinse 20 minutes Moderate Oven Cleaning FAQs How often should an oven get this treatment? A deep clean every few months keeps smoke and off smells away in a normal household. If you roast often or notice smoke at preheat, treat it as the sign to mix a fresh batch of paste. Wiping spills once the oven cools stretches the interval nicely. Can I use the self-cleaning function instead? You can, but know what you are signing up for: very high heat, strong odors, and a locked oven for hours. The baking soda method achieves a comparable result with none of that, which is why it remains the go-to for a quick, low-fuss clean. Why keep paste off the heating elements? Baking soda’s alkalinity can corrode exposed elements and shorten their life, and paste caked on them can burn and smell the next time you cook. They also rarely collect grime, so there is no benefit to justify the risk. Wipe around them carefully instead. Is commercial oven cleaner ever the right call? Yes, mainly for racks and heavy carbon that soaking and scrubbing cannot touch. Treat it as a targeted tool: gloves on, windows open, label followed to the letter. The same clean-first mindset health authorities apply to surfaces, as in the CDC’s cleaning guidance, applies here: remove the bulk physically before any chemical does the fine work. Prefer Someone Else Does It? An overnight paste is easy, but a full kitchen reset is a bigger job. Toronto Shine Cleaning’s deep cleaning service takes on kitchens top to bottom, and recurring maid service keeps them that way. A deep studio or one bedroom clean starts at $270.38 before HST, with every option listed on the pricing page. Call (647) 424-0355 and let the oven be our problem.

How to Clean Your Oven Quickly and Efficiently: A Step-by-Step Guide Read More »

Clean kitchen with a plant at the table

How to Easy Organize and Clean Your Kitchen Efficiently

Hey there, kitchen warriors! I’ve got your back! Today, we’re diving into the world Organize and Clean Your Kitchen, making it not just bearable but kinda fun too. So, grab your favorite cleaning gloves (you know, the ones that make you feel like a domestic superhero), and let’s get started! Decluttering: Your First Step Countertop Clear-Out Starting with your countertops, the goal here is to create a clear, usable space. Begin by removing all items from the countertops. This means everything – appliances, jars, utensil holders, and any decorative items. As you do this, clean the surface underneath each item. A simple mixture of warm water and mild dish soap works wonders for most countertop materials. For tougher stains, a baking soda paste (mixing baking soda with a bit of water) can be gently applied and then wiped away for a deeper clean. Once everything is off and the countertops are clean, it’s decision time. Carefully consider each item before putting it back. Ask yourself: Do I use this daily? Is it functional or purely decorative? Does it belong in the kitchen? This process helps you keep only what’s necessary and functional on your countertops. For the items that make the cut, place them back in a way that’s organized and aesthetically pleasing. The fewer items on the countertops, the easier they are to clean, and the more space you have for cooking and food preparation. Cabinet Crusade Now, let’s move on to the cabinets. This can be a bigger task, so set aside a good chunk of time for it. Start by emptying out all the contents of your cabinets. Lay everything out where you can see it – this helps in deciding what to keep. As you go through your items, have a box or bag ready for things you plan to donate or discard. For the items you decide to keep, consider how often you use them. Items used daily should be placed within easy reach, while those used less frequently can go on higher shelves or towards the back. This is also a good time to give your cabinets a good wipe-down. A simple all-purpose cleaner or a mix of vinegar and water can be used to clean the insides of the cabinets. For wood cabinets, a wood cleaner can help condition the wood and keep it looking its best. As you reorganize your items back into the cabinets, think about grouping like items together. For example, baking items in one area, pots and pans in another, and so on. This not only makes it easier to find what you need but also helps keep your cabinets tidy in the long run. Thorough Cleaning: More Than Just Surface-Level     Top-Down Approach Initiate your cleaning journey with the top-down approach. This method is particularly effective because it prevents the need to re-clean surfaces. Start with the highest points in your kitchen, such as the top of cabinets, refrigerator, and upper shelves. Dust and dirt tend to accumulate in these less frequently cleaned areas, and starting here ensures that any falling debris will be cleaned up in the later stages of your cleaning process. For dusting, you can use a microfiber cloth or a duster with an extendable handle. These tools are excellent for picking up dust without scattering it around. For areas with more stubborn dirt or grease, such as the tops of cabinets near the stove, you might need a cleaning solution. A mix of warm water and mild dish soap can work well, or you can use a vinegar solution (one part vinegar to one part water) for a more natural approach. Wipe these areas down and then move on to the next level, like shelves and counters. Appliance Deep Clean Your appliances deserve special attention during your cleaning spree. Over time, appliances accumulate grime, food particles, and other residues that can affect their performance and lifespan. For each appliance, the cleaning method will slightly vary: Refrigerator: Remove all items and shelves. Clean the interior with a baking soda solution (one tablespoon of baking soda to one quart of water) to remove odors and stains. Don’t forget to clean the rubber seals and the exterior. Oven: Use an oven cleaner for the interior, following the instructions on the product. For a natural method, a paste of baking soda and water left overnight works well. Wipe down the stovetop and control panels with a degreaser. Microwave: Heat a bowl of water with lemon juice inside the microwave for a few minutes. The steam will loosen any grime, making it easy to wipe away. Dishwasher: Run it empty with a specialized cleaner or just vinegar to clean and deodorize. Small Appliances: For toasters, blenders, coffee makers, etc., unplug and clean thoroughly. Use a vinegar-water mix for coffee makers and a damp cloth for toasters and blenders. Efficient Storage Solutions Use of Containers Containers are a game-changer in kitchen organization. They not only make your space look neater but also help in maintaining the freshness of your food. For dry goods like pasta, rice, and cereals, clear, airtight containers are ideal. These containers allow you to see what’s inside without opening them, saving you time and maintaining the quality of the food. They also come in uniform sizes, making it easier to stack them and utilize vertical space efficiently. When selecting containers, consider the size and shape based on what you’ll store in them and the space available in your pantry or cabinets. Square or rectangular containers are space-efficient as they fit snugly next to each other, minimizing wasted space. Glass containers are great for health and environmental reasons, but if you’re concerned about weight or breakage, BPA-free plastic containers are a good alternative. Label for Ease Labeling is a simple yet powerful tool in kitchen organization. It not only helps you identify contents quickly but also keeps track of expiration dates, reducing waste. This is particularly useful in the fridge, where leftovers and perishable items

How to Easy Organize and Clean Your Kitchen Efficiently Read More »

Vision from the ground of a corridor with carpet

How to Keep Your Carpets Looking New: Expert Advice on Carpet Care

How to Keep Your Carpets Looking New: Expert Advice on Carpet Care Carpets add warmth, comfort, and style to a home, but they also collect dust, dirt, and allergens with every step. Without regular care, fibers flatten, colours fade, and stains set in. The good news is that properly maintained carpets can last for years, even decades. This expert guide covers the routines that keep your carpets looking new, from daily habits to periodic deep cleaning. Why Carpet Care Matters Carpet fibers trap dust, pet dander, and other particles that settle into the pile. Left alone, that buildup dulls the look of the carpet and can affect the air you breathe indoors. Health Canada’s overview of indoor air contaminants explains why controlling dust and allergens in the home matters, and regular vacuuming is the single most effective way to keep them from building up in your flooring. Vacuum on a Schedule That Matches Your Household A good vacuum makes all the difference. Look for strong suction and rotating brushes that lift dirt from deep within the fibers. If you have pets, choose a model designed for pet hair and dander, and consider a HEPA filter, which traps fine particles and allergens instead of recirculating them. How often you vacuum depends on your household: Household type High-traffic areas Entire carpet Homes with pets or kids Every couple of days At least once a week Less busy homes As needed Weekly Empty the canister or change the bag regularly, because a full vacuum loses suction and picks up less dirt. Handle Spills by Blotting, Not Rubbing Spills happen, and how you react in the first minutes decides whether a stain sets. Keep a clean, absorbent cloth or paper towels handy, and blot gently. Rubbing pushes the stain deeper into the fibers, so resist the urge to scrub. For tougher stains, use a quality carpet cleaner or spot remover matched to your carpet type, whether that is a pet-stain formula, a heavy-traffic formula, or a gentle option for delicate carpets. Always test the cleaner on a small, inconspicuous area first to make sure it does not cause discolouration, and follow the product instructions. Deep Clean Carpets Periodically Even with diligent vacuuming, embedded dirt accumulates over time. A carpet cleaner machine injects a mix of water and cleaning solution into the fibers, loosens the dirt and grime that have settled deep down, then extracts the dirty water along with the loosened soil. It is an effective way to refresh your carpet at home, provided you choose a solution suitable for your carpet’s material and colour and spot-test first. Professional deep cleaning goes a step further. Powerful equipment and specialized solutions remove deeply embedded dirt and address specific problems like pet odours, tough stains, and delicate fibers. Toronto Shine Cleaning’s deep cleaning services give carpets the thorough treatment they need to stay fresh and last longer. Prevent Wear With Mats, Rugs, and Smart Habits Prevention is cheaper than repair. A few simple habits protect your carpet every day: Place mats and rugs at entrances, hallways, and in front of sofas, where foot traffic is heaviest. Choose durable mats with non-slip backing that are easy to clean. Vacuum the mats regularly, and deep clean them with a mild detergent or carpet cleaner when they get dirty. Spot-test any cleaner in an inconspicuous area before applying it to the full carpet. These first-line defenses absorb the brunt of daily wear so your main carpet stays vibrant underfoot. Build a Carpet Care Routine That Lasts Caring for your carpet is not complicated, but consistency matters. Vacuum on a schedule, blot spills the moment they happen, deep clean periodically, and protect high-traffic zones with mats. The payoff is a carpet that stays soft, colourful, and comfortable for years. If the job feels overwhelming, or you simply prefer to leave it to the professionals, Toronto Shine Cleaning can handle all your carpet care needs. A regular maid cleaning visit keeps daily dust in check, and our pricing page shows transparent base rates before HST. To keep your carpets looking new without lifting a finger, call (647) 424-0355 or browse our customer reviews to see why local homeowners trust us. Health Canada’s healthy living resources are a helpful reminder that a clean, comfortable home supports your family’s well-being, and well-cared-for carpets are part of that picture. Frequently Asked Questions About Carpet Care How often should I vacuum my carpets? In homes with pets or kids, vacuum high-traffic areas every couple of days and the entire carpet at least once a week. In less busy households, a weekly vacuum of the whole carpet usually keeps fibers clean and fresh. Should I rub a spill to clean it up? No. Rubbing pushes the stain deeper into the carpet fibers. Blot gently with a clean, absorbent cloth or paper towel, working from the outside in, and use a carpet cleaner matched to your carpet type for tougher stains. Can I deep clean my carpets myself with a machine? Yes. A carpet cleaner machine injects water and cleaning solution into the fibers, then extracts the dirty water along with loosened dirt. Choose a solution suited to your carpet’s material and colour, and spot-test in an inconspicuous area first. How long do carpets last with proper care? With regular vacuuming, prompt spill treatment, periodic deep cleaning, and protective mats in high-traffic zones, carpets can stay in great shape for years, even decades, instead of wearing out and needing early replacement.

How to Keep Your Carpets Looking New: Expert Advice on Carpet Care Read More »

apartment cleaning oakville

Does Indoor Air Quality Affect Your Health? How to Improve Your Home’s Indoor Air Quality

Hey, folks! Let’s chat about something we often take for granted: Indoor Air Quality Affect Your Health? Ever wonder if it really impacts your health? Spoiler alert: It absolutely does! Indoor air quality plays a massive role in our well-being. Let’s break down why it’s important and how you can make it better. Why Indoor Air Quality is a Big Deal for Your Health When we think of air pollution, our minds often jump to smoggy city streets or industrial smokestacks. But what about the air inside our homes? Surprisingly, it can be just as polluted, if not more so, than outdoor air. Our homes, the places where we should feel safest, can be teeming with airborne enemies that we’re not even aware of. Hidden Nasties – Think about all the things in your home right now. Cozy, right? But lurking within this comfort are unseen dangers. Your fluffy carpet, your beloved pet, even your favorite scented candles can be sources of indoor pollutants. Dust mites, a common household allergen, thrive in bedding, upholstered furniture, and carpets. Pet dander, a trigger for allergy sufferers, circulates freely in the air. Mold, a result of excess moisture, can grow in bathrooms and kitchens, releasing spores that can cause respiratory issues. These VOCs can evaporate into the air at room temperature, potentially causing headaches, dizziness, and other health problems. 24/7 Exposure – Here in Toronto, with our chilly winters and hot summers, we spend a lot of time indoors. This means we’re constantly exposed to whatever is in our indoor air. Whether we’re sleeping, working, or just hanging out, we’re breathing in whatever’s floating around in our home. For those with allergies or asthma, this constant exposure can mean a never-ending cycle of symptoms. And for the rest of us, it could mean a gradual impact on our health without us even realizing it. Long-Term Impact – The effects of poor indoor air quality aren’t always immediate. They can creep up on us over time, leading to more serious health issues down the road. Consistent exposure to pollutants can exacerbate respiratory conditions like asthma and can even lead to the development of chronic respiratory diseases. But it’s not just our lungs that are at risk. Studies have shown that long-term exposure to certain air pollutants can have cardiovascular effects as well. This means that the air in our homes could potentially be affecting our heart health. Embrace Fresh Air Opening Windows: One of the simplest yet most effective ways to improve indoor air quality is by opening your windows. This straightforward action invites a natural flow of fresh air into your home, diluting and displacing indoor air pollutants. Whether it’s pollen, dust, or chemical residues from household cleaners, opening windows helps to flush these out, replacing stale, contaminated air with cleaner, outdoor air. Using Exhaust Fans: Now, let’s talk about the role of exhaust fans, particularly in kitchens and bathrooms. These areas of your home are hotspots for moisture and odors. Cooking, for example, releases a variety of particles and gases into the air, some of which can be harmful if inhaled in large quantities. Similarly, bathrooms are prone to mold and mildew growth due to high humidity levels. Exhaust fans come into play by effectively removing moist air, odors, and airborne pollutants from these rooms. When you cook or take a hot shower, turning on the exhaust fan helps in reducing the potential for mold growth and ensures that any harmful byproducts of cooking are quickly removed from your indoor environment. Why This Matters: The combined approach of opening windows and using exhaust fans is a proactive way to maintain good air quality inside your home. By doing so, you’re not just making the air in your home more pleasant to breathe; you’re also contributing to a healthier living environment. Reducing the levels of indoor pollutants can have a significant impact on your overall health, especially for those with respiratory issues or allergies. Plus, it’s a cost-effective and easy-to-implement solution that can make a big difference in the feel and safety of your home environment.     Keep It Clean Regular cleaning is more than just about keeping your place looking neat; it plays a pivotal role in the quality of air you breathe indoors. Dusting and vacuuming are key activities in this routine. Dust accumulates a variety of allergens like pet dander, pollen, and dust mites, which can trigger allergic reactions and respiratory issues. For those with pets, it’s even more critical. Pet hair and dander can easily become airborne and contribute to indoor air pollution. Vacuuming with a good-quality vacuum cleaner, preferably one with a HEPA filter, is vital. These filters are designed to trap very fine particles that other vacuums might recirculate back into the air. By regularly vacuuming carpets, rugs, and even upholstery, you significantly reduce the amount of dust and allergens in your home. The choice of cleaning products is equally important. Many conventional cleaning products contain harsh chemicals that can release volatile organic compounds (VOCs) into your indoor air. These compounds can be harmful when inhaled and contribute to indoor air pollution. Opting for natural, non-toxic cleaning products is a healthier choice. These products are made from ingredients that are less likely to degrade your indoor air quality. You can even make your own cleaning solutions using everyday household items like vinegar, baking soda, and lemon juice. These natural ingredients are effective at cleaning and are much safer for your indoor air. Green It Up with Plants Certain plants, like spider plants and peace lilies, are celebrated for their air-purifying abilities. These plants do more than just add a touch of greenery; they actively work to cleanse the air. How? They absorb common indoor pollutants through their leaves and roots. These pollutants, such as formaldehyde, benzene, and trichloroethylene, are commonly found in household items and can be harmful over time. Plants like the spider plant and peace lily have been shown to effectively reduce these

Does Indoor Air Quality Affect Your Health? How to Improve Your Home’s Indoor Air Quality Read More »

How to Prevent Cold and Flu with Natural Cleaning Solutions

Hey there! To Prevent Cold and Flu with Natural Cleaning, it’s super important to keep our homes clean and germ-free. But, guess what? You don’t need to rely on harsh chemicals to do the trick. Natural cleaning solutions can be just as effective in keeping those pesky germs at bay. Let’s dive into how you can use natural solutions to prevent cold and flu in your cozy nest. Why Go Natural? First and foremost, natural cleaning solutions are kinder to your skin. We’ve all been there – using a strong cleaner only to end up with irritated hands. Natural options, on the other hand, are much gentler. This means you can clean away without worrying about harsh reactions, which is especially great if you have sensitive skin. But it’s not just about you! If you have little ones scampering around or furry friends lounging on your floors, you’ll love that natural cleaners are safer for them too. Kids and pets are often more sensitive to the harsh chemicals found in many standard cleaning products. By switching to natural alternatives, you’re creating a safer environment for the entire family. Imagine your kiddos playing on floors cleaned with gentle ingredients or your pets cozying up on freshly cleaned carpets that don’t have any harsh residues. It’s all about creating a safe and healthy space for everyone. Now, let’s talk about Mother Earth. We all want to do our part in keeping our planet happy and healthy, right? Well, natural cleaning solutions are a great step in that direction. They’re eco-friendly, which means they’re kinder to the environment. When you wash away these natural cleaners, you’re not sending harsh chemicals down the drain and into our water systems. It’s a win-win for your home and the environment. Another cool thing? You probably have most of these natural cleaning superheroes in your kitchen right now! That’s right – items like vinegar, lemon, and baking soda aren’t just for cooking; they’re also powerful cleaning agents. This means you can start your natural cleaning journey without a trip to the store. It’s convenient, effective, and kinder to your wallet too. The Magic of Vinegar So, what makes vinegar so special? It’s all about the acidity. Vinegar is known for its acidic nature, which is a nightmare for germs and viruses. This acidity isn’t just good for adding zing to your salad dressing; it’s also what gives vinegar its germ-killing superpowers. When you use vinegar as a cleaning agent, it works hard to break down grime, cut through grease, and yes, kill those pesky germs that can lead to colds and flu. Now, how do you transform vinegar into a cleaning superhero? It’s super simple. Take equal parts of water and white vinegar, mix them in a spray bottle, and there you have it – a natural disinfectant ready to tackle germs in your home. This mixture can be used on a variety of surfaces where germs love to lurk. Think kitchen counters, bathroom surfaces, doorknobs, and even your smartphone screen. But here’s the best part: it’s so easy to make and use. You don’t need to be a DIY guru to mix water and vinegar. Plus, it’s a cost-effective solution. Vinegar is way cheaper than most store-bought cleaners, and since you’re diluting it with water, a little goes a long way. You’re not only keeping your home clean; you’re also being kind to your wallet. Another bonus? You’re avoiding the strong, sometimes overwhelming scents that come with many commercial cleaners. While vinegar does have a distinct smell, it dissipates quickly, leaving you with a clean, fresh space without any lingering chemical odors.     Lemon: Not Just for Lemonade Why are lemons such a big deal in the cleaning world? It’s all about their high acidity. Just like vinegar, the acidic nature of lemons makes them a natural enemy for germs and viruses. When you’re trying to keep your home free from cold and flu bugs, lemons are your trusty allies. They can kill bacteria and leave your house not just clean, but also smelling fresh and citrusy. So, how do you turn lemons into a cleaning solution? It’s as easy as pie (or should I say, lemon pie?). Squeeze some lemon juice, mix it with a bit of water, and you’ve got yourself a natural disinfectant. This lemon-water mix is perfect for wiping down those areas where germs love to hang out. Think kitchen countertops, where you prepare all your meals, or doorknobs, which everyone touches multiple times a day. Even your bathroom surfaces can benefit from a lemony clean, leaving them not just germ-free but also with a refreshing scent. One of the coolest things about using lemon as a cleaner is the scent factor. Unlike some cleaners that can be harsh on your nose, lemons leave a light, refreshing citrus aroma. This makes cleaning a more pleasant experience and leaves your home smelling naturally fresh. Plus, there’s something incredibly satisfying about knowing you’re using a natural, biodegradable substance to keep your home clean. And let’s not forget, lemons are also great for tackling tough stains and bringing out natural shine. Got a stubborn stain on your countertop? Lemon juice to the rescue! Want to add some sparkle to your faucets or sink? Rub them with a lemon wedge and watch them shine. Essential Oils: Smells Good and Cleans Too! So, why are these particular oils so great for cleaning? Well, it turns out, nature has equipped them with properties that are tough on bacteria and viruses. For instance, tea tree oil is known for its powerful antiseptic properties. It’s like that tough-on-germs cleaner but without the harsh chemicals. Eucalyptus oil, on the other hand, isn’t just for helping you breathe easier when you have a cold; it’s also great for wiping out germs. And then there’s lavender, the all-rounder, known for its calming scent and its ability to fight off bacteria. Now, how do you use these oils in cleaning? It’s pretty

How to Prevent Cold and Flu with Natural Cleaning Solutions Read More »

How to Easy Rejuvenate Your Home After the Holidays: Winter Maintenance Guide

Hey there, folks! Rejuvenate Your Home for Winter’s chill, and with the holiday festivities now memories, it’s an ideal moment to embark on some post-holiday cleanup and home maintenance. This phase is crucial not just for tidiness but also for starting the new year on a fresh note. Let’s delve into some nifty ideas to help your home remain as dazzling as a winter wonderland, despite the snow and cold outside! Un-deck the Halls with Care The journey of post-holiday cleanup often begins with the bittersweet task of taking down those charming and festive decorations. It’s a gentle reminder that the season of joy and giving has wrapped up, and it’s time to welcome the new beginnings that the new year brings. But there’s no need to rush this process. After all, these decorations have been a source of joy and warmth during the cold days, so it’s perfectly fine to savor their presence a little longer. When you do decide it’s time to transition back to your regular decor, approach this task with a bit of strategy and a lot of care. Start with the smaller items like ornaments and tinsel. As you take down each piece, reflect on the memories they’ve been a part of – maybe the laughter shared during decorating, or the quiet, peaceful moments spent in their glow. Then, move on to the lights, which can be a bit tricky. A pro tip to avoid the all-too-familiar tangle frustration next year is to wrap your lights around a piece of cardboard. This simple step can save you a lot of time and prevent those pesky knots that seem to magically appear. Plus, it makes storage neater and more organized. Imagine pulling out perfectly coiled lights next holiday season – what a stress-reliever! As you pack away each item, consider doing a quick check for any repairs or replacements needed. Maybe some bulbs are out, or an ornament has seen better days. Taking note now means you can be ahead of the game when the next holiday season rolls around. Tree Be Gone! The process of removing your Christmas tree is more than just a cleanup task; it’s a step towards returning your home to its pre-holiday state. But before you start, take a moment to appreciate the joy and beauty it brought to your home. It’s been a symbol of warmth and cheer, a gathering spot for gift-giving and storytelling. As you prepare to remove it, you’re not just discarding a tree; you’re closing a chapter of this year’s festive story. Many cities, including Toronto and its surrounding areas, offer tree recycling programs, which is a fantastic way to give your tree a second life. These programs turn your once-adored Christmas tree into mulch or other useful materials, helping the environment and reducing waste. It’s a wonderful opportunity to contribute to sustainability efforts and ensure that the spirit of your tree lives on in a different form. Before you send your tree on its eco-friendly journey, make sure to strip it of all decorations. Remove every ornament, strand of tinsel, and light. This step is crucial as these items can hinder the recycling process. Plus, it’s a good practice to preserve and store these decorations for next year. Ensure that the tree is as natural as possible when you set it out for recycling – free of all the adornments that made it your unique holiday centerpiece.     Deep Clean the Living Spaces Starting with the living room, think of it as bringing back the calm after a delightful storm of festivities. This space, where you’ve shared gifts and stories, might now be showing signs of those joyous times. Vacuuming the carpets and floors is just the beginning. Dive into those nooks and crannies, under the couch cushions where stray popcorn kernels or cookie crumbs might be hiding. Dust off the shelves and entertainment center, and wipe down surfaces that have been frequent touchpoints. Next, the dining area, the stage of your sumptuous holiday feasts, may need some extra love. Cleaning the table and chairs is a given, but also remember to attend to the corners of the room and any sideboards or serving tables. If there are any lingering stains from wine spills or gravy drops, now’s the time to tackle them. And don’t forget about the floors – they’ve likely weathered their fair share of dropped food and scuff marks. Moving on to the kitchen, the command center of your holiday culinary exploits, it’s likely in need of a thorough scrub-down. After cooking and baking up a storm, your countertops, stove, and oven might be crying out for attention. Clear out the fridge, wiping down the shelves and getting rid of any holiday leftovers that have overstayed their welcome. Clean the sink and faucet, and consider running a cleaning cycle on your dishwasher, which has been a holiday hero in its own right. Freshen Up Your Floors First up, let’s talk about vacuuming. It might seem like a basic task, but it’s your first line of defense in reclaiming your floors from the remnants of holiday festivities. This step is crucial for removing dirt, crumbs, and other debris that have accumulated. Be thorough – move furniture around, get into the corners, and don’t forget those hard-to-reach spots like under the sofa or between the cushions. Next, if you have hardwood, tile, or laminate flooring, grab that mop and give them a good, thorough clean. This step is essential for removing any sticky spills or stains that might have occurred during the celebrations. It’s also a great way to restore the shine and luster that make your floors so inviting. Use a cleaner that’s suitable for your type of flooring to avoid any damage and bring out the best in your floors. For those with carpeted areas, consider a deeper clean. Steam cleaning is like a spa treatment for your carpets. It not only removes the surface dirt but also reaches deep

How to Easy Rejuvenate Your Home After the Holidays: Winter Maintenance Guide Read More »

Family putting up a Christmas tree

How to Achieve a Sparkling Clean Home this Holiday Season

A Clean Home this Holiday! A time of twinkling lights, warm cocoa, and… a little bit of chaos, right? It’s a season filled with joy, but let’s not sugarcoat it – it can get pretty hectic. From stringing up the lights to finding the perfect gifts, there’s a lot on your plate. And amidst all this festive frenzy, keeping your home clean might feel like a Herculean task. But hey, that’s where I come in with some easy-peasy strategies to help you keep your home not just clean, but holiday-card perfect! The Joy of a Clean Home for the Holidays Imagine this: You’re stepping into your home after a long day of holiday prep, and instead of a to-do list that seems a mile long, you’re greeted by a space that’s as calming as it is clean. This isn’t just about impressing your guests (though that’s a nice bonus!), it’s about creating a peaceful sanctuary for yourself during what can be the most wonderful, albeit busy, time of the year. So, how do you go about it? First up, think about setting the right vibe. A clean home during the holidays isn’t just about sparkling floors and dust-free shelves; it’s about crafting an environment that feels warm, welcoming, and oh-so-cozy. Imagine the scent of pine needles or your favorite holiday cookies wafting through the air, mingling with the soft glow of fairy lights. That’s the holiday spirit right there! Now, let’s talk about your game plan. The trick is to break down the overwhelming task of cleaning into manageable chunks. Maybe one day you tackle the living room, the next day the kitchen. It’s about finding a rhythm that works for you, without turning into the Grinch. Remember, the goal isn’t perfection – it’s about creating a space where memories can be made and enjoyed. Start with Decluttering Starting with decluttering is like setting the stage for a grand holiday show in your home. Think of it as prepping the canvas before you bring out the colors of your holiday décor. The mission here is simple yet transformative – clearing out the non-essentials to make room for festive cheer. Begin your decluttering adventure by walking into each room with a fresh pair of eyes. You’re on a treasure hunt, but instead of seeking out jewels, you’re looking for items that don’t belong in your holiday narrative. These could be stacks of magazines that have been piling up, summer clothes still lingering in your closet, or those random bits and bobs that mysteriously gather in every household. Each item you remove is like lifting a small weight off your home’s shoulders. Now, it’s not just about taking things away. It’s also about reorganizing what remains. This step is like a game of Tetris, where you find the perfect spot for each item. That summer gear? It might find a new home under the bed or in a storage bin. The infamous junk drawer? Give it a little love and attention, and you’ll be amazed at how much more functional your space becomes. Remember, the aim of decluttering isn’t just to make your home look neat for the holidays. It’s about creating a sense of order and tranquility. In a decluttered space, your holiday decorations will shine brighter, your rooms will feel more inviting, and you’ll find that your cleaning tasks become a whole lot easier. Less clutter means fewer places for dust to settle and less stuff to move around when you’re vacuuming or mopping. Deep Cleaning: Room by Room     The Kitchen: A Feast for the Senses The kitchen, undoubtedly, will be your holiday headquarters, buzzing with the aroma of delicious meals and the warmth of shared laughter. Start your deep cleaning saga here by focusing on your appliances. Your oven, microwave, and stovetop have been loyal companions throughout the year and now need a thorough scrub to be at their best. Then, move on to the countertops, where your culinary masterpieces will take shape. A sparkling clean surface not only looks inviting but also ensures a hygienic space for food preparation. Next, turn your attention to the floors, knowing they’ll soon witness the hustle and bustle of holiday cooking. A good mop can make them shine like new. The Living Room: The Stage for Memories Now, glide into the living room, the social hub of your home. This space will host everything from heartwarming chats to boisterous holiday games. Begin by dusting every surface. Each shelf, mantle, and corner should be free of dust bunnies, making way for your holiday decorations to take the spotlight. Next, those windows need a good cleaning to let the winter sunlight (or the twinkling lights from outside) filter through, adding to the room’s charm. And if you’re lucky enough to have a fireplace, give it the attention it deserves so it can be the heartwarming centerpiece for those chilly evenings. Lastly, vacuum or mop the floor, ensuring it’s pristine and inviting. Bedrooms & Bathrooms: Retreats of Comfort and Cleanliness Moving on to the bedrooms, especially if you’re hosting overnight guests, think comfort and coziness. Fresh linens are a must – they not only look inviting but also give that fresh, clean scent everyone loves. A quick decluttering here can also make the space more welcoming. In the bathrooms, aim for a level of cleanliness that would make a five-star hotel envious. Sparkling mirrors, spotless countertops, and a gleaming shower or tub will make your guests feel pampered. In each room, the goal is to create an environment that feels not just clean but also warmly inviting. It’s about setting the stage for the holiday magic to unfold, where every corner of your home contributes to the festive spirit. Happy deep cleaning! Focus on the Little Details Scent-sational Ambiance: Creating a delightful holiday atmosphere is as much about the scents as it is about the decor. The power of a festive fragrance can transport you straight into the holiday spirit. Start by

How to Achieve a Sparkling Clean Home this Holiday Season Read More »

Tesla, Electricity, Future

Revolutionizing Cleanliness: How Technology is Shaping the Cleaning Industry

Hey there, clean-freaks and tech-enthusiasts! Ever wondered how Revolutionizing Cleanliness in the cleaning industry is keeping pace with the dizzying advancements in technology? Well, strap in, because we’re about to dive into the sparkling world of high-tech cleanliness! The Tech Boom in Cleaning: A Sneak Peek In today’s fast-paced world, cleaning isn’t just about mops and buckets. It’s about smart gadgets, eco-friendly solutions, and, believe it or not, a bit of AI magic! Imagine walking into a room where a small robot whirs quietly, methodically making its way across your floor, leaving behind a trail of cleanliness. Or, consider the ease of using a mobile app to schedule your entire house cleaning routine, get product recommendations based on your preferences, or even remotely control smart cleaning devices. The future of cleaning embraces technology in a way that seamlessly integrates into our daily lives, enhancing efficiency and simplifying tasks. What’s truly exciting is the variety of innovations we’re seeing. From smart air purifiers that adjust their cleaning power based on air quality readings to window cleaners that stick to your panes and do the hard work for you, technology is redefining our concept of clean. And let’s not forget about the eco-friendly solutions coming into play. We’re talking about high-efficiency particulate air (HEPA) filters in vacuum cleaners that trap finer particles, reducing allergens in the air, and new cleaning agents that are tough on grime but gentle on the planet. Then, there’s the magic of AI. It’s not just about robots that can vacuum and mop. AI in cleaning involves complex algorithms that can learn your cleaning habits and preferences, suggesting optimized cleaning schedules and even alerting you to areas in your home that need extra attention. It’s like having a personal cleaning assistant that knows your home as well as you do, maybe even better! The blend of these smart, eco-friendly, and AI-driven solutions is transforming the cleaning industry from a task-driven to a tech-driven domain. It’s not just about getting the job done; it’s about how efficiently, effectively, and sustainably it can be done. This shift isn’t just making our lives easier; it’s revolutionizing the way we think about and approach cleaning. Smart Devices: The Future is Here Picture this: vacuums that map your home and clean autonomously, and apps that remind you when it’s time to scrub down the shower. Smart devices in cleaning are all about making your life easier and your home spick-and-span with minimal effort. These gadgets are not just cool to show off; they’re game-changers in maintaining cleanliness. Now, let’s dive a bit deeper into this world of smart cleaning devices. Imagine a robotic vacuum cleaner that not only maps out your entire house but also learns the layout over time. It knows which rooms are which, the best path to take for maximum efficiency, and even the areas that accumulate the most dirt. Some of these nifty gadgets come equipped with sensors that detect changes in surface types, adapting their cleaning method on the fly. Carpets? No problem. Hardwood? Easy-peasy. And let’s not forget about those hard-to-reach spots; these robots are designed to navigate around furniture and obstacles with ease. But it’s not just about robotic vacuums. There are smart mops that can tackle those sticky spills and grimy floors with the same level of autonomy and efficiency. Equipped with water tanks and the ability to dispense the right amount of moisture, they ensure your floors are not just clean but also properly cared for. Moving beyond floor cleaning, there are also smart devices designed to keep your air pure and free of allergens. Air purifiers equipped with smart technology can monitor the air quality in real-time, adjusting their settings automatically to filter out dust, pollen, and other airborne irritants. Some even offer smartphone integration, allowing you to monitor and control the air quality in your home no matter where you are. Then there are the apps. These are real game-changers in how we approach cleaning routines. With user-friendly interfaces, these apps can help you schedule cleaning sessions, remind you of maintenance tasks (like when to clean the filters in your devices), and even offer tips and tricks for efficient cleaning. Some even provide a platform for you to control all your smart cleaning devices from one place, making it easier to manage your entire cleaning arsenal.     Eco-friendly Solutions: Green is the New Clean The planet is thanking us, and it’s all thanks to eco-friendly cleaning technologies. Biodegradable cleaning agents, energy-efficient appliances, and waste-reducing tools are just the tip of the iceberg. These innovations are making cleaning an earth-loving affair! Let’s delve a little deeper into these green solutions. We’re talking about a new era of cleaning where every product and tool is designed with the planet in mind. Take biodegradable cleaning agents, for instance. These are not your average cleaners; they’re made from natural, plant-based ingredients that break down easily without harming the environment. This means that when you wash away that kitchen grease or bathroom grime, you’re not sending harmful chemicals down the drain. But the eco-friendly revolution doesn’t stop there. Energy-efficient appliances are taking center stage in the cleaning industry. Consider vacuum cleaners with eco-modes that consume less power or washing machines that use less water and energy. These appliances are meticulously engineered to deliver optimal cleaning performance while minimizing their carbon footprint. It’s a brilliant way of keeping your living spaces pristine without cranking up those utility bills or straining the planet’s resources. Then there are the waste-reducing tools. Ever heard of microfiber cloths? These little wonders are designed to be used over and over again, drastically reducing the need for disposable wipes and paper towels. They’re incredibly effective at picking up dirt and dust and can be easily tossed in the wash for repeated use. It’s a simple switch, but one that can significantly reduce household waste. And let’s not forget about water conservation. New-age cleaning technologies are focusing on ways to get the most

Revolutionizing Cleanliness: How Technology is Shaping the Cleaning Industry Read More »

Small bedroom, snowing

How to Deep Clean Your Mattress for a Better Night’s Sleep

Hey there! Have you ever paused to consider to Deep Clean Your Mattress? Imagine a tiny universe where dust mites, dead skin cells, and countless other unseen elements reside. Quite the thought, isn’t it? But fear not, because I’m here to guide you through the process of deep cleaning your mattress, transforming it into a haven for restful, peaceful sleep. Why Bother Cleaning Your Mattress? Hey there, sleepyheads! Have you ever paused to consider the mysterious world hidden within the confines of your mattress? Imagine a tiny universe where dust mites, dead skin cells, and countless other unseen elements reside. Quite the thought, isn’t it? But fear not, because I’m here to guide you through the process of deep cleaning your mattress, transforming it into a haven for restful, peaceful sleep. Think about it – we spend about a third of our lives sleeping, and that’s a lot of time spent in close contact with our mattresses. This regular use turns our mattresses into hotspots for accumulating a variety of things we’d rather not sleep with. From sweat and oils secreted by our bodies to dust and various allergens, our mattresses can harbor an array of substances. And let’s not forget about the occasional food crumbs from those lazy Sunday breakfasts in bed. All these contribute to an environment that’s not just unhygienic but can also impact our health and the quality of our sleep. You might be wondering, “Is it really that important to clean my mattress?” Absolutely! Think of your mattress as a giant sponge. Just like a sponge absorbs whatever it comes into contact with, so does your mattress. It soaks up sweat, collects dust, and becomes a home for allergens. These unwelcome bedfellows can wreak havoc on your health, potentially aggravating allergies and respiratory issues. Moreover, sleeping on a dirty mattress can disturb your sleep, leading to those frustrating nights where you toss and turn, unable to find comfort. But here’s the good news – maintaining a clean mattress is simpler than you might think. It doesn’t require professional cleaning services every month or expensive cleaning products. With a few simple steps, which I’ll guide you through, you can ensure that your mattress remains a clean, comfortable, and healthy place to rest your head. Step-by-Step Mattress Deep Clean Gather Your Tools Vacuum with an upholstery attachment Baking soda A mild detergent Cold water A few clean cloths Optional: essential oils (like lavender for that extra soothing scent)     Vacuum Away Vacuuming your mattress might seem like a chore, but it’s the cornerstone of a clean, hygienic sleeping space. Before you start, take a moment to strip your bed of all sheets, pillowcases, and other bedding. Toss these into the washing machine to ensure you’re not just cleaning your mattress but also the fabrics that come into direct contact with your skin. This is crucial because while you’re working on your mattress, your bedding gets a thorough wash, ridding it of dirt, oils, and sweat. Now, let’s focus on the main event: vacuuming your mattress. It’s a simple yet highly effective way to banish a host of unwanted guests from your mattress. The key tool here is your vacuum’s upholstery attachment. This handy accessory is specifically designed to gently yet effectively clean fabrics and surfaces like your mattress. Start by running the vacuum across the entire surface of the mattress. Pay special attention to the seams and crevices. You might be surprised at the amount of dust, dirt, and debris that accumulates in these hidden nooks and crannies. While vacuuming, it’s important to be thorough. Go over each area multiple times, especially if it’s been a while since your last mattress cleaning. These repeated passes help dislodge and remove stubborn particles that have worked their way into the fabric of your mattress. Dust mites, for example, are tiny creatures invisible to the naked eye but they can accumulate in large numbers in mattresses. They feed on dead skin cells shed by us during sleep, and their presence can trigger allergies and asthma in some people. Regular vacuuming helps keep their population in check. Spot Clean Stains Spot cleaning stains on your mattress is a crucial step in the deep-cleaning process. It’s like being a detective; you’re looking for clues (in this case, stains) to help you restore your mattress to its former glory. Let’s break it down into an easy-to-follow approach that ensures your mattress gets the gentle, yet effective treatment it deserves. First, arm yourself with a mild detergent and some cold water. You might wonder why cold water? Well, it’s because hot water can set some types of stains, making them even harder to remove. Mix a small amount of the detergent with the cold water to create a cleaning solution that’s tough on stains but gentle on your mattress. Now, it’s time to tackle those pesky stains. Dip a clean cloth into your detergent solution and gently dab at the stains. This is a delicate operation – you’re not trying to scrub the stain out, as that can push it deeper into the mattress. Think of it as gently coaxing the stain out of the fabric. Patience is key here. Some stains might require a bit of persistence, but it’s important not to get too aggressive. And here’s a crucial point: avoid soaking the mattress. Your goal is to use just enough of the solution to treat the stain without drenching your mattress. A water-logged mattress can take ages to dry and can even become a breeding ground for mold and mildew – definitely not what you want! For those tougher, more stubborn stains, baking soda is your secret weapon. Sprinkle a little over the stain, then let it work its magic. Baking soda is great because it’s a natural deodorizer and absorbent, which means it can help lift the stain and eliminate any odors. Let the baking soda sit on the stain for a few hours; this gives it enough time

How to Deep Clean Your Mattress for a Better Night’s Sleep Read More »