Hey there, busy bees! Trying to find Cleaning Hacks? between endless meetings, tight deadlines, and trying to squeeze in a bit of social life, cleaning is probably the last thing on your mind. But, fret not! I’ve got some super effective cleaning hacks that’ll keep your space sparkling without eating up your precious time. Let’s dive in!
1. The Magic of Microfiber
What’s the big deal with these cloths? First off, microfiber is made of super tiny fibers. I’m talking finer than a strand of silk! These tiny fibers create more surface area to pick up dirt, dust, and even bacteria. Imagine each fiber as a tiny hand grabbing and holding onto particles. This means when you wipe a surface with a microfiber cloth, it’s not just pushing the dirt around; it’s actually lifting and trapping it.
Another cool thing? You don’t always need a cleaning solution. If you’re dusting, a dry microfiber cloth does the trick beautifully. For tougher grime, slightly dampen the cloth with water, and it becomes an all-purpose cleaning wizard. You’re not just saving time; you’re also cutting down on the use of chemicals in your home, which is a win for you and the environment.
2. Daily 15-Minute Blitz
The Daily 15-Minute Blitz is a real game-changer, especially for you busy professionals out there. The idea is simple yet incredibly effective: carve out just 15 minutes a day for a focused, no-nonsense cleaning session. Trust me, it’s almost like a mini workout for your home, and the results can be surprisingly impressive!
Here’s how to make the most of these power-packed 15 minutes:
Set a Timer: This is key. Grab your phone or kitchen timer and set it for 15 minutes. The timer creates a sense of urgency and helps keep you focused. It’s like a race against the clock, and you’ll be amazed at how much you can accomplish when you’re watching those minutes count down.
Pick Your Battle: Each day, choose a specific area or type of task to tackle. Maybe it’s the kitchen counters today, the bathroom tomorrow, and duhttps://torontoshinecleaning.ca/blog/sink-cleaning-simplified-tips-to-make-your-sink-gleam/sting the living room the day after. Breaking your home into sections or types of tasks makes it manageable and prevents that overwhelming feeling of trying to do it all at once.
Equip Yourself: Have your cleaning tools at the ready. This isn’t the time for deep cleaning, so keep it simple. A microfiber cloth, a multi-surface cleaner, and a quick floor sweep or vacuum should cover most of your needs. The goal is to be efficient and effective.
Go, Go, Go! Once that timer starts, it’s go time. Work swiftly but don’t rush so much that you’re doing a sloppy job. The focus should be on surface-level cleaning that makes a noticeable difference. Wiping down surfaces, picking up clutter, a quick vacuum pass – these are the kinds of tasks that are perfect for your blitz.
Consistency is Key: Doing this daily creates a habit, and over time, you’ll find that your home stays consistently cleaner. Plus, it reduces the need for those long, exhausting cleaning sessions. It’s about maintenance rather than marathon cleaning.
Involve the Household: If you’re not living solo, get everyone in the house involved. If each person takes a zone or a task, your 15-minute blitz can be even more powerful. It’s also a great way to teach kids responsibility and the importance of keeping their living space tidy.
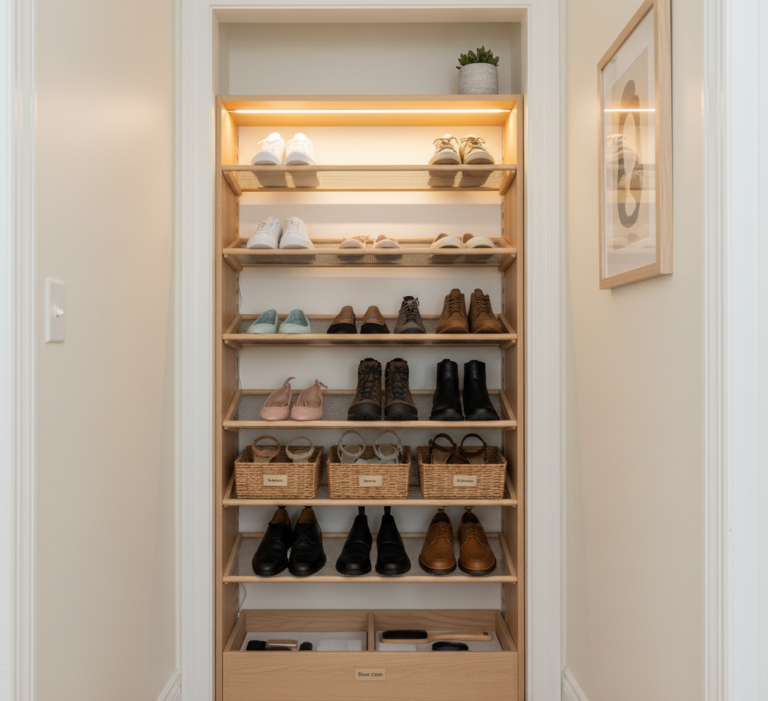
3. Declutter with Baskets
“Declutter with Baskets” is one of those brilliantly simple yet effective hacks that can transform the way you manage clutter in your home. It’s particularly great for those of us who are always on the go and don’t have the time to put every single thing back in its place immediately. Let’s break down how to make the most of this strategy.
Choose Your Baskets: First things first, pick some baskets that blend well with your home decor. They don’t have to be fancy – anything from wicker baskets to stylish fabric bins works. The idea is to have them blend in with your space so they don’t stick out like sore thumbs.
Strategic Placement: Place these baskets in areas where clutter tends to accumulate. This could be the living room, near the entrance, in the kids’ rooms, or even in the kitchen. The goal is to have them easily accessible so you can quickly toss in items without having to go out of your way.
The Daily Toss: Throughout your day, whenever you find items that aren’t in their proper place, instead of leaving them out or spending time putting them away right then, just toss them into the nearest basket. This could be anything – toys, books, clothes, mail, you name it. The basket acts as a temporary holding spot, preventing these items from spreading across your home.
Weekly Sorting Session: Now, the baskets aren’t a permanent solution. Once a week, take a few minutes to go through each basket and put everything back where it belongs. This can be a quick process since all the misplaced items are already gathered in one spot. It’s like having a mini-organizational session without the overwhelm of a full-on cleaning and tidying day.
Involve the Family: If you live with others, make this a shared responsibility. Each person can be responsible for sorting through their own basket, or you can make the weekly sorting a family activity. It’s a great way to teach organizational skills and reduce the clutter-related stress often found in shared living spaces.
Maintain the Habit: Consistency is key. The real magic of this hack lies in its ability to become a part of your daily routine. Once it becomes a habit, you’ll notice a significant reduction in the amount of random clutter around your house.

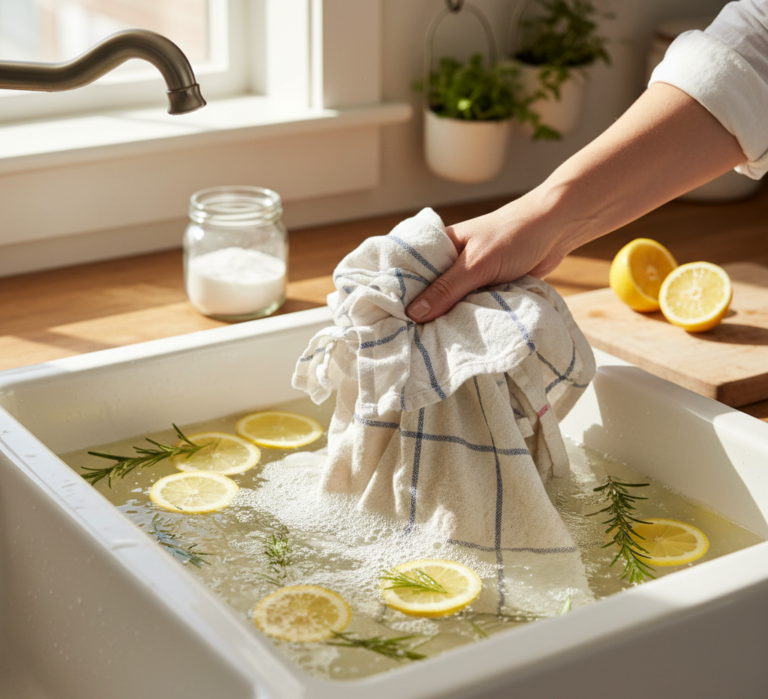
4. The Overnight Sink Soak
Start by making this a part of your evening wind-down routine. Just before you’re ready to call it a night, take a moment to prepare your kitchen sink. Give it a quick rinse to clear out any remnants or debris. This isn’t just about soaking dishes; it’s about creating a clean space for them to rest in.
Next, fill your sink with hot water. You want it hot enough to loosen grime, but not so hot that it damages delicate items. Then, with just a drop or two of dish soap, you create a mild, soapy solution. This isn’t about creating mountains of suds; it’s more about setting the stage for a gentle, overnight soak.
Now, introduce your dishes to their nightly spa. Submerge your utensils, plates, and even the stubborn pots and pans. If your sink is full or unavailable, a large basin can work just as well. The key here is to let every item enjoy the warm, soapy bath.
As you head off to bed, the magic begins. The combination of the warm water and the soap starts to break down oils, food particles, and all that grime that seemed like it would need a good scrubbing. It’s a bit like those cooking shows where everything’s prepped and ready — only this time, it’s with cleaning.
Come morning, return to your kitchen and witness the transformation. Most of the grime and food will have either loosened up or floated away. What you’re left with is a sink full of dishes that need nothing more than a quick scrub and rinse. No more laborious scrubbing, no more dreading the pile of dishes. For anything that’s still clinging on, a sprinkle of baking soda can work wonders, gently coaxing off any remaining bits.
5. Shower Spray Ritual
Grab your spray bottle filled with your daily shower cleaner. This could be a store-bought cleaner specifically designed for showers, or you could go the DIY route with a mixture of water, vinegar, and a dash of dish soap. The choice is yours, based on what you prefer for your bathroom surfaces and what smells good to you.
Now, give your shower a quick, but thorough, spritz. Start from the top and work your way down, covering the walls, door, and tub or shower floor. The idea is to coat the surfaces lightly, allowing the cleaner to work its magic. This solution helps break down soap scum, oils, and mildew that tend to build up over time.
What’s great about this ritual is that it’s quick and easy. There’s no need for scrubbing or rinsing off the cleaner. Just spray and walk away. The cleaner will do its job, keeping your shower surfaces cleaner for longer. This means when it’s time for your regular bathroom cleaning routine, the shower won’t need that much elbow grease.
6. Dishwasher Delights
Let’s start with the variety of items your dishwasher can handle. You might be surprised to find that many household objects are dishwasher-safe. For instance, plastic toys, toothbrush holders, soap dishes, and even glass light fixture globes can be given a thorough clean in your dishwasher. The key is to ensure that these items are dishwasher-safe to avoid any meltdowns or damages.
Think about those small, often overlooked items around your house that gather dust and grime. Instead of spending time scrubbing them by hand, just pop them in the dishwasher. Place smaller items in the cutlery basket to prevent them from slipping through the racks. For larger items, like light fixture globes, make sure they’re securely placed on the top rack where the washing is a bit gentler.
Now, a word of caution: make sure that what you’re placing in your dishwasher is indeed safe to be washed this way. Avoid anything that could be damaged by heat or water pressure, like delicate glassware or items with electronic components. It’s always better to check the manufacturer’s instructions if you’re unsure.
7. Microwave Steam Clean
Here’s how you can turn your microwave from grimy to gleaming with just a lemon and some water. First, grab a lemon – any lemon will do. Slice it up and place the slices in a microwave-safe bowl filled with water. The lemon not only adds a natural, fresh scent but its citric acid is great for cutting through grease and dried-on food particles.
Once your lemon slices are happily floating in the bowl, place it in the microwave. Set your microwave for about three minutes, or long enough to get the water boiling and the steam rolling. As the lemon-infused steam fills the microwave, it works its magic, loosening the grime and softening any stubborn splatters stuck to the walls and ceiling of your microwave.
After the timer goes off, don’t open the microwave door right away. Let the bowl sit inside for a few more minutes. This allows the steam to continue working on the grime, and it makes the cleaning process even easier. It’s like a mini spa session for your microwave, where the steam does all the hard work for you.
When you finally open the microwave, be careful as the bowl and the water will be hot. Remove the bowl with oven mitts or a towel. Now comes the satisfying part. Take a cloth or sponge – you could even use a microfiber cloth – and simply wipe down the inside of the microwave. You’ll find that the splatters and grime come off effortlessly, thanks to the steamy lemon treatment.
8. Bed Sheet Swap in a Snap
Start by picking out a spare set of bed sheets. This set is going to be your secret weapon for quick changes. The idea is to have this set readily accessible, so you’re not rummaging through closets or drawers when it’s time to change your sheets.
Now, here’s the key part: store this spare set right under your mattress. It’s a surprisingly convenient and space-saving spot. By keeping the sheets here, they stay flat, relatively wrinkle-free, and are literally at arm’s reach. This means, when it’s time to switch sheets, you’re already halfway there. No more hunting for where you last stored them, and no more procrastinating because it feels like too much of a hassle to get started.
When the day comes to change your sheets, it’s as simple as stripping off the used set and then reaching under your mattress for the fresh set. It’s an almost seamless transition. Put on the fresh sheets, and then, here’s a tip: take the used set, wash them, and once they’re dry, fold them and place them under the mattress. This way, you’re always one step ahead, and you always have a fresh set ready to go.
9. The Power of Baking Soda
First, let’s talk about why baking soda is so effective. This humble kitchen ingredient is a natural odor absorber. It doesn’t just mask unpleasant smells; it actually neutralizes them. This makes it an excellent choice for dealing with a variety of household odors.
Now, onto the method. It’s wonderfully straightforward. Start by identifying the smelly area – this could be a spot on the carpet where your pet likes to nap, a musty-smelling sofa cushion, or even a mattress that’s absorbed odors over time.
Take your box of baking soda and generously sprinkle it over the affected area. You don’t need a thick layer, just enough to cover the spot. The goal is to have the baking soda penetrate the surface fibers and start working on neutralizing any odors.
After you’ve sprinkled the baking soda, it’s time to let it sit and do its magic. About 15 minutes should be enough for most odors, but if you’re dealing with something particularly stubborn, you can leave it for a couple of hours or even overnight. The longer the baking soda sits, the more time it has to absorb odors.
Once the waiting period is over, it’s time to clean up. Take your vacuum cleaner and thoroughly vacuum the area where you applied the baking soda. Make sure to go over it a few times to ensure all the baking soda is removed. If you’re working on a mattress or upholstery, you might want to use a brush attachment to gently loosen the baking soda from the fibers.
10. Robotic Cleaning Buddies
The beauty of robotic vacuums lies in their simplicity and effectiveness. Once you’ve got your hands on one of these gadgets, the setup is usually quite straightforward. Charge it up, and with a few button presses, your robotic buddy is ready to embark on its cleaning journey.
One of the coolest things about these vacuums is their ‘set and forget’ nature. You can program them to clean at specific times – say, when you’re at work or running errands. Imagine leaving a slightly messy home and returning to immaculately clean floors. That’s the kind of convenience a robotic vacuum offers.
These devices are equipped with sensors that help them navigate around your home, avoiding obstacles like furniture, stairs, and loose items on the floor. Some models are even smart enough to map out your home’s layout for more efficient cleaning. They can handle various surfaces, from hardwood floors to carpets, making them versatile cleaning tools.
Another great feature is their ability to dock themselves. Once their battery runs low or they’ve completed their cleaning cycle, these vacuums will return to their charging station. This means they’re always ready for their next cleaning session, and you don’t have to worry about charging them manually.
For those with pets, robotic vacuums are a godsend. They can pick up pet hair and dander daily, helping to keep allergens and fur accumulation under control. This makes for a healthier and more comfortable living environment, especially for allergy sufferers.
Cleaning Hacks for an Easy and Better Quality of Life
Keeping a clean and tidy home doesn’t have to be a daunting task, even for the busiest professionals. By incorporating simple yet effective hacks like the Microwave Steam Clean, the Overnight Sink Soak, or the magic of Baking Soda, you can maintain a fresh and inviting space with minimal effort. These tips are not just about cleaning; they’re about smart, time-efficient practices that make your daily routine smoother and your living environment more enjoyable. From the convenience of Robotic Cleaning Buddies to the quick Bed Sheet Swap, each hack is designed to fit seamlessly into your busy life, proving that a clean home and a packed schedule can indeed go hand in hand.
However, there are times when you might need a bit more than just a quick hack. Maybe it’s a deep clean, a special occasion, or you simply deserve a break from the chores. That’s where Toronto Shine Cleaning comes in. With a range of professional cleaning services tailored to your needs, from regular household cleaning to deep-cleaning and office cleaning, they take the stress out of maintaining a pristine home or workspace. Their team of experienced professionals ensures that every nook and cranny is attended to, leaving your space not just clean, but deeply refreshed.
So, while these cleaning hacks are great for everyday upkeep, remember that it’s okay to seek professional help for those more demanding cleaning tasks. Whether it’s a one-time deep clean or a regular service to keep your home in top shape, Toronto Shine Cleaning has got you covered. Embrace the ease of these cleaning hacks for your daily routine and know that for everything else, Toronto Shine Cleaning is just a click away, ready to bring their expertise and attention to detail right to your doorstep. After all, everyone deserves a clean, serene space to call home.