Blog

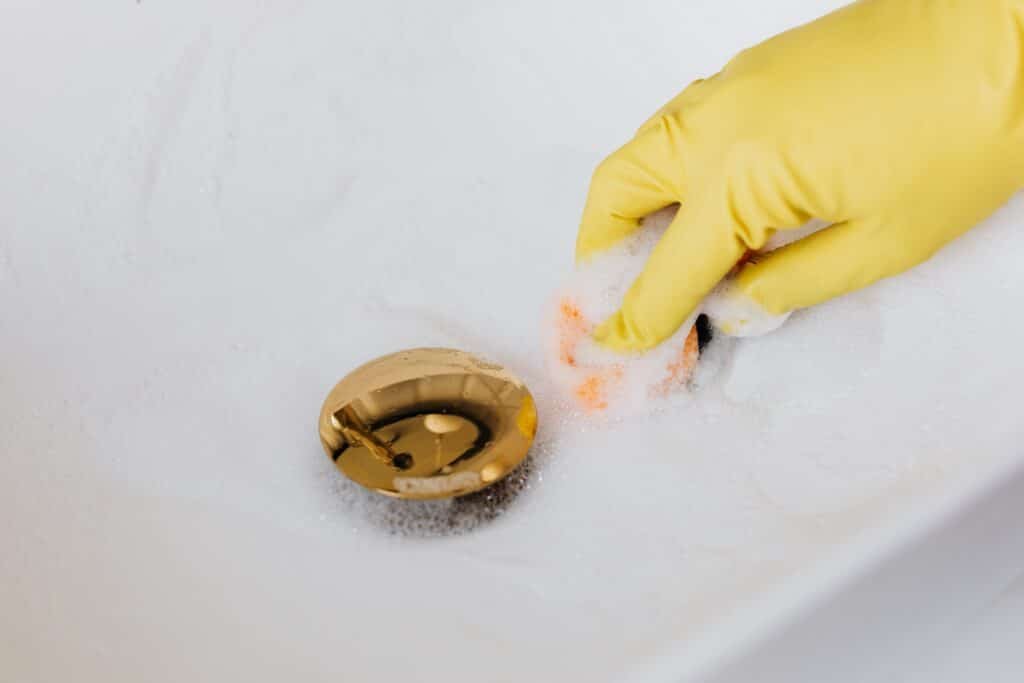
Drain being cleaned, yellow cleaning gloves, foam

Easy Drain Change: DIY Cleaning and Maintenance for Your Sink

Hey there! Let’s dive into the world of DIY Drain Change, specifically focusing on that all-important task – changing and cleaning your drain. Trust me, it’s easier than you think and can save you a lot of hassle (and maybe even a call to the plumber!). So, grab your rubber gloves, and let’s get started! Why Bother with DIY Drain Maintenance? You’re probably thinking, “Why should I fiddle with the drain when I can easily call a professional?” I get it, but hear me out. Tackling drain maintenance yourself is not just about fixing a current issue. It’s about being proactive. Regular maintenance of your sink drain can prevent those dreaded clogs that sneak up on you at the least convenient times. Think about it – no more standing water in the sink when you’re rushing to get dishes done. But it’s not just about clogs. Regularly cleaning and maintaining your sink drain reduces wear and tear. This means your plumbing stays in better shape longer, saving you money in the long run. Plus, let’s not forget about odors. A well-maintained drain means a fresher-smelling kitchen or bathroom, and who doesn’t want that? Beyond the practical benefits, there’s something satisfying about rolling up your sleeves and taking care of your home. It’s empowering to know you can handle these tasks yourself. Plus, it’s a great skill to have – you never know when it’ll come in handy. Whether it’s a simple clean-up or a full drain change, DIY maintenance gives you a sense of accomplishment. You’re not just a homeowner; you’re a home caretaker, and there’s something genuinely rewarding about that. Tools You’ll Need Plunger: Always handy for minor clogs. Pipe Wrench or Pliers: For those tighter fittings. Drain Snake or Wire Hanger: Perfect for fishing out debris. Bucket: To catch any water or gunk. Rubber Gloves: Keep those hands clean! Baking Soda OR Vinegar: The dynamic duo for natural cleaning.   Step-by-Step Guide to Changing Your Sink Drain When it comes to changing your sink drain, it may seem like a task reserved for the pros, but with the right approach, it’s definitely something you can handle yourself. Here’s a more detailed walk-through of each step: Turn Off the Water: This is your first and most crucial step. Before you even touch the drain, ensure the water supply is off. This step is all about safety and preventing any unexpected water flow while you’re working. Locate the valves under your sink and turn them off – this is usually a simple twist. Remove the Old Drain: Next up, it’s time to remove the old drain. This is where your tools come into play. Grab your wrench or pliers, and gently loosen the fittings that hold the drain in place. It’s important to be patient and careful here to avoid damaging your sink. Once everything is loose, lift out the old drain. You might find this step a bit tricky if the old drain is stubborn, but with a bit of elbow grease, it’ll come right out. Clean the Area: Now that the old drain is out, you’ll probably notice some gunk or residue around the sink opening. This is the perfect time to clean it up. Take a cloth and some cleaning solution – you can even use that trusty baking soda and vinegar mix – and thoroughly clean around the area. This ensures that your new drain has a clean, smooth surface to adhere to. Install the New Drain: Here’s where things get a bit more technical, but don’t worry, it’s nothing you can’t handle. Start by applying plumber’s putty around the new drain – this helps create a watertight seal. Then, place the drain into the opening in your sink. From below, you’ll need to tighten it to secure it in place. This might require a bit of contorting under the sink, but think of it as part of the DIY adventure. Reconnect and Test: You’re almost there! Reconnect any pipes that were disconnected during the process. Once everything is snugly in place, it’s time to turn the water back on and test your handiwork. Turn on the tap and watch the water flow. What you’re looking for here is a smooth drain and no leaks. If everything looks good, congratulations – you’ve just successfully changed your sink drain! Through these steps, you not only fix a potential problem but also gain a deeper understanding of how your home works. It’s a great feeling to know you can rely on your own two hands to keep your home in tip-top shape. Cleaning and Unclogging Your Drain Unclogging and cleaning your drain doesn’t always require harsh chemicals or professional help. Here’s a revised approach that swaps out the boiling water solution for something different, yet just as effective: The Plunger Method: Begin with the simplest tool – the plunger. It’s often the most immediate and effective way to deal with a clogged sink. Ensure enough water in the sink to cover the plunger’s head, creating the necessary suction. Press down firmly and then pull up sharply. Repeat this action several times. The pressure created by this movement can dislodge most minor clogs, making the plunger an invaluable tool in your DIY plumbing arsenal. Salt, Baking Soda, and Warm Water: Replace the boiling water with a more gentle warm water solution. Start by mixing half a cup of salt with half a cup of baking soda. This combination creates an abrasive mixture that can break down gunk and grime. Pour this mixture down the clogged drain. Follow it with about two liters of warm water. The warmth helps to dissolve any residues, and the salt and baking soda work together to scrub away the clog. This method is particularly effective for maintenance and for unclogging drains that don’t respond to plunging. Using a Drain Snake or Wire Hanger: For those stubborn clogs that resist other methods, it’s time to get physical. Use a drain snake or a straightened

Easy Drain Change: DIY Cleaning and Maintenance for Your Sink Read More »

Warm and confortable winter, book, christmas

How to Master Winter Cleaning: Essential Tips for a Warm and Welcoming Home

How to Master Winter Cleaning: Tips for a Warm and Welcoming Home Winter brings muddy boots, extra layers, snow day chaos, and far more hours spent indoors. You do not have to put your cleaning routine into hibernation just because it is cold outside. With a few clever strategies, your home can stay as inviting as a warm hug all season. Why Winter Cleaning Matters More Than You Think Winter cleaning is not about tidiness for its own sake. It is about creating a sanctuary where you can escape the cold and actually relax. With windows sealed and everyone indoors, a routine also keeps germs and dust from quietly building up: fewer sick days and a space that feels warm instead of closed in. Start the Season with a Deep Clean The best way to get ahead of winter is one thorough deep clean before the cold fully settles in. Focus on the rooms that carry the season: kitchen, bathrooms, and living spaces. Then hit the spots a normal wipe down skips, because that is where winter grime hides. Under and behind furniture, where dust layers build unnoticed Tops of cabinets and high shelves and corners of rooms Behind appliances, which collect crumbs and pet hair all year Baseboards, doors, and window sills that trap tracked-in dirt If a whole-home scrub feels overwhelming, a professional deep cleaning service handles it fastest; ours start at $270.38 for a studio or 1BR and run to $527.63 for a 4BR, before HST, listed on our pricing page. Build a Regular Schedule You Can Keep Consistency beats heroics. A routine stops chores piling into an overwhelming weekend marathon by splitting work into bite-sized chunks: dusting on Monday, vacuuming on Wednesday, laundry on Sunday. Tailor it to your house; a busy kitchen may need a five minute daily tidy while quieter rooms only need a weekly pass. Day Winter task Minutes Monday Dust surfaces, frames, and reachable corners 20 Wednesday Vacuum entryway, halls, and high traffic rooms 25 Friday Mop kitchen and bathroom floors, wipe appliance handles 20 Sunday Laundry, mail sorting, and a clutter sweep 30 Focus on High Traffic Areas Winter dirt follows the footpaths, so spend effort where boots land. The entrance is your first line of defense: sweep, vacuum, or mop it often, and place a sturdy doormat both outside and inside the door. The living room collects crumbs, pet hair, and dust on coffee tables and media consoles, so a daily quick pass keeps it welcoming. In the kitchen, wipe counters daily, handle spills immediately, and never ignore appliance fronts and handles. Don’t Forget the Windows Clean windows do double duty in winter: they let in more of the season’s scarce natural light, which brightens mood and makes rooms feel warmer, and washing them gives you a chance to inspect. Look for drafts around frames, which signal insulation problems that push up heating bills, and for condensation trapped between panes, a sign of seal failure worth catching early. Use a squeegee or microfiber cloth with a gentle solution and clean both sides. If weather or upper floors make the exterior unsafe, leave that to professionals. Declutter Before the Cabin Fever Sets In More time indoors means mail, magazines, and toys multiply on every surface. Handle mail the moment it arrives, sorting into urgent, later, and recycling. Give reading materials one basket and clear it weekly. For toys, labeled bins and a designated play zone make pickup faster. Clear surfaces also mean dusting and vacuuming take half the time. Protect Your Floors and Your Air Snow, salt, and grit are hard on finishes. Use the dual mat system at every entrance, a scraping mat outside and an absorbent mat inside, and ask everyone to remove shoes at the door. Vacuum and mop regularly to lift the salt that sneaks past, use a cleaner suited to your flooring type so you do not strip finishes, and dry wood floors well after mopping. Sealed windows also trap airborne dust, so air care belongs on the winter list. Dust and vacuum often with a HEPA filter vacuum that captures dander and pollen, run an air purifier sized for your most used room, and change forced-air heating filters before they clog. Counter dry indoor air with a humidifier to ease scratchy throats and static; because damp problem zones invite growth, the CDC mold health guidance is a useful reference for keeping humidity sensible rather than excessive. Choose Products Wisely for Closed-Up Homes With less ventilation in winter, harsh chemical fumes hit harder. Eco-friendly, non-toxic products clean effectively while being gentler on skin, eyes, and airways, which matters in homes with kids, pets, or asthma. Pantry options like vinegar, baking soda, and lemon tackle many tasks for pennies. Match products to surfaces regardless; what suits tile can damage a hardwood finish, and Health Canada’s household chemical safety resources explain label precautions worth following. Handle the Post-Holiday Reset When the festivities end, clean decorations before storage: dust ornaments, wipe decor, and make sure everything is dry. Pack in clear, labeled bins, use wreath containers and ornament dividers for fragile pieces, and wind lights on a reel or cardboard so they never tangle again. Then book a regular cleaning visit to reset the house while you keep the cocoa. Plan for Cozy Finish by layering warmth. Soft, golden light from table lamps, string lights, or dimmers makes rooms feel snugger than overhead brightness. Candles in cinnamon, vanilla, or pine add calm and scent. Fleece, velvet, and chunky knit throws and cushions bring texture and literal warmth to the spaces you just cleaned. Winter Cleaning FAQ How often should I clean during winter? Aim for small daily touches in the kitchen and entryway, a short scheduled task a few times a week, and one fuller session on weekends. That rhythm stops salt, dust, and clutter from compounding and keeps occasional deep cleans short. Why do my windows get condensation in winter? Warm indoor air meets cold glass and

How to Master Winter Cleaning: Essential Tips for a Warm and Welcoming Home Read More »

DIY cleaning with spray and cloth

Regular Cleaning: 6 Tips on How to Maintain a Sparkling Home Easily

Regular Cleaning: How to Maintain a Sparkling Home Easily Tired of weekends disappearing into chores? Regular cleaning is the answer, and it is simpler than it looks. Think of it as basic maintenance, like brushing your teeth: small habits that prevent the big, daunting mess. Here are six proven tips, and when to hand the routine to regular cleaning services. What Regular Cleaning Actually Means Regular cleaning covers the recurring basics: dusting, vacuuming, mopping, wiping surfaces, and tidying. It is more than running a vacuum once a week; it means keeping surfaces free of dust and grime, floors clean, clutter contained, and out-of-sight zones like under beds and atop cabinets in the rotation. Stay current and the occasional deep clean becomes a quick refresh instead of a months-long recovery. It is also health work, not vanity. Dust and crumbs attract pests and hurt air quality, and everyday buildup is a common trigger for allergies and breathing irritation; the CDC asthma resources explain how a low-dust home eases symptoms. There is a mental payoff too: a clean, orderly space lowers background stress, and a set schedule makes the whole system self-sustaining. Tip 1: Create a Cleaning Schedule Divide and conquer. Break tasks into slots so each gets attention without everything colliding into one marathon. Dedicate Monday to dusting surfaces, frames, and reachable corners, Tuesday to vacuuming, and so on. Then bend the plan to your energy: if you are freshest early in the week, schedule bathroom scrubbing and mopping then, and save light tidying for when you are tired. Consistency turns tasks into habits, and habits keep a home sparkling with almost no willpower. A sample weekly rhythm Day Focus Realistic time Monday Dust shelves, frames, and edges 20 minutes Tuesday Vacuum floors, rugs, and upholstery 25 minutes Wednesday Bathroom wipe down and mirror polish 15 minutes Thursday Kitchen surfaces, sink, and appliance fronts 15 minutes Friday Mop hard floors and tidy entryway 20 minutes Weekend Declutter sweep and laundry 30 minutes Tip 2: Declutter with the Five-Minute Rule Fewer items mean fewer things to clean around, and less visual noise. The Five-Minute Rule makes decluttering painless: each day, spend just five minutes on one small zone, a drawer, a countertop section, a shelf. Sort into keep, toss, and donate. Anyone can find five minutes, and you will be surprised what clears in that window. Over weeks the effect compounds, and dusting goes faster when surfaces are already clear. Tip 3: Invest in the Right Tools The right gear cuts time, not just effort. Microfiber cloths: trap dust and dirt better than traditional rags, work dry or damp, and leave surfaces residue free and streak free. A quality vacuum: modern models with attachments reach under furniture and along baseboards, and HEPA filtration captures fine particles that stir up allergies. A floor-matched mop: for homes with lots of hard flooring, a good mop and bucket or a steam mop is invaluable. Compact multi-function tools: ideal for smaller spaces with limited storage. Quality tools cost a little upfront, save money and frustration long term, and make cleaning pleasant enough that you keep the routine. Tip 4: Tidy as You Go Small habits beat big sessions. Make your bed each morning; one act instantly neats the room and sets the tone. Wash dishes right after use instead of letting piles grow. Put things back where they belong the moment you are done. Use dead time cleverly: wipe the counters while the coffee brews, clear the table and sweep crumbs after meals. This works best as a household effort; even young kids can pick up toys or help set the table, spreading the load and teaching life skills. Tip 5: Don’t Forget the Small Stuff The difference between clean and truly clean lives in the details. Touch points, doorknobs, light switches, remote controls, and appliance handles, get handled constantly and collect germs, so wipe them on a regular cycle with a disinfectant; the CDC cleaning and disinfecting guidance helps you decide what to clean versus disinfect. Then the quiet dust traps: room corners, baseboards, tops of doors, windowsills, and picture frames, plus behind and under furniture. An extendable duster and a vacuum nozzle attachment make these areas a two minute job instead of a scavenger hunt. Tip 6: Lean on Natural Cleaning Products Vinegar, baking soda, and lemon carry a shocking amount of the workload, cheaply and without harsh fumes. Vinegar: its acidity cuts grease, removes soap scum and hard water deposits, and cleans glass; diluted with water it becomes a capable all-purpose spray for counters and ceramic tile, and citrus peels or essential oils can infuse it for scent and power. Baking soda: a gentle abrasive for tough stains, grout, and polishing metal; combined with vinegar it helps unclog drains, and as a natural deodorizer it freshens carpets, upholstery, and refrigerators. Lemon juice: natural antibacterial and antiseptic properties for kitchen surfaces, plus stain treating, metal polishing, and brightening laundry whites. Natural options also reduce the risk of skin and respiratory irritation, a real plus in homes with children and pets, and Health Canada’s household products guidance covers safe storage and labeling even for gentler cleaners. When to Hire It Out Six good tips still assume you have the hours. If the schedule keeps slipping, professional maintenance is the honest fix. Toronto Shine Cleaning visits start at $212.63 for a studio or 1BR, $273 for a 2BR, and $327 for a 3BR before HST, with every rate on our pricing page, and a full deep clean available when you want to reset everything at once. We are bonded and insured, with a $1,000,000 policy and $10,000 accidental breakage and surety bond. Regular Cleaning FAQ How long does regular cleaning take each day? With the rhythm above, expect 15 to 30 focused minutes plus five minutes of decluttering. The point is frequency over duration: short daily touches prevent the Saturday marathon entirely, and once habits land, most tasks happen almost mindlessly. Is regular cleaning the

Regular Cleaning: 6 Tips on How to Maintain a Sparkling Home Easily Read More »

Cleaning with blue cleaning gloves furnitures, deep cleaning

New Build, New Clean: How to Tackle Post-Construction Cleaning Like a Pro

New Build, New Clean: How to Tackle Post-Construction Cleaning Like a Pro Congratulations on your new build or renovation. The dust has settled and the last step before enjoying your space is post-construction cleaning. This is not your typical tidy-up. It requires thoroughness and the right approach to remove all traces of construction debris, dust, and residues. A proper post-construction clean transforms your space from a work zone into a healthy, move-in-ready home. What Is Post-Construction Cleaning? Post-construction cleaning is a deep clean that removes all remnants of building work. This includes sawdust, drywall dust, paint splatters, adhesive residue, and debris like nails and screws. Beyond aesthetics, this cleaning is essential for health and safety. Construction dust can linger in the air and irritate respiratory systems, while chemical residues from paints and sealants need proper removal. If moisture from construction is left unchecked, mold can develop in hidden areas. Fine particles can also damage HVAC systems if they circulate through the home. Phase 1: The Rough Clean Start by removing large debris such as wood scraps, drywall chunks, and packaging materials. Wear protective gear including gloves, a mask (N95 recommended), and safety glasses. Use a heavy-duty vacuum with a HEPA filter to capture fine dust from floors, walls, and surfaces. A regular household vacuum will not cut it for this stage because construction dust is finer and denser than everyday household dust. Empty the vacuum frequently to maintain suction power. Remove all protective plastic sheeting and tape from floors, windows, and fixtures. This phase prepares the space for detailed work. Phase 2: The Detailed Clean Wipe down every surface including walls, countertops, windowsills, and cabinets. Construction dust settles on vertical surfaces just as much as horizontal ones. Use a damp microfiber cloth to capture dust without spreading it. Pay special attention to baseboards, window tracks, and corners where dust accumulates. Each flooring type needs specific care: hardwood requires gentle dust removal with a soft mop, tile needs streak-free cleaning with a neutral pH cleaner, and carpets benefit from steam cleaning to extract deep particles. Clean inside cabinets, closets, and behind fixtures where construction dust settles. Remove sawdust from electrical outlets, switch plates, and light fixtures. Indoor air quality can improve significantly when construction residues are thoroughly removed. Phase 3: The Final Polish Do a room-by-room walkthrough to spot missed smudges, paint flecks, or dusty corners. Clean windows and mirrors until streak-free using a quality glass cleaner and lint-free cloth. Perform a final vacuum and mop to capture any residual particles that settled during the detailed clean. This finishing stage transforms a space from construction site to move-in ready home. Touch up baseboards and door frames where cleaning may have revealed hidden dust. Check all vents and registers one last time. Phase Tasks Tools Needed Rough Clean Remove debris, vacuum dust HEPA vacuum, gloves, mask Detailed Clean Wipe surfaces, scrub grout, clean tracks Microfiber cloths, scrub brushes Final Polish Windows, mirrors, floor finishing Glass cleaner, mop, lint-free cloths Why Hire Professionals for Post-Construction Cleaning? Professional cleaners bring industrial-grade vacuums, steam cleaners, and specialized solutions that most homeowners do not own. They are trained to handle hazardous materials safely and know exactly where construction dust hides. A pro team can complete in one day what might take you an entire weekend. They also handle proper disposal of construction waste and know which cleaning agents work on each surface type without causing damage. Professional deep cleaning services ensure every surface is safe and spotless. DIY Tips for Post-Construction Cleaning Invest in a HEPA-filter vacuum for fine particle removal Use microfiber mops and cloths to trap dust instead of pushing it Break the work into manageable stages one room at a time Wear N95 masks, gloves, and safety goggles throughout Be patient and plan to go over areas multiple times Change vacuum filters partway through the job Frequently Asked Questions How long does post-construction cleaning take? For a standard condo or home, expect 4-8 hours. Large homes may take a full day or more. Do I need to clean before the post-construction team arrives? No, professional post-construction cleaners are equipped to handle every stage from rough debris removal to final polish. Is post-construction cleaning included in standard move-in cleaning? No. Post-construction cleaning is more intensive and requires different equipment. Move-in/out cleaning covers general household soiling, while post-construction targets builder residue. Can I move in right after post-construction cleaning? Yes. Once the cleaning is complete and all residues are removed, the space is safe and ready for occupancy. Post-construction cleaning is the final step in making your new space feel like home. If the job feels too big to tackle alone, trust the team at Toronto Shine Cleaning. We provide move-in/out cleaning and deep cleaning tailored to your needs. Check our pricing and call (647) 424-0355 to schedule your post-construction clean today.

New Build, New Clean: How to Tackle Post-Construction Cleaning Like a Pro Read More »

Professional vacuuming in home office setup.

How to Transform Your Space with Turn-Over Cleaning: A Step-by-Step Guide for Spotless Results

How to Transform Your Space with Turn-Over Cleaning: A Step-by-Step Guide Turn-over cleaning is the reset that happens between guests: the full clean that takes a rental suite, guest room, or Airbnb unit from just-vacated to ready-to-welcome. Done well, it is invisible; every guest simply finds a space that feels fresh and cared for. Done poorly, it shows up in reviews. This guide walks through the professional sequence, room by room, so your next turn-over is fast, thorough, and stress free. What Turn-Over Cleaning Actually Means A turn-over is more than a tidy up. It is a complete reset of a lived-in space: linens changed, kitchen and bathroom sanitized, floors redone, and every surface a guest will touch brought back to day-one condition. The window is usually tight, sometimes just a few hours between check-out and check-in, which is exactly why a repeatable checklist matters. With a system, you never stand in the middle of the unit wondering what comes next. Why Bother with a Real Turn-Over First impressions set the tone for an entire stay, and cleanliness is the first thing guests notice, before the view or the coffee machine. It is also the detail guests mention most in reviews, so consistent turn-overs protect your ratings directly. There is a health angle too: shared spaces pass germs easily, and health authorities recommend cleaning surfaces first and then disinfecting, which is the sequence the CDC’s clean and disinfect guidance lays out for high touch areas. Step 1: Plan and Prep Before You Start Build a checklist for the specific unit and keep a copy in the property, on paper or on your phone. Gather your supplies in one caddy so nothing sends you hunting mid-clean: microfiber cloths, sponges, an all-purpose cleaner, glass cleaner, a duster, a toilet brush, and trash bags. Wear gloves, and if you plan to use bleach-based disinfectants, read the label first; the CDC’s bleach safety page covers ventilation and the combinations to avoid. Budget your time per room before you begin. Step 2: Declutter Everything First Walk the unit and collect anything guests left behind: chargers in drawers, snacks in cabinets, socks under the bed. Empty every trash can, including bathroom bins, and replace liners. Tidy drawers and closets so they close the way a guest expects to find them, and sweep under the bed, the classic lost-sock zone. Decluttering first means the cleaning that follows never has to stop and restart around someone’s abandoned suitcase. Step 3: Dust from the Top Down Gravity is your coworker: start with ceiling fans, light fixtures, and shelves so falling dust lands on surfaces you have not cleaned yet, then work down to counters, baseboards, window sills, and door frames. Get the corners, the tops of picture frames, and the space behind appliances where dust settles quietly. Finish with the doorknobs and handles, which will get a second pass during disinfecting anyway. Step 4: Deep Dive the Kitchen and Bathroom These two rooms decide most reviews, so give them the full treatment. In the kitchen, wipe the appliances inside and out: the fridge shelves, the microwave, the kettle, the coffee maker. Clean the sink until it shines and clear the drain area completely. In the bathroom, the toilet, sink, and shower are the three benchmarks every guest checks. Scrub each properly, polish the mirror and fixtures, and lay out fresh toilet paper within easy reach. Step 5: Floors and Linens Last With surfaces done, sweep or vacuum every floor, then mop hard surfaces and let them dry while you handle linens. Strip and replace all bedding, from sheets to duvet covers, and set out fresh bath towels, hand towels, and face cloths. Fresh linens are both a hygiene requirement and one of the strongest signals of a cared-for space, so never try to stretch a set to a second guest. Step 6: The Guest-Ready Walkthrough Final touches turn a clean unit into a welcome: fluff the pillows, fold the towel corners, set the welcome note where it cannot be missed. Before you leave, do one walkthrough starting at the front door and moving through the space exactly as a guest would. Everything you would notice in a hotel, they will notice too. Between guests, pay special attention to the touch points everyone shares: Doorknobs and handles, entry to bathroom Light switches and lamp bases TV remotes and game controllers Faucet handles and toilet flush buttons Kettle, coffee maker, and fridge handles Room Non-Negotiables Before Check-In Kitchen Appliances inside and out, sink shining, dishes put away, trash emptied Bathroom Toilet, sink, shower scrubbed, mirror polished, fresh towels and toilet paper Bedroom Fresh linens, under-bed swept, surfaces dusted, closets tidy Living area Floors redone, cushions straightened, remotes wiped, decor aligned Turn-Over Cleaning FAQs How long does a turn-over clean take? It depends on the size of the unit and how the last guests left it. A studio with a good system is often done in an hour or two; larger multi-bedroom units take proportionally longer. Professional teams with a fixed checklist move faster because nothing gets revisited. How is a turn-over different from regular cleaning? A regular clean maintains a home you live in on a schedule. A turn-over rebuilds a like-new condition for a stranger arriving within hours, which adds linen changes, full sanitizing, and a hotel-style presentation standard on a deadline. Should linens really be changed after every single guest? Yes. It is the hygiene baseline guests assume, and protecting that assumption is what earns five star mentions for cleanliness. A spare, sealed set per bed keeps the turn-over fast even on back-to-back bookings. When does it make sense to hire professionals? When you manage more than one property, host back-to-back bookings, or simply want the guarantee of a hotel standard every time. A team turns the turn-over from a scramble into a scheduled, reliable service. Book the Reset, Skip the Scramble Toronto Shine Cleaning handles turn-overs across the city with the same checklist discipline described above. For

How to Transform Your Space with Turn-Over Cleaning: A Step-by-Step Guide for Spotless Results Read More »

Cleaning something with spray, wearing blue cleaning gloves

How to Easy Mitigate Health Risks by Cleaning Your House

How to Mitigate Health Risks by Cleaning Your House A spotless-looking home can still be quietly unhealthy. The risks that matter most, dust mites, bacteria on your sponge, mold creeping behind furniture, are exactly the ones you cannot see. Cleaning is not just curb appeal; it is one of the most practical things you do for your family’s health. This guide breaks down what is really living in your home, where to focus, and how to clean safely while doing it. The Lowdown on Germs and Dust Dust is not simple dirt. It is a mixture of dead skin cells, hair, pet dander, and even tiny plastic particles, and within it live dust mites: microscopic critters that settle into bedding, carpets, and upholstery and drive allergies and breathing problems for many people. Meanwhile, germs hide in plain sight on the things you touch daily. In the kitchen, sponges, cutting boards, and faucet handles serve as prime real estate for E. coli and salmonella, so the very places where you prepare meals and wash your hands can quietly spread illness if ignored. Why Regular Cleaning Matters Busting dust and allergens Treat dust mites and pet dander like uninvited performers causing a respiratory ruckus. Frequent dusting and vacuuming, especially where dust settles: bedding, carpets, upholstered furniture, shows those allergens the exit and helps everyone breathe easier. Households managing asthma benefit the most; the CDC asthma page outlines how controlling indoor triggers reduces symptoms. Keeping germs at bay Kitchens and bathrooms are the dense cities of the germ world. Raw meat, fresh produce, shared utensils, and personal hygiene routines all leave microbes behind, and without a routine, those rooms become breeding grounds. Scrubbing countertops, sanitizing sinks, and disinfecting toilets is not vanity; it is an illness-prevention measure. Tackling high-touch areas Every touch on a doorknob, light switch, or remote can deposit or pick up germs, making these surfaces highways for transmission between household members. Regular wipes with a proper disinfectant put up a barrier. Phones and tablets belong on the list too: they travel from bathroom to kitchen to public spaces and back, yet almost nobody cleans them. The CDC guidance on when and how to clean and disinfect your home is a good frequency benchmark, and hand washing after touching shared surfaces remains the simplest defense of all. Your Home’s Germ Hotspots Hotspot What lurks there Clean it Kitchen sponge and cutting boards E. coli, salmonella from raw food Daily disinfect, replace sponges often Doorknobs, switches, remotes Germs passed hand to hand Wipe several times weekly Phones and tablets Everything from pockets and public spaces Gentle disinfect wipe daily Bedding and upholstered furniture Dust mites, pet dander Vacuum weekly, wash linens hot and often Bathroom faucet handles and toilet Hygiene-related bacteria Scrub and sanitize weekly at minimum The Deep Clean Difference Routine tidying handles surfaces; deep cleaning handles the long game. It reaches the overlooked zones, under furniture, high shelves, behind appliances, where time builds up mold, mildew, and deep-seated grime. Mold is not merely ugly: it is notorious for triggering respiratory issues and allergic reactions, and left unchecked can contribute to more severe problems, which is why the CDC mold health guidance treats moisture and cleanup as health matters. Deep cleaning also clears the mental static: dirt and clutter quietly raise stress, and a thorough reset leaves your home feeling like a sanctuary, not a source of pressure. Clean Safely: Protect Yourself While You Scrub Cleaning should not harm you. Many conventional products contain harsh chemicals, so follow the basics every time: Wear gloves to prevent skin irritation and allergic reactions Ventilate well: open windows or run fans when using strong products, since fumes concentrate indoors Keep children and pets away from wet surfaces and stored chemicals, as pets are often more sensitive Consider natural alternatives like vinegar for grease and soap scum, baking soda as a gentle abrasive that will not scratch, and lemon for its fresh cleaning power and scent, all effective, inexpensive, and already in your pantry Read labels before mixing anything: Health Canada’s household chemical safety information covers the risks of combining products When to Call the Pros Some jobs deserve a team: whole-home deep cleans, large spaces, or simply a calendar with no room. Professional cleaners bring real advantages over DIY. Expertise and efficiency: trained methods for different soils and surfaces, with a full day of your work done in a fraction of the time using advanced equipment. Deep clean guarantee: sanitizing and disinfecting into crevices regular cleaning misses, lifting home air quality with it. Customized plans: one-time resets, ongoing maintenance, or focused kitchen and bathroom work. Peace of mind: no worrying about technique, hard areas, or effort. Toronto Shine Cleaning brings all four, fully bonded and insured with a $1,000,000 policy plus a $10,000 accidental breakage and surety bond. Deep cleans start at $270.38 for a studio or 1BR and run to $527.63 for a 4BR before HST, and ongoing regular cleaning keeps results from slipping between visits; see the full pricing page or book a deep clean directly. Health-Focused Cleaning FAQ How often should I disinfect high-touch surfaces? Several times a week as a baseline, daily during cold and flu season in your household, and immediately after someone is ill. Focus on doorknobs, switches, remotes, appliance handles, faucets, and phones, and clean visibly dirty surfaces with soap or detergent before disinfecting. Can dust really affect my health? Yes. Beyond irritation, dust carries mite allergens, dander, and fine particles that worsen allergies and asthma. Regular damp dusting, vacuuming with a HEPA filter, and washing bedding on a schedule measurably reduce the indoor allergen load. Are homemade cleaners safe for disinfecting? Vinegar, baking soda, and lemon are excellent cleaners and deodorizers, but they do not reliably disinfect. For illness prevention, disinfect high-touch areas with an approved product used exactly as the label directs, and ventilate while you work. Do professional cleanings improve indoor air? Meaningfully, yes, because they remove the reservoirs that keep recycling dust

How to Easy Mitigate Health Risks by Cleaning Your House Read More »

Cleaning, cloth, hand - Hand holding a cloth cleaning an item

Regular Cleaning VS Deep Cleaning: What’s The Difference?

Regular Cleaning VS Deep Cleaning: What’s The Difference? Many homeowners wonder what separates regular cleaning from deep cleaning. Both are essential for a healthy home, but they serve different purposes. Understanding the difference helps you choose the right service for your home in Toronto or anywhere in the GTA. Regular cleaning maintains daily order while deep cleaning resets your home from accumulated grime. Each service plays a distinct role in keeping your home clean, healthy, and comfortable throughout the year. What Is Regular Cleaning? Regular cleaning is the maintenance routine that keeps your home tidy week to week. It focuses on visible surfaces and high-traffic areas. Tasks include dusting furniture, vacuuming floors, wiping countertops, cleaning sinks and toilets, and making beds. Regular cleaning prevents dirt from building up and keeps your home comfortable for daily life. The CDC recommends regular cleaning to remove most germs from household surfaces. A weekly regular clean takes about one to two hours for a typical home. It covers the tasks that keep your home presentable for everyday living and unexpected guests. Think of it as the daily hygiene routine for your living space, much like brushing your teeth for your own health. Consistent regular cleaning also makes deep clean sessions faster and less intensive because dirt has less time to accumulate. What Is Deep Cleaning? Deep cleaning is an intensive, thorough clean that reaches areas regular cleaning misses. It includes cleaning ceiling fans, baseboards, window tracks, inside appliances, grout and tile, behind furniture, and under appliances. Deep cleaning removes built-up grime, allergens, and dust from hard-to-reach places. It improves indoor air quality and extends the life of your surfaces and appliances. A deep clean can take three to eight hours depending on your home size. It targets the areas where dust and allergens accumulate over months, such as the top of refrigerator coils, behind the toilet, and inside oven cavities. After a deep clean, your home feels noticeably fresher and surfaces look renewed. Using the right cleaning products safely is important during deep cleaning, since you will be working with stronger solutions on grout, ovens, and tile. Key Differences at a Glance Aspect Regular Cleaning Deep Cleaning Frequency Weekly or bi-weekly Monthly, quarterly, or seasonally Time per session 1-2 hours 3-8 hours depending on home size Focus areas Visible surfaces, floors, bathrooms, kitchen counters Baseboards, window tracks, grout, inside appliances, behind furniture Cost Lower, more frequent Higher, less frequent investment When to Choose Regular Cleaning Choose regular cleaning if you have a busy schedule and need consistent upkeep. It is ideal for maintaining a presentable home between deeper sessions. Regular cleaning services are affordable and keep your space guest-ready at all times. Regular cleaning prevents small messes from becoming big problems. When you wipe down surfaces weekly, you reduce the buildup of grease, soap scum, and dust that would otherwise require hours of scrubbing later. Regular cleaning also ensures that high-traffic areas like entryways and kitchens remain sanitary between deep clean sessions. It is the most cost-effective way to keep your home looking its best every day. When to Choose Deep Cleaning Deep cleaning is right for seasonal refreshes, before or after hosting events, when allergies flare up, or when moving into a new home. Professional deep cleaning targets allergens and deeply embedded dirt that regular cleaning cannot reach. It also prepares your home for special occasions and improves overall hygiene. If you notice dust accumulating on baseboards within days of dusting, or if the grout in your shower looks dull, it is time for a deep clean. Deep cleaning also addresses odors caused by trapped dirt and moisture in carpets, upholstery, and behind appliances, leaving your home smelling genuinely fresh. Regular cleaning maintains daily order and prevents mess buildup Deep cleaning resets the home and addresses neglected areas Both services are important for a well-maintained home The right choice depends on your schedule, budget, and needs Frequently Asked Questions Can I do deep cleaning myself? Yes, but it requires time, specialized tools, and thorough effort. Professional services save hours and deliver deeper results. How often should I deep clean my home? Most homes benefit from deep cleaning once per season. Homes with pets or allergies may need it more often. Do I need regular cleaning if I get deep cleaning? Yes. Regular cleaning keeps your home tidy between deep cleans and prevents deep dirt buildup, making each deep clean easier. What does deep cleaning include that regular cleaning does not? Deep cleaning covers baseboards, inside appliances, window tracks, ceiling fans, grout, blinds, and behind large furniture. Both regular and deep cleaning play vital roles in home maintenance. Combining both services ensures your home stays healthy and beautiful year-round. Toronto Shine Cleaning offers transparent pricing for both services. See why customers trust us across the GTA. Call (647) 424-0355 to schedule your service today.

Regular Cleaning VS Deep Cleaning: What’s The Difference? Read More »

Jar, Money, Tip

How Much Do You Tip a Cleaner in Toronto? Easy Learning

How Much Do You Tip a Cleaner in Toronto? Bringing a cleaner into your home is an act of trust and an investment in time, energy, and a space that feels just right. When the crew packs up and every surface gleams, the question naturally arises: should you tip, and if so, how much? Tipping norms in Toronto are not always obvious, but a few clear guidelines can take the guesswork out of showing your appreciation in a way that feels fair and respectful. The Standard Tip Rate for Cleaners in Toronto The general range for tipping a cleaner in Toronto falls between 10% and 20% of the service cost. For regular maintenance visits, where the crew handles a familiar layout with predictable effort, a tip around 10% of the total works well. For a deep cleaning session, move-in or move-out project, or any assignment that involves extra effort, heavy lifting, or tough grime, the higher end of the range is appropriate. A one-time deep clean generally merits a larger tip because of the intensity of labor. First-time service tips, while not required, are a thoughtful gesture that helps build a positive relationship from the start. Tip Amounts by Situation Situation Common tip range Why it varies Regular weekly service Around 10% per visit Lower effort, consistent routine Deep cleaning or special requests 15-20% Labor-intensive, tough grime, sometimes extra time First-time booking Optional, around 10-15% Establishes a good working relationship Holiday or year-end Larger than usual bonus Annual appreciation, often replaces a few regular tips Cash or Digital: What Works Best Cash remains the most straightforward option because it goes directly into the cleaner’s pocket without processing delays or fees. Many cleaning companies also offer electronic tipping through booking apps, direct online transfer, or the option to add the tip to the original payment. If you are unsure, ask the company or the cleaner directly about their preference. In Canada, tips and gratuities are considered taxable income that the recipient must report to the Canada Revenue Agency. The CRA provides guidance on tracking and reporting tips with clear documentation requirements, and the CRA also explains how tips affect CPP and EI contributions for both employees and employers. Other Ways to Show Appreciation Tipping is not the only way to let a cleaner know their work is valued. Many homeowners also build goodwill through: A handwritten thank-you note left on the counter Referrals to friends, family, or coworkers looking for cleaning help Flexible scheduling that accommodates the cleaner’s calendar Offering coffee, tea, or a cold drink during the visit Providing preferred cleaning supplies if the cleaner mentions a favorite product Leaving positive feedback and reviews on the Toronto Shine Cleaning reviews page A small seasonal gift, such as a gift card or baked treats, around the holidays Tipping Etiquette Quick Tips Consistency simplifies the arrangement. If you tip the same percentage each visit, the cleaner knows what to expect and can count on it. For regular clients, a larger holiday tip or a small seasonal bonus can replace the per-visit gratuity if that feels more natural. If the service falls short, address the issue with the company rather than withholding the tip; management values feedback and can correct the problem. Exceptional service, whether it is an emergency clean before guests arrive or going the extra mile on a stubborn stain, justifies moving toward the higher end of the standard range. Tips for Cleaners FAQ Is tipping mandatory for cleaning services in Toronto? Tipping is never mandatory, but it is a standard way to show appreciation for good work. Most clients offer between 10% and 20% for a job well done. Should I tip the same amount every visit? Consistency is appreciated. If the service level stays the same, keep the tip steady. Increase it when the cleaner handles extra tasks, deep cleaning, or arrives on very short notice. How do I handle tipping if the company says no cash tips? Some companies prefer electronic gratuities through their booking platform or direct transfer. Ask the company what they allow, and the cleaner will still receive the full amount through their preferred channel. What is a good holiday tip for a cleaner? A common approach is to give the equivalent of one or two extra visits as a year-end bonus. This replaces the regular tips for the holiday period and shows appreciation for the year’s work. Cleanings Worth Every Penny and Then Some Tipping your house cleaner is a small gesture with a big impact. It acknowledges the physical effort that goes into making your home shine and strengthens the working relationship over the long term. Whether you stick with the standard 10% for regular maintenance or bump it up for a deep clean, the key is finding a system that feels right for both you and the crew. See current base rates on our house cleaning pricing page, explore our regular maid cleaning plans, or call (647) 424-0355 to schedule a service that will have you happy to tip well, every single time.

How Much Do You Tip a Cleaner in Toronto? Easy Learning Read More »

house cleaning service toronto

How Much Does a Deep Cleaning Cost in Toronto?

Deep Cleaning Costs in Toronto: What to Expect If you are searching for deep cleaning costs in Toronto, the honest answer is that the price depends on your home. A deep clean is a different job from a regular tidy-up: cleaners reach behind appliances, scrub grout, degrease the kitchen, and dust every surface from ceiling to baseboard. For most Toronto homes, professional deep cleaning falls into predictable ranges based mainly on the size of the space, and Toronto Shine Cleaning publishes current house cleaning prices so you know what to expect before you book. Typical Deep Cleaning Prices by Home Size Home size Typical price range What the job includes Small apartment (studio or 1 bedroom) From CAD $270.38 Full dusting, kitchen and bathroom deep clean, floors, baseboards Medium-sized home (2 bedrooms) From CAD $393.75 All of the above, plus more rooms, closets, and high-traffic surfaces Larger home (3 bedrooms) From CAD $441 Entire home top to bottom, multiple bathrooms, stairs, and large kitchens Large property (4+ bedrooms, multiple levels) From CAD $527.63 Whole-home deep clean, multiple bathrooms, stairs, and large kitchens These figures are typical ranges for the Toronto area, not fixed quotes. Your exact price is confirmed after the size, condition, and specific needs of your home are reviewed. For a precise number, request a deep cleaning estimate from Toronto Shine Cleaning. What Drives the Price of a Deep Clean? Four main factors move the cost up or down: Size of your space. Cleaning a studio apartment takes far less time than a three-story house. Larger homes mean more rooms, more nooks and crannies, and more furniture and appliances to work around. Condition of the property. A well-maintained home cleans quickly. If surfaces have built-up grime, stubborn stains, or spots that have not seen a duster in months, expect extra time and a higher price. Specific requirements. Pet hair removal, high shelves, intricate light fixtures, and antique furniture all need special care that can add to the cost. Frequency of cleaning. One-off deep cleans cost more per visit than scheduled recurring cleans, which cleaning companies often discount for regular customers. Why a Professional Deep Clean Is Worth the Investment Deep cleaning is about more than looks. Dust, allergens, pet dander, and unseen germs accumulate in every home over time, and they can trigger allergies and respiratory problems, especially for children and older family members. A thorough clean reaches the hard-to-reach places, removes dust and mildew risks, and sanitizes surfaces, which leads to better indoor air quality. The EPA’s guide to indoor air quality explains how regular vacuuming, dusting, and moisture control keep allergens such as dust mites and pet dander from building up in the first place. There is a financial side too. Regular deep cleaning prevents the build-up of grime and dirt that slowly damages surfaces, furnishings, and fixtures. Preserving your carpets, appliances, walls, and floors means fewer hefty repair or replacement bills down the line. On top of that, coming home to a spotless, fresh, and organized space is a genuine stress reliever, and a clean home tends to stay that way because it inspires better daily habits. The National Institute of Environmental Health Sciences notes that household allergens hide in carpets, bedding, and upholstery, which is exactly where a deep clean earns its keep. How to Get an Accurate Quote To get a realistic price, describe your home accurately: the number of bedrooms and bathrooms, the square footage, and any areas that need extra attention such as pet hair, heavy grime, or high shelves. Ask whether the company offers a discount for recurring visits. If you simply need upkeep between deep cleans, regular maid cleaning keeps daily dirt in check so deep cleans stay faster and more affordable. If you are moving, move-in and move-out cleaning follows its own price structure, and moisture problems such as mould or mildew should be mentioned up front, because the EPA recommends fixing moisture sources before cleaning can fully succeed. Frequently Asked Questions About Deep Cleaning Costs in Toronto How much does deep cleaning cost for a small apartment in Toronto? For a studio or one-bedroom apartment, deep cleaning typically ranges between CAD $100 and $200. The exact price depends on the condition of the unit and any extras such as pet hair removal or appliance cleaning. Why does deep cleaning cost more than regular cleaning? Deep cleaning is more labour-intensive. Cleaners move furniture, scrub grout and tiles, degrease the kitchen, clean inside appliances, and dust every surface top to bottom, which takes significantly more time and specialized effort than a standard maintenance clean. Does the condition of my home affect the price? Yes. A well-maintained home can be cleaned quickly, while built-up grime, stubborn stains, or neglected areas require extra elbow grease and time. That extra work is reflected in the final quote. Do recurring deep cleaning bookings cost less per visit? Often, yes. Cleaning companies commonly offer better rates to customers who schedule deep cleaning on a regular basis, such as monthly or quarterly, because the work stays manageable and the schedule is predictable. Deep cleaning is an investment in your home’s comfort, health, and value. Use the ranges above to budget, and contact Toronto Shine Cleaning for a quote tailored to your space.

How Much Does a Deep Cleaning Cost in Toronto? Read More »

Timer

How Long Does it Take To Deep Clean A House?

How Long Does it Take To Deep Clean A House? If you are planning a deep clean, the first question is usually how long it will take. The answer depends on your home size, its current condition, and the level of detail you want. Understanding the time commitment helps you plan effectively or decide whether to call the professionals. A deep clean is a significant investment of time, but the results are transformative. Your home will look, smell, and feel like a fresh new space after a thorough deep cleaning session. Knowing what to expect helps you schedule your day and avoid frustration. What Is Deep Cleaning? Deep cleaning goes far beyond everyday tidying. It targets the areas that regular cleaning skips: baseboards, ceiling fans, window tracks, inside cabinets and appliances, behind furniture, and tile grout. Deep cleaning improves indoor air quality by removing allergens and deeply embedded dust. The CDC explains that cleaning removes most germs and dirt from surfaces, and deep cleaning takes this principle to every corner of your home. Unlike regular cleaning, deep cleaning addresses the accumulation of weeks or months in one thorough session. It reaches hidden areas like behind the refrigerator, under the sofa, and inside oven cavities that routine cleaning never touches. Average Time Estimates by Home Size Home Size Estimated Time Key Factors Small apartment (1-2 BR) 3-4 hours Less square footage, fewer rooms Medium house (3-4 BR) 4-8 hours Multiple bathrooms, more surfaces Large house (5+ BR) 8-12+ hours Extra rooms, stairs, basement Factors That Affect Deep Cleaning Time Current condition. A home that receives regular cleaning will deep clean faster than one that has not been thoroughly cleaned in months. Built-up grime and stains require extra scrubbing time. If you maintain a regular cleaning schedule, the deep clean takes significantly less time because dirt has not had months to accumulate. A weekly routine of surface cleaning keeps the deep clean focused on hard-to-reach areas rather than removing layers of built-up grime. Homes maintained with weekly cleaning can often complete a deep clean in half the time of neglected homes. Level of detail. Deep cleaning tasks like scrubbing grout, washing windows inside and out, and cleaning behind appliances all add time. The more detail you want, the longer each room takes. Some homeowners prefer a basic deep clean that hits the major areas, while others want every baseboard, blind, and light fixture done. A detailed deep clean that includes washing curtains, scrubbing grout lines, and polishing all hardware will take substantially longer than a standard deep clean. The choice is yours based on your standards and goals. Number of occupants. More people mean more belongings to work around and potentially more mess. Homes with children or pets typically need extra time because of higher traffic and more frequent staining. A family of four will naturally generate more deep cleaning work than a single occupant. Pet hair, muddy footprints, and sticky fingerprints all add to the cleaning burden and require additional attention. Help available. Cleaning alone takes longer. With two or three people working together, you can cut the time by half. Professional teams typically work in pairs and complete the job much faster because each person specializes in different tasks. Washing hands regularly during cleaning also helps prevent spreading dirt between surfaces and keeps the process hygienic. Hiring professionals is often the fastest and most reliable route to a thoroughly deep cleaned home. Tips to Speed Up Deep Cleaning Declutter each room before you start cleaning to reduce obstacles Work top to bottom and left to right for maximum efficiency Use a caddy to carry all supplies between rooms Set a timer for each task or room to stay on track Listen to music or a podcast to maintain momentum Keep up with regular cleaning to reduce deep cleaning time Open windows for ventilation while you work Frequently Asked Questions How often should I deep clean my house? Most homes benefit from a deep clean every 3-6 months. Homes with allergies, pets, or smokers may need it more frequently. Can I deep clean a whole house in one day? A small to medium home can be deep cleaned in one full day. Large homes may need two days or a professional crew. What happens if I skip deep cleaning? Dust, allergens, and grime accumulate over time, which can worsen indoor air quality and cause wear on surfaces and appliances. Is it worth hiring a deep cleaning service? Professional teams complete the job in a fraction of the time with industrial equipment. Toronto Shine Cleaning’s deep cleaning service handles everything from ceiling to floor. Deep cleaning is a significant time commitment, but the result is a healthier, fresher home. Check our pricing and read customer reviews. Call (647) 424-0355 to book your deep clean today.

How Long Does it Take To Deep Clean A House? Read More »