Blog

Easy Cleaning for Airbnb: DIY vs. Hiring a Cleaning Service in Toronto

Cleaning for Airbnb: DIY vs. Hiring a Cleaning Service in Toronto A clean Airbnb listing is not a nice-to-have, it is the single factor that most directly drives reviews, booking rates, and revenue. Toronto hosts face the same choice as everyone in the short-term rental space: handle the turnover cleaning yourself or hand it to a professional crew. Both paths work, but the right fit depends on the number of listings, the pace of bookings, and the level of polish you want your guests to experience. The DIY Route: Control and Cost Savings, but at a Price Cleaning your own Airbnb gives you total control. You decide the products, the order of work, and the finishing touches that match your personal standards. There is no coordination with an outside schedule, and the cost is zero in the sense that every hour you put in is time you do not pay someone else for. For a single listing with a moderate booking calendar and a host who lives nearby, DIY turnover can work well. The downsides start to show when bookings stack up. A same-day checkout and check-in leaves a narrow window to strip the bedding, clean every surface, restock supplies, launder linens, and inspect the property before the next guest arrives. A second overlapping booking, a travel delay, or a personal commitment can collapse that window entirely, and the result is a rushed clean or, worse, a negative review that hurts future bookings. The Professional Route: Consistency, Speed, and Scalability Hiring a professional cleaning service provides a fundamentally different level of consistency. Guests expect hotel-grade cleanliness, and a trained crew brings the tools, techniques, and systems to deliver it every turnover. Professional cleaners approach the work with a standardized checklist that covers high-touch surfaces, floors, linens, and the often-overlooked spots DIY hosts miss. The CDC emphasizes cleaning high-touch surfaces regularly with household cleaner before disinfecting, and this systematic approach is what professional turnover cleaning replicates visit after visit. For hosts with multiple listings or a high booking volume, the scaling advantage is decisive. A crew handles several properties across the city on the same day while the owner focuses on guest communication, pricing strategy, and expanding the portfolio. The cost is a direct expense, but it pays for itself through higher ratings, more bookings, and the ability to charge a premium nightly rate. DIY vs. Professional Cleaning for Airbnb Factor DIY cleaning Professional service Upfront cost Low (your time only) Higher per turnover Consistency Varies with your schedule and energy Standardized, repeatable every visit Scalability Hard once you have more than one listing Handles multiple properties seamlessly Time commitment 2-4 hours per turnover None beyond booking the appointment Guest impression Depends on your thoroughness that day Reliably hotel-ready How to Choose for Your Toronto Listing One quiet listing, you live nearby, you enjoy the process: DIY makes sense. Set aside a block of time for each turnover and keep your standards high. Back-to-back bookings or same-day turnover: The risk of a rushed clean is too high. A pro service guarantees the unit is ready on time. You plan to grow into multiple properties: Start with a professional service early so you build a relationship and a system before volume becomes unmanageable. Your reviews currently mention cleaning inconsistencies: A switch to professional cleaning is the fastest fix. Guests notice the difference immediately. Tech That Makes Airbnb Turnover Smoother Beyond the cleaning itself, modern technology can streamline the whole turnover process. Automated messaging platforms send guests Wi-Fi codes, house rules, and check-out instructions the moment they book. Smart locks let cleaners enter without a key handoff, and a quick calendar sync across booking platforms prevents double bookings. Some hosts also use robot vacuums to maintain floors between professional visits. Health Canada reminds everyone to store cleaning products safely, especially in homes where guests or children may access them, so keep supplies in a locked cabinet that only you and your cleaning crew can reach. Airbnb Cleaning FAQ Is professional cleaning worth it for a single Airbnb listing? Yes, if you have same-day turnovers, travel frequently, or want the reliability that drives five-star reviews. Many single-listing hosts find the cost is covered by the higher nightly rate they can charge. What is the difference between turnover cleaning and a regular maid service? Turnover cleaning is a focused, fast reset between guests covering linens, high-touch surfaces, floors, and bathrooms. Regular maid cleaning is a deeper, broader service for ongoing maintenance, and many hosts schedule a deep clean monthly to supplement turnovers. Can a cleaning service follow my specific Airbnb checklist? Most professional services accept a host’s written checklist. Toronto Shine Cleaning customizes its approach to each property, aligning with your house rules and guest expectations. How do I keep cleaning costs predictable for my Airbnb? Book a flat-rate turnover service and schedule deep cleans periodically. Compare rates on our pricing page and check what other Toronto hosts say on our reviews page. Five-Star Ready, Every Turnover Whether you handle the cleaning yourself or bring in a professional crew, consistency is the key to a successful Toronto Airbnb. Five-star reviews come from guests who walk into a spotless space that smells fresh, feels clean, and shows that someone cared about every detail. Toronto Shine Cleaning covers the entire GTA with bonded, insured crews trained in Airbnb turnover cleaning. Call (647) 424-0355 or reach out online today, and discover how much easier hosting becomes when the cleaning is the part you never have to think about.

Easy Cleaning for Airbnb: DIY vs. Hiring a Cleaning Service in Toronto Read More »

broom, wood floor, sweeping, bucket

How Much Does Deep Cleaning Cost in Canada?

How Much Does Deep Cleaning Cost in Canada? Most Canadian households pay somewhere between CAD 100 and CAD 400 or more for a professional deep clean, but the honest answer is that the final number depends on the size of your home, its condition, your city, and the work you ask for. This guide breaks down realistic price ranges, the five factors that move the number up or down, and how a flat-rate quote compares with a ballpark estimate, so you can budget for a whole-home reset without surprises. What Does a Deep Clean Actually Include? A deep clean goes well beyond surface tidying, especially in kitchens and bathrooms, the rooms most prone to dirt and bacteria buildup. Crews scrub tile, clean behind appliances, and descale faucets and showerheads. The insides of ovens, refrigerators, and dishwashers get attention they rarely receive between routine visits. Windows are washed inside and out, and blinds, curtains, and window sills are cared for as well. Floors get intensive work rather than a quick sweep: thorough mopping, deep carpet cleaning, and attention to corners and the spaces under furniture. Dusting targets spots regular cleaning skips, such as high shelves, ceiling fans, and the tops of door frames, and walls are wiped down to lift dust, fingerprints, and marks. For the difference between a reset visit and routine upkeep, see our regular maid service page, and follow the CDC’s guidance on when and how to clean and disinfect your home. Five Factors That Influence Deep Cleaning Costs Size of the space. A spacious four-bedroom house takes far more time than a cozy studio, so larger layouts cost more. Current condition. A regularly maintained home needs a touch-up, while a neglected one needs extra tender loving care and a higher price. Location. The cost of living and doing business varies widely across Canada, so downtown Toronto carries a premium over smaller towns. Frequency. A one-time deep clean costs more per session than an ongoing schedule, which often comes with long-term discounts. Custom requests. Delicate surfaces, specific products, or special-attention areas add time and equipment. If you handle those products yourself, Health Canada’s rules for using household chemicals safely are worth reading first. Average Deep Cleaning Costs in Canada Ballpark figures for smaller spaces, such as a studio or one-bedroom apartment, sit around CAD 100 to CAD 200. For medium to large homes, such as a three-bedroom house, expect CAD 200 to CAD 400 to cover the extra area and work. Luxury or larger properties start around CAD 400 and climb from there based on size, complexity, and special requirements. Treat every one of these as an estimate, because the most accurate way to price your home is a personalized quote. The table compares the national ballparks with the flat, before-HST rates on our pricing page. Property type Typical Canadian estimate Toronto Shine deep clean, before HST Studio or 1 bedroom CAD 100 to CAD 200 from $270.38 3 bedroom home CAD 200 to CAD 400 $441 Luxury or 4+ bedrooms CAD 400 and up $527.63 for a 4 bedroom How Often Should You Book a Deep Clean? Cost looks far more reasonable when you spread it over the year, because a deep clean is not a weekly chore. Most Canadian homes need a full reset one or two times a year. A spring clean is the classic choice, and a pre-holiday reset is a close second. Book a fresh session whenever life creates a deadline: a renovation that leaves fine dust in every crack, a new baby arriving, a wedding or house party on the calendar, a seasonal allergy flare-up that routine dusting cannot fix, or simply the realization that the oven has not been opened in a year. Households with pets, hardwood floors, or multiple kids tend to need resets closer to every six months. Between those appointments, a scheduled maid visit keeps grime from reaching the level that drives a quote upward, which is the single most effective way to pay less per session. Why the Investment Pays Off Health and hygiene Deep cleaning targets the spots where allergens, mold, and bacteria collect: under beds, behind appliances, and inside air vents. Reaching those areas improves indoor air quality, one of the concerns Health Canada tracks in its guide to indoor air contaminants and health. For households managing allergies or respiratory issues, a reset clean can make a noticeable difference. Maintenance and peace of mind Removing built-up grime protects finishes and can prolong the life of furniture, carpets, and appliances, which means fewer repairs and replacements over time. Advanced techniques such as steam cleaning for carpets and upholstery, pressure washing for outdoor areas, and detailed hand-washing of delicate items deliver a level of clean a routine cannot match. There is also a psychological return: coming home to a deeply cleansed, orderly space reduces stress and helps you relax. Deep Cleaning Cost FAQs Is a deep clean worth the extra cost over regular cleaning? Yes, whenever your home needs work a routine visit does not cover, such as inside appliances, descaled fixtures, washed walls, and cleaned carpets. Many households pair a one-time reset with recurring visits through our deep cleaning services in Toronto and maintain the result with scheduled housekeeping. How much does deep cleaning a three-bedroom house cost? Across Canada, three-bedroom homes typically fall between CAD 200 and CAD 400. Condition and add-ons swing that number, so the final quote depends on an assessment of your actual space rather than the bedroom count alone. Does timing affect the price? It can. Move-in and move-out dates are one of the most common reasons Canadians book a deep clean, and end-of-tenancy work follows its own checklist. See our move-out cleaning service for the deposit-focused version of this reset. How do I get an exact price? Request a personalized quote that reflects the services and level of attention your home actually needs, so you pay for exactly what you need and nothing you do not. What is included

How Much Does Deep Cleaning Cost in Canada? Read More »

Corridor, cleaning, maid, vacuum machine

How Much Does a Cleaning Maid Cost in Toronto

How Much Does a Cleaning Maid Cost in Toronto It is the search everyone does eventually: staring at a weekend’s worth of chores and wondering what it would cost to hand them to a professional. In Toronto the honest answer is a range, not a number, because maid service pricing responds to the size of your space, the level of cleaning required, and how often someone comes. Here is the full breakdown, from market rate ranges to what actually changes the quote, so you can price your own home in minutes. What Regular Cleaning Costs Regular cleaning is the maintenance tier: the recurring visit that keeps a home consistently fresh. A standard visit covers: Dusting surfaces, frames, and the corners where bunnies breed Vacuuming carpets and rugs thoroughly Mopping hard floors back to a shine Cleaning and sanitizing kitchen and bathroom sinks, counters, and appliances General tidying, from making beds to organizing the magazine pile Toronto market rates for regular cleaning typically run from $100 to $250 per visit. Smaller apartments sit at the lower end, larger houses reach the top, and extras like laundry or dishwashing add to the total. Frequency matters too: weekly or bi-weekly schedules often qualify for a lower per-visit rate, because a maintained home takes less work than a catch-up one. For comparison, Toronto Shine Cleaning’s current regular base for a studio or one bedroom starts at $212.63 before HST, with every size listed on the pricing page. What Deep Cleaning Costs Deep cleaning is the reset button: everything in a regular clean plus the detail work that standard visits never reach. That includes grout and tile scrubbing, the insides of the microwave, oven, and fridge, under and behind furniture, baseboards and window sills, and ceiling fans and light fixtures. Market rates for a professional deep clean commonly start around $200 and climb with size and condition. At Toronto Shine Cleaning the deep clean base for a studio or one bedroom is $270.38 before HST, rising with bedrooms and bathrooms as listed on the pricing page, and larger homes with months of buildup take proportionally more time, which is exactly what the price reflects. Custom requests, such as eco-friendly or allergy-sensitive products, can also adjust the total. Specialized Services and Their Pricing Beyond the two standard tiers, specialized cleans are quoted individually because their scope varies so much: Move-in and move-out cleaning is the comprehensive empty-home reset: inside cabinets and drawers, behind appliances, everything the next occupant or landlord will inspect. Post-construction cleaning removes the dust, debris, and paint splatter renos leave behind, with the equipment and techniques to do it safely. Short-term rental cleaning keeps an Airbnb guest-ready between stays, and office cleaning tailors the same rigor to commercial spaces. Personalized quotes are the norm here since the price depends on property size, condition, and any specific challenges the space presents. The Four Factors That Move Every Quote Factor Effect on Price Size of the space More rooms and bathrooms mean more time at every tier Level of cleaning Regular, then deep, then specialized in ascending cost Frequency Recurring schedules reduce the per-visit rate Condition and extras Buildup, pets, and add-ons like laundry add time One-Time Visit or Ongoing Service? A one-time clean makes sense for specific moments: a spring reset, prepping for guests or an event, or catching up after a chaotic stretch. Ongoing service is the better long-term value, because each visit maintains the last one instead of fighting buildup, the crew learns your home and preferences, and per-visit pricing usually improves with commitment. If your schedule allows only the occasional clean, book the deep version, then let regular visits take over; the combined cost beats repeated catch-up cleans. What the Bonded and Insured Question Means for Price Comparing quotes is not only about the number; it is about what sits behind it. A service that is bonded and insured carries real overhead that cheap operators skip, and it protects you if anything breaks or goes missing. Toronto Shine Cleaning holds a $1,000,000 insurance policy plus a $10,000 accidental breakage and surety bond, so the safety net is explicit. Whatever provider you choose, the answer to the insurance question should be instant and specific. Maid Cost FAQs Why is there such a wide price range in Toronto? The $100 to $250 market range for regular visits reflects real differences: home size, number of bathrooms, condition, frequency, and whether supplies and insurance are included. Quoting on details is how accurate pricing works. Does the first clean cost more? Usually the first visit takes longer because the team is establishing the baseline a regular schedule then maintains. After that, each visit gets faster and the per-visit rate often drops with recurrence. Are supplies included in the price? Professional services typically bring their own pro-grade products, including eco-friendly options on request, which is part of what the rate covers. Confirm at booking if you have specific product preferences; Health Canada’s household products guidance is a good reference for what to ask about, and its chemical safety page covers what the labels of stronger agents require. Is hiring a maid cheaper than doing it myself? In hours, yes: the average deep clean can eat most of a weekend, and your time has value. The professional rate buys back those hours with a more thorough result, which is the trade most busy Toronto households are happy to make. Get Your Home Priced Properly Toronto Shine Cleaning’s rates are published, not hidden: regular housekeeping, deep cleaning, and specialized services all map to the bases on the pricing page. Call (647) 424-0355, describe your space, and get a quote that matches your home and your schedule, not a guess.

How Much Does a Cleaning Maid Cost in Toronto Read More »

Cobwebs

How to Easy Remove Cobwebs From Your Home

Hey there! Have you ever been caught off guard by cobwebs, making a surprise appearance in your home? But worry not! We’re here to tackle and remove cobwebs from every corner of your home, ensuring your space stays sparkling clean. With our easy-to-follow tips and tricks, you’ll learn how to banish these unwelcome guests from hard-to-reach places and beyond. So, let’s arm ourselves with the right tools and dive into making your home cobweb-free and welcoming for everyone. The Ultimate Guide to Removing Cobwebs from Your Home Tired of those pesky cobwebs making your place look like a haunted house? Fear not! I’ve got the ultimate guide to help you banish those dusty strands from every nook and cranny of your home. Whether you live in a cozy apartment, a spacious condo, or a lovely house, these tips will keep your living space cobweb-free and sparkling. Let’s dive in! Understanding Cobwebs: More Than Just Dusty Threads To effectively tackle cobweb removal, it’s important to first understand what cobwebs are and why they appear in our homes. Here’s a more detailed look into the world of cobwebs: What are Cobwebs? Spider Webs vs Cobwebs: It’s a common misconception that all spider webs are cobwebs. In reality, cobwebs are a specific type of spider web. They are the irregular, tangled webs that you often find in the corners of a room or in dusty, undisturbed areas. These are typically created by house spiders, particularly those from the Theridiidae family. Abandoned Structures: Unlike some spiders that live in their webs, the spiders that create cobwebs usually abandon them after a while. These webs are left to collect dust and small debris, giving them that classic, fluffy, and dusty appearance. Understanding the Life Cycle of a Cobweb Formation: The formation of a cobweb starts with a spider spinning a web to catch prey. Abandonment: Over time, if the web proves unsuccessful in capturing prey or if the spider moves to a new area, the web is abandoned. Accumulation of Dust: Once abandoned, these webs start to collect dust, pollen, and other airborne particles. This accumulation is what makes cobwebs so visible and often gives them a gray or dusty appearance.   The Role of Cobwebs in Your Home Indicator of Low Traffic Areas: The presence of cobwebs can indicate areas in your home that are less disturbed or not regularly cleaned. This might include high corners, behind furniture, and in less-used rooms like basements and attics. Allergen Accumulators: As they collect dust and other particles, cobwebs can become a source of allergens in your home. Regular cleaning of these areas is essential for maintaining good indoor air quality. Essential Tools for the Job To effectively remove cobwebs, you’ll need some basic tools. Here’s your cobweb-busting arsenal: 1. Extendable Duster Why It Rocks: This tool is a game-changer for reaching those out-of-the-way spots where cobwebs love to hang out. You know, those high corners, ceiling fans, and the tops of bookshelves where you’d normally need a ladder. Pro Tip: Look for one with a telescoping handle and a bendable head. This way, you can adjust the angle to get into those really tricky spots. Remember to gently shake it out outdoors after each use to keep it cobweb-free! 2. Vacuum Cleaner with Attachments Why It’s a Must-Have: Your vacuum isn’t just for floors! With the right attachments, like a crevice tool or a dusting brush, it becomes a cobweb-conquering hero. It’s particularly great for getting rid of webs in corners, along baseboards, and even on textured ceilings. Pro Tip: Use the soft brush attachment to avoid scratching surfaces, and the crevice tool for those tight spots. Plus, vacuuming up spiders can be more humane as they often survive the trip and can be released outside. 3. Microfiber Cloth Why You’ll Love It: After you’ve banished those webs, a microfiber cloth is perfect for dusting off any remaining bits and polishing surfaces. It’s gentle on all types of materials and traps dust effectively. Pro Tip: Dampen the cloth slightly for added dust-grabbing power. These cloths are also washable and reusable, making them an eco-friendly option. 4. Soft-Bristled Brush Why It’s Essential: In those areas where a duster might be too bulky or a vacuum too strong, a soft-bristled brush is your go-to. It’s excellent for gently sweeping away webs from delicate items like indoor plants, intricate light fixtures, and artwork. Pro Tip: Opt for a brush with natural bristles for the softest touch. Keep a separate brush exclusively for cobweb removal to avoid cross-contamination with other cleaning tasks. Step-by-Step Guide to a Cobweb-Free Home     Step 1: Start at the Top Why: Tackling the highest points first prevents cobwebs from falling onto already cleaned areas. Detailed How-To: Begin with ceilings, especially in the corners where they meet the walls, as these are prime spots for cobwebs. Gently sweep with the extendable duster, moving from one corner to the other. Don’t forget to dust off ceiling fan blades and light fixtures, as these often harbor hidden cobwebs. Step 2: Work Your Way Down Why: Cleaning from top to bottom is efficient and prevents re-cleaning. Detailed How-To: After the ceilings, focus on walls and window frames. The vacuum cleaner is particularly effective for textured walls or intricate window designs. Use the soft brush attachment to avoid scratches. Gently vacuum along the edges and corners where webs may be hiding. Step 3: Focus on Hard-to-Reach Areas Why: Cobwebs in hidden areas may go unnoticed but contribute to overall dust and allergens. Detailed How-To: Move furniture away from walls to access hidden corners. Utilize the vacuum’s crevice tool for tight spaces. Don’t overlook areas behind large appliances, under beds, and inside closets. These spots may need a more thorough inspection and cleaning with the soft-bristled brush or microfiber cloth. Step 4: Regular Maintenance Why: Consistency is key to preventing cobweb accumulation. Detailed How-To: Incorporate cobweb cleaning into your weekly or bi-weekly cleaning routine. A quick sweep with the

How to Easy Remove Cobwebs From Your Home Read More »

Sink, clean

Sink Cleaning Simplified: Easy Tips to Make Your Sink Gleam

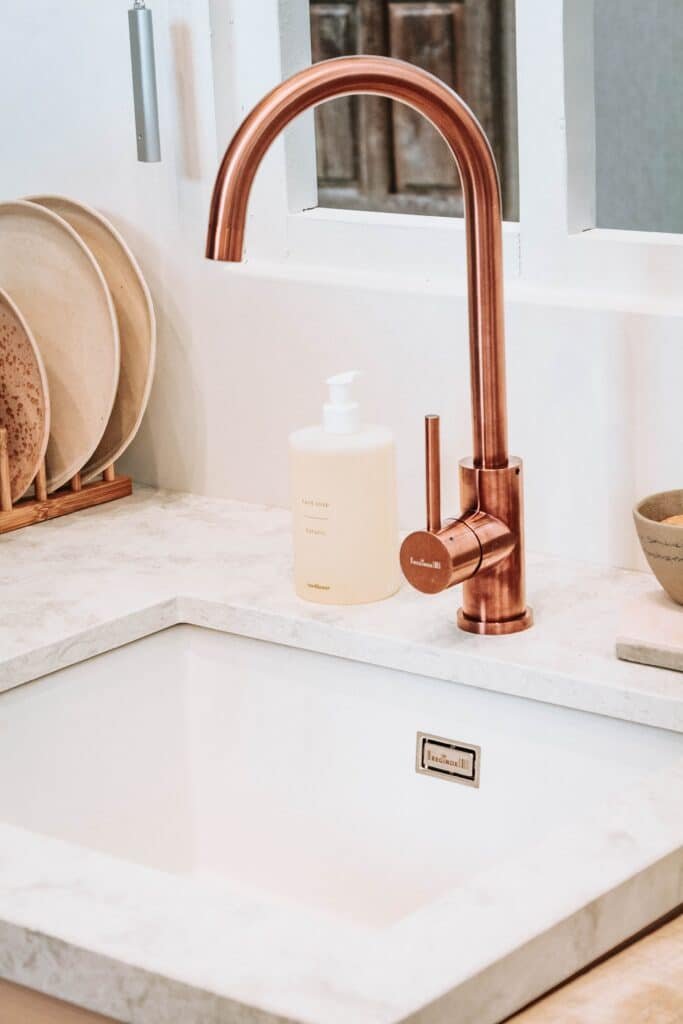
How to Clean a Kitchen Sink So It Gleams A bright, hygienic sink changes how the whole kitchen feels, and it is one of the quickest wins in your cleaning routine once you know the right order: rinse, wash, lift stains, disinfect, then dry and polish. The steps below work on stainless steel, porcelain, and composite basins, and they protect the finish while they clean. Why the Right Supplies Matter Harsh chemicals can dull or damage a sink finish, so the best kit leans on mild, natural products. Dish soap cuts everyday grease and food residue while staying gentle on the surface. Baking soda is a mild abrasive that lifts stubborn marks without scratching, and it also neutralizes odors. White vinegar brings disinfecting power plus the acidity that dissolves water spots and mineral deposits. A soft sponge or cloth handles washing, a dry cloth prevents streaks, and an old toothbrush reaches faucet bases and sink edges where grime hides. Rubber gloves keep hot water and cleaning agents off your skin, and a few drops of olive oil finish stainless steel with a polished, water-resistant sheen. Step 1: Rinse the Whole Basin Open the tap and let warm water run over the whole basin. Splash water up into the corners and around the faucet by hand or with a small cup, since a straight stream may skip those spots. This first rinse loosens debris and softens dried-on residue before soap touches anything. Step 2: Wash With Dish Soap Add a small amount of mild dish soap to your sponge or cloth; a little goes a long way. Scrub from the top of the sink downward, using circular motions, so everything you loosen falls toward the drain. Give extra attention to the drain area and the sink edges where grime collects. If your sink is stainless steel, scrub along the grain of the metal to prevent scratches. Step 3: Lift Stains With a Baking Soda Paste In a small bowl, stir baking soda with water at roughly a three to one ratio until you get a thick, spreadable paste that is neither watery nor dry. Lift some paste with a sponge, cloth, or your fingers, then press it onto the stains until they are fully covered. For stubborn spots, apply a thicker layer and let the paste work before you scrub. Step 4: Disinfect and Shine With White Vinegar Rinse the sink thoroughly with warm water first. This matters: vinegar and baking soda neutralize each other, so any paste left behind weakens both. Then soak a soft cloth in undiluted white vinegar and wipe the entire sink, including the faucet and drain area. Let it sit for a few minutes to disinfect the surface and build shine. If the smell bothers you, dilute the vinegar slightly. Step 5: Detail the Faucet With a Toothbrush Faucet bases trap grime and hard water minerals, and the buildup is worst in areas where tap water leaves spots. Dip an old toothbrush in soapy water for light jobs or in a vinegar solution for hard water stains, then scrub the base of the faucet, under the handles, and any tight corners with small circular motions. The bristles dislodge buildup that cloths and sponges cannot reach. Step 6: Final Rinse, Then Dry and Polish Give the sink one last rinse with warm water to wash away every trace of soap, vinegar, and baking soda. Leftover residue causes streaks and helps grime cling over time. Dry the basin with a soft cloth, because water droplets left to air dry leave spots, especially on stainless steel. For the finishing touch, pour a few drops of olive oil onto a cloth and buff the sink in circular motions, focusing on the most visible areas. The thin oil layer adds a mirror-like shine and repels future water marks and fingerprints. Sink Care at a Glance Task What to use Why it works Daily rinse and wipe Warm water and a soft cloth Stops food residue and soap film from building up Weekly wash Mild dish soap and a sponge Removes grease, dust, and unseen bacteria Stubborn stains Baking soda paste, roughly three to one with water Mild abrasion lifts marks without scratches Water spots and germs White vinegar on a soft cloth Dissolves minerals and disinfects the surface Stainless steel shine A few drops of olive oil Repels water spots and fingerprints Everyday Habits That Keep the Shine Clean the sink regularly so grime and bacteria never get a foothold. Keep to natural cleaners such as baking soda and vinegar so the finish stays protected. After preparing raw meat, disinfect the basin as part of your kitchen cleanup. The CDC explains when and how to clean and disinfect your home, and its food safety guidance covers kitchen surfaces that touch food. Never combine cleaning products casually, because some mixtures release dangerous fumes. Health Canada publishes household chemical safety advice worth checking before you experiment. Sink Cleaning Questions How often should I clean my kitchen sink? Rinse and wipe it daily, give it a full soap and vinegar clean weekly, and disinfect after raw meat, illness in the home, or any job that left visible grime. Regular attention keeps buildup from hardening into stains. Can I use the same method on a porcelain sink? Yes. The mild dish soap, baking soda paste, and vinegar routine is gentle enough for porcelain and other finishes, and skipping harsh chemicals is exactly what preserves the glaze. Test any stronger product in a hidden spot first. Why does my stainless steel sink still look dull after cleaning? Water droplets left to dry are usually the cause. Dry the basin immediately with a soft cloth and finish with a thin buff of olive oil; that final polish is what turns clean into gleaming. What should I do about hard water marks around the drain? Soak a cloth in white vinegar, wrap it over the spot for a few minutes, then wipe and rinse. The acidity breaks

Sink Cleaning Simplified: Easy Tips to Make Your Sink Gleam Read More »

Bathroom, clean, sink

Your Complete Guide to Clean Your Bathroom

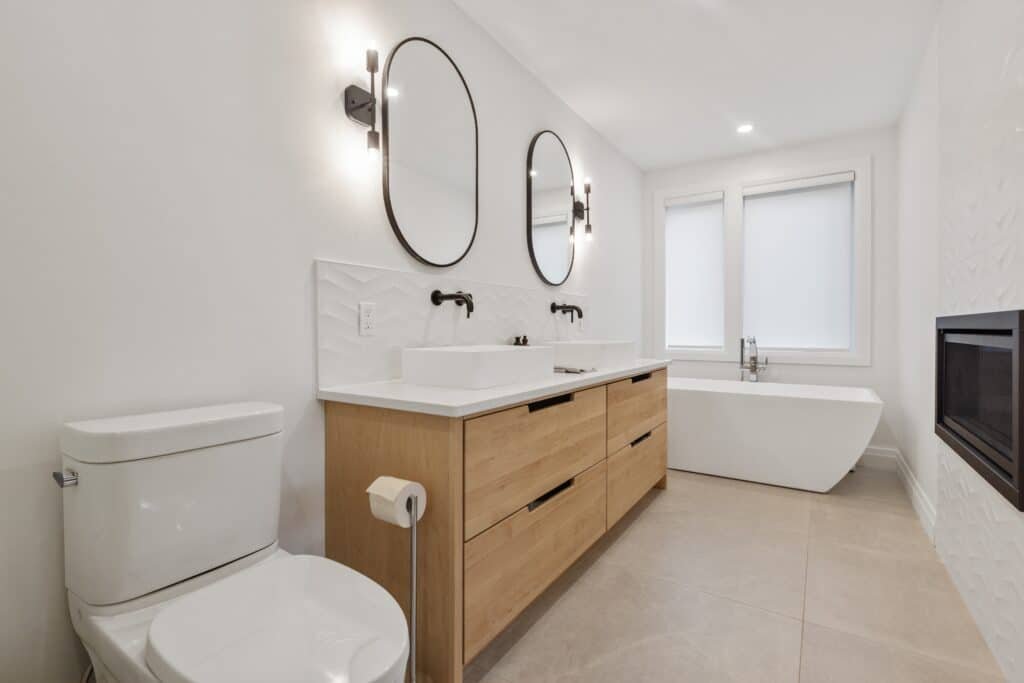
Your Complete Guide to a Bathroom That Sparkles Few rooms work harder than the bathroom, and few feel better when they are truly clean. This guide walks through one efficient top-to-bottom routine: start high, work down, and finish on the floor. The order matters, because dust you disturb overhead would otherwise land on surfaces you already wiped. Start at the Top: Ceilings, Fixtures, and Walls Working from the top stops falling dust from landing on areas you just finished. Corners and light fixtures are classic cobweb spots, so they set the tone for the whole job. Ceilings Reach high ceilings with an extendable duster or a clean, dry mop. Glide it gently across the surface, giving corners and edges extra attention where cobwebs gather. Work in sections so nothing is missed, and dampen the duster slightly to lift sticky patches. Light Fixtures Switch lights off and let fixtures cool first. From a stable step ladder, remove detachable parts, then wipe with a microfiber cloth and a gentle cleanser suited to the material. A soft-bristled brush reaches intricate shapes, and shades need attention inside and out. Walls Mix warm water with a gentle detergent and wipe the walls from top to bottom, corners and edges included. Light switches are high-contact points, so give them a careful pass. Wring the sponge well for textured wallpaper or delicate paint, which water damages easily, and rinse it often so dirt does not spread. A dry towel after each section prevents streaks, and opening a window clears the dust you disturbed and freshens the room. Mirrors and Glass: Small Effort, Big Impact Clean mirrors bounce light around the room and can make even a small bathroom feel more spacious. Smudged glass does the opposite, and it shows every fingerprint and water mark under bright lighting. For mirrors, reach for a glass cleaner or an equal-parts white vinegar and water mix plus a lint-free microfiber cloth. Wipe in circles to loosen dirt, then finish with vertical and horizontal strokes to avoid streaks. On shower doors and larger glass, a squeegee removes cleaner and water in smooth, overlapping passes from top to bottom. Hard water stains yield to vinegar or lemon juice left on for several minutes, while a soft-bristled brush handles corners and edges. Sinks, Countertops, and High-Touch Areas Bathroom sinks and counters pick up germs with every touch, and the faucet is a classic transfer point: hands that touched the toilet can leave microbes for the next person. Add toothpaste splatter, soap scum, makeup, and shaving residue, and these surfaces need regular attention before anything hardens into stains. Choose a bathroom-specific cleaner and a non-abrasive sponge so porcelain and ceramic stay scratch free, with an old toothbrush for the tight space around the faucet and drain. Mild detergent or an all-purpose cleaner is safe for most countertops, including laminate, tile, and even marble or granite, as long as it is not too acidic. A microfiber cloth removes residue without lint, then a disinfectant spray or wipe finishes the job. The CDC’s guide to cleaning and disinfecting your home explains why cleaning comes before disinfecting. Toilet, Then Tub and Shower For the toilet, apply a cleaner that fights germs and stains, or mix an eco-friendly version from baking soda and vinegar. Scrub the bowl thoroughly with a brush, including under the rim, then wipe the seat, lid, and base with a disinfectant. Spray the tub and shower with a tub and tile cleaner and give the foam several minutes to soften soap scum. Scrub the walls and basin, spend extra time on grout and crevices, rinse with the showerhead or a bucket, and dry with a clean towel to stop water spots. Finish With the Floor Floors see constant traffic plus hair, skin flakes, and dust that a moist bathroom turns into a perfect home for microbes. Sweep or vacuum first so dirt does not become muddy when you mop. Fill a bucket with warm water and a pH-neutral cleaner or mild detergent, then mop from the farthest corner back toward the door so you never tread on freshly cleaned tile. Rinse the mop and change the water as soon as it looks dirty. For grout, work a paste of baking soda and water into the lines with a small brush, give it a few minutes, then scrub and rinse. Once the floor is dry, buff glossy tiles with a soft cloth. Avoid over-wetting, since excess water can seep into seams and under baseboards, and post a wet floor sign in shared spaces. Order of Work at a Glance Step Zone Key tool 1 Ceiling, light fixtures, walls Extendable duster, microfiber cloth, gentle detergent 2 Mirrors and glass Vinegar and water spray, microfiber, squeegee 3 Sink and countertops Bathroom cleaner, non-abrasive sponge, old toothbrush 4 Toilet Toilet cleaner or baking soda and vinegar, brush 5 Tub and shower Tub and tile cleaner, scrub brush, towel 6 Floor Mop, pH-neutral cleaner, grout brush Daily Habits and Eco-Friendly Choices Wipe high-touch surfaces and dry the tub after use to slow soap scum and mildew. Keep the room ventilated so dampness does not linger; the CDC’s page on mold and health explains why moisture control matters. Reach for natural cleaners when you can, and never mix products such as bleach and vinegar or ammonia. Health Canada’s household chemical safety guidance covers safe use and storage. Clean regularly, and consider a scheduled service if the routine keeps slipping to the bottom of your list. Bathroom Cleaning Questions What is the correct order to clean a bathroom? Work top to bottom and finish with the floor: ceilings and fixtures, then mirrors and glass, sinks and counters, toilet, tub and shower, and finally the floor. Gravity carries dust downward, so this order avoids re-cleaning. How do I remove hard water stains from shower glass? Apply white vinegar or lemon juice to the spots, leave it on for several minutes, then squeegee from top to bottom. A soft-bristled brush helps in corners

Your Complete Guide to Clean Your Bathroom Read More »

cleaning kitchen rust and aplliances rusted

Battling Kitchen Rust: 7 Tips and Tricks for Keeping Your Cookware and Appliances Rust Free

Keep Your Kitchen Cookware and Appliances Rust Free Pulling a skillet from the cupboard and finding orange spots is a familiar kitchen letdown. Rust happens when iron meets oxygen and moisture, and once it starts, it spreads. The good news is that rust is manageable: a few simple habits prevent it, and three common pantry items remove it when prevention slips. What Rust Is and Why Your Kitchen Gear Gets It Rust is iron oxide. It forms through oxidation: the iron found in plenty of pots and appliances reacts with oxygen whenever water or moisture is present. In chemical shorthand, Fe plus O2 plus H2O produces Fe2O3. The reaction speeds up in wet environments, and even high humidity can start trouble. Repeated contact with water from washing and cooking raises the odds, and any scratch or chip in a protective coating leaves bare metal open to air and moisture. Prevention First: Dry, Store, and Control Humidity Dry thoroughly after every wash. Even a little lingering moisture starts the process, so wipe items down, and use a hair dryer on the cool setting for the parts a towel cannot reach. Store with paper towels. A sheet placed inside stacked cookware absorbs moisture, which matters most for cast iron. Run a dehumidifier in humid months or damp kitchens. Lower moisture in the air means rust has far less opportunity to form. Three DIY Ways to Remove Rust White Vinegar Soak The acetic acid in vinegar breaks down rust so it can be scrubbed away. Submerge the rusty item completely in white vinegar and leave it for a few hours, or overnight for heavier rust. Scrub with a non-metallic brush such as an old toothbrush, then rinse and dry immediately so fresh rust cannot form. Baking Soda Paste Baking soda is mildly abrasive, which makes it effective against rust without damaging the metal beneath. Mix it with water to form a thick paste, apply it generously over the rusted area, and let it sit for about an hour. Scrub with a brush or sponge, rinse the paste away, and dry the piece at once. The Potato Trick Potatoes contain oxalic acid, which helps dissolve rust, and pairing a raw potato with a mild abrasive works well on small spots. Slice a potato into two halves, dip the exposed flesh in dish soap or dust it with baking soda, and rub it over the rust until the marks fade. Repeat as needed, then rinse and dry. Method Cheat Sheet Method Best for Time needed White vinegar soak Heavily rusted items and thick patches A few hours, or overnight for tough rust Baking soda paste General surface rust on metal About an hour before scrubbing Potato and mild abrasive Small spots and light surface rust A few minutes of rubbing Caring for Rust-Prone Favorites Cast Iron Pans Clean the pan immediately after use and avoid soaking it in water. Dry it thoroughly, either with a towel or by resting it on the stovetop briefly so leftover damp evaporates. Then coat the surface with a thin layer of cooking oil to seal out air and damp, and store it in a dry spot. When pans get stacked, slip a paper towel in between each layer so trapped moisture is soaked up. Steel Utensils Hand wash these rather than running them through the dishwasher, dry them right away or stand them in a drying rack, and store them apart from items that could scratch them. A dry cabinet away from humid spots keeps them in good shape. Restore or Replace? The Decision Points Assess the damage: light surface rust usually cleans up, but rust that has pitted the metal and compromised it means replacement time. Weigh the value: a sentimental or costly piece may justify the restoration effort, while a cheap item is often easier to replace. Put safety first: deep rust can shelter bacteria, so such pieces may be unsuitable for preparing food. Count the effort: if removal means hours of scrubbing with an uncertain result, replacing the item may be the smarter call. Store-Bought Rust Removers: What to Look For When DIY methods are not enough, shop with four checks in mind: a kitchen-safe formula, non-toxic and environmentally friendly ingredients for anything that touches food, a track record of effectiveness without damaging the metal, and an application style you will actually use. Popular options include Bar Keepers Friend for stainless steel and other metals, CLR Calcium, Lime and Rust Remover for a range of surfaces, Evapo-Rust for a non-toxic soak that is safe for kitchen use, and WD-40 Specialist Rust Remover Soak for heavily rusted items. Follow label directions and store products carefully using Health Canada’s household chemical safety tips, and keep food safety in mind with guidance from the CDC’s food safety pages whenever an item touches food. Expert Habits for Rust-Free Kitchen Gear Professional kitchens stay ahead of rust with three habits. First, inspect regularly and act at the first sign of a spot, because early rust comes off easily while late rust does damage. Second, store smart: keep the area ventilated, tuck silica gel packs into drawers and cabinets to absorb extra moisture, and hang cookware where possible instead of stacking, which traps damp and invites scratches. Third, clean gently and dry thoroughly, using mild detergents rather than harsh chemicals, and season cast iron regularly so the baked-in oil layer keeps working as both a rust barrier and a non-stick surface. To keep a maintenance habit running across the whole house, professional regular cleaning keeps the kitchen on track. Kitchen Rust Questions Is rusted cookware safe to use? Surface rust can usually be scrubbed away and the piece returned to service, especially cast iron, which you can season again. Pitted or deeply rusted metal is a different story: it can harbor bacteria, so replacing the item is the safer choice. How long should rusty items soak in vinegar? A few hours handles light rust, and an overnight soak softens tougher patches.

Battling Kitchen Rust: 7 Tips and Tricks for Keeping Your Cookware and Appliances Rust Free Read More »

Clean and organized apartment with view

Small Apartment Cleaning and Decluttering Tips in Ajax

Small Apartment Cleaning and Decluttering in Ajax Compact living in Ajax can feel cozy and calm, or cramped and chaotic, and the difference usually comes down to two things: how much you keep and how well it is stored. The ideas below combine cleaning routines with clever decluttering moves so every square foot works harder for you. Start With an Honest Assessment Before you move a single item, walk through the apartment and note the zones that bother you most, from overflowing closets to countertops with no free surface left. Look at your storage options realistically, then write a plan that covers both how the space should look and how it should function. Group the clutter by zone, decide what stays and what goes, and keep the plan visible so small wins stay motivating. That roadmap guides every session that follows. Choose Furniture That Multi-Tasks In a small apartment, ordinary furniture wastes opportunity. Think sofa beds, coffee tables that hide clutter inside, and shelves on the wall that pull double duty as a desk. Each piece serves two purposes at once, saving floor space while adding flexibility. That matters most in studios, where one room has to be everything. Foldable chairs and tables tuck away when they are not needed, and modular pieces can be rearranged as your needs change. Ottomans, benches, and sofas with built-in compartments hide blankets and everyday items out of sight, while mirrored furniture adds a little glamour and reflects light around the room. Move Storage Up and Into the Corners When floor space runs out, build upward. Wall shelves and mounted cabinets free up valuable floor area and add visual interest, and they shine in rooms where counter space is scarce, like kitchens and baths. Door backs are another overlooked zone: hooks and over-the-door organizers hold bags, accessories, and even cleaning supplies. Look for nooks and crannies that can become a slim bookshelf or a cozy corner. Even the ceiling can work, with hanging shelves or hooks for luggage and seasonal items, and in kitchens, cabinet inserts such as tiered shelves, stacking racks, and pull-out trays make every inch count. Declutter With Rules, Not Regret Sentimental clutter is the hardest to face, so be selective: keep a few meaningful pieces and display or store them with intention, perhaps as a gallery wall of framed photos or in decorative boxes. Closets deserve the same discipline. Slim hangers, racks for shoes, and organizers for the closet multiply what fits, and a seasonal wardrobe rotation keeps the rail from drowning in off-season clothes. Do not forget the space under the bed, where storage bins can hold extra bedding, footwear, or clothing for other seasons. Give your digital life a clean sweep as well, because organizing files and inboxes frees mental space and keeps devices running efficiently. Then schedule regular decluttering sessions so nothing creeps back in unnoticed. Small Touches That Make a Room Feel Bigger Place mirrors and other light-bouncing finishes, like glass or metal, to create an illusion of space. Embrace minimalist decor with clean lines and neutral tones for a calm, cohesive look. Use light colors such as whites, creams, or pale pastels on walls and furniture to make rooms feel airy. Divide a studio with curtains or room dividers so each zone has a clear purpose. Tame cables with organizers or clips; tidy cords improve the look and make cleaning easier. Add a few indoor plants for freshness and a touch of nature without eating floor space. Choose functional decor, like baskets or stylish boxes that store as well as they display. Keep It Tidy With a Repeatable Routine Order survives on habit. Arrange furniture to keep pathways clear and make sure each piece serves a purpose, then experiment until the flow feels right for how you live. A five minute reset each evening means the weekend never turns into a rescue mission, and a brief weekly tidy plus a proper clean keeps every zone usable. A calmer, organized home supports wellbeing, as the CDC’s mental health resources note, and when cleaning day arrives, the CDC’s household cleaning and disinfecting guidance is a reliable reference. Health Canada’s household products safety page also helps you choose cleaners that are safe for a compact space. Zone-by-Zone Upgrades Zone Smart upgrade Payoff Entry Over-the-door hooks and a slim shoe rack Stops bags and footwear piling up by the door Kitchen Cabinet organizers and open shelving Frees cabinet space and keeps daily items visible Closet Space-saving hangers with a seasonal rotation Doubles usable hanging space year round Living room Storage ottoman or pouf instead of a coffee table Seating, surface, and hidden storage in one piece Bedroom Under-bed bins for bedding and off-season clothing Uses dead space without adding furniture Whole home Mirrors, light colors, and cable organizers Visual calm and a space that reads bigger Ajax Apartment Cleaning Questions How do I keep a small apartment clean when storage is tight? Declutter first so everything has a designated place, then keep sessions short and regular rather than heroic. A weekly tidy plus a monthly decluttering pass stops clutter from reaching the point where a whole weekend disappears. Is professional cleaning worth it for a studio or one bedroom? Many Ajax renters find it is. Regular cleaning starts at $212.63 for a studio or one bedroom before HST, and the hours you get back are the real value; see the full price list for details. What is the best furniture for a compact apartment? Multi-functional pieces win: sofa beds, storage ottomans, foldable tables, and modular units that adapt as your needs change. Mirrored or glass pieces add light and space without bulk. How do mirrors make a room feel bigger? They reflect light and create an illusion of depth, so a small bathroom or living room reads as more open. Keep them clean, since smudges cancel the effect. Let Toronto Shine Keep Your Place Guest Ready Toronto Shine Cleaning helps renters across Ajax and the surrounding areas keep

Small Apartment Cleaning and Decluttering Tips in Ajax Read More »

Elegant door knob

Unveiling the Best Practices High-Contact Surface Cleaning in Your Home

Hey there, fellow clean freaks! Today, we’re diving into the High-Contact Surface Cleaning. You know, the spots we all touch a zillion times a day but might not give the TLC they deserve when we’re on a cleaning spree. Let’s break down the best practices to keep these germ hubs in check and ensure our homes are not just clean, but hygienically clean. Why Focus on High-Contact Surfaces? This constant, almost invisible traffic makes high-contact surfaces hotspots for germs to hitch a ride, leading to their spread throughout your home. And it’s not just about colds or the flu. With the world having faced something as serious as COVID-19, our awareness of how easily illnesses can spread has skyrocketed. These aren’t just precautions for the here and now; they’re lessons for a lifetime of healthier living. The interaction between our hands and these surfaces is a two-way street. Just as we can pick up germs from them, we can also deposit germs onto them. If one person in the household is sick, their touch can turn a simple doorknob or remote control into a vessel for illness that can affect others. By focusing on these areas, we’re not merely performing routine cleaning; we’re actively participating in preventive healthcare for our families. It’s about creating a living space that supports wellbeing, minimizing the risk of illness and ensuring that our homes remain safe havens where health can thrive. Best Practices for Cleaning High-Contact Surfaces     1. Know Your Enemies – And Your Allies Now, for the everyday, run-of-the-mill dirt and grime, soap and water are your go-to. This duo is like the dynamic superhero team of cleaning, capable of tackling a wide range of common germs by simply breaking down the grease and dirt they cling to. It’s a gentle, effective way to keep surfaces clean without going overboard. There are times when we’re up against more formidable opponents – pathogens that require a bit more firepower to take down. This is where EPA-registered disinfectants enter the scene, armed and ready to eliminate viruses and bacteria that are tougher to kill. Choosing the right disinfectant is akin to selecting the perfect tool for a job; you wouldn’t use a sledgehammer to crack a nut, right? Similarly, using these powerful cleaners is about targeting specific germs with precision and efficiency. But here’s the kicker: not all disinfectants are created equal. Each product is formulated to tackle specific types of germs, so it’s essential to read labels and understand what each one is designed to do. Think of it as getting to know your allies in the battle against germs. Just like in any good strategy game, knowing the strengths and weaknesses of your team members can make all the difference in achieving victory. Using these disinfectants isn’t just a matter of spraying and wiping; timing plays a crucial role. Most disinfectants need to stay on the surface for a specific period to effectively kill germs – this is often referred to as the ‘dwell time.’ Rushing this process can be like pulling your cookies out of the oven too early; they might look okay, but they’re not quite done. 2. Timing is Everything When we say “timing is everything,” it’s not just a catchy phrase-it’s a fundamental principle of effective cleaning. Imagine your home as a bustling city. Throughout the day, its inhabitants (you, your family, maybe pets) go about their activities, interacting with various “public spaces” within this city-doorknobs, countertops, light switches. Just as a city needs regular maintenance to stay clean and functional, so does your home, especially these high-traffic areas. Regular cleaning is like the routine street sweeping that keeps the main roads clear of debris. It’s essential, but sometimes, especially after a parade (or a playdate), you need to ramp up the efforts. This is where frequency comes into play. The more activity a surface sees, the more frequently it needs attention. In a household bustling with kids, pets, or guests, these surfaces become like Grand Central Station at peak hours-busy and prone to accumulating unwanted “travelers” (aka germs). Increasing the cleaning rounds in such scenarios isn’t just about keeping up appearances; it’s about actively reducing the opportunities for germs to settle in and invite their friends over for a party. It’s about recognizing that in the dynamics of daily life, the chances for germ transmission grow with every touch, every sneeze, every snack prepared on the kitchen counter. Think of it this way: the goal isn’t to turn your home into a sterile lab (because, let’s face it, that’s neither feasible nor desirable) but to manage the ecosystem of your home in a way that minimizes risk and maximizes health. It’s about creating a rhythm of cleanliness that aligns with the rhythm of your life. Busy days with lots of coming and going might call for a quick wipe-down of surfaces in the evening. Less hectic days might afford a bit more leeway.     3. The Right Technique Matters Let’s start with the initial step: cleaning the surface with soap and water. This isn’t just a cursory prelude to the main event of disinfecting; it’s a critical phase that ensures the effectiveness of the entire process. By removing dirt and grime, soap and water prepare the stage, so to speak, clearing away the clutter that can shield germs from the lethal touch of disinfectants. It’s akin to clearing weeds from a garden so that the plants can grow unimpeded. Once the stage is set and the surface is clean, the application of the disinfectant takes center stage. This step isn’t just about applying the product; it’s about allowing it to perform its role thoroughly. The concept of “dwell time,” or the amount of time a disinfectant should remain on the surface to be effective, is crucial here. Ignoring this is like baking a cake without setting the timer-results will be unpredictable at best, and ineffective at worst. The application technique matters as much as

Unveiling the Best Practices High-Contact Surface Cleaning in Your Home Read More »

Cute colorful kids bedroom

Clean and Clutter-Free 101: Easy Organizing Your Kids’ Rooms with a House Cleaner

Hey there, fellow tidiness enthusiasts! Are you Organizing Your Kids’ Rooms, wondering if there’s a magical formula to transform them from clutter zones to clean, organized sanctuaries? Well, buckle up because with a little help from a professional house cleaner and some clever strategies, that dream can become your reality. Today, we’re diving into the ultimate guide to getting your kids’ rooms clean and clutter-free, making your home a serene space everyone can enjoy. Let’s get into it! Embrace the Magic of Decluttering When you start the decluttering process, consider it a perfect moment for bonding with your kids. You can turn it into a game-maybe it’s the “Keep, Donate, Toss” game. Items that are no longer needed or loved can find new homes where they’ll be appreciated, and this teaches your children about generosity and the joy of giving. Meanwhile, deciding what to toss helps them understand the lifecycle of items and the environmental impact of waste. Remember, decluttering isn’t just about physical items. It’s also about decluttering time and activities. This holistic approach can lead to discussions about what activities are meaningful and which ones might be taking up too much family time without adding value. It’s a beautiful way to instill the concept of quality over quantity in your children’s minds. Involving your kids in the decluttering process empowers them. They learn to make decisions, express their opinions, and see the results of their choices. It’s an excellent opportunity for them to understand the importance of keeping their space organized and the positive effects it has on their mood and productivity. The House Cleaner’s Touch Professional cleaners possess a treasure trove of knowledge when it comes to the products and techniques that work best for every type of mess and material. They bring along their arsenal of eco-friendly cleaning agents that are tough on dirt but gentle on your kids’ health and the environment. These experts are wizards in the art of cleaning, ensuring that even the most overlooked areas-like under the bed, the tops of furniture, and behind the curtains-are free from dust and allergens. The benefit of a professional cleaner’s touch extends beyond just the physical cleaning. It’s about creating a hygienic environment for your children. Regularly cleaned rooms are less likely to harbor the germs and allergens that can cause sickness. This proactive approach to cleanliness means fewer sniffles and more happy, healthy days for your kids. But let’s not forget the time and stress saved on your part. In the hustle and bustle of daily life, finding the time to give your kids’ rooms the deep clean they often need can be a challenge. By entrusting this task to Toronto Shine Cleaning, you’re not only ensuring the job is done right but also freeing up precious time. Time that can be better spent on quality moments with your family, pursuing hobbies, or simply taking a well-deserved break.     Systematic Storage Solutions The beauty of using bins, baskets, and shelves lies in their versatility and the visual appeal they can add to a room. By choosing containers that complement the room’s decor, you not only enhance the aesthetic appeal but also make organization a part of the room’s charm. It’s about turning necessity into an art form. For instance, colorful bins and baskets can add a pop of color and playfulness to the room, making them not just storage solutions but also decorative elements. Labeling these containers goes beyond mere identification; it’s a learning tool for your kids. It can aid in their reading development and help them associate words with objects, reinforcing their language skills. Moreover, it cultivates a sense of independence as they take ownership of their spaces. They learn that each item has its designated spot, fostering responsibility and discipline. And let’s not overlook the potential for creativity here-letting your kids decorate or choose the labels can make them feel involved and invested in keeping their room organized. Integrating shelves for books and displayable items not only saves space but also encourages a culture of reading and appreciation for personal belongings. A well-arranged shelf can serve as a display for their favorite books, artwork, or achievements, turning storage into a showcase of their personality and interests. The goal of these storage solutions is to make clean-up logical and effortless. When kids understand where everything goes, tidying up becomes less of a chore and more of a routine part of their day. This not only keeps their rooms clean but also instills in them the skills and habits that will serve them well throughout life. A Routine that Rocks Creating a routine that rocks starts with the basics: a daily dose of tidiness. Encourage your kids to make their beds every morning. It’s a small act, but it sets a positive tone for the day, teaching them the value of starting their day with a tidy space. Incorporating toy clean-up as part of their playtime ritual ensures that tidying becomes second nature, linking the fun of play with the responsibility of cleanup. Weekly tasks might include a more detailed organization of toys, books, and clothes. This is the time to check under beds and in closets to ensure everything is in its place and that nothing has been overlooked during the daily quick cleans. It’s also a great opportunity to involve your kids in the process, helping them learn to maintain their own spaces and take pride in their environment. Monthly, a deeper clean sweeps through, reaching into the corners and under the furniture, places where dust and lost toys tend to gather. This is where the professional touch of a house cleaner from Toronto Shine Cleaning truly shines. Their expertise ensures that even those out-of-sight areas receive the attention they need, maintaining a healthy and allergen-free environment for your kids to grow in. But the effectiveness of this routine lies not just in its execution but in its flexibility. Life happens, and there will be days when the routine

Clean and Clutter-Free 101: Easy Organizing Your Kids’ Rooms with a House Cleaner Read More »