Cleaning Guide

dirty Air Conditioner

The Best Way To Clean Your Air Conditioner And You Need To Know

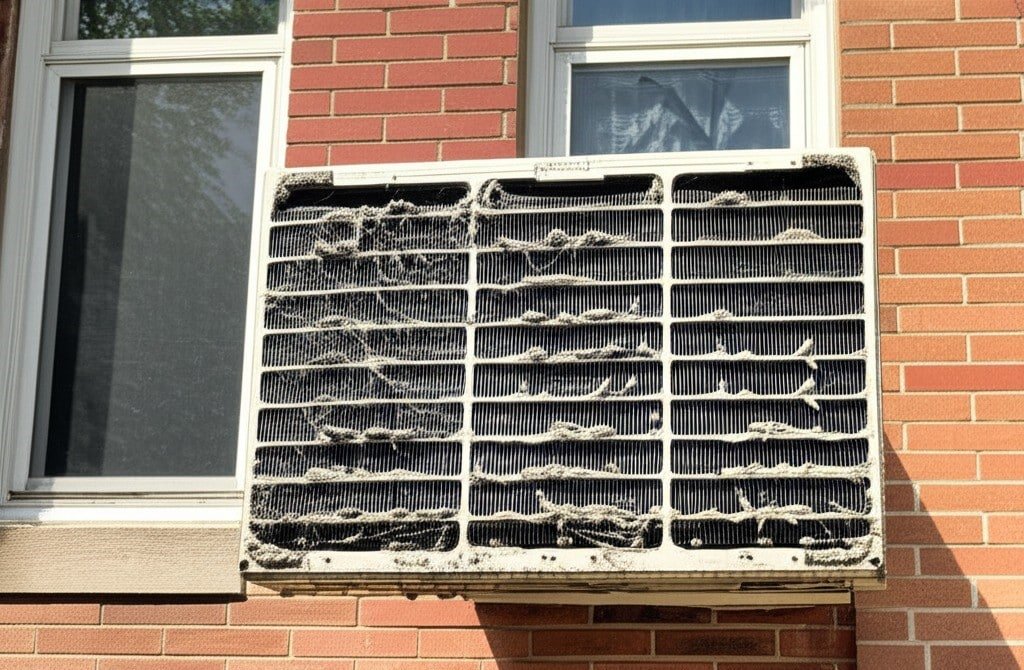
Ensure your air conditioner is completely disconnected from its power source before you begin any cleaning. For window units, this means unplugging it from the wall outlet. For split and central air conditioning systems, you must switch off the corresponding circuit breaker in your home’s main electrical panel. Outdoor condenser units often have an additional disconnect switch located near the unit itself; turn this off as well. Gather your supplies: a vacuum cleaner with a soft brush attachment, screwdrivers if needed for panel removal, a fin comb, specialized air conditioner coil cleaner (check if it’s for evaporator or condenser coils, and if it’s a no-rinse formula), a spray bottle, mild detergent, several clean cloths, gloves, and protective eyewear. Window Air Conditioner Once unplugged, you can begin cleaning your window air conditioner. If possible, removing the unit from the window and placing it on a stable, practical surface outdoors will allow for a more thorough cleaning, especially of the outer frame and rear condenser coils. If removal is not practical, proceed to clean the accessible parts while the unit is installed. Start by removing the front panel or grille. This usually comes off or may be held in place by a few screws. Consult your unit’s manual if you are unsure. Behind this panel, you will find the air filter. Slide the filter out. Most window air conditioner filters are washable. Use a vacuum cleaner with the brush attachment to remove loose dust and debris. For more stubborn dirt, wash the filter gently with warm water and a mild soap solution. Rinse it thoroughly under running water and allow it to air dry completely before reinstalling. A damp filter can encourage mold and mildew growth in your air conditioner. With the filter removed, you will see the evaporator coils. These are thin metal fins that cool the air. They can collect a significant amount of dust. Use the soft brush attachment on your vacuum cleaner to gently clean these coils. Always vacuum in the direction of the fins (usually up and down) to avoid bending them. If you notice any bent fins, a fin comb can be used to gently straighten them. Bent fins restrict airflow and reduce the efficiency of the unit. For a deeper clean, apply a non-acidic, foaming coil cleaner specifically designed for evaporator coils. Spray the cleaner evenly over the coils and let it sit for the time recommended by the manufacturer. The foam will usually break down and carry the dirt away, often dripping into the drain pan. Some cleansers do not require rinsing, while others may suggest a light rinse if possible. If you have removed the unit from the window, you can now access the condenser coils located at the back of the unit. These coils release heat to the outside and are prone to collecting leaves, grass, and other outdoor debris. Use a stiffer brush to remove larger debris, then vacuum carefully. You can also gently spray these coils with a garden hose, directing the water from the inside of the unit outwards, if possible, to push dirt out rather than further in. Avoid using high pressure, which could damage the fins. Apply a condenser coil cleaner if needed, following product instructions, and rinse if required. Locate the drain pan at the bottom of the unit. It collects condensation. Clean any accumulated slime or mold from the pan using a cloth and a mild detergent solution or a diluted bleach solution. Ensure the drain port or tube is clear of any blockages. A pipe cleaner or a small, flexible wire can be used to dislodge obstructions. Carefully wipe down any accessible fan blades, as these can also collect dust. Clean the interior surfaces of the AC casing with a damp cloth. Once all parts are clean and thoroughly dry, reassemble the air conditioner. Reinstall the dry filter, attach the front panel, and if you removed the unit, carefully place it back in the window, ensuring it is securely installed and properly sealed around the edges to prevent air leaks. Split Air Conditioner (Ductless Mini-Split) Split air conditioners consist of an indoor unit (evaporator) and an outdoor unit (condenser), both of which require regular cleaning. Indoor Unit: Make sure the entire system is turned off at the circuit breaker. Open the front panel of the indoor unit; this panel usually opens upward. You can clean the outer plastic housing of the air conditioner with a soft, damp cloth. The air filters are located directly below the front panel. Most units have two or more filter screens. Unclip or slide them out carefully. These filters are usually reusable. Vacuum them thoroughly on both sides. If they are greasy or very dirty, wash them in warm water with a mild detergent. Rinse them thoroughly and allow them to air dry completely. Never operate the unit without the filters installed, as this allows dust to directly clog the evaporator coils and fan rotor. Behind the filters are the evaporator coils. These delicate fins can be gently vacuumed with a soft brush attachment. Move the brush toward the edges. For a more thorough cleaning, use a no-rinse evaporator coil cleaner spray designed for indoor use. Apply it evenly over the entire surface of the coil. The cleaner will usually foam, dissolve dirt and grime, and then condense and drain with normal condensation the next time the unit is used. Straighten any bent edges of your air conditioner with a fine-toothed comb. The blower wheel, or drum fan, is located deep inside the indoor unit, behind the evaporator coils. This component is crucial for air circulation, but it is prone to accumulating a thick layer of dust, mold, and grime, which can significantly reduce airflow and air quality, as well as cause imbalances and noise. Cleaning the blower wheel can be challenging without disassembling it. For light surface cleaning, you can reach parts of the blower wheel with a long, thin brush or a specialized flexible cleaning brush,

The Best Way To Clean Your Air Conditioner And You Need To Know Read More »
5 Tricks How To Prevent Mold And Mildew In Your Home

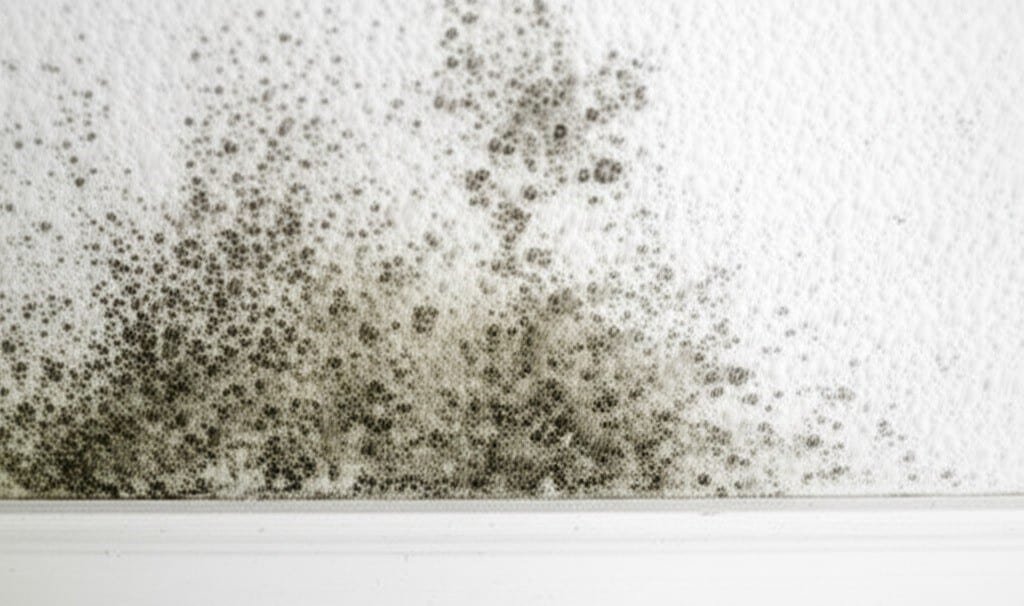
How To Prevent Mold And Mildew: Five Tricks That Work Preventing mold and mildew comes down to one thing: controlling moisture so these fungi never gain a foothold. Mold and mildew are more than unsightly; they release spores and volatile organic compounds that can affect respiratory health and worsen allergies or asthma, and the CDC’s mold information explains how exposure triggers symptoms. These five tricks cover the full defense: ventilation, moisture targets, leak response, food removal, and smart materials, finishing with the exterior water habits and inspection routine that catch problems early. Trick 1: Vent Out Moisture at Its Sources Bathroom exhaust fans should run before the shower starts and stay on for at least 20-30 minutes afterward so the moist air is fully vented outdoors; without a fan, crack a window briefly when the weather allows. In kitchens, use an outside-venting range hood whenever you cook, and clean or replace its filters regularly. Dryers must always vent directly outside; venting into an attic, crawl space, or interior room dumps huge moisture loads that invite widespread mold. Keep the vent hose unkinked, clean the lint trap after every cycle, and have the ductwork professionally cleaned periodically, since accumulated lint feeds mold and is a serious fire hazard. Whole-home ventilation helps too: opening windows on opposite sides creates cross-ventilation that swaps stale indoor air for cooler outdoor air, as long as outdoor humidity is not extreme. Trick 2: Hold Humidity Between 30% and 50% Aim for indoor relative humidity between 30% and 50%; levels consistently above 60% create an environment where mold thrives. A cheap hygrometer lets you monitor several rooms, and Health Canada’s guidance on reducing humidity and moisture mould backs the same target. Size a dehumidifier appropriately for basements, crawl spaces, and any poorly ventilated room, and either empty it regularly or plumb it to drain. Indoor relative humidity What it means Action needed 30-50% Target zone; mold cannot establish Maintain current habits: fans, venting, monitoring 50-60% Caution zone; damp corners suffer first Run a dehumidifier in problem rooms and recheck Above 60% Mold-friendly conditions Dehumidify aggressively and find the moisture source Trick 3: Fix Leaks Fast and Dry Within 24-48 Hours Even small, persistent leaks supply enough moisture for mold. Inspect the roof after severe weather for damaged shingles or flashing, and treat ceiling water stains as urgent. Check under every sink, around toilets, shower connections, washing machine hoses, and fridge icemaker lines for dampness, and insulate cold water pipes so condensation cannot form. Ensure windows and doors are properly sealed: condensation trapped between double-paned glass signals a failed seal, while staining or soft wood around frames means infiltration. Examine foundation walls for cracks or efflorescence, the white powdery deposit left by migrating water. When materials do get wet, mold can begin growing within 24-48 hours. Remove standing water with a wet-vac or pump, use fans, dehumidifiers, and heaters to dry carpets, drywall, and furnishings. Porous items saturated past that window often need to be discarded, because mold inside them is nearly impossible to eradicate. Never leave wet clothes in the washer or damp towels in a pile. Trick 4: Starve Mold of Food and Hiding Places Mold feeds on organic material, so routine cleaning is genuinely preventive. Dust frequently with a damp cloth or microfiber duster to capture particles that carry spores and organic debris, and vacuum with a HEPA-filter. Keep kitchen and bathroom surfaces free of residue, scrub tile grout and caulk around tubs and sinks regularly, and consider grout sealers to make grout less porous. Change your storage habits with these simple fixes: Skip cardboard boxes on basement or garage concrete, which absorb moisture and feed mold; use airtight plastic containers on shelves or pallets with airflow underneath. Do not over-pack closets, and pull furniture a gap away from exterior walls so air can circulate. Store firewood outdoors off the ground well away from the house, bring in only what you will burn soon, avoid overwatering indoor plants whose damp soil harbors mold, and take out organic waste regularly. Keep air moving with ceiling fans on low and occasionally opened closet doors. A consistent regular cleaning routine handles the surface food removal week in, week out. Trick 5: Build and Maintain With Mold-Resistant Choices Materials decide how forgiving a room is. In bathrooms, kitchens, and basements, use mold-inhibiting paint containing antimicrobial agents, and for new construction choose mold-resistant drywall, often called green board or purple board. Skip carpet in basements and bathrooms entirely; tile, vinyl, and sealed concrete are far better in damp areas. When caulk cracks, remove it completely, clean the area, and reapply a high-quality mold-resistant caulk; repair crumbling grout and reseal it periodically. Outside, keep gutters clear so water reaches the downspouts, and make sure downspouts discharge at least five to ten feet from the foundation. Grade soil away from the house, avoid dense shrubs pressed against siding, and aim sprinkler heads away from the exterior. If you have a crawl space with a dirt floor, cover it with a heavy-duty plastic vapor barrier. Book a seasonal deep clean in high-risk rooms if your home has a history of dampness. Mold Prevention FAQ How long does mold take to grow after a leak? On damp porous surfaces, growth can begin within 24-48 hours. That window is why professional drying starts immediately after water intrusion, and why saturated porous materials are often replaced rather than dried. What is the first sign of hidden mold? A musty or earthy odor is often the earliest clue, before anything is visible. Follow your nose to basements, closets on exterior walls, under sinks, and behind furniture against outside walls. Do exhaust fans really prevent shower mold? Yes, if used correctly: run the fan before the water starts and for at least 20-30 minutes after you finish. A fan that only runs during the shower leaves moisture behind in the room. Is a dehumidifier enough for a damp basement? Usually not alone. Pair it with the humidity

5 Tricks How To Prevent Mold And Mildew In Your Home Read More »

kitchen island

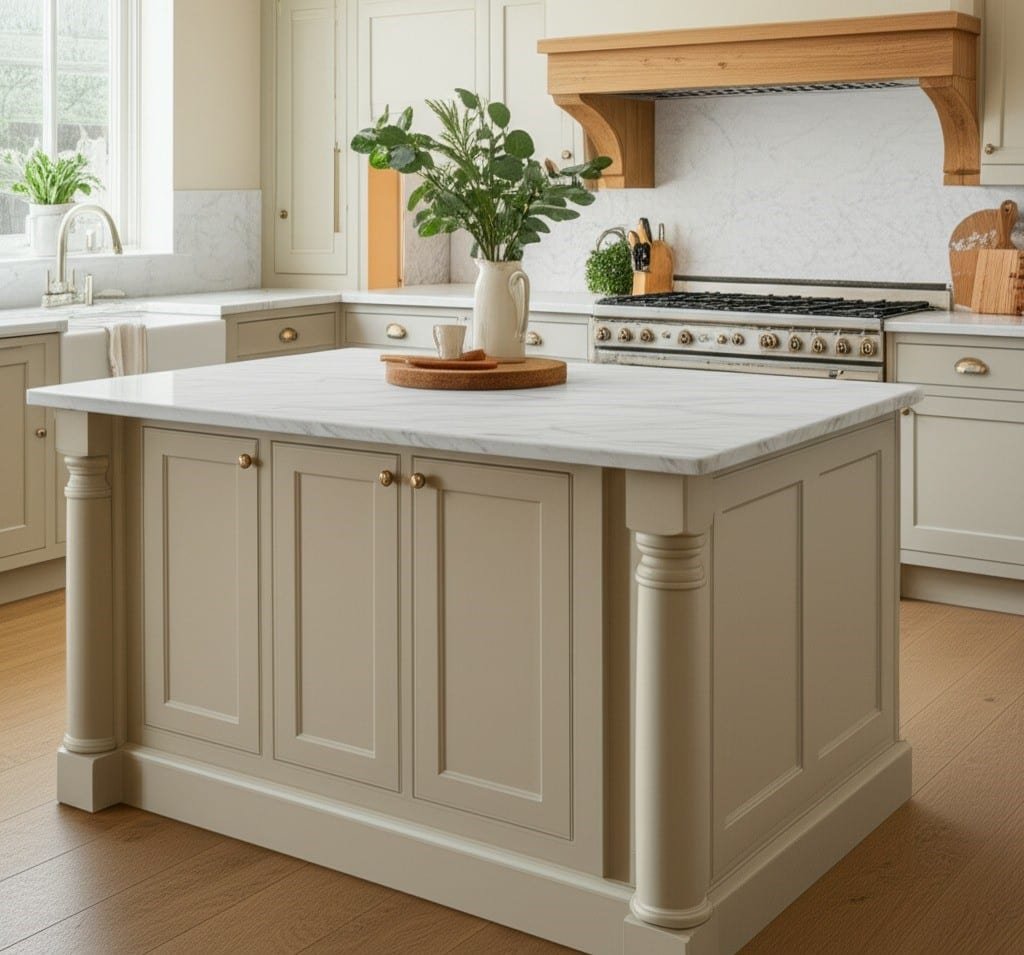
How To Clean Kitchen Islands – You Should Know

How to Clean Kitchen Islands the Right Way The kitchen island is often the busiest surface in a home: a prep station, a dining spot, and a gathering place all at once. Because islands are built from materials as different as granite, marble, quartz, wood, stainless steel, and concrete, no single cleaner suits them all, and the wrong product can etch stone, dull finishes, or leave streaks. This guide covers what to use on each surface, how to care for the details around the island, and which mistakes to avoid. Natural Stone Tops: Granite and Marble Granite is durable but porous and typically sealed after installation. Clean it daily with a pH-neutral stone cleaner or mild dish soap and warm water, applied with a soft microfiber cloth, then rinse and dry to prevent water spots. Never use abrasive powders or acidic cleaners like lemon juice or vinegar; they erode the stone and dull its polish. That protective seal weakens with daily use and typically needs renewal once or twice a year. For oil-based stains, apply a baking soda and water paste, leave it several hours or overnight, then wipe away. Coffee or wine stains respond to a hydrogen peroxide and flour poultice. Test any treatment on an inconspicuous spot first. Marble is softer and more delicate than granite. Even mildly acidic foods such as citrus, vinegar, and tomatoes can etch it, leaving dull marks; use only pH-neutral cleaners, wipe spills immediately, and reseal more often than granite. Oil stains call for a baking soda paste and organic stains for hydrogen peroxide, handled with extra care; abrasive scrubbing scratches the stone. Polished marble may need professional repolishing over time. Quartz and Laminate: Easy Care Surfaces Quartz is an engineered, nonporous stone that resists stains and needs no sealing. A soft cloth with warm water and a gentle detergent takes care of daily cleaning. Leave out bleach, oven cleaner, and abrasive pads; all of them can dull the surface or leave fine scratches. Wipe spills such as wine or coffee promptly anyway, and lift dried residue with a plastic spatula before cleaning with a quartz-safe or glass cleaner. Quartz can also be damaged by direct heat, so set hot pans on trivets or hot pads. Laminate is an economical choice that wipes clean with a soft cloth and mild soapy water, or a gentle all-purpose cleaner with no abrasives. The big rule: avoid excess water, especially near seams, where it can seep underneath and swell or delaminate the top layer. Skip steel wool and scouring pads, which scratch. For stubborn marks, use a baking soda paste, or denatured alcohol sparingly for ink and dye stains, rinsing well afterward. Wood and Butcher Block: Food-Safe Care Sealed wood needs only a lightly dampened cloth and a little mild detergent, dried thoroughly afterward. Unsealed or oil-finished butcher blocks, which often serve as prep surfaces, need more attention. Scrape away food debris, then wash the block with hot, soapy water and a mild detergent, drying it right away. To sanitize, spray a 1:1 mix of white vinegar and water, let it sit a few minutes, then wipe and dry. Because these surfaces touch food, keeping them clean is part of food safety; the CDC’s food safety basics page covers the habits that prevent foodborne illness. Wash your hands before prepping meals too; the CDC’s handwashing guidance explains why. Condition the wood monthly, or whenever it feels dry, with food-grade mineral oil or a butcher block conditioner; let it soak in for hours or overnight, then wipe off the excess. Never leave water standing on the surface. Heavy stains and scorch marks sometimes call for light sanding followed by fresh oil. Stainless Steel and Concrete Stainless islands look professional and resist heat but show fingerprints and water spots. Clean with a soft cloth and mild detergent in warm water, wiping with the grain, then rinse and dry with a microfiber cloth to prevent streaks. A stainless cleaner boosts shine and removes fingerprints; a baking soda paste handles sticky residue when rubbed with the grain. Never use steel wool or scrub against the grain. Concrete countertops are durable and stylish when properly sealed, but the material is porous underneath. Use mild, non-abrasive cleaners with a soft cloth, reseal every one to three years depending on the sealant, and consider waxing for extra protection and shine. Acidic cleaners and harsh solvents corrode the sealant, so treat spills immediately. For set-in stains, ask your installer or manufacturer what works with your sealer. Details That Matter: Sinks, Cooktops, and Cabinets Around the island, use the same care on: Stainless sinks: baking soda paste or Bar Keepers Friend, rinsed thoroughly. Porcelain sinks: non-abrasive powders or baking soda paste; avoid strong bleach soaks. Composite sinks: mild dish soap, or a 50/50 vinegar mix for hard water stains, rinsed well. Faucets: mild soap and water, dried well; wrap a vinegar-soaked cloth around mineral buildup briefly. Cooktops: ceramic cleaner and scraper once cool for glass tops; soak gas grates in hot soapy or degreasing water. Cabinets and hardware: mild wood or detergent cleaners for cabinet faces; all-purpose cleaner for pulls and knobs, dried after wiping. Vent hoods: wash wire mesh filters in hot soapy water or the dishwasher; replace charcoal filters on schedule. Kitchen Island Cleaning Cheat Sheet Surface Use Avoid Granite pH-neutral stone cleaner Vinegar, lemon, abrasives Marble pH-neutral cleaner Citrus, vinegar, abrasives Quartz Mild detergent Bleach, oven cleaner, abrasives Laminate Mild soap and water Excess water, steel wool Wood Mild detergent, mineral oil Standing water, harsh sanitizers Stainless steel Mild detergent with the grain Steel wool, against-grain scrubbing Concrete Mild non-abrasive cleaner Acidic cleaners, harsh solvents Frequently Asked Questions Can I use vinegar to clean my kitchen island? Only on the right surfaces. Diluted vinegar suits sealed wood and stainless steel, but never let it touch granite, marble, or concrete; the acid etches the surface and damages sealants. How often should granite and marble be resealed? Granite usually needs sealing once or

How To Clean Kitchen Islands – You Should Know Read More »

7 Best Tips To Make Your Basement Spotless

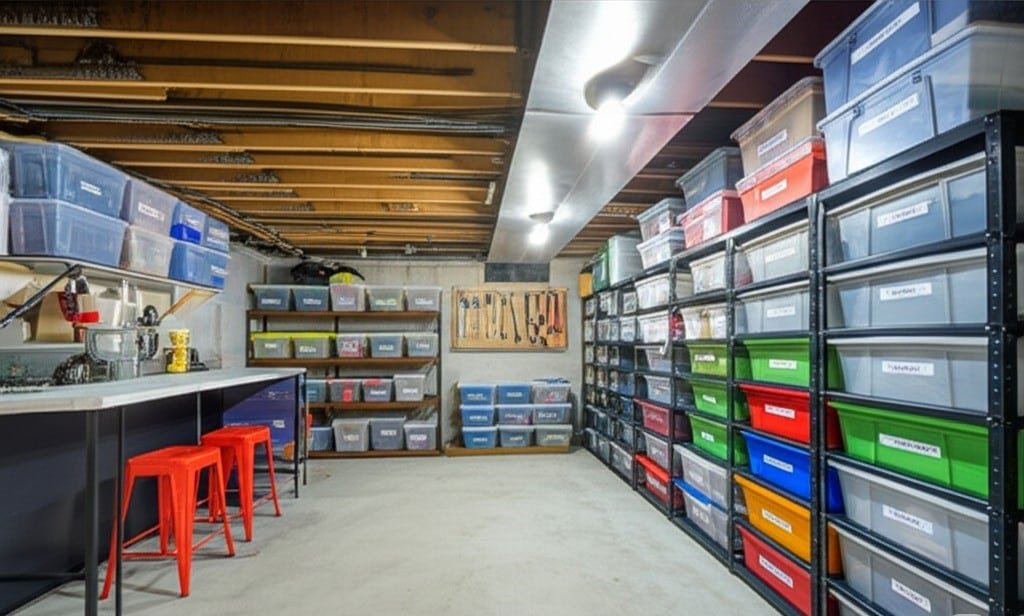
How to Make Your Basement Spotless: A Complete Cleaning Plan Basements earn their keep in Toronto homes as laundry rooms, storage space, workshops, and rec areas, but life below grade brings dust, clutter, and damp air together in one room. A truly clean basement needs more than a quick sweep: start with a safe setup, declutter hard, deep clean every surface, and keep moisture, mold, and pests in check. Follow these seven steps in order, or let our deep cleaning service do the heavy lifting. Step 1: Prep the Space and Gather Your Cleaning Kit Safety comes first because basements are often poorly ventilated. Open windows and doors, run fans to circulate air, and bring in portable work lights if the built-in lighting is weak. Wear heavy-duty gloves, safety glasses, and an N95 respirator to keep airborne dust, mold spores, and other particles out of your lungs, and choose sturdy, closed-toe shoes. Watch for spiders, insects, rodent droppings, and damp spots near outlets or wiring. Trash bags, sorting bins, labels, and markers for decluttering All-purpose cleaner, disinfectant, mold and mildew remover, and degreaser for oily stains Concrete cleaner, glass cleaner, and wood polish for the surfaces you actually have Vacuum with crevice and brush attachments, plus a shop vac for fine dust and damp debris Mop, bucket, scrub brushes in several sizes, microfiber cloths, sponges, and a squeegee Step ladder, broom, dustpan, and a dehumidifier for after the clean Clear a workspace first, then walk the room and note problem zones: visible mold, water stains, pest signs, or extreme clutter. Split the basement into manageable zones such as storage, laundry, and workshop areas. Step 2: Declutter With the Four-Box Method Work through furniture, stored boxes, clothing, toys, paperwork, hobby gear, holiday decorations, and tools one category at a time. Sort every item into one of four containers: Keep: items that stay in the basement or get stored properly Donate or sell: usable items you no longer want Trash or recycle: broken, expired, or damaged goods Relocate: things that belong upstairs or in another room Shred paperwork with personal information, and never pour old paints, solvents, or chemicals down the drain: check your municipality’s hazardous waste rules. For sentimental items, allow one or two labeled keepsake boxes and photograph the rest before letting go. Arrange bulk trash pickup, donation runs, or a weekend dumpster rental for the overflow. Step 3: Clean From the Ceiling Down, Floor by Floor Dust the ceiling, corners, ductwork, pipes, and light fixtures first with a long-handled duster, then move down the walls with a dry microfiber pad. Wash grimy painted walls with a squirt of dish soap in warm water, spot-test first, and rinse with a clean cloth. Small mold patches can be treated with a dedicated mold and mildew remover while you wear your mask, gloves, and eye protection; large growths need a professional remediation service. Floor type Cleaning approach Extra care tips Concrete Sweep, then shop vac the edges; scrub oily stains with a degreaser or concrete cleaner; mop with all-purpose cleaner or disinfectant White powdery residue is efflorescence from salts in the concrete; scrub it with a stiff brush, then seal the dry floor Vinyl or linoleum Sweep or vacuum, then mop with a cleaner made for vinyl Avoid abrasive pads and excess water, which can seep into seams Tile Vacuum, scrub grout with a grout brush or baking soda paste, then mop with tile cleaner Give grout lines extra passes in high-traffic paths Carpet Vacuum slowly in multiple directions, then treat spots with a carpet spot cleaner Use attachments along edges; a rental machine gives a deeper refresh Step 4: Windows, Fixtures, and Utility Areas Vacuum window sills and tracks, wash them with all-purpose cleaner, then spray and squeegee the glass; clear exterior window wells of leaves and check drainage Turn off the power before dusting light fixtures, and wash removable covers in the sink Empty shelves completely, dust them, and clean items before they go back Clear debris from the sump pump pit and test the pump before rainy season Dust the furnace and water heater exteriors only, and keep flammable clutter away from them Pull out the washer and dryer to clean behind them, wipe both machines, and clean the dryer lint trap after every load plus the full vent hose at least once a year Mold, Moisture, and Pest Checks Mold needs moisture and organic material to grow, so cleaning it without fixing the dampness guarantees a comeback. Keep basement humidity around 30-50 percent with a dehumidifier, ventilate the space, and repair leaks from pipes, foundations, or windows promptly. Check gutters and downspouts too: water should be carried at least six feet from the house. If mold keeps returning or covers a large area, bring in a remediation professional and follow Health Canada’s guidance on controlling moisture and mould. For pests, dispose of droppings and nests in sealed bags, then close entry points with caulk or steel wool; persistent infestations may need traps or a pest control service. The CDC overview of mold and health covers why moisture problems deserve fast action. Organize and Maintain Your Clean Basement Store belongings in clear plastic bins with tight lids instead of cardboard, install metal or heavy-duty plastic shelving to keep items off the floor, and label everything. Formal zones, such as storage, utility, workshop, and recreation areas, make the space easier to use and keep tidy. Regular upkeep is the secret to staying spotless: Weekly: sweep or vacuum traffic areas, empty the dehumidifier tray, and scan for leaks or pests Monthly: dust shelves and surfaces, and check the dehumidifier filter Seasonally: review stored items, check window wells, and inspect corners for mold Annually: repeat a full clean, rework your organization system, and clean the dryer vent Frequently Asked Questions How often should I deep clean my basement? A full clean once a year works for most homes, with lighter monthly dusting and seasonal checks in between; damp or high-use basements

7 Best Tips To Make Your Basement Spotless Read More »

various cleaning tools

13 Essential Cleaning Tools Every Home Needs

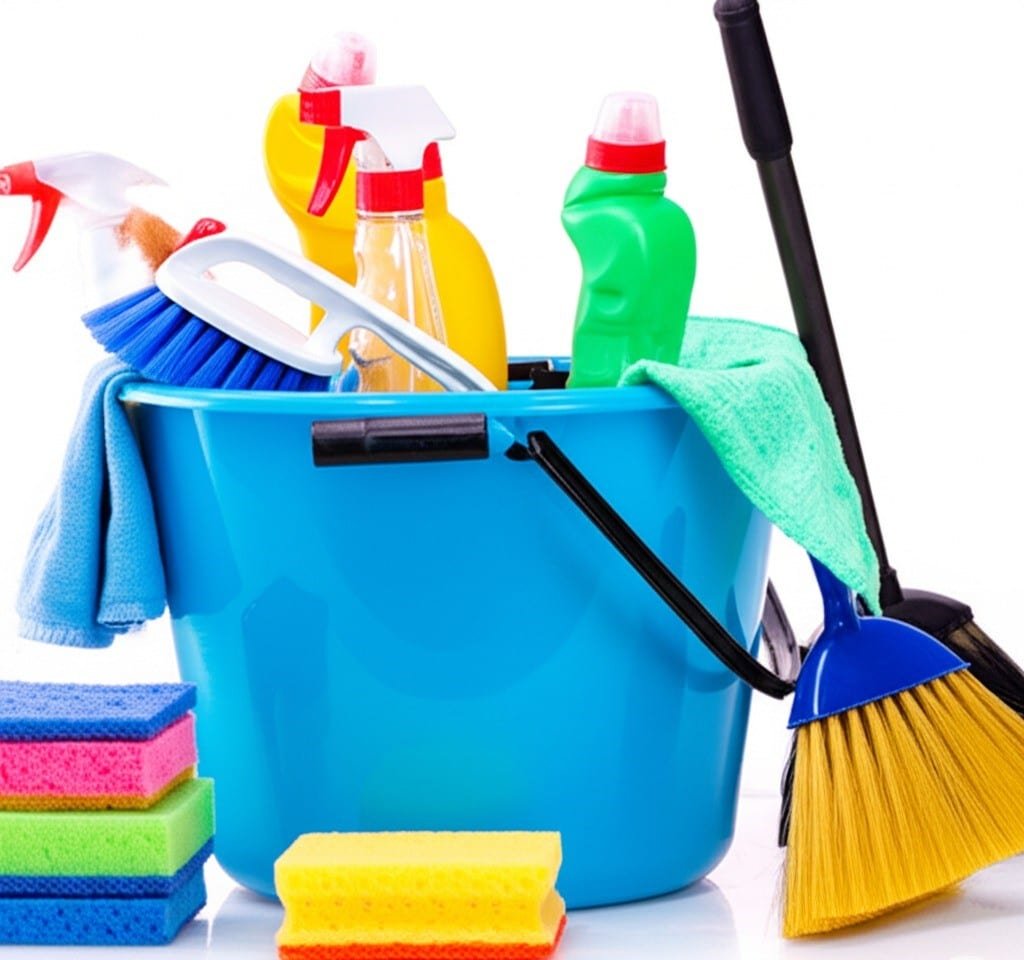
A truly clean home starts with the right collection of essential cleaning tools. These implements are the backbone of any effective cleaning routine, transforming chores from overwhelming burdens into manageable tasks. Without the correct cleaning tools, even the best intentions can fall short, leaving behind dirt, germs, and frustration. Investing in a quality set of these items will pay dividends in time saved and the satisfaction of a spotless living space. 1.Microfiber Cloths Microfiber cloths are indispensable cleaning tools in any modern cleaning arsenal. Their finely woven synthetic fibers, typically a blend of polyester and polyamide, are engineered to trap dust, dirt, bacteria, and absorb liquids far more effectively than traditional cotton rags, which often just push dirt around. These versatile cleaning tools come in various weaves and textures; some feature a tighter weave perfect for polishing glass and mirrors to a streak-free shine, while others have a plusher, terry-cloth like texture designed for general surface wiping, dusting, or scrubbing tougher grime from countertops and appliances. The electrostatic charge generated by the fibers actively attracts and holds onto dust particles. Because they can be laundered and reused hundreds of times (if cared for correctly – avoid fabric softener and high heat which can damage the fibers), they are also an economical and environmentally sound choice among your collection of cleaning tools. Properly caring for these cloths ensures they remain exceptionally effective cleaning tools for a long time, outperforming disposable wipes in both cost and performance. 2.Sponges Sponges, in their various forms, remain vital cleaning tools, especially for tasks requiring absorbency and a bit of scrubbing action for dislodging food particles and grime. You’ll find cellulose sponges, derived from wood pulp, which are highly absorbent and excellent for wiping spills from countertops and tables; they are also often biodegradable. Then there are scrub sponges, which are dual-purpose cleaning tools combining a soft, absorbent sponge on one side with a more abrasive scouring pad on the other, ideal for tackling stuck-on food on pots, pans, and oven interiors. It’s crucial to select non-scratch scrub sponges for delicate surfaces like non-stick cookware, glass cooktops, or ceramic dishes to prevent damage. Due to their porous and often damp nature, sponges can become breeding grounds for bacteria, so regular disinfection (e.g., microwaving a damp sponge for a minute, or running it through a dishwasher cycle) and timely replacement are key to keeping these ubiquitous cleaning tools hygienic and effective. An off-smell is a clear indicator that a sponge needs replacing. 3.Sprays Reusable spray bottles are fundamental cleaning tools for anyone looking to customize their cleaning solutions, dilute concentrates, or embrace DIY green cleaning recipes. Having a set of clearly labeled, sturdy spray bottles, preferably made from chemical-resistant plastic like HDPE, allows for efficient and safe application of specific cleaners for different tasks – one for all-purpose cleaning, another for glass, one for disinfecting, and so on. An adjustable nozzle, offering settings from a fine mist (ideal for covering large areas or delicate plants) to a direct stream (perfect for targeting specific stains or reaching into crevices), significantly enhances their versatility as cleaning tools. These are simple yet absolutely essential cleaning tools for any well-equipped cleaning kit, promoting both economy by allowing bulk purchase of concentrates and environmental responsibility by reducing single-use plastic waste. 4.Cleaning Brushes For grime that clings stubbornly to surfaces and resists gentler methods, scrub brushes are the go-to manual cleaning tools. A well-rounded set should include various sizes, shapes, and bristle stiffness to tackle diverse challenges. A large, stiff-bristled utility brush is excellent for heavy-duty scrubbing on durable surfaces like concrete floors, tile, or outdoor furniture. A narrow grout brush, characterized by its very stiff, often angled bristles, is a specialized cleaning tool designed specifically to dislodge mold, mildew, and embedded dirt from tile grout lines in kitchens and bathrooms. Smaller detail brushes, which can even include repurposed toothbrushes, are perfect cleaning tools for getting into nooks and crannies around faucets, drain openings, and window tracks. These manual cleaning tools provide the necessary mechanical action – the ‘elbow grease’ – that some messes require, lifting dirt that chemical cleaners alone cannot. No bathroom cleaning kit is complete without a dedicated toilet brush and holder, a truly essential set of cleaning tools for maintaining hygiene and cleanliness in one of the most critical areas of the home. The brush itself needs to have stiff, durable bristles capable of effectively scrubbing the toilet bowl surface, especially under the rim where bacteria and stains can accumulate; many modern designs include a specialized under-rim lip brush for this purpose. The holder is equally important, as it keeps this important cleaning tool stored discreetly and, ideally, facilitates proper drying to prevent the growth of bacteria and unpleasant odors. Look for holders with ventilation or designs that suspend the brush head, rather than allowing it to sit in contaminated water. Regular cleaning and disinfection of both the brush and holder are paramount. 5.Broom And Dustpan The classic broom and dustpan set remains one of the most basic yet indispensable cleaning tools for maintaining hard floors, from hardwood and laminate to tile and vinyl. Whether sweeping up daily crumbs in the kitchen, tracked-in dirt in the entryway, or dust bunnies in the hallway, these fundamental cleaning tools are the first line of defense against loose debris. Brooms with flagged (split-ended) bristles are better for fine dust on smooth indoor surfaces, while unflagged, stiffer bristles tackle larger debris. An angled broom head helps reach into corners and along baseboards more effectively. A crucial feature of a good dustpan is a thin rubber lip that sits flush against the floor, ensuring all swept debris is collected efficiently without leaving that frustrating line of dirt behind. Long-handled dustpans offer ergonomic benefits by reducing bending. For many households, these are among the most frequently used cleaning tools. 6.Mop And Bucket For washing and sanitizing hard floors after sweeping, a mop and bucket are non-negotiable cleaning tools. The market offers a variety of options to suit different needs and floor types. Traditional string mops are known for their absorbency but can be bulky. Flat mops, often featuring washable and reusable microfiber pads, are increasingly popular and are excellent cleaning tools for

13 Essential Cleaning Tools Every Home Needs Read More »

cleaning toilet

Keep Your Toilet Clean And Shiny – 4 Tricks You Need To Know

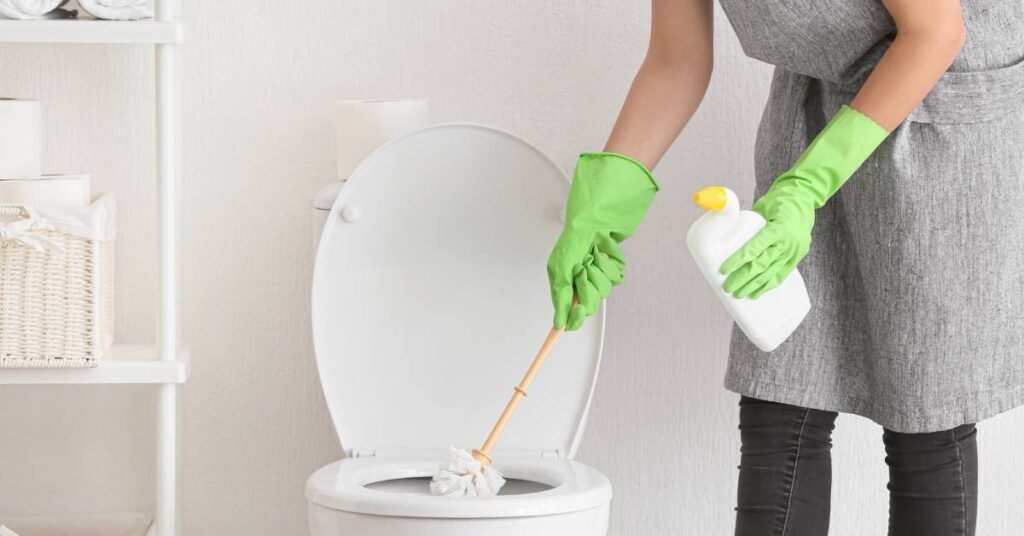
Achieving and maintaining a toilet that is perpetually clean and emits a consistently fresh scent is a highly attainable goal, though it requires a structured approach encompassing both diligent deep cleaning practices and steadfast interim maintenance. This commitment not only enhances the aesthetic of your bathroom but also contributes significantly to a more hygienic home environment. 1.Good Gel Product The foundation of any successful toilet cleaning regimen lies in the careful selection and use of appropriate tools and products. A high-quality, clinging gel toilet bowl cleaner is paramount; its viscosity allows it to adhere to the vertical surfaces of the bowl for an extended period, maximizing contact time and enhancing its efficacy against grime, bacteria, and stains. Complement this with a potent all-purpose disinfectant spray or ready-to-use disinfectant wipes, indispensable for sanitizing all exterior surfaces. The toilet brush itself is a critical instrument; opt for a sturdy model, preferably one featuring an under-the-rim extension or uniquely shaped head designed to reach this often-neglected, problematic area. Bristle brushes offer robust scrubbing power, while some newer silicone models are lauded for being less prone to trapping debris and easier to sanitize. Microfiber cloths are superior to paper towels for wiping tasks; their unique fiber structure effectively traps and lifts dirt particles rather than merely pushing them around, and they are reusable and highly absorbent. Always wear durable rubber gloves to protect your hands from cleaning chemicals and direct contact with soiled surfaces. For particularly stubborn mineral deposits, such as limescale or rust rings, a pumice stone specifically designed for porcelain surfaces can be invaluable; it works by gently abrading the stain without scratching the fixture when used correctly on a wet surface. Alternatively, specialized hard water stain removers, often acidic in formulation, can chemically dissolve these deposits. For those preferring more natural solutions, baking soda serves as a mild abrasive and an excellent deodorizer, while white vinegar, a mild acid, is effective at cutting through soap scum, mineral deposits, and neutralizing odors. The deep cleaning process should commence with the toilet bowl interior. If your toilet design allows, lowering the water level in the bowl can significantly improve cleaning effectiveness, especially for stains at or below the waterline. This can often be achieved by flushing and then quickly turning off the water supply valve located behind or near the base of the toilet before the bowl fully refills. Apply your chosen clinging toilet bowl cleaner generously, ensuring complete coverage under the rim and along the sides of the bowl. Allow the cleaner to dwell for the manufacturer-recommended time, typically at least 10-15 minutes, or even longer for heavily soiled bowls, permitting the chemical agents to break down waste, kill bacteria, and loosen stains. 2.Accessories While the bowl cleaner is activating, turn your attention to the toilet’s exterior. Methodically spray all external surfaces the tank, the lid (both top and underside), the seat (both top and underside, paying special attention to the often heavily soiled underside and areas around buffers), the hinges, the flush handle or buttons, and the entire pedestal down to the floor with your disinfectant spray. The hinges and the crevices where the seat attaches to the bowl are notorious for trapping urine, skin cells, and other debris; an old toothbrush dipped in disinfectant can be exceptionally useful for scrubbing these intricate areas. Wipe all sprayed surfaces thoroughly with a clean microfiber cloth or paper towels, replacing them as they become soiled. Don’t neglect the floor area immediately surrounding the toilet base, as this zone is prone to collecting dust, hair, and splashes. Once the bowl cleaner has had sufficient dwell time, it’s time to scrub the interior. Employ your toilet brush, starting under the rim and systematically working your way down, covering all surfaces of the bowl. Apply firm, consistent pressure, focusing extra effort on any visible stains or rings. Utilize the under-the-rim feature of your brush to meticulously clean this hidden channel where odor-causing bacteria and unsightly buildup thrive. For stubborn waterline rings or mineral stains that persist after initial scrubbing, gently use a wet pumice stone. Remember to keep the stone and the porcelain surface wet to prevent scratching. After a thorough scrubbing, flush the toilet. As the clean water swirls, rinse the toilet brush in the flushing water. To allow the brush to drip dry effectively and prevent a soggy, bacteria-breeding holder, wedge the brush handle between the toilet seat and the bowl, letting the brush head suspend over the bowl. Once dry, spray the brush and its holder with disinfectant before storing. Maintaining this level of cleanliness and freshness between deep cleaning sessions requires incorporating simple, regular habits. A quick swish of the bowl with the toilet brush, even without cleaner, on a daily or every-other-day basis can significantly inhibit the formation of biofilm and rings. Keep disinfectant wipes conveniently located for swift wipe-downs of the seat, rim, and handle, particularly beneficial in households with multiple users, young children, or individuals prone to splashes. Ensure your bathroom is adequately ventilated; consistently use an exhaust fan during and after showers and baths to reduce ambient humidity, which discourages the growth of mold, mildew, and odor-causing bacteria. A small but impactful habit is to close the toilet lid before flushing. This practice helps to contain the “toilet plume,” the aerosolized cloud of microscopic water droplets, bacteria, and viruses that can be ejected into the air and settle on surrounding surfaces. 3.Odors Addressing odors effectively often requires looking beyond surface cleaning. If persistent, unpleasant smells linger despite regular, thorough cleaning, further investigation is warranted. One common culprit for sewer-like odors is a failing or improperly installed wax ring that seals the base of the toilet to the drainpipe; symptoms can include water seepage around the base or a rocking toilet. Replacing a wax ring is typically a job for a plumber. Urine odors can also permeate porous grout lines if the toilet base is not properly caulked or if splashes are not cleaned promptly. Cleaning the grout

Keep Your Toilet Clean And Shiny – 4 Tricks You Need To Know Read More »

microfiber mop

Microfiber Mop Cleaning – 4 Tips You Should Know

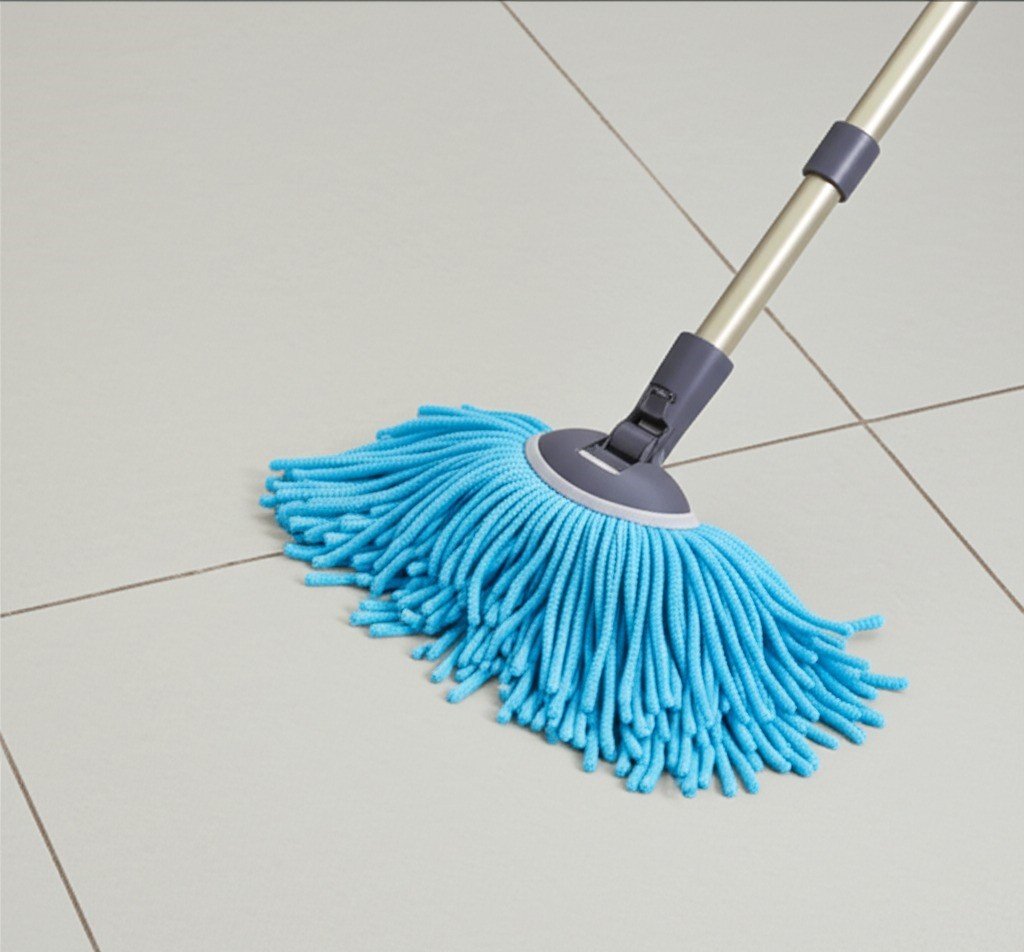
Microfiber Mop Cleaning: 4 Tips You Should Know Microfiber mops clean better than cotton mops because of how the material is built. The pads are made of ultra-fine polyester and polyamide fibers, split into strands thinner than a human hair, which gives them a huge surface area and a mild electrostatic charge that pulls dust and dirt in instead of pushing it around. Used correctly, a microfiber mop lifts more grime with less water and fewer chemicals, which makes it a smart choice for hardwood, laminate, tile, and vinyl alike. These four tips will help you get the most from your mop, and for homes that want professional results every week, our regular cleaning service covers floors throughout the house. Tip 1: Use a Dry Pad for Dusting and a Damp Pad for Mopping A microfiber mop is really two tools in one. Run a clean, dry pad over hard floors for daily dusting: the electrostatic action grabs fine dust and allergens that a broom would just launch into the air, so it is ideal for homes with allergy sufferers or pets. For wet cleaning, dampen the pad and wring it out until it is barely moist. Microfiber holds many times its weight in water but releases it evenly, so water-sensitive hardwood and laminate never get over-wet. Less moisture also means faster drying and less risk of slipping. Tip 2: Match the Pad to the Mess Not every pad is the same, and swapping pads for the task at hand makes cleaning faster and more effective. Pad style Best for Looped weave General-purpose damp mopping and dry dusting on most hard floors Scrubbing strips Sticky spills and stubborn dirt on resilient floors such as tile and vinyl Fringed edges Sweeping up larger debris and reaching into corners and along baseboards Dense, high-quality microfiber Maximum particle pickup and longer pad life for busy households Stock a spare pad or two so you can swap in a fresh one mid-clean instead of rinsing a single soiled pad again and again. Tip 3: Use the Right Technique and the Right Products For dry dusting, move the mop in a figure-eight or S pattern so debris gathers instead of streaking. For damp mopping, work in sections and replace the pad as soon as it looks visibly soiled. When you do need a cleaning agent, hot water alone often does the job, and a very dilute pH-neutral cleaner handles tougher spots without leaving residue that builds up on floors. Wring the pad until just damp: soaking wet pads streak and over-wet sensitive floors Clean in a figure-eight motion to trap dirt rather than push it Rinse or swap pads whenever they stop picking up efficiently Skip heavy chemicals: microfiber removes microbes effectively with water alone Tip 4: Wash Pads the Right Way So They Last Microfiber pads are built to survive hundreds of wash cycles, but only with the right care. Pre-rinse heavily soiled pads, then machine wash them separately from cotton towels and clothes, because cotton lint clogs the split fibers and kills their cleaning power. Use a mild detergent and never fabric softener, which coats the strands, kills their absorbency, and destroys the static charge; skip bleach, which degrades the material. Air drying is gentlest; if you use a dryer, keep it on low heat because high heat can melt the synthetic fibers. Stored clean and dry, a good set of pads keeps performing for years, which makes microfiber systems cheaper over time than disposable sheets despite the higher upfront cost. Microfiber mops also help the environment. Because they clean with minimal water, you use far less water per mop session, and the reduced reliance on chemical cleaners is easier on indoor air, pets, and waterways. Studies cited in cleaning research show microfiber traps bacteria more effectively than cotton even with plain water, which is why many professional cleaners, including the teams that provide deep home cleaning in Toronto, choose them for kitchens and bathrooms. When you do reach for a product, Health Canada’s advice on using household products safely helps you pick and handle it the right way. Frequently Asked Questions Can I use a microfiber mop on hardwood floors? Yes, if the pad is only damp, never soaking wet, and you use a pH-neutral cleaner made for hardwood; excess moisture is the main cause of warping and finish damage. Why did my microfiber pad stop picking up dirt? The fibers are probably clogged with fabric softener, bleach damage, or cotton lint from the wash; rewash the pad without softener and keep microfiber loads separate from cotton items. Should I use disinfectant with a microfiber mop? Microfiber physically captures a high percentage of bacteria with water alone, but for extra sanitation you can use a disinfectant suited to your floor type; the CDC’s guidance on cleaning and disinfecting your home explains when disinfecting is actually needed. How often should I replace microfiber mop pads? Quality pads last through hundreds of washes, roughly six months to a year of weekly use; replace them when the fibers feel matted, smell musty after washing, or visibly stop trapping dirt. Proper care and technique turn a humble mop into the most versatile tool in your cleaning closet. For hands-on help keeping every floor in your home spotless, Toronto Shine Cleaning offers bonded and insured service with equipment that respects delicate surfaces; browse our pricing to see if we serve your area, then call (647) 424-0355 to schedule a visit.

Microfiber Mop Cleaning – 4 Tips You Should Know Read More »

wooden items on top of a wooden table

Keep Your Wood Items Shining – 4 Best Tips

Keep Your Wood Items Shining: 4 Best Tips Wood furniture, floors, and decor add warmth to a Toronto home, but wood is a living material: it is porous, it breathes, and it reacts to humidity, heat, and sunlight. The finish, whether paint, oil, wax, varnish, lacquer, or polyurethane, acts as the real shield against damage, so care routines should match the finish. Follow these four tips and your wood pieces will keep their glow for decades. When life gets busy, a professional maid service can dust and polish wood surfaces on a schedule that suits your home. Tip 1: Dust Often and With the Right Fabric Dust looks harmless, but it is abrasive: left to build up, it causes microscopic scratches that dull a finish over time and wear it away. Dust wooden furniture once or twice a week, more often in busy or dusty homes, and always wipe along the grain so particles lift out of the texture instead of getting pushed deeper. Use a soft, lint-free cloth such as microfiber or a well-washed cotton T-shirt Choose real ostrich feather dusters for carved or delicate pieces, since they trap dust instead of scattering it Reach crevices with a soft-bristled brush such as a clean paintbrush Avoid silicone dusting sprays, which leave a greasy coating that pulls in more dust Tip 2: Clean Grime Gently, Never Soak the Wood Fingerprints, sticky stains, and everyday grime need more than dusting, but water is wood’s weak spot. For sealed finishes such as varnish, polyurethane, or lacquer, wring a cloth out until nearly dry, wipe the surface, and dry immediately with a clean cloth; never let water sit on wood, since it can seep into imperfect finishes and cause swelling, white spots, or discoloration. Add a tiny amount of mild dish soap to the water for stubborn grime, and always test any product, even plain water, on a hidden spot first. Oiled and waxed finishes are more vulnerable to moisture, so use a dry cloth or a cleaner made for those finishes. Blot spills the moment they happen, working from the outside in, because wiping spreads liquid deeper into the grain. Tip 3: Protect Wood From Sun, Heat, and Humidity Swings Environmental damage is slower than spills but just as real. Prolonged sunlight fades color and dries wood out until it cracks or warps, so keep valuable pieces out of direct sun, use UV-blocking blinds or film, and rotate furniture so light exposure stays even. Humidity matters even more: wood absorbs and releases moisture, so aim for a stable indoor range of 40-60 percent. When the air is too dry, joints loosen, floorboards gap, and surfaces crack; when it is too damp, drawers stick, veneer bubbles, and mold can take hold. Threat What it does Simple fix Direct sunlight Fades color, dries the wood, causes cracking UV-blocking curtains or window film; rotate pieces seasonally Low humidity in winter Shrinks wood, loosens joints, opens cracks Run a humidifier and track moisture with a hygrometer High humidity Swelling, sticking drawers, lifted veneer, mold risk Use a dehumidifier and improve ventilation Heat vents and radiators Localized drying, warping, and finish damage Keep furniture several feet away from heat sources Coasters, placemats, trivets under hot dishes, and felt pads under lamps and vases prevent most water rings and scratches, and lifting furniture instead of dragging it protects both the piece and your floor. Tip 4: Feed the Finish: Polish, Oil, or Wax Deeper treatments restore shine and add protection, but only the right product for the finish. Hard, sealed surfaces such as polyurethane or varnish need little more than a quality furniture polish used sparingly a few times a year; skip heavy silicone or wax polishes, which build up into a dull, hard-to-remove film, and always spray or apply polish to the cloth, never directly on the wood. Oiled pieces want re-oiling every six to twelve months with tung oil or boiled linseed oil, applied thinly and wiped down so excess never turns sticky; note that linseed-soaked rags can ignite, so dispose of them safely. Waxed finishes benefit from an annual coat of paste wax, allowed to haze and then buffed vigorously to a hard shine. Whatever the finish, start from a completely clean, dry surface. Caring for Floors, Cutting Boards, and Special Pieces Hardwood floors take the most abuse in a home. Vacuum or sweep regularly with a soft brush, then clean with a damp microfiber mop and a pH-neutral hardwood cleaner; skip steam mops and oil-based soaps, which force moisture into the wood or leave residue. Wood cutting boards need hand washing in hot, soapy water after every use, thorough drying, and periodic treatment with food-grade mineral oil to keep them from cracking and to seal pores against bacteria. Antiques and carved decor deserve gentle dusting and a spot away from heat and sun. For anything stubborn, test a small hidden area first, and remember that harsh chemicals such as ammonia, bleach, and scouring powders strip finishes. Health Canada’s household chemical safety tips are a useful reminder to read labels before using strong products, and its guide to using household products safely covers cleaning and care items. Frequently Asked Questions How do I remove white water rings from wood? Light rings sometimes lift when you press a dry cloth over the mark with a warm iron for a few seconds, or with a brief application of non-gel toothpaste or mayonnaise wiped off and polished; test any method in a hidden spot, since these tricks can alter the finish. Can I use vinegar to clean wood furniture? Avoid it on most finishes: vinegar is acidic and can dull varnish and polyurethane over time; a barely damp cloth or a cleaner matched to your finish is safer. Should I oil wood furniture even if it looks fine? Only oiled finishes need re-oiling, roughly every six to twelve months or when the surface looks dry; sealed finishes need polish, not oil, which would sit on top and

Keep Your Wood Items Shining – 4 Best Tips Read More »

ceiling fan

4 Ceiling Fan Cleaning Tricks You Need to Try

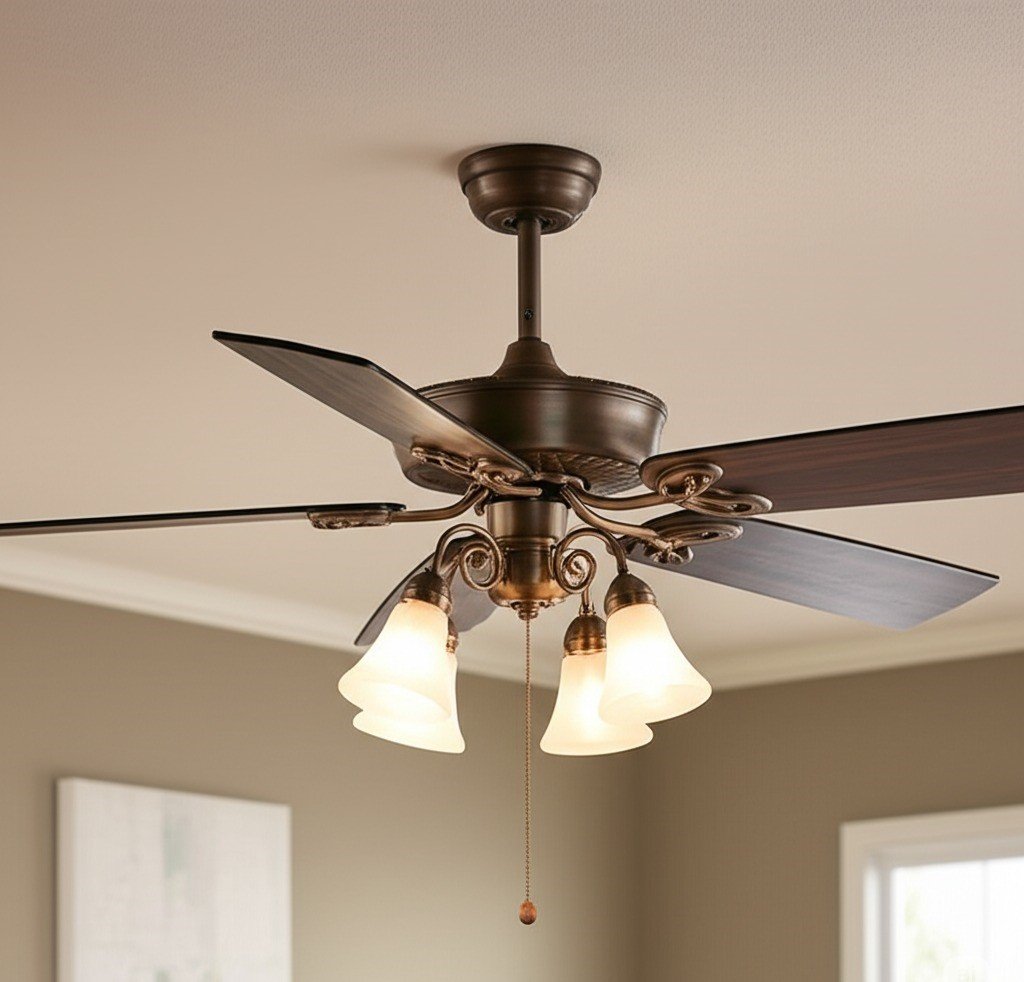
4 Ceiling Fan Cleaning Tricks You Need to Try A ceiling fan gathers dust on every blade, then throws it back into the air each time the fan spins, which is bad news for allergies and breathing. Heavy buildup can also unbalance the blades, causing wobble, noise, and strain that shortens the motor’s life. Cleaning the fan every two to three months keeps air fresher and the fan running smoothly, and these four tricks make the chore quick and tidy. If ceiling fans and other high spots are easy to overlook, a deep cleaning service can take them off your list entirely. Trick 1: Kill the Power Before You Touch Anything Safety first: turn off the fan with the wall switch or pull chain, then flip the circuit breaker that feeds the fan at your electrical panel so there is no chance of accidental start-up. Test the switch after you cut the power, and put a strip of tape over the breaker as a reminder. Use a sturdy A-frame or platform ladder that lets you reach the blades without overreaching, keep three points of contact, and have a spotter hold the ladder if you can. Set up your supplies before you climb: Drop cloth, painter’s tarp, or flattened cardboard to protect the floor and furniture below Safety glasses and a dust mask or N95 respirator for falling debris An old pillowcase for the blade trick below Vacuum with soft brush and crevice attachments Microfiber cloths plus a mild cleaner, or a half-and-half mix of white vinegar and water Trick 2: Slide a Pillowcase Over Each Blade The pillowcase method is the fastest way to remove loose dust without raining it down on the room. Climb up, slip the open end of a clean pillowcase over the full length of one blade like a sock, press the fabric gently against the top and bottom surfaces, then slide the case off: the dust and cobwebs stay trapped inside. Repeat for every blade, then take the case outside, away from windows and doors, and shake it out. A cotton pillowcase is ideal because its light texture grabs dust without scratching the blade finish. Trick 3: Follow Up With Vacuuming or a Damp Wipe For light residue, go over the top, bottom, and edges of each blade with a vacuum soft brush attachment, moving slowly so dust is captured rather than scattered, and use the crevice tool around the blade mounts. Heavier grime, like the oily film on kitchen fans, needs a damp microfiber cloth wrung out until barely moist. Excess moisture can damage the motor and warp wooden blades, so wring thoroughly, never spray anything near the fan, and wipe wooden blades in the direction of the grain using a wood-safe cleaner or plain water. Fan part Cleaning method How often Blades Pillowcase trick, then vacuum or damp-wipe residue Every 2-3 months; monthly with pets or allergy sufferers Motor housing Dry microfiber cloth; soft toothbrush for vents With every blade clean Light globes and bulbs Hand wash globes in warm soapy water, dry fully; wipe cool bulbs with a dry cloth With every blade clean Kitchen fans Degreaser applied to a cloth, not the blade; wipe and dry Monthly, since cooking grease builds up fast Never use abrasive powders, steel wool, or harsh solvents on blades, and test any new cleaner on an inconspicuous spot first, especially on wood finishes. Trick 4: Don’t Skip the Housing, Lights, and Grease Once the blades are clean, dust the motor housing’s exterior with a dry cloth or an extendable duster, and clear the air vents with a dry toothbrush; never let liquid near the motor’s openings or wiring. Removable glass globes wash easily in warm, soapy water, but dry them completely before reattaching so no moisture reaches the electrical parts. If blades carry sticky grease, apply a degreaser safe for the blade material to your cloth, let it sit briefly, then wipe with a clean damp cloth and dry. While you are up there, check for loose screws or wobble, and set the directional switch for the season: downdraft in summer, updraft in winter. Dust that stays airborne is a real indoor air concern, and Health Canada’s guide to indoor air contaminants explains why regular dust control matters; its information on dust and dust mites notes that dust mites thrive in carpets, furniture, and anywhere dust collects. Frequently Asked Questions How often should I clean my ceiling fan? Most homes can manage every two to three months, but clean monthly if you have pets, allergy sufferers, or visible dust buildup, and more often for kitchen fans exposed to cooking grease. Can I spray cleaner directly on ceiling fan blades? No: spray the cleaner onto a cloth instead, because mist can reach the motor and electrical connections, and excess liquid can stain or warp wooden blades. Do I need to turn off the circuit breaker to clean a fan? It is the safest habit, since the wall switch can be flipped accidentally while you work; tape over the breaker keeps everyone in the household aware. Why does my ceiling fan wobble after cleaning? A blade may have shifted out of alignment or a mounting screw may be loose; check and retighten the screws and gently straighten the blades, and if wobble continues, the motor or bracket may need professional attention. Once the fan is clean, fold the drop cloth inward to contain the dust, let every damp part dry completely, restore power, and test the fan on low speed: smooth and quiet means the job is done. For help with the rest of the home, Toronto Shine Cleaning offers regular cleaning visits that keep dust under control between deep cleans. Call (647) 424-0355 or visit our pricing page to book a service.

4 Ceiling Fan Cleaning Tricks You Need to Try Read More »

3 Best Tips How To Keep Your Living Area Clean

3 Best Tips to Keep Your Living Area Clean The living room is the hardest-working space in a Toronto home: it hosts family evenings, visitors, snacks, and pets, so it collects clutter, dust, and grime faster than any other room. A systematic routine keeps it welcoming without eating your whole weekend. Start with the three pillars below, then layer in small daily habits. If you would rather spend your free time relaxing than dusting, Toronto Shine Cleaning’s regular cleaning service keeps living areas fresh on a schedule you choose. Tip 1: Declutter Surfaces Before You Clean Anything Cleaning around clutter wastes time and misses spots, so clear the room first. Work one surface at a time, starting with the coffee table, then side tables, media cabinets, and shelves. As you handle each item, sort it into one of four destinations: trash, donate, another room, or a proper home in the living area. The usual suspects are mail, old magazines, stray remotes, and things carried in from other rooms, so give frequent-use items such as remotes and current reading a designated spot, and clear the rest away. Decluttering also makes the space feel calmer, and it reveals the true scope of the cleaning ahead. Tip 2: Dust Top to Bottom, and Don’t Skip the Details Dust falls, so always work from the ceiling down: start with fan blades, light fixtures, and the tops of tall shelving, then move to lower shelves, picture frames, and furniture. Microfiber cloths trap dust instead of moving it around, and an extendable duster reaches high corners. On shelves full of objects, lift the items off, dust the shelf, dust the items, and replace them. Electronics such as TVs, consoles, and speakers attract dust too: turn them off and unplug them, wipe screens with a dry microfiber cloth, and clear vents with compressed air, never liquid. Treat the rest of the room by surface type: Item Cleaning method Watch out for Lampshades Vacuum fabric shades with a brush attachment; wipe plastic or paper shades dry Rough handling can crease paper shades Blinds and shutters Wipe each slat with a microfiber cloth or blind tool Slats snap back if wiped too hard Wood furniture Dust with the grain; polish sparingly, applied to the cloth Excess polish and silicone sprays attract dust Glass tabletops Glass cleaner with a lint-free cloth Streaks appear when cleaner dries before wiping Tip 3: Refresh Sofas and Floors With the Right Routine Upholstered furniture traps dust, crumbs, pet hair, and odors. Vacuum sofas and armchairs regularly with the upholstery attachment, remove the cushions to reach the base and seams, and use the crevice tool along edges and under cushions. Act fast on spills: blot with a clean cloth from the outside in, never rub, and test any cleaning product on a hidden spot first, following the manufacturer’s care label when you can. For musty fabric, sprinkle baking soda lightly, let it sit for 15-30 minutes, and vacuum it up. Finish with the floor. Hardwood and laminate need a sweep or vacuum on the hard-floor setting, then a barely damp flat microfiber mop with a pH-neutral cleaner; a wet mop is the fastest way to damage wood. Tile tolerates more water and standard tile cleaners, vinyl is happy with mild all-purpose cleaner, and any hard floor benefits from extra passes in corners and under furniture. Carpets ask for slow, overlapping vacuum passes in two directions to lift embedded grit that grinds down fibers, plus the crevice tool along baseboards; treat stains by blotting and testing first, and rent a carpet machine or hire professionals for a periodic deep refresh. Health Canada’s dust and dust mites page notes that regular vacuuming keeps dust levels down in carpets, furniture, and bedding, while the CDC’s home cleaning and disinfecting guidance explains that plain cleaning with soap or detergent removes most germs from everyday surfaces. Small Habits That Keep the Room Guest-Ready Tidy surfaces for five minutes each evening: remotes back, mail sorted, cushions fluffed Deal with spills the moment they happen, blotting rather than rubbing Vacuum high-traffic zones weekly and the whole room every one to two weeks Open windows briefly when weather allows to air the room out Rotate decorative pillows and fold throws so the room always looks arranged A clean living area is a place people want to linger, and maintaining it is mostly about rhythm: quick daily tidying, weekly vacuuming, and a monthly top-to-bottom dusting keep deep cleaning sessions short. Frequently Asked Questions What order should I clean a living room? Declutter first, then dust from the ceiling down, refresh upholstery, and clean the floor last so you pick up everything that fell during the earlier steps. How often should I vacuum my sofa? Once a week for sofas in regular use, or every few days with pets; remove cushions and use the crevice tool to keep debris from working into the frame. Is it safe to use baking soda on upholstery? A light sprinkle left for 15-30 minutes and vacuumed up neutralizes odors on most fabrics, but test an inconspicuous spot first and avoid it on delicate materials. How do I stop my living room from getting dusty so fast? Use microfiber cloths for dusting, vacuum with a HEPA-equipped machine, wash throws and cushion covers regularly, and keep windows closed on high-pollen days. Consistent routines protect your investment in furniture and flooring, and a fresh living area makes every evening more relaxing. For a deeper reset, our deep cleaning service tackles baseboards, vents, and upholstery in one visit. Call (647) 424-0355 or see our pricing page to book your clean.

3 Best Tips How To Keep Your Living Area Clean Read More »