Cleaning Guide

Barbecue Grills

6 Tips on How to Keep Your Barbecue Grills Looking Like New

Six Tips to Keep Your Barbecue Grill Looking Like New The film clinging to your grates is residue from past meals: carbonized marinade sugars, polymerized fats from meat, and open-flame ash. It is not a badge of honor or a seasoning layer: that buildup adds bitter flavor to fresh food, fuels flare-ups, and can harbor bacteria, so a clean grill matters for taste, safety, and equipment life. Grates touch your food directly, and the routine is simpler than it looks once you learn the order of operations. Tip 1: Assemble the Right Tools First Preparation wins here. Buy a quality grill brush: wire bristles clean fast but can shed into food, so inspect yours before every use or choose a bristle-free coiled-steel design. Then keep these nearby: A long-handled scraper for thick, flat carbon deposits Heavy-duty rubber or nitrile gloves and a bucket Degreasing dish soap, distilled white vinegar, baking soda Microfiber cloths and a non-abrasive scour pad A barbecue degreaser or oven cleaner, only for extreme cases Tip 2: Burn-Off and Scrape After Every Cook The routine always starts with heat, and this one habit outperforms any deep clean. Set the grill to its highest setting, close the lid, and run it for 15 to 20 minutes until fresh residue incinerates into dry white or gray ash, which makes scraping dramatically easier. Then shut off the gas or extinguish the charcoal and, while the grates are still very hot, scrape along the bars with firm pressure. Repeat after every cook and deep cleans stay rare. Tip 3: Submerge the Grates in Hot Soapy Water For a deep clean, remove the grates once they are cool enough to handle. Submerge them in a sink, bucket, or heavy-duty trash bag filled with the hottest water you can handle plus a generous pour of degreasing dish soap. Soak at least 30 minutes, or several hours to overnight for neglected grates, so the polymerized grease the burn-off missed softens and dissolves. Scrub with a stiff non-abrasive brush, rinse away every trace of soap so it cannot flavor your next steak, and dry immediately, because cast iron especially will flash-rust if it sits damp. Tip 4: Fight Rust and Grime with Vinegar and Baking Soda For a detergent-free approach, place cool grates in a large heavy-duty trash bag and pour in a two to one mix of distilled white vinegar and water, using enough liquid to coat every bar. Close the bag and leave it to rest for several hours, ideally overnight, while the acetic acid breaks down grease and rust. Open it, sprinkle baking soda generously over the wet grates, and the acid-alkali reaction fizzes into a gentle abrasive foam. Close the bag for another 20 to 30 minutes, scrub, rinse thoroughly, and dry completely. Tip 5: Reach for Oven Cleaner Only in Extreme Cases When carbon has fused to grates over years of neglect, a commercial oven cleaner or barbecue degreaser is the last resort. Work outdoors with ventilation, away from children and pets, wearing gloves and eye protection, with the grates laid on newspaper. Spray evenly, follow the product instructions, and bag the coated grates for 30 minutes to several hours. Open the bag away from your face, then rinse with a hose obsessively and wash with soap, because leftover caustic residue is hazardous if ingested. Skip this route on porcelain-coated grates unless the label allows it, since harsh chemicals etch the coating. Health Canada’s rules for using household chemicals safely apply directly to degreasers like these. Tip 6: Clean the Cook Box, Then Season Before Reassembly While the grates soak, do not neglect the interior. Heat tents, also called flavorizer bars, catch drippings, vaporize them into flavor, and shield the burner tubes; they get just as filthy, so remove and scrape them or soak them in hot soapy water. Inspect the gas ports along the burner tubes, because clogs cause uneven heating and weak yellow flames; clear them with a paperclip, never anything that can break off inside. Scrape flaking carbon from the lid and basin so it cannot land on your food, then vacuum loose debris out with a wet/dry shop vacuum. Finish with the grease tray and catch pan, where rendered fat becomes a fire hazard: scrape out hardened grease, wash the tray in hot soapy water, replace disposable pans, and scrub reusable ones clean. With everything dry, reassemble the tray, burners, and tents, then season the clean grates: wipe a barely-there sheen of high-smoke-point oil (canola, grapeseed, or vegetable), pat off excess, and heat the closed grill on medium-high for 15 to 20 minutes until smoking stops. That polymerizes the oil into a hard, non-stick finish. Deep-Clean Methods Compared Method Best for Dwell time Watch out for High-heat burn-off and scrape Every cook, light residue 15 to 20 minutes heating Very hot grates; work along the bars Hot soapy soak Routine deep cleans 30 minutes to overnight Rinse all soap; dry fast to prevent rust Vinegar soak plus baking soda Surface rust, natural cleaning Hours plus 20 to 30 minutes fizzing The bag must be heavy-duty and sealed Oven cleaner or BBQ degreaser Years of fused carbon 30 minutes to several hours bagged Gloves, eye protection, outdoor air; skip on porcelain coating Scrape after every cook and you stretch the distance between full resets; deep clean at the start and end of grilling season and the equipment lasts for years. The same logic applies indoors, since food-contact surfaces deserve real cleaning, a point the CDC makes in its food safety basics. When your grill, or the kitchen beneath it, needs a professional reset, Toronto Shine Cleaning brings that care to GTA homes: a deep cleaning handles the big job, regular visits keep kitchens maintained, and the pricing page shows plans for every area we serve. Call (647) 424-0355 to book. Barbecue Cleaning FAQ How often should I deep clean my grill? Scrape and burn-off after every cook; deep clean the grates, burners, cook box, and grease

6 Tips on How to Keep Your Barbecue Grills Looking Like New Read More »
different types of cleaning sponges

10 Tips on How to Use Sponges That You Should Know

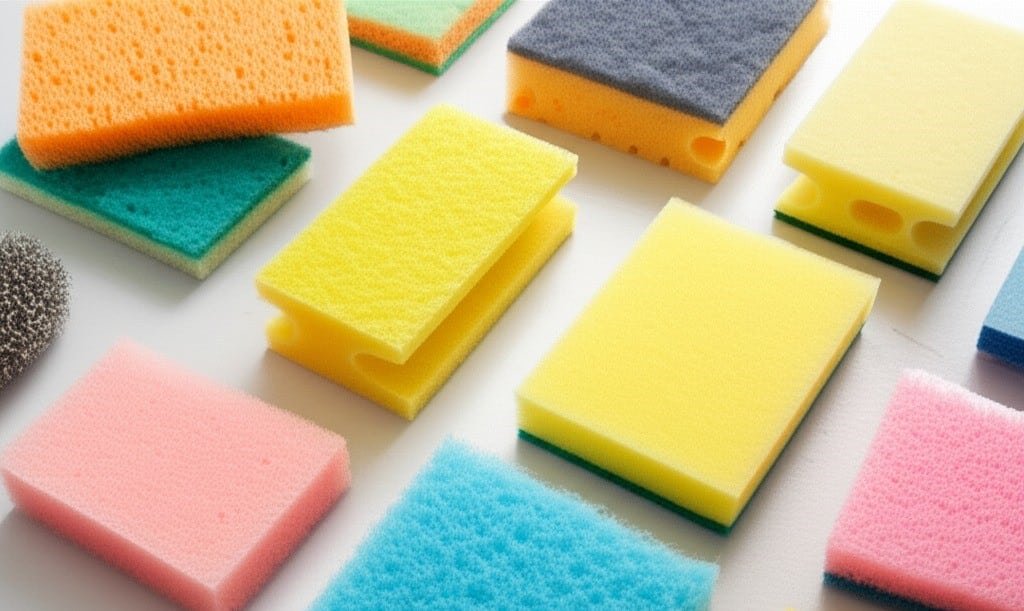
Types of Sponges for Cleaning: Pick the Right Tool for Every Surface The humble sponge decides whether a dish sparkles or a countertop gets scratched. Choose wrong and non-stick pans dull, polished stone etches, or soot smears across a wall. Each type trades absorbency, abrasion, and lifespan differently, so match the tool to the job. These ten types cover everything from daily dishes to fire-damage restoration. 1. Cellulose Sponge: The Everyday Absorber Made from wood pulp and plant fibers, the standard kitchen sponge holds up to twenty times its weight in liquid, ideal for spills, dishes, and wiping counters or sealed granite without scratching. Organic fibers invite bacteria, so sanitize it on the dishwasher’s top rack or damp and microwave one to two minutes. Bleach disintegrates the fibers; replace it every two to three weeks or as soon as it smells or crumbles. 2. Dual-Sided Scrub Sponge: A Kitchen Workhorse One side is cellulose for absorbing and sudsing; the other, usually green, is abrasive nylon for real friction: burnt-on food in pots and pans, oven interiors, barbecue grates, and grime on concrete or unsealed tile. Never use the green side on non-stick cookware, glass cooktops, polished counters, acrylic tubs, or painted surfaces: it etches permanent scratches. 3. Anti-Scratch Scrub Sponge: Power Without Damage These look like their green-backed cousins, but the abrasive layer is a finer nylon weave or plastic mesh, often blue or white to signal the difference. It lifts stuck food without gouging, making it the safe pick for non-stick pans, glass cooktops, ceramic dishes, stainless steel sinks, chrome, and plastic containers. Not for baked-on carbon, but ideal for daily dishwashing. 4. Natural Sea Sponges: Delicate and Self-Protecting Harvested from the ocean floor, these are the skeletons of simple marine organisms: hard when dry, silky soft when wet, and more absorbent and durable than synthetic cellulose. Natural enzymes inhibit mold, mildew, and bacteria, so a cared-for sea sponge stays hygienic and outlasts synthetics. Use it for fine china, crystal, silver, cars, or windows, or for bathing; rinse, air dry, never wring hard, and keep harsh chemicals away. 5. Melamine Foam Sponges: The Magic Eraser Effect Melamine foam, widely sold as Magic Eraser, needs no soap: wet, its microscopic structure acts like super-fine sandpaper that wears stains away. It erases crayon, marker, and scuffs from painted walls, cuts shower soap scum, and revives vinyl flooring and sneakers. Because it abrades whatever it touches, it can dull glossy finishes and scratch delicate plastics. It cannot be sanitized: discard when worn. 6. Steel Wool and Metal Scourers: Maximum Friction Fine steel filaments or woven stainless ribbons make these the last-resort tools for cast iron, rust removal, paint stripping, and filthy grill grates and oven racks. Never use them on non-stick surfaces, ceramic, glass, enamel, polished metal, or coatings: the scratches are deep and permanent. Fragments can rust, so rinse afterward; expect one or two uses per pad. 7. Silicone Sponges: Hygienic and Built to Last Food-grade, non-porous silicone absorbs nothing, so bacteria, mold, and odors never take hold, and boiling, microwaving, or a dishwasher cycle sanitizes it instantly. One sponge lasts years. Its soft bristles work like flexible scrapers: great for pre-dishwasher scraping, light dishes, and scrubbing root vegetables, weak on spills and heavy grease. 8. Microfiber Sponges: Chemical-Free Cleaning Power A foam or cellulose core wrapped in microfiber combines absorbency with electrostatic attraction: millions of split synthetic fibers trap dust and grime, so it cleans with little or no chemical help. It is gentle enough for fine furniture, stainless steel, glass, and cars. Machine-wash regularly, never with fabric softener, which clogs the fibers and ruins its power. 9. Dry Sponges: For Soot and Delicate Surfaces Dry sponges, also called chemical or soot sponges, are vulcanized natural rubber used completely dry: a porous, tacky surface pulls soot, smoke residue, dust, and pet hair into its pores. Restoration pros lift smoke and soot from walls, ceilings, and upholstery without smearing, and it suits lampshades, wallpaper, acoustic tiles, and pool-table felt. Wipe gently, slice off the dirty layer, and never wet it. 10. Grout Sponges: The Tile Installer’s Tool Built for tile installation, grout sponges are larger and denser than cellulose versions, with rounded edges. Density lets them hold rinse water without collapsing into soft grout lines and pulling grout out before it sets, and rounded corners never dig as you wipe haze off fresh tile. No other sponge does that job as cleanly. Sponge Quick-Reference Table Sponge type Best for Avoid on Care Cellulose Spills, dishes, gentle wiping Harsh chemicals Replace every 2 to 3 weeks Dual-sided scrub Burnt-on food, ovens, grills Non-stick, glass cooktops Sanitize weekly Anti-scratch scrub Non-stick pans, ceramics, sinks Heavy baked-on carbon Sanitize weekly Natural sea China, crystal, cars, bathing Boiling water, harsh chemicals Air dry; lasts months Melamine foam Walls, scuffs, soap scum Glossy and clear-coated surfaces Discard when worn Steel wool Cast iron, rust, grill grates Non-stick, enamel, glass One or two uses Silicone Pre-rinse scraping, light dishes Spills, heavy grease Lasts years; boil to clean Microfiber Dusting, polishing, glass Fabric softener ruins it Machine wash plain Dry sponge Soot, lampshades, wallpaper Any wet cleaning Slice off dirty layers Grout sponge Tile installation, grout haze General heavy scrubbing Rinse and air dry Keep Germs Out of Your Sponge Routine Whatever you pick, hygiene decides how long it stays useful. Follow three simple rules: Rinse and squeeze sponges dry after every use Sanitize wet sponges weekly and replace them on schedule Keep sponges out of standing water and away from raw meat juices Clean tools and clean hands stop germs moving between surfaces and people, a point the CDC makes in its handwashing guidance, while Health Canada’s household product safety hub covers any cleaner you pair with your sponge. When a surface needs more than a sponge, a professional hand protects your finishes: Toronto Shine Cleaning matches materials to each job, whether you need a one-time deep clean, a regular maid service, or a move-day reset,

10 Tips on How to Use Sponges That You Should Know Read More »

How to Clean Your Microwave – 6 Amazing Tips

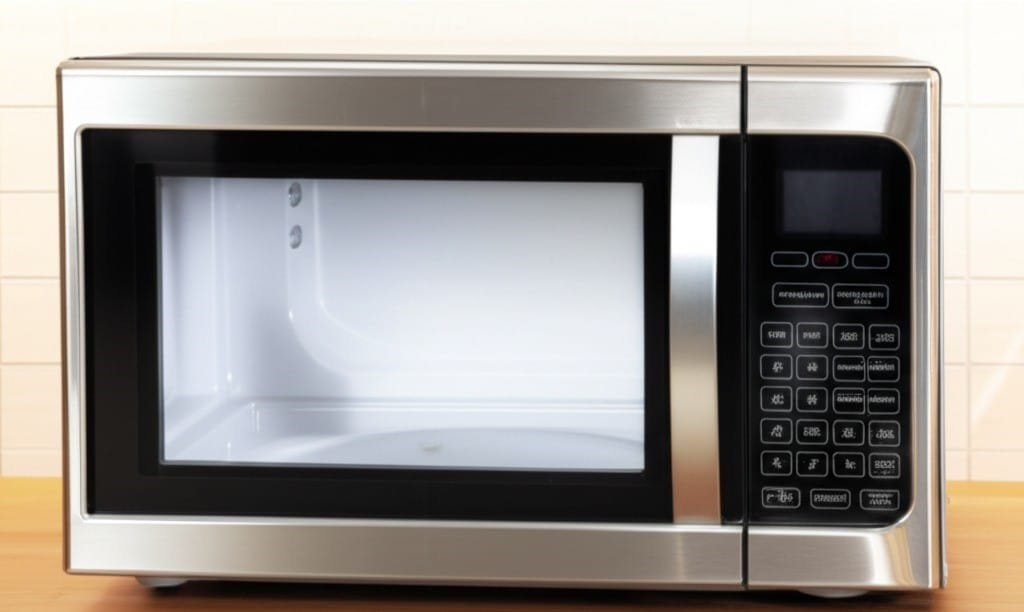
How to Clean Your Microwave Without Harsh Chemicals Few kitchen appliances see as much daily use as the microwave, and few collect grime as quickly. Reheated meals splatter, soups boil over, and sauces pop, leaving dried residue on the walls, ceiling, and door of the unit. Many people respond with abrasive scrubbers and strong chemical sprays, which risk scratching the interior coating and leaving fumes behind. A better approach relies on steam, mild acids, and gentle abrasives that dissolve messes without damaging the appliance. These microwave cleaning tips keep the process quick and safe. For homes that want every corner handled, Toronto Shine Cleaning offers a full deep cleaning package for the kitchen and beyond. Steam: The Gentle Way to Lift Stubborn Splatters Steam is the most effective weapon against baked-on messes because it softens residue so it wipes away with almost no effort. Fill a large glass measuring cup or another microwave-safe container with one cup of water, then stir in two tablespoons of white vinegar along with the juice squeezed from half a lemon. Drop in the squeezed lemon halves too, so their oils can freshen the air as the water heats. Run the microwave on high for three to five minutes, until the water boils and condensation covers the door window. Then leave the door closed for five to ten minutes. That pause holds the hot, acidic steam inside, where it loosens caked-on splatters everywhere. Do not rush: wiping too early is less effective and risks burns from hot steam. Wipe the Interior From Top to Bottom Once the steam has done its work, open the door carefully and remove the bowl with an oven mitt. Use a clean microfiber cloth to wipe from the ceiling down across the side walls, back wall, and floor, since loosened grime drips downward. Most splatters, even old ones, lift away easily. For spots that resist, dip the cloth into the warm vinegar or lemon water, or use the soft side of a non-scratch sponge. Never use steel wool, scouring pads, or abrasive metal scrubbers; they permanently scratch the interior surface. Don’t Forget the Turntable, Roller Ring, and Door The glass turntable and the plastic roller ring beneath it are prime hiding spots for drips and crumbs. Wash the glass plate by hand in warm, soapy water; most models also allow top-rack dishwasher cleaning. Scrub the roller ring the same way, using an old toothbrush on the small wheels where grease and particles get trapped and slow the rotation. Wipe the floor of the unit once more, then return the ring to its track and set the plate on top. Wipe the door’s interior with that same vinegar or lemon mixture, paying special attention to the mesh screen. Never spray cleaner straight at the control panel; liquid can work its way behind the buttons and ruin the electronics. Spray the cloth first instead. Stainless steel exteriors do best with a dedicated stainless cleaner wiped with the grain. Health Canada’s household product safety guidance also covers microwave ovens and the safe use of cleaning products. Baking Soda Paste for Burnt-On Food When steam alone cannot handle heavily carbonized spots, baking soda comes to the rescue. Stir roughly two parts of baking soda to one part of water until you get a thick, spreadable paste. Apply it only to the problem areas and let it sit for at least fifteen minutes so it can break down the burnt food. Gently scrub in circular motions with a damp cloth or a soft non-scratch sponge, rinsing the cloth often. Finish with a fresh, damp cloth to remove every trace of the paste. Over-the-Range Models: Clean the Grease Filters Over-the-range microwaves rely on grease filters underneath to trap airborne grease, and those filters are easy to forget. Slide the latch to remove them, then soak them for twenty minutes or more in a sink of very hot water with plenty of degreasing dish soap. For heavy buildup, sprinkle a quarter cup of the baking soda into the water. Scrub with a soft-bristled brush, rinse thoroughly with hot water, and let the filters air dry completely before sliding them back in. If your model has a charcoal filter for recirculated air, it is not washable and must be replaced on the manufacturer’s schedule. Odor Control and Everyday Prevention Lingering smells such as burnt popcorn usually vanish after a steam clean with lemon or vinegar. For a stubborn smell, leave a small dish of baking soda uncovered in the unit overnight, or set out a bowl of coffee grounds. Keeping the microwave clean also supports safe food handling; the CDC’s food safety basics page explains how germs spread through food. Prevention is the best maintenance strategy: Cover food with a splatter guard or a paper towel before heating. Wipe fresh spills right away, before they bake on during the next use. Do a quick damp-cloth wipe-down weekly to stop buildup. Microwave Cleaning Methods at a Glance Problem Best Method Key Detail Light splatters Vinegar or lemon steam Wait 5-10 minutes before wiping Burnt-on food Baking soda paste Let the paste sit for 15 minutes Greasy filters Hot soapy water soak Add baking soda for heavy grease Bad odors Baking soda or coffee grounds Leave inside overnight, door shut Frequently Asked Questions How often should you clean your microwave? A full steam clean once a week keeps most kitchens fresh, while the turntable and interior can be wiped more often if you use the microwave daily. Grease filters on over-the-range models need attention every few weeks depending on how much you cook. Is vinegar safe for the inside of a microwave? Yes. Distilled white vinegar is a mild acid that cuts grease and neutralizes odors without harming the interior coating, and it is safe around food. Just keep vinegar away from unsealed natural stone surfaces; microwave interiors are not a concern. Can you use baking soda in a microwave? Yes, as a gentle abrasive paste for burnt-on spots.

How to Clean Your Microwave – 6 Amazing Tips Read More »

7 Best Homemade Cleaning Solutions to Make Your Home Look Like New

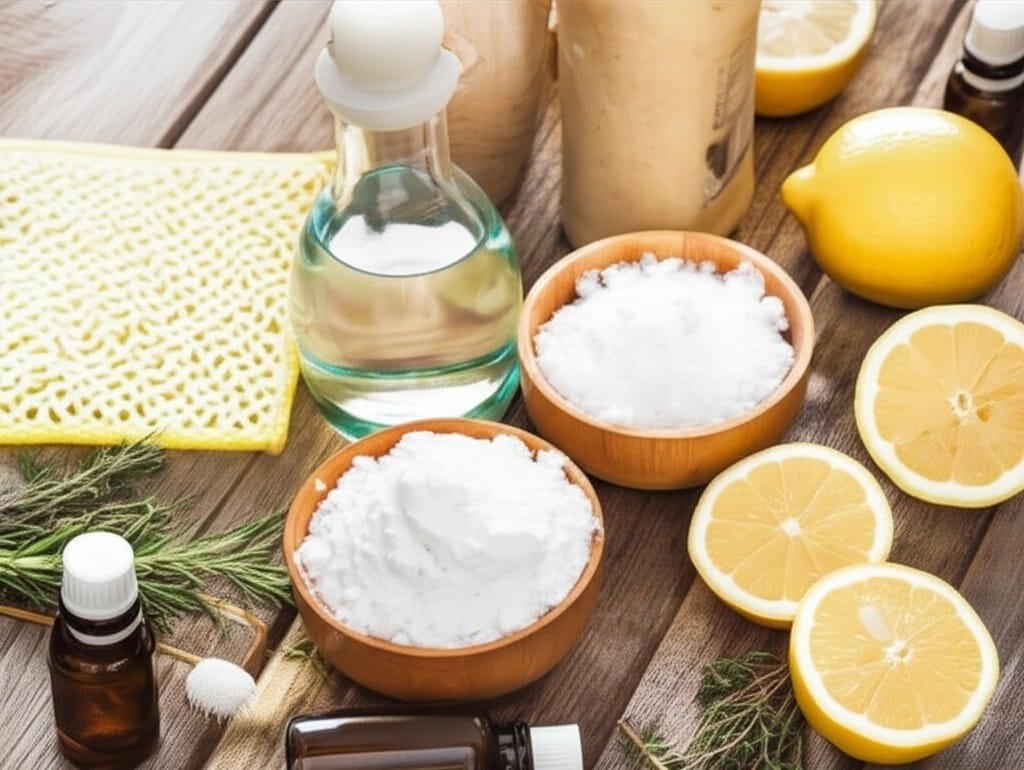
Creating your own homemade cleaning solutions is a direct approach to maintaining your home using simple, accessible ingredients. The effectiveness of these homemade cleaning solutions lies in understanding the properties of each component and how they interact with different surfaces and types of grime. There is no single magic formula; rather, a collection of recipes tailored for specific tasks. Many people turn to homemade cleaning solutions for their simplicity and cost-effectiveness. 1.White Vinegar The foundation of most homemade cleaning solutions rests on a few key ingredients. White vinegar, with its acetic acid content, is a powerful degreaser and disinfectant, capable of breaking down mineral deposits from hard water, soap scum, and everyday grime. Baking soda acts as a gentle, non-scratching abrasive, perfect for scrubbing surfaces without causing damage. It also serves as a natural deodorizer, absorbing and neutralizing unpleasant odors in refrigerators, drains, and carpets. The combination of these two ingredients creates a fizzing reaction that can help dislodge stubborn buildup, making them a dynamic duo in the world of DIY cleaning. The key to successful homemade cleaning solutions is understanding the ingredients. 2.Lemon For an all-purpose cleaner suitable for a majority of household surfaces, a simple mixture is highly effective. Combine one part white vinegar with one part water in a spray bottle. For a more pleasant scent and added antibacterial properties, add 10-15 drops of an essential oil like lemon, tea tree, or lavender. This specific homemade cleaning solution is excellent for wiping down laminate countertops, sealed granite, appliance exteriors, and painted walls. It cuts through fingerprints and light grease with ease. However, this vinegar-based homemade cleaning solution should not be used on natural stone surfaces like marble or unsealed granite, as the acid can etch and dull the finish. The versatility of this simple recipe demonstrates why so many rely on homemade cleaning solutions for daily upkeep. When it comes to glass and mirrors, achieving a streak-free shine is the primary goal. A superior homemade cleaning solution for this task involves mixing one part rubbing alcohol, one part white vinegar, and two parts water in a spray bottle. The rubbing alcohol is the key ingredient here; it evaporates quickly, preventing the water and vinegar from leaving behind streaks as they dry. Spray the solution directly onto a microfiber cloth rather than the glass surface to prevent drips. Wipe the surface clean, then use a second, dry microfiber cloth to buff it to a perfect shine. This is one of the most reliable homemade cleaning solutions for achieving crystal-clear windows and mirrors. 3.Baking Soda The kitchen presents a variety of cleaning challenges, from greasy stovetops to stained sinks. A powerful degreasing homemade cleaning solution can be made by creating a paste of baking soda and a small amount of warm water. Apply this paste directly to greasy splatters on the stovetop, backsplash, or inside the oven. Let it sit for 15-20 minutes to break down the grease, then scrub gently with a non-abrasive sponge and wipe clean with a damp cloth. For tougher, baked-on food, you can spray the baking soda paste with white vinegar to create that fizzing action, which helps lift the grime. This method showcases the targeted power of specific homemade cleaning solutions. To clean and deodorize a kitchen sink, sprinkle a generous amount of baking soda over the entire basin. Cut a lemon in half and use it to scrub the baking soda into the sink surface. The mild abrasiveness of the soda, combined with the citric acid and fresh scent of the lemon, will clean, polish, and deodorize the sink and garbage disposal simultaneously. Rinse thoroughly with hot water. This technique is a classic example of how natural, food-safe homemade cleaning solutions can be incredibly effective. 4.Natural Deodorant In the bathroom, soap scum and mildew are the primary adversaries. For tubs, showers, and tile, a highly effective homemade cleaning solution involves mixing one cup of baking soda with about a quarter-cup of liquid castile soap to form a thick, scrubby paste. Apply this paste to the surfaces and scrub with a brush or sponge. The baking soda provides the scrubbing power, while the castile soap helps lift and wash away the grime and soap scum. For tough mildew stains, a spray made of equal parts white vinegar and water can be used. Spray it on the affected areas, let it sit for at least 30 minutes, and then scrub away. It’s important to have good ventilation when working with these homemade cleaning solutions, particularly vinegar. Toilet bowls can be cleaned and sanitized without harsh chemicals. Pour about one cup of white vinegar into the toilet bowl and let it sit for at least an hour, or even overnight. The acid will work to dissolve mineral rings and stains. Afterward, sprinkle baking soda into the bowl, scrub with a toilet brush, and flush. The fizzing action provides an extra cleaning boost. This is a straightforward yet potent homemade cleaning solution for a task many people dislike. The power of homemade cleaning solutions extends to every corner of the house.   5.Dilute Floors require different approaches based on their material. For tile, vinyl, or linoleum floors, a simple and effective homemade cleaning solution consists of a gallon of warm water mixed with a half-cup of white vinegar and a few drops of castile soap. The vinegar disinfects and cuts through dirt, while the soap helps to lift it. Be careful not to use too much soap, as it can leave a sticky residue. For hardwood floors, the approach must be much more delicate. A heavily diluted homemade cleaning solution is necessary to prevent damage to the wood’s finish. Mix a gallon of warm water with just a quarter-cup of white vinegar. Wring the mop out until it is barely damp before applying it to the floor. Never let water pool on a hardwood surface. The development of specialized homemade cleaning solutions for different floor types is crucial for proper care. 6.Sprinkle Even carpets can

7 Best Homemade Cleaning Solutions to Make Your Home Look Like New Read More »

Dishwasher

5 Common Dishwasher Cleaning Mistakes You Need to Stop Making

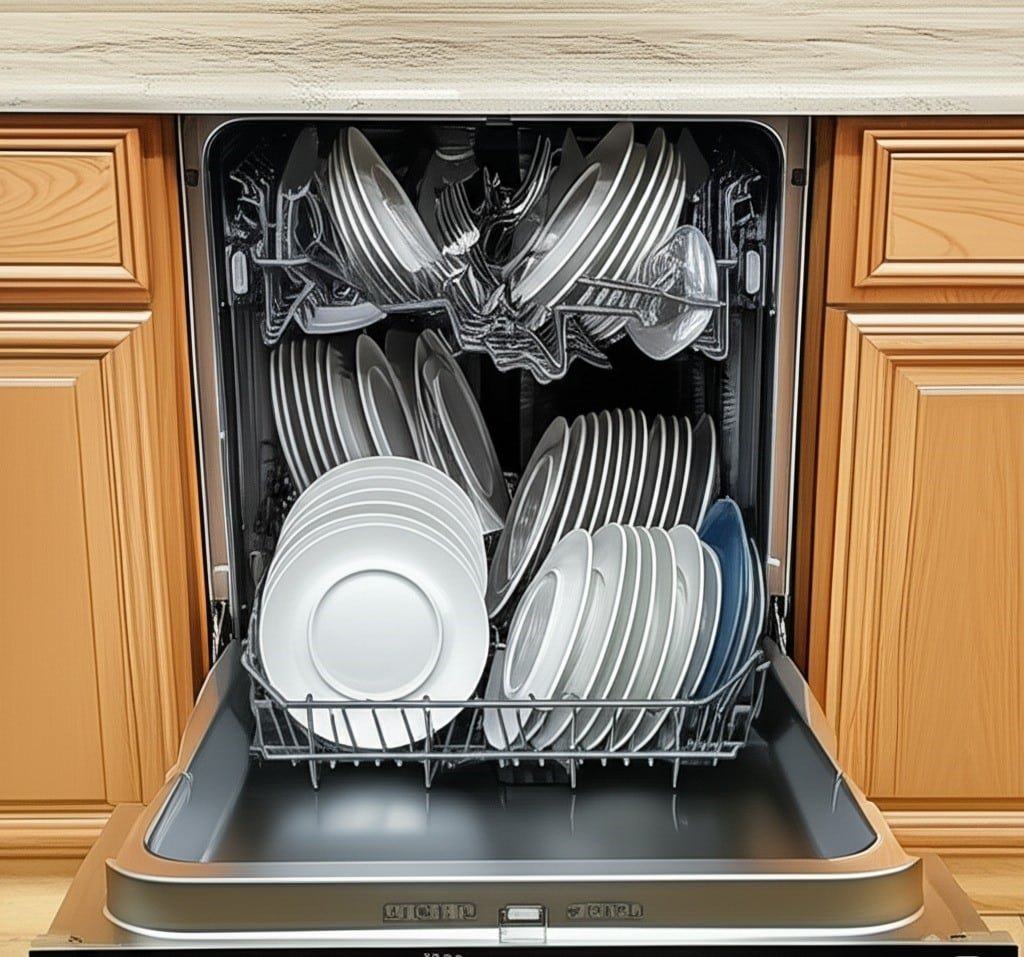
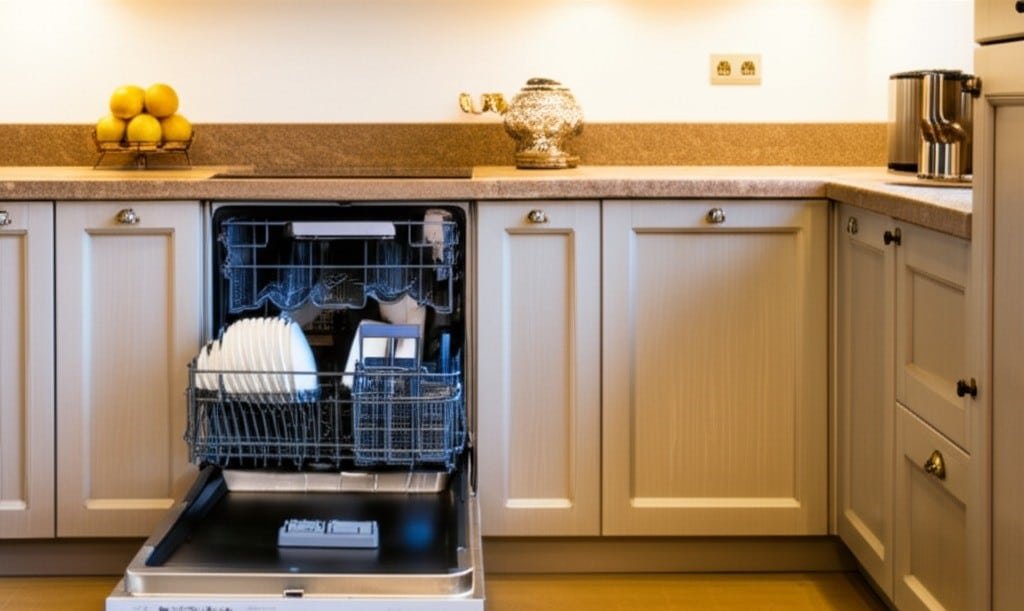
The critical Dishwasher Cleaning Mistakes that are ruining your dishes, dishwasher is an instrument of precision, not a brute-force cleaning bin. Its ability to produce sparkling, sanitized dishes is entirely dependent on the user’s understanding of its mechanical and chemical processes. When dishes emerge still dirty, streaked, or wet, the fault lies not with the machine, but with a series of preventable and often repeated Dishwasher Cleaning Mistakes. Rectifying these errors transforms the appliance from a source of frustration into the reliable workhorse it was designed to be. 1.Loading The most fundamental failures originate with loading. The core principle of a dishwasher is the systematic spraying of every dish surface with high-pressure, hot, detergent-laden water. Anything that obstructs this spray guarantees a failed cleaning. Overcrowding is the most common violation of this principle. The temptation to fit one more plate or bowl is strong, but doing so creates “water shadows.” A large bowl placed incorrectly can block the spray from reaching half a dozen smaller items behind it. This leads not only to the shielded items remaining dirty but to a more insidious problem: food particles trapped on those dishes can become loosened by the heat and steam, only to be blasted across the machine during the rinse cycle. This is the source of the dreaded gritty film that can coat supposedly clean glasses and plates. These types of Dishwasher Cleaning Mistakes actively make other dishes dirtier. Each item requires clearance on all sides for the water to circulate.   2.Right Position Equally important is the orientation of the dishes. The primary spray arms are located at the bottom of the tub and often underneath the top rack, meaning the water’s primary trajectory is upward. As a consequence, all soiled surfaces must face down and be angled toward the center of the machine where the spray is most concentrated. Placing a bowl upright is a classic example of Dishwasher Cleaning Mistakes; its interior will remain a dry, dirty island. Cups, glasses, and bowls belong on the top rack, angled downward between the tines to maximize exposure. Plates on the bottom rack should be arranged in the tines so they face the central spray, not all aligned in one direction against the side. The tines themselves are angled to achieve this optimal positioning. Large, flat items like cutting boards and baking sheets must be placed on the periphery along the sides or back of the bottom rack. Placing one at the front can physically block the detergent door from opening or impede the rotation of the lower spray arm, effectively neutralizing the entire wash cycle and creating one of the most frustrating Dishwasher Cleaning Mistakes to diagnose. The division of the racks is deliberate. The bottom rack is a zone of high intensity, situated directly above the main heating element and in the path of the most powerful water jets. This area is reserved for durable items: ceramic plates, stainless steel pots, and sturdy pans. The top rack provides a gentler wash, making it the safe haven for more delicate items. All plastics, even those labeled “dishwasher safe,” must be placed on the top rack. The intense, direct heat from the lower heating element will inevitably warp or melt plastic placed on the bottom rack, a permanent form of damage that ranks high among costly Dishwasher Cleaning Mistakes. The heat can also cause certain plastics to degrade and potentially leach chemicals. Delicate glassware, too, belongs on the top rack, secured between tines to prevent it from rattling against other items and chipping. Utensil loading is a science in itself. Simply dumping cutlery into the basket leads to “nesting,” where identical shapes, especially spoons, fit together and form a waterproof seal. To prevent this, utensils must be mixed. Alternate placing some handles up and some handles down. Distribute forks, spoons, and knives across different compartments. This simple act of separation is vital to avoid these common Dishwasher Cleaning Mistakes. For safety, sharp knives should always be placed blade-down, though it must be stressed that fine cutlery should never be subjected to a dishwasher’s harsh environment. 3.Be Careful This leads to arguably the most destructive category of Dishwasher Cleaning Mistakes: washing items that are not dishwasher-safe. The damage is often irreversible. Wood, including cutting boards, utensils, and knife handles, will absorb the hot water and swell, then crack and split as the heat-dry cycle rapidly removes the moisture. Cast iron cookware will be stripped of its vital seasoning-the polymerized oil layer that provides its non-stick quality. The harsh detergents are designed to dissolve grease and oil, so they directly attack this layer, exposing the raw iron which will immediately begin to rust. High-carbon steel chef’s knives suffer a dual assault: the chemicals in the detergent micro-corrode the fine blade edge, while the physical jostling against racks dulls it. Most non-stick pans will have their delicate coatings slowly abraded by the detergents. Fine china with metallic trim or hand-painted patterns will be chemically stripped by the heat and powerful cleaning agents. Insulated travel mugs can lose their vacuum seal due to the extreme temperature fluctuations, rendering them useless. These are not minor mishaps; they are severe Dishwasher Cleaning Mistakes that ruin valuable kitchen tools. 4.Very Clean Paradoxically, being too clean before loading is also an error. Many modern dishwashers are equipped with soil sensors, often a turbidity sensor that shines a light through the wash water to measure how dirty it is. When you pre-rinse dishes to a squeaky-clean state, the sensor detects very little soil in the water. The machine’s logic then concludes it’s a light load and runs a shorter, more energy-efficient cycle. This may be insufficient for any genuinely dirty pots or pans elsewhere in the load. Furthermore, modern detergents are packed with enzymes like amylase and protease, which are designed to break down starches and proteins. These enzymes need a substrate food to work on. By pre-rinsing, you are essentially washing away the target of the detergent, making it less effective. Scraping off large chunks of food is all

5 Common Dishwasher Cleaning Mistakes You Need to Stop Making Read More »

Professional Floor Cleaning

5 Benefits of Professional Floor Cleaning

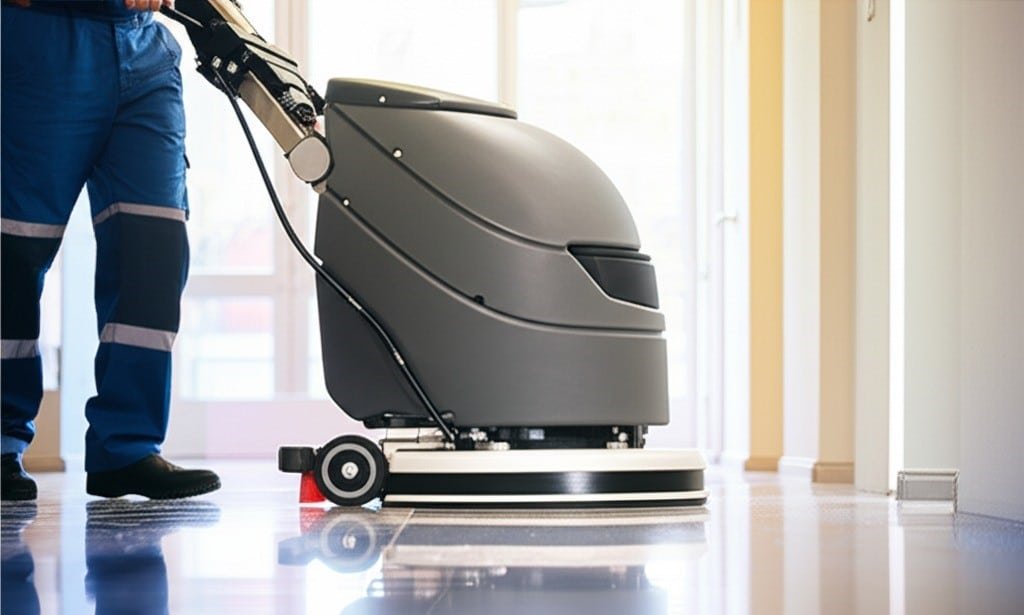
Why Professional Floor Cleaning Matters Floors bear the brunt of daily life: constant foot traffic, spills, furniture being dragged around, and the slow buildup of dust, soil, and allergens that ordinary sweeping and mopping leave behind. Routine maintenance cleans the surface, but deep-seated grime in grout lines, carpet fibers, and wood grain can damage flooring and worsen indoor air quality over time. Professional floor cleaning closes that gap with specialized equipment, professional-grade solutions, and trained technique. Here are five concrete benefits of bringing in experts, and what each service actually involves. Benefit 1: Hardwood and Laminate Stay Protected Hardwood floors need a delicate touch. Professionals start with dry soil removal using commercial vacuums with soft-bristle heads and HEPA filters that trap microscopic dust and allergens without scratching the finish. The next stage is a controlled damp clean, never a wet one: excess water seeps between planks and can cause swelling, warping, or cupping. Microfiber mops hold just enough solution to lift embedded dirt, and a pH-neutral cleaner formulated for wood protects the polyurethane or wax finish, which harsh all-purpose products can dull. For worn floors, low-speed buffing with a soft pad removes minor scuffs and restores an even sheen. Laminate is handled with the same care but with even less moisture, since its fiberboard core swells and blisters when water penetrates the seams. Steam mops are off the list for laminate: their heat and pressure can push moisture into the joints and delaminate the planks. Benefit 2: Tile and Grout Look New Again Ceramic and porcelain tiles wipe clean with ease, but the grout joining them is porous and soaks up cooking grease, food soil, soap film, and bacteria like a sponge. Everyday mopping can actually make things worse, driving dirty water down into the recessed grout lines. Professional tile and grout cleaning applies a high-alkaline solution that breaks down years of accumulated soil, lets it dwell so it penetrates the pores, and then agitates every line with specialized grout brushes or orbital scrubbers. The final step is extraction with a high-pressure hot water system that flushes the loosened grime and vacuums it away. A clear penetrating grout sealer is then applied to create an invisible barrier that keeps future spills from soaking in and makes routine maintenance much easier. Benefit 3: Carpets Are Deep Cleaned and Air Quality Improves Carpets function like a giant air filter, capturing dust, pollen, pet dander, and soil tracked in from outside. Everyday vacuuming lifts only the surface layer, while heavier soils and oily residues settle toward the base of the pile, where they can damage fibers and feed allergens. The industry standard for a deep carpet clean is hot water extraction, often called steam cleaning. Technicians pre-inspect the fiber type and treat stains individually, apply a pre-conditioner that breaks down oily soil, then inject hot water deep into the pile and extract it with a powerful vacuum. Commercial-grade machines recover far more water than rental units, which means a deeper clean and faster drying. Air movers speed the process and help prevent mold or mildew, and grooming the pile keeps fibers standing straight. Health Canada explains how dust and dust mites collect in carpets and bedding and can aggravate allergies and asthma, which is why removing trapped pollutants matters for everyone in the home. Keeping floors clean is one practical step toward fewer indoor air contaminants. Benefit 4: Resilient Floors Can Be Restored, Not Replaced Luxury vinyl tile and linoleum are durable and water-resistant, but they suffer from scuffs and from old layers of finish that yellow and trap dirt over time. Professionals restore these floors with stripping and waxing. A chemical stripper dissolves the old acrylic finish, and a rotary machine fitted with an aggressive pad works it into a slurry that a wet-vac lifts away. After a neutralizing rinse and full drying, fresh finish or wax goes on in several thin, even coats, each allowed to dry completely. The payoff is a glossy, protected surface that looks newly installed and shrugs off everyday wear. Benefit 5: Your Flooring Investment Lasts Longer Regular professional care extends the life of every floor type and keeps your home healthier in the process. What pros bring that daily mopping cannot: Commercial vacuums with HEPA filtration that trap allergens instead of recirculating them. pH-balanced and material-specific cleaners that protect finishes. Hot water extraction equipment that sanitizes carpet and cuts drying time. Sealing and finishing steps that guard grout, stone, and resilient floors. Professional Floor Cleaning by Surface Type Floor Type Professional Method Main Benefit Hardwood HEPA vacuum, damp microfiber, pH-neutral cleaner, buffing Finish protected, scuffs removed Laminate Dry vacuum, minimal-moisture clean No swelling or delamination Tile and grout Alkaline dwell, agitation, hot water extraction, sealer Grout restored and stain resistant Carpet Pre-conditioning and hot water extraction Allergens removed, faster drying LVT and linoleum Stripping and waxing Glossy finish restored Frequently Asked Questions How often should floors be professionally cleaned? Carpets usually benefit from hot water extraction every 12 to 18 months, while tile, grout, and hard surfaces can go 6 to 12 months depending on traffic. Homes with kids, pets, or allergy sufferers may need shorter intervals. Is steam cleaning the same as professional carpet cleaning? Steam cleaning is the common name for hot water extraction, the method professionals use. It injects hot water and rinsing agents into the pile and extracts them with powerful vacuum equipment, which delivers a deeper clean than rental machines. Can professional cleaning damage hardwood floors? Not when done correctly. Professionals use soft-bristle vacuums, damp rather than wet mopping, and pH-neutral wood cleaners. The risk of damage comes from excessive water and harsh chemicals, which trained technicians avoid by design. Why does grout stay dirty no matter how much I mop? Grout is porous and absorbs what mop water leaves behind. Only agitation with the right cleaning chemistry followed by hot water extraction removes soil from inside the pores, and a sealer then keeps it from returning quickly. Hiring professionals

5 Benefits of Professional Floor Cleaning Read More »

small office

Making Your Small Office a Pleasant Place to Work – 5 Expert Tips

Making Your Small Office a Pleasant Place to Work A tidy office does more than impress visitors; it protects staff health, lifts morale, and helps people focus. Clients and job candidates start forming opinions before a word is spoken, at the front door, and employees feel the difference every day in how the space looks, smells, and functions. Break the workload into five zones: Entrance and reception, where first impressions form. Workstations, where the team spends its day. The kitchen and breakroom, shared by everyone. Restrooms, which need daily sanitation. Periodic deep tasks that keep the whole office fresh. Tip 1: Make the Entrance and Reception Sparkle First impressions start at the door. Keep the glass panels free of fingerprints and smudges, and disinfect the handle daily, since it is the first thing everyone touches. Vacuum or mop the entryway floor every day so dirt, salt, and moisture stay at the threshold instead of traveling through the building. In the reception area, clear the desk of clutter, dust it thoroughly, and wipe it with a product that dries streak-free. Sanitize the telephone, keyboard, and mouse, arrange any brochures neatly, and wipe down guest chairs, including legs and armrests, vacuuming upholstery to remove dust and crumbs. Tip 2: Keep Workstations Clean and Disinfected The main workspace is where your team spends most of its day, so its condition directly affects health and productivity. Empty trash and recycling bins and replace the liners. Dust from high to low so dislodged particles land on surfaces you clean next, covering shelves, cabinet tops, picture frames, and partition ledges before desks. Wipe monitors with a dry microfiber cloth so they are not scratched. Then move everything on each desk and clean the surface with a pH-neutral product safe for wood, laminate, and glass. Disinfect the high-touch items: the phone handset and keypad, the mouse, and the keyboard, using compressed air to blow crumbs from between the keys first. Wipe chair armrests, adjustment levers, and bases, and vacuum fabric seats. Finish by vacuuming the floor around every desk, reaching underneath and behind the chair. The CDC’s guidance on when and how to clean and disinfect explains why regular cleaning of high-touch surfaces is usually enough to keep germs from spreading. Tip 3: Give the Kitchen and Breakroom Daily Attention The breakroom is the social heart of a small office and the hardest area to keep clean. Clear the counters and wipe them with a food-safe disinfectant so no crumbs or sticky coffee rings remain. Scrub the sink with a non-abrasive cleaner, then disinfect the basin and the faucet hardware. That microwave gets a daily wipe-down, inside and out; a few minutes of heating a bowl of lemon water loosens dried food so it wipes away easily. Sanitize the fridge handle and door, check the interior regularly for expired food, and clean the door seals. Wash the coffee maker carafe and filter basket and wipe the machine’s exterior. Clean breakroom tables and chairs, then sweep and mop the floor with a degreasing disinfectant. Handwashing is part of the same hygiene picture: the CDC’s handwashing guidance notes that clean hands are one of the best ways to prevent the spread of germs in shared spaces. Tip 4: Keep Restrooms Sanitized and Stocked A clean, well-stocked restroom signals a well-managed office. Check toilet paper, paper towels, and soap dispensers first, then empty and sanitize the trash receptacles and fit fresh liners. Clean mirrors with a glass cleaner so they stay free of spots, and scour sinks and faucets, focusing on the handles and the soap dispenser surround. For toilets, use a hospital-grade disinfectant and respect its dwell time, the period the product must stay wet on the surface to kill germs. Work from the handle and top of the tank down to the lid, both sides of the seat, the exterior of the bowl, and the base. Scrub the inside of the bowl with a dedicated brush and bowl cleaner. Keep separate cloth colors assigned to the toilet zone so they never double as sink or counter rags, wipe partitions from top to bottom, and finish by mopping the floor with a disinfectant cleaner. Tip 5: Schedule Deeper Cleaning for the Whole Office Beyond the daily routine, a small office needs periodic deep tasks that keep the space truly healthy. Meeting rooms should be presentation-ready at all times: wipe the table, clean chairs, erase whiteboards with a proper whiteboard cleaner to remove ghosting, dust televisions, projectors, and conference phones, and vacuum. Along hallways, vacuum carpets edge to edge, sweep and mop hard floors, and disinfect light switches and door handles while wiping railings and baseboards periodically. Then book the deeper work on a schedule: interior window cleaning for natural light, hot water carpet extraction to remove embedded dirt and allergens, and high dusting of ceiling fan blades, shelves, vents, and light fixtures. Small Office Cleaning Priorities at a Glance Zone Focus Points Suggested Routine Entrance and reception Glass, handles, desk, guest seating Daily wipe-downs and floor care Workstations Desks, phones, keyboards, chairs Daily tidy, weekly full clean Kitchen and breakroom Counters, sink, microwave, fridge Daily wipe-downs, weekly deep scrub Restrooms Toilets, sinks, mirrors, supplies Daily sanitation, stock checks Common areas Windows, carpets, vents, light fixtures Periodic professional deep clean Frequently Asked Questions How often should a small office be cleaned? High-touch surfaces such as door handles, kitchen counters, and restroom fixtures should be cleaned daily. Workstations and floors need attention several times a week, and deep tasks like carpet extraction and window cleaning are typically done quarterly or twice a year. What is the difference between cleaning and disinfecting? Cleaning removes dirt and most germs with soap or detergent, while disinfecting uses a product that kills remaining germs on the surface. In an office, clean first, then disinfect the high-touch areas where illness spreads most easily. Why does my office still look dusty after vacuuming? Dust settles on high surfaces such as shelves, vents, and light fixtures and

Making Your Small Office a Pleasant Place to Work – 5 Expert Tips Read More »

preparing for the July cleaning

How to Prepare for July Cleaning: 4 Steps Fast and Easy

July Cleaning brings a unique set of circumstances to our living spaces. The longer days, increased outdoor activity, and potential for more guests mean our homes need a different kind of attention. Preparing for a thorough July Cleaning is not merely about having supplies on hand; it is a systematic approach to ensuring efficiency and effectiveness, laying the groundwork so the actual cleaning process becomes smoother and more impactful. Without proper preparation, cleaning can feel overwhelming and incomplete, like trying to build a house without first pouring a solid foundation. 1.Preparing The Mind Start by mentally preparing yourself for the task ahead. This involves more than just setting aside time; it means adopting a mindset focused on systematic action rather than sporadic effort. Acknowledge that a significant clean requires energy and focus. Break down the entire house into manageable zones or rooms. Avoid the trap of trying to tackle everything at once, which often leads to burnout and a sense of defeat. Instead, visualize the clean, organized space you aim to achieve, and let that vision guide your planning. Consider creating a simple, unwritten mental checklist or a rough written outline of areas you want to address. This helps in prioritizing tasks and ensures nothing important is overlooked. Think about who else might be able to contribute, even small tasks, as collaboration can significantly lighten the load. Hydrate well, ensure you have comfortable clothing, and think about playing some uplifting music to keep spirits high. The mental readiness is the first, often underestimated, step towards a successful July Cleaning. 2.One Room At a Time Once your mind is aligned, the next crucial step is comprehensive decluttering. This isn’t just tidying; it’s a strategic removal of anything that obstructs access or impedes effective cleaning. Clutter acts as a barrier, trapping dust, hiding spills, and making it impossible to properly wipe surfaces or vacuum floors during your July Cleaning efforts. Begin by focusing on one area at a time, perhaps starting with the most heavily used spaces like the kitchen or living room. In the kitchen, this means clearing every countertop. Move small appliances like toasters, coffee makers, and blenders. Don’t just push them aside; truly lift them, wipe the counter beneath them, and consider if they need a quick wipe-down themselves. Empty the sink of all dirty dishes and load them into the dishwasher, or wash them immediately. Go through any papers or mail that have accumulated on kitchen surfaces, sorting them into immediate action, filing, or recycling piles. Check the pantry and refrigerator for expired food items, disposing of anything that’s past its prime to prevent future messes and odors. This creates clear, unobstructed surfaces, allowing your cleaning tools to reach every corner and crevice effectively for your July Cleaning. 3.Supplies And Tools With decluttering underway, the next phase is gathering all your cleaning supplies and tools. There’s nothing more frustrating than starting a task only to realize you’re missing a crucial item or that a bottle is empty. Take an inventory of your cleaning arsenal for your July Cleaning. Do you have a sufficient supply of all-purpose cleaner, glass cleaner, bathroom cleaner, and floor cleaner suitable for your specific flooring types? Check the levels of your dish soap and hand soap. Ensure you have plenty of clean microfiber cloths for dusting and wiping, a separate set for glass, and another for bathrooms to prevent cross-contamination. Sponges, scrub brushes for tough grime, a toilet brush, and a squeegee for windows or shower doors are essential. Check the condition of your mop and bucket; do they need to be cleaned or replaced? Ensure your vacuum cleaner bags are empty or the canister is cleared, and that all attachments are readily available and free of blockages. A good dustpan and brush are also invaluable. Don’t forget protective gloves to safeguard your hands from harsh chemicals and dirty water. Have a designated cleaning caddy or bucket where you can neatly organize and transport these items from room to room, minimizing trips back and forth to the supply closet. This foresight saves valuable time and maintains momentum once the actual July Cleaning begins. Before the deep cleaning commences, there are a few immediate pre-cleaning actions that make a significant difference. First and foremost, empty all trash cans throughout the house. This prevents new odors from developing and clears the way for wiping down the bins themselves. Next, address any obvious large debris or major spills. If there’s a pile of dirt by the entryway, sweep it up. If there’s a visible spill on the kitchen floor, wipe it up immediately rather than waiting for the floor cleaning. These seemingly small actions prevent tracking dirt into other areas and save you from having to clean over existing messes during your July Cleaning. For bathrooms, consider pre-treating stubborn stains in the toilet bowl or shower with a specialized cleaner; allowing it to soak for some time will significantly reduce scrubbing effort later. In the kitchen, if your oven racks are greasy, remove them and soak them in a tub with hot, soapy water. Opening windows and doors, if the weather permits, is also an excellent preliminary step, especially in July, for an effective July Cleaning. This not only ventilates the house, dispelling stale air and potential cleaning fumes, but also helps to dry surfaces more quickly after they’ve been cleaned, which is particularly useful in humid summer conditions. Now, let’s refine the room-by-room preparation, ensuring every space is primed for optimal July Cleaning. 4.Remove Items In the kitchen, beyond clearing countertops and dealing with dishes, think about items typically stored inside cupboards or drawers that might benefit from a quick re-organization or wipe-down of their exterior. Pull out the toaster crumb tray and empty it. If your microwave is splattered, a quick pre-wipe with a damp cloth or a bowl of water steamed inside for a few minutes will loosen grime significantly, aiding your July Cleaning. Ensure the area around your sink is completely clear, moving soap dispensers, sponge holders, and dish racks. If you have a small

How to Prepare for July Cleaning: 4 Steps Fast and Easy Read More »

dishwasher

6 Easy Tips On How To Clean Your Dishwasher With Vinegar

How to Clean Your Dishwasher With Vinegar Your dishwasher works hard washing plates, glasses, and cutlery, but it never washes itself. Food particles, soap scum, and hard water minerals gradually build up inside the tub, on the filter, and in the spray arms. The first signs are cloudy spots or film on glasses, a musty smell, and loads that come out less clean than they should. A regular vinegar cycle dissolves that buildup with a product that is cheap, natural, and safe. These six tips cover the whole process, from prepping the machine to keeping it fresh between cycles. Why White Distilled Vinegar Works So Well The active ingredient in white distilled vinegar is acetic acid, typically at about 5 percent concentration. That mild acid dissolves limescale and hard water deposits, the chalky film you see inside the tub and on glassware. It cuts through grease and soap scum and neutralizes odors instead of covering them with fragrance. It also discourages mold and mildew in damp areas, is non-toxic and safe around food and pets, and biodegrades completely. Used as directed, it will not harm stainless steel interiors, plastic parts, or rubber seals. Stick with clear white vinegar; apple cider vinegar can stain the interior and leave a sugary residue. Tip 1: Empty the Dishwasher and Clean the Filter First Preparation decides how well the vinegar cycle works. Remove every dish and piece of cutlery so the solution reaches all internal surfaces. Then take out the filter, usually a removable cylinder or multi-part assembly at the bottom of the tub, and rinse it under hot running water. You will likely find food scraps, labels, and greasy buildup; loosen them with an old toothbrush or scrub brush, using a little dish soap for stubborn grime. Check the manual for how the filter locks back into place. A clogged filter blocks water circulation and keeps the vinegar from reaching the whole machine. While you are there, wipe the door edges, rubber gaskets, and lower spray arm. Tip 2: Run the Vinegar Cycle on the Hottest Setting Pour two cups of the white distilled vinegar into an open, dishwasher-safe glass or ceramic bowl, and set the bowl on the top rack. The open bowl lets the vinegar mix into the wash water while its vapors spread through the cavity. Make sure the detergent and rinse aid dispensers are empty; the vinegar cycle must run on its own. Select the hottest and longest cycle your machine offers, often labeled Heavy Duty, Sanitize, or Pots and Pans. Hot water makes the acid noticeably more effective at dissolving minerals and grease. Tip 3: Never Mix Vinegar With Bleach Never combine vinegar with chlorine bleach: mixing them releases chlorine gas, which can cause serious respiratory problems and eye irritation. Check that no bleach products or residues are in the machine first. For guidance on handling cleaning products safely, see Health Canada’s household product safety pages. When someone is sick, a sanitize cycle is a good extra step; the CDC’s cleaning and disinfecting guidance explains when sanitizing is worth the effort. Tip 4: Wipe Seals, Gaskets, and Spray Arms After the Cycle Once the cycle finishes and the machine cools, open the door and inspect; cloudy surfaces should look clearer and odors gone. The folds of the rubber door seals can still hide grime and mildew; wipe them with a damp cloth and diluted vinegar or dish soap, and check around both dispensers for residue. If the vinegar smell lingers, run a short rinse cycle to flush it out. Between vinegar cleans, keep the spray arms clear: their small nozzles clog with hard water deposits, leaving dishes with unwashed spots. Clear blocked holes with a toothpick, a straightened paperclip, or a small wire. Clean the filter manually every week or two, scrubbing it under hot water, since a neglected filter makes the machine work harder and shortens its life. Tip 5: Clean the Exterior and the Daily Details The outside deserves attention too. For stainless steel doors, use a microfiber cloth with a stainless cleaner or diluted vinegar, then rinse with plain water to prevent streaking. Other finishes clean well with an all-purpose product. Good daily habits reduce how often you need a deep cycle: Scrape leftover food off plates before you load them; heavy pre-rinsing is rarely needed. Do not overload the racks or block the spray arms so water reaches every surface. Run full loads to save water and energy. Give the bottom edge of the door a regular wipe; water and food settle there. Tip 6: Know How Often to Run a Vinegar Cycle Most households benefit from a vinegar clean every one to three months. If you have hard water or run the dishwasher several times a day, clean it monthly. Watch for film on glasses, a persistent odor, or declining performance; any of these means a vinegar cycle is due. Dishwasher Problems and Vinegar Solutions Sign Likely Cause Fix Cloudy film on glassware Hard water deposits Run a vinegar cycle monthly Musty odor Food and grime in filter or seals Clean filter, wipe seals, vinegar cycle Spots on dishes Clogged spray arm nozzles Clear holes with a toothpick Weak cleaning results Blocked filter or buildup Full filter clean plus vinegar cycle Frequently Asked Questions Is it safe to run vinegar through a dishwasher? Yes. White distilled vinegar is non-corrosive to dishwasher components when used as directed. Still, check your user manual for any model-specific warnings before starting. Why does my dishwasher smell like vinegar after cleaning it? A temporary vinegar smell means the cycle did its job and usually fades within a few hours or after the next wash. If it bothers you, run a short rinse cycle right after the vinegar clean. Dishes are still dirty after a vinegar cycle. What now? Confirm the filter is clean and seated properly, clear any blocked spray arm nozzles, and make sure your hot water tank delivers roughly 120-140 F (49-60 C). Detergent type

6 Easy Tips On How To Clean Your Dishwasher With Vinegar Read More »

protective items for cleaning the house

Why do You Need Protection To Clean Your House? – 6 Essential Items

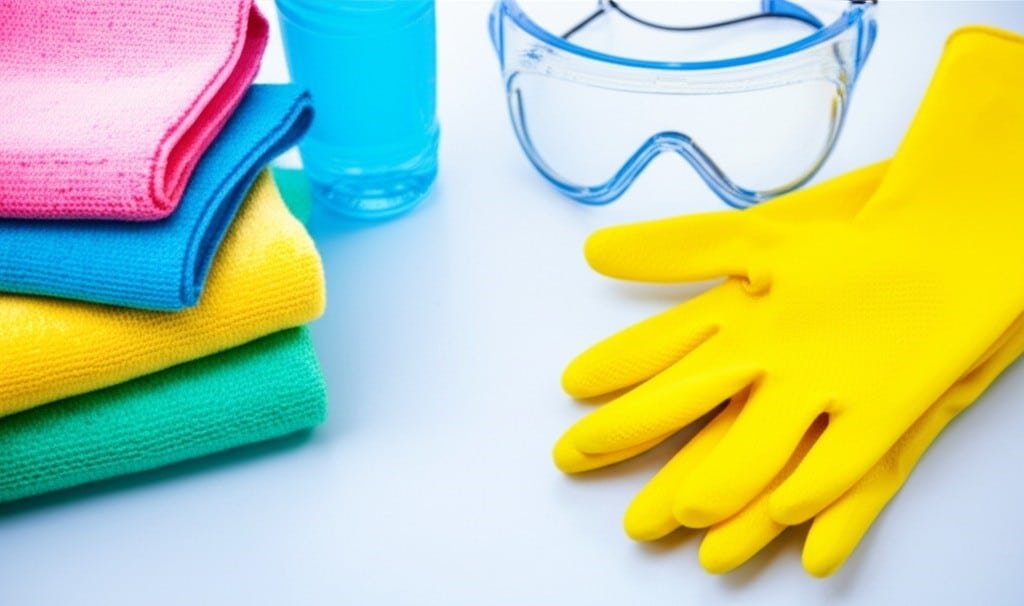
Cleaning your home without protection can be dangerous. It’s a battle against dust, dirt, germs, and clutter. In this battle, we arm ourselves with an arsenal of tools: powerful chemical sprays, abrasive sponges, powerful vacuum cleaners, and microfiber cloths. However, amidst the focus on eliminating dirt from our surroundings, one critical element is often overlooked: protecting the combatant. The cleaning process exposes individuals to a variety of occupational hazards, ranging from the seemingly minor, such as dry skin, to the extremely serious, such as chemical burns, respiratory distress, and lasting physical injuries. Wearing a full complement of protective gear is not a sign of over-meticulousness; it’s the hallmark of a smart, safe, and professional approach to a task that involves direct contact with chemicals, biological contaminants, and significant physical exertion. 1.Gloves The most immediate and constant point of contact in any cleaning endeavor is the hands. They are the primary instruments, manipulating cloths, holding spray bottles, and scrubbing surfaces. The skin, our body’s largest organ, provides a remarkable natural barrier, but it is a barrier with limits. Continuous exposure to water, a universal solvent, systematically strips away the skin’s protective layer of sebum, leading to dehydration, redness, painful cracking, and a compromised ability to defend against infection. Introduce cleaning chemicals into this equation, and the risks escalate dramatically. Detergents, degreasers, disinfectants, and acidic or alkaline solutions can induce contact dermatitis, trigger severe allergic reactions, and, in the case of concentrated agents like oven cleaners or drain unblockers, inflict serious chemical burns. Therefore, gloves are not an optional accessory; they are an indispensable piece of personal protective equipment. A truly prepared cleaning kit contains multiple types of gloves for different applications. For light-duty tasks requiring high dexterity, such as wiping down countertops, polishing fixtures, or handling soiled laundry, disposable gloves are the superior choice. Nitrile gloves are often preferred over latex due to their superior chemical resistance and the prevalence of latex allergies. They provide a reliable shield against germs and chemicals for short-term use and can be discarded immediately, which is a crucial step in preventing cross-contamination between different areas of the home, like the kitchen and the bathroom. For more demanding jobs, a pair of heavy-duty, reusable gloves is required. Tasks like washing dishes in very hot water, scrubbing floors with strong detergents, or cleaning a mold-affected area call for the robust protection of thick rubber or PVC gloves. These are more durable, less prone to tearing, and often feature longer cuffs that extend up the forearm, providing a crucial defense against splashes. Opting for a pair with a flock lining can significantly increase comfort by absorbing perspiration, allowing them to be worn for longer periods without discomfort. Proper care extends the life and safety of these gloves. After each use, they must be rinsed thoroughly while still on the hands, washed with soap and water, then removed and allowed to air dry completely, both inside and out, to inhibit the growth of bacteria and mold within them. 2.Ventilation As we move from contact hazards to airborne ones, the protection of the respiratory system becomes paramount. Many of the most effective cleaning products achieve their results through chemical reactions that release fumes and volatile organic compounds (VOCs) into the air. When a cleaner is sprayed, it is aerosolized, creating a fine mist of chemical droplets that are easily inhaled. The acrid scent of bleach, the sharp, pungent odor of ammonia-based glass cleaners, or the powerful fumes from a self-cleaning oven cycle are all indicators of airborne chemicals that can irritate the delicate mucous membranes of the nose, throat, and lungs. For individuals with asthma, allergies, or other respiratory sensitivities, this exposure can trigger wheezing, coughing, and shortness of breath. Even for those without pre-existing conditions, chronic, long-term inhalation of these fumes can contribute to a range of health problems. The first line of defense is always ventilation. Opening windows and doors to create a cross-breeze and using an exhaust fan can significantly dilute the concentration of airborne chemicals. However, ventilation alone is not always sufficient, especially in enclosed spaces like small bathrooms or when dealing with particularly potent substances or large amounts of particulates. In these cases, respiratory protection is essential. For tasks that kick up a lot of dust, pet dander, or debris, such as sweeping a dusty garage, deep-cleaning carpets, or clearing out a long-neglected storage area a well-fitting N95 respirator is the appropriate choice. Unlike a simple dust mask, an N95 is certified to filter out at least 95 percent of fine airborne particles, providing meaningful protection against allergens and irritants that can penetrate deep into the lungs. When working with aggressive chemicals known to produce harmful vapors, such as certain solvents, paint strippers, or heavy-duty oven cleaners, a more advanced respirator is warranted. An elastomeric half-mask respirator with interchangeable cartridges designed to filter organic vapors offers a much higher level of protection. It is also a vital piece of safety knowledge that mixing certain household cleaners can create lethal gases. The most infamous combination, bleach and ammonia, produces toxic chloramine gas, while mixing bleach with acidic cleaners can release chlorine gas. Proper respiratory protection, coupled with unwavering adherence to the rule of never mixing cleaning products, is a foundational principle of household safety. 3.Safety Glasses The eyes, with their delicate and irreplaceable tissues, are uniquely vulnerable to cleaning-related injuries. A single misdirected splash of a chemical cleaner can cause immediate, intense pain and has the potential to inflict permanent corneal damage and vision loss. These incidents can happen with surprising ease: a toilet brush flicking contaminated water upwards, an aerosol spray nozzle sputtering unexpectedly, or gravity pulling droplets down as you clean a surface overhead, like a showerhead or a ceiling fan. Standard eyeglasses or sunglasses offer minimal protection, as splashes can easily enter from the sides, top, or bottom. The gold standard for eye protection during cleaning is a pair of safety goggles. Goggles are designed to form a seal around the eye

Why do You Need Protection To Clean Your House? – 6 Essential Items Read More »