Cleaning Guide

lemon

Lemon For Cleaning – 4 Best Tips On How To Use It

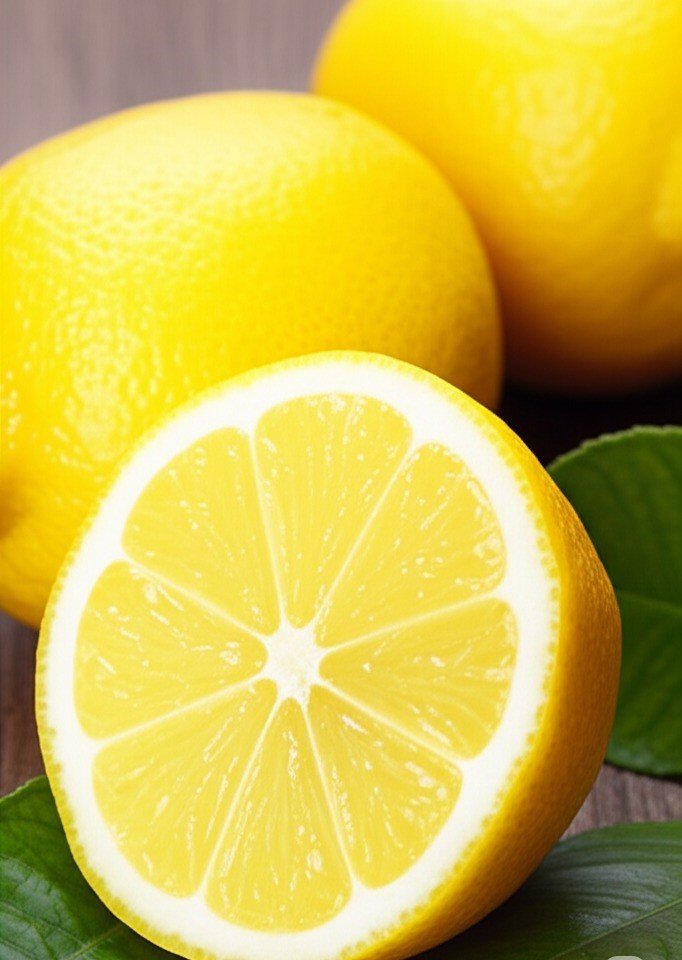
Why Lemon Works So Well As A Natural Cleaner Lemons are one of the most effective cleaning tools already sitting in your kitchen, and the science behind them is simple. Their juice is rich in citric acid, which sits at a low pH of roughly 2 to 3. That acidity breaks down grease, hard water mineral deposits, and alkaline residues such as soap scum, and it creates an environment where many common household bacteria and molds struggle to grow. The peel adds a second weapon: lemon oil contains d-limonene, a natural solvent that lifts oily films water alone cannot shift. The citrus scent also neutralizes alkaline odor molecules instead of merely covering them up. Here are four practical ways to use lemon around the house, plus the surfaces where it can do damage. Tip 1: Degrease And Freshen The Kitchen With Lemons The kitchen is where citrus earns its keep. Rub a cut lemon half across a wooden or plastic cutting board and the acid reaches into knife grooves where food bacteria hide, while the scent pulls out onion and garlic odors and fades old food stains. For a grimy microwave, simmer a bowl of water with a few lemon slices until the window fogs, leave the door shut for a few minutes so the acidic steam softens dried-on splatters, then wipe the cavity clean in seconds. The garbage disposal brightens up when you grind a few peels or a chopped lemon through it, which scrubs the chamber and clears trapped food smells. Stainless steel sinks and chrome faucets come back shiny after you wipe them with juice to dissolve the cloudy mineral film, and the inside of stained plastic storage containers clears up after a soak in lemon water. Cutting boards: rub with a lemon half, then rinse before prepping food Microwave: boil water with lemon slices, let the steam loosen baked-on splatters Garbage disposal: grind peels for a clean chamber and fresh drain Fridge and containers: a lemon-water soak lifts food stains and trapped odors Appliance fronts: wipe with juice on a cloth, buff dry to remove fingerprints Tip 2: Dissolve Soap Scum And Hard Water In The Bathroom Soap scum forms when soap reacts with the calcium and magnesium in hard water, and because the residue is alkaline, citric acid is its natural opposite. Spray lemon juice over glass shower doors, wall tile, or a porcelain tub, let it dwell for several minutes, then scrub with a non-abrasive sponge and rinse. Thick buildup responds well to a fizzing paste of lemon juice and baking soda, where the mild abrasion lifts the softened scum. Chalky white crust on faucets disappears after you wrap a juice-soaked cloth around the fixture, and a showerhead with sputtering, clogged nozzles can be left in a plastic bag filled with lemon juice for an hour or more to dissolve the scale inside. Pouring a cup of juice into a toilet bowl, letting it coat the sides for 15 to 30 minutes, then brushing helps loosen grime and neutralize odor. A diluted spray of half lemon juice and half water, wiped dry with a microfiber cloth, leaves mirrors and glass streak-free. Bathroom target Lemon treatment Dwell time Shower doors and tile Full-strength juice, or a lemon-plus-baking-soda paste for heavy scum Several minutes before scrubbing Chrome fixtures Juice-soaked cloth wrapped around the stain 15 to 30 minutes Clogged showerhead Bag of lemon juice tied over the head At least 1 hour Toilet bowl One cup of juice coated around the rim, then brush 15 to 30 minutes Mirrors and glass Equal parts juice and water in a spray bottle Spray and wipe dry Tip 3: Brighten Laundry And Polish The Rest Of The House Lemon juice is a mild natural bleach. Dab fresh juice onto rust, fruit, or ink marks, then set the item in sunlight for a few hours: the ultraviolet rays accelerate the acid’s lightening action, and laundering afterward often removes the spot entirely. Adding about half a cup of juice to the rinse cycle brings dingy whites back to life with a fresh scent instead of synthetic fragrance. Elsewhere in the house, one part lemon juice shaken with two parts olive oil makes a furniture polish that lifts dust and conditions wood. Ants and fleas are said to dislike lemon, so wiping thresholds and windowsills with juice is a popular deterrent, though the evidence is anecdotal. Tarnished brass or copper recovers its shine when you rub on a paste of lemon juice and salt, since the acid dissolves the oxidation layer and the grains scour it away. For routine cleaning guidance that balances home remedies with proven disinfecting steps, the CDC’s page on when and how to clean and disinfect your home is a sensible reference. Tip 4: Learn Where Lemon Can Do Damage The same acidity that makes lemon useful can harm sensitive materials. Never use it on unsealed granite, marble, limestone, or travertine: these stones contain calcium carbonate, and citric acid etches them, leaving dull rough patches that permanently alter the polish. On colored fabrics and upholstery, the bleaching effect can cause uneven fading, especially in sunlight, so test a hidden seam first. Rinse cutting boards and counters well after treating them so no residue affects food taste, and wear gloves during long sessions because undiluted juice can irritate sensitive skin. Health Canada’s guidance on household products and chemical safety at home is worth reading before you mix anything. If natural scrubbing will not shift years of buildup, a professional deep cleaning can restore kitchen and bathroom surfaces without further elbow grease. Frequently Asked Questions About Cleaning With Lemon Is lemon juice a disinfectant? Its low pH inhibits many common household bacteria and molds, which makes it a strong cleaner, but it is not registered as a disinfectant. For surfaces that need true sanitizing, follow label directions on an approved product or the CDC’s cleaning and disinfecting guidance. Can I clean granite or marble counters with lemon? No. Acid

Lemon For Cleaning – 4 Best Tips On How To Use It Read More »

different types of carpets

How to Clean Different Types of Carpets – 4 Best Ways

How to Clean Different Types of Carpets: 4 Best Ways Cleaning carpet effectively depends on the material. Different fibers react differently to water, vacuuming, and cleaning solutions, and the wrong method can shrink, fade, or mat the pile. These four approaches cover the carpet types found in most Toronto homes, from durable synthetics to delicate natural fibers like wool and sisal. 1. Synthetic Carpets: Nylon, Polyester, and Olefin Synthetic carpets are popular for durability and stain resistance. Nylon is very resilient, polyester is soft with natural stain and fade resistance, and olefin (polypropylene) resists moisture and mildew, which makes it common in basements. Vacuum high-traffic areas daily or every other day and the whole carpet at least twice a week, using a beater bar or rotating brush to lift embedded dirt before it grinds down the fibers. For spills, scoop up solids with a dull knife or spoon, then blot liquids immediately with a clean white cloth, working from the outside in. Never rub. A quarter teaspoon of mild, non-bleach dishwashing liquid in one cup of lukewarm water handles most spills, but test any solution in a hidden spot first. Rinse with a light mist of cool water, blot dry, and leave weighted paper towels over the area overnight. For deep cleaning, hot water extraction (steam cleaning) is the most effective method, and drying usually takes 6 to 12 hours with good ventilation. 2. Wool Carpets: Gentle Care for Natural Fibers Wool is luxurious, durable, and naturally soil resistant, but it is sensitive to harsh chemicals, high pH levels, and excessive moisture. Vacuum with strong suction, and set the beater bar to its highest pile setting or use a suction-only attachment, because aggressive beater bars make wool fuzz or pill. Use only WoolSafe or pH-neutral cleaners; alkaline detergents or bleach can yellow and weaken wool fibers. Blot spills rather than rubbing, dry quickly with fans or a dehumidifier, and avoid direct heat. For deep cleaning, low-moisture methods such as dry foam cleaning are safer than traditional steam cleaning. 3. Cotton and Viscose Rugs: Handle With Care Cotton is soft and absorbent but can shrink, brown, or bleed color, while viscose (rayon) is extremely delicate when wet, losing up to 50 percent of its strength. Vacuum these rugs with the beater bar disengaged or on the highest setting. Before any spot treatment, run a colorfastness test in a hidden area. Use a highly diluted pH-neutral cleaner applied with a barely damp cloth, blot gently, and dry immediately with fans or a cool hairdryer. Deep cleaning is best left to professionals who specialize in delicate fibers, and steam cleaning viscose can cause irreversible damage. 4. Plant Fiber Carpets: Sisal, Jute, Seagrass, and Coir Natural plant fiber carpets are highly absorbent and extremely sensitive to water. Moisture can cause browning, water stains, shrinkage, and mildew. Vacuum frequently with a suction-only cleaner, at least twice a week, from different directions to remove grit trapped in the weave. Blot spills immediately and thoroughly, scrape off solids, and avoid water when possible. For stains, use a dry-cleaning solvent or dry carpet cleaning powder, brushed in and vacuumed up. Never steam clean these fibers; professional dry or very low-moisture cleaning is the safe choice. A quick spill response that works on most carpets: Blot liquids immediately with a clean white cloth, outside in Scoop solids with a dull knife or spoon, never rub Test any cleaning solution in a hidden spot first Use minimal moisture, then dry the area quickly Weight down paper towels overnight for stubborn damp spots Carpet Type Vacuuming Spot Cleaning Deep Cleaning Synthetic (nylon, polyester, olefin) Beater bar, twice weekly Mild dish soap and water Hot water extraction Wool High pile setting or suction only WoolSafe, pH-neutral cleaner Low-moisture professional cleaning Cotton and viscose Suction only, gentle Diluted pH-neutral, minimal water Professional delicate-fiber cleaning Sisal, jute, seagrass, coir Suction only, twice weekly Dry-cleaning solvent or powder Dry methods only, no steam Keep Carpets Clean Between Deep Cleans Vacuuming and quick spill response extend the life of any carpet, but dirt and allergens build up inside the fibers over time. Dust mites and pet dander are common indoor allergens linked to asthma symptoms, according to the CDC, and Health Canada also lists them among indoor air contaminants that affect respiratory health. Whenever moisture is involved, dry the carpet fast, because the CDC’s mold guidance stresses that moisture control prevents mold growth. When to Call Professional Carpet Cleaners Toronto Shine Cleaning handles all carpet materials with the care and specialized techniques they deserve. Our home deep cleaning service includes thorough carpet vacuuming and spot treatment as part of a full clean, and our regular maid service keeps high-traffic areas fresh between deep cleans. Check our pricing page or see if we serve your neighbourhood in the GTA. Call (647) 424-0355 to book. Can I steam clean a wool carpet? Traditional steam cleaning can introduce too much moisture for wool. Use low-moisture methods such as dry foam cleaning or low-moisture hot water extraction with minimal water and rapid drying, ideally handled by professionals experienced with wool. How long does carpet take to dry after steam cleaning? With good ventilation, most synthetic carpets dry in 6 to 12 hours, sometimes longer. Open windows, run fans, and use a dehumidifier to speed up drying and prevent musty odors or mold. What should I do about grease, ink, or wine stains? Use a stain remover designed for your carpet type and follow the product instructions carefully. Test it in an inconspicuous spot first, apply it to a cloth rather than the carpet, and blot from the outside in. Can wet viscose rugs be saved? Act immediately: blot with a clean white cloth, never rub, dry with fans or a cool hairdryer, and groom the pile back into place while drying. For set stains, contact a professional who specializes in delicate natural fiber rugs.

How to Clean Different Types of Carpets – 4 Best Ways Read More »

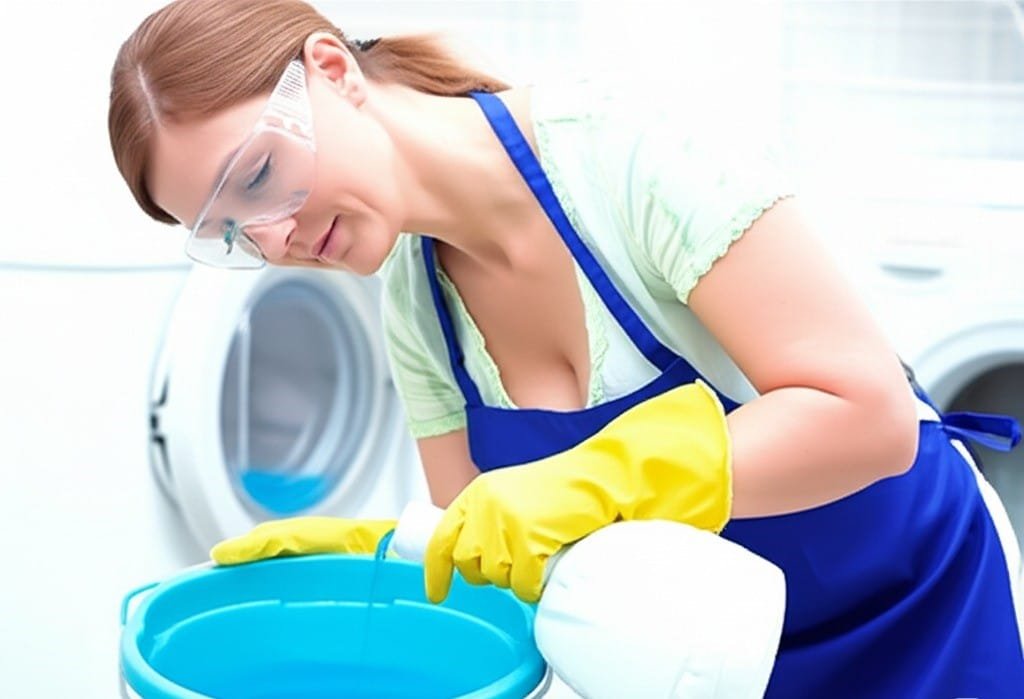
woman cleaning with bleach

6 Best Ways to Clean With Bleach – Diluted or Not?

Chlorine bleach, scientifically known as sodium hypochlorite, is a powerful chemical compound widely used for cleaning and disinfection. Its main function is to kill germs, including bacteria, viruses and fungi, making it an effective agent for sanitizing surfaces. In addition to disinfection, bleach is also recognized for its powerful whitening power, commonly used to brighten white fabrics and remove stubborn stains. Understanding its effectiveness is the first step to using it correctly. 1.Good Ventilation When working with bleach, safety is non-negotiable. Always make sure the area you’re cleaning is well-ventilated; open windows and doors to promote airflow and prevent fumes from building up. Personal protective equipment is essential. Wear impervious gloves to protect your skin from irritation and chemical burns, and consider eye protection, such as goggles, to protect your eyes from accidental splashes. It’s also a good idea to wear old clothes that you don’t mind getting damaged, as the chemical can discolor fabrics. One of the most critical safety rules is to never mix bleach with other cleaning products, especially those that contain ammonia or acids. Combining it with ammonia produces toxic chloramine gas, which can cause serious respiratory problems and can be fatal. Likewise, mixing it with acidic cleaning products like vinegar or toilet bowl cleaners can release chlorine gas, another dangerous irritant. Always use this disinfectant alone after rinsing off any other cleaning agents. Dilution is another key aspect of safe use. Concentrated disinfectants are often too strong for most applications and can damage surfaces or be overly corrosive. Always dilute the product with water based on the task at hand. Before applying the diluted solution to a large area or a new type of surface, perform a spot test. Apply a small amount of the diluted disinfectant to an inconspicuous area and wait to see if any discoloration or damage occurs. Keep undiluted sodium hypochlorite and prepared solutions out of the reach of children and pets. 2.Care Labels Creating the correct solution is vital for both safety and effectiveness. The appropriate dilution ratio depends on the cleaning task. For general disinfection of hard, non-porous surfaces, a common and effective dilution is approximately one-quarter cup of standard household disinfectant (typically 5-6% sodium hypochlorite) per gallon of cool water. This translates to roughly one tablespoon of the concentrated cleaner per quart of water. Always add the active ingredient to water, not water to the concentrate, to prevent splashing of the strong chemical. If you are dealing with more resilient issues like mold or mildew, a slightly stronger solution may be required. For such tasks, you might use up to one cup of the concentrated cleaner per gallon of water. However, stronger solutions increase the risk of surface damage and produce more potent fumes, so enhanced ventilation and caution are necessary. For laundry purposes, specifically for whitening white fabrics, the amount of whitener will depend on your washing machine and the load size. Typically, one-half to one cup of the product is added to the designated dispenser or diluted in water before being added to the wash, once the machine has filled with water and detergent. Always check garment care labels to ensure they are safe for this type of cleaner. Use cool or cold water for dilution, as hot water can decompose the active ingredient in the disinfecting liquid, reducing its effectiveness and potentially releasing more chlorine gas. 3.Bleach Bleach can be used to clean and disinfect a variety of hard, nonporous surfaces throughout the home. In the kitchen, diluted solutions are effective for sanitizing countertops, as long as they are made of materials such as laminate, sealed granite (after spot testing), or Corian. Sinks, both stainless steel and porcelain, can also be cleaned and disinfected with it. After cleaning food preparation surfaces with the solution, it is crucial to rinse them thoroughly with clean water and allow them to air dry or wipe them dry with a clean cloth. In the bathroom, it is an ideal option for toilets, bathtubs, showers, and tile surfaces. To clean the toilet, pour about a cup of the diluted solution into the bowl, scrub with a toilet brush, let it sit for at least 10 minutes to disinfect, and then flush. For bathtubs, showers, and tiled walls or floors, apply the diluted sanitizing solution using a sponge, cloth, or spray bottle. Allow the solution to sit on the surface for the recommended contact time, typically 5 to 10 minutes, to ensure proper disinfection. Then, rinse these surfaces thoroughly with water. Certain flooring types, such as vinyl and ceramic or porcelain tiles, can also be cleaned with a diluted solution. Avoid using the cleaner on hardwood floors, unsealed natural stone, or porous tiles, as it may cause damage or discoloration. When cleaning with the disinfectant liquid, ensure the area is well ventilated and keep pets and children away from the wet area until it is completely dry. Contact time is important; allow the solution to sit on the surface for several minutes before rinsing if necessary or allowing it to air dry, depending on the surface and concentration used. Bleach is a powerful tool for whitening white clothes and linens. Before using it in your laundry, always check the care labels on your clothes to confirm that they are safe for this type of cleaning. It is generally suitable for cotton, linen, and some synthetic fabrics that are white. Avoid using chlorine bleach on wool, silk, spandex, leather, or any colored fabric unless the product is specifically labeled as a “color safe” product or oxygen bleach, which is a different chemical. When adding the liquid to your laundry, most washing machines have a designated dispenser. If your machine has one, add the recommended amount of the substance (usually ½ to 1 cup, depending on the load size and concentration) to the dispenser before starting the wash. The dispenser will release the cleaning agent at the appropriate time in the wash cycle, usually after the machine is filled with water and

6 Best Ways to Clean With Bleach – Diluted or Not? Read More »

person with allergies to cleaning products

4 Best Tips For Allergy Sufferers That You Need To Know

Cleaning Products And Allergies: What You Need To Know For people with asthma, eczema, or chemical sensitivities, cleaning day can trigger more symptoms than it prevents. Many conventional products release fragrances and harsh fumes that irritate airways, skin, and eyes, and the very act of scrubbing kicks dust and allergens into the air. The good news is that a few informed changes, namely choosing the right products, reading labels critically, adapting your technique, and protecting yourself while you work, let you keep a genuinely clean home without paying for it in sneezes, rashes, and headaches. The four tips below cover each of those steps. Tip 1: Drop Fragrances And Harsh Chemicals First Fragrance is the single biggest problem for allergy-prone noses. Whether synthetic or from essential oils, scents release volatile organic compounds (VOCs) such as limonene, pinene, and aldehydes that can set off asthma attacks, headaches, nausea, and contact dermatitis. Beware the word “unscented”: those products often contain masking fragrances to hide the smell of the base chemicals, so look for the explicit label “fragrance-free” instead. Other common troublemakers include preservatives such as methylisothiazolinone (MI) and methylchloroisothiazolinone (MCI), which are notorious causes of itchy, blistering rashes even from rinse-off products like dish soap; decorative dyes that add zero cleaning power; and the sharp fumes of ammonia and chlorine bleach, which assault the eyes, nose, throat, and lungs. Surfactants that lift grease also strip natural oils from skin, causing dryness and cracking. One absolute rule: never combine bleach with ammonia or acids such as vinegar, because the mixture releases toxic chloramine or chlorine gas. Tip 2: Read Labels And Trust Certifications Symptoms range from coughing, wheezing, and a runny nose to hives, eczema flares, watery eyes, and dizziness in poorly ventilated rooms, and tracing the culprit ingredient is hard because manufacturers need not disclose every fragrance component. Read labels for words like “fragrance,” “parfum,” CI-numbered dyes, MI/MCI, and formaldehyde-releasing preservatives such as DMDM hydantoin or quaternium-15, and prefer short ingredient lists. Understand that no regulator such as the FDA or EPA tightly controls the term “hypoallergenic”: it signals the maker’s intent, not a guarantee of no reaction. Third-party marks carry more weight: the EPA’s Safer Choice label means ingredients were reviewed against health and environmental criteria, and Asthma and Allergy Friendly certification requires independent testing. Be equally skeptical of greenwashing, because words like “natural,” “botanical,” or “plant-based” do not mean non-allergenic, since tea tree, lavender, eucalyptus, and citrus oils are known allergens and VOC sources. Label claim What it really means Reliability for allergy sufferers Unscented May contain masking fragrances Poor: choose fragrance-free instead Hypoallergenic Maker omitted some common allergens Weak: not tightly regulated EPA Safer Choice Ingredients reviewed for health and environment Strong: independent program Asthma and Allergy Friendly Independently tested against trigger standards Strong: certification testing required Natural or plant-based Contains botanicals, which can still allergize Poor: essential oils are known irritants Tip 3: Change How You Clean, Not Just What You Use Technique matters as much as chemistry. Open windows and run exhaust fans whenever you clean so VOCs and particles dilute and leave instead of settling into drywall and furniture. Use less product than instinct tells you, following label dilution ratios, and consolidate to a few gentle multi-purpose cleaners instead of a cabinet of specialty bottles, since the combined chemical load of many products is what tips sensitive people over. Then lean on physical methods that need little or no chemical at all: Microfiber cloths trap dust, allergens, and bacteria with water alone, holding particles instead of smearing them like cotton does Steam cleaners sanitize hard floors, grout, upholstery, and mattresses with superheated vapor that kills dust mites, mold spores, viruses, and bacteria without residue Let steam-treated areas dry fully with ventilation on, because added humidity invites mold, itself a major allergen Damp-mop instead of dry-sweeping, and vacuum with a HEPA-filter machine so extracted air stays clean Dust mites are a leading indoor trigger, and Health Canada’s guidance on dust and dust mites explains how they colonize bedding, carpets, and soft furniture, while its overview of indoor air contaminants covers the irritants that accumulate in tightly sealed homes. Tip 4: DIY Safely And Suit Up Before You Scrub Homemade solutions are gentler but not harmless. Diluted white vinegar, typically one part to one part water, cuts grease and dissolves mineral films on glass and fixtures, though its pungent smell can irritate highly sensitive airways. Baking soda works as a soft abrasive and deodorizer. Lemon juice adds mild antibacterial and bleaching action, yet it can cause skin irritation or phytophotodermatitis when sun follows contact. Use distilled water in your mixes to avoid tap-mineral residue, never blend vinegar with bleach, and remember DIY cleaners may fall short of commercial disinfectants when real sanitizing is required. Before adopting any new product, spot-test the surface, patch-test skin-contact items like detergents on the inner forearm for 24 to 48 hours, and introduce one new product at a time so a reaction is easy to trace. Wear nitrile or neoprene gloves (latex-free if you react to latex), and consider a well-fitting N95 respirator when dusting or handling heavily soiled areas, following the sort of sensible precautions the CDC outlines for cleaning and disinfecting your home safely. Frequently Asked Questions About Allergy-Friendly Cleaning What is the difference between unscented and fragrance-free? Unscented products can still contain masking chemicals to hide ingredient odors, while fragrance-free means no added fragrance at all. Allergy sufferers should buy the fragrance-free version. Are natural cleaners safer for allergies? Not automatically. Essential oils such as tea tree, lavender, and citrus are documented allergens and VOC sources. Judge every product, homemade or store-bought, by its full ingredient list rather than marketing words like natural or eco-friendly. Why does my cleaning spray give me headaches? Volatile organic compounds in fragrances and solvents irritate the nervous system and airways, especially in closed rooms. Open windows, run exhaust fans, use less product, and switch to fragrance-free formulas to see whether symptoms settle. Can

4 Best Tips For Allergy Sufferers That You Need To Know Read More »

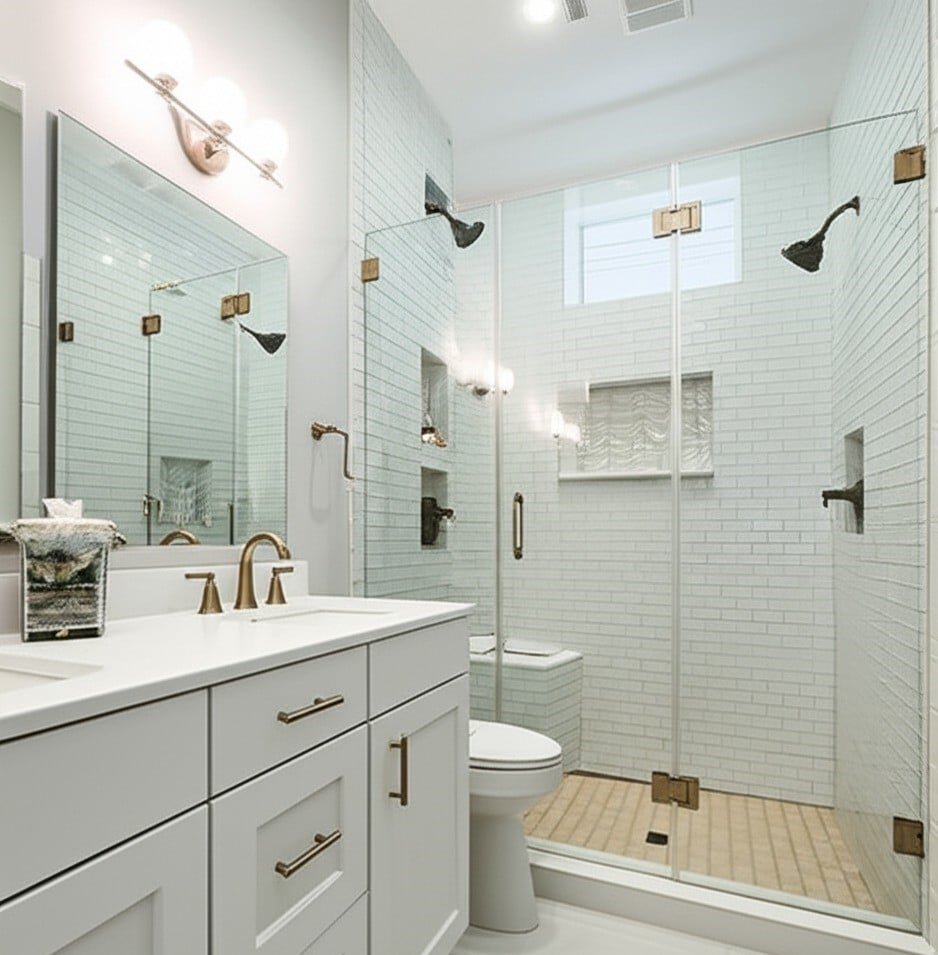
clean shower walls

How to Keep Your Shower Walls Shining – 5 Best Tips You Need to Know

How to Keep Your Shower Walls Shining Shower walls take a beating every single day: soap, body oils, minerals, and constant moisture team up into films, crust, and black specks that make even a recently scrubbed bathroom look dingy. The fix is not one heroic Saturday battle but a short, repeatable system that matches the cleaner to the grime and the wall material, gives the chemistry time to work, and then prevents buildup from returning. The five tips below walk through exactly that, from diagnosis to daily habits, so your tile, fiberglass, or stone surround stays bright with far less effort. Tip 1: Know What You Are Cleaning Off the Walls Three offenders cause almost all shower-wall grime. Soap scum forms when fatty acids in bar soap react with calcium and magnesium in tap water, creating a sticky, grayish film that hardens into stubborn layers if ignored. Hard water stains are the chalky white spots or cloudy haze left behind when mineral-rich water evaporates, mostly calcium and magnesium carbonate, and they show up worst on dark tile and glass. Mold and mildew are fungi that love warm, damp, poorly ventilated enclosures; mold tends to sit on the surface as a powdery growth, while mildew can sink deeper into grout and corners as black, green, or pink spots. Beyond looking bad, these growths can trouble some people’s health, which is why the CDC keeps reference information on mold and health. Tip 2: Prep the Bay and Yourself Before Scrubbing Clear every bottle, loofah, and razor off the walls so nothing blocks your access, then assemble your kit. Good preparation makes the difference between a fifteen-minute wash and an hour of frustration. A spray bottle with your chosen solution, homemade or commercial Non-abrasive sponges, soft cloths, and microfiber towels, plus brushes with different bristle stiffness for your wall material An old toothbrush or dedicated grout brush for the lines between tiles Waterproof gloves, and safety glasses when working with strong sprays overhead The exhaust fan running or a window open for ventilation during and after Tip 3: Match the Cleaner to the Grime and the Surface For routine soap scum and light mineral haze, equal parts white vinegar and warm water works well because acetic acid dissolves both. Add a squirt of dish soap to help the mixture cling to vertical surfaces and cut oily residue, or make a baking soda paste when you need gentle abrasion. Hydrogen peroxide sprayed on mildew spots is an effective first-line attack. Commercial bathroom cleaners can handle the same jobs with more convenience; read the label for dwell times, safety warnings, and material compatibility before buying. Material choice matters most: ceramic and porcelain tolerate vigorous scrubbing and most cleaners, though their porous grout suffers from repeated harsh acid. Fiberglass and acrylic surrounds scratch easily, so use soft cloths and non-abrasive cleaners only. Natural stone such as marble, granite, limestone, or travertine needs a pH-neutral stone cleaner; vinegar, lemon, and bleach can all corrode or stain it. Wall material Safe cleaners Avoid Ceramic or porcelain tile Vinegar solution, baking soda paste, most bathroom sprays Repeated harsh acids on grout Fiberglass or acrylic Mild detergent, non-abrasive sprays, soft sponge Scouring powders, steel wool, stiff brushes Natural stone pH-neutral cleaner formulated for stone Vinegar, lemon juice, bleach Glass doors Vinegar spray or diluted lemon juice, squeegee finish Abrasive pads that scratch When trying any new product, test a small inconspicuous patch first to rule out discoloration or etching. Tip 4: Follow a Top-to-Bottom Wash Routine Rinse the walls with warm water to loosen surface dirt, then apply your cleaner from the top down so dirty runoff never crosses freshly treated areas. Let it dwell: 5 to 10 minutes for light cleaning, and 15 to 30 minutes or longer for heavy scum or mildew, because dwell time is what breaks the bond between grime and wall. Scrub in systematic strokes from top to bottom with a tool suited to your material, concentrating on corners, crevices, and fixture bases, and tackle grout lines with your toothbrush or grout brush, using hydrogen peroxide or a grout cleaner for discolored seams. Rinse thoroughly from the top down so no residue remains to attract fresh dirt, then squeegee each wall in overlapping downward strokes, wiping the blade as you go, or dry with an absorbent microfiber towel. Leave the fan on so the enclosure dries completely. Tip 5: Handle Stubborn Problems and Prevent New Ones Thick scum that survives a first round can take a stronger commercial remover with an extended dwell, and gentle plastic scraper work can lift heavy layers, never metal on delicate surrounds. Severe limescale on glass or hardy tile may call for a calcium, lime, and rust remover used exactly as directed with excellent ventilation. For persisting mildew on bleach-safe ceramic and grout, one part bleach to ten parts water, applied for 10 to 15 minutes before scrubbing and rinsing, kills spores that surface wiping misses. Never mix that bleach with ammonia or vinegar-based cleaners, since the combination releases dangerous gases. If mold keeps returning despite your best scrubbing, suspect a deeper moisture or airflow problem; Health Canada’s guide to air contaminants and health explains how to dry out damp spaces for good. Prevention is cheap and fast: squeegee the walls after every shower, mist with a daily shower spray, run the exhaust fan during showers and for 20 to 30 minutes afterward, and give the enclosure a quick weekly wipe with a mild cleaner. Frequently Asked Questions About Shower Wall Cleaning What removes soap scum from shower walls naturally? Equal parts white vinegar and warm water, optionally with a drop of dish soap so it clings, dissolved scum after a 15 to 30 minute dwell. Baking soda paste adds gentle abrasion for patches that resist wiping. How do I get black mold out of grout? Spray hydrogen peroxide first and scrub with a grout brush. On bleach-safe tile and grout, a ten-to-one water-and-bleach solution left for 10 to

How to Keep Your Shower Walls Shining – 5 Best Tips You Need to Know Read More »

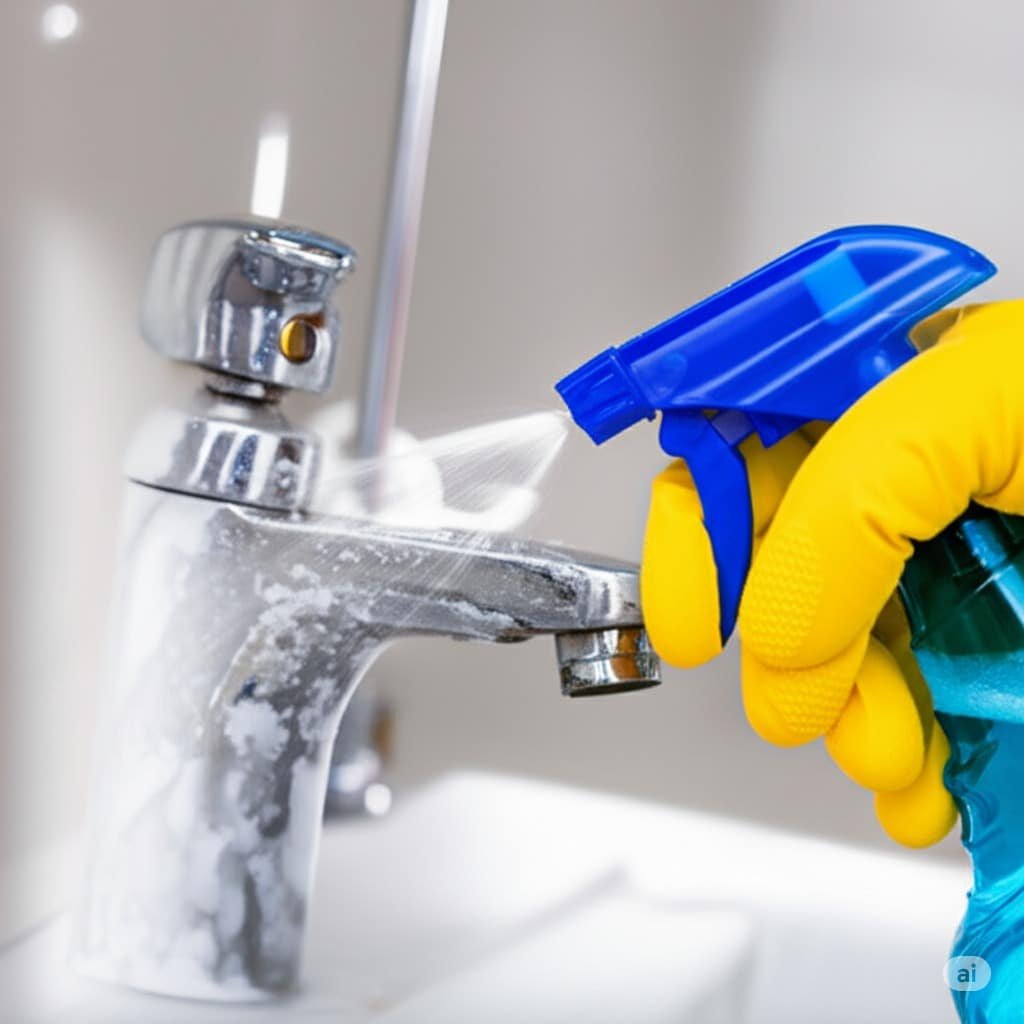
cleaning hard water

How to Clean Hard Water – 2 Easy Steps for a Sparkling Home

Hard water deposits, those chalky white or sometimes rusty stains, are a common nuisance in many homes. These marks are primarily composed of minerals like calcium and magnesium left behind as water evaporates. They can accumulate on various surfaces, diminishing their appearance and sometimes affecting their functionality. Addressing these buildups requires understanding how to dissolve these mineral deposits effectively. 1.Bathrooms In bathrooms, faucets and showerheads are frequent victims of hard water. The buildup can clog nozzles, reducing water flow and creating an unsightly crust. To clean these fixtures, undiluted white vinegar is a powerful ally. For faucets, you can soak a cloth or paper towel in vinegar and wrap it around the affected area. Let it sit for at least an hour, or longer for stubborn deposits. Afterward, scrub gently with an old toothbrush or a non-scratch sponge and rinse thoroughly. For showerheads, if removable, submerge them in a bowl or bag filled with white vinegar. Ensure the spray holes are completely covered. Let it soak for several hours, or even overnight for severe cases. After soaking, use a small brush or pin to clear any remaining debris from the nozzles and rinse with water before reattaching. Glass shower doors and enclosures often develop a cloudy film or streaks from hard water. A spray bottle filled with a solution of equal parts white vinegar and water can be used here. Spray the solution generously onto the glass and let it sit for 15 to 30 minutes. This allows the acetic acid in the vinegar to begin breaking down the mineral deposits. Then, scrub the surface with a non-scratch pad or a microfiber cloth. For more resistant stains, a paste made from baking soda and a small amount of vinegar can be applied and gently scrubbed before rinsing. Rinse the glass thoroughly with clean water and dry with a squeegee or a clean, lint-free cloth to prevent new spots from forming. Sinks and bathtubs, whether porcelain, ceramic, or stainless steel, can also suffer from hard water stains. For general cleaning, spraying with a vinegar solution and letting it sit before wiping and rinsing works well. For more concentrated stains, apply white vinegar directly or create a paste of vinegar and baking soda. Apply the paste to the stained areas, let it sit for about 30 minutes, then scrub with a soft brush or sponge. Rinse thoroughly with water. Be cautious with colored grout or natural stone, as vinegar’s acidity can sometimes affect these materials; test in an inconspicuous area first. Toilets often develop a hard water ring at the waterline. To address this, pour about one to two cups of white vinegar directly into the toilet bowl, ensuring it covers the ring. Let it sit for at least an hour, or preferably overnight for tough rings. After soaking, scrub the ring with a toilet brush. The minerals should loosen and come off more easily. Flush the toilet to rinse. For very stubborn stains below the waterline, you might need to empty the bowl of water first (by turning off the water supply and flushing) before applying vinegar directly to the stains. 2.Kitchen In the kitchen, appliances like kettles and coffee makers are prone to internal mineral buildup, often called scale. This scaling can affect the taste of your beverages and the efficiency of the appliance. To descale a kettle, fill it with a solution of equal parts white vinegar and water. Bring the solution to a boil, then turn off the kettle and let it sit for an hour or two. Empty the kettle and rinse it thoroughly several times with fresh water to remove any vinegar residue and taste. For coffee makers, fill the water reservoir with the same vinegar-water solution and run a brewing cycle without coffee grounds. Afterward, run two to three cycles with plain water to rinse the system completely. Dishwashers can also accumulate hard water deposits, leading to spotty dishes and a less effective cleaning cycle. To clean your dishwasher, place a dishwasher-safe cup or bowl filled with one to two cups of white vinegar on the top rack of the empty dishwasher. Run a regular hot water cycle. The vinegar will circulate through the machine, helping to dissolve mineral buildup on the interior components and spray arms. Washing machines, especially in hard water areas, can suffer from mineral buildup that affects their performance and can even leave deposits on clothes. To clean your washing machine, you can run an empty cycle with hot water and add about two to four cups of white vinegar directly into the drum or the detergent dispenser. Allow the machine to complete a full wash and rinse cycle. This helps to remove scale and soap scum from the drum and hoses. For tiles and grout in kitchens and bathrooms, a vinegar solution can be effective against hard water stains. Spray the solution onto the tiles, let it sit for a short period, then scrub with a brush, paying extra attention to grout lines. Rinse thoroughly with water. As mentioned, always test vinegar on a small, hidden area of tiles, especially if they are natural stone or colored, as acidity can sometimes cause etching or discoloration. While vinegar is a common and effective household cleaner for hard water, lemon juice, another natural acid, can also be used in a similar manner for smaller areas or as an alternative. Commercial descaling products are also available and can be very effective, especially for severe buildup or for appliances where manufacturers recommend specific descalers. Always follow the product instructions carefully when using commercial cleaners. Regular cleaning of affected surfaces can prevent severe buildup, making the task easier over time. Consistent attention to areas prone to hard water can keep your fixtures and appliances looking their best and functioning properly. Hard water stains and mineral buildup can be challenging, but with the right approach, these deposits can be effectively removed from various household surfaces. Understanding how to dissolve these minerals using common household items

How to Clean Hard Water – 2 Easy Steps for a Sparkling Home Read More »

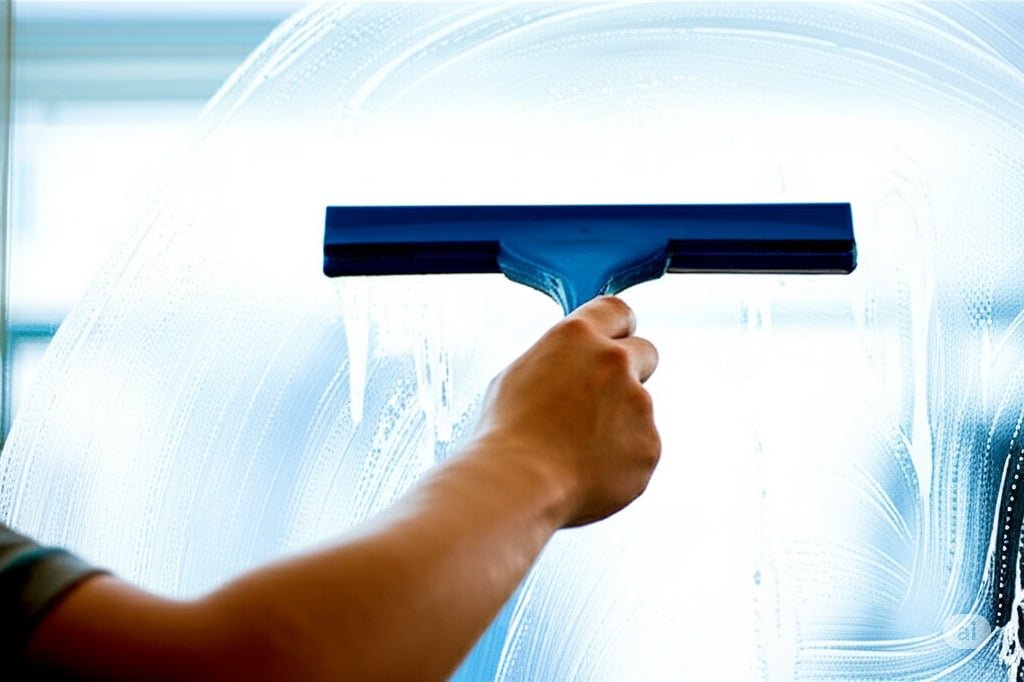
The Best Window Cleaning Solution – 4 Tips You Need To Try

The Best Window Cleaning Solution: 4 Tips for Streak-Free Windows Achieving truly clean, streak-free windows comes down to the right solution, the right water, and the right technique. You can mix an effective cleaner at home for pennies, or choose a commercial product for convenience. These four tips cover both paths, plus the tools that make either one work. 1. Vinegar and Water: The Classic Homemade Solution White vinegar, thanks to its acetic acid content, cuts through grease and grime. A common mixture is one part white vinegar to one part warm water, while a more diluted mix of one part vinegar to ten parts water suits regular cleaning. The acidity breaks down mineral deposits left by hard water and general dirt. Apply with a spray bottle or sponge, then wipe or squeegee clean. The vinegar smell fades as the glass dries, and using distilled water in the mix prevents the mineral streaks that tap water can leave behind. 2. Dish Soap and Water for Greasy Windows A few drops to a teaspoon of liquid dish soap per gallon of warm water makes a strong surfactant solution that loosens and lifts dirt and greasy film. Moderation is key: too much soap leaves a residue that is difficult to remove and causes streaks. Rinse thoroughly or squeegee carefully to remove every trace of soap, and use distilled water to avoid mineral deposits on the glass. 3. Commercial Cleaners: Ammonia vs Ammonia-Free Commercial window cleaners are formulated for glass and often contain solvents, detergents, and ammonia or ammonia substitutes. Ammonia-based cleaners evaporate quickly for a streak-free shine, but they have a strong odor and may not suit tinted windows or certain frames. Ammonia-free products use other solvents and surfactants with less smell and a gentler effect on surrounding materials. Always follow the manufacturer’s instructions. If you prefer to know what is in your products, Health Canada publishes a guide to chemicals in household products. 4. Tools and Technique Matter as Much as the Solution A high-quality squeegee with a straight, pliable rubber blade is the professional’s key tool. Wet the glass with your chosen solution, then draw the squeegee from the top down in a consistent pattern, overlapping each stroke by about an inch. Wipe the blade with a clean, lint-free cloth after every stroke so collected dirt is not redeposited. For scrubbing, a sponge or a dedicated window scrubber with a microfiber sleeve loosens heavy soil before squeegeeing. Finish the edges of the pane and the sill with a dry microfiber cloth; these cloths are absorbent, non-abrasive, and lint-free, which makes them ideal for washing, drying, and polishing glass. The order of steps matters too. Dust the frame and sill before you wet the glass, so loose dirt does not rinse onto the pane. Apply the solution generously, scrub with the sponge or scrubber, then squeegee in smooth, overlapping strokes. Wipe the blade after each pass and finish the edges and sill with a dry microfiber cloth before the water dries. Working window by window keeps the solution from drying on the glass, which is what causes hazy patches on hot, sunny days. Everything you need for streak-free windows: White vinegar or liquid dish soap Distilled water for hard-water areas Spray bottle and sponge or window scrubber Squeegee with a pliable rubber blade Clean, lint-free microfiber cloths Solution Best For Watch Out For Vinegar and water (1:1 or 1:10) Everyday grime and hard water spots Acidity on some frames over time Dish soap and water Greasy, heavily soiled glass Residue if you use too much soap Ammonia-based commercial cleaner Fast, streak-free shine Strong odor, not for tinted windows Ammonia-free commercial cleaner Gentler, low-odor cleaning Higher cost than DIY mixes When to Let Professionals Handle the Windows DIY solutions work well for regular maintenance, but large windows, second-storey glass, and stubborn build-up are easier and safer with professionals. Toronto Shine Cleaning provides professional window cleaning services, and its home deep cleaning covers interior windows, frames, and sills. Pair it with regular maid service to keep glass and sills fresh all year, review pricing, and check service areas across the GTA. Call (647) 424-0355 to book. The CDC’s cleaning and disinfecting guidance is a useful reference for keeping household surfaces healthy. Is vinegar safe for all window frames? Vinegar’s acidity may not suit every surface over prolonged exposure. Test it on an inconspicuous part of the frame first, and keep vinegar off bare metal and unsealed wood where possible. Why does tap water leave streaks on windows? Tap water in hard-water areas contains minerals like calcium and magnesium. When the water evaporates, these minerals are left behind as spots or streaks. Distilled water, which has most impurities removed, significantly reduces this problem. Can I use ammonia-based cleaner on tinted windows? Ammonia-based cleaners may not be suitable for tinted windows or certain frame materials. Choose an ammonia-free product or a homemade vinegar or dish soap solution instead. Does Toronto Shine Cleaning clean windows? Yes. Toronto Shine Cleaning provides professional window cleaning services so you get a guaranteed spotless finish without mixing solutions or perfecting your squeegee technique. Call (647) 424-0355 to book.

The Best Window Cleaning Solution – 4 Tips You Need To Try Read More »

salt on recipient

6 Tips On The Benefits Of Salt For Cleaning – You Need To Know

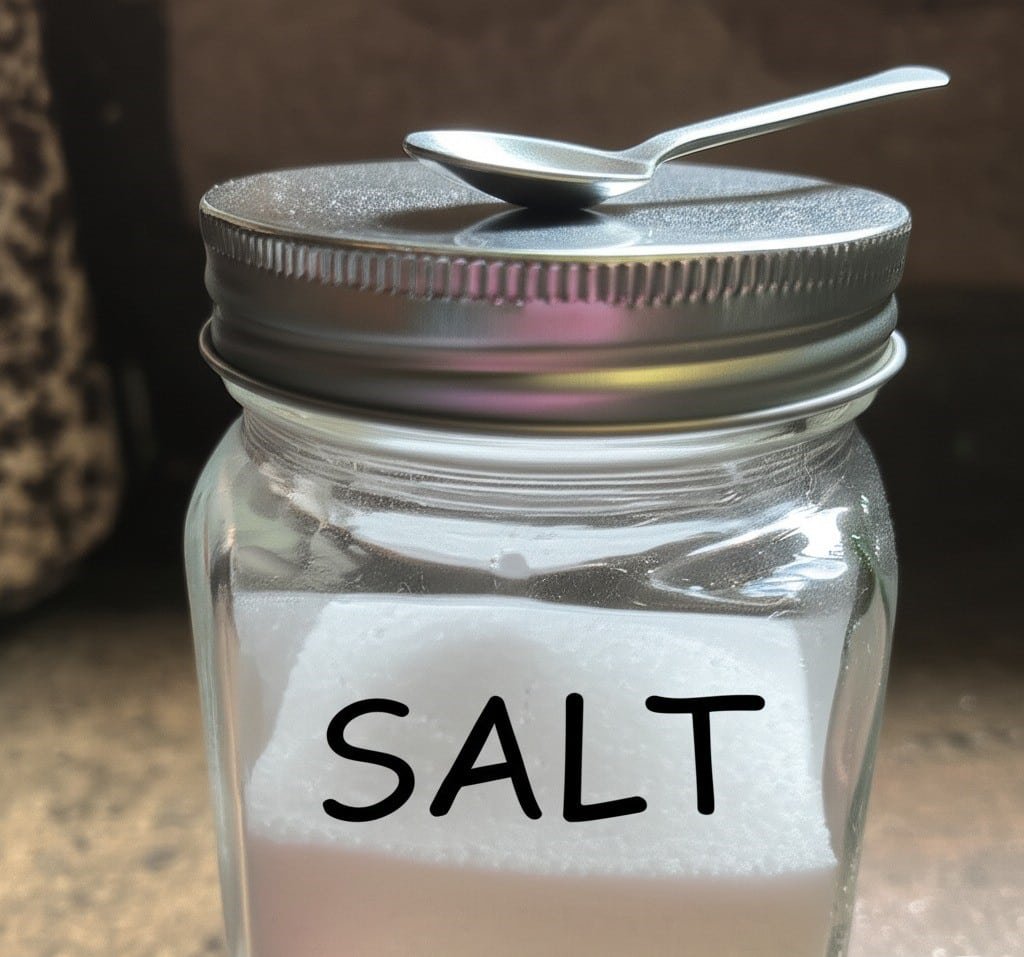
The Benefits Of Salt For Cleaning Around Your Home Salt is far more than a seasoning. Its crystalline grit, its hunger for water, and its ability to react with stains and odors make it one of the cheapest, most versatile tools in the house, often with fewer harsh chemicals than commercial cleaners demand. The six uses below cover the full range, from burnt pans to brightened laundry, along with the cautions that keep this pantry staple from becoming an abrasive mistake. 1. Use Salt As a Gentle Abrasive Scrub Salt’s granules scour without the aggression of steel wool or chemical powders. Sprinkle crystals inside a stainless steel or enamel pot with caked-on food, add a little water to form a paste, and scrub with a damp sponge, brush, or even a halved potato; non-stick surfaces tolerate a gentle paste if you use care. Coarse kosher or sea salt handles tough jobs while fine table salt suits lighter ones. A halved lemon dipped in salt brightens stainless and porcelain sinks, coffee and tea rings lift off mugs with a damp, salty cloth, and grout lines and cooled oven spills clean up with a salty paste and an old toothbrush. Test hidden spots on polished surfaces first, because grit can mark them. 2. Let Salt Absorb Fresh Spills Salt is hygroscopic, meaning it pulls water molecules toward itself, which makes it a fast-response team for liquid accidents. Knock red wine onto the carpet and a thick bed of salt drawn over the damp spot will wick the staining liquid out of the fibers through osmosis; leave it until the crystals darken and seem saturated, often a few hours, then vacuum. Speed matters, since the salt works before the stain sets. Greasy splatters on floors, counters, or fabric respond the same way, and a ridge of salt can even dam a spreading spill on a hard surface. A bowl of salt in a closet draws out some dampness and musty air, though its capacity is small next to commercial desiccants such as silica gel. 3. Deodorize With an Open Box of Salt Because odor-causing bacteria and mold thrive in moisture, salt’s drying nature makes it a fair deodorizer. Try these quick applications: Refrigerator: an open bowl of salt gradually pulls food smells and excess damp from the air Drains: flush dry crystals followed by hot water, or add baking soda and vinegar for an effervescent scrub Wooden cutting boards: scrub with coarse salt moistened with lemon, then rinse in very hot water Shoes: sprinkle inside overnight to absorb moisture, shake out in the morning Carpets: salt lightly, rest an hour, then vacuum to lift musty odors 4. Lift Stubborn Stains With Salt Pastes Combined with an acid or a soak, salt handles stains that outlast fresh-spill rescue. Rust on fabric or porcelain fades under a paste of salt and lemon juice or white vinegar: the acid dissolves the iron oxide while the grains scour away the loosened particles. On colorfast fabric, sun exposure afterward can boost the lightening, with a careful test first. Coffee or tea marks on tablecloths and shirts respond to a soak in strong hot salt water before laundering, unnoticed grease spots lift after rubbing in a salt paste, and yellowed underarm and collar stains often improve after an hour or two under a hot-water salt paste. Fresh blood comes out in a cold-water salt soak. Always test colored or delicate material in a hidden area first. 5. Flush Drains the Non-Corrosive Way Drains collect grease, soap, hair, and food daily, and salt offers gentle maintenance. Tip a half cup of salt mixed with a half cup of baking soda down the dry drain, add a cup of warmed white vinegar for a vigorous fizz that breaks up grease, let it sit 15 to 30 minutes, then flush with several gallons of boiling water so the abrasive grains scour the pipe walls on their way down. A simpler weekly or biweekly habit is a strong brine, about a half cup dissolved in a gallon of very hot water, poured down to slow buildup and quiet odors. Be realistic: salt will not drive out a fully blocked drain the way a plumber’s snake or chemical opener can, but steady use prevents many clogs and spares your pipes the corrosion that harsh openers invite. Cleaning job Salt recipe Method Burnt pot residue Coarse salt plus a splash of water Scrub with sponge or halved potato, then rinse Fresh wine spill Thick layer of table salt Wait until crystals darken, then vacuum Rust on fabric Salt and lemon juice paste Apply, rest, sun-boost if colorfast, rub and rinse Slow, smelly drain Half cup salt, half cup baking soda, cup of warmed vinegar Fizz, rest 15-30 minutes, flush with boiling water Dingy colors in laundry Half cup salt in the wash Add to the cycle to set dyes and brighten 6. Boost Your Laundry With Table Salt The laundry room benefits too. About a half cup of salt in the wash helps set dye in new cottons and linens, so bright colors bleed less and look fresher, best during a garment’s first few washes. Salt paste pre-treats grease spots, cold brine soaks out fresh blood, and mildew marks on shower curtains or cotton canvas lift after rubbing with a salt-and-lemon paste, drying in the sun, then laundering. Because brine softens water slightly, detergent lathers and rinses better where water is moderately hard, though salt cannot replace a softener unit in truly hard water. Skip direct salt scrubs on silk and fine synthetics, since the crystals can damage delicate weaves. Frequently Asked Questions About Using Salt to Clean What kind of salt cleans best? Coarse kosher or sea salt gives the most scrubbing power for pots, grout, and oven spills, while inexpensive table salt works for pastes, soaks, drains, and laundry because it dissolves quickly. Can salt scratch my surfaces? It can mark highly polished or soft finishes. Test an inconspicuous corner before scrubbing

6 Tips On The Benefits Of Salt For Cleaning – You Need To Know Read More »

summer cleaning woman

Preparing for Summer Cleaning – 6 Easy Steps

Preparing For Summer Cleaning: The Setup That Does Half The Work A summer cleaning session feels very different when the house is ready for it. Instead of wrestling through piles, running for missing supplies, and burning out by noon, you walk into a clear space with a plan, and every task goes faster and lands better. These six preparation steps turn a vague, overwhelming weekend into a series of manageable actions, and the same habits carry over into year-round upkeep. If preparation is not your strong suit, a professional team handles the whole job in one visit with deep cleaning services built for seasonal resets. Step 1: Declutter First With the Four Box Method Unnecessary objects soak up dust, harbor allergens, and slow down every surface you wipe around, so decluttering is the highest-leverage move you can make. Walk through the house room by room, or by category if that suits you better: clothes, books, papers, kitchen gadgets, old electronics. Give every item a conscious decision using four labeled boxes: Keep, Donate or Sell, Trash, and Relocate for things that belong in another room. Less stuff means less to clean and organize, and the open, calm feeling of a decluttered room is a benefit in itself: an organized home stays faster to maintain all year. Step 2: Turn Your Plan Into a Written Checklist A vague intention to clean up fizzles; a concrete roadmap does not. List every specific task you want to cover: degreasing the oven, emptying the fridge, washing interior glass and drapes, scrubbing floors and baseboards, dusting ceiling fans and light fixtures, and dealing with the deck or patio. Organize the list by room, kitchen tasks then bathroom tasks, or by activity type, dusting, vacuuming, mopping, whichever matches how you work. A written checklist gives direction, lets you watch progress pile up (genuinely motivating), keeps important areas from being forgotten, and lets you prioritize the tasks with the biggest visual impact before your energy runs out. Step 3: Gather Supplies and Test Your Equipment Nothing kills momentum like a mid-scrub store run. Inventory your products, cloths, sponges, brushes, buckets, and specialty equipment, then buy replacements for anything low, expired, or worn out before cleaning day. Do a quick function check too: fresh vacuum bags or an emptied canister, clean filters, fresh mop heads, spray bottles that mist rather than sputter. Decide in advance whether you will use commercial products or simple homemade solutions like white vinegar and baking soda, and stock the ingredients you chose. Check product labels and safety information as you shop; Health Canada’s overview of indoor air contaminants is a good reminder that strong-smelling chemicals deserve careful use in closed homes. All-purpose cleaner, glass cleaner, and disinfectant for shared and touch surfaces Microfiber cloths in quantity, plus sponges, scrub brushes, and an old toothbrush for grout A vacuum with crevice and dusting attachments, mop, bucket, and rubber gloves DIY staples if chosen: white vinegar, baking soda, lemons, dish soap Drop cloths or old sheets, trash bags, and boxes for the sorting step Step 4: Schedule Blocks That Fit Your Real Life Decide how you will spend your time before you spend it. One approach assigns specific days or weekends to rooms or task types: Saturday morning for the kitchen, a weeknight afternoon for every window in the house. The alternative is a little and often, thirty to sixty minutes daily crossing off one or two checklist items. Either way, put the blocks on your calendar like any other commitment, protect your energy for each task instead of sprinting through one marathon weekend, and estimate generously, because tasks almost always take longer than planned. Fitting cleaning into the schedule you already have produces consistency, and consistency is what actually finishes the job. Step 5: Protect the Space and Yourself Before Scrubbing Prepare the room to be cleaned as carefully as you prepare the task list. Open windows and set fans to circulate air, especially in warm months when fumes linger in stagnant rooms. Cover furniture and floors you are not working on with old sheets, plastic sheeting, or canvas drop cloths, move small furniture clear of the zone, and keep walkways unobstructed to prevent trips while carrying buckets. Strip knick-knacks and clutter off the surfaces themselves so you can wipe in long, uninterrupted strokes. Dress for the work too: old clothes, closed-toe shoes, and rubber gloves, with eye protection for overhead spraying or ladder work. When the job involves disinfecting as well as cleaning, the CDC’s page on when and how to clean and disinfect your home explains the sequence that matters: visibly dirty surfaces need soap and water first, because soil can stop a disinfectant from working. Step 6: Recruit the Household and Keep Morale Up Solo projects stall; family projects finish. Assign tasks matched to each person’s age and ability, state expectations clearly, and demonstrate anything new rather than hoping for it. Splitting the workload turns a chore into a team effort toward a shared result, teaches kids responsibility, and, with upbeat music playing and a payoff planned, stops feeling like a punishment. Rewards can be small: ordering takeout when the last room is done, or a family movie night once the checklist is empty. Prep step Core action Typical time Declutter Four boxes: Keep, Donate/Sell, Trash, Relocate A full day or spread over a week Plan Write a room-by-room or task-by-task checklist 30-45 minutes Supplies Inventory, buy missing items, test equipment 1 hour plus shopping Schedule Book room blocks or 30-60 minute daily slots 10 minutes to plan Protection Ventilate, cover, clear walkways, glove up 15-20 minutes per room Team up Assign tasks, set music, plan a reward 5 minutes to delegate Frequently Asked Questions About Summer Cleaning Prep What is the four box method? A decluttering system using boxes labeled Keep, Donate or Sell, Trash, and Relocate. Every item you touch gets an instant verdict, so sorting decisions happen once and clutter leaves the room as you work. How long

Preparing for Summer Cleaning – 6 Easy Steps Read More »

4 Easy Home Deep Cleaning Tips You Need to Try

4 Easy Home Deep Cleaning Tips You Need to Try Home deep cleaning goes far beyond routine tidying. Where regular cleaning maintains surface-level order, deep cleaning removes accumulated dirt, stubborn grime, bacteria, and hidden allergens that build up over time in every part of a home. It is a methodical, top-to-bottom process that restores a home to its best hygienic condition, and these four tips make it manageable. 1. Deep Clean the Kitchen From Top to Bottom The kitchen needs the most intensive work because grease, food particles, and bacteria collect there. Clean the interior and exterior of major appliances: degrease ovens inside and out, including racks and doors, clean microwaves internally and externally, wipe refrigerator and dishwasher exteriors, and degrease range hoods and their filters. Wipe cabinet exteriors to remove fingerprints and splatters, descale and polish sinks, faucets, and fixtures, sanitize countertops and backsplashes with attention to grout lines, and scrub floors including edges, corners, and under movable appliances. 2. Say No to Mold, Hard Water, and Dust in Bathrooms Bathrooms are high-moisture areas prone to mold, mildew, and soap scum. Scrub showers and bathtubs, including walls, doors, and tracks, to remove soap scum, hard water deposits, and signs of mildew. Disinfect toilets thoroughly, both inside the bowl and on all exterior surfaces, including the base and surrounding floor. Clean and polish sinks, vanities, countertops, and mirrors, and scrub tiles and grout on floors and walls to restore brightness. Dust light fixtures, exhaust fans, and vents, and descale chrome faucets and showerheads. 3. Dust High, Clean Low, and Don’t Skip the Details Work from top to bottom so dust falls onto surfaces you have not cleaned yet. Dust ceiling fans, light fixtures, picture rails, and curtain rods, then move to baseboards, skirting boards, and electrical outlet covers. Vacuum furniture, including under cushions, and move pieces where possible to clean underneath and behind. Wipe window sills, ledges, tracks, and frames, remove cobwebs from ceilings and corners, and clean interior windows and mirrors. Finish with floors: vacuum carpets thoroughly, including edges and high-traffic areas with spot treatment for stains, and mop hard floors with a suitable cleaning solution, paying attention to corners. 4. Call a Professional Home Deep Cleaning Service Professional cleaners bring training, industrial-grade equipment, and specialized solutions that most homes do not have. They work from a detailed checklist so every agreed area is covered consistently, and a full house deep clean can take many hours or even days of strenuous work when done alone. Reputable companies are insured and bonded: Toronto Shine Cleaning carries a $1,000,000 insurance policy plus a $10,000 accidental breakage and surety bond. The process starts with a consultation to define the scope and finishes with a walk-through so you can confirm the results. The CDC’s cleaning and disinfecting guidance explains why removing dirt before disinfecting matters, and Health Canada’s indoor air quality information covers the allergens a deep clean removes. For mold-prone areas, the CDC’s mold resources explain why moisture control is essential. Signs it is time for a home deep cleaning: Persistent musty odors despite regular cleaning Visible dust build-up in corners or on less-disturbed surfaces Grease build-up in the kitchen or hard water stains in the bathroom Allergy symptoms that worsen indoors A big event, move, sale, or renovation on the calendar Room Deep Cleaning Focus Tools That Help Kitchen Appliances, range hood, cabinets, grout, floors Degreaser, microfiber cloths, scrub brush Bathroom Shower, toilet, tiles, grout, fixtures Disinfectant, descaler, grout brush Living areas and bedrooms Ceiling fans, baseboards, furniture, windows Vacuum attachments, extendable duster Whole home Vents, door frames, switches, floors Vacuum, mop, step ladder Make Deep Cleaning a Seasonal Habit Spring and autumn are natural triggers, and many homeowners book an annual or semi-annual deep clean to maintain a consistently high standard, especially before hosting events or after renovations. Once the professionals finish, ongoing regular maid service keeps the baseline high, while a professional home deep cleaning resets the whole house. Review pricing or find your GTA location, then call (647) 424-0355 to book. How often should I deep clean my home? Many homes benefit from a deep clean once or twice a year, typically in spring and autumn. You may want one more often before or after events, when moving in or out, before selling or renting a property, or after renovations. How long does a professional deep clean take? It depends on the size of the home, its initial condition, and the tasks involved. A full house deep clean can take many hours or even days of work, which is why professional teams working from a checklist are faster and more consistent. Is a professional deep cleaning service insured? Reputable companies are insured and bonded. Toronto Shine Cleaning carries a $1,000,000 insurance policy and a $10,000 accidental breakage and surety bond, so you are protected against accidental damage or liability. What is the difference between regular and deep cleaning? Regular cleaning maintains surface-level order: dusting, wiping counters, and tidying. Deep cleaning removes accumulated grease, soap scum, limescale, dust, and allergens from hard-to-reach places such as behind appliances, inside ovens, and along baseboards, and it sanitizes areas that routine cleaning misses.

4 Easy Home Deep Cleaning Tips You Need to Try Read More »