Fall Cleaning

housekeeper deep cleaning

Deep Cleaning Services in Toronto, We Do It Right!

Deep Cleaning Services in Toronto: The Complete Reset Your Home Needs A regular cleaning keeps surfaces tidy, but the grime that accumulates below the surface quietly builds up over the months. That is the domain of specialized deep cleaning services in Toronto. Unlike standard housekeeping, a deep clean is a comprehensive, methodical process that tackles dirt in every often-overlooked, hidden corner of your home: a fundamental reset that restores your space to a truly pristine state. What Makes a Deep Clean Different? Professional deep cleaning focuses on a thorough, top-to-bottom reset of every room, targeting buildup that routine visits simply do not reach. It goes far beyond the surface and into the details: grease on cabinet fronts, dust in air vents, limescale on fixtures, and grime in grout lines. The scope demands expertise and specialized equipment, and more and more Toronto homeowners and businesses are investing in it, whether for a spring reset or as part of ongoing maintenance. For a fuller breakdown of what a session covers, see our guide to deep cleaning services in Toronto. Kitchen Deep Cleaning: Degreasing and Appliance Interiors In kitchens, the work is all about degreasing and disinfecting, starting inside your cupboards. Crews empty cupboards and pantries to inspect for spills, sticky residue, forgotten food, and signs of pests, then degrease and sanitize every interior surface. Handles and cabinet fronts get attention too, because repeated hand contact leaves a sticky film. Appliances receive treatment they almost never get at home: Oven: racks soaked, interior carbon buildup scrubbed, door glass cleaned for a like-new view. Stovetop: grates and burner caps removed and cleaned, boiled-over residue scrubbed from the surface. Range: pulled out so the sides, the floor behind it, and the wall are reached and wiped clean. Refrigerator and freezer: emptied, shelves and drawers washed, door gaskets detailed with a small brush, condenser coils vacuumed of dust to support efficiency and lifespan. Small appliances: toaster crumb trays emptied, coffee makers and kettles descaled, microwave interiors scrubbed, including the often-splattered ceiling. Bathroom Deep Cleaning: Soap Scum, Limescale, and Grout Bathrooms are scrubbed and sanitized top to bottom, dissolving soap scum and body residue from tubs and showers with specialized agents made for stubborn film. Shower doors and glass enclosures are cleaned until streak-free, the tracks at the base are cleared of accumulated gunk, and tiles and grout lines are meticulously scrubbed to lift mildew and dirt from porous grout. Stubborn mold and mildew in damp bathrooms are common culprits, and the CDC’s guidance on mold and your health explains why proper removal matters. Health Canada also recommends keeping indoor humidity low and fixing moisture sources so mould cannot take hold in the first place. Fixtures get their shine back as limescale and mineral deposits are removed from faucets and showerheads, and chrome is polished. Toilets are cleaned inside the bowl and across the entire exterior, from the tank lid and handle to the seat, hinges, base, and surrounding floor, plus the often-ignored overflow hole inside the tank, flushed clean with disinfectant. Vanity and medicine cabinets are emptied and wiped inside, and exhaust fan covers are removed and washed, because a dusty fan cannot ventilate properly and traps the humidity that leads to mildew. Living Areas and Bedrooms: A Top-to-Bottom Reset Crews work from the ceiling down to the floor in every room. Cobwebs are removed from corners and ceiling edges, light fixtures and ceiling fan blades are dusted, and the tops of bookcases, wardrobes, and cabinets are reached. Walls are spot-cleaned of scuffs and splatters, and baseboards, door frames, window frames, and switch plates are hand-wiped one by one. The process continues behind and beneath the obvious. Furniture is moved so the floors underneath are reached, and upholstery is vacuumed with crevice tools to extract dust, skin cells, and allergens from fabric. Wood furniture is polished, lampshades and blinds are dusted, and the air system itself is addressed: vents and grilles are vacuumed and wiped, and HVAC return air covers are pulled and dusted out. Professional crews rely on HEPA-filter vacuums that capture microscopic allergens rather than recirculating them, and steam cleaners that sanitize without harsh chemicals. When Toronto Homes Need a Deep Clean Most Deep cleaning requests tend to follow life events: Moving into or out of a home, when deposits and first impressions are at stake. Post-renovation cleanup after the construction dust settles in every crack. Seasonal refreshes, especially the annual spring clean. Before hosting an event or gathering, such as a wedding at home or the holidays. Preparing a space for a new baby or toddler who will crawl across every floor. Allergy season, when dust, dander, and pollen accumulate indoors. How to Choose a Professional Deep Cleaning Company Not all services are created equal, so choose carefully. Look for a company that offers a range of deep cleaning options with a detailed, transparent list of what each package includes. Prioritize experienced, trained professionals who understand the right products and techniques for different surfaces, and verify that the company is insured and bonded to protect your home and belongings. What to check Why it matters Transparent scope and checklist You can compare packages and know what is covered before booking. Trained, vetted crew Correct products and techniques protect finishes instead of damaging them. Insurance and bonding Toronto Shine carries a $1,000,000 insurance policy and a $10,000 accidental breakage and surety bond. Flat, upfront pricing Our deep clean starts at $270.38 before HST for a studio or one-bedroom, shown on our pricing page. Deep Cleaning Service FAQs What is included in a deep cleaning service in Toronto? A full reset of each room: kitchen cabinets and appliances inside and out, bathrooms degreased and descaled with grout scrubbed, walls spot-cleaned, baseboards and switch plates wiped, vents dusted, furniture moved, and floors and carpets thoroughly cleaned. How is deep cleaning different from regular housekeeping? Regular visits maintain cleanliness on visible surfaces. A deep clean restores the areas maintenance skips, which is why many homes pair

Deep Cleaning Services in Toronto, We Do It Right! Read More »
August cleaning preparation

How to Prepare for August Cleaning: 7 Steps, Fast and Easy

Why August Deserves Its Own Cleaning Reset Toronto air in late August has a particular weight. Summer peaks just before it starts retreating, and every room shows it: pollen-dusted glass, grit ground into entryway tile, a fridge stuffed with barbecue leftovers. An August clean is not ordinary tidying. It is a systematic reset that strips out the season’s specific grime and lays a clean foundation for the indoor months ahead. The seven steps below cover the whole arc. Step 1: Deal With the Air First Open windows let pollen, city dust, and allergens drift into every room, and the HVAC system has run nearly nonstop all season. Its filter is your first line of defense: a grey, clogged unit wastes energy and pushes right back the particles you are trying to evict, so replacing it is the opening move. Once the new filter is in, vacuum every intake and exhaust vent with a brush attachment. As you work through the rest of the plan, the CDC’s home cleaning and disinfecting guidance is a sound baseline for surface work. Step 2: Windows, Screens, and Tracks Screens have spent the season intercepting bugs, leaves, and dirt. Pull them and wash each one with a soft brush, mild soap, and a spray from the garden hose. While they dry, attack the channels they came from: window tracks and sills are small graveyards for dust and insects, so vacuum the loose debris and scrub the caked residue with an old toothbrush. Then wash the glass on both sides, choosing an overcast day, because sun bakes cleaner onto the pane and leaves streaks. This step brightens the house immediately. Step 3: Floors Carry the Season’s Story The floors hold the record of summer: sand from the Beaches, garden soil, grass tracked in from the park. Mop hard floors thoroughly and expect high-traffic lanes to need a second pass. Wall-to-wall carpet and area rugs are due for a real extraction clean with a rented or owned carpet machine, because ordinary vacuuming never reaches the settled grit and allergens; the murky water you dump out is proof of that. Pull furniture aside and clean underneath, where three months of dust bunnies and lost hair clips have gathered quietly. Step 4: Cut the Kitchen’s Grease Film The refrigerator has been a revolving door all summer. Empty it shelf by shelf, wash the shelves and drawers in warm soapy water, wipe the interior with a food-safe cleaner, and check expiration dates as you go. Handles and doors get wiped in the same motion. Summer cooking leans on frying and grilling, which leaves a sticky film on cabinets, backsplash, and especially the range hood: spray a degreaser, let it sit a few minutes, then wipe it clean. Finish by pulling the oven and stove forward to wash the exposed sides and the floor behind them, the most forgotten grease traps in any home. Step 5: Reset the Living Room’s Soft Surfaces Dust and dander settle into fabric, so give upholstery real attention. Launder any sofa cushion covers marked machine-washable; for everything else, vacuum slowly with the right attachment, working into every seam and crevice. To pull odors, scatter baking soda over the fabric, let it sit for half an hour, then vacuum it off. Wash throw blankets and pillows per their care tags. Dust with a damp microfiber cloth, which traps particles instead of scattering them, and reach the spots daily cleaning skips: picture-frame tops, ceiling fan blades, and lamp shades. Step 6: Bathrooms After a Humid, High-Traffic Season Bathrooms absorb summer humidity and a steady stream of guests in swimwear, so scrub grout lines on floors and in showers where soap scum and mineral deposits have hardened; a baking soda and vinegar paste handles them well. Wash the shower curtain and its liner. Then remove the exhaust fan cover, usually caked with dust, and clean it so the fan can genuinely pull moisture from the air. That detail matters because damp, stagnant air invites mildew, and the CDC’s page on mold explains why controlling moisture is the real defense. Empty medicine cabinets and vanities, tossing expired products. Step 7: Retire the Summer Gear and Reclaim Storage Seasonal belongings need a clean exit. Wash pool toys and inflatables, dry them fully, deflate, and store them for next year. Give the barbecue grill its post-season service: scrape the grates, empty the grease trap, wipe the exterior, then cover it for cooler months. Wipe the pollen layer off patio furniture, and make sure cushions are completely dry before boxing them, since damp cushions in storage grow mildew. Finish with the declutter: Sort summer clothes into keep, donate, and toss piles. Organize the garage and basement so sports equipment, camping gear, and garden tools each have a designated home. This is the step that turns chores into an actual season handoff. The August Reset at a Glance Zone Core tasks Why now Air system Replace filter, vacuum vents Pollen and dust loaded every room Windows Wash screens, scrub tracks, clean glass Brighter rooms before light fades Floors Double mop, carpet extraction, move furniture Settled grit holds allergens vacuums miss Kitchen Fridge reset, degrease hood and cabinets Old grease invites odor and pests Upholstery Launder covers, baking soda pass, damp dust Fabric collects dander all season Storage Wash, dry, and box seasonal gear Protects belongings and reclaims space August Cleaning Questions, Answered How long does a full reset take? Split it across two weekends: one for air, windows, floors, and upholstery, another for the kitchen, bathrooms, and storage. Doing the filter swap first means you are never blowing last season’s dust onto surfaces you just cleaned. What should I cut if I only have one day? The air step and the floors. Allergens drawn in through open windows end up in the filter and ground into carpet pile, so clearing those two gives the health payoff even when everything else waits. Is renting a carpet cleaner worth it? If sandy feet crossed the

How to Prepare for August Cleaning: 7 Steps, Fast and Easy Read More »

different types of carpets

How to Clean Different Types of Carpets – 4 Best Ways

How to Clean Different Types of Carpets: 4 Best Ways Cleaning carpet effectively depends on the material. Different fibers react differently to water, vacuuming, and cleaning solutions, and the wrong method can shrink, fade, or mat the pile. These four approaches cover the carpet types found in most Toronto homes, from durable synthetics to delicate natural fibers like wool and sisal. 1. Synthetic Carpets: Nylon, Polyester, and Olefin Synthetic carpets are popular for durability and stain resistance. Nylon is very resilient, polyester is soft with natural stain and fade resistance, and olefin (polypropylene) resists moisture and mildew, which makes it common in basements. Vacuum high-traffic areas daily or every other day and the whole carpet at least twice a week, using a beater bar or rotating brush to lift embedded dirt before it grinds down the fibers. For spills, scoop up solids with a dull knife or spoon, then blot liquids immediately with a clean white cloth, working from the outside in. Never rub. A quarter teaspoon of mild, non-bleach dishwashing liquid in one cup of lukewarm water handles most spills, but test any solution in a hidden spot first. Rinse with a light mist of cool water, blot dry, and leave weighted paper towels over the area overnight. For deep cleaning, hot water extraction (steam cleaning) is the most effective method, and drying usually takes 6 to 12 hours with good ventilation. 2. Wool Carpets: Gentle Care for Natural Fibers Wool is luxurious, durable, and naturally soil resistant, but it is sensitive to harsh chemicals, high pH levels, and excessive moisture. Vacuum with strong suction, and set the beater bar to its highest pile setting or use a suction-only attachment, because aggressive beater bars make wool fuzz or pill. Use only WoolSafe or pH-neutral cleaners; alkaline detergents or bleach can yellow and weaken wool fibers. Blot spills rather than rubbing, dry quickly with fans or a dehumidifier, and avoid direct heat. For deep cleaning, low-moisture methods such as dry foam cleaning are safer than traditional steam cleaning. 3. Cotton and Viscose Rugs: Handle With Care Cotton is soft and absorbent but can shrink, brown, or bleed color, while viscose (rayon) is extremely delicate when wet, losing up to 50 percent of its strength. Vacuum these rugs with the beater bar disengaged or on the highest setting. Before any spot treatment, run a colorfastness test in a hidden area. Use a highly diluted pH-neutral cleaner applied with a barely damp cloth, blot gently, and dry immediately with fans or a cool hairdryer. Deep cleaning is best left to professionals who specialize in delicate fibers, and steam cleaning viscose can cause irreversible damage. 4. Plant Fiber Carpets: Sisal, Jute, Seagrass, and Coir Natural plant fiber carpets are highly absorbent and extremely sensitive to water. Moisture can cause browning, water stains, shrinkage, and mildew. Vacuum frequently with a suction-only cleaner, at least twice a week, from different directions to remove grit trapped in the weave. Blot spills immediately and thoroughly, scrape off solids, and avoid water when possible. For stains, use a dry-cleaning solvent or dry carpet cleaning powder, brushed in and vacuumed up. Never steam clean these fibers; professional dry or very low-moisture cleaning is the safe choice. A quick spill response that works on most carpets: Blot liquids immediately with a clean white cloth, outside in Scoop solids with a dull knife or spoon, never rub Test any cleaning solution in a hidden spot first Use minimal moisture, then dry the area quickly Weight down paper towels overnight for stubborn damp spots Carpet Type Vacuuming Spot Cleaning Deep Cleaning Synthetic (nylon, polyester, olefin) Beater bar, twice weekly Mild dish soap and water Hot water extraction Wool High pile setting or suction only WoolSafe, pH-neutral cleaner Low-moisture professional cleaning Cotton and viscose Suction only, gentle Diluted pH-neutral, minimal water Professional delicate-fiber cleaning Sisal, jute, seagrass, coir Suction only, twice weekly Dry-cleaning solvent or powder Dry methods only, no steam Keep Carpets Clean Between Deep Cleans Vacuuming and quick spill response extend the life of any carpet, but dirt and allergens build up inside the fibers over time. Dust mites and pet dander are common indoor allergens linked to asthma symptoms, according to the CDC, and Health Canada also lists them among indoor air contaminants that affect respiratory health. Whenever moisture is involved, dry the carpet fast, because the CDC’s mold guidance stresses that moisture control prevents mold growth. When to Call Professional Carpet Cleaners Toronto Shine Cleaning handles all carpet materials with the care and specialized techniques they deserve. Our home deep cleaning service includes thorough carpet vacuuming and spot treatment as part of a full clean, and our regular maid service keeps high-traffic areas fresh between deep cleans. Check our pricing page or see if we serve your neighbourhood in the GTA. Call (647) 424-0355 to book. Can I steam clean a wool carpet? Traditional steam cleaning can introduce too much moisture for wool. Use low-moisture methods such as dry foam cleaning or low-moisture hot water extraction with minimal water and rapid drying, ideally handled by professionals experienced with wool. How long does carpet take to dry after steam cleaning? With good ventilation, most synthetic carpets dry in 6 to 12 hours, sometimes longer. Open windows, run fans, and use a dehumidifier to speed up drying and prevent musty odors or mold. What should I do about grease, ink, or wine stains? Use a stain remover designed for your carpet type and follow the product instructions carefully. Test it in an inconspicuous spot first, apply it to a cloth rather than the carpet, and blot from the outside in. Can wet viscose rugs be saved? Act immediately: blot with a clean white cloth, never rub, dry with fans or a cool hairdryer, and groom the pile back into place while drying. For set stains, contact a professional who specializes in delicate natural fiber rugs.

How to Clean Different Types of Carpets – 4 Best Ways Read More »

4 Easy Home Deep Cleaning Tips You Need to Try

4 Easy Home Deep Cleaning Tips You Need to Try Home deep cleaning goes far beyond routine tidying. Where regular cleaning maintains surface-level order, deep cleaning removes accumulated dirt, stubborn grime, bacteria, and hidden allergens that build up over time in every part of a home. It is a methodical, top-to-bottom process that restores a home to its best hygienic condition, and these four tips make it manageable. 1. Deep Clean the Kitchen From Top to Bottom The kitchen needs the most intensive work because grease, food particles, and bacteria collect there. Clean the interior and exterior of major appliances: degrease ovens inside and out, including racks and doors, clean microwaves internally and externally, wipe refrigerator and dishwasher exteriors, and degrease range hoods and their filters. Wipe cabinet exteriors to remove fingerprints and splatters, descale and polish sinks, faucets, and fixtures, sanitize countertops and backsplashes with attention to grout lines, and scrub floors including edges, corners, and under movable appliances. 2. Say No to Mold, Hard Water, and Dust in Bathrooms Bathrooms are high-moisture areas prone to mold, mildew, and soap scum. Scrub showers and bathtubs, including walls, doors, and tracks, to remove soap scum, hard water deposits, and signs of mildew. Disinfect toilets thoroughly, both inside the bowl and on all exterior surfaces, including the base and surrounding floor. Clean and polish sinks, vanities, countertops, and mirrors, and scrub tiles and grout on floors and walls to restore brightness. Dust light fixtures, exhaust fans, and vents, and descale chrome faucets and showerheads. 3. Dust High, Clean Low, and Don’t Skip the Details Work from top to bottom so dust falls onto surfaces you have not cleaned yet. Dust ceiling fans, light fixtures, picture rails, and curtain rods, then move to baseboards, skirting boards, and electrical outlet covers. Vacuum furniture, including under cushions, and move pieces where possible to clean underneath and behind. Wipe window sills, ledges, tracks, and frames, remove cobwebs from ceilings and corners, and clean interior windows and mirrors. Finish with floors: vacuum carpets thoroughly, including edges and high-traffic areas with spot treatment for stains, and mop hard floors with a suitable cleaning solution, paying attention to corners. 4. Call a Professional Home Deep Cleaning Service Professional cleaners bring training, industrial-grade equipment, and specialized solutions that most homes do not have. They work from a detailed checklist so every agreed area is covered consistently, and a full house deep clean can take many hours or even days of strenuous work when done alone. Reputable companies are insured and bonded: Toronto Shine Cleaning carries a $1,000,000 insurance policy plus a $10,000 accidental breakage and surety bond. The process starts with a consultation to define the scope and finishes with a walk-through so you can confirm the results. The CDC’s cleaning and disinfecting guidance explains why removing dirt before disinfecting matters, and Health Canada’s indoor air quality information covers the allergens a deep clean removes. For mold-prone areas, the CDC’s mold resources explain why moisture control is essential. Signs it is time for a home deep cleaning: Persistent musty odors despite regular cleaning Visible dust build-up in corners or on less-disturbed surfaces Grease build-up in the kitchen or hard water stains in the bathroom Allergy symptoms that worsen indoors A big event, move, sale, or renovation on the calendar Room Deep Cleaning Focus Tools That Help Kitchen Appliances, range hood, cabinets, grout, floors Degreaser, microfiber cloths, scrub brush Bathroom Shower, toilet, tiles, grout, fixtures Disinfectant, descaler, grout brush Living areas and bedrooms Ceiling fans, baseboards, furniture, windows Vacuum attachments, extendable duster Whole home Vents, door frames, switches, floors Vacuum, mop, step ladder Make Deep Cleaning a Seasonal Habit Spring and autumn are natural triggers, and many homeowners book an annual or semi-annual deep clean to maintain a consistently high standard, especially before hosting events or after renovations. Once the professionals finish, ongoing regular maid service keeps the baseline high, while a professional home deep cleaning resets the whole house. Review pricing or find your GTA location, then call (647) 424-0355 to book. How often should I deep clean my home? Many homes benefit from a deep clean once or twice a year, typically in spring and autumn. You may want one more often before or after events, when moving in or out, before selling or renting a property, or after renovations. How long does a professional deep clean take? It depends on the size of the home, its initial condition, and the tasks involved. A full house deep clean can take many hours or even days of work, which is why professional teams working from a checklist are faster and more consistent. Is a professional deep cleaning service insured? Reputable companies are insured and bonded. Toronto Shine Cleaning carries a $1,000,000 insurance policy and a $10,000 accidental breakage and surety bond, so you are protected against accidental damage or liability. What is the difference between regular and deep cleaning? Regular cleaning maintains surface-level order: dusting, wiping counters, and tidying. Deep cleaning removes accumulated grease, soap scum, limescale, dust, and allergens from hard-to-reach places such as behind appliances, inside ovens, and along baseboards, and it sanitizes areas that routine cleaning misses.

4 Easy Home Deep Cleaning Tips You Need to Try Read More »

Very dirty gutter

Gutters Cleaning In 3 Steps – You Should To Know

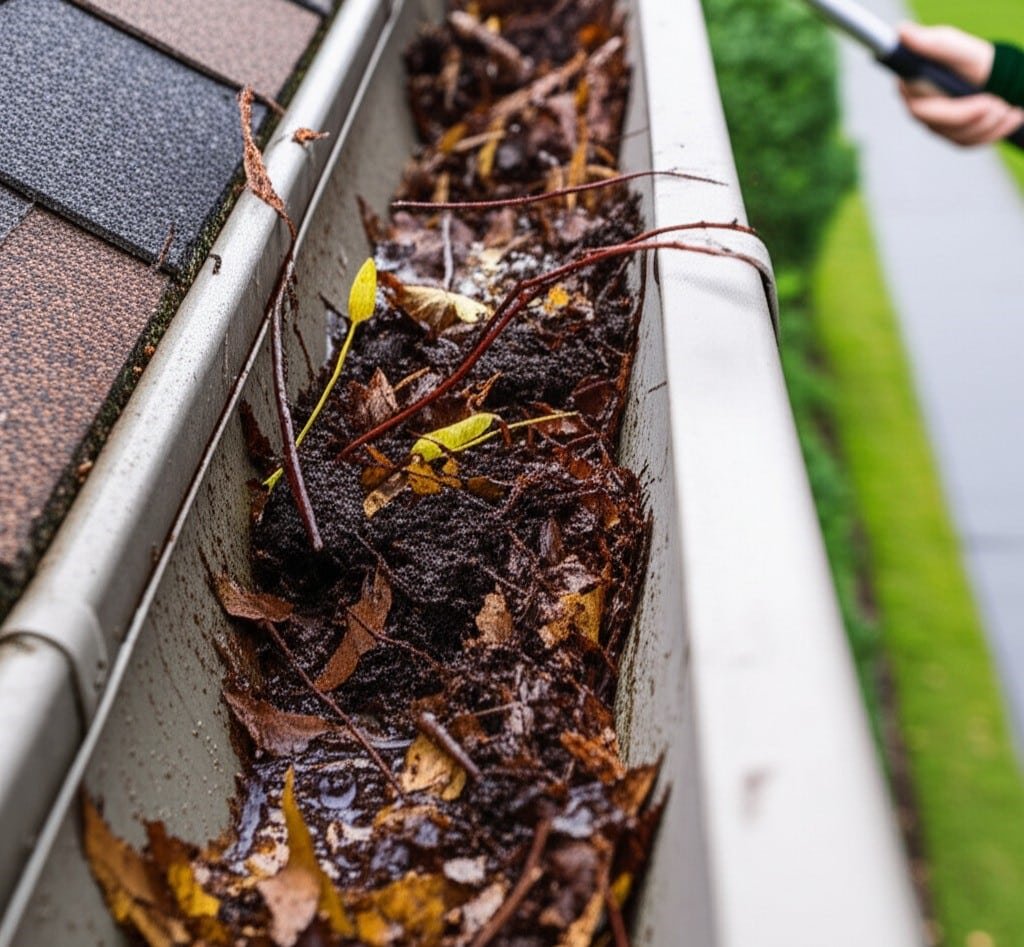
Gutters Cleaning In 3 Steps: A Job You Can Do Safely Clogged gutters do not announce themselves. Water backs up under the roofline, seeps behind the fascia, and works its way toward the foundation, where repairs get expensive quickly. The task itself is straightforward when it is done in order: set up safely, pull out the bulk debris, then flush and check the whole run. Three steps, one afternoon, and the house stays dry. Tools to Have Ready A sturdy ladder tall enough to reach the gutters without straining Heavy-duty waterproof gloves for sharp debris and bacteria A gutter shovel or small garden spade for leaves, twigs, mud and snow A bucket, or a tarp spread on the ground to catch what falls A garden hose fitted with a spray nozzle Safety glasses, plus a plumber’s snake or flexible auger for stubborn clogs Step 1: Safety First, Then the Big Debris Place the ladder on firm, level ground. On uneven soil, use a ladder leveler or sturdy boards so the feet cannot shift, and never set it on a wet or slippery surface. Extend it so the top rises at least three rungs past the roofline or gutter edge, and keep three points of contact while climbing, meaning two feet and one hand, or two hands and one foot. Rather than leaning out sideways, climb down and move the ladder. It takes longer, but it removes the job’s biggest hazard. If you work alone, tell someone that you are going up. Gloves protect your hands from sharp debris and the bacteria it carries, so wash up thoroughly once you climb down, following the CDC hand hygiene guidance. Begin near the gutter outlet and work in manageable sections, scooping leaves, twigs, pine needles and gravel into the bucket or onto the tarp below. Valleys and corners collect the most, so give them extra attention. Clearing this bulk first stops larger items from being pushed into the downpipes later. Step 2: Flush the Channels With Water Once the bulk is out, take the hose and start at the end of the run furthest from a downpipe, directing the stream toward the downpipe. The water carries away the smaller grit, mud and fine particles your shovel missed, and it doubles as a test. If water pools or backs up, something is still blocking the channel or the pipe. A steady flow into the downpipe means that section is clear. Downpipes deserve their own check. If water refuses to drain, try a concentrated spray from the top first. If that fails, feed the hose into the bottom opening and spray upward. For a stubborn blockage, work a plumber’s snake or auger down from the top or up from the bottom; in severe cases take apart the sections at the elbow joints where clogs form. A blocked downpipe erases all the work you did upstream. Step 3: Inspect and Set a Schedule With the run clean, walk it once more and look for damage. Check for cracks, holes and rust, especially on older metal gutters, and confirm that every section is fastened tightly to the fascia board with no sagging. Sagging lets water pool instead of draining, which defeats the point of the job. Examine the seams and end caps for leaks, and make sure the downspouts are attached firmly at both ends and send water well away from the foundation. Spotting these small problems now prevents costly repairs later, and water that sits against the house instead of draining away is a mold risk, as the CDC mold guidance warns. Most homes need gutters cleaned twice a year: once in late spring after trees release seeds and pollen, and again in late fall once the leaves are down. If mature trees crowd the roof, and especially pines that drop needles all year, plan on three or four visits. Put reminders in your calendar so the task does not slip. Keeping the channels clear is what protects your roof, siding, foundation and landscaping from water damage. Step What You Do What to Watch For 1. Safety and setup Ladder on firm level ground, three rungs above the gutter, three points of contact Never lean out sideways; tell someone you are on the roof 2. Remove debris Start near the outlet, shovel leaves, twigs, needles and gravel into a bucket or onto a tarp Valleys and corners where debris collects 3. Flush and check Hose from the far end toward the downpipe, then clear a blocked pipe with a snake Pooling or backing up means a blockage Cleaning Products That Work Plain water at good pressure handles most of the work. For stubborn dirt or mildew, a little mild detergent in a bucket of water, applied with a brush and rinsed well, is usually enough. A mix of equal parts white vinegar and water loosens algae, mold and mildew stains: apply it, wait fifteen to twenty minutes, scrub gently, then rinse. Diluted all-purpose household cleaner can brighten the exterior of the gutters, but test it on a hidden spot first. Commercial gutter cleaners exist for severe leaf staining, algae or rust on metal, so read the label to confirm it suits your gutter material, such as aluminum, vinyl or steel. Always begin with the mildest option. Avoid abrasive chemicals and keep high-pressure washers at a distance, since both can damage surfaces, ruin gaskets or dislodge sections. For routine indoor cleaning, the CDC home cleaning page is a good follow-up. Frequently Asked Questions How often should gutters be cleaned? Twice a year suits most homes: late spring after seeds and pollen fall, and late fall once the leaves are down. Homes surrounded by mature trees, especially pines, may need three or four cleanings. What if a downpipe stays blocked after flushing? Spray from the top first, then feed the hose into the bottom and spray upward. If that fails, run a plumber’s snake or auger through the pipe, and take apart the elbow joints in severe

Gutters Cleaning In 3 Steps – You Should To Know Read More »