Home Improvement

apartment cleaning oakville

Does Indoor Air Quality Affect Your Health? How to Improve Your Home’s Indoor Air Quality

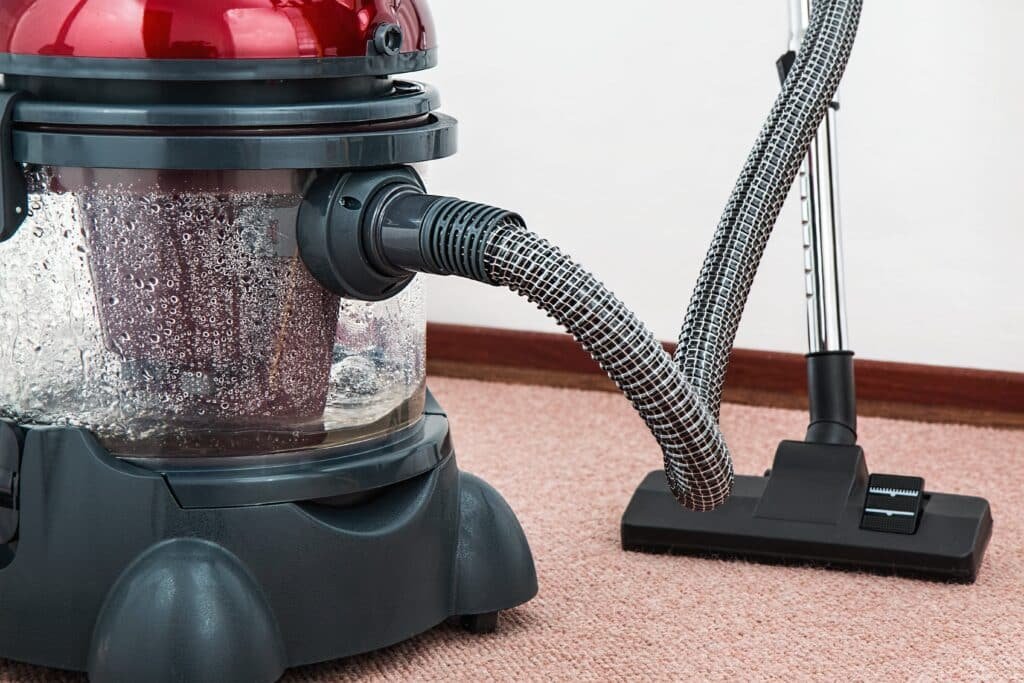
Hey, folks! Let’s chat about something we often take for granted: Indoor Air Quality Affect Your Health? Ever wonder if it really impacts your health? Spoiler alert: It absolutely does! Indoor air quality plays a massive role in our well-being. Let’s break down why it’s important and how you can make it better. Why Indoor Air Quality is a Big Deal for Your Health When we think of air pollution, our minds often jump to smoggy city streets or industrial smokestacks. But what about the air inside our homes? Surprisingly, it can be just as polluted, if not more so, than outdoor air. Our homes, the places where we should feel safest, can be teeming with airborne enemies that we’re not even aware of. Hidden Nasties – Think about all the things in your home right now. Cozy, right? But lurking within this comfort are unseen dangers. Your fluffy carpet, your beloved pet, even your favorite scented candles can be sources of indoor pollutants. Dust mites, a common household allergen, thrive in bedding, upholstered furniture, and carpets. Pet dander, a trigger for allergy sufferers, circulates freely in the air. Mold, a result of excess moisture, can grow in bathrooms and kitchens, releasing spores that can cause respiratory issues. These VOCs can evaporate into the air at room temperature, potentially causing headaches, dizziness, and other health problems. 24/7 Exposure – Here in Toronto, with our chilly winters and hot summers, we spend a lot of time indoors. This means we’re constantly exposed to whatever is in our indoor air. Whether we’re sleeping, working, or just hanging out, we’re breathing in whatever’s floating around in our home. For those with allergies or asthma, this constant exposure can mean a never-ending cycle of symptoms. And for the rest of us, it could mean a gradual impact on our health without us even realizing it. Long-Term Impact – The effects of poor indoor air quality aren’t always immediate. They can creep up on us over time, leading to more serious health issues down the road. Consistent exposure to pollutants can exacerbate respiratory conditions like asthma and can even lead to the development of chronic respiratory diseases. But it’s not just our lungs that are at risk. Studies have shown that long-term exposure to certain air pollutants can have cardiovascular effects as well. This means that the air in our homes could potentially be affecting our heart health. Embrace Fresh Air Opening Windows: One of the simplest yet most effective ways to improve indoor air quality is by opening your windows. This straightforward action invites a natural flow of fresh air into your home, diluting and displacing indoor air pollutants. Whether it’s pollen, dust, or chemical residues from household cleaners, opening windows helps to flush these out, replacing stale, contaminated air with cleaner, outdoor air. Using Exhaust Fans: Now, let’s talk about the role of exhaust fans, particularly in kitchens and bathrooms. These areas of your home are hotspots for moisture and odors. Cooking, for example, releases a variety of particles and gases into the air, some of which can be harmful if inhaled in large quantities. Similarly, bathrooms are prone to mold and mildew growth due to high humidity levels. Exhaust fans come into play by effectively removing moist air, odors, and airborne pollutants from these rooms. When you cook or take a hot shower, turning on the exhaust fan helps in reducing the potential for mold growth and ensures that any harmful byproducts of cooking are quickly removed from your indoor environment. Why This Matters: The combined approach of opening windows and using exhaust fans is a proactive way to maintain good air quality inside your home. By doing so, you’re not just making the air in your home more pleasant to breathe; you’re also contributing to a healthier living environment. Reducing the levels of indoor pollutants can have a significant impact on your overall health, especially for those with respiratory issues or allergies. Plus, it’s a cost-effective and easy-to-implement solution that can make a big difference in the feel and safety of your home environment.     Keep It Clean Regular cleaning is more than just about keeping your place looking neat; it plays a pivotal role in the quality of air you breathe indoors. Dusting and vacuuming are key activities in this routine. Dust accumulates a variety of allergens like pet dander, pollen, and dust mites, which can trigger allergic reactions and respiratory issues. For those with pets, it’s even more critical. Pet hair and dander can easily become airborne and contribute to indoor air pollution. Vacuuming with a good-quality vacuum cleaner, preferably one with a HEPA filter, is vital. These filters are designed to trap very fine particles that other vacuums might recirculate back into the air. By regularly vacuuming carpets, rugs, and even upholstery, you significantly reduce the amount of dust and allergens in your home. The choice of cleaning products is equally important. Many conventional cleaning products contain harsh chemicals that can release volatile organic compounds (VOCs) into your indoor air. These compounds can be harmful when inhaled and contribute to indoor air pollution. Opting for natural, non-toxic cleaning products is a healthier choice. These products are made from ingredients that are less likely to degrade your indoor air quality. You can even make your own cleaning solutions using everyday household items like vinegar, baking soda, and lemon juice. These natural ingredients are effective at cleaning and are much safer for your indoor air. Green It Up with Plants Certain plants, like spider plants and peace lilies, are celebrated for their air-purifying abilities. These plants do more than just add a touch of greenery; they actively work to cleanse the air. How? They absorb common indoor pollutants through their leaves and roots. These pollutants, such as formaldehyde, benzene, and trichloroethylene, are commonly found in household items and can be harmful over time. Plants like the spider plant and peace lily have been shown to effectively reduce these

Does Indoor Air Quality Affect Your Health? How to Improve Your Home’s Indoor Air Quality Read More »

How to Prevent Cold and Flu with Natural Cleaning Solutions

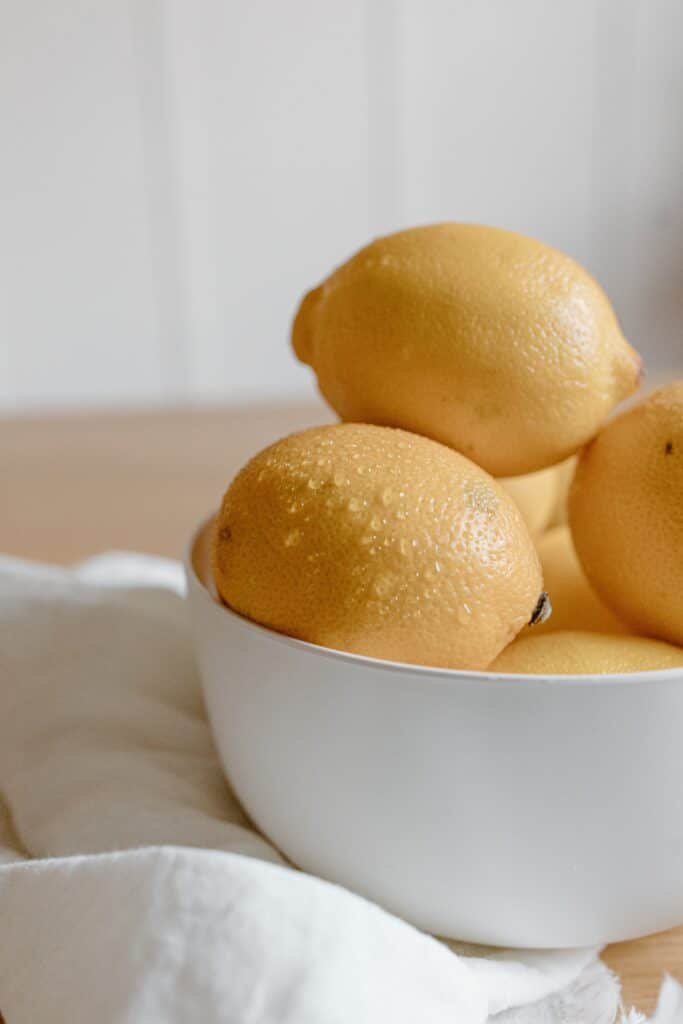
Hey there! To Prevent Cold and Flu with Natural Cleaning, it’s super important to keep our homes clean and germ-free. But, guess what? You don’t need to rely on harsh chemicals to do the trick. Natural cleaning solutions can be just as effective in keeping those pesky germs at bay. Let’s dive into how you can use natural solutions to prevent cold and flu in your cozy nest. Why Go Natural? First and foremost, natural cleaning solutions are kinder to your skin. We’ve all been there – using a strong cleaner only to end up with irritated hands. Natural options, on the other hand, are much gentler. This means you can clean away without worrying about harsh reactions, which is especially great if you have sensitive skin. But it’s not just about you! If you have little ones scampering around or furry friends lounging on your floors, you’ll love that natural cleaners are safer for them too. Kids and pets are often more sensitive to the harsh chemicals found in many standard cleaning products. By switching to natural alternatives, you’re creating a safer environment for the entire family. Imagine your kiddos playing on floors cleaned with gentle ingredients or your pets cozying up on freshly cleaned carpets that don’t have any harsh residues. It’s all about creating a safe and healthy space for everyone. Now, let’s talk about Mother Earth. We all want to do our part in keeping our planet happy and healthy, right? Well, natural cleaning solutions are a great step in that direction. They’re eco-friendly, which means they’re kinder to the environment. When you wash away these natural cleaners, you’re not sending harsh chemicals down the drain and into our water systems. It’s a win-win for your home and the environment. Another cool thing? You probably have most of these natural cleaning superheroes in your kitchen right now! That’s right – items like vinegar, lemon, and baking soda aren’t just for cooking; they’re also powerful cleaning agents. This means you can start your natural cleaning journey without a trip to the store. It’s convenient, effective, and kinder to your wallet too. The Magic of Vinegar So, what makes vinegar so special? It’s all about the acidity. Vinegar is known for its acidic nature, which is a nightmare for germs and viruses. This acidity isn’t just good for adding zing to your salad dressing; it’s also what gives vinegar its germ-killing superpowers. When you use vinegar as a cleaning agent, it works hard to break down grime, cut through grease, and yes, kill those pesky germs that can lead to colds and flu. Now, how do you transform vinegar into a cleaning superhero? It’s super simple. Take equal parts of water and white vinegar, mix them in a spray bottle, and there you have it – a natural disinfectant ready to tackle germs in your home. This mixture can be used on a variety of surfaces where germs love to lurk. Think kitchen counters, bathroom surfaces, doorknobs, and even your smartphone screen. But here’s the best part: it’s so easy to make and use. You don’t need to be a DIY guru to mix water and vinegar. Plus, it’s a cost-effective solution. Vinegar is way cheaper than most store-bought cleaners, and since you’re diluting it with water, a little goes a long way. You’re not only keeping your home clean; you’re also being kind to your wallet. Another bonus? You’re avoiding the strong, sometimes overwhelming scents that come with many commercial cleaners. While vinegar does have a distinct smell, it dissipates quickly, leaving you with a clean, fresh space without any lingering chemical odors.     Lemon: Not Just for Lemonade Why are lemons such a big deal in the cleaning world? It’s all about their high acidity. Just like vinegar, the acidic nature of lemons makes them a natural enemy for germs and viruses. When you’re trying to keep your home free from cold and flu bugs, lemons are your trusty allies. They can kill bacteria and leave your house not just clean, but also smelling fresh and citrusy. So, how do you turn lemons into a cleaning solution? It’s as easy as pie (or should I say, lemon pie?). Squeeze some lemon juice, mix it with a bit of water, and you’ve got yourself a natural disinfectant. This lemon-water mix is perfect for wiping down those areas where germs love to hang out. Think kitchen countertops, where you prepare all your meals, or doorknobs, which everyone touches multiple times a day. Even your bathroom surfaces can benefit from a lemony clean, leaving them not just germ-free but also with a refreshing scent. One of the coolest things about using lemon as a cleaner is the scent factor. Unlike some cleaners that can be harsh on your nose, lemons leave a light, refreshing citrus aroma. This makes cleaning a more pleasant experience and leaves your home smelling naturally fresh. Plus, there’s something incredibly satisfying about knowing you’re using a natural, biodegradable substance to keep your home clean. And let’s not forget, lemons are also great for tackling tough stains and bringing out natural shine. Got a stubborn stain on your countertop? Lemon juice to the rescue! Want to add some sparkle to your faucets or sink? Rub them with a lemon wedge and watch them shine. Essential Oils: Smells Good and Cleans Too! So, why are these particular oils so great for cleaning? Well, it turns out, nature has equipped them with properties that are tough on bacteria and viruses. For instance, tea tree oil is known for its powerful antiseptic properties. It’s like that tough-on-germs cleaner but without the harsh chemicals. Eucalyptus oil, on the other hand, isn’t just for helping you breathe easier when you have a cold; it’s also great for wiping out germs. And then there’s lavender, the all-rounder, known for its calming scent and its ability to fight off bacteria. Now, how do you use these oils in cleaning? It’s pretty

How to Prevent Cold and Flu with Natural Cleaning Solutions Read More »

Family putting up a Christmas tree

How to Achieve a Sparkling Clean Home this Holiday Season

A Clean Home this Holiday! A time of twinkling lights, warm cocoa, and… a little bit of chaos, right? It’s a season filled with joy, but let’s not sugarcoat it – it can get pretty hectic. From stringing up the lights to finding the perfect gifts, there’s a lot on your plate. And amidst all this festive frenzy, keeping your home clean might feel like a Herculean task. But hey, that’s where I come in with some easy-peasy strategies to help you keep your home not just clean, but holiday-card perfect! The Joy of a Clean Home for the Holidays Imagine this: You’re stepping into your home after a long day of holiday prep, and instead of a to-do list that seems a mile long, you’re greeted by a space that’s as calming as it is clean. This isn’t just about impressing your guests (though that’s a nice bonus!), it’s about creating a peaceful sanctuary for yourself during what can be the most wonderful, albeit busy, time of the year. So, how do you go about it? First up, think about setting the right vibe. A clean home during the holidays isn’t just about sparkling floors and dust-free shelves; it’s about crafting an environment that feels warm, welcoming, and oh-so-cozy. Imagine the scent of pine needles or your favorite holiday cookies wafting through the air, mingling with the soft glow of fairy lights. That’s the holiday spirit right there! Now, let’s talk about your game plan. The trick is to break down the overwhelming task of cleaning into manageable chunks. Maybe one day you tackle the living room, the next day the kitchen. It’s about finding a rhythm that works for you, without turning into the Grinch. Remember, the goal isn’t perfection – it’s about creating a space where memories can be made and enjoyed. Start with Decluttering Starting with decluttering is like setting the stage for a grand holiday show in your home. Think of it as prepping the canvas before you bring out the colors of your holiday décor. The mission here is simple yet transformative – clearing out the non-essentials to make room for festive cheer. Begin your decluttering adventure by walking into each room with a fresh pair of eyes. You’re on a treasure hunt, but instead of seeking out jewels, you’re looking for items that don’t belong in your holiday narrative. These could be stacks of magazines that have been piling up, summer clothes still lingering in your closet, or those random bits and bobs that mysteriously gather in every household. Each item you remove is like lifting a small weight off your home’s shoulders. Now, it’s not just about taking things away. It’s also about reorganizing what remains. This step is like a game of Tetris, where you find the perfect spot for each item. That summer gear? It might find a new home under the bed or in a storage bin. The infamous junk drawer? Give it a little love and attention, and you’ll be amazed at how much more functional your space becomes. Remember, the aim of decluttering isn’t just to make your home look neat for the holidays. It’s about creating a sense of order and tranquility. In a decluttered space, your holiday decorations will shine brighter, your rooms will feel more inviting, and you’ll find that your cleaning tasks become a whole lot easier. Less clutter means fewer places for dust to settle and less stuff to move around when you’re vacuuming or mopping. Deep Cleaning: Room by Room     The Kitchen: A Feast for the Senses The kitchen, undoubtedly, will be your holiday headquarters, buzzing with the aroma of delicious meals and the warmth of shared laughter. Start your deep cleaning saga here by focusing on your appliances. Your oven, microwave, and stovetop have been loyal companions throughout the year and now need a thorough scrub to be at their best. Then, move on to the countertops, where your culinary masterpieces will take shape. A sparkling clean surface not only looks inviting but also ensures a hygienic space for food preparation. Next, turn your attention to the floors, knowing they’ll soon witness the hustle and bustle of holiday cooking. A good mop can make them shine like new. The Living Room: The Stage for Memories Now, glide into the living room, the social hub of your home. This space will host everything from heartwarming chats to boisterous holiday games. Begin by dusting every surface. Each shelf, mantle, and corner should be free of dust bunnies, making way for your holiday decorations to take the spotlight. Next, those windows need a good cleaning to let the winter sunlight (or the twinkling lights from outside) filter through, adding to the room’s charm. And if you’re lucky enough to have a fireplace, give it the attention it deserves so it can be the heartwarming centerpiece for those chilly evenings. Lastly, vacuum or mop the floor, ensuring it’s pristine and inviting. Bedrooms & Bathrooms: Retreats of Comfort and Cleanliness Moving on to the bedrooms, especially if you’re hosting overnight guests, think comfort and coziness. Fresh linens are a must – they not only look inviting but also give that fresh, clean scent everyone loves. A quick decluttering here can also make the space more welcoming. In the bathrooms, aim for a level of cleanliness that would make a five-star hotel envious. Sparkling mirrors, spotless countertops, and a gleaming shower or tub will make your guests feel pampered. In each room, the goal is to create an environment that feels not just clean but also warmly inviting. It’s about setting the stage for the holiday magic to unfold, where every corner of your home contributes to the festive spirit. Happy deep cleaning! Focus on the Little Details Scent-sational Ambiance: Creating a delightful holiday atmosphere is as much about the scents as it is about the decor. The power of a festive fragrance can transport you straight into the holiday spirit. Start by

How to Achieve a Sparkling Clean Home this Holiday Season Read More »

Office window cleaning by men surrounded by plants

Green Cleaning: How to Make an Easy Eco-Friendly Cleaning

Hey there, fellow Green Cleaning freaks! Are you tired of harsh chemicals that leave your home smelling like a science lab? Well, guess what? You can keep your space sparkling clean and be kind to Mother Earth at the same time. Welcome to the world of green cleaning! It’s not just a trend; it’s a lifestyle shift that’s good for you, your home, and the planet. Let’s dive into how to make eco-friendly cleaning a part of your everyday routine. Why Go Green in Your Cleaning Routine? Before we jump into the “how,” let’s talk about the “why.” Traditional cleaning products are often loaded with chemicals that can be harsh on your skin, respiratory system, and the environment. When you use them, they can release volatile organic compounds (VOCs), which contribute to indoor air pollution and can be tough on our lungs. Ever felt a bit dizzy or had a headache after a big clean? Those could be the chemicals talking! But that’s not all. These chemical-laden cleaners can have a lasting impact on our environment too. When they wash down the drain, they can end up in our waterways, affecting aquatic life and even coming back to us in our water supply. Not a pretty picture, right? Switching to green cleaning means you’re choosing products that are safer for you and the planet. These eco-friendly options are usually made with plant-based, biodegradable ingredients that break down harmlessly in the environment. Plus, they’re often free from artificial fragrances and colors, which is great news for those with allergies or sensitivities. And here’s a bonus: green cleaning can be kinder on your wallet in the long run. Many green cleaning products are concentrated, so a little goes a long way. Or, if you’re into DIY solutions, you can whip up effective cleaners with inexpensive, everyday items like vinegar and baking soda. Easy Eco-Friendly Cleaning Swaps When it comes to green cleaning, there are so many simple swaps you can make that have a big impact. Let’s start with DIY cleaners. You might be surprised by the cleaning power of items you already have in your pantry. White vinegar, for example, is a natural disinfectant and great at cutting through grease and grime. Baking soda is another hero in the DIY cleaning world. It’s fantastic for scrubbing and neutralizing odors. And let’s not forget lemon juice, which not only leaves a refreshing scent but also has natural antibacterial properties. You can use these ingredients separately or mix them to create a variety of cleaners for different purposes. Now, if you’re not the DIY type, no worries! The market for eco-friendly cleaning products has exploded in recent years. More and more brands are focusing on creating products that are both effective and kind to the planet. When shopping for these products, look for ones with biodegradable ingredients and packaging. This means they’ll break down naturally without harming the environment. Many of these products also avoid harsh chemicals, making them safer for use around kids and pets. Another swap is replacing your paper towels with microfiber cloths. Microfiber cloths are a game-changer in cleaning. They’re incredibly effective at trapping dirt and dust, and the best part is they’re reusable. Just toss them in the wash and they’re good as new, reducing waste and saving you money in the long run. Essential oils are a great addition to your green cleaning arsenal. They not only add a natural and pleasant scent to your homemade cleaners but also come with their own cleaning benefits. For instance, lavender and citrus oils have natural antibacterial and antiviral properties, making them great for homemade disinfectants. Plus, using essential oils allows you to customize the scent of your cleaners to suit your mood or preference. Lastly, consider your scrubbing tools. Instead of reaching for plastic scrubbers, choose brushes made from natural materials like bamboo or sisal. These materials are sustainable and biodegradable, and they work just as well, if not better, than their plastic counterparts. They’re also more durable, so you won’t have to replace them as often.     Tips for a Successful Green Cleaning Routine Embarking on a green cleaning journey can be both exciting and a bit overwhelming, but don’t worry, I’ve got some more tips to help you along the way. Start Small: You don’t need to do a complete 180 on your cleaning routine overnight. It’s okay to start small. Maybe swap out your all-purpose cleaner or dish soap with a greener alternative and see how it goes. As you get comfortable, you can gradually replace more products. This approach not only eases the transition but also allows you to test what works best for you and your home. Read Labels: When shopping for commercial green cleaning products, reading labels is key. Not all products marketed as “green” or “natural” are created equal. Look for certifications like EcoLogo or Green Seal, as these indicate that the product meets certain environmental standards. Also, be cautious of vague terms like “eco-friendly” or “green” without any specific information, as these can sometimes be misleading marketing tactics. Recycle and Reuse: Green cleaning isn’t just about the products you use; it’s also about reducing waste. Get creative with what you already have. Old t-shirts and towels can be cut into cleaning cloths, and old toothbrushes are perfect for scrubbing grout and other tight spaces. This not only saves you money but also keeps these items out of landfills. Stay Informed: The world of green cleaning is always evolving. New products and methods are constantly being developed. Stay informed about the latest trends and breakthroughs. This could be as simple as following a few eco-friendly blogs, joining online communities, or subscribing to newsletters that focus on sustainable living. Consider the Whole Product Lifecycle: Think about a product’s impact from production to disposal. For example, products with minimal packaging or those made from recycled materials have a lower environmental footprint. Also, consider the energy used in producing the product and whether

Green Cleaning: How to Make an Easy Eco-Friendly Cleaning Read More »

Small bedroom, snowing

How to Deep Clean Your Mattress for a Better Night’s Sleep

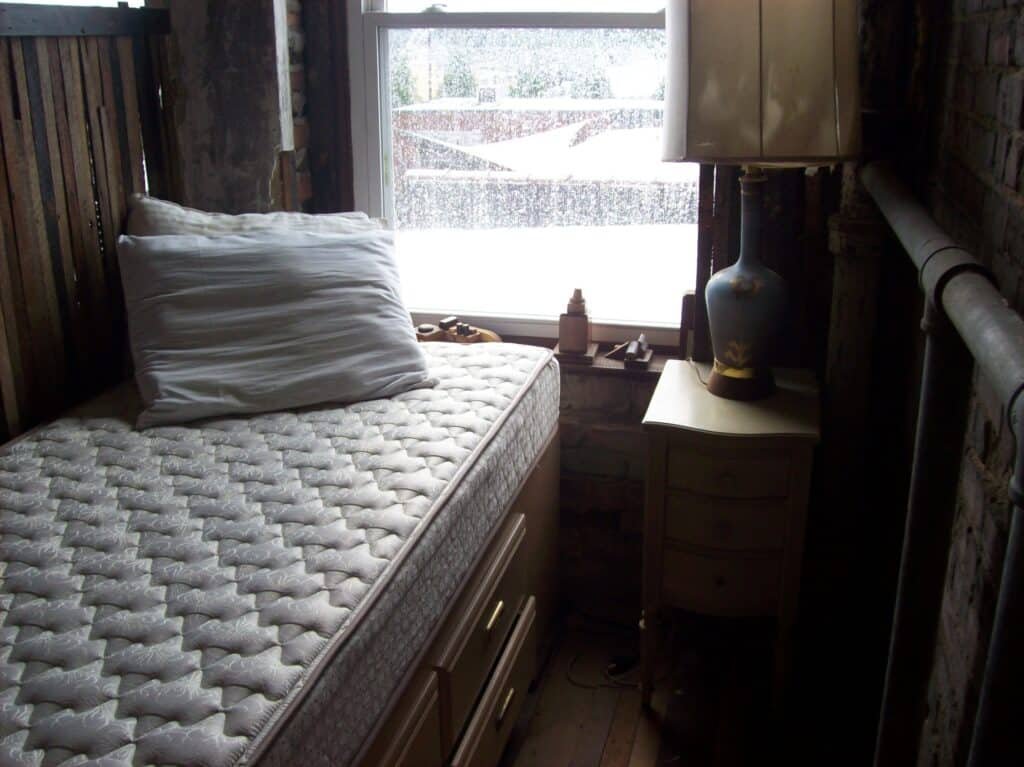
How to Deep Clean Your Mattress for a Better Night’s Sleep You spend about a third of your life asleep, and during those hours your mattress collects sweat, body oils, dust, dead skin cells, and the occasional food crumb from a late-night snack. Over time these accumulations turn a comfortable bed into a breeding ground for dust mites and allergens that can disturb your sleep and aggravate respiratory issues. A thorough deep clean every six months changes that, keeping your mattress fresh, extending its life, and helping you fall asleep in a truly clean environment. Why Mattress Deep Cleaning Matters Think of your mattress as a giant sponge. It absorbs whatever comes into contact with it: perspiration, oils, and moisture from the body, plus airborne dust and pollen that settle into the fabric. Dust mites, microscopic creatures that feed on shed skin cells, thrive in this environment, and their presence can trigger allergies and asthma symptoms in sensitive individuals. Health Canada notes that dust mites live in beds, carpets, and upholstered furniture and that keeping dust levels down reduces exposure to potentially harmful substances. Beyond the health angle, a clean mattress simply feels better. The surface stays smooth and odor-free, and you avoid the stale, musty smell that develops when bedding goes too long without attention. What You Need Before You Start Vacuum cleaner with an upholstery attachment Baking soda (a generous box or bag) Mild laundry detergent Cold water in a spray bottle or bowl Clean cloths (microfiber or soft cotton) Optional: a few drops of lavender or eucalyptus essential oil for a relaxing scent Step-by-Step Mattress Deep Clean Step 1: Strip the bed and vacuum Remove all sheets, pillowcases, and mattress protectors and toss them into the wash. With the mattress bare, run the upholstery attachment over the entire surface, paying close attention to seams, crevices, and tufts where dust and debris settle. Go over each area multiple times, especially if you have not cleaned the mattress in a while. A thorough vacuum lifts the bulk of loose dust, skin cells, and allergens before you tackle stains. Step 2: Spot-clean stains with cold water Mix a small amount of mild detergent with cold water. Hot water can set certain stains, making them harder to remove, so stick with cold. Dip a clean cloth into the solution and dab the stain gently. Do not scrub, which pushes the stain deeper into the padding, and do not soak the mattress: excess moisture can lead to mold and mildew growth inside the core. For tougher, stubborn stains, sprinkle a layer of baking soda over the area and let it sit for a few hours. Baking soda acts as a natural absorbent and deodorizer, pulling the stain and odor out of the fabric. The CDC warns that mold grows wherever moisture accumulates, so keeping the mattress as dry as possible during cleaning is essential. Step 3: Deodorize with baking soda Once the stains are treated, sprinkle a generous, even layer of baking soda over the entire mattress surface. If you want a calming scent, add a few drops of lavender or eucalyptus essential oil to the baking soda and mix it through before sprinkling. Let the baking soda rest for several hours, or ideally the whole day. During this time it absorbs lingering odors, residual moisture, and any remaining oils that the vacuum did not lift. Step 4: Vacuum everything off After the baking soda has done its work, vacuum the entire surface again using the upholstery attachment. Every granule of baking soda needs to come off, because any left behind creates a gritty texture that makes the bed uncomfortable. Run the attachment over seams, tufts, and edges where the powder settles. This final pass also lifts any dust or allergens that re-settled during the deodorizing process. Step 5: Air it out in sunlight If your living situation allows it, move the mattress outside to a balcony, patio, or backyard. Direct sunlight acts as a natural disinfectant: UV rays help kill bacteria and microorganisms that survived the cleaning process, and fresh air ventilates the padding to remove the last traces of moisture. Keep an eye on the weather a sudden rain shower can undo your work. If moving the mattress outdoors is not practical, place it in a well-ventilated room near an open window for several hours. Step 6: Add a mattress protector After the mattress is completely dry, cover it with a mattress protector. A fitted-sheet-style cover guards the top surface, while a full-zip encasement wraps the entire mattress for complete protection against spills, dust mites, and allergens. Homes with young children, pets, or allergy sufferers benefit most from full encasement. Wash the protector regularly like your sheets to keep it fresh. Mattress Maintenance at a Glance Task Frequency Benefit Strip and vacuum mattress Every six months with deep clean Removes dust, allergens, and skin cells Spot-clean stains As soon as they appear Prevents permanent marks and odors Deodorize with baking soda Every six months Absorbs odors and residual moisture Air out in sunlight Every six months Natural disinfectant and ventilation Wash mattress protector With regular laundry Keeps the barrier clean and effective Mattress Deep Cleaning FAQ How often should I deep clean my mattress? A full deep clean every six months is the standard recommendation. More frequent cleaning may be needed if you have allergies, asthma, or pets that share the bed. Why should I use cold water instead of hot for stains? Hot water can set certain stains, especially protein-based ones like sweat or blood, locking them into the fabric. Cold water lifts the stain without fixing it. Can I use vinegar or hydrogen peroxide on my mattress? Vinegar and peroxide are sometimes used for stain removal, but they can damage some mattress fabrics or leave a strong smell. The safest method for most mattresses is mild detergent with cold water and baking soda. Is professional deep cleaning worth it for a mattress? A regular at-home clean handles

How to Deep Clean Your Mattress for a Better Night’s Sleep Read More »

Warm and confortable winter, book, christmas

How to Master Winter Cleaning: Essential Tips for a Warm and Welcoming Home

Winter Cleaning is here, and let’s be real – it’s not just about sipping hot cocoa and watching the snowfall. Keeping our homes warm, cozy, and sparkling clean during these chilly months can seem like a tall order. The muddy boots traipsing through the hallway, those extra layers of clothing piling up, and the inevitable snow day chaos can quickly turn your cozy haven into a bit of a mess. It’s tempting to just curl up under a blanket and ignore it all, right? But here’s the thing: you don’t have to let your cleaning routine go into hibernation just because it’s cold outside. In fact, with some clever strategies and a bit of elbow grease, you can keep your home as inviting as a warm hug. The trick is to find the right balance – keeping things neat without feeling like you’re constantly battling against the winter elements. Why Winter Cleaning is Important Now, let’s talk about why winter cleaning is actually a big deal. It’s not just about making your space look tidy for the sake of it. Winter cleaning plays a huge role in creating an environment that’s more than just visually pleasing – it’s about making your home a sanctuary. A place where you can escape the cold, snuggle up, and truly relax. During winter, we spend a lot more time indoors (because, let’s face it, who wants to brave the cold more than necessary?), and that means our surroundings have a bigger impact on us than we might realize. A clean, well-organized home does wonders for your mood and overall well-being. It’s about clearing out the clutter, both physical and mental. It means coming back to a space that’s warm, welcoming, and peaceful – a space where you can unwind and recharge. Plus, let’s not forget the practical side of things. Regular cleaning in the winter helps keep those pesky germs at bay, making your home not just a cozy retreat, but a healthy one too. Tips to Ace Your Winter Cleaning     Start with a Deep Clean One of the best ways to kickstart your winter cleaning is by beginning with a deep clean. This is your chance to get ahead of the game before the winter chill fully takes hold. Think of it as preparing your home for the cozy days ahead. A deep clean isn’t just a regular once-over; it’s a detailed scrub down of every part of your home. Focus your efforts on areas that get the most traffic and use, like the kitchen, bathrooms, and living spaces. These are the areas where you and your family spend the most time, so you’ll want them to be extra clean and comfortable. When deep cleaning, it’s crucial not to overlook those spots that don’t often get much attention during regular cleaning sessions. We’re talking about those sneaky places like under the furniture, the tops of cabinets, and behind appliances. These areas can accumulate a surprising amount of dust, dirt, and grime over time. And let’s not forget about those high shelves and corners of rooms that are easy to overlook. Giving these areas a thorough clean can make a huge difference in the overall feel and cleanliness of your home. Now, if the thought of deep cleaning your entire home feels overwhelming, or if you simply don’t have the time, there’s always the option of calling in the pros. Professional cleaning services, such as Toronto Shine Cleaning, are experts at deep cleaning. They come equipped with all the tools and expertise needed to tackle every nook and cranny in your home. They can handle those hard-to-reach places and ensure that every inch of your space is sparkling clean. Plus, having a professional handle the deep clean can save you a lot of time and effort, allowing you to focus on enjoying the winter season in your freshly cleaned home. Create a Regular Cleaning Schedule Establishing a regular cleaning schedule is a game-changer when it comes to keeping your home tidy and comfortable during the winter months. Consistency really is key here. By setting a routine, you avoid the all-too-familiar scenario where cleaning tasks pile up, only to become an overwhelming mountain of chores. No one wants to spend their cozy winter weekends tackling a huge cleaning backlog! The beauty of a cleaning schedule lies in its ability to break down your cleaning tasks into manageable, bite-sized chunks. Instead of facing a daunting, full-house clean-up, you can focus on specific areas or tasks each day or week. For example, you might dedicate Mondays to dusting, Wednesdays to vacuuming, and Sundays to laundry. This way, you’re not trying to do everything at once, and your home stays consistently clean and inviting. Another tip is to tailor your cleaning schedule to your lifestyle and the specific needs of your home. Consider the areas that get the most use and might need more frequent attention. For instance, if you have a busy kitchen, it might need a quick daily tidy-up, whereas other areas of your home might only need a weekly once-over. Remember, the goal of a regular cleaning schedule is not just about maintaining cleanliness; it’s also about making your life easier. When you have a plan in place, you spend less time worrying about when to clean and more time enjoying your snug winter haven. Plus, a scheduled approach to cleaning means you’re less likely to overlook important tasks or areas of your home. Focus on High-Traffic Areas When it comes to winter cleaning, honing in on high-traffic areas in your home is a strategy that pays off immensely. These are the spots that get the most foot traffic and, consequently, accumulate the most dirt and grime. We’re talking about the bustling hubs of your home: the entrance, living room, kitchen, and any other area where your family and guests tend to congregate. The entrance, for instance, is your home’s first line of defense against the outside world. It’s where muddy boots

How to Master Winter Cleaning: Essential Tips for a Warm and Welcoming Home Read More »

Professional vacuuming in home office setup.

How to Transform Your Space with Turn-Over Cleaning: A Step-by-Step Guide for Spotless Results

How to Transform Your Space with Turn-Over Cleaning: A Step-by-Step Guide Turn-over cleaning is the reset that happens between guests: the full clean that takes a rental suite, guest room, or Airbnb unit from just-vacated to ready-to-welcome. Done well, it is invisible; every guest simply finds a space that feels fresh and cared for. Done poorly, it shows up in reviews. This guide walks through the professional sequence, room by room, so your next turn-over is fast, thorough, and stress free. What Turn-Over Cleaning Actually Means A turn-over is more than a tidy up. It is a complete reset of a lived-in space: linens changed, kitchen and bathroom sanitized, floors redone, and every surface a guest will touch brought back to day-one condition. The window is usually tight, sometimes just a few hours between check-out and check-in, which is exactly why a repeatable checklist matters. With a system, you never stand in the middle of the unit wondering what comes next. Why Bother with a Real Turn-Over First impressions set the tone for an entire stay, and cleanliness is the first thing guests notice, before the view or the coffee machine. It is also the detail guests mention most in reviews, so consistent turn-overs protect your ratings directly. There is a health angle too: shared spaces pass germs easily, and health authorities recommend cleaning surfaces first and then disinfecting, which is the sequence the CDC’s clean and disinfect guidance lays out for high touch areas. Step 1: Plan and Prep Before You Start Build a checklist for the specific unit and keep a copy in the property, on paper or on your phone. Gather your supplies in one caddy so nothing sends you hunting mid-clean: microfiber cloths, sponges, an all-purpose cleaner, glass cleaner, a duster, a toilet brush, and trash bags. Wear gloves, and if you plan to use bleach-based disinfectants, read the label first; the CDC’s bleach safety page covers ventilation and the combinations to avoid. Budget your time per room before you begin. Step 2: Declutter Everything First Walk the unit and collect anything guests left behind: chargers in drawers, snacks in cabinets, socks under the bed. Empty every trash can, including bathroom bins, and replace liners. Tidy drawers and closets so they close the way a guest expects to find them, and sweep under the bed, the classic lost-sock zone. Decluttering first means the cleaning that follows never has to stop and restart around someone’s abandoned suitcase. Step 3: Dust from the Top Down Gravity is your coworker: start with ceiling fans, light fixtures, and shelves so falling dust lands on surfaces you have not cleaned yet, then work down to counters, baseboards, window sills, and door frames. Get the corners, the tops of picture frames, and the space behind appliances where dust settles quietly. Finish with the doorknobs and handles, which will get a second pass during disinfecting anyway. Step 4: Deep Dive the Kitchen and Bathroom These two rooms decide most reviews, so give them the full treatment. In the kitchen, wipe the appliances inside and out: the fridge shelves, the microwave, the kettle, the coffee maker. Clean the sink until it shines and clear the drain area completely. In the bathroom, the toilet, sink, and shower are the three benchmarks every guest checks. Scrub each properly, polish the mirror and fixtures, and lay out fresh toilet paper within easy reach. Step 5: Floors and Linens Last With surfaces done, sweep or vacuum every floor, then mop hard surfaces and let them dry while you handle linens. Strip and replace all bedding, from sheets to duvet covers, and set out fresh bath towels, hand towels, and face cloths. Fresh linens are both a hygiene requirement and one of the strongest signals of a cared-for space, so never try to stretch a set to a second guest. Step 6: The Guest-Ready Walkthrough Final touches turn a clean unit into a welcome: fluff the pillows, fold the towel corners, set the welcome note where it cannot be missed. Before you leave, do one walkthrough starting at the front door and moving through the space exactly as a guest would. Everything you would notice in a hotel, they will notice too. Between guests, pay special attention to the touch points everyone shares: Doorknobs and handles, entry to bathroom Light switches and lamp bases TV remotes and game controllers Faucet handles and toilet flush buttons Kettle, coffee maker, and fridge handles Room Non-Negotiables Before Check-In Kitchen Appliances inside and out, sink shining, dishes put away, trash emptied Bathroom Toilet, sink, shower scrubbed, mirror polished, fresh towels and toilet paper Bedroom Fresh linens, under-bed swept, surfaces dusted, closets tidy Living area Floors redone, cushions straightened, remotes wiped, decor aligned Turn-Over Cleaning FAQs How long does a turn-over clean take? It depends on the size of the unit and how the last guests left it. A studio with a good system is often done in an hour or two; larger multi-bedroom units take proportionally longer. Professional teams with a fixed checklist move faster because nothing gets revisited. How is a turn-over different from regular cleaning? A regular clean maintains a home you live in on a schedule. A turn-over rebuilds a like-new condition for a stranger arriving within hours, which adds linen changes, full sanitizing, and a hotel-style presentation standard on a deadline. Should linens really be changed after every single guest? Yes. It is the hygiene baseline guests assume, and protecting that assumption is what earns five star mentions for cleanliness. A spare, sealed set per bed keeps the turn-over fast even on back-to-back bookings. When does it make sense to hire professionals? When you manage more than one property, host back-to-back bookings, or simply want the guarantee of a hotel standard every time. A team turns the turn-over from a scramble into a scheduled, reliable service. Book the Reset, Skip the Scramble Toronto Shine Cleaning handles turn-overs across the city with the same checklist discipline described above. For

How to Transform Your Space with Turn-Over Cleaning: A Step-by-Step Guide for Spotless Results Read More »

Cleaning something with spray, wearing blue cleaning gloves

How to Easy Mitigate Health Risks by Cleaning Your House

Hey there, Toronto friends! Ever wondered how mitigate health risks by cleaning? It’s a vital step in keeping you and your family healthy. Let’s dive into why keeping your living space spick and span is a big deal for your health and how you can make it happen. The Lowdown on Germs and Dust When we think about dust, it’s easy to dismiss it as just little bits of dirt. But there’s more to it than meets the eye. Dust is actually a complex mix of dead skin cells, hair, pet dander, and even tiny plastic particles. Hidden within this dusty mix are dust mites, minuscule critters that love to set up shop in our homes. They’re so small you can’t see them, but they have a big impact, especially for those of us with allergies. While your home might look spotless at a glance, germs have a way of hiding in plain sight. They’re masters of stealth, taking refuge on surfaces we touch daily. Kitchen sponges, cutting boards, and faucet handles are prime real estate for bacteria like E. coli and salmonella. It’s a little unsettling to think that the places where we prepare our meals and wash our hands could be harboring these unwelcome microbes. Why Regular Cleaning Matters     Busting Dust and Allergens Imagine your home as a stage where dust mites and pet dander are uninvited performers, causing a ruckus with allergies and breathing problems. These tiny troublemakers thrive in dusty environments, making themselves comfortable in your bedding, carpets, and upholstery. Regular dusting and vacuuming become your go-to moves to keep these unwanted guests under control. By frequently cleaning your home, especially those cozy spots where dust and dander like to settle, you’re essentially showing these allergy-causing particles the exit. It’s not just about cleanliness; it’s about creating an environment where you can breathe easier and feel better. Keeping Germs at Bay Now, let’s talk about the germ hotspots – your kitchen and bathroom. These areas are like bustling cities for bacteria and viruses, and without regular cleaning, they can become breeding grounds for harmful microorganisms. Think about the various activities that happen in these spaces. In the kitchen, you handle raw meat, fresh produce, and a myriad of utensils. In the bathroom, it’s all about personal hygiene. Each of these activities, while normal, can leave behind germs that potentially lead to infections. Regular cleaning, therefore, isn’t just a chore; it’s a health measure. When you scrub down your countertops, sanitize your sinks, and disinfect your toilets, you’re actively reducing the risk of illnesses in your home. Tackling High-Touch Areas Tackling high-touch areas in your home is crucial in the fight against germs. Think about it: every time someone touches a doorknob, light switch, or remote control, they could be leaving behind or picking up germs. These common items are like highways for bacteria and viruses, facilitating their travel from one person to another within your household. That’s why it’s so important to clean them frequently. By doing so, you essentially put a stop sign on these germ highways, preventing the spread of illness-causing microorganisms. Disinfecting these high-touch surfaces regularly is key. When you use a good disinfectant to wipe down doorknobs, light switches, remote controls, and similar items, you’re effectively putting up a barrier that stops germs in their tracks. It’s a simple yet powerful way to safeguard your home against the invisible threat of bacteria and viruses. But let’s not forget about the devices we use every day. Our phones and tablets are often overlooked in our cleaning routines, yet they are some of the biggest germ magnets around. We take them everywhere – from the bathroom to the kitchen, to public spaces, and back home again. A gentle wipe with a disinfectant can work wonders in keeping these devices clean and safe to use. Make it a habit to clean your phone, tablet, and other frequently used electronics. It’s a small step that can make a big difference in maintaining a healthy home environment. In short, paying extra attention to these high-touch areas and devices is a critical component of a comprehensive home cleaning strategy. Not only does it help keep your living space aesthetically pleasing, but more importantly, it plays a significant role in protecting the health and wellbeing of everyone in your household. So, grab that disinfectant and start targeting those germ hotspots – your health will thank you for it!     The Deep Clean Difference The deep clean difference is all about going beyond the usual tidy-up to tackle those areas that often get overlooked in routine cleaning. It’s about reaching into those nooks and crannies, the under-furniture spaces, and the high shelves that usually don’t get much attention. This thorough approach ensures that every corner of your home gets the care it needs. Deep cleaning plays a vital role in maintaining long-term health in your home. Over time, areas that aren’t regularly cleaned can accumulate mold, mildew, and deep-seated dirt. These aren’t just unsightly; they can actively contribute to health problems. Mold, for instance, is notorious for causing respiratory issues, allergic reactions, and even more severe health conditions if left unchecked. By deep cleaning your home, you’re actively preventing these build-ups, ensuring a healthier living environment. But the benefits of deep cleaning extend beyond just physical health. It’s also about creating a more harmonious and stress-free living space. A clean and organized home can significantly reduce stress and improve mental health. Clutter and dirt can unconsciously add to our daily stress levels, making us feel more chaotic and overwhelmed. When you deep clean, you’re not just scrubbing away dirt; you’re also clearing away the mental clutter. It’s about creating a sanctuary where you can relax and feel at ease. Safe Cleaning Practices When it comes to cleaning your home, safety should always be your top priority. It’s crucial to protect yourself from the potential harms of harsh chemicals found in many cleaning products. Wearing gloves is

How to Easy Mitigate Health Risks by Cleaning Your House Read More »

Cleaning, cloth, hand - Hand holding a cloth cleaning an item

Regular Cleaning VS Deep Cleaning: What’s The Difference?

Regular Cleaning VS Deep Cleaning: What’s The Difference? Many homeowners wonder what separates regular cleaning from deep cleaning. Both are essential for a healthy home, but they serve different purposes. Understanding the difference helps you choose the right service for your home in Toronto or anywhere in the GTA. Regular cleaning maintains daily order while deep cleaning resets your home from accumulated grime. Each service plays a distinct role in keeping your home clean, healthy, and comfortable throughout the year. What Is Regular Cleaning? Regular cleaning is the maintenance routine that keeps your home tidy week to week. It focuses on visible surfaces and high-traffic areas. Tasks include dusting furniture, vacuuming floors, wiping countertops, cleaning sinks and toilets, and making beds. Regular cleaning prevents dirt from building up and keeps your home comfortable for daily life. The CDC recommends regular cleaning to remove most germs from household surfaces. A weekly regular clean takes about one to two hours for a typical home. It covers the tasks that keep your home presentable for everyday living and unexpected guests. Think of it as the daily hygiene routine for your living space, much like brushing your teeth for your own health. Consistent regular cleaning also makes deep clean sessions faster and less intensive because dirt has less time to accumulate. What Is Deep Cleaning? Deep cleaning is an intensive, thorough clean that reaches areas regular cleaning misses. It includes cleaning ceiling fans, baseboards, window tracks, inside appliances, grout and tile, behind furniture, and under appliances. Deep cleaning removes built-up grime, allergens, and dust from hard-to-reach places. It improves indoor air quality and extends the life of your surfaces and appliances. A deep clean can take three to eight hours depending on your home size. It targets the areas where dust and allergens accumulate over months, such as the top of refrigerator coils, behind the toilet, and inside oven cavities. After a deep clean, your home feels noticeably fresher and surfaces look renewed. Using the right cleaning products safely is important during deep cleaning, since you will be working with stronger solutions on grout, ovens, and tile. Key Differences at a Glance Aspect Regular Cleaning Deep Cleaning Frequency Weekly or bi-weekly Monthly, quarterly, or seasonally Time per session 1-2 hours 3-8 hours depending on home size Focus areas Visible surfaces, floors, bathrooms, kitchen counters Baseboards, window tracks, grout, inside appliances, behind furniture Cost Lower, more frequent Higher, less frequent investment When to Choose Regular Cleaning Choose regular cleaning if you have a busy schedule and need consistent upkeep. It is ideal for maintaining a presentable home between deeper sessions. Regular cleaning services are affordable and keep your space guest-ready at all times. Regular cleaning prevents small messes from becoming big problems. When you wipe down surfaces weekly, you reduce the buildup of grease, soap scum, and dust that would otherwise require hours of scrubbing later. Regular cleaning also ensures that high-traffic areas like entryways and kitchens remain sanitary between deep clean sessions. It is the most cost-effective way to keep your home looking its best every day. When to Choose Deep Cleaning Deep cleaning is right for seasonal refreshes, before or after hosting events, when allergies flare up, or when moving into a new home. Professional deep cleaning targets allergens and deeply embedded dirt that regular cleaning cannot reach. It also prepares your home for special occasions and improves overall hygiene. If you notice dust accumulating on baseboards within days of dusting, or if the grout in your shower looks dull, it is time for a deep clean. Deep cleaning also addresses odors caused by trapped dirt and moisture in carpets, upholstery, and behind appliances, leaving your home smelling genuinely fresh. Regular cleaning maintains daily order and prevents mess buildup Deep cleaning resets the home and addresses neglected areas Both services are important for a well-maintained home The right choice depends on your schedule, budget, and needs Frequently Asked Questions Can I do deep cleaning myself? Yes, but it requires time, specialized tools, and thorough effort. Professional services save hours and deliver deeper results. How often should I deep clean my home? Most homes benefit from deep cleaning once per season. Homes with pets or allergies may need it more often. Do I need regular cleaning if I get deep cleaning? Yes. Regular cleaning keeps your home tidy between deep cleans and prevents deep dirt buildup, making each deep clean easier. What does deep cleaning include that regular cleaning does not? Deep cleaning covers baseboards, inside appliances, window tracks, ceiling fans, grout, blinds, and behind large furniture. Both regular and deep cleaning play vital roles in home maintenance. Combining both services ensures your home stays healthy and beautiful year-round. Toronto Shine Cleaning offers transparent pricing for both services. See why customers trust us across the GTA. Call (647) 424-0355 to schedule your service today.

Regular Cleaning VS Deep Cleaning: What’s The Difference? Read More »

Timer

How Long Does it Take To Deep Clean A House?

How Long Does it Take To Deep Clean A House? If you are planning a deep clean, the first question is usually how long it will take. The answer depends on your home size, its current condition, and the level of detail you want. Understanding the time commitment helps you plan effectively or decide whether to call the professionals. A deep clean is a significant investment of time, but the results are transformative. Your home will look, smell, and feel like a fresh new space after a thorough deep cleaning session. Knowing what to expect helps you schedule your day and avoid frustration. What Is Deep Cleaning? Deep cleaning goes far beyond everyday tidying. It targets the areas that regular cleaning skips: baseboards, ceiling fans, window tracks, inside cabinets and appliances, behind furniture, and tile grout. Deep cleaning improves indoor air quality by removing allergens and deeply embedded dust. The CDC explains that cleaning removes most germs and dirt from surfaces, and deep cleaning takes this principle to every corner of your home. Unlike regular cleaning, deep cleaning addresses the accumulation of weeks or months in one thorough session. It reaches hidden areas like behind the refrigerator, under the sofa, and inside oven cavities that routine cleaning never touches. Average Time Estimates by Home Size Home Size Estimated Time Key Factors Small apartment (1-2 BR) 3-4 hours Less square footage, fewer rooms Medium house (3-4 BR) 4-8 hours Multiple bathrooms, more surfaces Large house (5+ BR) 8-12+ hours Extra rooms, stairs, basement Factors That Affect Deep Cleaning Time Current condition. A home that receives regular cleaning will deep clean faster than one that has not been thoroughly cleaned in months. Built-up grime and stains require extra scrubbing time. If you maintain a regular cleaning schedule, the deep clean takes significantly less time because dirt has not had months to accumulate. A weekly routine of surface cleaning keeps the deep clean focused on hard-to-reach areas rather than removing layers of built-up grime. Homes maintained with weekly cleaning can often complete a deep clean in half the time of neglected homes. Level of detail. Deep cleaning tasks like scrubbing grout, washing windows inside and out, and cleaning behind appliances all add time. The more detail you want, the longer each room takes. Some homeowners prefer a basic deep clean that hits the major areas, while others want every baseboard, blind, and light fixture done. A detailed deep clean that includes washing curtains, scrubbing grout lines, and polishing all hardware will take substantially longer than a standard deep clean. The choice is yours based on your standards and goals. Number of occupants. More people mean more belongings to work around and potentially more mess. Homes with children or pets typically need extra time because of higher traffic and more frequent staining. A family of four will naturally generate more deep cleaning work than a single occupant. Pet hair, muddy footprints, and sticky fingerprints all add to the cleaning burden and require additional attention. Help available. Cleaning alone takes longer. With two or three people working together, you can cut the time by half. Professional teams typically work in pairs and complete the job much faster because each person specializes in different tasks. Washing hands regularly during cleaning also helps prevent spreading dirt between surfaces and keeps the process hygienic. Hiring professionals is often the fastest and most reliable route to a thoroughly deep cleaned home. Tips to Speed Up Deep Cleaning Declutter each room before you start cleaning to reduce obstacles Work top to bottom and left to right for maximum efficiency Use a caddy to carry all supplies between rooms Set a timer for each task or room to stay on track Listen to music or a podcast to maintain momentum Keep up with regular cleaning to reduce deep cleaning time Open windows for ventilation while you work Frequently Asked Questions How often should I deep clean my house? Most homes benefit from a deep clean every 3-6 months. Homes with allergies, pets, or smokers may need it more frequently. Can I deep clean a whole house in one day? A small to medium home can be deep cleaned in one full day. Large homes may need two days or a professional crew. What happens if I skip deep cleaning? Dust, allergens, and grime accumulate over time, which can worsen indoor air quality and cause wear on surfaces and appliances. Is it worth hiring a deep cleaning service? Professional teams complete the job in a fraction of the time with industrial equipment. Toronto Shine Cleaning’s deep cleaning service handles everything from ceiling to floor. Deep cleaning is a significant time commitment, but the result is a healthier, fresher home. Check our pricing and read customer reviews. Call (647) 424-0355 to book your deep clean today.

How Long Does it Take To Deep Clean A House? Read More »