Are Robotic Vacuums Worth It? A Deep Dive into Modern Floor Care
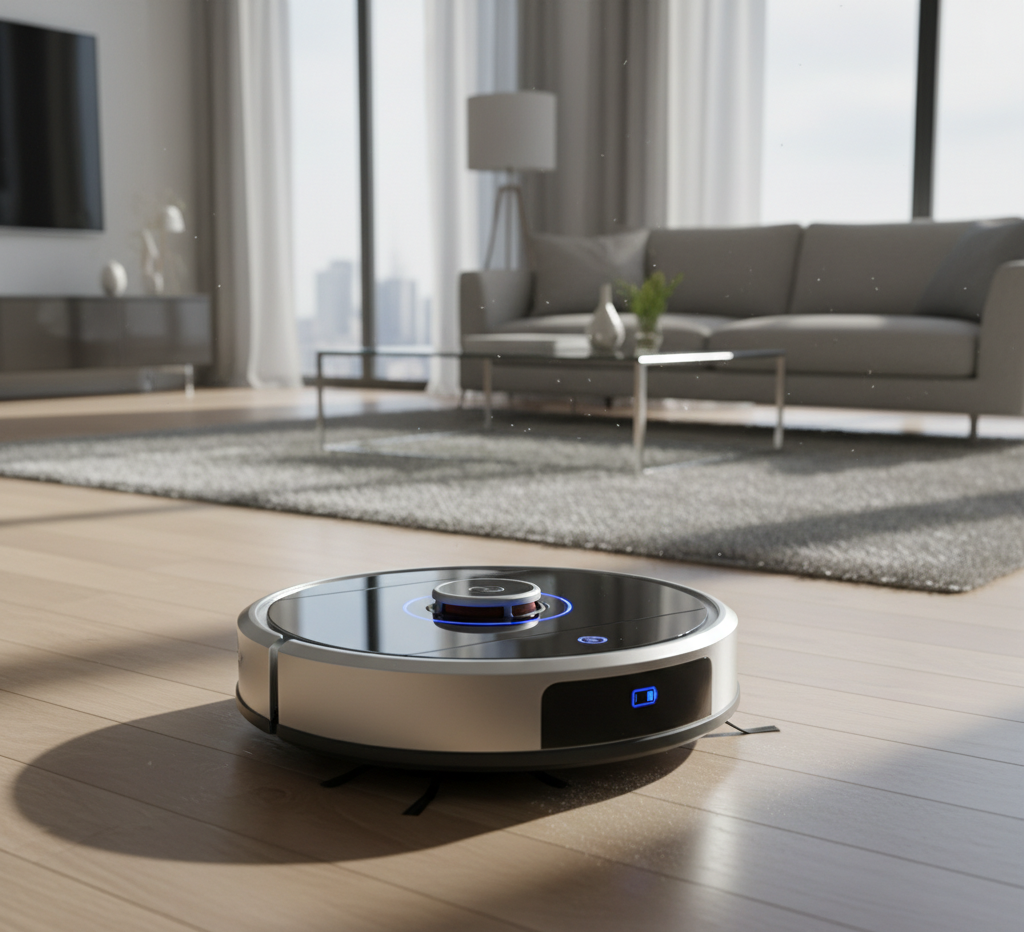
The robotic vacuum cleaner, when it first arrived on the consumer market, was a clunky, often comical interpretation of this dream. Early models were infamous for their random, pinball-like navigation, their tendency to get stuck under the sofa, and their habit of missing entire sections of a room. They were novelties, interesting gadgets for early adopters, but hardly a serious replacement for the traditional vacuum. Today, that landscape has changed so dramatically that it is almost unrecognizable. The robotic vacuum cleaner has come of age. Fueled by staggering advancements in navigation, artificial intelligence, and cleaning technology, these machines have evolved from clumsy gimmicks into sophisticated, powerful, and indispensable tools for home maintenance. They are no longer just vacuuming; they are mapping, strategizing, and, in the most advanced models, even mopping and cleaning themselves. Understanding the technology behind these modern marvels is the first step to appreciating their profound impact on the modern clean home. Revolution The single greatest leap in robotic vacuum technology has been in navigation. This is what separates a frustrating toy from a reliable cleaning partner. The Old Guard: Random Navigation: The earliest and most basic models use a “bump-and-go” system. They travel in a straight line until they hit an obstacle, at which point they turn in a random direction and continue. While this method can eventually cover most of a simple, square room, it is incredibly inefficient, misses spots, and takes a frustratingly long time to complete a job. This technology is now found only on the most budget-friendly models. The Smarter Path: Gyroscopic Navigation: A significant step up, these robots use a gyroscope and other sensors to travel in more deliberate, parallel lines, creating a more systematic and efficient cleaning path. They have a better sense of where they have been, resulting in more complete coverage. However, they can still become disoriented if they are picked up or get stuck, as they don’t create a persistent map of the home. The Gold Standard: LiDAR (Light Detection and Ranging): This is where robotic vacuums became truly intelligent. A LiDAR-equipped robot has a spinning laser turret on top that continuously scans its surroundings, measuring distances and creating a highly accurate, detailed map of your home in real-time. This is the same core technology used in self-driving cars. This map allows the robot to know exactly where it is, where it has been, and where it needs to go. It cleans in precise, methodical rows, navigates around furniture with grace, and can be sent to clean specific rooms or areas on command via a smartphone app. It works flawlessly in complete darkness and is the foundation for the most advanced smart features. The Visual Approach: vSLAM (Visual Simultaneous Localization and Mapping): Another high-end navigation method, vSLAM uses a camera to view its surroundings, identifying landmarks like furniture, doorways, and walls to build a map. As it cleans, it is constantly comparing what it sees to the map it has created, allowing it to navigate systematically. Modern vSLAM robots often use advanced AI to recognize and avoid specific obstacles, like shoes or power cords. The main drawback is that, like a person, they need a reasonable amount of light to “see” and navigate effectively. These advanced navigation systems are supported by a suite of other sensors. Cliff sensors prevent the robot from tumbling down stairs, wall sensors allow it to clean tightly along baseboards without constantly bumping them, and dirt detect sensors (on some models) can identify areas with a higher concentration of debris and command the robot to spend extra time cleaning there. Key Features of a Modern Robotic Vacuum A robot’s intelligence is its brain, but its features are what truly define its capabilities and convenience. Interactive Smart Maps: The maps created by LiDAR or vSLAM systems are not just for the robot’s benefit; they are for yours. Through a companion app on your phone, you can view the map and interact with it. You can name rooms, draw virtual “no-go zones” to keep the robot away from pet bowls or delicate furniture, and create “clean zones” to send it for a quick cleanup of a specific spill. This level of control is a game-changer. Suction Power: Measured in Pascals (Pa), this is the raw cleaning force of the vacuum. An entry-level model might have around 1,500 Pa, while a high-end model can exceed 4,000 Pa. Higher suction is particularly important for homes with carpets, as it is needed to pull dirt and pet hair from deep within the fibers. Many models now feature an automatic carpet boost, where they intelligently increase suction power the moment they detect they are on a carpet. Battery Life and “Recharge & Resume”: A long battery life is crucial for cleaning larger homes in a single run. However, the most important feature in this category is “Recharge & Resume.” An intelligent robot knows the status of its own battery. When it runs low on charge before a job is finished, it will automatically return to its dock, recharge just enough to complete the remaining area, and then go back out to finish the job exactly where it left off. AI-Powered Object Avoidance: This is a cutting-edge feature found on premium models. It goes beyond simple obstacle detection. Using a front-mounted camera and artificial intelligence, these robots can identify specific objects and navigate around them. This is the technology that allows a robot to avoid a stray sock, a child’s toy, or the most dreaded of household obstacles: pet waste. For pet owners, this feature alone can be worth the price of admission. The Convenience Revolution: Self-Emptying Bins: One of the most significant recent innovations is the auto-empty dock. After each cleaning run, the robot returns to its charging base, which contains a powerful vacuum of its own. This vacuum sucks all the debris from the robot’s small internal dustbin into a large, sealed bag or canister within the dock. This means that instead of having to empty the robot’s bin after every one or two cleanings, you only
Are Robotic Vacuums Worth It? A Deep Dive into Modern Floor Care Read More »