Kitchen Cleaning

Cleaning the Waffle Maker: The Best Way to Clean a Waffle Maker Without Damaging It

A waffle maker is a delightful appliance, a specialized tool dedicated to creating one of life’s simple pleasures. Yet, this single-purpose design is precisely what makes it notoriously difficult to clean. Its fixed, intricate grids, full of deep pockets and sharp corners, are perfect for creating crisp, golden-brown waffles, but they are equally perfect for trapping drips of batter, sticky sugar crystals, and baked-on oil. This residue can build up over time, not only looking unsightly but also causing future waffles to stick, cook unevenly, and even acquire a faint, burnt taste. Proper, regular cleaning is the key to preserving the non-stick surface, ensuring the longevity of the appliance, and guaranteeing that every waffle you make is as delicious as the first. Prevention The most effective strategy for cleaning a waffle maker begins before any mess has had a chance to set. Prevention and immediate care are the golden rules. While most modern waffle makers have a non-stick coating, a light application of oil is still recommended to ensure a clean release. The key is to apply it correctly. Instead of using aerosol cooking sprays, which often contain lecithin and other additives that can build up on the non-stick surface over time and become gummy, opt for a neutral oil with a high smoke point, like canola or grapeseed oil. Apply a very thin layer using a silicone pastry brush or a folded paper towel to evenly coat the grids. Over-oiling is a common mistake that leads to a sticky, polymerized residue that is incredibly difficult to remove. Equally important is using the correct amount of batter. Overfilling the grids is the primary cause of messy overflow that drips down the sides and hardens in the hinges of the appliance, the most challenging area to clean. It is better to have a slightly smaller waffle than to deal with the cleanup of a major spill. Once the last waffle has been cooked, the cleaning process should begin almost immediately. The most crucial element here is temperature. You must never attempt to clean a waffle maker while it is still plugged in or piping hot, but you also should not wait until it is completely cold. The ideal time is when it is still warm to the touch. In this state, any residual oil is still in a semi-liquid state and any rogue batter has not yet fully hardened into a stubborn crust. First, and most importantly, unplug the appliance. Then, while it is still warm, take a dry paper towel or a soft, dry cloth and wipe out any loose crumbs and blot up any excess pools of oil. This initial dry wipe removes the bulk of the debris with minimal effort. For the standard, after-use cleaning, a simple damp cloth is your most valuable tool. Take a soft cloth or a sponge and dampen it with warm water. It is critical that the cloth is only damp, not dripping wet. Remember, this is an electrical appliance, and excess water can seep into the internal components and cause damage or a safety hazard. Gently wipe down the interior of the grids. The warmth of the appliance combined with the moisture from the cloth will create a gentle steaming effect, helping to soften and lift any light batter residue. For slightly more stubborn spots, you can add a single, tiny drop of mild dish soap to your damp cloth, but be aware that you will then need to go over the surface again with a separate cloth dampened only with plain water to “rinse” away any soap residue. Finally, use the damp cloth to wipe down the exterior of the waffle maker, removing any drips, smudges, or fingerprints. Stubborn Messes For the truly baked-on, stubborn messes that a simple wipe-down cannot handle, a deep clean is necessary. This is where you can employ a few clever techniques to restore the grids to their original state. One of the most effective methods involves using the appliance’s own residual heat to create steam. After unplugging the waffle maker, while it is still quite warm, take a paper towel, saturate it with water, and wring it out so it is very damp but not sopping. Carefully lay the damp towel over the bottom grid, close the lid, and let it sit for ten to thirty minutes. The heat will turn the water into steam, which will be trapped inside the closed appliance. This steam is incredibly effective at softening and loosening even the most caked-on, sugary batter. After the steaming period, open the lid, remove the paper towel, and much of the grime should wipe away easily with a soft cloth. For any remaining particles in the deep pockets, a soft-bristled brush, like a clean toothbrush or a small kitchen brush, can be used to gently scrub them away. If steaming alone is not enough, a baking soda paste is the next level of cleaning power. Baking soda is a mild alkali and a gentle abrasive, perfect for scrubbing without scratching the delicate non-stick surface. To create the paste, mix a few tablespoons of baking soda with just enough water to form a thick, spreadable consistency. Using a soft cloth or your fingers, apply this paste to the problem areas on the cooled waffle maker grids. Let the paste sit for at least thirty minutes, or even up to an hour, to allow it to work on breaking down the grime. After the waiting period, use a damp cloth to gently scrub the area in a circular motion. The paste will lift the baked-on food. The most important part of this method is the removal. You must be meticulous in wiping away all traces of the baking soda residue with a clean, damp cloth. This may take several passes. Any paste left behind will affect the taste of your next batch of waffles. For a particularly greasy or sticky, brownish buildup from polymerized oil, a different approach is needed. The principle of “like

Cleaning the Waffle Maker: The Best Way to Clean a Waffle Maker Without Damaging It Read More »

Basic Things You Should Get Rid of at Home This Spring

Spring Declutter Checklist: 7 Basic Things You Should Get Rid of at Home This Spring

Spring Declutter Checklist: 7 Basic Things to Get Rid of This Season Spring arrives with longer days and brighter light, and that light exposes the dust, piles, and excess that winter hid. True spring cleaning cannot begin with a mop: it begins with subtraction. You cannot clean clutter, and organizing excess only shuffles it into new piles. Work through this room-by-room checklist to clear out what has served its purpose, then finish with a deep clean that leaves your home lighter, brighter, and healthier. When the scrubbing is done, Toronto Shine Cleaning can handle the details; call (647) 424-0355. Golden Rules for a Faster, Easier Declutter Work one zone at a time: finish the entryway before touching the wardrobe so every room has a clear end point. Sort into four piles: keep, toss, donate, and recycle, and move each finished pile out of the house the same day. Apply the one-year test: if you did not use it, wear it, or reach for it in the past year, it has already earned its exit. 1. Entryway: Winter Gear and Homeless Items The entryway bears the brunt of winter: thick parkas, wool scarves, heavy boots, and the salty grit tracked in from the road. Audit every coat and pair of boots before storing them. A broken zipper, cracked sole, or missing glove mate means the item should not be stored; you would only defer the decision until November. Clear the flat surfaces of flyers, loose batteries, keys to unknown locks, and dried-out lip balms so the entryway flows again. 2. Wardrobe: Clothes for a Life You No Longer Live The seasonal switch is a chance to confront what you actually wear. If a sweater stayed folded through January and February, it is unlikely to earn its place next year. Inspect spring and summer clothes as you unpack them: elastic degrades, and white fabrics yellow in storage. A sundress that does not fit or a stained t-shirt is not a virtue to keep. Culling now reduces the friction of getting dressed every morning. 3. Kitchen: Pantry, Fridge, and Container Drawer Winter cooking leaves relics: spices bought for holiday meals, specialty flour for cookies, and jars of heavy sauce. By spring, much of it is stale or forgotten. Rock-hard brown sugar, scentless dried herbs, and three-year-old sprinkles are trash, not assets. Clear the dregs from the refrigerator door for better airflow and room for fresh produce. Then tackle the container drawer: any container without a matching lid, and any lid without a container, gets recycled on the spot. 4. Bathroom: Expired Products and Old Remedies The medicine cabinet and vanity hide expired chemistry. Check dates on everything: last summer’s sunscreen has likely lost its efficacy, mascara and liquid makeup harbor bacteria, and expired medications lose potency and can become chemically unstable. Dispose of medications responsibly through a pharmacy take-back program rather than flushing them. A streamlined counter with only current products creates a calmer morning routine. 5. Living Areas: Paper Piles and Tech Graveyard Winter hibernation breeds doom piles: stacks of mail, catalogs, and school papers. Spring, often tax season, is the deadline. Most manuals, bills, and statements live digitally now, so shred the paper copies and stop feeding the dust collectors, since Health Canada notes that dust and dust mites collect in fabrics, carpets, and anywhere dust accumulates. Then recycle the cables you cannot identify, broken headphones, and remote controls for devices long gone. If you have not used a piece of tech in a year, let it go. 6. Linen Closet: Towels and Sheets You Do Not Use Scarcity thinking keeps scratchy towels and threadbare sheets in the closet “just in case,” but we reach for the same few favorites every time. An overstuffed closet also blocks air circulation and turns musty. Donate old towels to animal shelters, discard sheets with snapped elastic, and keep only linens you actually use and love. 7. Garage and Shed: Broken Tools and Winter Debris Winter turned the garage into a dumping ground. Clear broken snow shovels, empty bags of road salt, and outgrown winter sports gear before you can reach the lawnmower and bicycles. Inspect patio furniture and planters too: a cracked pot from the freeze-thaw cycle or a rusted chair will only annoy you all summer. Spring Declutter Checklist at a Glance Zone Toss or Donate If Outcome Entryway Broken zippers, cracked soles, single gloves Clear hooks and floor space Wardrobe Unworn this winter, stained, or ill-fitting Faster morning decisions Kitchen Stale spices, old condiments, lidless containers Better airflow, fresh ingredients Bathroom Expired meds, old sunscreen, used-up cosmetics Calmer, safer routine Living areas Paper piles, orphan cables, dead tech Less dust, less visual noise Linens Scratchy towels, sheets with broken elastic Fresh, breathable closet Garage and shed Broken shovels, empty salt bags, cracked planters Room for summer gear Frequently Asked Questions How do I decide what to throw away during a spring declutter? Ask whether you used the item in the past year and whether it still works or fits. If it is expired, broken beyond repair, or stored only out of guilt, let it go. When in doubt, donate items in good condition rather than keeping them “just in case.” Should I declutter before or after cleaning? Always declutter first. Moving boxes and piles reveals dust, scuffs, and grime that were hidden, so cleaning after decluttering gives you a genuinely fresh result. Decluttering is the demolition phase; cleaning is the reconstruction phase. How long should a full spring declutter take? Plan one session per zone, roughly two to three hours for the wardrobe and one hour each for the entryway, kitchen, bathroom, linens, and garage. Spread the zones across a weekend or one evening per room so the job stays manageable. What should I do with items that are too worn to donate? Recycle what you can: textiles in poor condition can go to textile recycling bins, electronics to municipal e-waste depots, and medications to pharmacy take-back programs. For anything left,

Spring Declutter Checklist: 7 Basic Things You Should Get Rid of at Home This Spring Read More »

March Checklist: 8 Safety Checks to Do When You Change the Clocks

The March Checklist: Turn Clock Change Day Into Home Safety Day March is the hinge between winter and spring: the snow exposes months of grit, yet the ground stays too wet for a full spring clean, so treat the month as a readiness drill instead. Replace what winter wore out, test the systems that kept the house safe and warm, and clear away salt, dust, and stale air. The second Sunday of March is when clocks spring forward, the perfect annual reminder for home maintenance. The old rule still holds: when you change your clocks, change your batteries. 1. Test Smoke and Carbon Monoxide Detectors Even hardwired units usually carry a battery backup, so install fresh batteries and test every alarm this month. Check the dates on the backs of the units: smoke alarms typically last about ten years, while carbon monoxide detectors often expire after roughly seven. Vacuum the units too; dust inside can trigger false alarms. Health Canada’s overview of carbon monoxide explains why the risk peaks in colder months, when fuel burning appliances run the most. 2. Reclaim the Mudroom From Salt and Gravel March is the muddiest month, and the entryway takes the beating. Scrub the boot trays outdoors or in a laundry tub to remove the crusty residue of road salt and gravel, because salt dust settles on your furniture. Rotate the footwear: clean and condition the heavy winter boots, store them, and bring out rain boots and mud shoes. Wash the floor with vinegar water to neutralize the alkaline haze tracked in salt leaves before spring humidity makes it sticky. 3. Change the Furnace Filter and Clear the Vents After months of near constant running, the furnace filter is choked with dust, pet dander, and lint. It matters in March because fluctuating temperatures make the furnace cycle often, and restricted airflow can overheat the heat exchanger. Swapping the filter cuts energy bills and improves the air you breathe. Vacuum the cold air return grilles, and lift out floor registers to pull winter dust out of the ductwork before you switch to air conditioning and blow it back into the rooms. 4. Wash Interior Glass and Dig Out Window Tracks The lower March sun shines straight into rooms that stayed dim all winter, and this truth lighting exposes the haze of candle soot, cooking grease, and condensation on the inside of the panes. Cleaning interior glass now maximizes the light that lifts the look of the home. Do not forget the tracks: condensation pools there and mixes with dust into a black sludge that can grow mold. Dig the sludge out with an old toothbrush and a vacuum crevice tool before open-window season blows mold spores inside. Health Canada’s mould guidance recommends fixing moisture problems right away and controlling humidity to keep mold from spreading. 5. Give the Refrigerator a Ten Minute Tune-Up Start with the hard working kitchen appliances. Vacuum the refrigerator coils: when those coils get blanketed in fuzz, the compressor runs longer and hotter to keep food cold, and cleaning them takes about ten minutes and can extend the life of the fridge by years. Defrost the freezer if ice has built up, and eat through the stockpile of frozen winter foods. Wipe the door gaskets with warm soapy water, because sticky spills can tear the rubber seal and let cold air escape. 6. Deodorize Sofas, Carpets, and Curtains Soft surfaces act like giant filters, trapping body oils, dust, and odors all winter. Sprinkle baking soda over carpets and fabric sofas, let it sit for an hour to absorb the oils, then vacuum slowly. Launder the heavy throw blankets, and vacuum velvet or wool curtains that caught dust from heater convection all season. Cutting that dust load eases the coming allergy season. 7. Walk the Exterior Perimeter on a Clear Day One dry afternoon is enough for a perimeter check. Look for freeze-thaw damage: loose gutters, debris blocking downspouts, and extensions that no longer point away from the foundation, because water that cannot escape the roof ends up in the basement. Inspect the foundation for cracks and confirm melted snow drains away from the walls. If you have a sump pump, test it now by pouring a pail of water into the pit until the float lifts and the pump runs, before spring rains raise the water table. 8. Audit the Pantry Before Bugs Wake Up Winter stockpiling crowds the pantry with extra cans and baking supplies. Check the expiration dates on items pushed to the back of the shelves, inspect flour and grains for pests that may have hatched in the warmth of the kitchen, and consolidate open boxes so you can see what you actually own and stop overbuying. Wipe the shelves to remove crumbs, which attract the ants that start scouting as the ground warms. March Safety Checks at a Glance Set aside thirty minutes and work through the drill in four quick zones: Safety: detector batteries, exterior perimeter, sump pump. Air: furnace filter, vents, carpets, curtains. Surfaces: window tracks, mudroom, pantry shelves. Kitchen: fridge coils, gaskets, freezer stock. Task Action Why it matters Detectors New batteries, test, vacuum dust Working alarms save lives Mudroom Scrub boot trays, wash floors Stops salt dust and sludge Furnace New filter, vacuum vents Lower bills, better air Windows Clean glass and tracks More light, no mold spores Fridge Vacuum coils, defrost Longer appliance life Soft goods Baking soda, launder, vacuum Fewer allergens Perimeter Gutters, foundation, sump test No flooded basement Pantry Check dates, wipe shelves No pests, less waste Frequently Asked Questions About the March Checklist Why do I need to change detector batteries when the clocks change? The clock change is an easy date to remember, and fresh batteries plus a test keep alarms working, since even hardwired units usually run on battery backup. Why does the furnace filter need changing in March specifically? The filter is clogged after months of winter use, and March’s fluctuating temperatures make the furnace

March Checklist: 8 Safety Checks to Do When You Change the Clocks Read More »

Coffee Machine Cleaning: 5 Signs Your Coffee Machine Is Clogged with Limescale

The coffee machine is the silent engine of the morning, a device that many regard with a level of reverence usually reserved for religious artifacts. It is the first appliance touched in the day, the vessel that delivers the caffeine required to jumpstart human productivity. However, this reliance often breeds a dangerous complacency regarding hygiene. We assume that because boiling water passes through the system daily, it is inherently self-cleaning. This is a fallacy that leads to bitter coffee, mechanical failure, and the ingestion of mold and bacteria. The internal geography of a coffee maker is a dark, damp, and warm environment, the trifecta for biological growth. Furthermore, the very ingredients used to make the beverage-water and coffee beans-leave behind chemical residues that calcify and oxidize, slowly choking the machine. Cleaning a coffee machine is not merely a matter of rinsing the pot; it is a necessary maintenance protocol involving chemistry and mechanics to preserve the integrity of the brew and the lifespan of the equipment. Distinct Enemies To understand the cleaning process, one must first understand the two distinct enemies of the coffee machine: mineral scale and coffee oils. Water is the solvent of life, but it is rarely pure. Tap water contains dissolved minerals, primarily calcium and magnesium. When water is heated, these minerals precipitate out of the liquid and bond to the heating elements and internal tubing of the machine. This is known as limescale. It acts like cholesterol in an artery, narrowing the passages and insulating the heating coil. A machine suffering from scale buildup will struggle to reach the optimal brewing temperature of 195 to 205 degrees Fahrenheit. It will brew slower, produce lukewarm coffee, and eventually, the pump will fail under the strain of trying to push water through a blocked pipe. The second enemy is the bean itself. Coffee beans are rich in lipids. When roasted and ground, these oils are released to create the flavor and crema we desire. However, once these oils settle on the plastic and metal surfaces of the filter basket, the carafe, and the dispensing showerhead, they begin to degrade. Oxidized coffee oil turns rancid, developing a sharp, acrid flavor profile. If you have ever tasted a cup of coffee that seemed sour or metallic despite using fresh beans, the culprit was likely layers of old, rancid oil coating the machine. This residue is sticky and hydrophobic, meaning a simple water rinse will not remove it; it requires a degreasing agent to break the chemical bond. Descaling For the standard drip coffee maker, the reservoir is the ground zero of biological activity. Because it is often left damp and closed, it frequently harbors coliform bacteria and yeast. The cleaning protocol here requires a descaling solution. While many manufacturers sell proprietary powders, a mixture of white distilled vinegar and water remains a potent and accessible descaler for standard machines. The acid in the vinegar reacts with the alkaline mineral deposits, dissolving them into a liquid state that can be flushed away. The process involves filling the reservoir with a fifty-fifty mixture of vinegar and water, running the brew cycle halfway, and then turning the machine off. This “dwell time” is critical. It allows the acidic solution to sit inside the heating element and the tubing, eating away the scale. After an hour, the cycle is finished, followed by multiple cycles of fresh water to ensure no acetic acid taste remains. However, vinegar has limitations. It can be harsh on the rubber seals and gaskets found in more expensive or complex machines. For high-end espresso machines or pod systems, using a specialized descaling solution based on citric or lactic acid is safer. These acids are odorless and formulated to be gentle on internal components while being ruthless on scale. Using vinegar in a high-pressure espresso pump can sometimes cause the rubber O-rings to degrade, leading to internal leaks. Single-Serve pod Machine The single-serve pod machine presents a unique set of hygiene challenges. These machines rely on a hollow needle to puncture the foil of the coffee capsule. This needle often becomes clogged with coffee grounds and dried oils, restricting flow and causing pressure backups. Cleaning the needle requires a mechanical approach, often using a straightened paper clip or a specialized tool provided by the manufacturer to physically dislodge the blockage. Furthermore, the exit spout of these machines is a trap for coffee splatter. Bacteria known as Serratia marcescens, which manifests as a pinkish slime, loves the drip tray and the nozzle area. Regular wiping with a disinfectant and running a “cleansing brew”-a cycle without a pod-is essential to flush out the internal chamber where the coffee is actually brewed. Espresso Machines Espresso machines are the most complex and require the most rigorous cleaning routine. The group head, the metal component where the portafilter locks in, is subjected to immense pressure and heat. Coffee fines and oils are forced back up into the group head after every shot. If not cleaned, this debris blocks the dispersion screen, causing water to channel unevenly through the puck, resulting in bad espresso. The solution is “backflushing.” This involves inserting a blind filter basket (one with no holes) into the portafilter, adding a specialized detergent powder, and engaging the pump. The pressure forces the soapy water back up into the group head and through the three-way solenoid valve, scrubbing the internal pathways. This should be done daily in commercial settings and at least weekly for home enthusiasts. The steam wand on an espresso machine acts as a direct line to the boiler or thermoblock. When steaming milk, a vacuum effect can occur when the steam knob is closed, sucking a small amount of milk back up into the wand. If this milk residue is allowed to dry, it rots. The bacteria multiply rapidly, and the next time you steam milk, you are injecting that bacteria into your drink. The rule for steam wands is absolute: purge and wipe. Before and after every use, the

Coffee Machine Cleaning: 5 Signs Your Coffee Machine Is Clogged with Limescale Read More »

Best Steam Cleaner: 5 Tips for Choosing the Ideal Steam Cleaner for Your Home

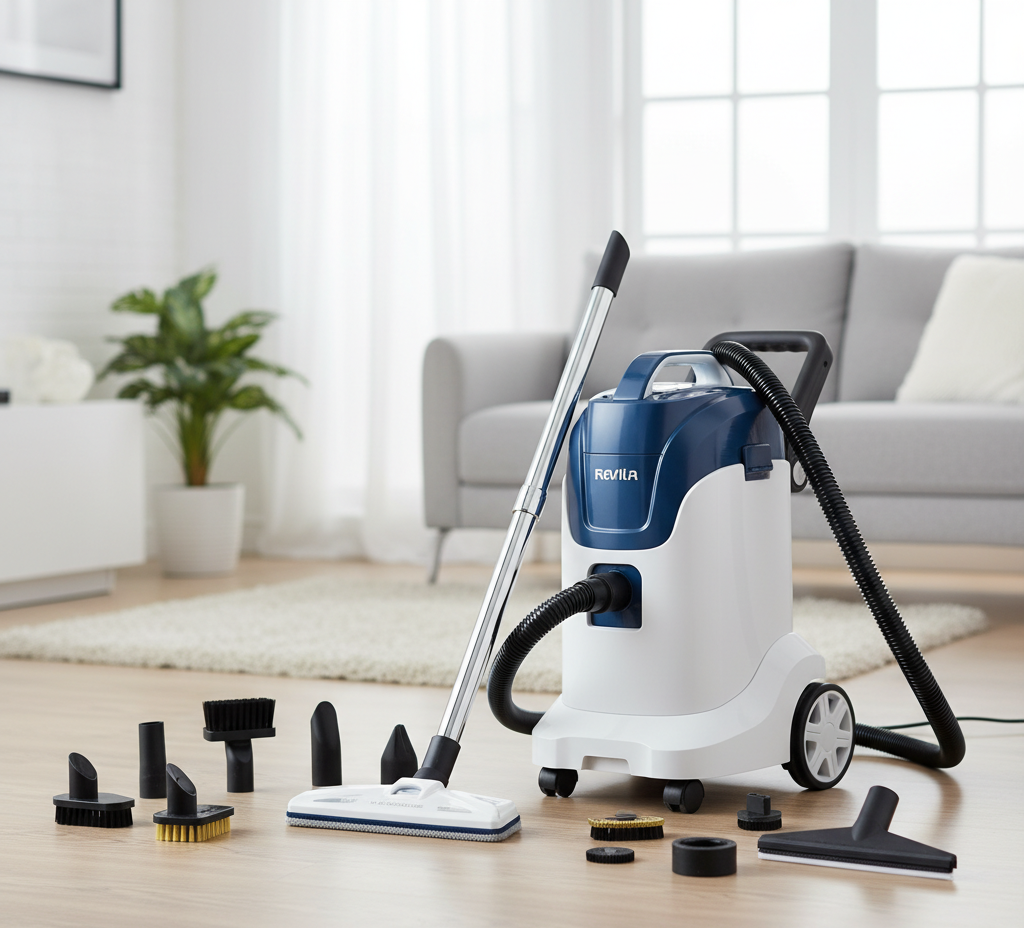
Choosing the Best Steam Cleaner for Your Home Steam cleaning replaces harsh chemicals with superheated, pressurized water that pushes heat into tiny crevices, loosens dirt, and neutralizes bacteria on contact. For households that want fewer chemical residues, a steam cleaner handles everything from kitchen grease to mattress allergens, but only when the right machine is chosen. Cheap units with weak pumps disappoint quickly, so shop with these five tips in mind to find the model that truly earns the title of best steam cleaner for your home. Tip 1: Match the Machine Type to the Job The market splits into three broad categories, and the best machine for a tiled mudroom is rarely the best one for detailed kitchen work. Handheld units are the scalpels of the steam world: portable, quick to heat, and perfect for targeted jobs such as faucet grease, window tracks, and doorknobs, though their small tanks limit run time. Steam mops specialize in sealed hard floors and avoid the cross contamination of a bucket and mop, but they cannot clean vertical surfaces or upholstery. Canister systems separate the boiler from the wand, which allows a bigger water capacity and more power, making them the most versatile choice for whole home cleaning. Machine type Best for Limits to know Handheld steamer Grease spots, grout, small surfaces Short run time, lower pressure Steam mop Sealed tile, stone, and hard floors No vertical or fabric cleaning Canister steamer Whole home, fabrics, kitchens Bigger, heavier, pricier Tip 2: Demand Dry Steam and Real Pressure Dry steam sounds like a contradiction, but it describes vapor superheated well above boiling, often reaching 240-300 F while carrying less than five percent liquid water. That low moisture vapor is what makes steam safe for mattresses, upholstery, and carpets: wet steam soaks fabric and invites mildew, but dry vapor flashes off in seconds. Pressure is the second metric that separates professional grade machines from toys. Look for at least four to five bars of pressure, because low pressure simply billows hot fog that may kill surface bacteria but cannot blast the black gunk out of grout lines. Check the heating system too: flash heating models drip water onto a hot plate and produce sputtering, inconsistent steam, while a pressurized boiler tank holds a steady, powerful stream. Tip 3: Buy the Boiler You Can Refill Mid-Clean A standard pressurized boiler must cool down before it can be refilled, which stops momentum cold. The best machines feature a continuous refill system: a secondary, non pressurized reservoir pumps water into the boiler as needed, so long cleaning sessions never need a pause. Boiler quality also decides how long the machine lasts. Plastic boilers and weak pumps often give out after a year or two of limescale and heat stress, while premium units with stainless steel boilers and replaceable heating elements are built to serve for decades. Treat the purchase as a long term investment in one machine that retires the mop, the chemical caddy, and the scrub brush. Tip 4: Count the Accessories Before You Commit Versatility lives in the attachments, so a truly great steamer should arrive with more than a floor head. Look for a triangular brush for corners, a jet nozzle for blasting stuck on grime, plus compact nylon and brass brushes for detail work. Brass bristles sparkle on oven racks and grill grates, where steam softens burned on food and the stiff wires take over the scrubbing. Add the window squeegee attachment and the steamer delivers a streak free glass finish with no chemical spray. Flimsy bristles that melt under high heat make a machine useless, so inspect attachment quality before buying. Use the kit like a transformer: Floor head for mopping hard floors without detergent residue. Jet nozzle for shower tracks, radiators, and tight crevices. Brass brushes for oven racks, grill grates, and burned on food. Squeegee for streak free windows and mirrors. Tip 5: Verify the Heat for Pests, Allergens, and Delicate Surfaces Dust mites and bed bugs resist many poisons but cannot survive thermal shock, and a steamer that holds a tip temperature above 160 F is lethal to them and their eggs on contact. For allergy sufferers that makes the machine a genuine health tool: pillows, mattresses, and plush toys can be sanitized without the potential allergens found in chemical sprays. Heat this powerful demands respect, however, so use it with care: Never steam unsealed hardwood floors; the moisture can strip the finish, grey the wood, and make it swell. Avoid blasting cold window glass in winter, which can shatter it; warm the pane first. Skip surfaces where heat can melt glue, such as some laminate countertops and luxury vinyl tile. Machines with variable steam control solve this: turn the dial down for silk plants and velvet curtains, and crank it up for barbecue grills. In the kitchen, steam melts the polymerized grease on range hoods and backsplashes so it wipes away with a microfiber cloth, sanitizes the sink drain by melting odor causing biofilm, and even defrosts a freezer in minutes. The CDC’s home cleaning and disinfecting guidance notes that routine cleaning removes most germs from surfaces, with disinfecting reserved for illness situations, which is why steam fits so well into a healthy home routine. And because steam leaves no residue, Health Canada’s household chemical safety advice becomes easier to follow: fewer products in the house means fewer poisoning, burn, and storage risks to manage. Frequently Asked Questions About Steam Cleaners What is dry steam and why does it matter? Dry steam is vapor heated well above boiling, typically 240-300 F with less than five percent liquid water, so it cleans and evaporates quickly instead of leaving fabrics wet and prone to mold. Can a steam cleaner damage hardwood floors? Steam can strip the finish from unsealed hardwood, turning the wood grey and causing it to swell, so use a steamer only on sealed floors and always follow the manufacturer’s guidance for delicate surfaces. Does steam cleaning kill

Best Steam Cleaner: 5 Tips for Choosing the Ideal Steam Cleaner for Your Home Read More »

Detergent and Warm Water: 3 Amazing Tips on how to Clean Your Entire House With this Simple Mixture

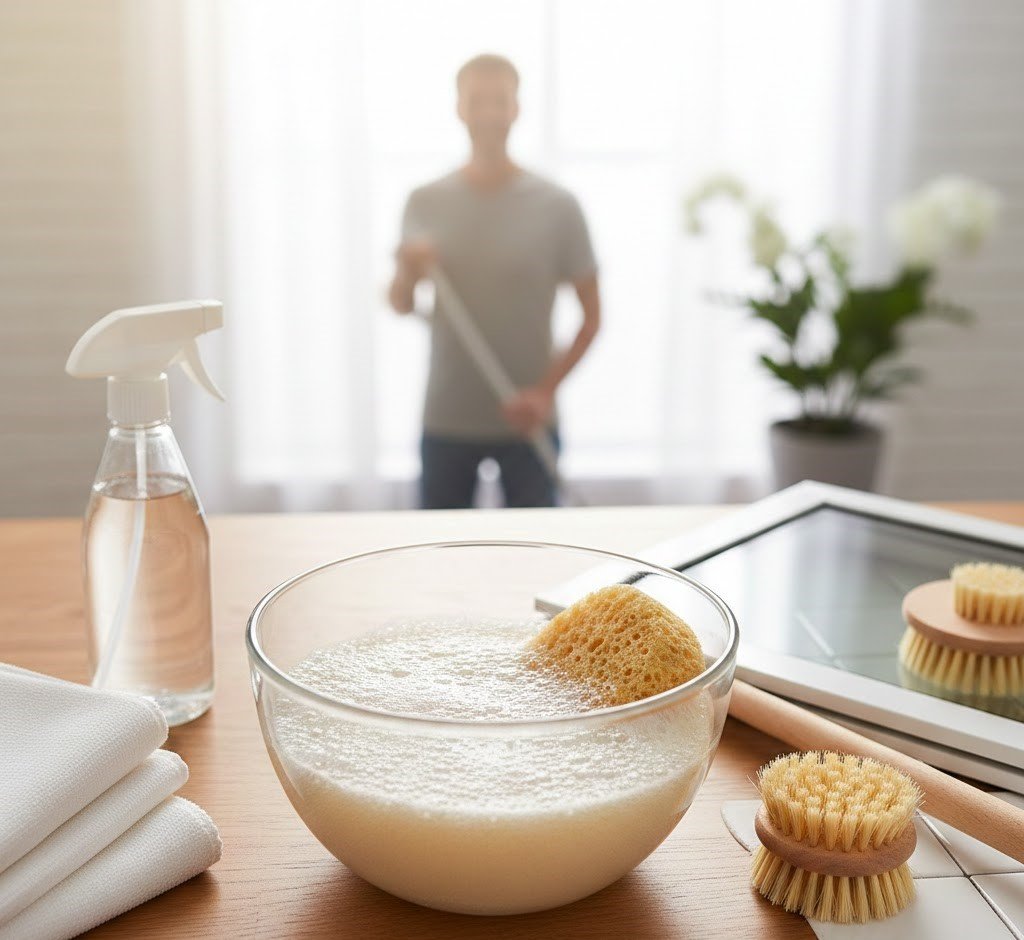
Detergent and Warm Water: The Cleaning Duo That Does It All Shelves full of specialty sprays make it easy to forget that the most reliable cleaner in any home costs pennies per bucket. Detergent and warm water tackle an astonishing range of household grime through simple chemistry, and understanding how the pair works turns a habit into a deliberate tool. Warm water provides the energy to loosen dirt while detergent provides the mechanism to lift and trap grease, which makes the solution stronger than the sum of its parts. Here are three ways to put the mixture to work across the whole house. Why the Chemistry Works So Well Heat gives water an edge. Warm water molecules move faster than cold ones, so they agitate and break down sugar crystals, salt rings, and other common messes, and warmth melts fats and oils that cold water only smears around. Picture a greasy plate under the tap: cold water makes the fat congeal and slide, while warm water melts it off in seconds. The detergent brings the real genius: dish soap contains surfactants, two sided molecules with a hydrophilic head that loves water and a lipophilic tail that loves oil. When soap meets greasy water, the tails latch onto the oil droplets while the heads face outward, forming tiny spheres called micelles that trap the grease and rinse it away down the drain. Surfactants also break the surface tension that makes water bead up, so the solution spreads, penetrates tiny crevices, and lifts dirt that plain water simply flows over. Tip 1: Clean Counters, Cabinets, and Walls the Gentle Way For daily kitchen duty, a cloth barely damp with diluted dish soap in warm water often beats stronger sprays. It lifts food residue, light grease spatters, and sticky fingerprints from laminate, quartz, and sealed stone with no chemical smell or streaky film. The same solution is a hero on cabinet fronts, where aerosolized cooking grease builds a sticky film that resists all purpose cleaners: wipe with a warm, soapy cloth that has been wrung out well and the grime dissolves. Walls, baseboards, and door frames also respond beautifully to the mixture, which lifts scuffs, fingerprints, and accumulated dust without harming the paint finish. Tip 2: Mop Floors Without the Sticky Residue Vinyl, linoleum, and ceramic tile floors respond well to a bucket of warm water with just a little detergent. Restraint is the rule: use the detergent sparingly, because too much requires endless rinsing, and wring the mop out thoroughly so excess water never seeps into grout or floor seams. Done right, the method lifts dirt and footprints while leaving none of the dull, sticky film that some specialized floor cleaners deposit. In entryways and kitchens, where winter salt and cooking splatter land daily, a quick warm water mop keeps the finish from dulling and cuts down the buildup that heavy scrubbing has to fight later. It is an economical routine that keeps high traffic flooring looking fresh between deeper professional treatments. Tip 3: Blot Out Carpet and Upholstery Stains Many fresh food and drink spills on carpets or upholstery respond to a first line of defense made from a highly diluted solution of clear dish soap and warm water. Dip a clean cloth into the soapy water and gently blot the stain, working from the outside in to avoid spreading it. Always test the method on an inconspicuous area first, then blot the spot afterward with a cloth wet with clean water to rinse and lift out soap residue. This gentle approach often lifts the spill completely without resorting to aggressive carpet stain removers, though CDC guidance on cleaning your home is a useful reminder that surfaces should always be cleaned before any sanitizing or disinfecting step is considered. Where This Simple Mixture Does Not Belong Knowing the limits of detergent and warm water is as important as understanding its strengths. Keep the bucket away from these surfaces: Unsealed wood floors and furniture, where water causes swelling, warping, and staining. Natural unsealed stone such as marble or travertine, where soapy water can seep into the porous surface and darken it. Delicate fabrics like silk and velvet, which can spot permanently and need professional care. Electronics and wiring of any kind; water and electricity never mix. For everything else, the duo is safe, effective, and economical. Handling any cleaning product responsibly still matters, and Health Canada’s tips for using household chemicals safely cover buying, storing, and disposing of cleaners, which keeps the whole household protected. Detergent and Warm Water by the Job Household job Right mixture Why it works Counters and cabinet fronts Weak dish soap solution, well wrung cloth Surfactants trap grease, no chemical smell Vinyl, linoleum, tile floors Small amount of detergent per bucket Lifts dirt without sticky residue Walls, baseboards, door frames Mild soapy water, damp cloth Removes scuffs and dust, paint stays safe Carpet and upholstery spills Diluted clear dish soap, blotting Breaks the stain, rinse blot clears soap Frequently Asked Questions About Cleaning With Soap and Water Why does warm water clean better than cold? Warm water molecules carry more kinetic energy, which helps break down sugar and salt messes, and the warmth melts fats and oils so they release from surfaces instead of congealing and smearing. What makes dish soap dissolve grease? Dish soap contains surfactants with water loving heads and oil loving tails; the tails grab the grease, the heads face the water, and the resulting micelles hold the oil suspended until it rinses away. Can I use detergent and warm water on hardwood floors? No, unsealed wood should never be cleaned with water because it can swell, warp, and stain; use products made for wood floors or ask a professional for advice. Is soapy water safe for marble countertops? Natural stone is porous, and soap and water can seep in and darken or stain marble and travertine, so stick to stone specific cleaners for those surfaces. When is a professional clean better than

Detergent and Warm Water: 3 Amazing Tips on how to Clean Your Entire House With this Simple Mixture Read More »

cleaning walls

Don’t Ruin Your Walls: 5 Common Mistakes Homeowners Make When Washing Walls

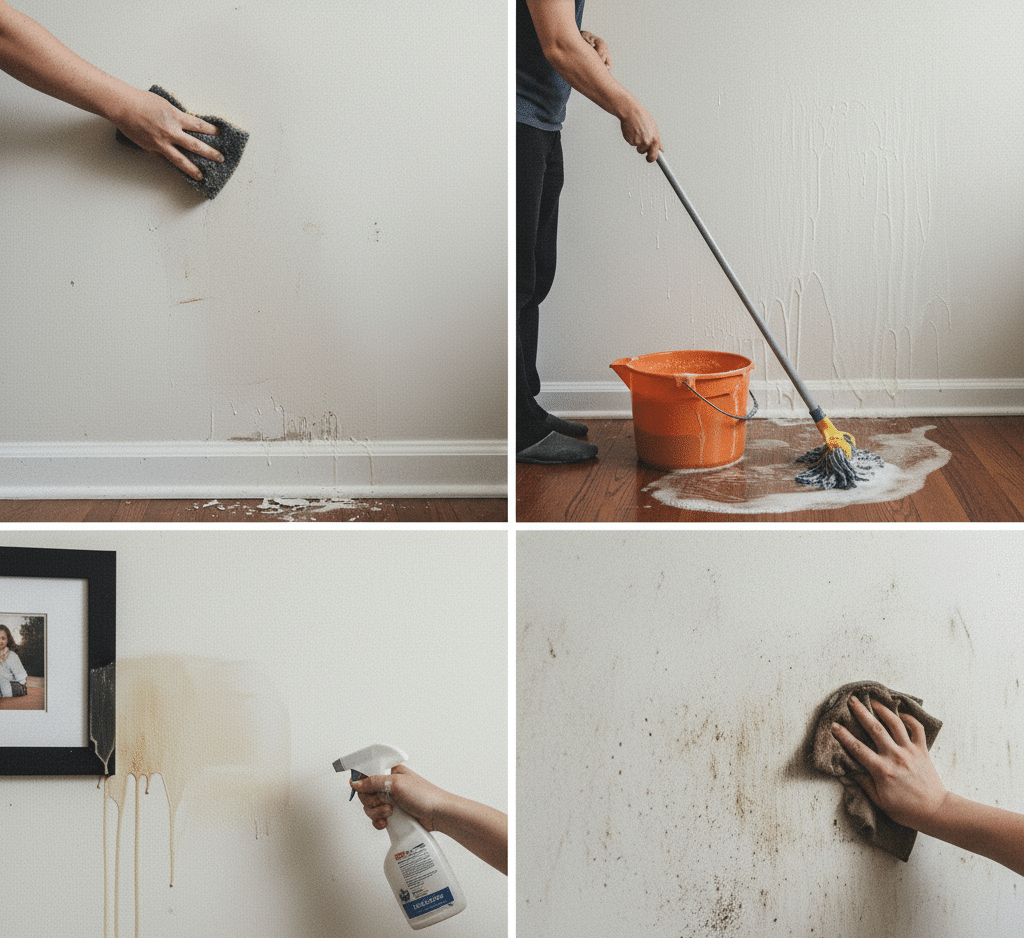
Why Washing Walls Is the Missing Step in Your Spring Clean Most cleaning routines look down: floors, carpets, and grout get all the attention, while the largest surface area in every room stays ignored. Walls, doors, and baseboards escape foot traffic, but they suffer their own assault during a sealed winter. Dry furnace air creates static charges on painted drywall, and convection currents carry dust, pet dander, cooking oils, and soot past those charged surfaces, where the particles bond into a grey film that dulls paint and absorbs light. Faint dark streaks above baseboard heaters and vents, sometimes called thermal tracking or ghosting, are this buildup made visible. Worse, the walls become a reservoir for allergens that drift back into the breathing zone every time a door slams. Washing them is a real health task, but five common mistakes turn the job into a disaster. Mistake 1: Washing From the Top Down Intuition says start at the top and let gravity help, but on painted walls gravity is the enemy. A wet sponge squeezed against a dry, dirty upper wall releases water that trickles down in rivulets, cutting clean streaks through the dust and soot layer. Dry porous paint absorbs that dirty water instantly, and the streaks become permanent stains; you have essentially stained the wall with cleanliness. Use the professional bottom up technique instead: start at the baseboard and work toward the ceiling. Drips from the sponge land on an already wet, clean surface below, where they float on the film of water and wipe away without marking, leaving a uniform finish with no crying lines. Mistake 2: Reaching for Harsh Cleaners Strong chemicals do not equal clean walls. Painted walls need nothing harsher than warm water with a little dish soap or a pH neutral wall cleaner. Aggressive products strip the sheen from eggshell and satin paints, leaving dull patches that look as bad as the dirt they removed. Match the cleaner to the surface and test any product on a hidden corner first. Gentle and consistent beats strong and patchy every time. Mistake 3: Wetting Dusty Baseboards First Baseboards collect everything gravity drops, and in winter that dust mixes with bathroom and kitchen humidity into a grey, paste like sludge that clings to the molding profiles. The classic error is grabbing a wet rag immediately, which turns the dust into mud that gets pushed into corners and caulking lines, where it dries into dark, hard grout. Clean baseboards in two stages: Remove the loose dust first with a vacuum brush attachment or a dry microfiber duster. Follow with a damp cloth only once the dry debris is gone, to lift the adhered grime. Use extension handles, like a flat microfiber mop turned on its side, to save your back and knees. Mistake 4: Skipping Doors and Switch Plates While walls collect environmental dust, doors and switch plates collect biological evidence. Look closely at the halo around a light switch or door handle: it is a buildup of skin oils, hand lotion, and microscopic dirt transferred by fingertips thousands of times. That oily residue is sticky, traps dust, and forms the dark smudges that signal poor hygiene, and as flu and cold season winds down these touchpoints remain prime vectors for cross contamination. Clean them with a mild degreaser to break down the lipid bonds without damaging paint or hardware, then apply a disinfectant and respect its dwell time to neutralize lingering pathogens. Give extra attention to the front door handle and bathroom switches, which see the most traffic from the outside world. The CDC’s home cleaning guidance lists light switches among the hard surfaces that benefit from regular cleaning, with disinfecting recommended when someone in the home is sick. Mistake 5: Waiting Until the Grime Is Visible The winter film on walls is largely invisible until the low spring sun rakes across it, and by then the dust has had months to bond with the paint. Waiting costs more than looks: every draft and slammed door flicks allergen laden particles off the walls and back into the air you breathe. A seasonal wash, done before the sun exposes the damage, keeps the paint vibrant and resets the room’s air quality for allergy season. If the walls feel fine but condensation has left damp patches near windows or behind furniture, deal with the moisture quickly, because Health Canada advises controlling humidity and fixing moisture problems to keep mold from taking hold on walls and fabrics. Wall Washing Mistakes and the Fixes Mistake What goes wrong Correct approach Top down washing Dirty drips stain the paint permanently Wash bottom up so drips land on wet surface Harsh cleaners Sheen stripped from eggshell and satin Mild dish soap or pH neutral wall cleaner Wet rag on dusty baseboards Dust turns to mud that cakes in corners Vacuum dry first, then damp cloth Ignoring doors and switches Oily germs spread from high touch spots Degrease, then disinfect with dwell time Waiting for visible grime Allergen film bonds and dulls the paint Seasonal bottom up wash before spring sun Frequently Asked Questions About Washing Walls Why should walls be washed from the bottom up? Drips from the sponge land on an already wet, clean lower surface and wipe away without marking, while top down washing lets dirty water soak into dry paint and leave permanent streaks. What is the safest cleaner for painted walls? Warm water with a scant amount of dish soap or a pH neutral wall cleaner; harsh chemicals strip the sheen from eggshell and satin paint and leave dull patches. Can washing walls really help with allergies? Yes, winter dust, dander, and soot bond to statically charged walls and re enter the air when disturbed, so a seasonal wash removes the reservoir and lowers the particles you breathe. What are the dark streaks above baseboard heaters? Called thermal tracking or ghosting, they are dust patterns created by temperature differences between wall studs and insulation; washing bottom up with

Don’t Ruin Your Walls: 5 Common Mistakes Homeowners Make When Washing Walls Read More »

curtains and blinds

Cleaning of Blinds and Curtains: Removing the Dust Trapped in Your Curtains and Blinds Before Spring

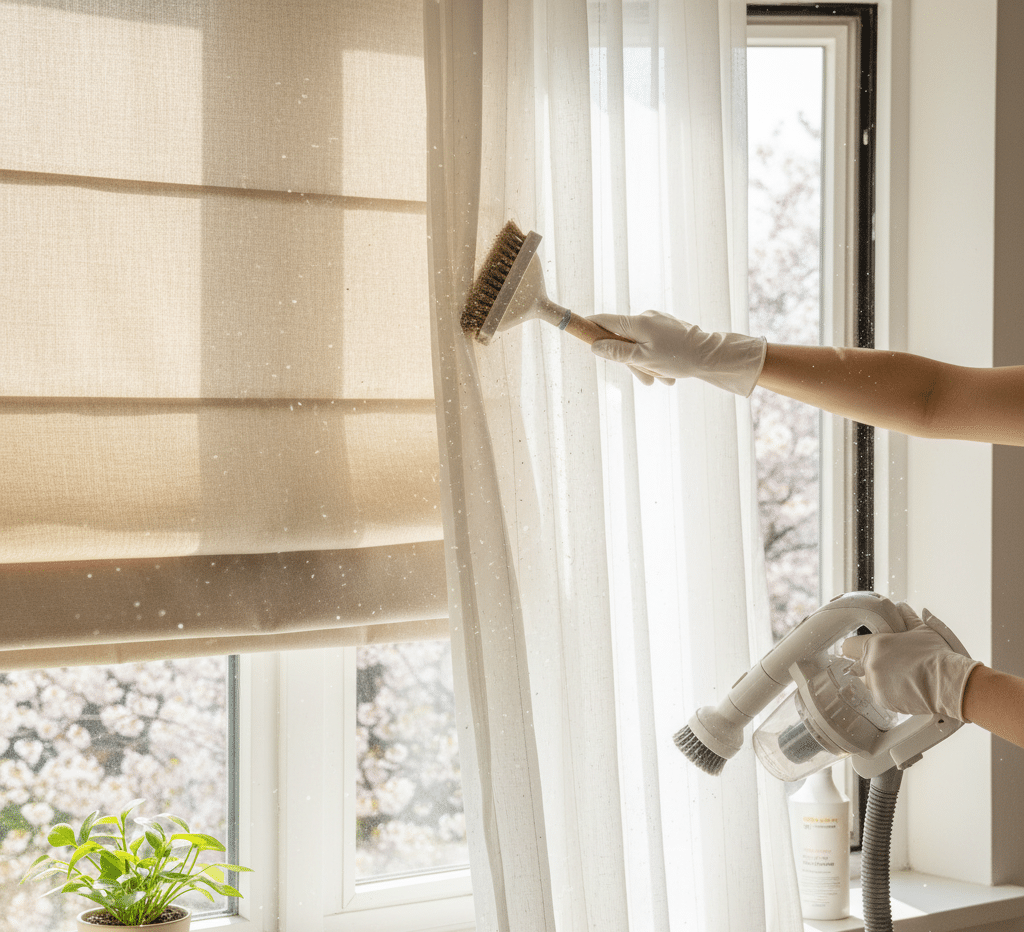
Cleaning of Blinds and Curtains: Removing the Dust Trapped in Your Curtains and Blinds Before Spring The first hint of spring in Toronto is not the thermometer; it is the light. As the sun climbs higher in late winter, its beams reach deeper into rooms that seemed dim all January, and they expose everything: the hazy film on the glass, the dust on the sills, the grey fuzz on the blinds, and the state of the tracks nobody inspected since fall. That unflattering spotlight is actually good news. It marks the perfect window of opportunity to clean the entire window assembly, inside and out of the weather, before spring arrives and steals your weekends. Why Window Treatments Hold So Much Dust Blinds and curtains are the lungs of the window. Glass is usually the coldest surface in a wall, so warm indoor air rises, cools against it, and sinks, cycling the room’s air past your curtains and blinds day and night. The fabrics trap allergens, cooking odors, and smoke like a filter; synthetic blinds generate static that actively attracts dust into a tenacious grey layer. All winter that load accumulates invisibly, and all winter you breathe the results. Health Canada’s indoor air contaminants guidance flags exactly this kind of settled dust and dander as a driver of poor air quality in sealed winter homes. Clean the glass but not the treatments, and the first time you adjust the curtains, a fresh cloud of dust lands right back on your work. The Curtain and Blind Reset Take the textiles down. Curtains go into the wash or to a dry cleaner according to their fabric labels, and they come back lighter, literally, without their winter load of dust and odors. Blinds need manual care: each slat wiped with a damp microfiber cloth or a microfiber wand, working top to bottom and flipping the wand for the back side. The dampness matters, not just the wiping, because moisture is what finally breaks the static bond that makes feather dusting so futile. It is repetitive work, but it is the single biggest air quality win in the room. Do Not Skip the Glass, Tracks, and Sills The window assembly toolkit, gathered once, covers every part of it: Vacuum with a crevice tool for loose track debris An old toothbrush for the corners and weep holes A degreasing solution of water, vinegar, and a drop of dish soap A squeegee and microfiber cloths for streak-free glass Fine sandpaper and matching paint for sill touch-ups While the treatments are down, handle the rest of the assembly. Interior glass carries a greasy film of cooking vapors, candle soot, and condensation residue that plain glass cleaner smears around; a degreasing solution of water, vinegar, and a drop of dish soap, finished with a squeegee, actually removes it. The tracks below are the real health hazard: dust, dead insects, and condensation pool there into a sludge that grows mold, dries out, and releases spores into the room with every draft. Excavate the tracks with a vacuum crevice tool, soak the crusty corners with cleaning solution, and agitate with an old toothbrush until the channels drain clear again. Then inspect the sills and casings: winter condensation softens paint and breeds mildew on wood, so scrub with a vinegar solution, sand any peeling spots, and touch up the paint before spring humidity arrives. While you are at the cords, check them for wear against Health Canada’s blind cord safety guidance, since spring sunlight often reveals frayed cords that became a hazard over winter. Part of the Window The Task How Often Curtains Launder or dry clean per fabric label Twice a year, before spring and fall Blinds Wipe each slat with a damp microfiber wand Monthly, deeper at season change Glass, interior Degreasing solution plus squeegee finish Seasonally Tracks and weep holes Vacuum, soak, and agitate out the sludge Seasonally, or when grit appears Sills and casings Scrub mildew, sand and repaint soft spots Yearly inspection Why Do It Now, Not in April There is strategy in the timing. On the first truly warm, sunny day, you will want to be on a patio, not indoors scrubbing window tracks with a toothbrush. Front-load the tedious work into the last grey weekends of winter and the payoff arrives with the season: the first window you slide open glides instead of grinding, the breeze comes in without a puff of spores, and the room gets noticeably brighter, which matters more than it sounds in a city where winter gloom weighs on everyone’s mood. Maximizing clean glass is maximizing the daylight that reaches your rooms. Blinds and Curtain FAQs Can I clean blinds without taking them down? Yes, for routine dusting: close the slats, wipe with a damp microfiber cloth, flip, and repeat. A full seasonal clean with each slat wiped on both sides while the blinds hang is slower but avoids rehanging them. Fabric and specialty blinds usually do better professionally than with water at home. How do I stop static from attracting dust right back? Static is worst in dry winter air and on dry synthetic surfaces. Wiping slats with a slightly damp cloth, rather than dusting dry, removes the charge along with the dust, which is why the dust-free period right after a proper wipe lasts so much longer. What is the black stuff in my window tracks? Usually a mix of dust, dead insects, and mold colonies fed by condensation. Treat it as a health issue rather than a cosmetic one: vacuum it out, agitate with cleaner, and keep the channels draining so it does not return. When should I call professionals for windows? When the count of windows multiplies the job, twenty windows means twenty tracks, forty sides of blinds, and a full weekend. A professional team brings steam cleaners for the tracks, high-reach tools for the blinds, and squeegee technique for a flawless finish in one visit. Let the Spring Light In Toronto Shine Cleaning handles the

Cleaning of Blinds and Curtains: Removing the Dust Trapped in Your Curtains and Blinds Before Spring Read More »

A woman is at peace while her house is clean and organized during the winter.

Winter Organization: 5 Amazing Daily Habits to Keep Your House Organized During a Snowstorm

Winter Organization: 5 Daily Habits That Keep a Snowstorm Home Tidy When the temperature drops, the way a house works changes overnight. Windows stay shut, everyone spends more hours inside, and every trip outdoors drags in parkas, boots, and slush. Winter clothing takes roughly three times the closet volume of summer gear, so a home that felt spacious in September can feel buried by January. Keeping things organized through a snowstorm is not about occasional purges; it is about small daily habits that stop the mess before it compounds. These five routines take minutes each day and turn the entryway, kitchen, and living room back into calm, usable space. Habit 1: Give Every Winter Item a Landing Zone at the Door The entryway is where the winter battle is won or lost. A standard coat closet fails in daily use because nobody wants to fight hangers while wearing gloves, which is why coats end up draped over chairs. Install a sturdy wall-mounted rack or a heavy-duty coat stand for the gear currently in rotation and keep the closet for storage pieces, separating active items from backup ones. Beneath the coats, a high-walled boot tray is not optional: it catches the melt-off from wet boots and stops salt water from puddling on your floor. Fill the tray with river stones so boots drain and dry instead of soaking in dirty water. Finally, give each family member a labeled bin for hats, mittens, scarves, and neck warmers so the frantic morning search for a matching glove pair disappears. Habit 2: Send Blankets and Cushions Back to Their Station Winter is the season of cocooning, when extra throws, pillows, and cushions pile onto every sofa to make the house feel warm. Comfortable as they are, draped blankets create instant visual chaos. Choose a designated home for soft goods, whether a large wicker basket, a storage ottoman, or a blanket ladder, and adopt the rule that leaving the room means returning the blanket to its station. The same reset applies to slippers, chargers, and books: everything keeps a place, so the living room stays cozy instead of cluttered. Habit 3: Rotate Kitchen Gear for Soup and Stew Season Cold-weather cooking changes which tools you reach for daily. The slow cooker, roasting pan, and Dutch oven take over from the salad spinner and grill tools, so rotate your storage to match: move barbecue equipment, picnic ware, and summer small appliances to high shelves or the basement, and bring the heavy pots and stew-making appliances down to waist level where you can grab them without effort. Stocking up for storms also overloads the pantry, so use tiered risers and clear bins to keep canned goods and comfort foods visible. When you can see what you own, nothing gets pushed to the back of the shelf and forgotten until it expires. Habit 4: Clear Every Flat Surface Before Bed Grey skies and short days make visual clutter feel heavier in winter. Piles of mail, scattered toys, and crowded counters raise stress levels, and unlike summer, you cannot escape them by going outside. A clean-surfaces policy counters the gloom: counters, tables, and desks get cleared every evening so the limited winter light reflects instead of being swallowed by stuff. Rooms instantly feel larger and airier, and mornings start calmer when the kitchen island and dining table are ready for breakfast rather than buried under the previous day’s debris. Habit 5: Audit the Closet and Control Humidity Daily Winter closets reward a ruthless eye. A coat not worn in two winters, or an itchy sweater that pills, is taking space from the pieces you actually wear; donate it. Vacuum-seal bags compress the off-season summer wardrobe so sundresses and beach towels store flat under the bed, freeing the rod for bulky winter layers. Humidity is the invisible half of winter organization: dry furnace air creates static that pulls dust onto walls and electronics, so run a humidifier to settle particles where the vacuum can reach them. The flip side is condensation, since warm indoor air meeting cold glass creates damp sills where mold appears quickly. As Health Canada explains, controlling humidity and fixing moisture problems are the keys to preventing mold, and the CDC adds that mold grows wherever moisture collects, so keep heavy drapes and furniture away from windows and wipe sills down whenever you spot droplets. Your 5-Minute Evening Reset A daily reset takes less time than it sounds and prevents the weekend-long catch-up: Return boots to the tray and coats to their hooks before you take yours off. Drop hats and gloves into each family member’s bin on the way in. Return throws and pillows to the basket or ladder as you leave the living room. Clear the kitchen counters and dining table of the day’s debris. Wipe the entryway floor and window sills that show salt dust or condensation. Zone Daily habit Payoff Entryway Hang coats, tray the boots, bin the accessories No puddles, no salt trails, no lost mittens Living room Return soft goods to their station Cozy without the chaos Kitchen Keep winter cookware at hand, pantry visible Faster meals, less food waste Whole house Clear surfaces and manage humidity Brighter rooms, less dust and mold risk Frequently Asked Questions How do I keep the entryway from becoming a disaster during a snowstorm? Set up a coat rack for daily-use outerwear, a boot tray with river stones for wet footwear, and a labeled bin per person for small accessories. Add a strict no-shoes-past-the-mat rule, then spend five minutes each evening returning everything to those zones. What is the best way to store winter coats and boots in a small home? Store off-season items in vacuum-seal bags under beds or on high shelves, and keep only current-season gear on the main rod. Bulky winter items in active rotation belong on an open rack, not jammed into a closet where they wrinkle and get abandoned on chairs. Should I run a humidifier in winter, and

Winter Organization: 5 Amazing Daily Habits to Keep Your House Organized During a Snowstorm Read More »

5 Signs Your Coffee Grinder Needs a Deep Clean Immediately

Five Signs Your Coffee Grinder Needs a Deep Clean Stale grounds and rancid oils collect inside the chamber, dragging bitter and off-flavors into every fresh batch. Check these five signs before you blame the beans, then run the routine that fits your machine. Why Grinders Go Rancid From the Inside Roasted coffee is rich in oils. Grinding releases those oils onto the burrs or blades, chamber walls, and chute. Oxygen turns that film rancid, with a smell like old crayons or spoiled nuts. Microscopic fines get wedged into crevices, then dislodge into your next grind with a stale, muddy taste. The Five Warning Signs 1. Sour, flat, or bitter coffee Even an expensive single origin Gesha tastes compromised passing through rancid oil. If fresh beans and good water still produce a flat, muddy cup, the residue inside the grinder is overpowering the coffee. 2. A stale or musty smell Crack the lid. Coffee aroma that has gone sharp, sour, or musty means oxidized oil has built up past the point where a tap helps. 3. Sluggish grinding and odd sounds A clean unit runs smoothly. Once oil and dust thicken, beans feed unevenly, the motor strains, and one setting produces fine powder next to boulder-sized chunks because compacted residue has changed the burr geometry. 4. Visible clumps and oily film A light dusting is normal. Dark clumps of oily coffee on the blades, burrs, or chute, and a sticky yellow sheen on the hopper walls, are not. 5. Mould or mildew The serious sign. Moisture plus grounds invites mould: look for fuzzy white or green patches and a damp, musty scent. Discard affected beans, clean every affected part, and move the grinder away from kettle steam, per the CDC’s mould and health guidance. Signs, Causes, and First Moves Sign What is really happening First move Sour or bitter cup Rancid oils on burrs or blades Full clean, then retest Stale, musty smell Oxidized residue in the chute Brush and vacuum the grounds path Loud motor, uneven grind Compacted dust jamming the surfaces Disassemble and brush the burrs Dark clumps, oily hopper Coffee dust bound by released oils Wash and fully dry the hopper Fuzzy spots, damp odour Mould from moisture plus organics Strip clean, dry, replace beans Cleaning a Blade Grinder Without Straining the Motor Blade grinders chop like small blenders and the blade is fixed to the motor shaft, so there is nothing to remove. Unplug the unit first: this is a non-negotiable step when your fingers work near sharp metal. Wipe the chamber with a damp microfiber cloth to lift loose grounds. Because the blade blocks the bottom, use the rice trick: grind a quarter cup of uncooked rice for thirty seconds. The rice scours the walls and the underside of the blade while its starch absorbs the oils, and the flour takes the stale odour out when you dump it. Since manufacturers warn that rice is harder than coffee and can strain the motor, use minute or parboiled rice, then wipe out the residue. If the grinder handles cumin or peppercorns, grind a piece of stale bread or a tablespoon of baking soda to neutralize transferred odours. Cleaning a Burr Grinder the Mechanical Way Unplug and remove the hopper. This is the only part of a burr grinder that should see water: wash it by hand in warm soapy water, scrub off the sticky yellow film, rinse, and let it air dry completely. A wet hopper lets moisture drip onto the burrs and motor, rusting the steel and gluing the chute shut. The upper burr twists or unclips out, exposing the lower burr and the chamber. Keep water away: steel burrs rust. Scrub the teeth of both burrs with a stiff brush and work loose the compacted dust wedged between cutting edges. Then let gravity and suction finish: invert a small unit and tap it over a bin, or vacuum with a hose attachment through the chamber and exit chute, a common choke point where oil-laden fines jam the grinder. For a deeper clean without disassembly, commercial cleaning tablets are the standard. Made of food-safe grains at similar hardness to beans, run a capful through: they crush, expand, scrub the metal, and absorb oil. Follow with a handful of sacrificial beans to push out tablet dust so the next cup tastes like coffee, not grain. The Schedule That Keeps the Cup Clean Daily: brush out the chute and wipe the housing. Weekly: if you grind oily dark roasts, wipe the hopper and vacuum the chamber, since their surface oils accumulate faster than light roasts. Monthly: a full deep clean with the burrs brushed and a run of tablets, which resets the flavour profile. Quarterly: inspect burr sharpness carefully. Even clean burrs wear out, and dull edges need replacing. After a deep clean, brightness and acidity return from under the oxidized heaviness, and the grinder runs quieter and faster without the friction. Exterior, Storage, and Mistakes That Undo Your Work Coffee dust settles around the base and catch bin: wipe the housing with a mild all-purpose cleaner or a damp cloth. If your grinder has a rubber seal between hopper and body, check for cracks, since that seal keeps air off the burrs. Store beans airtight away from heat and light. Never rinse the grinder body, skip abrasive pads and steel wool, and never reassemble a part that is not dry. Follow Health Canada’s household chemical safety rules with degreasers: ventilate, never mix products. Wash your hands after handling old grounds, as CDC handwashing guidance recommends. Frequently Asked Questions How often should a coffee grinder be cleaned? A daily chute brush, weekly hopper wipe, and monthly deep clean cover most kitchens. Dark roasts speed buildup: deep clean every two to three weeks. Is the rice trick safe for every grinder? No. Rice is harder than coffee, and some manufacturers warn it strains small motors. If you try it, use minute rice, keep the run to about thirty

5 Signs Your Coffee Grinder Needs a Deep Clean Immediately Read More »