Kitchen Cleaning

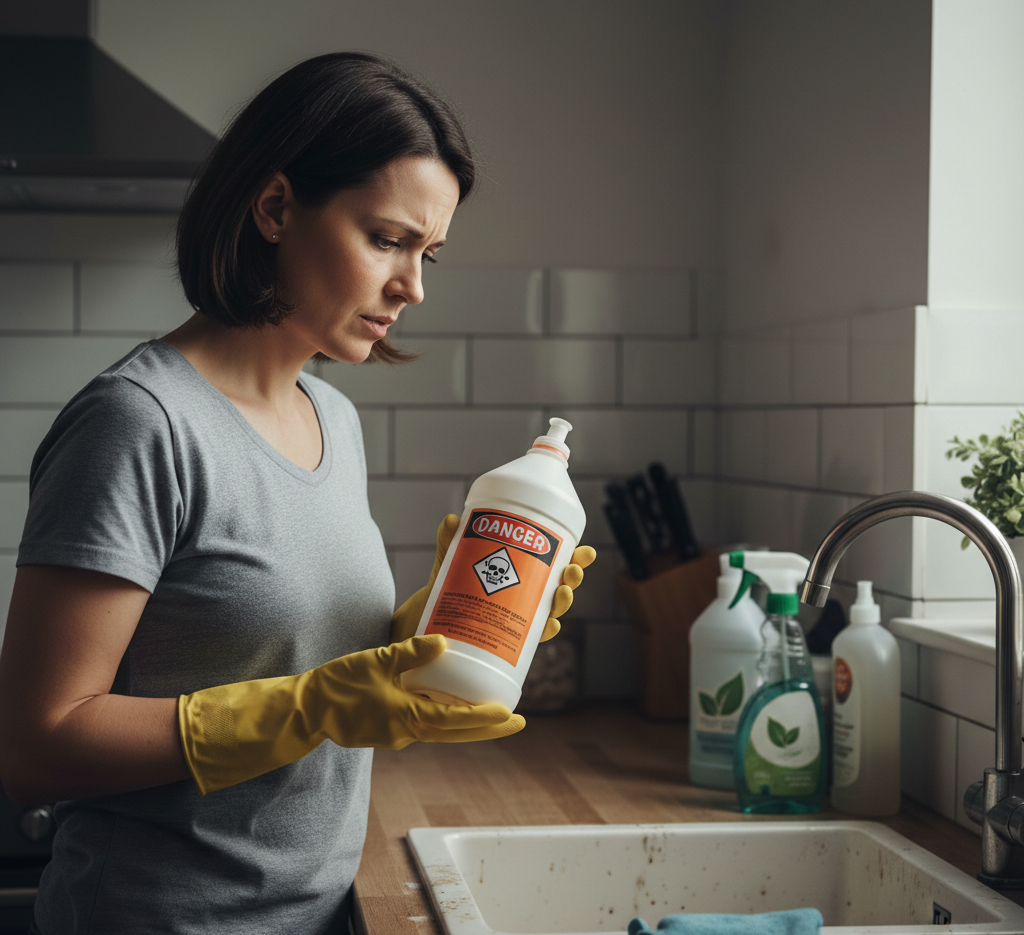
Woman unsure whether to use caustic soda for cleaning.

Caustic Soda 101: The Dangers and Safe Handling of Lye

How does caustic soda work, in the world of cleaning, there is a clear hierarchy of chemical power. At the bottom are the gentle, pH-neutral soaps designed for daily maintenance. Further up the scale are the acids, like vinegar and citric acid, which dissolve mineral deposits. At the very top, reigning supreme as one of the most potent and aggressive substances available to the public, sits sodium hydroxide. More commonly known as caustic soda or lye, this chemical is not a cleaner in the traditional sense. It does not lift dirt; it chemically dismantles it. It is an industrial-strength weapon that has found its way into household products, particularly oven cleaners and drain openers. Its efficacy is undeniable, but so are its dangers. To handle caustic soda is to handle a controlled chemical reaction. Understanding its properties, its limitations, and the absolute necessity of safety protocols is the non-negotiable prerequisite for anyone considering its use. Alkaline Substances To appreciate the power of caustic soda, one must understand its chemistry. It is a highly alkaline substance, sitting at the extreme end of the pH scale. When it comes into contact with organic matter, it initiates a process called saponification. In simple terms, it turns fats and grease into soap. The sodium hydroxide breaks down the triglycerides in the fat, creating glycerol and a water-soluble fatty acid salt (soap). This reaction is exothermic, meaning it generates a significant amount of heat. It is this combination of chemical transformation and thermal energy that makes caustic soda so effective at clearing a drain clogged with hair and grease. The heat melts the solid fats, and the chemical reaction turns the entire mess into a liquid that can be flushed away. The most common household application of caustic soda is in heavy-duty oven cleaners. Over time, the spills and splatters in an oven undergo polymerization. The oils bake onto the enamel surface, turning into a rock-hard, black carbonized layer that is impervious to standard scrubbing. When you spray an oven cleaner containing caustic soda onto this surface, the chemical begins to dissolve this polymer. It breaks down the long-chain molecules of the baked-on grease, softening the carbon into a gummy, brown sludge. After allowing the chemical to dwell for several hours, this sludge can be wiped away, revealing the clean enamel underneath. Without caustic soda, removing this layer would require hours of aggressive scraping with a razor blade. The chemical does the physical work for you. Corrosive However, this immense power comes with an equally immense risk profile. Caustic soda is indiscriminately corrosive. While it targets fats and proteins, it will also attack living tissue with the same ferocity. Skin contact with a concentrated lye solution can cause severe chemical burns within seconds. The chemical not only burns the surface layer but continues to eat through the tissue underneath. Splash-back into the eyes can result in permanent blindness. This is why the safety warnings on these products are not suggestions; they are absolute mandates. Protective gear is not optional. Heavy-duty rubber gloves that extend up the forearm, along with splash-proof goggles, are the minimum requirement for handling any product containing this chemical. Inhalation is another significant danger. Many caustic soda products, particularly drain openers, are sold in a granular or flake form. When these solids are mixed with water, the exothermic reaction can create a cloud of hot, corrosive steam. Inhaling this vapor can cause severe damage to the delicate tissues of the respiratory tract. Furthermore, if the reaction is uncontrolled-such as by pouring water into a container of lye instead of the other way around-the mixture can erupt violently, splashing the caustic solution across the room. All work with caustic soda must be done in a well-ventilated area, with windows open and fans running to disperse the fumes. The reactivity of caustic soda extends beyond biological tissue. It is highly corrosive to certain metals, most notably aluminum. If a lye-based drain cleaner is used in pipes made of aluminum or certain alloys, it will eat through the metal, causing catastrophic leaks. This is why it is crucial to know the composition of your plumbing before using these products. It is generally safe for PVC and stainless steel, but older homes with mixed metal plumbing present a significant risk. The same caution applies to cookware. Never use an oven cleaner containing caustic soda on an aluminum baking pan or a grill grate made of aluminum. It will pit and discolor the metal permanently. Drain Plunger The use of caustic soda as a drain opener also carries a mechanical risk. If the chemical fails to clear the clog, you are left with a pipe filled with a highly toxic, corrosive liquid. At this point, you cannot use a mechanical snake or a plunger, as the back-splash could be life-threatening. You are forced to call a plumber and inform them that the drain is “live” with chemicals, a situation that significantly increases the cost and complexity of the repair. For this reason, many plumbers advocate for enzymatic drain cleaners or mechanical removal as the first line of defense, reserving caustic soda for professional use only. Despite these dangers, the effectiveness of caustic soda for specific, targeted tasks is undeniable when used correctly. For restoring old, cast iron cookware that has been caked with decades of carbon buildup, a lye bath is the gold standard for restorers. This involves creating a diluted solution of caustic soda and water in a plastic bin and submerging the pan for several days. The lye slowly but surely strips everything off the pan-old seasoning, rust, and carbon-down to the bare grey iron, without the physical labor of sanding. This process must be done outdoors with extreme care, but it yields a perfectly clean slate for re-seasoning. The key to safely using caustic soda is neutralization. As a strong base, it is neutralized by a strong acid. After cleaning an oven or a piece of cast iron, the surface must be thoroughly

Caustic Soda 101: The Dangers and Safe Handling of Lye Read More »
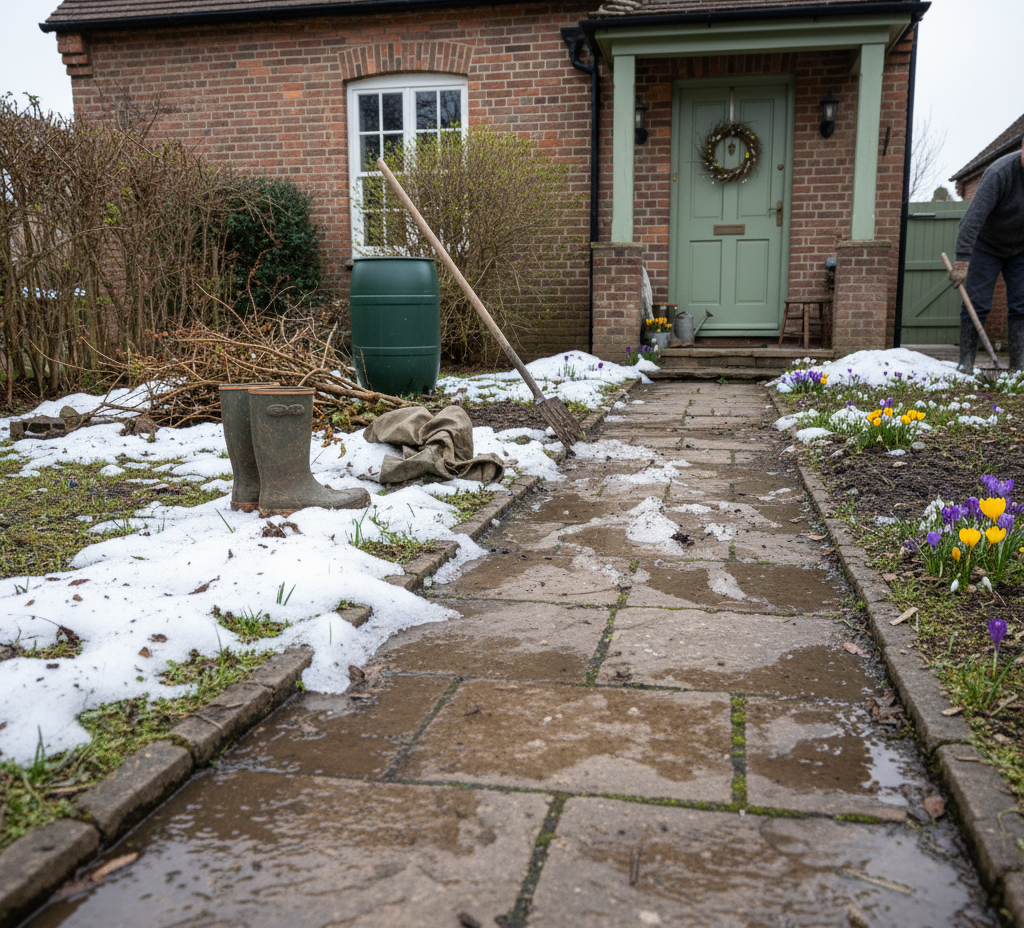
Manage the Spring Thaw Mess

How to Manage the Spring Thaw Mess: A Step-by-Step Guide

How to Manage the Spring Thaw Mess: A Step-by-Step Guide The Canadian spring does not arrive gently. It arrives as weeks of melting snow, cold rain and relentless mud, and the front lines of that battle sit right inside your entryway. April is the month when salt-stained boots, wet paws and gritty slush threaten every clean floor in the house. Winning means more than one heroic cleaning session: it takes a defensive system that stops the mess at the door, cleans the gear that carries it and keeps the worst of the season outside where it belongs. This step-by-step guide covers the entryway, the two-mat system, winter gear storage and the garage sweep that together keep your home clean through the thaw. Step 1: Beat Salt Stains and Mud at the Entryway Start with a thorough dry clean. Vacuum the entire entryway with a crevice tool to pull loose salt crystals, sand and dried dirt out of the floor and deep grout lines before any liquid touches them. The chalky white stains left by winter salt are an alkaline residue, and the most effective remover is a mild acid: plain white vinegar. Mix equal parts white vinegar and warm water, apply it to the stained areas and let it sit for five to ten minutes so the acid can dissolve the salts. Agitate with a stiff-bristled scrub brush, then rinse with a mop or cloth dipped in plain clean water, because vinegar left to dry can leave a sticky film. When you use any cleaner near floors and walls, read the label and follow the household chemical safety tips from Health Canada, including ventilating the space and never mixing products. For tile and vinyl, frequent mopping prevents mud layers from being tracked deeper into the home. Hardwood entryways demand extra care: water is wood’s enemy, so use a microfiber mop only lightly dampened with a pH-neutral wood floor cleaner, and wipe up puddles from wet boots immediately before moisture seeps between the boards. Splattered walls and baseboards just need a quick pass with a damp cloth and a drop of mild dish soap. Step 2: Set Up a Two-Mat System A single doormat is not enough during the thaw. A two-mat system turns the doorway into a two-stage cleaning zone for footwear. Outside the door, place a coarse scraper mat of coir or grooved rubber, or another abrasive surface that shears heavy mud and slush off boot treads. Hose it down and scrub it with a stiff brush whenever it loads up. Just inside the door, place a highly absorbent mat with a non-slip rubber backing to trap fine dirt and moisture. Vacuum it daily during the messiest weeks and machine-wash or hose it down once it becomes saturated. Never let either mat stay soaking wet for long, since damp fabric is a perfect spot for mould, and Health Canada links moisture buildup directly to mould growth in the home. The two-mat system also keeps outdoor grit out of your indoor air. Dirt, salt dust and fine particles tracked past the door become household dust, one of the indoor air contaminants Health Canada tracks in Canadian homes, so scraping shoes twice before they hit the floor is a small habit with real benefits. Step 3: Clean Winter Boots and Gear Before Storage Putting boots and mats away dirty is a mistake you pay for next November. Salt residue keeps attacking leather and synthetic materials through months of storage, and embedded dirt can attract pests. Every pair of winter boots deserves one last clean before retirement: dry-brush caked mud off soles and uppers, wipe surfaces with a damp cloth and dab stubborn salt lines with a cloth barely dampened using that same 50/50 vinegar and water mix. Let boots air dry completely away from direct heat, stuff them with paper to hold their shape and store them in a cool, dry spot. Take the heavy boot trays outside, hose them off and scrub them clean before storing them too. Step 4: Do a Garage Spring Sweep If you park in an attached garage, that floor is a hidden source of tracked-in grime. All winter it collects the salt, sand and slush that drip off your car, and shoes carry that gritty residue straight into the house. A spring sweep cuts the flow dramatically. Move the vehicles and large items out to open the space, then work a heavy-duty push broom from the back wall forward, sweeping debris out the main door. For a deeper clean, hose down the concrete and push the dirty water out with a floor squeegee to remove the fine salty dust a broom leaves behind. Problem Area Main Culprit Best Fix Tile and grout lines Chalky salt stains Dry vacuum, 50/50 vinegar solution, scrub, plain-water rinse Entryway hardwood Puddles from wet boots Lightly damp pH-neutral mop, wipe spills instantly Doorway mats Mud and moisture Two-mat system, daily vacuum, regular washing Winter boots Salt and caked dirt Brush, vinegar wipe, air dry before storage Garage floor Salt, sand and slush Push-broom sweep, hose and squeegee rinse Step 5: Stay Ahead of the Mess All Season Spring thaw mess is not a one-week event, so treat these steps as a routine rather than a project. Keep the scraper mat loaded outside, vacuum the indoor mat daily, mop the entryway on schedule and clear the garage once the snow is gone. Containment at the source beats cleaning the whole house twice. When winter’s last traces have worked their way into carpets, upholstery and far corners, a professional reset helps you start the season fresh. Toronto Shine Cleaning serves homes across the GTA with deep cleaning, regular cleaning and move-in and move-out cleaning. Check our pricing page, then call (647) 424-0355 to book your spring clean. Frequently Asked Questions About the Spring Thaw Mess Why does vinegar remove salt stains from floors? Winter salt residue is alkaline, and white vinegar is a mild acid. Applied as a 50/50 mix with

How to Manage the Spring Thaw Mess: A Step-by-Step Guide Read More »

How to Deep Clean a Blender, Its Blades, and Gasket

How to Deep Clean a Blender, Its Blades, and Gasket

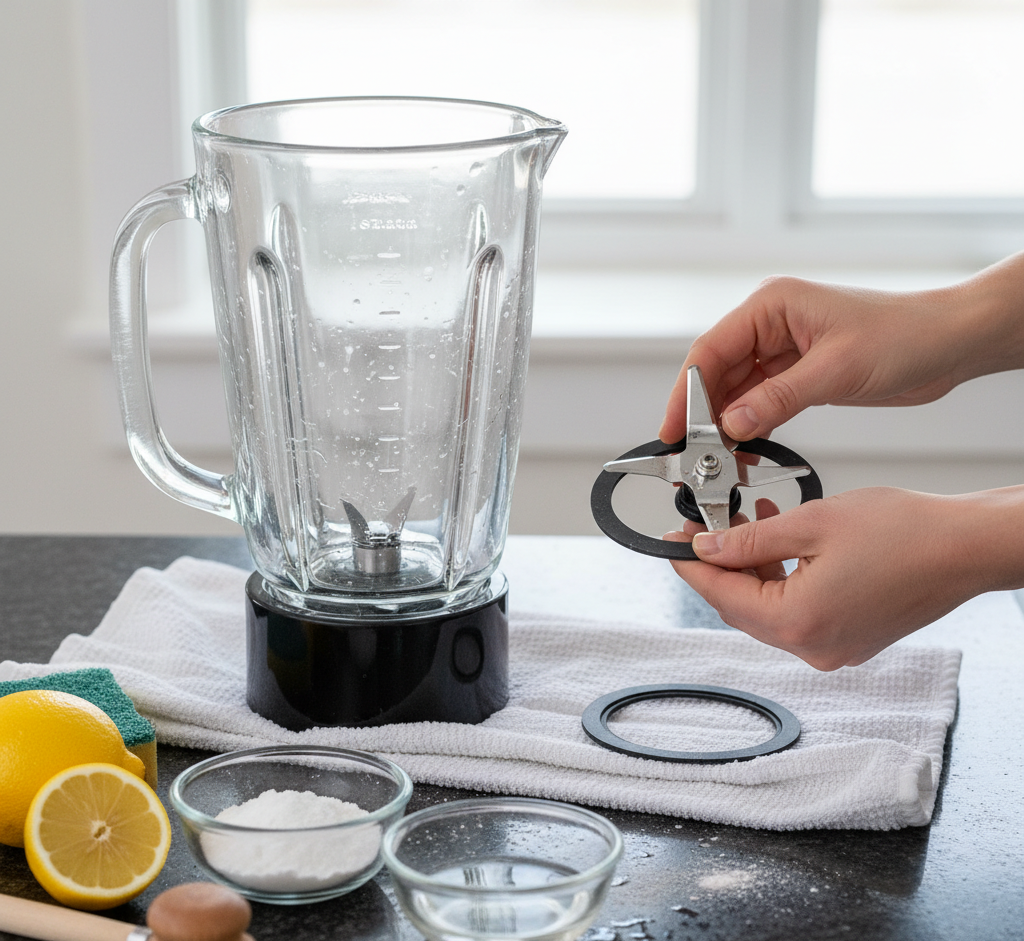
How to Deep Clean a Blender Without Wrecking the Seals A quick rinse after your morning smoothie keeps a blender presentable, but it is not a deep clean. Dried-on residue, absorbed smells, and grime packed into crevices need real attention. The good news: no specialty products are needed, since warm water, dish soap, baking soda, and white vinegar handle all of it in under an hour. Why Blender Deep Cleaning Actually Matters Blenders blend food, and food residue builds up. The trouble is where it hides: the crevices around the blade assembly and the rubber gasket that seals the blades to the jar. Liquid seeps into those gaps during blending, and the jar is rarely dried completely afterwards, so residue sits damp, dulling the flavour of whatever you make next and giving bacteria and mould somewhere comfortable to grow. Protein-heavy smoothies turn rancid quickly, and sweet fruit blends leave a sugary film that feeds mould and yeast. Odour transfer is the symptom you notice first: blend garlic, ginger, or onion and the next green smoothie tastes like last week’s curry. Safety First: Power Off, Parts Off, Fingers Clear Unplug the blender before you start, and never dunk the motorized base in the sink. The blades are extremely sharp, so never reach into an inverted jar carelessly. Check the user manual, especially which parts are dishwasher safe, since disassembly varies by model. Prep Work: Disassemble and Find the Gasket Deep cleaning only works once you can reach every surface. Detach the blade assembly from the jar if your model allows; many blenders have a removable rubber gasket or seal ring under the blades, the primary hiding spot for grime. The gasket comes off by hand or needs a flathead screwdriver or the tool shown in your manual. Some jars have a fixed blade assembly that cannot be separated, so give the visible areas extra care. Wipe away loose residue before soaking. The 60 Second Clean After Every Use The deep clean stays short if you rinse properly every time. Right after blending, fill the jar about halfway with warm water, add a couple of drops of dish soap, secure the lid, and run it for 30 to 60 seconds. Pour it out, rinse under the tap, and set the jar upside down to air dry. That one habit stops residue bonding to the blades and gasket, and wet residue is far easier to lift than baked-on film. Deep Cleaning, Step by Step 1. Soak and scrub the blades and gasket Fill a bowl or sink with warm soapy water and a few drops of degreasing dish soap, then soak the blade assembly and gasket for 20 to 30 minutes. Use a small brush or an old toothbrush to gently scrub around the blades and the crevice the gasket sits in. Rinse thoroughly and let the parts dry completely before reassembly. 2. Lift residue off the inside of the jar For stubborn spots on the bottom and sides, sprinkle baking soda onto the surface and scrub with a damp sponge in gentle circular motions. Baking soda rinses clean and deodorizes, tackling film and smell in one pass. 3. Wipe the exterior and the base Wipe the outside of the jar and the base with a damp cloth and a little mild dish soap, including the control panel and anywhere batter or juice has dripped. Sticky spots respond to rubbing alcohol or white vinegar on the cloth. Never immerse the base: it holds the motor and electronics. 4. Deodorize the jar Odours survive a visible clean. Add a cup of warm water with a tablespoon of baking soda or a splash of white vinegar, blend briefly, and let it sit in the jar for 15 to 30 minutes before rinsing. For resilient smells, smear a thick paste of baking soda and water inside the jar and leave it overnight with the lid off. 5. Descale with white vinegar Hard water leaves a cloudy mineral film on the jar over time. Fill it halfway with white vinegar, neat or with an equal part of water, let it sit 30 to 60 minutes, then blend for a few seconds and pour it out. The vinegar dissolves the deposits and the jar comes up clearer. 6. Reassemble and test Put it back together only when every part is dry, and make sure the gasket sits correctly so the jar does not leak later. Finish with a short run of clean water to flush any particles and confirm the seal. Which Pantry Cleaner Does What Problem Best agent Contact time Dried food on the jar bottom Baking soda with a damp sponge Scrub, then rinse Greasy film on blades and gasket Warm soapy water with degreasing soap 20 to 30 minutes Cloudy mineral haze White vinegar 30 to 60 minutes Onion, garlic, or curry odour Baking soda paste 15 to 30 minutes or overnight Sticky drips on the base Vinegar or alcohol on a cloth Wipe and dry at once How Often to Deep Clean, and What to Skip Give the blender a thorough deep clean at least once a month, and more often if you use it daily or lean on it for thick, pulpy, or dairy blends. Between deep cleans: Run the 60 second soap-and-water cycle straight after every use. Dry the jar fully before the lid goes back on, since a closed damp jar invites mould. Wash your hands before handling parts and after touching the gasket, the habit CDC handwashing guidance recommends for food equipment. Ventilate the sink area and never mix cleaners such as vinegar and bleach, per Health Canada’s household chemical safety advice. After mould or a bad smell, a dilute bleach soak works under the CDC’s guidance on cleaning with bleach, if you rinse extremely well. Frequently Asked Questions Can I put the blender jar in the dishwasher? Only if the manual says so. Glass jars usually survive a cycle, but heat can warp plastic jars and weaken blade

How to Deep Clean a Blender, Its Blades, and Gasket Read More »

5 Versatile Household Items That Save Time and Money

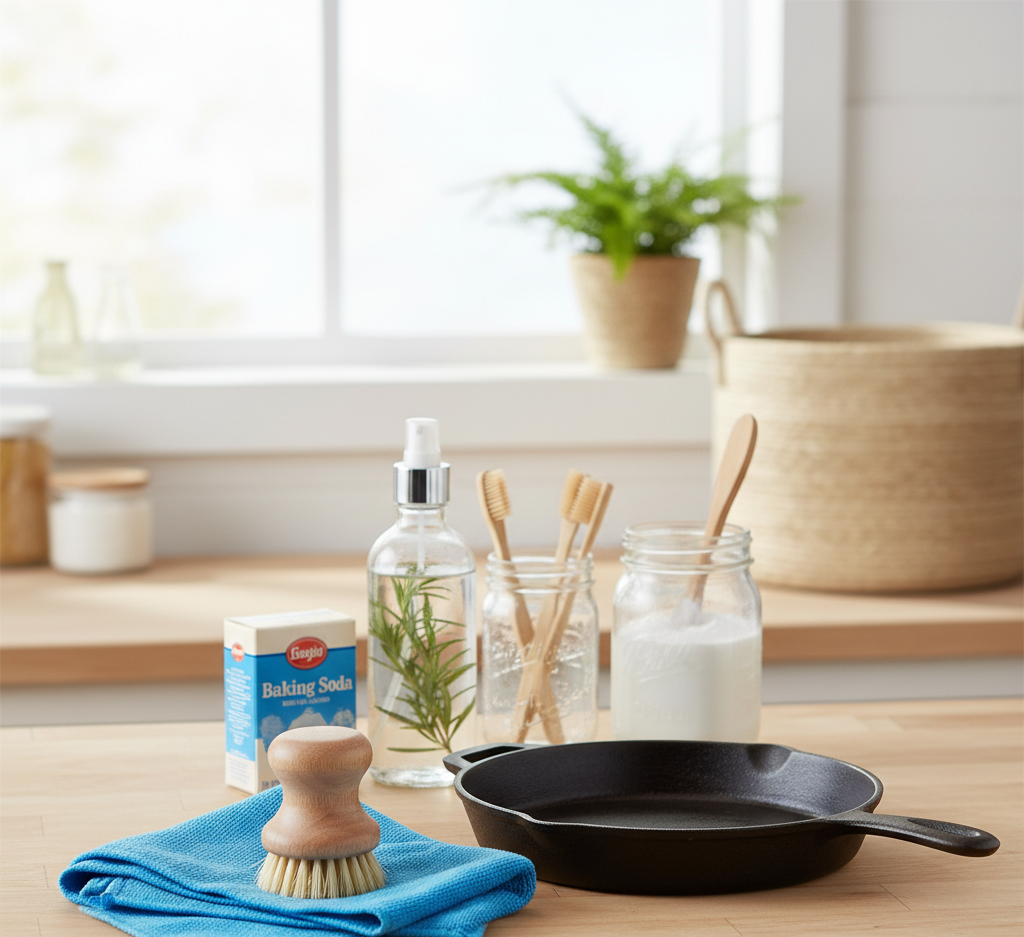
5 Versatile Household Items That Save Time and Money Managing a household is a constant balancing act of time, resources, and energy. The foundation of a well-run home is not an endless collection of specialized gadgets but a curated arsenal of simple, versatile tools that tackle many tasks with reliable results. These unsung heroes save space, reduce waste, and simplify the endless list of chores that keep a home clean, comfortable, and functional. Embracing versatility is the key to working smarter, not harder. White Vinegar: The Mineral Deposit Fighter The humble bottle of plain white vinegar may be the most underestimated tool in any home. Its gentle acidity makes it formidable against a specific category of grime: mineral deposits. In areas with hard water, the chalky buildup of limescale is a constant battle. A kettle crusted with scale is restored by boiling a solution of equal parts vinegar and water inside it, letting it sit, and rinsing it clean. A sputtering showerhead comes back to life after soaking overnight in a bag full of vinegar. Vinegar extends to the laundry room, where a cup added to the rinse cycle acts as a natural fabric softener, breaking down detergent residue without the waxy buildup of commercial softeners. As a cleaner, a 50/50 solution of vinegar and water in a spray bottle is an effective streak-free glass and mirror cleaner, disinfects countertops, cuts through soap scum on shower doors, and neutralizes odors. Baking Soda: The Gentle Alkaline Workhorse If vinegar is the master of acidic cleaning, baking soda is the master of alkaline cleaning. This simple white powder is a gentle abrasive and a phenomenal natural deodorizer. Its fine, gritty texture makes a perfect paste for scrubbing stubborn food residue from pots and pans or lifting light stains from countertops without scratching. A small dish of baking soda in the refrigerator or freezer absorbs ambient odors. Sprinkled liberally over a carpet before vacuuming, it lifts dirt and neutralizes pet or smoke smells settled deep in the fibers. For greasy messes, a sprinkle is a mild alkali that breaks down the fatty acids in grease for easier wiping. Microfiber Cloths: Built for Dust and Streak-Free Finishes A set of high-quality microfiber cloths is a non-negotiable upgrade over cotton rags and paper towels, and their effectiveness is rooted in their design. The fibers are incredibly fine and split into a star-like shape, creating an enormous surface area. Used dry for dusting, they generate a natural static charge that actively attracts and traps dust particles instead of pushing them around, so dusting actually removes allergens from the home. Used damp, the same fibers scrub grime and absorb spills efficiently, delivering streak-free windows, mirrors, and stainless steel. A color-coded set, for example blue for glass, green for general surfaces, and yellow for the kitchen, replaces an entire cabinet of disposable wipes, making it both an economical and an environmentally friendly choice. Cast Iron Skillet and Dutch Oven: Cook Once, Buy Well In the kitchen, the ultimate versatile tool is a well-seasoned cast iron skillet. One piece of equipment can sear a steak on the stovetop, transfer into the oven to finish cooking, bake cornbread or a fruit crumble, and even work over a campfire. It gets screaming hot and retains heat evenly. With simple care, scraping, rinsing with hot water, and a light application of oil, it develops a natural non-stick surface called seasoning that improves with every use, replacing a collection of frying and sauté pans for generations. A Dutch oven, typically enameled cast iron, complements the skillet as the master of slow, moist cooking. It is the perfect vessel for soups, stews, and braising tough cuts until tender, with a heavy lid that seals in moisture. It is also one of the best tools for baking crusty bread at home, trapping steam for a professional-quality crust, and it deep-fries, boils pasta, and serves large dishes at the table with excellent heat retention. One pot serves as stockpot, roaster, bread cloche, and serving dish. The Sturdy Basket: Instant Order for Everyday Chaos Finally, the simple, sturdy basket is a surprisingly versatile tool for the daily ebb and flow of household life. A large, attractive woven basket can be a clutter catch-all in the living room for stray toys, remote controls, and mail before guests arrive, a chic holder for rolled throw blankets by the sofa, a hamper or carrier for folded laundry, and a home by the entryway for shoes or library books to return. Its purpose can shift daily with the needs of the household, a low-tech solution to the perpetual problem of clutter. Item Best at Everyday use It replaces White vinegar Mineral deposits and limescale Glass cleaner, rinse-cycle softener Ammonia glass sprays, fabric softener Baking soda Odors and gentle abrasion Fridge deodorizer, cleaning paste Air fresheners, scouring powders Microfiber cloths Dust trapping and streak-free shine Dry dusting, damp scrubbing Paper towels, cotton rags Cast iron skillet High-heat searing and baking Stovetop to oven cooking Several frying and sauté pans Dutch oven Slow, moist cooking Stews, bread, deep frying Stockpot, roaster, bread cloche A well-managed home is not defined by the quantity of its possessions but by the quality and utility of its tools. Choosing simple, versatile items lets a household run more smoothly, more economically, and with far less clutter and stress. When a deeper, more comprehensive clean is needed, Toronto Shine Cleaning provides professional deep cleaning services and regular maid service that embody the same principles of efficiency and thoroughness. Our bonded and insured cleaners carry a $1,000,000 insurance policy; see pricing and client feedback on our reviews page. Call (647) 424-0355 to book. For more on keeping your home hygienic, see the CDC handwashing guidance and the Government of Canada guide on indoor air contaminants. Versatile Household Items FAQ Is white vinegar a good glass cleaner? Yes. A 50/50 solution of vinegar and water in a spray bottle cleans glass and mirrors without streaks, often outperforming ammonia-based products. It

5 Versatile Household Items That Save Time and Money Read More »

5 Toxic Cleaning Products You Should Stop Buying Today

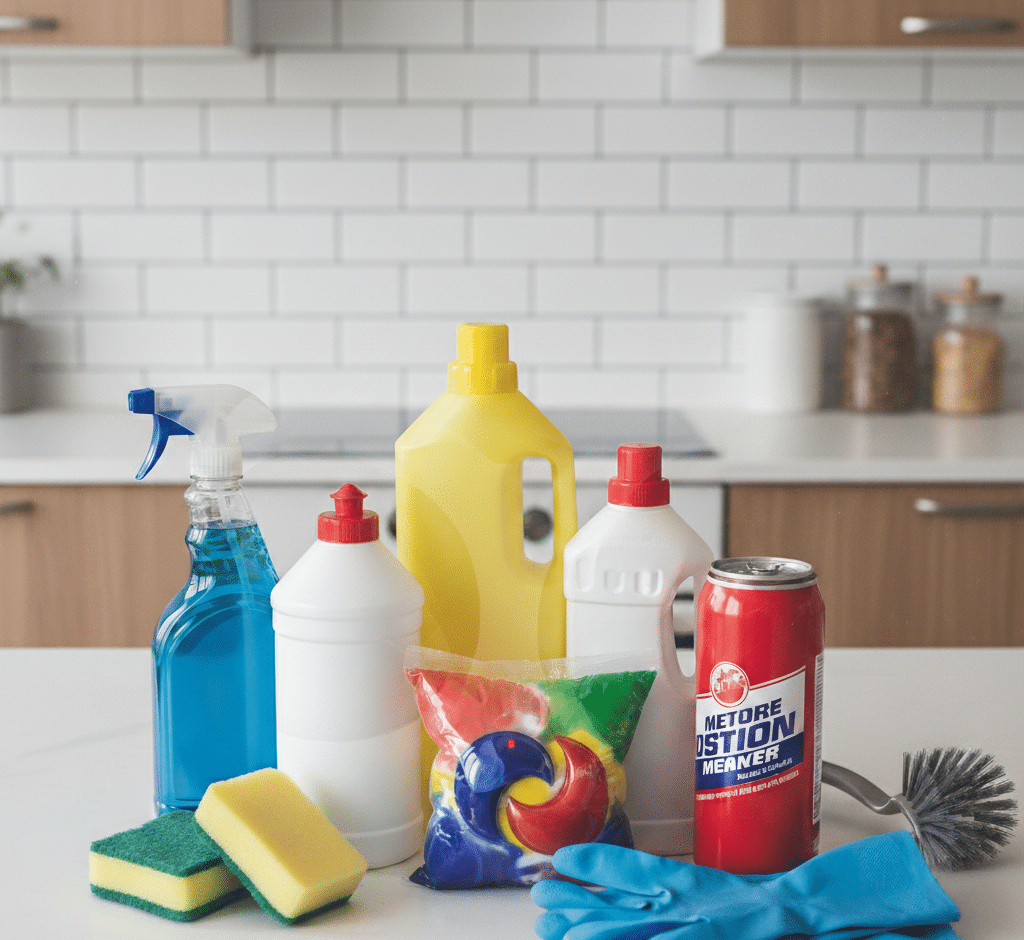
Do you know which products are toxic? In the quest for a clean and healthy home, a paradox often arises. We scrub, spray, and sanitize with the intention of creating a safe environment, yet the very products we use can introduce a host of hazardous chemicals into our living spaces. The brightly colored liquids lining the supermarket aisles often contain aggressive, industrial-strength compounds that, while effective at removing grime, can pose significant risks to our respiratory systems, our skin, and the overall air quality of our homes. Making informed choices about what we bring across our thresholds is not about succumbing to fear, but about embracing a more mindful and effective approach to cleaning, one where true cleanliness is not achieved at the expense of our well-being. Bleach One of the most ubiquitous and misunderstood products in the conventional cleaning arsenal is chlorine bleach. Marketed as the ultimate disinfectant and whitener, its power comes from its highly reactive nature. This reactivity is precisely what makes it so dangerous. The most immediate risk lies in its potential for accidental mixture. When chlorine bleach is combined with ammonia-a common ingredient in many glass and all-purpose cleaners-it creates toxic chloramine gas, which can cause severe respiratory distress. When mixed with an acid, such as a toilet bowl cleaner or even vinegar, it produces chlorine gas, a chemical weapon infamous for its devastating effects on the lungs. Even when used on its own in a poorly ventilated area, the fumes from bleach can be a powerful irritant to the eyes, throat, and lungs, particularly for individuals with asthma or other respiratory sensitivities. For a safer approach to disinfecting, a solution of white vinegar and water can handle most household germs. For whitening laundry and treating stubborn stains on white surfaces, hydrogen peroxide or oxygen-based bleach powders are excellent alternatives that break down into harmless water and oxygen. Ammonia Ammonia itself, even when not mixed with bleach, is another chemical to handle with extreme caution. It is the active ingredient in many popular window and glass cleaners, prized for its streak-free finish. However, ammonia is a potent respiratory irritant. Its sharp, pungent odor is a clear warning sign from our bodies that we are inhaling something harmful. The fumes can cause coughing and irritation in the throat and lungs, and can be particularly aggravating for people with chronic respiratory conditions. A far safer, cheaper, and equally effective alternative for cleaning glass and mirrors is a simple solution of equal parts white vinegar and water in a spray bottle. The mild acidity of the vinegar cuts through smudges and films effortlessly, and wiping with a clean microfiber cloth ensures a perfectly clear, streak-free shine without any toxic fumes. Caustic Soda Perhaps the most aggressive and overtly dangerous products found under our sinks are conventional drain cleaners. These products are designed to solve a stubborn problem by dissolving dense clogs of hair and grease deep within our plumbing. To achieve this, they rely on extremely caustic chemicals like sodium hydroxide, also known as lye. These substances are highly corrosive, designed to burn through organic matter. While they may burn through the clog, they can also cause severe chemical burns to the skin and eyes upon contact and can permanently damage older plumbing pipes. The risk is magnified when the cleaner fails to dislodge the clog, leaving a pipe full of highly toxic, standing liquid that is incredibly dangerous to deal with. A much safer approach to drain maintenance is preventative. A weekly flush with a kettle of boiling water can dissolve grease buildup before it becomes a problem. For minor clogs and odors, the classic combination of baking soda and vinegar, with its fizzing mechanical action, can loosen debris. For a true blockage, the most effective and safest solution is not chemical, but physical: a simple plastic drain snake can physically pull out the clog without any risk to your pipes or your health. Similarly caustic ingredients are found in most aerosol oven cleaners. These products are formulated to cut through thick layers of baked-on, carbonized grease, and they often contain the same lye found in drain cleaners. The aerosol spray format is particularly hazardous as it atomizes these caustic chemicals, making them easy to inhale. The fumes can cause immediate and severe respiratory irritation. The safer alternative requires a bit more time but is completely non-toxic and remarkably effective. Create a thick paste of baking soda and water and spread it liberally all over the cool interior surfaces of your oven, avoiding the heating elements. Let this paste sit overnight. The baking soda will work to soften and break down the carbonized grease. The next day, using a plastic scraper and a damp cloth, you can wipe and scrub away the paste, and the grime will come with it, all without a single toxic fume. Synthetic air Fresheners One of the most subtle but pervasive categories of harmful products is synthetic air fresheners. This includes aerosol sprays, plug-in diffusers, and scented candles made with fragrance oils. The goal of these products is not to clean, but to mask odors by releasing a continuous stream of chemicals into the air. The term “fragrance” on an ingredient list is a legal loophole that can hide a proprietary blend of hundreds of different chemicals, including phthalates and a host of volatile organic compounds (VOCs). Phthalates are endocrine disruptors that can interfere with the body’s hormonal systems, while VOCs can contribute to a wide range of health issues, from headaches and dizziness to long-term respiratory problems. True freshness comes not from masking odors, but from eliminating them. Open your windows to allow for natural ventilation. Place a small bowl of baking soda or activated charcoal in a room to absorb ambient smells. For a pleasant scent, simmer a pot of water on the stove with natural ingredients like cinnamon sticks, cloves, and citrus peels, or use a diffuser with pure, high-quality essential oils. Triclosan At the end, be wary

5 Toxic Cleaning Products You Should Stop Buying Today Read More »

window track cleaned and sanitized

Window Tracks Cleaning: The Secret to Cleaning Stubborn Dirt from Sliding Window Tracks

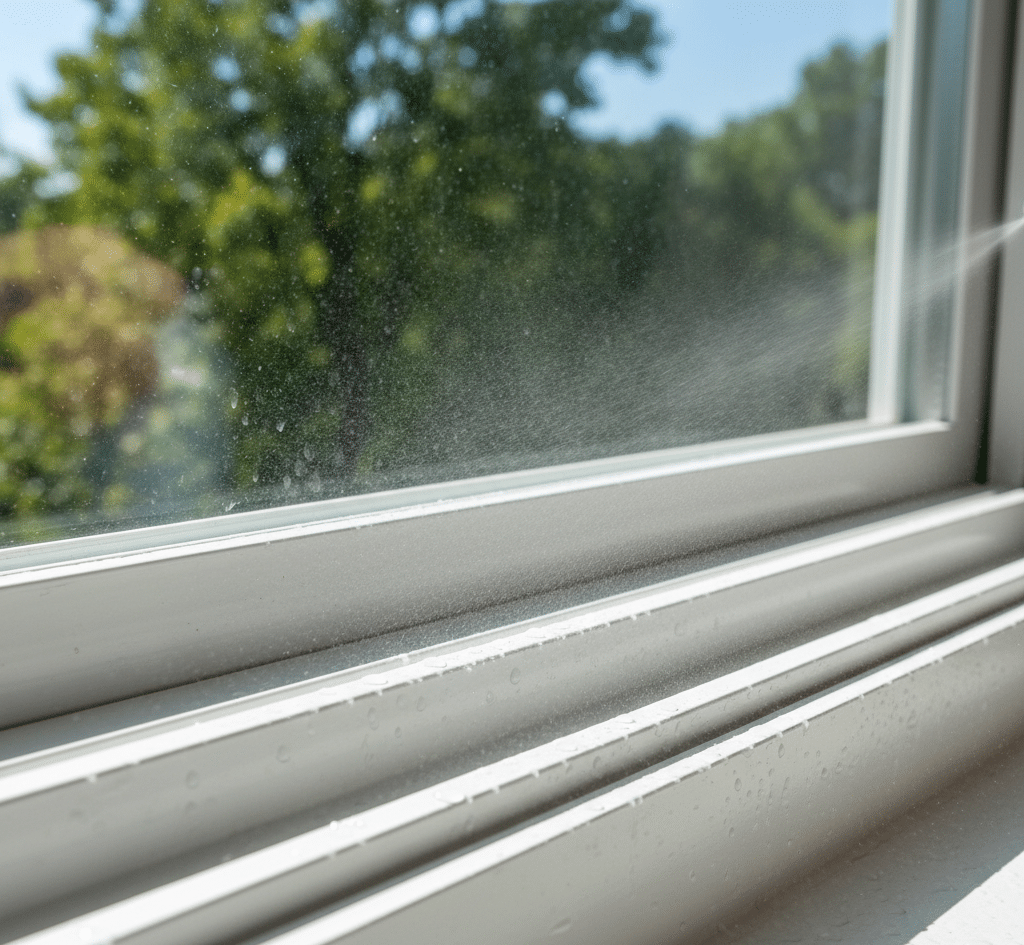
Window Tracks Cleaning: A Step-by-Step Guide to Stubborn Dirt Window tracks do a lot of quiet work: they let heavy glass panels glide, seal out drafts and rain, and lock the weather where it belongs. In return, they get neglected. Tucked at the bottom of the frame, sliding window tracks collect an astonishing blend of dust, pollen, rain-soaked dirt, dead insects and condensation that packs into a thick, stubborn sludge. That buildup is not just ugly: it jams the window, traps allergens and makes a room feel permanently dirty no matter how often you vacuum. Cleaning window tracks is easier than it looks once you follow the right sequence. This guide covers the tools, the dry-cleaning steps and the baking soda and vinegar technique that dissolves even set-in grime. Gather the Right Tools for Window Track Cleaning Vacuum cleaner with a crevice tool and a brush attachment Small stiff-bristled brush or an old toothbrush Spray bottle for precise solution application Baking soda and plain white vinegar Paper towels and clean microfiber cloths Butter knife or flathead screwdriver wrapped in cloth for corners Old towel to lay under the window and catch drips Step 1: Vacuum Out the Loose Debris First Never add liquid to a track full of loose dirt. The moment water hits that dry mix of dust, sand and dead bugs, it becomes a muddy paste that is far harder to remove. Open the window as wide as possible for full access, fit the vacuum with its crevice tool and work methodically along every groove and channel, giving extra attention to the corners where grime piles up deepest. Step 2: Loosen Caked-On Dirt With a Dry Brush Switch to the dry stiff-bristled brush and scrub the whole track vigorously. This agitates compacted, caked-on dirt that suction alone cannot lift, breaking it into fine powder. Vacuum again to pull up everything the brush freed. Finishing this dry phase thoroughly makes the wet cleaning below far more effective. Step 3: Let Baking Soda and Vinegar Fizz Away the Grime With the solids gone, only the sticky film of grime remains, and the classic chemistry of baking soda and vinegar handles it. Sprinkle a generous layer of baking soda over the whole track, filling every channel and corner until a visible white coating forms. Baking soda acts as a gentle abrasive and natural deodorizer. Fill the spray bottle with white vinegar, set it to a direct stream and spray the powder until it hisses and fizzes. That effervescent reaction is actively working, bubbling up and lifting grime off the surface, so leave it for ten to fifteen minutes before the next step. Step 4: Scrub, Dig Out the Corners and Scoop the Slurry Take the toothbrush back and scrub the gritty paste into every part of the track. The vinegar dissolves the grime, the baking soda scours and the brush supplies the muscle, producing a powerful cleaning slurry that lifts even set-in dirt. For the tight corners, wrap the tip of a butter knife or flathead screwdriver in a small piece of microfiber cloth or sturdy paper towel, and use this detail tool to dig out the gunk the brush cannot reach. Then scoop out the dark paste with paper towels, wiping until most of the visible mess is gone. Step 5: Rinse, Dry Completely and Clear the Weep Holes Finish with a clean microfiber cloth dampened with plain warm water and wrung out thoroughly. Wipe the entire track, rinsing the cloth often, to remove leftover dirt and any baking soda or vinegar residue. Then dry every surface completely with a clean, dry microfiber cloth. A bone-dry track resists mold and mildew and picks up far less new dirt, which matters because Health Canada identifies dampness as the main driver of mould growth in the home. Finally, inspect the weep holes, the small slots on the exterior side of the track that let rainwater drain. When they clog, water backs up and can leak into your home. Clear them with a toothpick or a blast of compressed air, then apply a tiny drop of silicone-based lubricant to the track so older windows glide smoothly again. Stage Tool Job Dry removal Vacuum with crevice tool Pull loose dust and debris from channels Compact dirt Stiff brush, then vacuum Break up and lift caked-on buildup Grime film Baking soda plus vinegar Fizz and dissolve sticky residue Tight corners Cloth-wrapped knife or screwdriver Dig out gunk brushes cannot reach Final finish Damp then dry microfiber cloth Rinse residue and dry fully Drainage Toothpick or compressed air Clear weep holes, then lubricate track Why Clean Window Tracks Matter for Your Home Clean tracks are about more than appearances. Sliding windows that glide freely seal better and last longer, and removing the dust, pollen and mold spores that collect in the frame means less of that debris circulates through the room. Household dust is one of the indoor air contaminants Health Canada flags for Canadian homes, so a track that no longer sheds grime with every open and close is a genuine air-quality win. Since mold can cause symptoms such as stuffy noses and wheezing in sensitive people, per the CDC’s mold overview, keeping the frame dry is a health habit, not just a cleaning one. Make Window Tracks Part of Your Cleaning Routine Add this five-step track cleaning to your seasonal routine, and the payoff shows every time you open a window. For homes where the grime has spread far beyond the frames, a professional deep clean restores every surface, from tracks and sills to floors and baseboards. Toronto Shine Cleaning brings that level of detail to deep cleaning visits and regular home cleaning across the city. See our pricing page and service areas, then call (647) 424-0355 to book your clean. Frequently Asked Questions About Cleaning Window Tracks How often should window tracks be cleaned? Include tracks in your seasonal deep cleaning, and clean them more often if you live on a busy

Window Tracks Cleaning: The Secret to Cleaning Stubborn Dirt from Sliding Window Tracks Read More »

How to Clean a Sink Drain Without Using Harsh Chemicals

A sink drain is one of the hardest-working and least-appreciated fixtures in a home. Day after day, it dutifully swallows everything we send its way: soap scum, toothpaste, shaving cream, grease from cooking, and countless tiny food particles. Over time, this constant barrage takes its toll. The first sign of trouble is often subtle, a slight gurgle as the water slowly spirals away. Soon, you notice a persistent, unpleasant odor wafting up from the depths, a smell of decay and stagnant water. Eventually, the drain becomes fully clogged, turning your sink into a basin of murky, standing water. Cleaning a sink drain is not just a reactive task for when a clog occurs; it is a crucial act of preventative maintenance that preserves the health of your plumbing and the freshness of your home. Effective Ways 1. Hot Water The most effective approach to drain care begins with simple, regular maintenance designed to prevent major blockups. One of the easiest and most powerful preventative measures is a regular boiling water flush. At least once a week, boil a full kettle of water and pour it directly down the drain. The intense heat of the boiling water is incredibly effective at melting and dissolving the congealed grease, soap scum, and other fatty substances that are the primary culprits in building up slow-moving clogs. This simple act keeps the interior of your pipes clear, flushing away the sticky buildup before it has a chance to solidify and trap other debris. It is a thirty-second task that can save you from a major headache down the line. 2. Baking Soda and White Vinegar To address the common issue of drain odors, the classic combination of baking soda and white vinegar is a safe and remarkably effective solution. This method works through a simple acid-base chemical reaction that fizzes and scrubs the inside of the drain pipe, while also neutralizing the odor-causing bacteria that thrive in the dark, damp environment. Start by pouring about half a cup of dry baking soda directly into the drain opening. Follow this with an equal amount of plain white vinegar. The mixture will immediately begin to foam and bubble vigorously. This fizzing action is not just for show; it is actively working to dislodge small particles of grime and hair from the pipe walls. Place a drain stopper or a small cloth over the opening to contain the reaction within the pipe. Let this mixture work its magic for fifteen to thirty minutes. To finish, flush the drain thoroughly with another kettle of boiling water to wash away all the loosened debris and any remaining vinegar and baking soda. This process not only combats odors but also serves as a gentle cleaning that helps to keep drains flowing freely. Manual Removal When you are faced with a slow-moving drain that regular maintenance cannot resolve, it is time to escalate to a physical removal of the blockage. More often than not, the primary obstruction is located very close to the drain opening, caught on the mechanism of the stopper. Before reaching for any tools, you must first address this gatekeeper. For a bathroom sink with a pop-up stopper, look for the small metal rod that extends from the back of the drainpipe just below the sink. This is the pivot rod, and it is held in place by a retaining nut. Unscrew this nut, pull the rod out slightly, and you will be able to lift the stopper straight out of the drain opening. For kitchen sinks or other drains with lift-and-turn or push-and-pull stoppers, they can often be removed by unscrewing them counter-clockwise while holding the main body in place. Once the stopper is removed, you will likely be greeted by a disgusting but satisfying sight: a clump of hair, soap scum, and other gunk that was the main cause of your slow drain. Clean the stopper thoroughly before setting it aside. With the stopper removed, you can now access the top section of the drainpipe. A simple, inexpensive plastic tool known as a drain snake or zip-it tool is incredibly effective here. This is a long, thin, flexible strip of plastic with barbed, tooth-like edges. Simply feed the tool down into the drain as far as it will go, then slowly pull it back up. The barbs will snag onto the hair and grime, allowing you to pull up the blockage. You will likely need to repeat this process several times, wiping the tool clean after each pass. This physical removal of the clog is far more effective and safer for your pipes than any chemical solution. For the most stubborn clogs or as a part of a deep annual cleaning, you may need to address the P-trap. This is the U-shaped section of pipe located directly beneath your sink. Its clever design serves two critical functions: it holds a small amount of water at all times to create a seal that blocks unpleasant sewer gases from entering your home, and its curved shape makes it an effective trap for larger debris (or dropped rings), preventing clogs from forming deeper in your plumbing system. While cleaning the P-trap may seem intimidating, it is a straightforward task that most homeowners can handle. Before you begin, prepare the area. Place a bucket directly underneath the P-trap to catch the water and debris that will spill out. It is also wise to lay down some old towels to protect your cabinet floor. Wearing rubber gloves is highly recommended. The P-trap is connected to the vertical and horizontal pipes by two large slip nuts. These are often made of plastic and can usually be loosened by hand by turning them counter-clockwise. If they are too tight, a pair of channel-lock pliers can be used, but be careful not to apply too much force and crack the plastic. Loosen the nut on the vertical pipe first, then the one on the horizontal pipe. As you loosen the second nut, be prepared

How to Clean a Sink Drain Without Using Harsh Chemicals Read More »

pizza stone clean

How to Make Your Stained Pizza Stone Look and Cook Like New

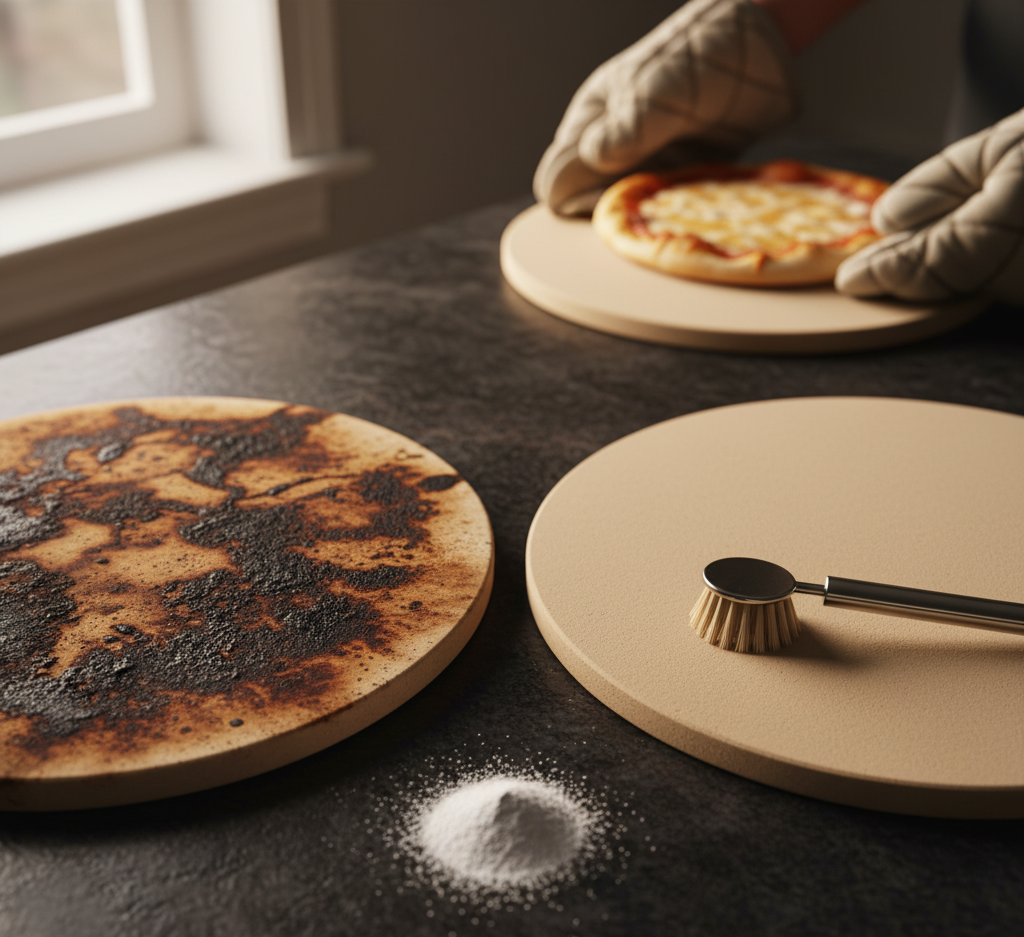
Pizza Stone Care: Make a Stained Stone Look and Cook Like New A pizza stone delivers the crisp, pizzeria-quality crust that metal pans cannot match because its porous ceramic, cordierite, or clay body pulls moisture from the dough while spreading heat evenly. That same porosity makes cleaning counterintuitive: the wrong move can leave you with soapy-tasting pizza, a cracked stone, or a sticky, smoky mess. This guide covers what never to do, how to remove baked-on food safely, and why dark stains are a sign of a well-loved stone. If the rest of your kitchen needs the same level of care, Toronto Shine Cleaning offers professional deep cleaning for your home; call (647) 424-0355 to book. Never Use Soap or Detergent on a Pizza Stone The first rule of pizza stone care is absolute: keep soap and detergent away from the surface. The stone acts like a very hard sponge, so liquid soap seeps deep into its structure. The next time the stone reaches pizza temperature, that trapped soap heats up, releases fumes, and bakes an unpleasant chemical taste directly into the bottom of your crust. Rinsing cannot pull soap back out of the ceramic, which means a single wash can permanently ruin the stone. If the stone ever needs more than dry scraping, the gentle methods below are the only safe options. Avoid Thermal Shock at All Costs A pizza stone is one solid piece of ceramic. It expands when heated and contracts when cooled, and a rapid temperature swing creates stress that can crack it in half. Never plunge a hot stone into a sink of cool or lukewarm water, and never place a cold stone into a preheated oven. Always put the stone in a cold oven and let it preheat along with the oven itself. After baking, leave the stone inside, turn the oven off, and let everything cool gradually over several hours before you touch it. How to Clean a Pizza Stone, Step by Step Once the stone is completely cool, cleaning is mostly dry work. The goal is not a pristine beige surface: a well-used stone is supposed to be stained, much like the patina on a cast iron skillet. The goal is a smooth surface free of food debris. Scrape away every bit of burnt cheese, scorched sauce, and fused crust with a flat, rigid tool such as a bench scraper or metal spatula held at a low angle with firm pressure. A stiff-bristled grill brush or dedicated pizza stone brush works too. Then wipe the residue away with a dry cloth; for most cleanings, that is all you need. Routine removal of food debris keeps the stone hygienic between bakes, which mirrors the CDC’s advice that regular cleaning is the first step for surfaces in your home. For stubborn spots, escalate carefully. Dampen a soft cloth or non-abrasive sponge with plain warm water, wring it out thoroughly, and scrub only the problem area. Never soak or submerge the stone, and dry the spot immediately with a clean cloth. For greasy, tacky marks, mix a few tablespoons of baking soda with only enough water to build a thick paste. Spread it over the stain, let it sit for ten to fifteen minutes, and scrub gently with a stiff brush or damp cloth. Wipe the area several times so no baking soda residue remains, since leftover paste can affect the flavor of your next pizza. Your Pizza Stone Cleaning Toolkit Bench scraper or metal spatula: shears off baked-on food when held at a low angle. Grill brush or pizza stone brush: useful for loosening residue across the whole surface. Soft cloth or non-abrasive sponge: for careful spot cleaning with warm water only. Baking soda: makes a gentle paste that lifts greasy, sticky stains without scratching. Dry cloths: for wiping debris away and removing moisture immediately after wet cleaning. Should You Try the Oven Self-Clean Cycle? Some owners run the oven’s self-cleaning cycle with a cool, scraped stone inside. The cycle heats far beyond 900 F (480 C), incinerating every trace of residue into fine white ash that you wipe away with a dry cloth once the oven has fully cooled, which can take many hours. This is a high-risk, high-reward method: the intense heat can crack thinner stones or any stone with hairline fractures. Check with the stone’s manufacturer before attempting it. Dry the Stone Completely Before the Next Bake Moisture trapped inside a pizza stone is dangerous. In a hot oven, water held in the pores turns to steam and expands rapidly, creating internal pressure that can crack the stone or even shatter it. After any wet cleaning, air-dry the stone for at least 24 hours. For extra certainty, set the dry-looking stone in a cold oven, bring it up to about 250 F (120 C) for one hour, and let it cool completely to bake out any hidden moisture. Pizza Stone Do’s and Don’ts at a Glance Do Don’t Scrape residue off a fully cooled stone Use soap, detergent, or the dishwasher Let the stone cool down inside the oven Plunge a hot stone into cold water Spot clean with a well-wrung damp cloth Soak or submerge the stone Air-dry for 24 hours after wet cleaning Heat a stone that may hold moisture Embrace the dark stains of seasoning Scrub with abrasive pads or harsh chemicals Frequently Asked Questions Is a stained pizza stone safe to cook on? Yes. Dark splotches are seasoning, not dirt, and they do not affect performance. What matters is that the surface is smooth and free of food debris after each use. The CDC’s food safety guidance puts keeping kitchen tools and surfaces clean first, which is exactly what scraping the stone after baking accomplishes. Can I wash a pizza stone with dish soap if it smells? No. Soap will be absorbed into the pores and ruin future pizzas. For odors, bake the stone empty at a high temperature in a cold oven, or use the

How to Make Your Stained Pizza Stone Look and Cook Like New Read More »

cooper pan

How to Clean Copper Pans and Remove Tarnish for a Brilliant Shine

Copper pans is the jewel of the kitchen, prized by professional chefs and passionate home cooks alike for its exceptional performance and stunning, undeniable beauty. Its ability to conduct heat with unparalleled speed and precision makes it a responsive and intuitive tool, allowing for nuanced control that is simply unattainable with other materials. Beyond its remarkable function, a set of gleaming copper pans hanging from a pot rack is a statement piece, an aesthetic centerpiece that lends a warm, fiery glow to any kitchen. Yet, this beauty and performance come with a responsibility. Copper is a reactive metal, and its brilliant, rose-gold luster is susceptible to the natural process of oxidation, which results in a dull, sometimes greenish-brown film known as tarnish. Cleaning copper is therefore not just a matter of hygiene, but a rewarding ritual of restoration, a process of bringing a magnificent tool back to its original, brilliant glory. Copper Pans A crucial aspect to understand before beginning any cleaning process is that a copper pan is often two distinct entities that require separate care. The stunning exterior is, of course, the signature copper. The interior cooking surface, however, is almost always lined with a non-reactive metal, most commonly stainless steel or, in more traditional and vintage pans, tin. This lining is essential because copper itself can react with acidic foods like tomatoes or vinegar, potentially leaching into your meal and affecting its taste. Therefore, you must approach the cleaning as two separate jobs: one for the durable interior and another for the delicate, reactive exterior. 1.Interior Cooking Surface Let us first address the interior cooking surface. If your pan is lined with stainless steel, which is the most common and durable option in modern copper cookware, the cleaning process is straightforward and robust. For daily washing after cooking, simple dish soap and warm water applied with a non-abrasive sponge or cloth are all that is needed. If you have stubborn, burnt-on food particles, resist the urge to attack them with steel wool. Instead, fill the pan with an inch of water, add a single drop of dish soap, and gently heat it on the stove for a few minutes. This will soften and loosen the residue, allowing it to be scrubbed away with minimal effort. Stainless steel can also develop a rainbow-like, iridescent discoloration known as heat tint. While harmless, it can be unsightly. To remove it, a paste made from a powdered cleanser like Bar Keepers Friend and a little water is remarkably effective. Apply the paste, scrub gently with a soft sponge, and rinse thoroughly to restore the steel’s brilliant silver shine. If your pan has a tin lining, much greater care must be taken. Tin is a very soft metal and can be easily scratched, which will compromise the surface. For tin-lined pans, only use soft cloths, warm water, and mild soap. Never use abrasive cleaners or scouring pads, and avoid overly aggressive scrubbing. 2.Copper Exterior With the interior handled, the focus shifts to the main event: restoring the copper exterior. This is fundamentally a chemical process, one that requires a mild acid to react with and dissolve the copper oxide that forms the tarnish. This chemical action is often combined with a very gentle abrasive to help lift the dissolved tarnish away from the surface. Fortunately, some of the most effective and safest cleaners for this task can be created from simple, inexpensive ingredients found right in your kitchen. The most classic and widely used method involves the powerful combination of lemon and salt. The citric acid in the lemon is the chemical powerhouse that breaks down the tarnish, while the fine crystals of salt act as a gentle but effective scrubbing agent. The application is beautifully simple. Slice a fresh lemon in half and dip the cut, fleshy side into a small bowl of kosher or table salt, ensuring it is well-coated. Then, simply take this salted lemon half and begin scrubbing the exterior of the copper pan in a firm, circular motion. You will see the tarnish begin to disappear almost instantly, a satisfying transformation that reveals the bright, clean copper underneath. For more control or for larger pans, you can squeeze the juice of a lemon into a bowl, mix it with a few tablespoons of salt to form a paste, and apply this paste with a soft cloth. Continue scrubbing until the entire surface is clean, then rinse the pan thoroughly with warm water. The final step, which is absolutely critical for a perfect, lasting finish, is to dry the pan immediately and completely with a soft, clean cloth, like a microfiber towel. Any water droplets left to air dry will create new spots and begin the tarnishing process anew, undoing all of your hard work. 3.Ketchup Another surprisingly effective and readily available acidic cleaner is ketchup. While it may seem like an unlikely candidate, ketchup contains both vinegar (acetic acid) and tomato concentrate (which also has a degree of acidity), providing the mild chemical action needed to break down light tarnish. This method is best for maintenance cleaning or for pans that are only slightly dulled rather than heavily oxidized. Simply smear a thin layer of ketchup all over the copper surface, ensuring complete coverage. Let it sit for ten to thirty minutes, allowing the acids time to work. Then, simply wipe it off with a soft cloth and rinse well with warm water. The tarnish should be gone, and the pan will be noticeably brighter and warmer in tone. 4.Vinegar, Salt and Flour For more heavy-duty, set-in tarnish that has built up over time, a more potent paste made from white vinegar, salt, and flour is an excellent solution. The flour in this mixture plays a crucial role; it acts as a thickener, creating a paste that allows the acidic vinegar and abrasive salt to cling to the vertical surfaces of the pan for an extended period, giving them more time to work their magic. In

How to Clean Copper Pans and Remove Tarnish for a Brilliant Shine Read More »

beatiful wooden floor

Cleaning Hardwood Floors: Stop Scratching Your Wood Floors with These Essential Cleaning Habits

Cleaning Hardwood Floors: Essential Habits to Stop Scratching Your Wood Floors Hardwood floors are a significant investment that adds warmth and value to a home, but the surface you clean every day is rarely the raw wood. Modern floors are protected by a thin, transparent layer of polyurethane finish that acts as a sacrificial shield against the friction of daily life. Once that finish is compromised, the wood underneath degrades rapidly. The good news is that a few consistent habits, dry dusting, careful moisture control, and the right cleaning products, will keep the finish intact for decades. For professional care, Toronto Shine Cleaning is available at (647) 424-0355. The Real Enemy Is Grit, Not Spills The most persistent threat to a polyurethane finish is not the occasional spill but the invisible accumulation of dry grit. Silica, sand, dirt, and pavement dust ride in on shoes, paws, and drafts. When a foot presses a grain of sand across the floor, it carves a microscopic trench in the finish. Thousands of these micro-abrasions scatter light over time, turning a glossy floor dull and cloudy, especially in high-traffic areas. Remove Grit Daily With the Right Tools Sweeping with a traditional bristle broom is inefficient: stiff bristles flick fine dust into the air so it settles right back down. A vacuum is better, but only with a hard-floor brush attachment and the rotating beater bar switched off, since a spinning beater bar beats grit into the finish. A wide, dry microfiber dust mop worked in a continuous figure-eight pattern is another excellent choice; its fibers trap fine particles with static electricity and lift them safely away. Use Less Water Than You Think Wood is hygroscopic: its cells naturally draw in moisture. The polyurethane finish protects the top face of each plank, but the seams between boards, deep scratches, and unfinished edges remain vulnerable. A traditional saturated string mop is a disaster on hardwood. Excess water seeps into the joints, the wood fibers swell, and the boards buckle upward into a permanent ripple called cupping. Trapped moisture can also break the bond between finish and wood, causing peeling and a milky white haze. The correct tool is a flat microfiber mop system. Microfiber’s split fibers create a huge surface area that traps dirt and absorbs liquid efficiently, so the pad needs only a fraction of the water of a cotton mop. Dampen the pad and wring it until it is practically dry before it touches the floor, and mist the cleaning solution onto a small section of about four square feet rather than pouring it. A simple test: the moisture left behind should evaporate within about sixty seconds. If the floor stays visibly wet, you used too much liquid. Skip Vinegar and Oil Soaps: Use pH-Neutral Cleaners One of the most damaging myths in floor care is the vinegar-and-water mixture. Vinegar is a solution of acetic acid, and repeated exposure chemically degrades polyurethane, stripping its sheen and its ability to repel water and stains. Traditional oil-based soaps, liquid waxes, and acrylic polishes are just as harmful on modern sealed floors: they cannot penetrate the finish, so they cure on top into a sticky, opaque film that traps every particle of dust and dirt. Removing that buildup requires harsh chemical strippers. The only acceptable cleaner for a modern hardwood floor is a pH-neutral formula engineered for polyurethane finishes. These products use mild surfactants that lift dirt and grease without leaving residue or altering the coating. Remember that mopping only removes surface soil: if a floor has lost its shine, no liquid can replace worn-away polyurethane. The real remedy for a dull floor is mechanical refinishing. Protect the Finish Beyond Cleaning Preserving hardwood takes a whole-home strategy. Indoor humidity is one piece: winter heating dries the air and shrinks wood, opening gaps between boards, while humid summer air makes it swell. Keeping relative humidity between 35 and 55 percent year-round with humidifiers and dehumidifiers minimizes that movement. Health Canada also links excess moisture to mould and dust mites and recommends controlling humidity for healthier indoor air. Pets, furniture, and sunlight need attention too: Fit every furniture leg with felt pads and replace them when they compress or pick up grit. Use soft polyurethane wheels or a protective mat under rolling office chairs. Trim pet claws regularly and clean up urine accidents immediately, since the acid can burn the finish and blacken the wood. Place scraping mats outside and absorbent mats inside every exterior door, and take shoes off at the threshold. Close blinds during peak sunlight to slow fading and discoloration from UV rays. Know When the Finish Is Failing Even with perfect care, a polyurethane finish wears out after roughly seven to ten years in a typical household. The clearest warning sign is a change in how water behaves: if droplets no longer bead up and instead soak into the wood and darken it, the protective seal is gone. Catching this early allows a screening and recoating, where only the top layer is lightly abraded and a fresh coat is applied, avoiding the cost and disruption of a full sand-down. Regular, correct cleaning is what delays that day as long as possible. The CDC notes that mould grows on wood wherever moisture collects, another reason to keep spills, humidity, and standing water away from your floors. Hardwood Cleaning Quick Reference Task Right Tool Avoid Daily dusting Dry microfiber dust mop or vacuum with hard-floor brush Bristle brooms and spinning beater bars Weekly cleaning Flat microfiber mop, wrung nearly dry Saturated string mops and steam mops Cleaning product pH-neutral polyurethane-safe cleaner Vinegar, oil soaps, waxes, acrylic polish Moisture control Humidifier or dehumidifier to hold 35-55 percent humidity Leaks, flooding, and standing water Furniture protection Felt pads and soft casters Bare wood or hard plastic feet Frequently Asked Questions Can I use vinegar and water on hardwood floors? No. Vinegar’s acidity gradually degrades polyurethane finish, leaving floors hazy and less water-resistant. Use a pH-neutral cleaner made for

Cleaning Hardwood Floors: Stop Scratching Your Wood Floors with These Essential Cleaning Habits Read More »