Hey there, fellow clean-freaks! Today, we’re tackling a task that might make some of you cringe just thinking about it – Clean Your Oven Quickly. But fear not! I’ve got a step-by-step guide that’ll make this daunting task quicker and more efficient. Let’s turn that grime into shine!
Step 1: Gather Your Supplies
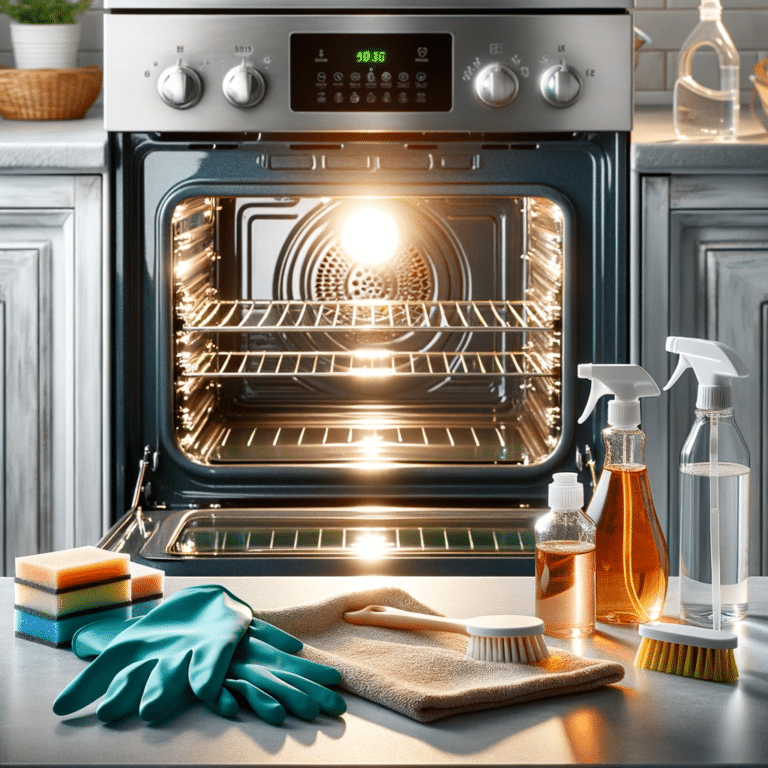
First things first, let’s talk tools and supplies. You’ll need:
- Baking soda
- White vinegar
- A spray bottle
- A damp dishcloth
- A plastic or silicone spatula
- A pair of rubber gloves (trust me, you’ll want these)
Step 2: Empty the Oven
- Access to Every Nook and Cranny: When your oven is chock-full of racks, pizza stones, and other accessories, it’s like trying to clean a room full of furniture without moving anything – nearly impossible! Clearing everything out gives you unrestricted access to all those hard-to-reach areas, ensuring a more thorough clean.
- Individual Attention to Each Item: Each item in your oven has its own cleaning needs. Oven racks might require soaking and scrubbing, while a pizza stone might need a gentler approach. Cleaning them separately ensures they get the care they need without damaging them.
- Safety and Ease of Cleaning: Let’s face it, oven racks can be heavy and awkward. Removing them makes it safer and easier to clean the oven’s interior. You don’t want to be twisting and turning in odd angles to reach around them, do you?
- Spot Potential Issues: With everything out of the oven, you can inspect the interior for any maintenance issues that might need addressing, like a faulty heating element or wear and tear.
How to Do It
- Oven Racks: Gently slide them out and set them aside. If they’re grimy, consider soaking them in soapy water while you clean the oven.
- Pizza Stones or Baking Sheets: Carefully remove these. Remember, pizza stones are porous and require special cleaning methods, like brushing off crumbs and baking on a high heat to sanitize.
- Thermometers and Other Gadgets: Take these out too. They’re delicate and could be damaged by cleaning agents or scrubbing.
- Check for Loose Debris: Before you start cleaning, do a quick sweep for any loose crumbs or food particles. These can be wiped out with a dry cloth or a handheld vacuum.
Step 3: Make Your Cleaning Paste
The heart of this cleaning method lies in baking soda, a humble kitchen staple that doubles as a powerful cleaning agent. Baking soda, or sodium bicarbonate, is mildly abrasive, which makes it perfect for scrubbing off tough stains without scratching surfaces. Plus, it’s a natural deodorizer, so it helps to eliminate any unpleasant smells.
When you mix baking soda with water, you create a paste. This paste is the perfect consistency for cleaning – it’s thick enough to cling to vertical surfaces (like the walls of your oven) and gritty enough to scrub away grime. The beauty of making a paste is that it stays where you put it, targeting the dirt directly and giving it a chance to break down the baked-on spills and splatters.
Crafting the Perfect Paste
Creating this paste is more art than science. Start with half a cup of baking soda and add water gradually. You’re aiming for a spreadable consistency, similar to frosting. Too runny, and it won’t stick to the oven walls; too thick, and it won’t spread easily or penetrate the grime.
Adjust the ratio as you mix. If it’s too thick, add a bit more water. If it’s too runny, sprinkle in a bit more baking soda. You’ll know you’ve got it right when it spreads easily but doesn’t drip.
Why Baking Soda and Not Something Else?
You might wonder, “Why not just use a commercial oven cleaner?” Well, those products often contain harsh chemicals that can be abrasive, toxic, and leave a strong chemical odor. Baking soda, on the other hand, is non-toxic, inexpensive, and widely available. It’s a safer choice, especially for households with pets, children, or anyone sensitive to harsh chemicals.
Plus, there’s a certain satisfaction in using a natural, DIY solution – it’s kinder to the environment and gentle on your wallet!
Step 4: Coat the Oven
When you’re ready to coat the oven, first slip on those rubber gloves. They aren’t just for keeping your hands clean; they also protect your skin from the grime and grease you’re about to tackle.
Now, take the baking soda paste you’ve prepared. Start spreading it around the interior surfaces of your oven. You’ll want to cover every nook and cranny, but be careful to avoid the heating elements. Why? Well, baking soda can have a corrosive effect on these elements, potentially causing damage. Plus, it’s just unnecessary to put paste there as these areas don’t usually get dirty.
As you apply the paste, you’ll notice something interesting – it might start turning brown. Don’t worry, this is a good sign! It means the baking soda is reacting with the dirt and grease. This discoloration is the baking soda lifting all that baked-on gunk off the surfaces. It’s sort of like a science experiment happening right in your kitchen. The paste adheres to the grime, and as it sits, it breaks down the tough, burnt-on residues, making them much easier to wipe away later.
This coating step is crucial because it’s where the majority of the cleaning action happens. The abrasive nature of the baking soda works against the grime, while its alkaline properties help break down organic substances like grease and food particles. This is why baking soda is such a champion in cleaning – it tackles various types of dirt and stains all at once.
Step 5: Let It Sit
When you’ve finished spreading the paste, it’s time to step back and let patience play its part. The recommendation to let the paste sit for at least 12 hours, or overnight, isn’t arbitrary. This duration is essential for the baking soda to effectively break down and lift the grime from your oven’s surfaces.
So, why the long wait? Baking soda is an alkaline substance, and when it comes into contact with the acidic components of the food residues and grease in your oven, it starts a chemical reaction. This reaction is what helps to loosen and soften these hard-to-remove substances. However, this process isn’t instant. It takes time for the baking soda to penetrate and break down the layers of baked-on food and grease.
Leaving the paste on overnight maximizes its cleaning potential. While you’re sleeping, the baking soda is working overtime, slowly but surely eating away at the stubborn stains and spills. The longer the paste sits, the more time it has to work into the grime, making your cleaning job much easier when it comes time to wipe it all away.
Another advantage of this approach is that it’s low-effort. Once you’ve applied the paste, your work is essentially done until it’s time to clean it up. There’s no need for vigorous scrubbing or constant attention. It’s a passive but highly effective cleaning method.
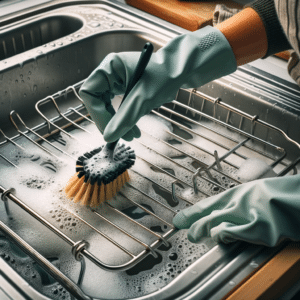
Step 6: Clean the Oven Racks
Oven racks tend to accumulate a lot of grease and burnt-on food over time, and they can be one of the trickier parts of the oven to clean due to their size and shape. The process of soaking them in hot, soapy water is a tried-and-true method for loosening up all that stubborn grime. The heat of the water helps to melt and soften the grease, while the soap breaks it down. This soaking period is key because it does most of the heavy lifting in the cleaning process. The longer you soak the racks, the easier it will be to scrub off the dirt.
After a couple of hours of soaking, the grime on the racks should be softened enough to scrub away. This is where a stiff brush comes in handy. It provides the necessary abrasion to remove the remaining grease and burnt-on food without damaging the racks. It’s important to use a brush that’s tough enough to remove the grime but not so harsh that it scratches or damages the metal.
In cases where the grime is particularly tough, and soaking plus scrubbing doesn’t quite do the job, it’s okay to turn to a commercial oven cleaner. These cleaners are formulated specifically for handling the kind of stubborn, baked-on food and grease you find on oven racks. However, it’s important to follow the instructions on the cleaner carefully, as these products can be quite strong and sometimes corrosive. Always use them in a well-ventilated area and wear gloves to protect your hands.
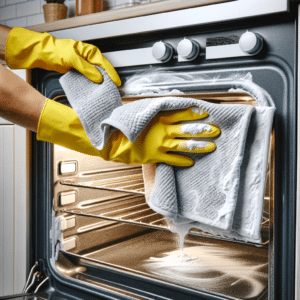
Step 7: Wipe It Down
The first part of this step involves using a damp cloth to wipe out the dried baking soda paste. The dampness of the cloth is key here. It helps in rehydrating the dried paste, making it easier to wipe away. As you start wiping, you’ll likely notice the dirt and grease coming off with the paste. This is because the baking soda, during its long interaction with the grime, has broken it down to a point where it’s no longer stubbornly clinging to the surfaces of your oven.
Despite the effectiveness of the baking soda, there might still be some stubborn spots. These are areas where the grime was thicker or perhaps more baked-on. This is where the spatula comes into play. A plastic or silicone spatula is ideal for this job. It’s firm enough to scrape off the tougher bits of grime, yet gentle enough not to scratch the oven’s surfaces. Using a spatula helps ensure that you can effectively remove all of the baking soda paste and the loosened dirt without leaving any residue.
The reason for using a spatula instead of, say, a metal scouring pad or knife, is to protect the interior of your oven. The surfaces inside your oven, whether they’re coated with enamel or another type of finish, can be prone to scratching. Scratches not only affect the appearance of your oven but can also become new havens for grease and grime to accumulate in the future, making your next cleaning session even harder.
In this step, patience and gentle persistence are your allies. You might need to rinse and wring out your cloth several times to ensure you’re not just spreading the paste around. The goal is to remove as much of the paste as possible, along with the grime it has adhered to.
Step 8: Vinegar Spray
Once you’ve wiped away as much of the baking soda paste as possible, there’s a good chance some residue will remain. This is where white vinegar, housed in a spray bottle, becomes your next best friend. Vinegar, an acidic solution, reacts with the leftover baking soda, which is alkaline. When these two meet, they create a fizzing reaction. This isn’t just fun to watch; it’s actually a crucial part of the cleaning process.
Spraying vinegar over baking soda residue serves a dual purpose. First, the fizzing action helps to break down any remaining baking soda. This makes it easier to wipe away any residue without excessive scrubbing, which is especially useful in an oven, where there are often hard-to-reach spots and corners. Second, this reaction lifts any remaining dirt or grease, bringing it to the surface.
Using vinegar also has the added benefit of neutralizing odors. Baking soda is great for cleaning, but it can leave a slight film or residue. Vinegar helps to remove this, ensuring that your oven doesn’t just look clean, but smells clean too. Additionally, vinegar is a natural disinfectant, so it helps to sanitize the oven as well.
The reason you don’t use vinegar from the start but rather after most of the baking soda has been wiped away is because if mixed too early, vinegar and baking soda neutralize each other. You want the baking soda to do its job first before bringing vinegar into the equation.
Step 9: Final Wipe-down
Using a damp cloth for this final wipe-down is key. The cloth’s dampness helps to pick up the foamy mixture created by the vinegar and baking soda reaction. This mixture, along with any loosened dirt and grease, will adhere to the cloth, making it easier to remove from the oven’s interior. It’s important to ensure the cloth isn’t too wet, as excess water could create more of a mess and make it harder for you to see what you’re cleaning.
As you wipe, you might need to rinse and re-dampen your cloth several times. This is because, with each wipe, the cloth picks up a mixture of vinegar, baking soda, and dirt. Rinsing it out ensures that you’re not just spreading this mixture around the oven but actually removing it. This step might require several passes, especially if your oven was particularly dirty.
The final wipe-down is essentially a rinsing process. You’re removing the last of the cleaning agents (vinegar and baking soda) and any remaining grime. This step is crucial because any leftover baking soda or vinegar in the oven can leave residues or odors, and might even affect the taste of your next meal.
Step 10: Replace Your Oven Racks
The reason why replacing the oven racks is a distinct step in the cleaning process is that it signifies the completion of your task. It’s not just about putting them back; it’s about restoring your oven to its fully functional state. The oven racks are an integral part of the oven, used in almost all of your baking and roasting activities. By cleaning and replacing them, you’re ensuring that your oven is not only clean in appearance but also hygienic and safe for cooking.
When you’re putting the racks back in, you might want to take a moment to consider their placement. If you have adjustable racks, this is a great opportunity to think about your baking needs. Perhaps you’ve found that certain dishes cook better on a higher or lower rack position. Now’s your chance to customize the rack placement to your cooking preferences.
Clean Your Oven Quickly With Toronto Shine cleaning
Cleaning your oven is a task that often seems daunting, but it doesn’t have to be. With simple household items like baking soda and vinegar, coupled with a little bit of your time and effort, you can transform a grimy oven into a gleaming kitchen appliance. This method not only saves you from the harsh chemicals found in many commercial cleaners but also proves to be cost-effective and environmentally friendly. A clean oven isn’t just a matter of pride in your clean kitchen; it’s also about the efficiency and safety of your cooking.
Moreover, regular oven cleaning extends the life of your appliance. When an oven is caked with old food and grease, it has to work harder to reach the desired temperature, putting extra strain on its elements. This can lead to more frequent repairs or even a shorter lifespan for your oven. Also, let’s not forget the impact on taste. A clean oven ensures that flavors aren’t contaminated by remnants of previous meals, allowing your culinary creations to shine through with their intended flavors. So, not only does a clean oven contribute to a healthier cooking environment, but it also enhances your overall cooking experience.
While DIY methods are effective for regular maintenance, there are times when a professional touch is needed, especially for deep cleaning. If your oven requires more thorough attention or if you’re struggling to find the time to clean, Toronto Shine Cleaning offers comprehensive deep-cleaning services. Their experienced professionals can tackle even the toughest oven grime, ensuring your appliance is in pristine condition. So, whether you choose the satisfaction of a DIY job or the convenience of professional services, keeping your oven clean is an essential part of kitchen upkeep.