Allergy

Sodium Percarbonate

6 Genius Ways to Use Sodium Percarbonate in Your Cleaning Routine

The White Powder That Cleans With Oxygen Most people know chlorine bleach and its drawbacks: harsh fumes, damaged fabrics, and whites that yellow over time. Far fewer know its gentler cousin, sodium percarbonate, the ingredient behind products sold as oxygen bleach. This unassuming white powder is a dry, granulated compound of hydrogen peroxide held in a stable form with sodium carbonate, also known as washing soda or soda ash. Dry, it is completely inert. Dissolved in hot water, it splits into hydrogen peroxide, a powerful oxidizer, and sodium carbonate, a water softener that cuts through grease. The peroxide attacks the molecules that give organic stains their color, breaking them into colorless compounds that wash away. The result is a cleaner that is tough on coffee, tea, red wine, grass, and blood, yet far gentler on most fabrics than chlorine bleach. Six Ways to Put Sodium Percarbonate to Work 1. Brighten laundry. Add two to three tablespoons of powder to the machine drum with your regular detergent and wash on a warm or hot cycle. The heat fully activates the compound and releases the maximum amount of oxygen, restoring dingy whites and reviving dull, light-colored fabrics. 2. Pre-soak stubborn stains. Dissolve one to two tablespoons of sodium percarbonate per gallon of the hottest water the fabric can safely tolerate, making sure the powder dissolves completely before adding the garment. Soak for one hour on lighter stains, up to eight hours or overnight for deeply set-in marks. You will often see the water change color as the stain lifts from the fabric, and a soak rescues stained baby clothes, yellowed pillowcases, and grimy dish towels that regular washing cannot save. 3. Restore mugs and teacups. Years of coffee and tea leave a brown film inside ceramic that scrubbing barely touches. Drop one to two teaspoons of powder into the stained vessel, carefully fill it with boiling water, and wait at least 30 minutes while the solution fizzes gently. Pour it out and the interior is sparkling clean with zero scrubbing. 4. Clean cutting boards, bakeware, and thermoses. A thick paste of powder and hot water scrubbed into a stained plastic cutting board lifts berry and tomato marks in about 20 minutes and deodorizes the board at the same time. For burnt-on food on stainless steel or ceramic bakeware, sprinkle the powder liberally over the dish, fill it with boiling water, and soak for several hours; carbonized food softens and lifts away without scraping. A stained thermos or coffee carafe cleans up with the same soak-and-rinse method used for mugs. 5. Whiten grout and shower curtains. Porous grout absorbs soap scum, dirt, and mildew until it looks permanently gray. Make a thick paste of sodium percarbonate and hot water, work it into the grout lines with an old toothbrush, and keep it moist for at least 30 minutes before scrubbing and rinsing; the oxidizing action pulls grime out of the pores. Plastic shower curtains with mildew spots come clean with a long soak in a hot sodium percarbonate solution in the tub or a large basin. 6. Clear mildew, moss, and algae outdoors. Dissolve about one cup of powder in a gallon of hot water, spread it over wooden decks, patios, and outdoor furniture with a deck brush or mop, and keep the surface wet for about 30 minutes before scrubbing and rinsing with a garden hose. It eliminates organic growth and lifts grime without chlorine bleach’s harshness, which can harm wood fibers. For persistent mildew problems indoors and out, Health Canada’s mould guidance explains how to remove growth and prevent it from returning by controlling moisture. Heat and Dwell Time Rule Everything Sodium percarbonate has two non-negotiables. First, heat: hot water is the catalyst that triggers the release of oxygen, and in cold water the reaction is sluggish and nearly useless. Second, time: the cleaning action is not instant. Whether it is 15 minutes for a mug or an overnight soak for a stained shirt, dwell time is what lets oxidation fully break down stain molecules, which is why every method above pairs hot water with patience. Hot water activates the powder; cold water leaves the reaction sluggish. Dwell time does the cleaning, from 15 minutes for mugs to overnight for stains. Rinse cleaned surfaces thoroughly before using them again. Handle It With Care Sodium percarbonate is significantly safer than chlorine bleach, but it is still a powerful oxidizer. Wear gloves for long soaks, because concentrated solutions can irritate skin. Keep it away from delicate protein fibers such as wool and silk, which it can damage, and skip aluminum and finished, painted, or varnished wood. Never mix it with other chemicals, especially chlorine bleach or acids like vinegar; the CDC’s bleach safety guidance warns that combining cleaners can release dangerous vapors. Follow the household chemical safety advice from Health Canada for buying, storing, and disposing of all cleaning products. Job Amount Water Dwell Time Laundry brightener 2-3 tbsp Warm or hot cycle Full cycle Stain pre-soak 1-2 tbsp per gallon Hottest safe for fabric 1 hour to overnight Mugs and teacups 1-2 tsp Boiling 30 minutes Bakeware and thermoses Liberal sprinkle Boiling Several hours Grout and shower curtains Thick paste or full soak Hot 30 minutes or longer Decks and patios 1 cup per gallon Hot 30 minutes Frequently Asked Questions What exactly is sodium percarbonate? It is a granulated compound of sodium carbonate and hydrogen peroxide. In water, especially hot water, it releases hydrogen peroxide, which oxidizes and breaks down the molecules that give organic stains their color. How is it different from chlorine bleach? Chlorine bleach whitens through a harsher reaction, can damage fabric fibers, and is unsafe on many colors. Sodium percarbonate releases oxygen gently and is color-safe on most washable fabrics, making it far more versatile. Can I mix sodium percarbonate with vinegar? Never. Mixing it with acids or chlorine bleach can create unpredictable and potentially hazardous reactions. Use it on its own, dissolved in water, and

6 Genius Ways to Use Sodium Percarbonate in Your Cleaning Routine Read More »

garage

The Garage Swap: How to Organize Your Space for the New Season

Why Your Garage Needs a Seasonal Swap By the end of winter, most garages quietly turn into organized chaos: shovels lean in dusty corners, half-empty salt bags leave a gritty film on the floor, and the snowblower waits for storms that have passed. Spring demands more than a quick tidy; it calls for a strategic reset that turns the garage from a winter service station into a launchpad for the warmer months. The classic swap follows four phases: empty everything out, deep clean the space, sort what you own, and store each season’s gear where it belongs. Phase 1: Empty Out the Garage Completely The most effective, and admittedly most daunting, first step is a total empty-out. On a clear, dry day, pull every tool, bin and bicycle out onto the driveway. It may feel extreme, but it is the only way to get an honest count of what you own and a clear look at the true condition of the garage. An empty room also gives you a blank canvas to re-envision the layout from the ground up. Phase 2: Deep Clean the Salt and Grit Winter leaves behind road salt, gravel and sand that dripped off your vehicle or was tracked in on boots. That grit is not just unsightly; it is abrasive, can slowly damage a concrete floor, and gets tracked inside where it scratches hardwood. Start with a heavy-duty push broom, sweeping from the back wall toward the main garage door; a leaf blower makes short work of that pass. Then hose down the floor with a firm spray, working back to front and pushing the dirty water out onto the driveway, with a large floor squeegee speeding up the job. While the floor dries, knock down cobwebs and wipe down shelves, workbenches and cabinets. If the rest of your home needs the same reset, a professional deep cleaning service can erase winter’s last traces indoors while you work on the garage. Phase 3: Sort Everything Into Keep, Donate or Discard With a clean, empty space behind you, turn to the collection on the driveway and make three zones: keep, donate or sell, and discard. Be practical and honest as you decide: Broken tools beyond repair: get rid of them. Duplicates, such as owning five identical screwdrivers: keep the best two and donate the rest. Old paint cans, expired chemicals and hardware you have not touched in years: dispose of them properly. Anything unused for a full season: sell or donate. Paint, thinners and automotive fluids are hazardous, so check with your local municipality before you toss them. Health Canada explains how to use household chemicals safely, and many communities schedule special collection days for toxic household waste such as paint and car fluids. Cutting down the sheer volume of items is the single most effective way to make the rest of the project manageable. Phase 4: Put Winter Gear Into Deep Storage Winter tools will not be needed for months, so clean them first and relegate them to the least accessible areas. Wipe salt residue off shovels and ice scrapers so it cannot cause corrosion, and do the same for the snowblower to protect its metal and plastic from rust. Finish the season by running the engine until the tank is empty or by adding fuel stabilizer, so the gas cannot gum up the engine over the summer. Store the snowblower in a back corner, and hang long-handled tools on wall hooks or a dedicated rack so they stay off the floor. Finally, pour leftover salt and sand into a heavy-duty bin with an airtight lid so it stays dry, clump-free and ready for the first frost. Phase 5: Organize Spring Gear for Easy Access Now the satisfying part: arrange warm-weather gear by zone and frequency of use. Weekly items such as the lawnmower and primary gardening tools belong in the easiest-to-reach spots, and wall space is your most valuable asset, so get as much as possible off the floor: Spring item Storage method Best location Lawnmower Clear, unobstructed floor spot Close to the garage door Rakes, hoes, shovels Wall-mounted rack Side wall, off the floor Small hand tools Pegboard with hooks Above the workbench Bicycles Vertical hooks, wall rack or ceiling hoist High wall or ceiling Balls and sports gear Open-topped bins and hooks Dedicated recreation zone Patio cushions High, hard-to-reach shelves Out of the way until first use Wall racks keep rakes and hoes visible instead of tangled in a corner, and a pegboard gives trowels and pruners a designated home. Park the lawnmower near the door for easy weekly access, and use this moment for preseason maintenance: sharpen the blade, change the oil and check the spark plug. Bicycles eat floor space fast, so hang them vertically with screw-in hooks, wall-mounted racks or a pulley hoist in high-ceiling garages. Finish with a recreation zone of open bins for balls and hooks for helmets and gloves. Garage Organization FAQ How long does a full garage swap take? Most homeowners finish the four phases in one weekend. The empty-out and deep clean take the better part of a day, while sorting and re-storing usually take another half day once you have made the keep, donate and discard calls. Do I really need to empty the whole garage? Yes, and it is the step people skip most often. Pulling everything onto the driveway forces you to see what you own, makes the floor easy to clean, and lets you plan a layout from a blank canvas. Partial cleanouts tend to rearrange clutter instead of removing it. What should I do with old paint and automotive fluids? Never put them in the regular garbage. Contact your local municipality about hazardous waste drop-off days, or check with nearby retailers that run take-back programs. Store anything you keep in labeled, sealed containers away from heat sources and children. When is the best time to do the garage swap? Aim for a clear, dry weekend in early spring,

The Garage Swap: How to Organize Your Space for the New Season Read More »
Remove Nail Polish from Any Surface

6 Tips How to Remove Nail Polish from Any Surface

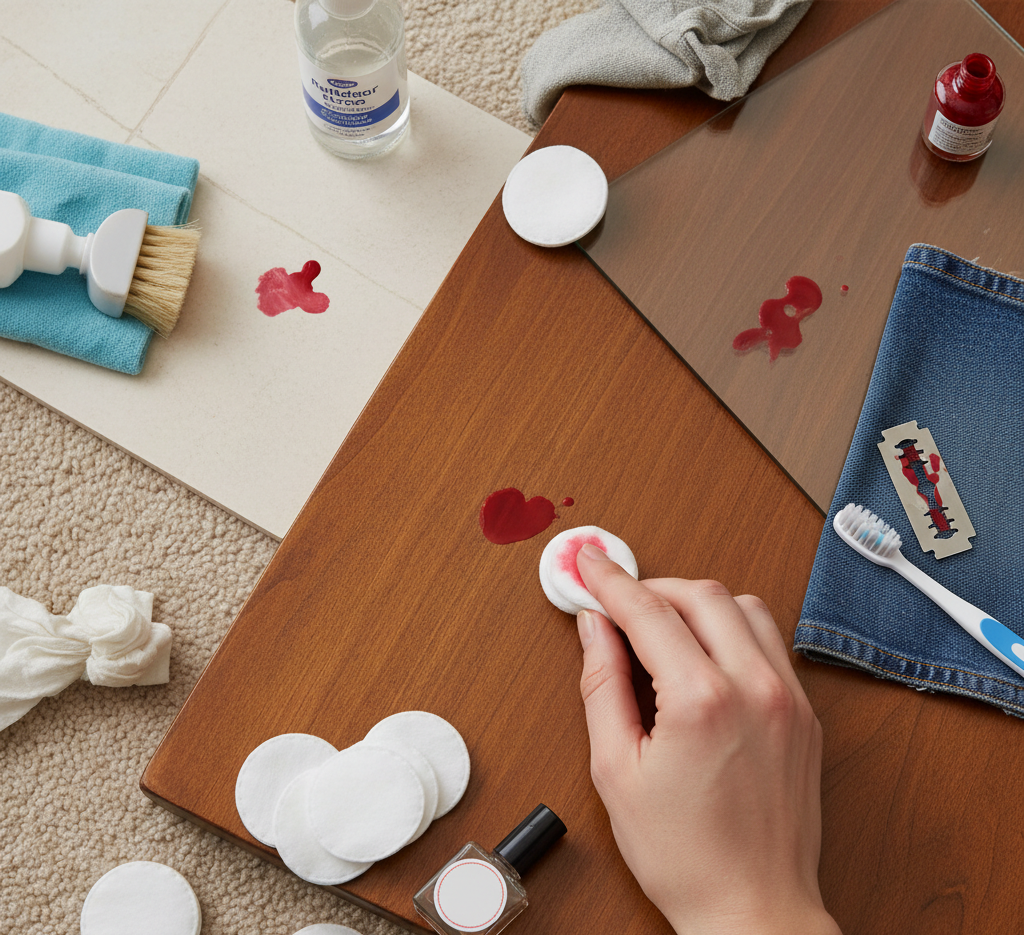
How to Remove Nail Polish Stains Before They Set A spilled bottle of nail polish is a panic moment for good reason: that small bottle holds a durable, intensely pigmented lacquer that becomes a formidable opponent on carpet, wood floors or clothing. Treating the stain is not like handling a food spill; it is a delicate chemical operation. The wrong product or technique can spread the stain, dissolve the surface underneath and turn an accident into permanent damage. These tips cover the safest removal method for every surface in your home. Golden Rules Before You Touch the Stain Whatever the surface, four rules apply before you start: Act fast: wet polish lifts far more easily than dried polish bonded to fibres or finish. Blot, never rub: rubbing smears the spill over a wider area and pushes it deeper into the material. Spot test first: solvents strong enough to dissolve polish can also dissolve dyes and finishes, so test on a hidden hem, closet carpet or the underside of furniture. Ventilate: removers, especially acetone-based ones, give off irritating, flammable fumes, so open a window. Health Canada’s guidance on using household chemicals safely covers storing solvents out of reach, while its page on volatile organic compounds explains why ventilation matters when you work with polish remover. Choose Your Weapon: Acetone or Non-Acetone Nail polish remover comes in two forms, and choosing correctly is half the battle. Acetone dissolves polish fast but destroys many surfaces, including certain plastics, acetate and virtually all wood finishes. Non-acetone removers are gentler and safe for far more materials, though they work more slowly and may struggle with set-in stains. Start with the gentlest product and escalate to acetone only after a successful spot test. The quick-reference table below summarizes the safest approach for each surface: Surface Go-to method Never do this Wood floors and furniture Denatured alcohol or hairspray, dabbing from the edges inward Use acetone or scrape with metal Carpet Non-acetone remover on a white cloth, blotting outside in Pour remover directly on the carpet Upholstery Match the cleaning code tag, blot with solvent on cloth Clean an “X” coded piece yourself Washable clothing Work remover through from the back over paper towels Use acetone on acetate blends Tile, glass and laminate Let polish dry, chip with a plastic scraper, wipe with acetone Scrub the wet spill wider Wood Floors and Furniture: Keep Acetone Far Away On wood, your first instinct must be to keep acetone in the bottle. It strips varnish and polyurethane finishes almost instantly, leaving a permanent cloudy scar that needs professional refinishing. If the polish is wet, gently dab the centre of the spill using a paper towel to soak up the excess without spreading the puddle. For dried polish, skip metal scrapers, which scratch the wood, and reach for a gentler solvent such as denatured alcohol: apply a small amount to a cotton swab and dab from the outside edges inward, and the polish dissolves onto the swab. Aerosol hairspray is a surprising backup: spray lightly, wait 20 to 30 seconds, then wipe with a soft cloth. After any solvent, clean the area with a cloth dampened in mild soap and water, then wipe completely dry. Carpet and Upholstery: Blot, Repeat, Rinse Carpet needs patience. If the spill is wet, scoop up the excess with a spoon or the dull edge of a butter knife, then blot with a dry paper towel. Never pour remover directly on the carpet: it soaks to the backing and can dissolve the latex holding it together. Apply non-acetone remover to a clean white cloth and dab from the outside in, moving to a fresh section of cloth as polish transfers so you never redeposit the stain. If the stain resists, escalate to acetone only after testing a hidden patch for discoloration. Finish by blotting with a cool-water-dampened cloth, cleaning the spot with a few drops of clear, non-bleach dish soap in a cup of water, rinsing again, then weighing down a thick stack of dry paper towels on the spot for several hours to wick moisture from the padding. Upholstery follows the same logic with one extra step: check the furniture’s cleaning code tag first. An “S” means solvent cleaners are safe, “W” or “W/S” means proceed with caution, and “X” means call a professional. For delicate fabrics like silk, suede and velvet, a spill is almost always a job for professional cleaners; the trained team at Toronto Shine Cleaning can treat upholstery safely as part of a deep home cleaning. Clothing, Hard Surfaces and Skin For washable clothing, check the fabric content label first: on acetate or acetate blends, acetone melts the fibres and creates a hole. For other fabrics, lay the stain face down over thick paper towels and dab from the back with a cotton ball soaked in remover, pushing the polish out onto the towels below; shift to a clean section as the stain transfers. Rinse with cool water, launder normally, and confirm every trace is gone before using the dryer, since heat permanently sets any residue. Hard surfaces such as tile, glass and laminate are the easiest case: let the polish dry, chip away the bulk with a plastic scraper or credit card edge, wipe the film with an acetone-soaked cotton ball, then clean with your usual all-purpose cleaner. For polish on skin, remover works best, with rubbing alcohol as a backup. A gentler route for sensitive skin is rubbing the area with olive, coconut or baby oil to loosen the polish, then washing with soap and water. Solvents are extremely drying, so moisturize your hands afterward. Nail Polish Removal FAQ Will nail polish remover ruin wood furniture? Acetone will, almost instantly, by stripping the protective finish and leaving a cloudy scar. Use denatured alcohol or aerosol hairspray on wood instead, dabbing gently, and never scrape with metal tools that can scratch the surface. Can I pour nail polish remover directly on carpet? No. It soaks through to the

6 Tips How to Remove Nail Polish from Any Surface Read More »

hot water for cleaning

A Water Temperature Guide: Never Wash These 7 Things in Hot Water

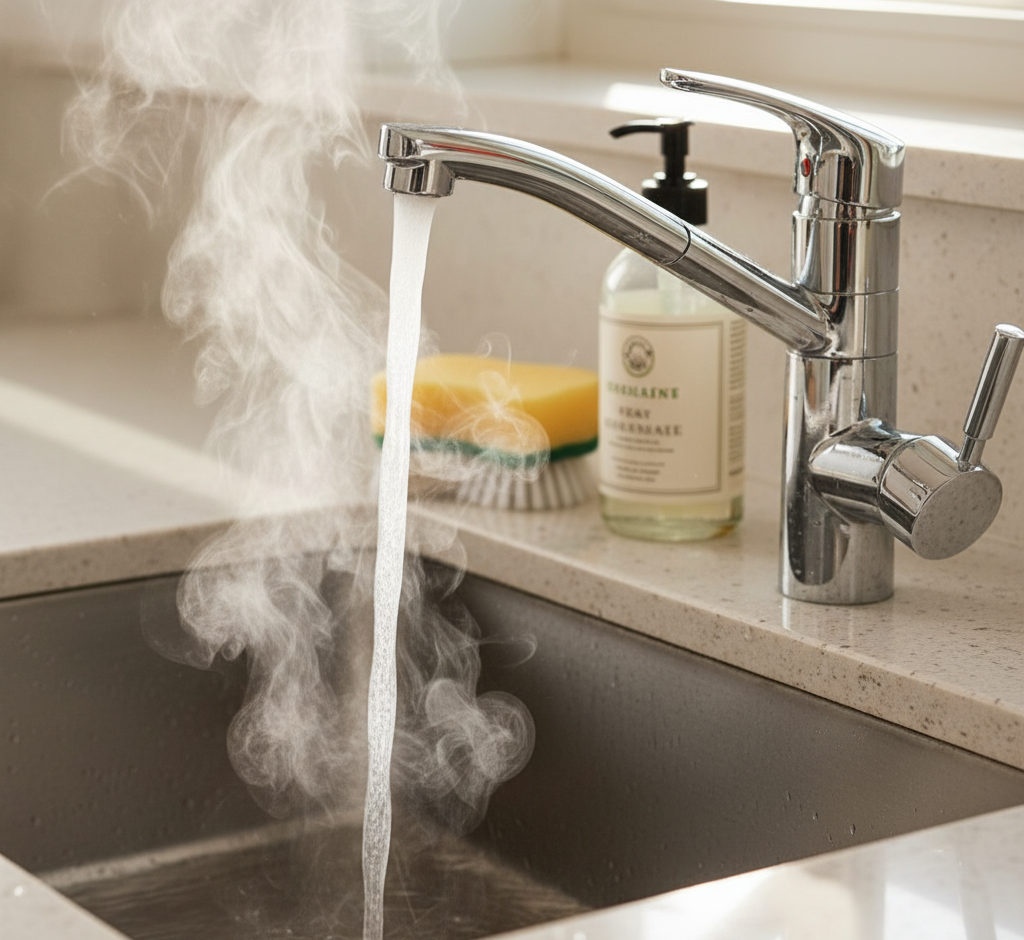
Why Water Temperature Is a Cleaning Superpower and a Hidden Risk Water temperature ranks among the most powerful variables in any cleaning routine, yet in laundry and housecleaning the choice between hot, warm and cold is usually habit rather than science. Hot water dissolves grease, kills bacteria and blasts stubborn grime, but heat is also a destructive force that can lock stains in permanently, shrink delicate fabrics, warp plastics and wreck expensive flooring. The physics is simple: hot water carries more kinetic energy, so its fast-moving molecules break the bonds holding dirt and oil to a surface and speed up detergent chemistry. That same energy destroys materials with weaker structures, which is why knowing what must never touch hot water protects your belongings. When Hot Water Is the Right Call Hot water earns its place in the laundry room for a specific group: heavily soiled whites in durable natural fibres such as cotton and linen. Bed sheets, bath towels, kitchen dishcloths and white undergarments absorb sweat, body oils and food grease, and water at about 60 degrees Celsius (140 degrees Fahrenheit) is what actually melts those heavy organic oils away. That temperature matters for hygiene too. It is the only practical laundry heat that kills dust mites, which thrive in bedding, and neutralizes many common bacteria and viruses, so washing bedding and towels in hot water after an illness helps stop germs spreading through the house. Health Canada’s dust and dust mites guidance explains why regular hot washing of bedding controls them, and the CDC’s advice on when and how to clean and disinfect your home covers laundry hygiene when someone is sick. Never Wash These 7 Things in Hot Water The list of items hot water ruins is long, and most of the damage is irreversible. This table covers the seven most common casualties and what to do instead: Item What hot water does The right approach Wool, cashmere and mohair Opens fibre scales, causing felting and shrinking Cold water, gentle cycle, minimal agitation Silk Dulls the sheen and weakens the threads Hand wash in cold water with a gentle detergent Activewear and anything with spandex Breaks down elastic so garments lose their stretch Cold water, and skip high-heat drying Polyester and nylon brights Opens fibres so dyes escape and colours bleed Cold water keeps dyes locked inside Protein stains (blood, milk, egg, mud) Cooks the proteins, setting them permanently Cold water for pre-treating and washing Hardwood floors Heat and moisture damage the finish and warp boards pH-neutral cleaner, barely damp mop, cool water Laminate floors Softens the glue, making plank edges peel and swell Minimal moisture and cool water only Wool and Silk: Delicate Protein Fibres Wool fibres carry overlapping microscopic scales. In hot water and machine agitation those scales open and interlock, felting the fabric into a dense, stiff shell that nothing can reverse; cashmere and mohair deserve the same cold-water respect. Silk is equally heat-sensitive, so hand wash it in cold water with a specialized gentle detergent to protect its sheen, strength and softness. Stretch Fabrics and Synthetics Elastic fibres such as spandex appear in athletic wear, leggings and sock and underwear waistbands, and heat makes their polymer chains brittle, so garments lose their stretch and wear out early. Polyester and nylon survive heat better but still wrinkle, weaken and build static. More importantly, heat causes colour bleeding by opening the fibres and letting dyes escape into the wash water, so cold water, which keeps fibres closed and colours locked in, is the best strategy for both brights and darks. Protein Stains Need Cold, Oil Stains Love Heat The stain type matters as much as the fabric. Hot water is catastrophic for protein-based stains such as blood, milk, eggs, dairy and mud: heat cooks the proteins and bonds them permanently to the fibres, turning what cold water and soap would lift into a permanent mark. Always pre-treat and wash protein stains in cold water. Oil-based stains are the opposite: grease, butter, cooking oils, heavy lotions and makeup melt in heat so detergent can surround and wash them away, while cold water makes grease solidify and smear. Hot Water Rules Beyond the Laundry Room The same logic carries into the rest of the house. In the kitchen, hot water is a master degreaser for pots, pans and dishes, and dishwashers rely on very hot water to dissolve food residue and sanitize. But a number of kitchen items must never face high heat: Plastics not labelled dishwasher safe, which can warp or leach chemicals like BPA. Fine crystal, which heat can crack. Hand-painted ceramics, whose paint hot water dulls. Wooden cutting boards and utensils, which can swell, warp and split. Floors demand the most caution. Hardwood, solid or engineered, is highly sensitive to moisture and temperature, and hot-water mopping damages the finish while moisture penetrates the boards and makes them swell and buckle. Laminate is even more vulnerable: heat and moisture soften the glue between layers, so plank edges peel. Even luxury vinyl planks can soften under very hot water. For nearly every modern floor type, the safest route is a specialized cleaner and a damp, not wet, mop with cool or lukewarm water. Prefer to leave floor care to the experts? Toronto Shine Cleaning uses the correct products and temperatures on every surface as part of its professional deep cleaning service. Water Temperature FAQ What temperature should I use to sanitize bedding? Water at about 60 degrees Celsius (140 degrees Fahrenheit) is the practical laundry temperature that kills dust mites and neutralizes many common bacteria and viruses. After an illness in the house, wash bedding, towels and pyjamas in the hottest setting the fabric allows. Why does a blood stain set permanently in hot water? Blood is a protein stain, and heat coagulates proteins the way cooking does. The cooked protein binds to the fabric fibres and can never be washed out. Cold water keeps the protein dissolved so detergent can lift it. Can I mop

A Water Temperature Guide: Never Wash These 7 Things in Hot Water Read More »

The Best Mop for Every Floor Type: A Complete Guide

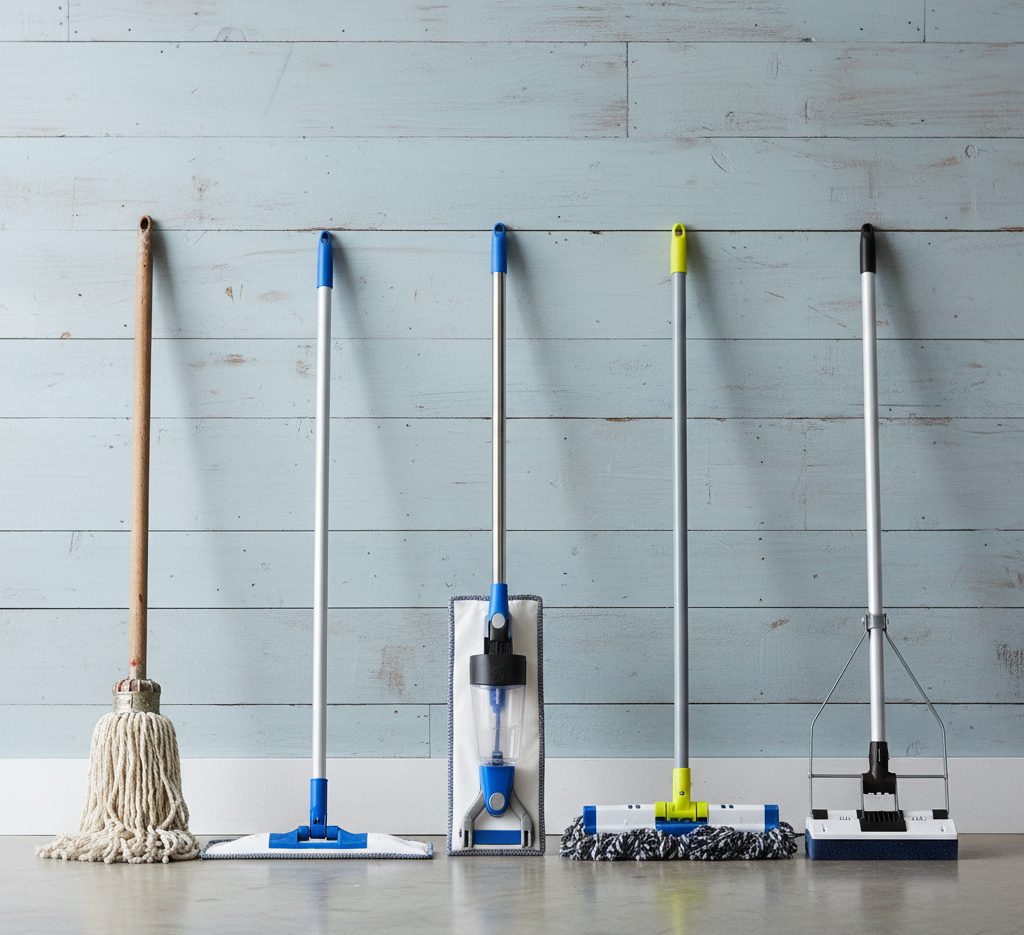
How to Choose the Best Mop for Every Floor Type in Your Home Mopping seems like the simplest job in the house, yet the mop you pick decides whether your floors end up truly clean or quietly damaged. Dragging one string mop across every surface leaves streaks, spreads grime and can even ruin a finish. The smarter approach is to match the mop to the floor so each material gets the treatment it was designed for. This guide breaks down the best mop for ceramic tile, porcelain, vinyl, linoleum, hardwood, laminate and concrete. Spin Mop: The Best Mop for Ceramic, Porcelain, Vinyl and Linoleum Kitchen and bathroom floors take a beating: greasy splatters, sticky spills, soap scum and hard water spots. For these durable, water-resistant surfaces, the spin mop is the standout choice. Its two-part bucket spins the head dry with a foot pedal, so you control exactly how wet it stays. Leave the microfiber head wetter to dissolve a sticky mess, then spin it almost dry for the final pass so excess water never sits in grout lines. The fluffy, absorbent microfiber heads trap grease and dirt well, and the round shape reaches corners and slides around the base of a toilet with ease. For everyday hygiene on these floors, follow the CDC guidance on when and how to clean and disinfect your home. Steam Mop: Deep Sanitation for Sealed Hard Floors Only When a kitchen or bathroom needs more than a wipe-down, a steam mop adds a chemical-free layer of sanitation. High-temperature steam can kill 99.9% of germs and bacteria, including E. coli and Salmonella, and it loosens caked-on grime and textured tile buildup without harsh chemicals. That power comes with a strict warning: use steam only on completely sealed, durable hard floors. Never steam natural stone, unsealed grout, wood or laminate, because the heat and moisture can warp boards, swell seams and permanently damage the finish. Hardwood Floors: Flat Microfiber and Spray Mops Win Wood is a natural, porous material and its biggest enemy is water. Excess moisture swells boards and ruins finishes, so hardwood cleaning means minimal moisture and gentle tools. The flat microfiber mop is the ideal partner. Used dry, its static charge works like a magnet for dust, pet hair and allergens, capturing more of them than a broom. For wet cleaning, damp is the keyword, never wet. Keep two pads on hand: lightly mist one with a pH-neutral wood floor cleaner, spritzing the pad rather than the floor, then mop a small section and follow immediately with the second, completely dry pad to buff away residual moisture. This damp-then-dry method leaves hardwood gleaming. A spray mop is the convenient cousin of the flat mop and another excellent hardwood choice. Its built-in reservoir and handle trigger release a fine, controlled mist ahead of the mop head, so you use the smallest possible amount of liquid. It is perfect for quick spills and routine touch-ups. Laminate and Luxury Vinyl: Keep Water Out of the Seams Laminate and luxury vinyl tile share hardwood’s sensitivity to moisture. Laminate’s weak point is its seams: water that seeps between planks can swell the fiberboard core and peel the edges, causing irreversible damage. Luxury vinyl tolerates water better but shows streaks when too much cleaner is left behind. The flat microfiber mop and the spray mop are again the ideal tools, because both clean with minimal liquid. A clean, slightly damp pad lifts dirt without flooding the joints and delivers the streak-free finish these floors are known for. The Flat Mop Doubles as a Dusting and Baseboard Tool With a telescoping handle, the flat microfiber mop earns its place beyond floors. Used dry, it dusts walls and sweeps cobwebs out of high corners. Used slightly damp, it washes baseboards and door frames while you stand upright, instead of crouching with a rag. String and Sponge Mops: Heavy-Duty Tools for Tough Jobs String and sponge mops still have a role, though a narrow one. A cotton string mop is an absorbent workhorse for huge spills and heavy scrubbing on very durable, non-porous surfaces like concrete or commercial tile. For most homes, however, it holds too much water and is hard to wring dry enough for wood, laminate or delicate grout. The sponge mop’s flat head tends to push dirt around rather than lift it. Floor Type Best Mop Why It Works Ceramic, porcelain, vinyl, linoleum Spin mop; steam mop on sealed floors Moisture control plus scrubbing power for grease and grime Hardwood Flat microfiber or spray mop Near-dry cleaning protects the finish from water damage Laminate and luxury vinyl Flat microfiber or spray mop Minimal moisture keeps seams dry and surfaces streak-free Concrete or commercial tile Cotton string mop High absorbency for big spills and tough scrubbing Build a Small Toolkit Instead of Buying One Universal Mop No single mop does everything well. A spin or steam mop for high-grime zones plus a flat microfiber or spray mop for delicate surfaces covers nearly every challenge in a modern home. Choose floor cleaners that suit each material and follow the label, and when you shop, review Health Canada’s guidance on using household products safely. Keep two microfiber flat mop pads: one damp for cleaning, one dry for buffing. Wash mop heads after each use and replace them when they fray or hold odors. Use a separate mop head for kitchen and bathroom floors to avoid cross-contamination. Reserve the string mop for concrete, garage and other truly tough surfaces. Toronto Shine Cleaning brings this same care to every room, from a deep clean of kitchen and bathroom tile to gentle hardwood maintenance with our regular cleaning service. Check our transparent pricing and our locations page, then call (647) 424-0355 to book your visit. Frequently Asked Questions About Choosing the Right Mop What is the best mop for tile floors? A spin mop with microfiber heads is the best all-around choice for ceramic, porcelain, vinyl and linoleum. It lets you control moisture levels,

The Best Mop for Every Floor Type: A Complete Guide Read More »

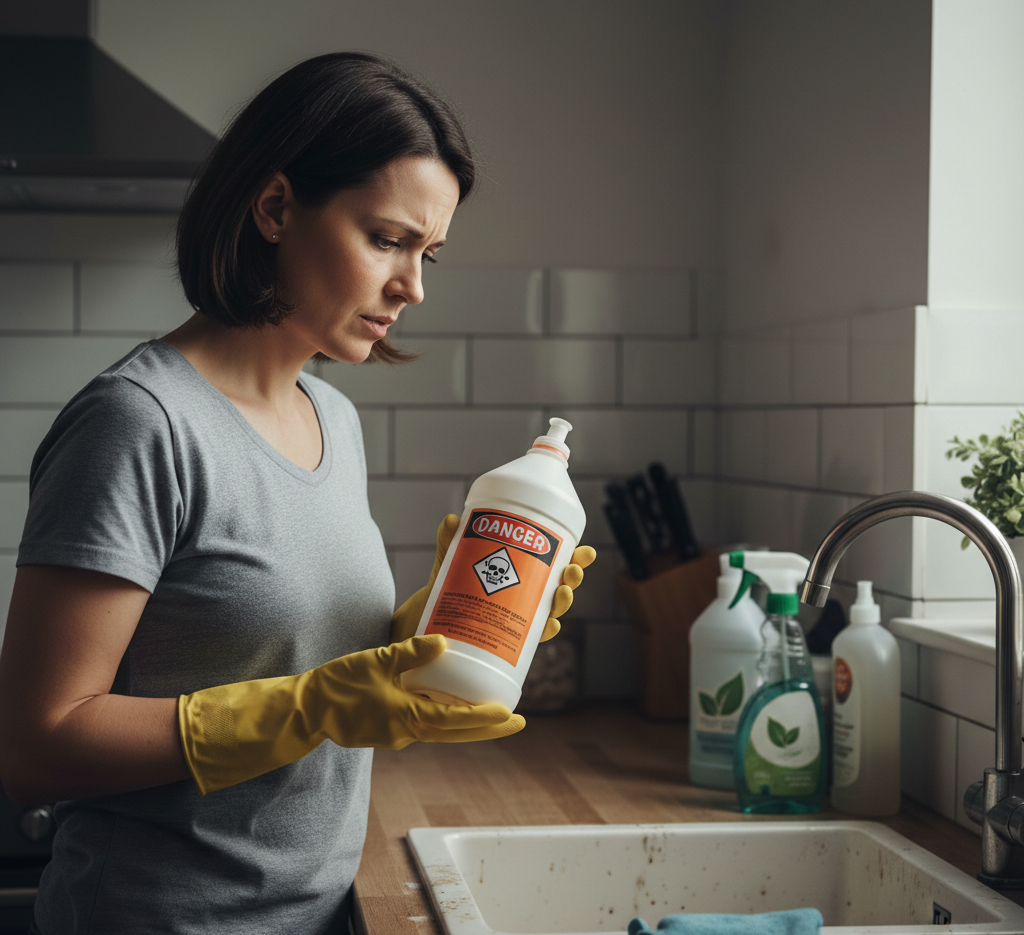
Woman unsure whether to use caustic soda for cleaning.

Caustic Soda 101: The Dangers and Safe Handling of Lye

How does caustic soda work, in the world of cleaning, there is a clear hierarchy of chemical power. At the bottom are the gentle, pH-neutral soaps designed for daily maintenance. Further up the scale are the acids, like vinegar and citric acid, which dissolve mineral deposits. At the very top, reigning supreme as one of the most potent and aggressive substances available to the public, sits sodium hydroxide. More commonly known as caustic soda or lye, this chemical is not a cleaner in the traditional sense. It does not lift dirt; it chemically dismantles it. It is an industrial-strength weapon that has found its way into household products, particularly oven cleaners and drain openers. Its efficacy is undeniable, but so are its dangers. To handle caustic soda is to handle a controlled chemical reaction. Understanding its properties, its limitations, and the absolute necessity of safety protocols is the non-negotiable prerequisite for anyone considering its use. Alkaline Substances To appreciate the power of caustic soda, one must understand its chemistry. It is a highly alkaline substance, sitting at the extreme end of the pH scale. When it comes into contact with organic matter, it initiates a process called saponification. In simple terms, it turns fats and grease into soap. The sodium hydroxide breaks down the triglycerides in the fat, creating glycerol and a water-soluble fatty acid salt (soap). This reaction is exothermic, meaning it generates a significant amount of heat. It is this combination of chemical transformation and thermal energy that makes caustic soda so effective at clearing a drain clogged with hair and grease. The heat melts the solid fats, and the chemical reaction turns the entire mess into a liquid that can be flushed away. The most common household application of caustic soda is in heavy-duty oven cleaners. Over time, the spills and splatters in an oven undergo polymerization. The oils bake onto the enamel surface, turning into a rock-hard, black carbonized layer that is impervious to standard scrubbing. When you spray an oven cleaner containing caustic soda onto this surface, the chemical begins to dissolve this polymer. It breaks down the long-chain molecules of the baked-on grease, softening the carbon into a gummy, brown sludge. After allowing the chemical to dwell for several hours, this sludge can be wiped away, revealing the clean enamel underneath. Without caustic soda, removing this layer would require hours of aggressive scraping with a razor blade. The chemical does the physical work for you. Corrosive However, this immense power comes with an equally immense risk profile. Caustic soda is indiscriminately corrosive. While it targets fats and proteins, it will also attack living tissue with the same ferocity. Skin contact with a concentrated lye solution can cause severe chemical burns within seconds. The chemical not only burns the surface layer but continues to eat through the tissue underneath. Splash-back into the eyes can result in permanent blindness. This is why the safety warnings on these products are not suggestions; they are absolute mandates. Protective gear is not optional. Heavy-duty rubber gloves that extend up the forearm, along with splash-proof goggles, are the minimum requirement for handling any product containing this chemical. Inhalation is another significant danger. Many caustic soda products, particularly drain openers, are sold in a granular or flake form. When these solids are mixed with water, the exothermic reaction can create a cloud of hot, corrosive steam. Inhaling this vapor can cause severe damage to the delicate tissues of the respiratory tract. Furthermore, if the reaction is uncontrolled-such as by pouring water into a container of lye instead of the other way around-the mixture can erupt violently, splashing the caustic solution across the room. All work with caustic soda must be done in a well-ventilated area, with windows open and fans running to disperse the fumes. The reactivity of caustic soda extends beyond biological tissue. It is highly corrosive to certain metals, most notably aluminum. If a lye-based drain cleaner is used in pipes made of aluminum or certain alloys, it will eat through the metal, causing catastrophic leaks. This is why it is crucial to know the composition of your plumbing before using these products. It is generally safe for PVC and stainless steel, but older homes with mixed metal plumbing present a significant risk. The same caution applies to cookware. Never use an oven cleaner containing caustic soda on an aluminum baking pan or a grill grate made of aluminum. It will pit and discolor the metal permanently. Drain Plunger The use of caustic soda as a drain opener also carries a mechanical risk. If the chemical fails to clear the clog, you are left with a pipe filled with a highly toxic, corrosive liquid. At this point, you cannot use a mechanical snake or a plunger, as the back-splash could be life-threatening. You are forced to call a plumber and inform them that the drain is “live” with chemicals, a situation that significantly increases the cost and complexity of the repair. For this reason, many plumbers advocate for enzymatic drain cleaners or mechanical removal as the first line of defense, reserving caustic soda for professional use only. Despite these dangers, the effectiveness of caustic soda for specific, targeted tasks is undeniable when used correctly. For restoring old, cast iron cookware that has been caked with decades of carbon buildup, a lye bath is the gold standard for restorers. This involves creating a diluted solution of caustic soda and water in a plastic bin and submerging the pan for several days. The lye slowly but surely strips everything off the pan-old seasoning, rust, and carbon-down to the bare grey iron, without the physical labor of sanding. This process must be done outdoors with extreme care, but it yields a perfectly clean slate for re-seasoning. The key to safely using caustic soda is neutralization. As a strong base, it is neutralized by a strong acid. After cleaning an oven or a piece of cast iron, the surface must be thoroughly

Caustic Soda 101: The Dangers and Safe Handling of Lye Read More »

Spring Wardrobe

Spring Wardrobe: 5 Simple Steps to a Perfectly Organized Spring Wardrobe

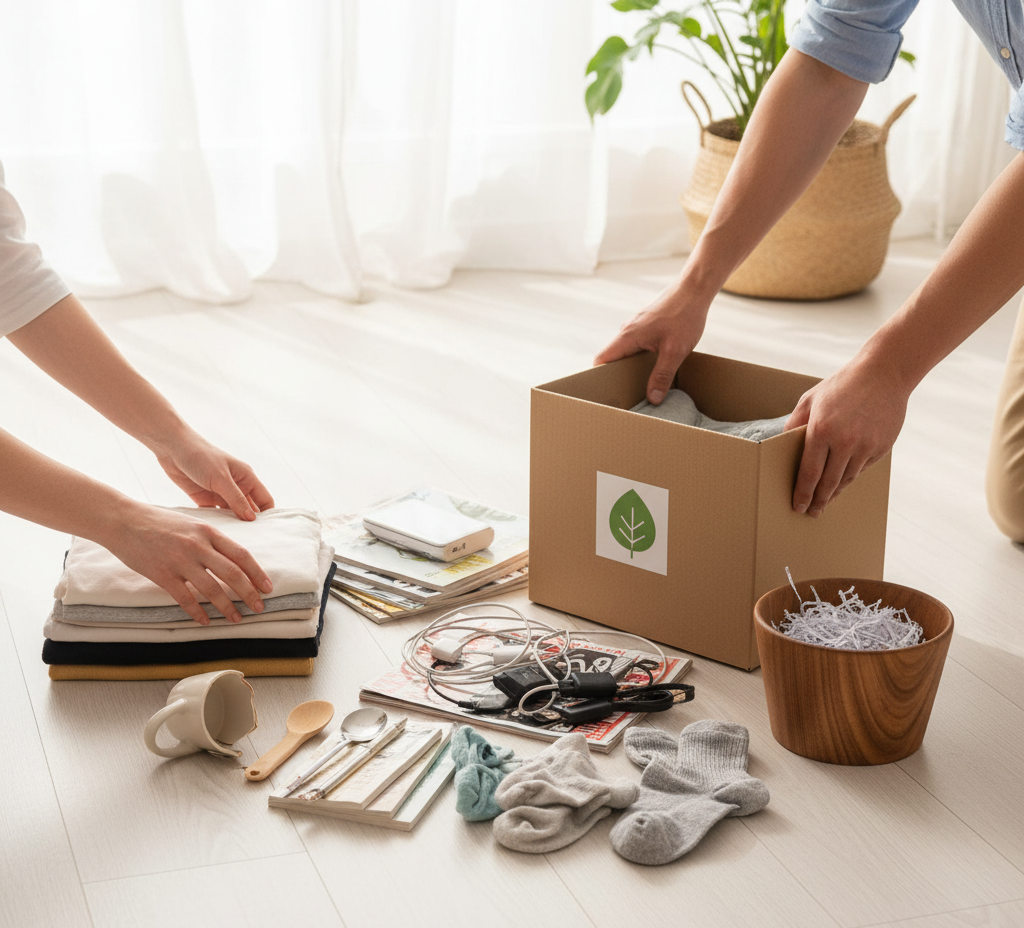
The transition from winter to spring is more than just a change in the calendar or wardrobe; it’s a shift in energy, a collective sigh as the world sheds its heavy layers. This same instinct to lighten and refresh should extend to the most personal of our spaces: the wardrobe. For months, it has served as a dark, crowded barracks for bulky sweaters, heavy coats, and thick fabrics. Now, as the days lengthen and the air warms, it is time to perform the essential ritual of the seasonal wardrobe switch. This is not merely a matter of tidying; it is a strategic reorganization that streamlines your daily routine, protects your clothing, and brings a sense of clarity and ease to the act of getting dressed. Emptying the Wardrobe The first and most crucial step in this transformation is the total empty-out. This is a non-negotiable act that sets the stage for all the work to come. You cannot truly assess or organize what you cannot see. Begin by taking every single item out of your wardrobe and drawers. Every shirt, every pair of trousers, every scarf must be removed and placed onto your bed. This may seem like a daunting and chaotic task, but it is the only way to begin with a truly clean slate and to get an honest, unfiltered look at the sheer volume of what you own. As you empty the wardrobe, take a moment to give the now-vacant space a thorough cleaning. Vacuum out the corners to remove dust bunnies and lint, wipe down every shelf and hanging rod with a damp cloth, and clean any mirrors. Starting with a pristine, empty space is a powerful psychological reset. Clothing Selection With your entire wardrobe laid bare, the most difficult and most liberating phase begins: the edit. This is where you must be practical, honest, and sometimes ruthless. The goal is to create a curated collection of clothes that you actually wear and love, rather than a museum of items from your past. As you pick up each individual piece, ask yourself a series of direct questions. Does this fit me properly right now? Have I worn this in the last year? Do I feel confident and comfortable when I wear it? Is it damaged, stained, or worn beyond repair? Based on your answers, sort every item into one of four distinct piles: keep, store for next season, donate, or discard. The “keep” pile is for spring-appropriate items that you genuinely love and will wear. The “store” pile is for your heavy winter essentials-the wool coats, cashmere sweaters, and flannel shirts that have served you well but have no place in the warmer months. The “donate” pile is for items that are still in good condition but no longer serve you, while the “discard” pile is for anything that is irreparably damaged. Be particularly wary of the “maybe” items. If you find yourself agonizing over a piece, place it in a box and seal it. If you have not felt the need to open that box in six months, you have your answer: it is time to donate it. Before you address the winter items destined for storage, focus on the clothes you are keeping for the current season. This is where the strategic organization begins. The fundamental principle is to group like with like. All of your shirts should be together, all of your trousers together, all of your dresses together. This simple act of categorization immediately creates a sense of order and makes finding specific items infinitely easier. You can then take this a step further by sub-categorizing within these groups. For example, within your shirt category, you can group all the t-shirts together, then the blouses, then the button-down shirts. Once your clothes are categorized, the next layer of organization is to arrange them by color. Working from light to dark within each category creates a visually calming and incredibly functional system. When you are looking for a specific white blouse, you will know exactly where to look instead of hunting through a jumble of different patterns and colors. This visual harmony reduces the mental effort of choosing an outfit and transforms your wardrobe from a source of stress into a space of serene order. Hang up the Clothes The tools you use for organization are as important as the system itself. This is the time to invest in a set of matching, high-quality hangers. A mismatched collection of wire hangers from the dry cleaner, chunky plastic hangers, and old wooden ones creates visual chaos and can damage your clothes. Wire hangers can stretch out the shoulders of garments, while bulky hangers eat up valuable rod space. Opt for slim, velvet-flocked hangers. Their slender profile can nearly double your hanging space, and their non-slip surface ensures that wide-necked blouses and silky fabrics stay put instead of sliding onto the floor. As you begin to reintroduce your spring clothes into the clean wardrobe, be strategic about placement. Your wardrobe has prime real estate-the areas at eye level and within easy reach-and less valuable space, like the high top shelves and the low-to-the-ground areas. Your most frequently worn items, such as your go-to jeans, simple t-shirts, and work blouses, should occupy this prime real estate. Items you wear less often, like formal dresses or special occasion jackets, can be placed in less accessible spots. Not everything should be hung. A general rule of thumb is to hang anything that is delicate, prone to wrinkling, or has a structured shape, such as blouses, dresses, jackets, and trousers. Sturdy items and anything that can stretch out under its own weight should be folded. This includes all of your knitwear, t-shirts, and jeans. For drawers, the most effective folding method is file-folding. Instead of stacking folded items on top of one another, you fold them into neat rectangles and “file” them vertically in the drawer, like papers in a filing cabinet. This allows you to see every

Spring Wardrobe: 5 Simple Steps to a Perfectly Organized Spring Wardrobe Read More »

5 Toxic Cleaning Products You Should Stop Buying Today

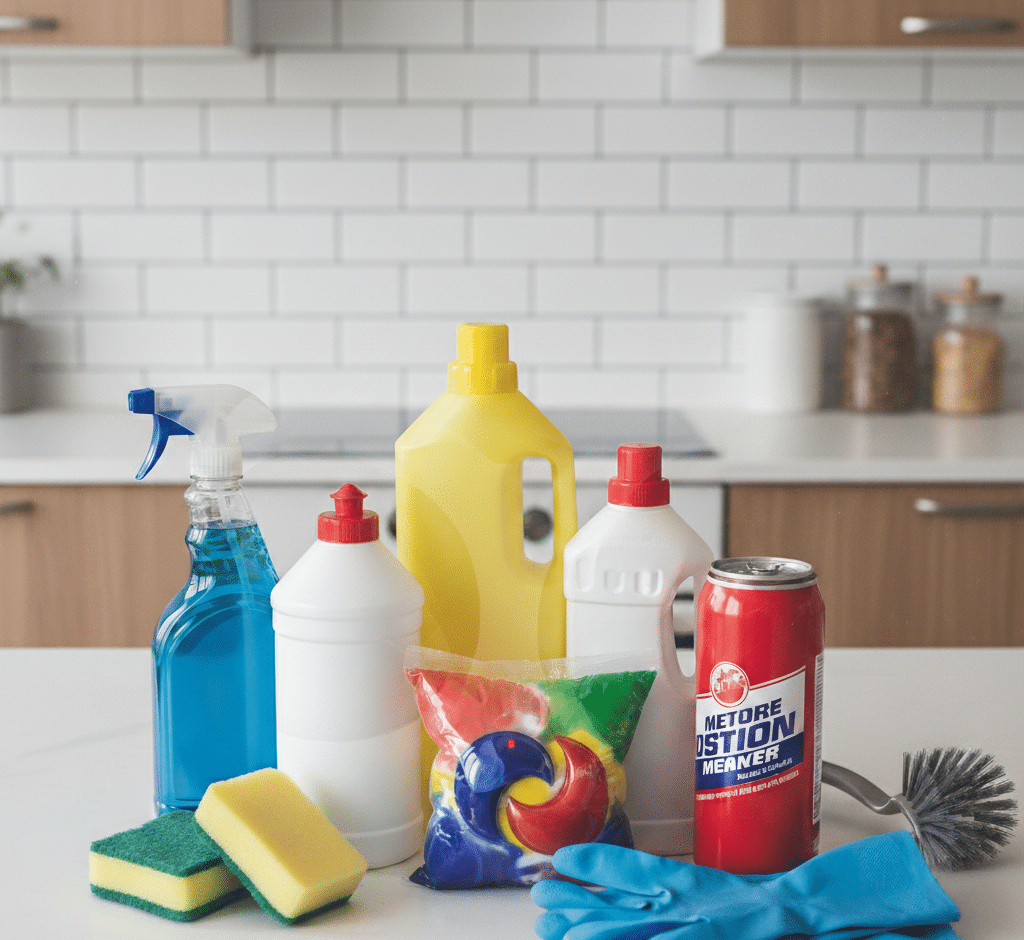
Do you know which products are toxic? In the quest for a clean and healthy home, a paradox often arises. We scrub, spray, and sanitize with the intention of creating a safe environment, yet the very products we use can introduce a host of hazardous chemicals into our living spaces. The brightly colored liquids lining the supermarket aisles often contain aggressive, industrial-strength compounds that, while effective at removing grime, can pose significant risks to our respiratory systems, our skin, and the overall air quality of our homes. Making informed choices about what we bring across our thresholds is not about succumbing to fear, but about embracing a more mindful and effective approach to cleaning, one where true cleanliness is not achieved at the expense of our well-being. Bleach One of the most ubiquitous and misunderstood products in the conventional cleaning arsenal is chlorine bleach. Marketed as the ultimate disinfectant and whitener, its power comes from its highly reactive nature. This reactivity is precisely what makes it so dangerous. The most immediate risk lies in its potential for accidental mixture. When chlorine bleach is combined with ammonia-a common ingredient in many glass and all-purpose cleaners-it creates toxic chloramine gas, which can cause severe respiratory distress. When mixed with an acid, such as a toilet bowl cleaner or even vinegar, it produces chlorine gas, a chemical weapon infamous for its devastating effects on the lungs. Even when used on its own in a poorly ventilated area, the fumes from bleach can be a powerful irritant to the eyes, throat, and lungs, particularly for individuals with asthma or other respiratory sensitivities. For a safer approach to disinfecting, a solution of white vinegar and water can handle most household germs. For whitening laundry and treating stubborn stains on white surfaces, hydrogen peroxide or oxygen-based bleach powders are excellent alternatives that break down into harmless water and oxygen. Ammonia Ammonia itself, even when not mixed with bleach, is another chemical to handle with extreme caution. It is the active ingredient in many popular window and glass cleaners, prized for its streak-free finish. However, ammonia is a potent respiratory irritant. Its sharp, pungent odor is a clear warning sign from our bodies that we are inhaling something harmful. The fumes can cause coughing and irritation in the throat and lungs, and can be particularly aggravating for people with chronic respiratory conditions. A far safer, cheaper, and equally effective alternative for cleaning glass and mirrors is a simple solution of equal parts white vinegar and water in a spray bottle. The mild acidity of the vinegar cuts through smudges and films effortlessly, and wiping with a clean microfiber cloth ensures a perfectly clear, streak-free shine without any toxic fumes. Caustic Soda Perhaps the most aggressive and overtly dangerous products found under our sinks are conventional drain cleaners. These products are designed to solve a stubborn problem by dissolving dense clogs of hair and grease deep within our plumbing. To achieve this, they rely on extremely caustic chemicals like sodium hydroxide, also known as lye. These substances are highly corrosive, designed to burn through organic matter. While they may burn through the clog, they can also cause severe chemical burns to the skin and eyes upon contact and can permanently damage older plumbing pipes. The risk is magnified when the cleaner fails to dislodge the clog, leaving a pipe full of highly toxic, standing liquid that is incredibly dangerous to deal with. A much safer approach to drain maintenance is preventative. A weekly flush with a kettle of boiling water can dissolve grease buildup before it becomes a problem. For minor clogs and odors, the classic combination of baking soda and vinegar, with its fizzing mechanical action, can loosen debris. For a true blockage, the most effective and safest solution is not chemical, but physical: a simple plastic drain snake can physically pull out the clog without any risk to your pipes or your health. Similarly caustic ingredients are found in most aerosol oven cleaners. These products are formulated to cut through thick layers of baked-on, carbonized grease, and they often contain the same lye found in drain cleaners. The aerosol spray format is particularly hazardous as it atomizes these caustic chemicals, making them easy to inhale. The fumes can cause immediate and severe respiratory irritation. The safer alternative requires a bit more time but is completely non-toxic and remarkably effective. Create a thick paste of baking soda and water and spread it liberally all over the cool interior surfaces of your oven, avoiding the heating elements. Let this paste sit overnight. The baking soda will work to soften and break down the carbonized grease. The next day, using a plastic scraper and a damp cloth, you can wipe and scrub away the paste, and the grime will come with it, all without a single toxic fume. Synthetic air Fresheners One of the most subtle but pervasive categories of harmful products is synthetic air fresheners. This includes aerosol sprays, plug-in diffusers, and scented candles made with fragrance oils. The goal of these products is not to clean, but to mask odors by releasing a continuous stream of chemicals into the air. The term “fragrance” on an ingredient list is a legal loophole that can hide a proprietary blend of hundreds of different chemicals, including phthalates and a host of volatile organic compounds (VOCs). Phthalates are endocrine disruptors that can interfere with the body’s hormonal systems, while VOCs can contribute to a wide range of health issues, from headaches and dizziness to long-term respiratory problems. True freshness comes not from masking odors, but from eliminating them. Open your windows to allow for natural ventilation. Place a small bowl of baking soda or activated charcoal in a room to absorb ambient smells. For a pleasant scent, simmer a pot of water on the stove with natural ingredients like cinnamon sticks, cloves, and citrus peels, or use a diffuser with pure, high-quality essential oils. Triclosan At the end, be wary

5 Toxic Cleaning Products You Should Stop Buying Today Read More »

window track cleaned and sanitized

Window Tracks Cleaning: The Secret to Cleaning Stubborn Dirt from Sliding Window Tracks

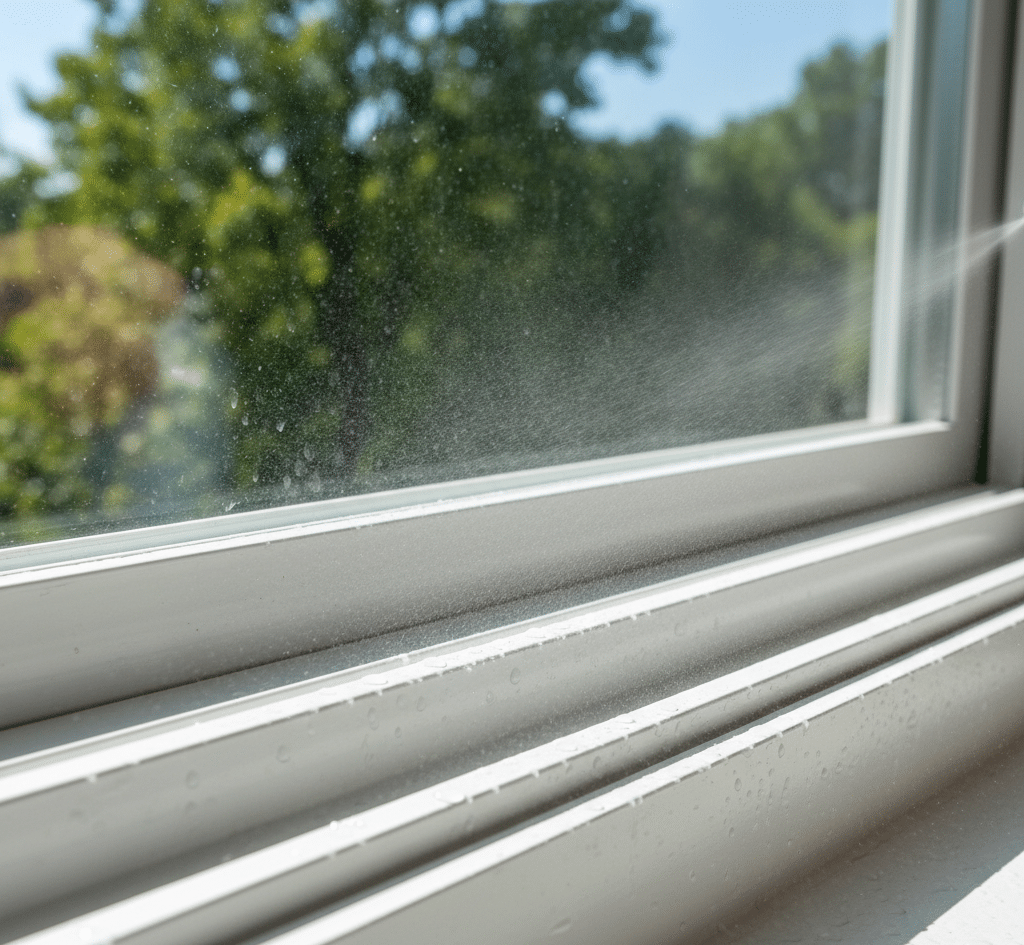
Window Tracks Cleaning: A Step-by-Step Guide to Stubborn Dirt Window tracks do a lot of quiet work: they let heavy glass panels glide, seal out drafts and rain, and lock the weather where it belongs. In return, they get neglected. Tucked at the bottom of the frame, sliding window tracks collect an astonishing blend of dust, pollen, rain-soaked dirt, dead insects and condensation that packs into a thick, stubborn sludge. That buildup is not just ugly: it jams the window, traps allergens and makes a room feel permanently dirty no matter how often you vacuum. Cleaning window tracks is easier than it looks once you follow the right sequence. This guide covers the tools, the dry-cleaning steps and the baking soda and vinegar technique that dissolves even set-in grime. Gather the Right Tools for Window Track Cleaning Vacuum cleaner with a crevice tool and a brush attachment Small stiff-bristled brush or an old toothbrush Spray bottle for precise solution application Baking soda and plain white vinegar Paper towels and clean microfiber cloths Butter knife or flathead screwdriver wrapped in cloth for corners Old towel to lay under the window and catch drips Step 1: Vacuum Out the Loose Debris First Never add liquid to a track full of loose dirt. The moment water hits that dry mix of dust, sand and dead bugs, it becomes a muddy paste that is far harder to remove. Open the window as wide as possible for full access, fit the vacuum with its crevice tool and work methodically along every groove and channel, giving extra attention to the corners where grime piles up deepest. Step 2: Loosen Caked-On Dirt With a Dry Brush Switch to the dry stiff-bristled brush and scrub the whole track vigorously. This agitates compacted, caked-on dirt that suction alone cannot lift, breaking it into fine powder. Vacuum again to pull up everything the brush freed. Finishing this dry phase thoroughly makes the wet cleaning below far more effective. Step 3: Let Baking Soda and Vinegar Fizz Away the Grime With the solids gone, only the sticky film of grime remains, and the classic chemistry of baking soda and vinegar handles it. Sprinkle a generous layer of baking soda over the whole track, filling every channel and corner until a visible white coating forms. Baking soda acts as a gentle abrasive and natural deodorizer. Fill the spray bottle with white vinegar, set it to a direct stream and spray the powder until it hisses and fizzes. That effervescent reaction is actively working, bubbling up and lifting grime off the surface, so leave it for ten to fifteen minutes before the next step. Step 4: Scrub, Dig Out the Corners and Scoop the Slurry Take the toothbrush back and scrub the gritty paste into every part of the track. The vinegar dissolves the grime, the baking soda scours and the brush supplies the muscle, producing a powerful cleaning slurry that lifts even set-in dirt. For the tight corners, wrap the tip of a butter knife or flathead screwdriver in a small piece of microfiber cloth or sturdy paper towel, and use this detail tool to dig out the gunk the brush cannot reach. Then scoop out the dark paste with paper towels, wiping until most of the visible mess is gone. Step 5: Rinse, Dry Completely and Clear the Weep Holes Finish with a clean microfiber cloth dampened with plain warm water and wrung out thoroughly. Wipe the entire track, rinsing the cloth often, to remove leftover dirt and any baking soda or vinegar residue. Then dry every surface completely with a clean, dry microfiber cloth. A bone-dry track resists mold and mildew and picks up far less new dirt, which matters because Health Canada identifies dampness as the main driver of mould growth in the home. Finally, inspect the weep holes, the small slots on the exterior side of the track that let rainwater drain. When they clog, water backs up and can leak into your home. Clear them with a toothpick or a blast of compressed air, then apply a tiny drop of silicone-based lubricant to the track so older windows glide smoothly again. Stage Tool Job Dry removal Vacuum with crevice tool Pull loose dust and debris from channels Compact dirt Stiff brush, then vacuum Break up and lift caked-on buildup Grime film Baking soda plus vinegar Fizz and dissolve sticky residue Tight corners Cloth-wrapped knife or screwdriver Dig out gunk brushes cannot reach Final finish Damp then dry microfiber cloth Rinse residue and dry fully Drainage Toothpick or compressed air Clear weep holes, then lubricate track Why Clean Window Tracks Matter for Your Home Clean tracks are about more than appearances. Sliding windows that glide freely seal better and last longer, and removing the dust, pollen and mold spores that collect in the frame means less of that debris circulates through the room. Household dust is one of the indoor air contaminants Health Canada flags for Canadian homes, so a track that no longer sheds grime with every open and close is a genuine air-quality win. Since mold can cause symptoms such as stuffy noses and wheezing in sensitive people, per the CDC’s mold overview, keeping the frame dry is a health habit, not just a cleaning one. Make Window Tracks Part of Your Cleaning Routine Add this five-step track cleaning to your seasonal routine, and the payoff shows every time you open a window. For homes where the grime has spread far beyond the frames, a professional deep clean restores every surface, from tracks and sills to floors and baseboards. Toronto Shine Cleaning brings that level of detail to deep cleaning visits and regular home cleaning across the city. See our pricing page and service areas, then call (647) 424-0355 to book your clean. Frequently Asked Questions About Cleaning Window Tracks How often should window tracks be cleaned? Include tracks in your seasonal deep cleaning, and clean them more often if you live on a busy

Window Tracks Cleaning: The Secret to Cleaning Stubborn Dirt from Sliding Window Tracks Read More »

Medicine Cabinet: 5 Amazing Organization Tips for Shared Bathrooms and Medicine Cabinets

Medicine Cabinet Organization: 5 Tips for Shared Bathrooms The medicine cabinet is the nerve center of daily hygiene, grooming, and health routines, yet it often becomes a jumble of expired prescriptions, sticky bottles, and half-empty tubes. That chaos is more than an eyesore: it is a daily source of friction and a potential health hazard, especially when you are sick or in a hurry. With a systematic approach, you can turn a cramped cabinet into a streamlined space that works for everyone who shares it. Need a hand with the rest of the bathroom? Toronto Shine Cleaning offers professional deep cleaning for homes across the GTA; call (647) 424-0355. Tip 1: Empty Everything and Clean the Cabinet Interior You cannot organize a cabinet while it is full. Remove every item and lay it out on the bathroom counter or a table so you can see what you actually own. This visual inventory is often shocking: we buy new products before old ones run out and stock remedies for illnesses long past. With the shelves bare, scrub them clean. Glass shelves respond well to glass cleaner or a vinegar solution, and if the shelves are adjustable, take them out to clean the tracks and the back wall so the cabinet is pristine before anything goes back in. Supplies for the Job Glass cleaner or vinegar solution for restoring transparent glass shelves. Microfiber cloths to wipe shelves, tracks, and the mirror without streaks or lint. Clear acrylic trays and small bins to contain products by category and catch leaks. Magnetic strips and adhesive pods to reclaim the inside of the door for small tools. Labels or color-coded tape so every family member can find their own zone instantly. Tip 2: Purge Ruthlessly by Expiration Date The audit is where safety beats thrift. Medications degrade over time: their chemical stability fades, leaving them ineffective or, rarely, unsafe. That bottle of aspirin from years ago will not help today’s headache, expired sunscreen loses its SPF protection, and antibiotic ointments separate and lose potency. Check every bottle and tube, and toss anything expired. Disposal matters: flushing medications pollutes the water supply. Health Canada advises returning unused and expired medications to any pharmacy in Canada, which accepts take-backs year-round. Cosmetics get the same scrutiny: mascara has a shelf life of about three months before it risks eye infections, and anything that smells off, changed color, or separated belongs in the trash. Tip 3: Move Real Medicine Out of the Bathroom The bathroom is actually the worst place to store medication. Every hot shower floods the room with steam, and heat and humidity accelerate the breakdown of pills and capsules; aspirin can even degrade into vinegar-like acetic acid. True medicine, such as antibiotics, heart medication, and pain relievers, belongs in a cool, dry spot such as a kitchen cabinet far from the stove or a sealed box in a bedroom closet. Rebrand the bathroom cabinet as a grooming cabinet for humidity-stable items like toothpaste, mouthwash, and sealed lotions. Tip 4: Zone the Shelves and Use Every Inch Treat each shelf according to its reach. Eye level is prime real estate for daily drivers: toothbrush, deodorant, contacts, and the skincare you use every morning and night. Upper shelves suit occasional items such as first aid supplies, face masks, and backup razors. The highest shelf should hold dangerous products when children are in the home, and the lowest shelf is right for heavy or leak-prone bottles. Adjust shelf spacing to your tallest bottles, and reclaim the cabinet door: magnetic strips hold tweezers, nail clippers, and bobby pins, while small adhesive pods can hold toothbrushes or razors. Group items by function, dental, first aid, skincare, and shaving, and keep small products in clear acrylic trays or bins. Trays contain leaks, prevent the domino effect of falling bottles, and slide out for easy access. For households with kids, Health Canada’s guidance on storing household chemical products safely recommends keeping anything hazardous out of sight and reach. Tip 5: Define Territory and Maintain the System Shared bathrooms need clear rules. Give each person their own shelf, or use color-coded, labeled bins if space is tight. This prevents merged products, cross-contamination, and disputes. Then keep the system honest with two habits: the one-in-one-out rule, so a new tube of toothpaste means the old one is finished or discarded, and a five-minute monthly audit for empty bottles and expired items. Wipe the shelf bottoms during the audit to stop toothpaste rings from building up, and your cabinet will stay organized all year. Medicine Cabinet Zones at a Glance Zone Best For Examples Eye-level shelf Daily drivers Toothbrush, deodorant, daily skincare Upper shelves Occasional use First aid supplies, masks, backup razors Highest shelf Caution items or rarely used refills Anything hazardous to children Lowest shelf Heavy or leak-prone products Large bottles, liquid refills Cabinet door Small metal tools Tweezers, nail clippers, bobby pins Frequently Asked Questions Where should I store prescription medications? In a cool, dry spot outside the bathroom, such as a kitchen cabinet far from the stove or a locked box in a bedroom closet. Bathroom heat and humidity can degrade pills and capsules, so reserve the medicine cabinet for grooming products. How should I dispose of expired medications? Never flush them. Return unused and expired prescription and over-the-counter medications to any pharmacy in Canada through its take-back program, following Health Canada’s safe disposal advice. If no pharmacy is convenient, ask your pharmacist or municipality about other options. How often should I reorganize the medicine cabinet? Do a full purge and reset once or twice a year, and run a five-minute monthly audit for empties and expired items. The one-in-one-out rule keeps the cabinet from filling up again between deep cleans. Is it okay to keep bandages and antiseptics in the bathroom? Yes, for convenience, as long as they are in sealed containers that resist humidity. Remove bulky cardboard packaging, trim blister packs into clear bins, and store cotton swabs and bandages

Medicine Cabinet: 5 Amazing Organization Tips for Shared Bathrooms and Medicine Cabinets Read More »