Stop Wasting Money: 4 How a Clean Dryer Pays for Itself
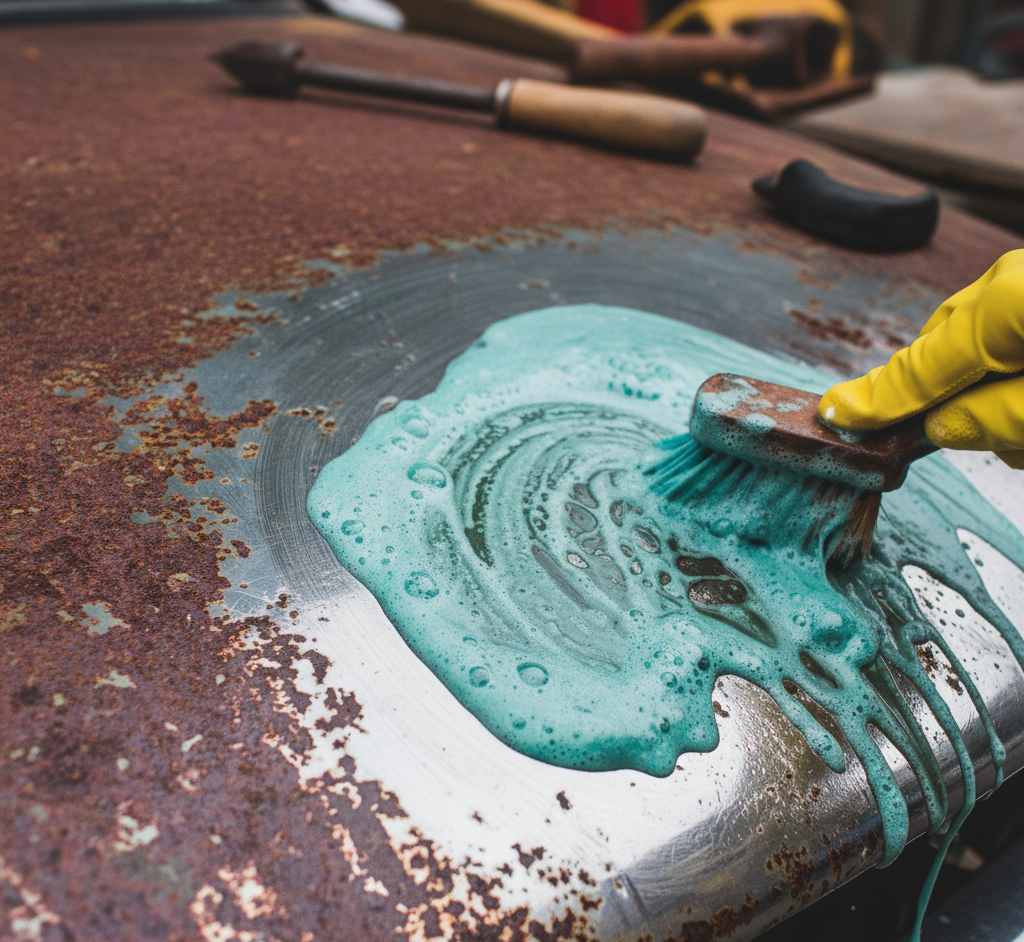
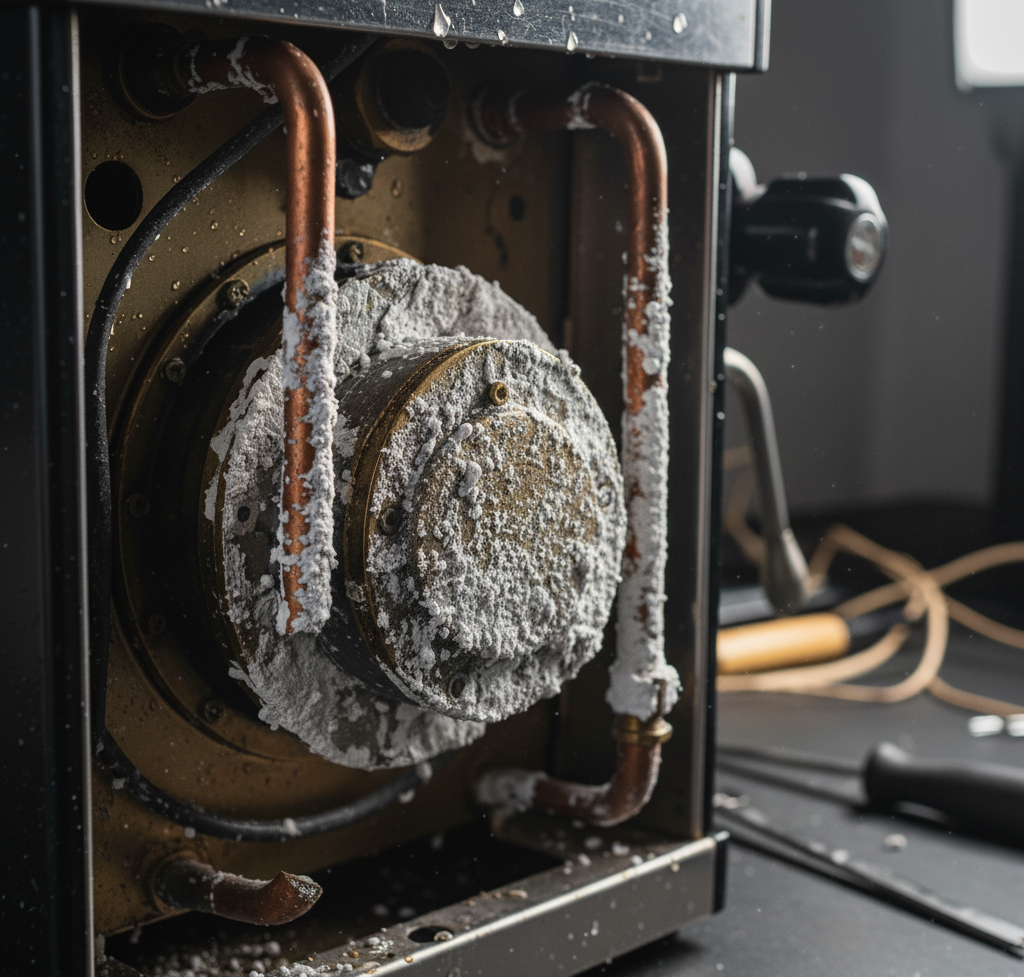
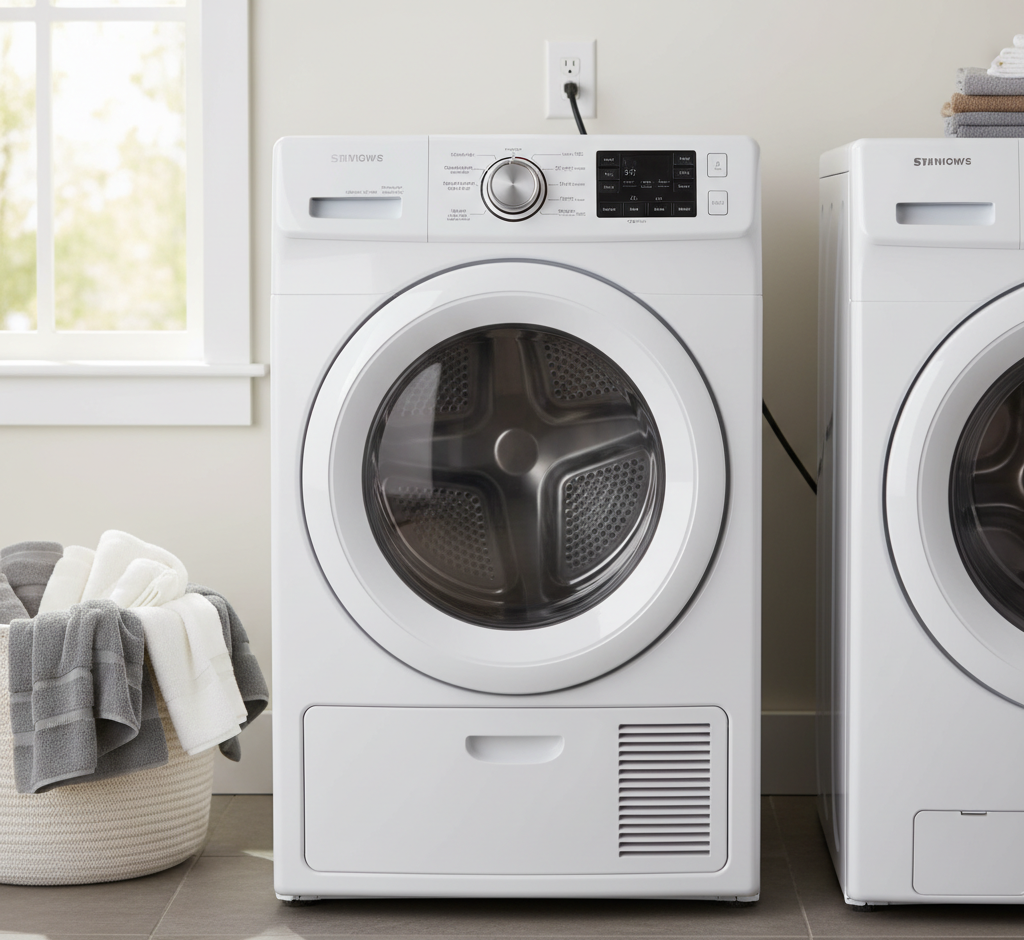
It is the final act in the theater of laundry, the warm and tumbling conclusion to a cyclical chore. It is the clothes dryer, and in the hierarchy of household appliances, it is perhaps the most taken for granted. We entrust it with our wet clothes, press a button, and return later to find them dry, soft, and ready to be worn. This simple, reliable function masks a powerful and potentially dangerous system. A dryer is not just a gentle, warm box; it is a machine that combines intense heat with a constant flow of air to perform its task. And the byproduct of this process—lint—is the root of nearly every problem a dryer will ever face. 1.Do Not Neglect To neglect a clothes dryer is not just to invite inefficiency and shortened appliance life; it is to court a genuine fire hazard. Proper, regular cleaning of your dryer is not a matter of aesthetics. It is one of the most critical and often overlooked safety procedures in the entire home. Understanding how works, where its weaknesses lie, and how to perform a few simple maintenance tasks can transform it from a hidden risk into the efficient, reliable workhorse it was designed to be. At its core, a clothes dryer is a simple system. A heating element (either gas or electric) heats the air. A fan pulls this hot air into a rotating drum, where it tumbles with your wet clothes, causing the water to evaporate. The fan then pushes this hot, moist, lint-filled air out of the dryer and through a duct system to the exterior of your home. The key to this entire process is uninterrupted airflow. Anything that obstructs this flow of air forces the machine to work harder and run hotter, creating a dangerous and inefficient situation. The primary, and constant, source of this obstruction is lint. Lint is simply the collection of tiny fibers that shed from our clothes during the drying process. These fibers are highly flammable—essentially a form of super-dried tinder. and they are carried by the exhaust air. While some of this lint is caught by the primary filter, a significant amount makes it past, settling in the ductwork and building up over time. The consequences of neglecting this simple system are serious and threefold. First and most importantly is fire safety. This is the most critical reason for regular cleaning. The U.S. Fire Administration reports that thousands of residential fires are caused by clothes dryers each year, with the leading cause being a “failure to clean.” When lint accumulates in the vent system, the dryer cannot exhaust hot air properly. This causes heat to build up. If the temperature gets high enough, it can ignite the highly combustible lint, leading to a fast-spreading and devastating fire that often starts hidden within the walls of your home. 2.Inefficient Dryer Second is energy efficiency and cost. A clogged dryer is an inefficient dryer. When airflow is restricted, it takes much, much longer for your clothes to dry. A load that should take 45 minutes might take an hour and a half. During this entire time, the dryer is consuming a significant amount of electricity or gas. A clean dryer uses less energy, which means a lower utility bill. Proper maintenance is a direct investment that pays for itself in energy savings. Third is appliance longevity and clothing care. The strain of running hotter and longer takes a toll on the dryer‘s components, particularly the heating element and the blower motor. This leads to premature wear and tear and costly repairs. Furthermore, the excessive heat and prolonged tumbling time are damaging to your clothes, causing them to shrink, fade, and wear out faster. Proper dryer care is not complicated. It consists of two primary tasks: one that must be done with every single use, and another that should be done periodically. 3.Lint Protection Screen The first task is to clean the lint screen after every single load. This is the simplest, fastest, and most important habit you can develop. The lint screen is your first line of defense. A clogged screen immediately restricts airflow, forcing the dryer to work harder and creating the conditions for overheating. Even a thin layer of lint can reduce efficiency. After every load, pull out the lint screen. Use your fingers to peel the layer of lint off the screen and dispose of it in the trash. About once a month, you should deep clean the screen itself. Dryer sheets and fabric softeners can leave behind an invisible, waxy film on the mesh screen that further restricts airflow, even when the visible lint is gone. Take the screen to a sink and scrub it gently with a soft brush, hot water, and a little dish soap. Rinse it thoroughly and let it dry completely before putting it back in the dryer. You can test your screen by pouring a small amount of water onto it; if the water pools instead of passing through easily, it needs to be washed. The second task is to clean the dryer vent and duct system annually. This is the more involved, but critically important, deep cleaning that removes the lint your screen could not catch. This should be done at least once a year, or more often if you have a large family and do a lot of laundry. You will need a specialized dryer vent cleaning kit. These are readily available at hardware stores and typically consist of a flexible, rotating brush that can be attached to a power drill, along with several connectable rods to reach the full length of your duct. Before you do anything, unplug your electric dryer or shut off the gas supply to your gas dryer. Carefully move the machine away from the wall to give yourself room to work.. Disconnect the flexible transition hose that connects the back of the dryer to the duct in the wall. Reach into the hole at the back of the dryer where you disconnected the hose and manually pull out any clumps of lint. Use a vacuum with a hose attachment to clean it out as thoroughly as possible. The flexible hose is often a
Stop Wasting Money: 4 How a Clean Dryer Pays for Itself Read More »