Appliance Cleaning

Baseboard Heaters routine day

Baseboard Heaters: The Step-by-Step Heater Cleaning Routine

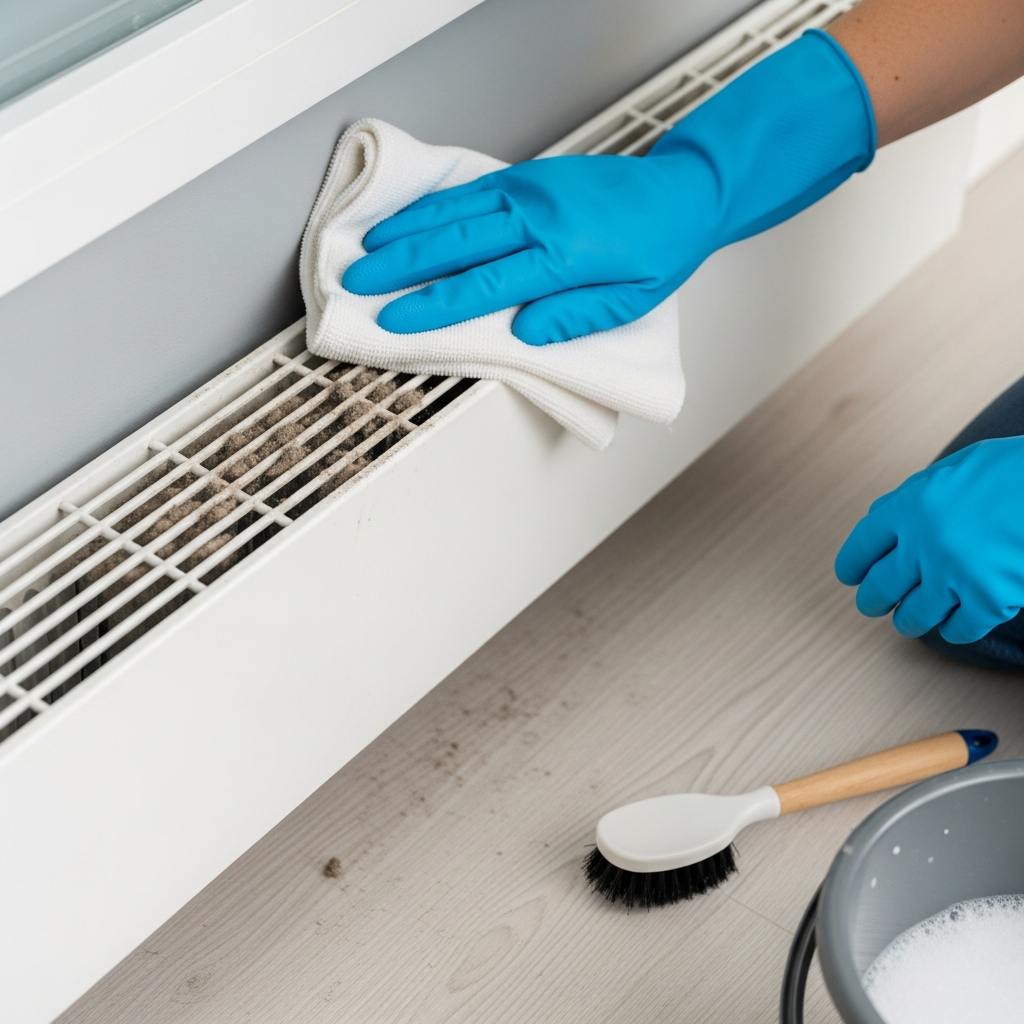
Why Baseboard Heaters Need a Cleaning Routine Baseboard heaters keep many Toronto apartments and older homes warm, especially where forced-air ductwork could never be retrofitted. They sit at floor level under windows, out of sight until autumn’s first cold snap switches them on and fills the room with the sharp smell of scorched dust. That odor means the units are clogged, wasting electricity and blowing combustion particles back into your air. This routine protects your lungs, your hydro bill and your fire safety. How a Quiet Metal Box Collects Trouble These heaters are passive convection engines with no blower fan, just a heating element inside a metal pipe wrapped in aluminum fins. Room air is drawn into the bottom of the housing, crosses the hot element and exits at the top, because warm air rises and cool air falls. That silent loop acts like a floor-height vacuum, pulling in fur, skin flakes, lint and dust. The fins are the weak point. Hundreds of thin, sharp aluminum plates sit close together for surface area, and the tight gaps wedge debris in place. Over months the buildup packs into a gray mat that insulates the metal, so the unit runs longer and harder to reach the set temperature. Three costs of a neglected heater Money. A dust-coated exchanger loses heat to itself, and longer run cycles show up as a spike in your electricity bill: part of your heating budget literally warms lint. Air quality. That October burning smell is dust and hair actually carbonizing on the element. The convection loop suspends those fine particles and combustion byproducts in your breathing zone, hitting asthma and allergy sufferers hardest. Health Canada’s overview of indoor air contaminants covers particulate sources at home. Safety. Lint is highly flammable. Most dust merely chars, but fur clumps, paper or curtain edges on the element can ignite, often unnoticed behind sofas or drapes. The dark, warm interior also invites mold and pests through spring and summer. Health Canada’s guidance on mould and household moisture explains why hidden damp spots matter. Step-by-Step Baseboard Heater Cleaning Routine Step 1: Kill the power and prove it Turn the circuit off at the main breaker panel, never just the thermostat, because a sudden temperature drop can fire the element while your hands are inside. Sweep a voltage detector across the unit to confirm it is dead. Aluminum fins bend under a fingertip or careless vacuum nozzle, and flattened fins block airflow completely at that spot. Step 2: Remove the cover and start dry Pry off the faceplate; difficulty varies by model. Attack the dust dry: water on packed dust turns it into mud that no crevice tool can lift. A strong vacuum with a crevice nozzle pulls debris from between the fins without dragging plastic across them; a soft brush handles the cover. Step 3: Blow out the core, strategically Compressed air clears the matted fuzz wedged near the heating rod, but it launches a dust cloud. Hold the vacuum nozzle at the blast zone to catch the plume, aim parallel to the fins from back to front, and wear a mask, then vacuum the floor afterward. Step 4: Degrease the sticky buildup Kitchen units collect a film of airborne cooking grease, and bathroom units gather hairspray residue plus humidity rust. Wipe the faceplate and fin tops with a damp cloth and mild degreaser, on a dead unit only, and never spray the core, where shock and corrosion risks live. A soft toothbrush dipped in solution can free greasy fins if you dry the area thoroughly before power returns. Step 5: Comb, repaint and clear the zone An inexpensive fin comb, borrowed from air-conditioner service, straightens crushed blades and returns lost heat output. Steel housings rust in damp rooms; sand the spots and repaint only with heat-rated metal paint, since standard paint peels and smells. Never coat the element or fins themselves: paint insulates them and burns off as toxic fumes. Because swapping a whole unit means hiring an electrician, refurbishing yellowed covers outdoors with high-heat enamel is the smart money. Give the unit room: manufacturers want at least 12 inches clear in front and 6 inches above. Blocked covers trap heat, trip the thermal safety limit switch and ruin furniture, and drapes resting on a heater act as a lid and fire hazard; hem floor-length panels above the intake. Electric vs Hydronic Baseboards Aspect Electric Hydronic Heat source Element inside the pipe Hot water from a central boiler through copper pipe Cool-down Stops when the thermostat does Stays warm longer after shutdown Surface heat Element gets hot enough to scorch debris Lower surface temperature, slightly safer against fire Service note Test the breaker before touching fins No shock risk in the fins, but green corrosion on copper means a slow leak and a plumber visit Their fins clog the same way, so the routine above applies to both types. Tune the Rest of the System Two details finish the job. Old bi-metal thermostats are inaccurate and cycle the unit violently, and each start-stop pulse stirs dust into the element; digital or smart models hold steadier heat and schedule warm-up for when someone is home. Watch the wall above each heater too: soot ghosting, carbonized dust plated onto drywall, resists scrubbing once set and needs stain-blocking primer and repaint, so regular cleaning is the only prevention. Frequently Asked Questions Why does my heater smell like burning when I switch it on? Autumn’s first runs carbonize the dust and fur that settled on the element over summer. A mild smell fading within a day or two is that residue; a strong or lasting odor means heavy buildup, so cut breaker power and clean the fins first. Can a dirty baseboard heater really start a fire? Yes, if enough ignitable material reaches the element. Dense lint, paper or drapery fabric resting on the heating rod can catch fire, often behind furniture where a smolder goes unnoticed. Clearances of 12 inches in front and

Baseboard Heaters: The Step-by-Step Heater Cleaning Routine Read More »
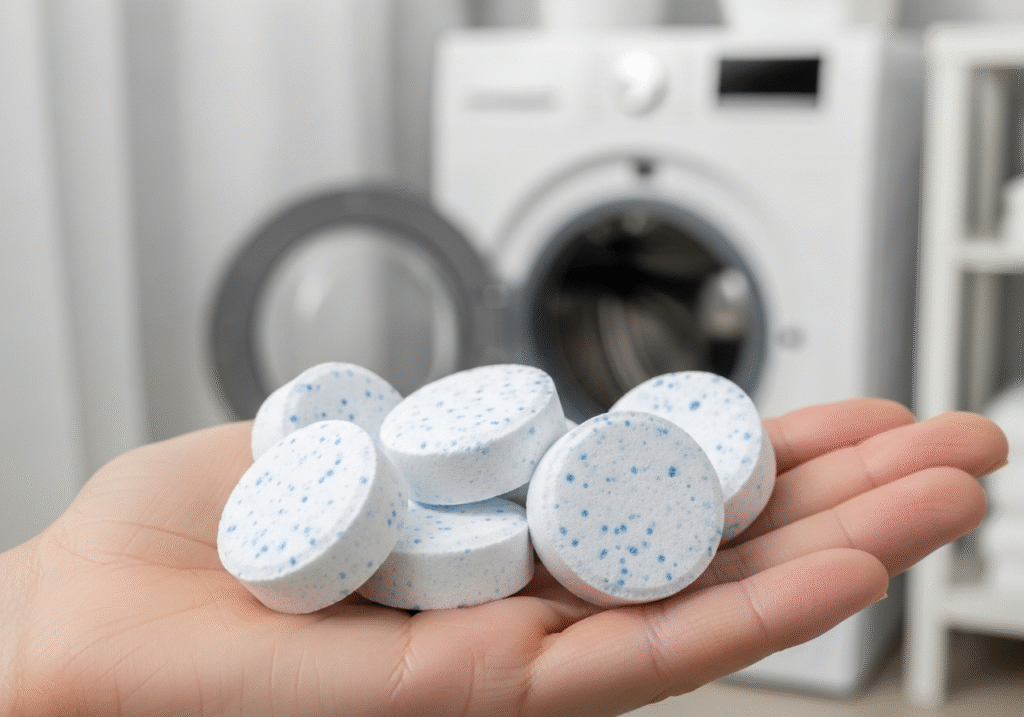
Washing Machine Cleaning Tablets: Are You Wasting Money on Washer Tablets?

Let’s understand how to use washing machine cleaning tablets? The modern laundry room is often viewed as a sanctuary of hygiene, a place where the grime of the outside world is washed away, leaving behind only the scent of fresh linen. Central to this operation is the washing machine, an appliance that we instinctively trust to be the cleanest object in the house. We assume that because gallons of hot water and detergent flow through it daily, it must be self-cleaning. However, this assumption is the primary cause of a domestic crisis that affects millions of households: the slow, invisible accumulation of biological sludge that destroys appliances and ruins clothing. In response to the rise of high-efficiency machines and the foul odors that accompany them, the market has introduced a specific chemical solution: washing machine tablets. These small, effervescent pucks have become a staple in the cleaning aisle, promising to strip away years of neglect with a single cycle. Yet, to truly understand their value and their limitations, one must look past the marketing and understand the chemistry and mechanics of why our machines get dirty in the first place. Sustainability or Disaster? To understand the necessity of washing machine tablets, one must first look at the engineering shift that created the problem. Decades ago, traditional top-loading washers used massive volumes of water. They filled the tub to the brim, allowing clothes to float freely, and the aggressive mechanical agitation flushed soil and residue down the drain effectively. Today, in the name of environmental preservation and energy efficiency, we use front-loading or high-efficiency top-loading machines. These devices use a fraction of the water, relying on the tumbling action of the drum to clean clothes through friction and gravity. While this is a victory for sustainability, it is a disaster for internal hygiene. The dirt, dead skin cells, body oils, and excess detergent that are stripped from your clothing are not always flushed away. Instead, due to the low water volume, they are often cast onto the walls of the outer tub-a stationary drum that surrounds the spinning basket you see. In this dark, warm, and damp crevice, a layer of biofilm begins to grow. This biofilm is a sticky, living matrix of bacteria and mold that feeds on the residual laundry products we leave behind. Washing machine tablets are engineered specifically to target this hidden environment. Unlike laundry detergent, which is chemically formulated to lift soil from fabrics and suspend it in water using surfactants, cleaning tablets are designed to be aggressive against hard surfaces. They are typically composed of concentrated oxidative agents, such as sodium percarbonate, which breaks down into hydrogen peroxide and soda ash when dissolved in water. When a tablet is dropped into the drum and the cycle begins, it effervesces violently. This fizzing action is not merely theatrical; it serves a crucial mechanical purpose. It helps to disperse the active chemical ingredients throughout the entire volume of the drum, splashing the cleaning solution up to the “roof” of the tub and into the crevices of the spider arm-the metal bracket that holds the drum in place and is notorious for corroding and snapping due to chemical buildup. Alkaline Cleaning Products The chemistry of washing machine tablets is typically alkaline, which is essential for their function. Most of the grime inside a washer is acidic in nature-fatty acids from soap scum, body lipids, and grease. By introducing a highly alkaline solution, the tablets can saponify these fats, turning them into a soluble soap that can be rinsed away. Many advanced formulations also include specific enzymes. These enzymes act as biological catalysts that digest the organic matter within the biofilm, effectively eating away the food source that allows mold to thrive in the damp recesses of the pump and drain lines. By breaking down the structural integrity of the sludge, the tablet allows the water to flush it out of the system. However, a dangerous misconception exists regarding what these tablets can actually achieve. Many homeowners treat them as a repair tool rather than a maintenance tool. If a washing machine has been neglected for five years and has developed a thick, black ring of mold on the rubber door gasket, a washing machine tablet will not remove it. Mold has root structures that penetrate the porous rubber of the seal. No amount of splashing chemical water will scrub that physical infestation away. The tablet is designed to maintain the hard, non-porous surfaces-the stainless steel of the drum and the heavy plastic of the outer tub. Relying solely on a tablet while ignoring the physical gaskets is why many frustrated users claim the product “doesn’t work.” It works perfectly for its intended chemical purpose, but it cannot perform miracles on permanent organic staining that requires manual agitation and a mildewcide. Water Temperature The effectiveness of washing machine tablets is also entirely dependent on how they are used, particularly regarding water temperature. This is where user error runs rampant. Almost all cleaning tablets rely on chemical reactions that require heat energy to activate. The oxygen release from the bleaching agents is significantly more vigorous and effective in scalding hot water. If a user throws a tablet in and runs a “Quick Wash” or a cold cycle, they are essentially wasting their money. The tablet may not even fully dissolve, leaving a gritty, chalky residue at the bottom of the drum that adds to the mess rather than resolving it. To get the full benefit, the machine must be set to its hottest possible setting-often labeled “Sanitize” or “Extra Hot.” This heat ensures that the tablet dissolves completely and that the chemical solution is energetic enough to penetrate the layers of calcified grime. A major contributor to the sludge that tablets are fighting is the overuse of fabric softener. Fabric softener is, essentially, liquid fat. It is designed to coat the fibers of your clothing with a thin layer of lipids to make them feel slick and reduce static.

Washing Machine Cleaning Tablets: Are You Wasting Money on Washer Tablets? Read More »

Make Your Stove Look New Again with These Simple Tools

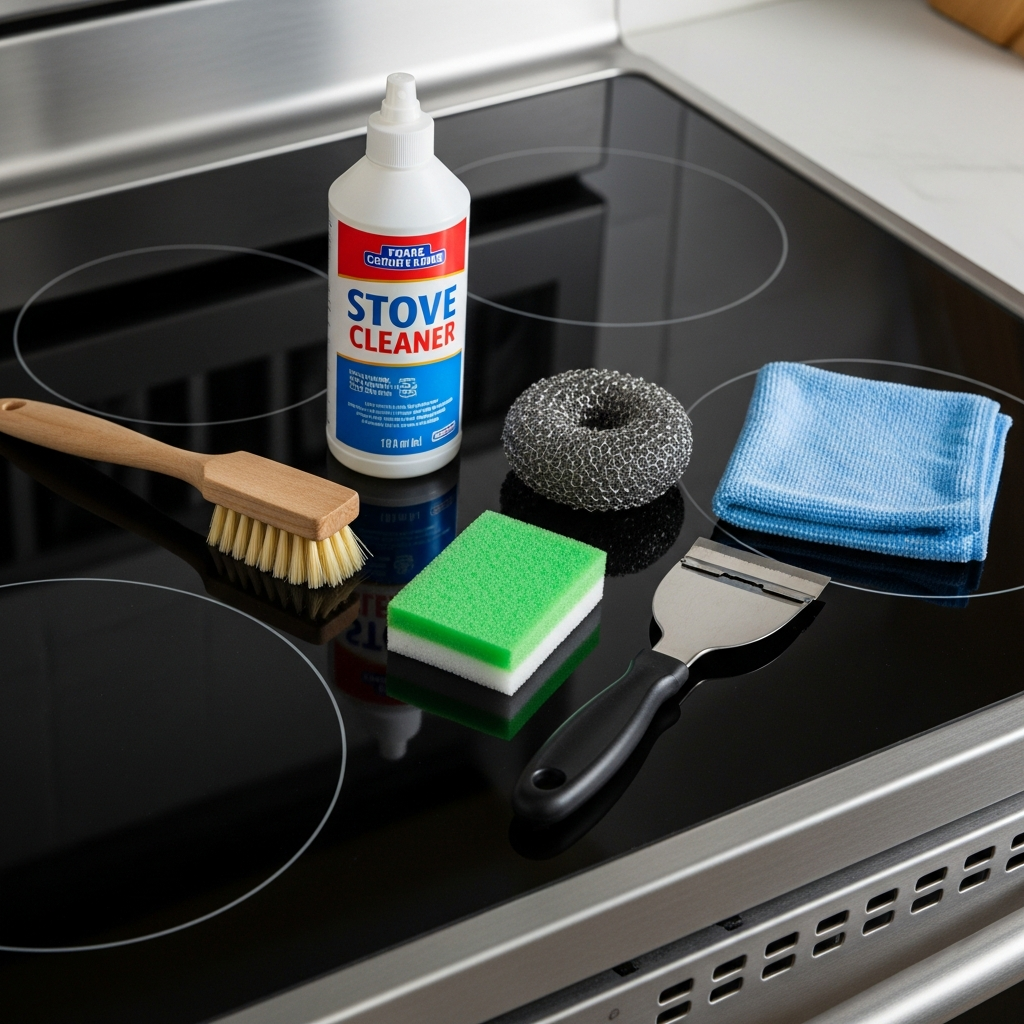
The stove is the undeniable workhorse of the kitchen, the command center where raw ingredients are transformed into meals. It is also, by nature of its function, the appliance most prone to filth. Every splatter of oil, every boil-over of pasta water, and every dropped crumb contributes to a layer of grime that, if left unchecked, hardens into a substance nearly as tough as the metal it sits upon. Cleaning a stove is not merely a matter of aesthetics; it is a matter of safety and efficiency. A grease-laden stovetop is a fire hazard, and clogged burner ports result in uneven heating that ruins food. Yet, despite its importance, stove cleaning is often performed incorrectly, with homeowners using the wrong chemicals on the wrong surfaces, scratching delicate glass, or neglecting the hidden areas where grease accumulates the most. Mastering the art of stove maintenance requires understanding the specific materials you are working with-whether it is tempered glass, cast iron, or enamel-and applying the right chemical and mechanical leverage to remove residue without causing damage. 1.Glass-Ceramic Cooktop The glass-ceramic cooktop, a staple of modern kitchens, presents a unique paradox: it is the sleekest surface to look at but often the most frustrating to maintain. The smooth, black surface shows every fingerprint and dust mote, but the real enemy is burnt-on food. A common mistake is attacking these surfaces with abrasive scouring pads. The rough side of a standard kitchen sponge is practically sandpaper to a glass cooktop. Over time, this creates a haze of micro-scratches that dulls the finish and, more importantly, traps dirt, making future cleaning even harder. The correct tool for a glass top is not a scrubber, but a razor blade scraper. When food is burnt onto the surface-especially sugary substances which can actually pit the glass if left to cool-a metal scraper held at a forty-five-degree angle is the only way to physically shear the carbon off without damaging the substrate. This should be done while the surface is wet with a specific glass cooktop cleaner or a paste of baking soda and water, which acts as a lubricant. The goal is to lift the debris, not grind it into the glass. Polishing with a dry microfiber cloth afterwards is what restores the shine, but the heavy lifting is done by the blade. 2.Gas Stove Gas ranges offer a completely different set of challenges, primarily centered around the heavy, cast-iron grates. These grates are porous and subjected to direct flame, meaning that grease spills are baked into the iron almost instantly. Scrubbing these by hand at the sink is a labor-intensive task that rarely yields perfect results. The structure of the grates, with their many corners and rough texture, shreds sponges and resists brushes. The most effective method for cleaning heavy cast iron grates utilizes the chemistry of ammonia fumes. By placing the grates inside a heavy-duty garbage bag with a splash of ammonia and sealing it tight for twenty-four hours, you allow the fumes to penetrate the grease. The ammonia breaks down the bond between the carbonized food and the iron. When you open the bag the next day-preferably outside to avoid inhaling the strong fumes-the grime usually wipes off with minimal scrubbing. This method saves hours of physical labor. It is important, however, to rinse them thoroughly and dry them completely, perhaps even placing them in a warm oven for a few minutes, to prevent rust from forming on the exposed iron. Beneath the grates lie the burner caps and heads, the actual machinery of the gas stove. If your flame is yellow instead of blue, or if the ignition clicks incessantly before lighting, the cause is almost always a clogged port. Food spills can block the tiny holes where gas escapes, disrupting the flow and air mixture. Cleaning these requires precision, not brute force. A straightened paper clip or a needle can be used to gently clear the ports, but one must be careful not to break the metal tip off inside the hole. The burner heads themselves can be soaked in warm soapy water, but the electrical igniter-the little ceramic nub that sparks-must remain dry. If this ceramic piece gets wet or coated in cleaner, the stove will not light until it has dried out completely. Reassembling the burners requires checking the alignment; a cap that sits slightly askew will result in a dangerous, uneven flame that can flare up unexpectedly. 3.Electric Stove Electric coil stoves, often seen in older apartments, are frequently neglected because they seem difficult to disassemble, but they are actually the most modular of all designs. The coils themselves rarely need cleaning because they get hot enough to burn off most residue, but the drip pans beneath them are magnets for disaster. These metal bowls catch everything that falls through the coils. When they are coated in black, carbonized grease, they become a smoke generator every time the stove is turned on. While many people wrap these in aluminum foil to avoid cleaning them, this is a dangerous practice that can trap heat and melt the wiring or cause a short circuit. Drip pans are inexpensive and should be viewed as semi-disposable. If they are rusted or hopelessly caked, replacing them is safer and more effective than scrubbing. If they are salvageable, they should be removed and boiled in a mixture of water and vinegar to loosen the charred remains. The coils themselves pull out, but one must be careful never to submerge the electrical contacts in water. 4.Control Panel and Buttons The control panel and knobs are the most touched but often the least cleaned parts of the stove. Because they are usually located above the cooking surface or on the front face, they are constantly bombarded with microscopic grease splatters. Over time, this grease works its way behind the knobs, acting as a glue that makes them difficult to turn. To clean this area effectively, the knobs must be pulled off. Simply wiping around them pushes

Make Your Stove Look New Again with These Simple Tools Read More »

Woman cleaning the counter with pH-neutral products next to her.

Understanding pH-Neutral Cleaners: The Complete Guide

What pH-Neutral Cleaners Are and Why Your Surfaces Thank You for Them Somewhere between the vinegar bottle and the oven degreaser sits the most important concept in household chemistry: a balanced pH. Master it and you move from aggressive scrubbing that quietly damages finishes to gentle, sustainable maintenance that keeps stone, wood, and tile looking new for decades. This guide explains what a pH-neutral cleaner actually does, exactly where it is essential, where it fails, and how to use one like a professional. The pH Scale in Plain Language The pH scale measures how acidic or alkaline a water-based solution is, running from 0 to 14. Pure water sits at 7, dead center, and is the model of neutral. Below 7 lands acid, with vinegar and lemon juice as the classic household examples. Above 7 is alkaline, also called basic, a club that includes bleach, ammonia, and most oven degreasers. The further a product strays from 7, the more chemically reactive and potentially caustic it becomes. That reactivity is a double-edged sword: it is what lets strong cleaners dissolve hard water stain or cut heavy grease, and it is also what ruins surfaces that never stood a chance against them. Health Canada’s resource on using household products safely makes the same point about reading labels and respecting product strength. What a Neutral Cleaner Actually Does A pH-neutral soap is a surfactant formulated to sit at or very near 7. It lifts dirt, oils, and grime off a surface and suspends them so they can be wiped away, without trying to dissolve, etch, or strip the material underneath. Its action is mechanical, breaking the bond between soil and surface rather than attacking the surface itself. Think of it as the do-no-harm principle of cleaning: the default choice for any material that a strong acid or alkali would permanently damage. Natural Stone: The Strongest Case for pH 7 Marble, limestone, travertine, and onyx bring luxury into a home and extraordinary vulnerability with them. These stones are largely calcium carbonate, which reacts violently with acid. Even a “natural” splash of vinegar on a marble counter sets off a reaction that dissolves a microscopic layer of stone. The result, called etching, looks like a dull whitish stain but is physical damage that no wipe can undo; removing it means professional re-honing and polishing. Alkaline cleaners are less dramatic but still wrong, dulling the finish and working into pores over time. A pH-neutral cleaner is the only recommended routine product for these calcium-based stones. Granite etches far less readily, yet harsh chemicals degrade the sealant that protects it from stains, so neutral soap remains the wisest daily choice. Floors, Leather, and Fabrics The same preservation logic protects your floors. A sealed hardwood floor is defended by its finish, not the wood beneath, and repeated washes with high-alkaline cleaners slowly strip that polyurethane layer. The floor may look clean today while growing duller and thinner with every mop. A properly diluted pH-neutral floor cleaner lifts soil off the finish without eating it. Manufacturers of luxury vinyl tile and laminate almost universally specify neutral cleaners for the same reason: harsh chemistry clouds or embrittles the factory wear layer, permanently marring the look and often voiding the warranty. Leather, a natural skin kept supple by its own oils, reacts the same way to alkaline soaps by drying, cracking, and fading, while delicate upholstery and clothing respond far better to a neutral spot-cleaning solution. Professionals follow that order of force: start with the gentlest method that can work. Where pH-Neutral Cleaners Hit Their Limits Neutral products are masters of maintenance, not miracle workers. Three common jobs need something else: Hard water stains and soap scum. These are alkaline mineral deposits of calcium and magnesium, so an acidic cleaner is required to break the bonds. Baked-on stovetop or oven grease. Polymerized oil needs a moderately alkaline degreaser; a neutral soap simply lacks the power. Disinfecting. Neutral soaps clean but do not inherently kill germs. Countertops touched by raw meat or a bathroom during flu season need a dedicated disinfectant applied after cleaning, as the CDC’s home cleaning and disinfecting guidance describes. Strong chemistry also demands respect: never blend cleaning products, and store them per Health Canada’s household chemical safety rules, since mix-ups like combining bleach with other cleaners can release toxic gas. Smart Technique: Dilute, Two-Bucket, Microfiber Most neutral cleaners ship as concentrates, so dilute exactly to the label. Too much product leaves a sticky film that attracts fresh dirt, the opposite of the goal. For floors, the two-bucket method keeps things honest: one bucket holds cleaning solution, the second holds clean rinse water, so the mop never redistributes what it lifted. On countertops, pair the cleaner with a quality microfiber cloth whose fibers trap soil instead of pushing it around. Lift the dirt, remove it, leave nothing behind but a clean surface. The sensible arsenal is small: a neutral workhorse for the vast majority of daily and weekly tasks, plus acidic and alkaline specialists reserved for the specific problems that truly need them. Which Cleaner for Which Surface Surface or soil Right chemistry Why Marble, limestone, travertine, onyx pH-neutral Acids etch calcium carbonate instantly Granite and sealed stone pH-neutral Protects the stain-blocking sealant Sealed hardwood, LVT, laminate pH-neutral, diluted Spares the wear layer and the warranty Leather, upholstery, delicates pH-neutral Keeps natural oils and dyes intact Hard water and soap scum Mildly acidic Alkaline minerals dissolve in acid Baked-on grease Mildly alkaline degreaser Saponifies polymerized oils Germ-sensitive counters Clean, then disinfect Neutral soap lifts soil, not pathogens pH-Neutral Cleaner FAQ How do I know if a cleaner is truly pH-neutral? The label should say pH neutral or pH 7. If it does not, contact the manufacturer; a generic “all surface” claim is not a promise, since many multi-purpose products lean alkaline. Is a diluted neutral cleaner safe for everyday mopping? Yes, and it is the recommended routine for sealed floors and stone. Use weak solution, a well-rinsed mop

Understanding pH-Neutral Cleaners: The Complete Guide Read More »

paper towels on a kitchen counter

The Right and Wrong Way to Use Paper Towels for Cleaning – 6 Best Tips

Paper Towels: When the Roll Is Right and When It Is Dead Wrong The paper towel is a cornerstone of modern cleaning, so embedded in daily life that we grab it without thinking: sudden spill on the counter, smudge on the window, greasy stovetop. Its virtues are real. No hunting for a clean cloth, no laundry burden, no hesitation with unpleasant messes before it hits the bin. One fresh sheet guarantees a clean slate and rules out spreading yesterday’s germs on today’s surfaces. But convenience is not the same as correctness, and most homes reach for the roll far too often. These six tips put paper towels back in their proper role. Tip 1: Blot Spills, Never Wipe Them Paper towels are engineered to absorb: cellulose fibers, usually from wood pulp, wick liquid and hold it, while texture, thickness, and quilting add scrubbing grip. That engineering only pays off if you work with it. Lay a sheet over a fresh spill and let capillary action pull the liquid up and out of the surface. An aggressive wiping motion does the opposite, pushing moisture over a wider footprint and driving it into porous wood or grout where it becomes a real stain. For large spills, layer several sheets so the pile soaks through instead of smearing. Tip 2: Use One as a Disposable Applicator Beyond mopping up liquids, the roll is a superb delivery system. Sprayed with glass cleaner, a paper towel polishes windows and mirrors streak-free precisely because it is new: a reusable cloth can carry residual oils or fabric softener from the last wash, and those residues are what leave glass hazing. Sprayed with disinfectant, a fresh sheet spreads the product evenly across counters and sinks, then leaves the house carrying whatever germs it collected. That matters more than it sounds, because a damp sponge or cloth that skips regular sanitizing becomes a breeding ground for bacteria and a vehicle for cross-contamination, the exact risk the CDC’s home cleaning and disinfection guidance warns about. Tip 3: Hit Heavy Grease Dry First Grease and oil are where paper genuinely shines. It wipes greasy cooktops, cleans microwave splatter, and blots excess oil off fried food, trapping grease in fibers destined for the trash. A reusable cloth takes that same oil into your laundry, where it lingers and transfers. For thick, heavy grease, run the dry towel first to pull up the bulk, then follow with your cleaning solution. Two steps stop the smear and make the actual cleaning dramatically shorter. Tip 4: Know the Real Downsides The disposability that makes paper towels lovable creates their two genuine weaknesses. The first is cost in every currency. Making them consumes trees, water, and energy, and seconds later the sheet heads to landfill, while the recurring purchase adds up to far more than one-time reusable alternatives. The second is performance limits: a standard sheet lacks durability for heavy scrubbing. Faced with dried-on food or textured surfaces it shreds, leaving lint and pulp behind, painfully visible on dark surfaces and screens. Any job that needs friction belongs to a scrub brush or a good cloth, not paper. Tip 5: Default to Microfiber Instead For most everyday tasks, microfiber is simply the better tool. These cloths weave extremely fine synthetic fibers, typically a polyester and polyamide blend, split during manufacturing to create huge surface area and a positive electrostatic charge that pulls dust, dirt, and microbes into the cloth instead of shuffling them around. Dry, they are exceptional dusters. Damp, their capillary action absorbs remarkable water and lifts grime with little effort, often with plain water alone. They scrub without falling apart, polish glass without lint, and survive hundreds of washes, which makes them cheaper and greener over any realistic timeline. Care is the catch: wash them apart from other laundry and skip fabric softener, which clogs the fibers and kills both the static cling and the absorbency. Tip 6: Save the Roll for Hazardous Messes Hygienic disposal is the paper towel’s trump card, and some messes should never touch reusable laundry. The list is short and specific: Raw meat juices from poultry or beef packaging Pet accidents, vomit, and illness-related fluids Litter box spills and tracked-in mud bombs Anything you would rather incinerate than launder With biological hazards, containing and discarding immediately is the responsible move against pathogens like salmonella or E. coli, since scrubbing a cloth clean enough to be safe is often impractical mid-crisis. If you finish with a bleach-based sanitizing wipe, handle it per Health Canada’s rules for household chemicals, which stress dilution accuracy and never mixing products. Paper Towel vs Microfiber by Task Task Better tool Why Fresh liquid spill Paper towel Blots and contains, then disappears Windows and mirrors Either Paper never carries softener haze; microfiber must be lint-clean Raw chicken juices Paper towel Single-use stops cross-contamination Dusting shelves Microfiber Static charge traps dust instead of airborne-izing it Stovetop grease film Paper first, cloth after Dry towel pulls bulk; washable cloth finishes Scrubbing dried messes Brush and cloth Paper shreds and leaves pulp Drying hands Cloth or paper, your call Cloth wins cost, paper wins when hands are filthy Paper Towel FAQ Are paper towels more hygienic than reusable cloths? For hazardous messes, yes, because the towel exits with the contamination instead of returning to a laundry pile. For routine wiping, a microfiber cloth washed regularly and used damp is equally sanitary and far cheaper. Why does my paper towel leave lint on dark surfaces? Cheap towels shed pulp and lint, especially when wet or when dragged across texture. Dab instead of dragging, use two layers for wet jobs, or switch to a lint-free microfiber pass for the final polish on screens and dark finishes. Can I compost used paper towels? Only if they absorbed food scraps or water. Towels dirty with cleaning chemicals, grease, or biological waste belong in the trash, since compost is meant for untreated organics. How much does the roll habit really cost? A household

The Right and Wrong Way to Use Paper Towels for Cleaning – 6 Best Tips Read More »

Uses for Coarse Salt

Coarse Salt: 10 Surprising Uses for Coarse Salt in Home Cleaning

In the search for effective and non-toxic cleaning solutions, one of the most powerful tools is often already sitting in the kitchen pantry. Coarse salt, whether it is kosher salt, sea salt, or rock salt, is a remarkably versatile and inexpensive mineral with properties that extend far beyond flavoring food. Its utility as a cleaning agent is rooted in its fundamental physical and chemical characteristics. The crystalline structure of salt makes it an excellent natural abrasive, capable of scouring away grime without being as harsh as many commercial powders. Furthermore, salt is a desiccant, meaning it absorbs water and, by extension, moisture-laden messes. It also has mild antibacterial and deodorizing properties, making it a multi-functional powerhouse for a wide range of household chores. 1.Cast Iron Pans Perhaps the most classic and celebrated use for coarse salt in cleaning is on cast iron cookware. Maintaining the seasoned surface of a cast iron skillet is crucial; harsh soaps and detergents can strip away this protective, non-stick layer that has been built up over time. Salt provides the perfect solution. To clean a warm skillet after cooking, simply pour a generous amount of coarse salt into the pan. Using a folded paper towel or a stiff brush, scrub the salt around the pan. The salt’s abrasive texture will lift away stuck-on food particles and absorb any excess oil without damaging the seasoning. Once the pan is clean, the dirty salt can be discarded, and the pan can be wiped clean with a cloth. A thin layer of oil can then be applied to reinforce the seasoning, leaving the skillet ready for its next use. This method not only cleans but also helps to manage rust spots that may begin to form. 2.Kitchen Utensils This same abrasive quality makes coarse salt an exceptional cleaner for other kitchen items, particularly wooden cutting boards and butcher blocks. These surfaces, being porous, can harbor bacteria and absorb odors from foods like garlic and onion. To deep clean and deodorize a wooden board, sprinkle it liberally with coarse salt. Then, take half a lemon and use it as a scrubber, squeezing slightly as you work the salt into the wood in a circular motion. The salt acts as a scouring agent to lift away fine particles of food and stains, while the citric acid in the lemon juice acts as a natural disinfectant and bleach, brightening the wood and neutralizing odors. Let this salty, lemony paste sit on the board for ten to fifteen minutes before scraping it off and rinsing the board thoroughly with hot water. This process leaves the cutting board sanitized, deodorized, and visually refreshed. 3.Fat Removal Coarse salt is also highly effective at tackling grease. For greasy pots, pans, or baking dishes, sprinkling salt onto the greasy areas can make cleanup significantly easier. The salt absorbs a good portion of the grease, so when you wipe it out with a paper towel, you remove a large amount of the mess before even introducing soap and water. This pre-cleaning step can reduce the amount of grease going down your drain and make the final wash much quicker. This principle also applies to grease spills on fabric. If you get an oily splatter on your clothing or a tablecloth, immediately cover the spot with a pile of coarse salt. Let it sit for an hour or so to draw the oil out of the fibers. Afterwards, brush off the salt and treat any remaining stain before laundering as usual. 4.Red Wine Stain removal is another area where salt’s properties shine. For the dreaded red wine spill on a carpet or upholstery, salt can be a first line of defense. After blotting the spill with a clean cloth to absorb as much liquid as possible, cover the entire stain with a thick layer of coarse salt. The salt will begin to draw the wine out of the fibers, and you may see it turn pink as it works. Leave the salt to dry completely, which may take several hours or even overnight. Once it is dry and caked, you can simply vacuum it all up. While it may not remove a very old or heavily set-in stain completely, it is incredibly effective on fresh spills and can significantly reduce the severity of the stain. 5.Cleaning Inside the kitchen, coarse salt can be used to clean and deodorize in less obvious ways. The inside of a coffee pot or a thermos can develop brown stains from coffee and tea tannins that are difficult to scrub. To remove these, fill the carafe with a handful of coarse salt and about a cup of crushed ice. Swirl the mixture vigorously for a few minutes. The ice provides a hard medium that forces the abrasive salt crystals against the interior walls of the carafe, effectively scouring away the stains. For particularly stubborn stains, adding a bit of lemon juice or vinegar to the mix can provide an acidic boost to the cleaning power. After swirling, let the mixture sit for about half an hour, then rinse thoroughly. This method is a safe and effective way to restore clarity to a glass coffee pot without using harsh chemicals. 6.Deodorizing The power of salt extends to cleaning drains and garbage disposals. To freshen a smelly kitchen drain, pour about half a cup of coarse salt down the drain, followed by a quart of very hot water. The salt helps to dislodge grease and food particles that can get trapped and cause odors. For a garbage disposal, the combination of ice and salt works wonders. Pour a cup of salt and a couple of cups of ice cubes into the disposal and run it until the grinding sound stops. The ice and salt work together to freeze and scour away built-up grime and sludge from the blades and the walls of the disposal, sharpening the blades in the process. Following this with a few lemon or orange peels will leave the disposal and

Coarse Salt: 10 Surprising Uses for Coarse Salt in Home Cleaning Read More »

Understanding Acetone: A Guide to the Powerful Cleaning Solvent

What Makes Acetone a Powerful Cleaning Solvent Acetone is a potent organic solvent that dissolves residues most household cleaners cannot touch: oils, greases, dried paint, varnish, lacquer, permanent ink, and stubborn adhesives. Chemically, it is a polar aprotic solvent, so it attacks both greasy, non-polar materials and many polar substances. It also evaporates very quickly, which means it can do its job and vanish, usually leaving a clean, dry, residue-free surface behind. That speed and strength are exactly why acetone demands respect: it is indiscriminate, so you need to know where it helps and where it will do damage. Top Cleaning Jobs for Acetone Paint and Finish Removal Splatters of dried latex or oil-based paint on hard, non-porous materials such as glass, tile, or bare metal are no match for acetone. It breaks down the polymer binders that hold paint together, liquefying the coating so it can be wiped away. The same chemistry makes acetone the standard choice for cleaning paint brushes, roller covers, and spray gun components used with lacquers and enamels. It can also strip varnish or polyurethane from metal hardware and lift old, yellowed lacquer from brass fixtures. Expect to apply it, give it a few minutes to work, and then scrape or wipe off the softened layers. Adhesive and Residue Removal Most nail polish removers list acetone as their active ingredient because it dissolves the tough acrylic polymers in nail lacquer. The same principle defeats cyanoacrylate, better known as super glue: a small dab, carefully applied, dissolves the bond on skin or countertops. Acetone also penetrates the gummy residue left behind by stickers, labels, and tape, cutting through the stickiness until it wipes clean. Heavier challenges such as contact cement or construction adhesive usually need several applications plus some mechanical scraping. Workshop Degreasing Before welding, painting, or powder-coating a metal part, any trace of oil or wax can ruin the bond or finish. Acetone cuts through petroleum-based grime and flashes off fast, leaving a clean substrate. Mechanics use it on automotive parts, machinery, and tools to dissolve grime and tar that would otherwise require heavy scrubbing. On a concrete garage floor, it can lift deep oil stains, but only when you pull the dissolved oil up with an absorbent material; used carelessly, acetone can drive the stain deeper into the porous concrete. Remove nail polish spills from hard surfaces. Break super glue bonds on skin and countertops. Dissolve sticker, label, and tape residue. Clean brushes and rollers after lacquer or enamel projects. Prep metal parts before painting or welding. Where Acetone Causes Damage Acetone dissolves many common plastics, including polystyrene (styrofoam), ABS found in electronics housings and car interiors, acrylic (Plexiglas), and polycarbonate. Contact can soften, warp, cloud, or fully dissolve these materials, and even brief exposure can cause solvent crazing, a web of fine surface cracks. High-density polyethylene (HDPE) and polypropylene generally resist the solvent, so they are the usual choice for acetone containers. Finished wood is another casualty: acetone strips shellac, varnish, lacquer, and polyurethane, dries out the wood fibers, and can lift veneers or damage laminates, so it should never touch wooden furniture, flooring, or cabinetry unless a full refinishing is planned. Some fabrics are equally vulnerable. Acetate, triacetate, and modacrylic fibers can literally dissolve, creating holes, while cotton, wool, and silk usually survive but may lose dye. Material Acetone reaction Safe to clean? Polystyrene, ABS, acrylic, polycarbonate Softens, warps, clouds, or dissolves No; test a hidden area first HDPE and polypropylene Resists the solvent Yes Finished wood and veneers Strips finish, dries fibers Only for refinishing Acetate, triacetate, modacrylic fabric Dissolves; can create holes No Cotton, wool, silk Usually safe; dye may run Spot-test first Acetone Safety: Flammability, Ventilation, and Gear Acetone is extremely flammable with a very low flash point, so vapors can catch fire at room temperature when they meet a spark or flame some distance away. Ignition sources include pilot lights on water heaters, the spark of a refrigerator motor kicking on, and static electricity. Work with strong ventilation: open windows and doors and use a fan to push fumes outside, or work outdoors whenever possible. Protect your skin with butyl rubber or nitrile gloves; latex gloves break down quickly, and direct contact can defat the skin, causing dryness, irritation, and cracking. Wear splash-proof goggles, and in enclosed spaces or during long sessions use a respirator with an organic vapor cartridge, since concentrated fumes can irritate the respiratory tract and cause dizziness and headaches. Health Canada’s household chemical safety tips cover flammable and corrosive products such as paint thinners, and its household products guidance explains safe use and storage around the home. How to Apply Acetone the Right Way For small stains, pour the acetone onto a clean white cloth or cotton ball instead of directly onto the surface; that controls the amount and stops it from spreading to nearby vulnerable materials. Blot the stain from the outside edge inward so it does not create a larger ring, and avoid rubbing, which can push the stain deeper or damage the surface texture. Afterward, wipe the area with a cloth dampened with water and mild detergent, rinse with a clean, damp cloth, and dry thoroughly. Test any new surface or fabric in an inconspicuous spot first, such as an inner seam. Frequently Asked Questions About Acetone Can I use acetone on plastic surfaces? Only on plastics known to resist it, such as HDPE and polypropylene. Most others, including polystyrene, ABS, acrylic, and polycarbonate, will soften, cloud, or dissolve, so always test an unseen area first. Will acetone ruin wood furniture? Yes. It strips the finish, dries out the wood fibers, and can lift veneers. Reserve it for refinishing projects where removing the old finish is the whole point. Is acetone safe on fabrics and carpets? Fabrics made of acetate, triacetate, or modacrylic fibers can dissolve, and dyes on natural fibers may bleed. Spot-test an inconspicuous area before treating any stain. Is nail polish remover the same as pure acetone?

Understanding Acetone: A Guide to the Powerful Cleaning Solvent Read More »

5 Key Areas to Deep Clean Before Winter Sets In

5 Key Areas to Deep Clean Before Winter Sets In

5 Key Areas to Deep Clean Before Winter Sets In When the temperature drops, your home becomes the center of your world. Windows stay closed, the furnace runs daily, and family time moves indoors. That is why a deep clean before winter is more than a seasonal ritual: it protects your air quality, your fabrics, and your comfort for months. These five areas make the biggest difference, and each one is easy to tackle with the right plan. 1. Improve Indoor Air Quality: Vents and Furnace Filter After months of sitting idle, your heating system collects dust, pollen, pet dander, and fine particles in the ductwork. The first time the furnace kicks on, it can blow that accumulation straight into your living space and aggravate allergies. Start by turning off the HVAC system, then vacuum each vent cover with the brush attachment. For a deeper clean, unscrew the covers and wash them in warm, soapy water, using a small brush to reach into the grilles, then vacuum as far into the duct opening as the crevice tool allows. The single most impactful task is replacing the furnace filter. A clogged filter traps fewer particles, forces the system to work harder, and raises both energy use and the risk of malfunction. A fresh filter is inexpensive, and it pays off in health and efficiency all season. Good indoor air quality supports everyday health, and clean vents and filters are the first line of defense, as the CDC notes about air quality. 2. Maximize Natural Light: Windows and Screens Dirty windows can noticeably dim a room during the darker months. Remove your window screens, lay them flat outside, scrub them with a soft-bristled brush and mild soap and water, then rinse and dry completely. Storing screens in a garage or basement during winter lets in more light and protects them from snow and ice damage. Clean the interior glass with warm water and a few drops of dish soap, finishing with a high-quality squeegee for a streak-free result. Do not skip the tracks and sills: a crevice tool clears loose debris, and a damp cloth with an old toothbrush handles the tight corners. Mold can grow where moisture collects around windows, so the CDC recommends keeping damp areas dry. 3. Sanitize Fabrics and Upholstery Comforters, flannel sheets, wool throws, and decorative blankets that have been stored all year can absorb a stale, musty odor. Launder everything according to its care label before use so your cozy essentials are fresh and free of dust mites. Curtains and drapes collect surprising amounts of dust: vacuum them top to bottom with the upholstery attachment, use a steam cleaner on durable fabrics, or machine wash when the label allows. For sofas and armchairs, remove the cushions and vacuum every seam, crack, and corner where crumbs, dust, and pet hair hide. Following basic hygiene practices keeps high-touch fabrics healthier for the whole family. 4. Prepare the Fireplace and Deep Clean Floors Before the first fire of the season, clear and wipe down the mantel, hearth, and fireplace tools so that first flame does not send a plume of dust into the room. The interior of the chimney still needs a professional sweep for safety. Then turn to the floors: carpets and area rugs become the main surfaces for play and relaxing, and a quick vacuum will not do. Vacuum slowly and methodically, making multiple passes in overlapping, perpendicular directions to agitate the pile and pull embedded grit from the fibers. Move furniture where possible to reach the dustiest corners of the room. 5. Get the Kitchen Ready for the Busy Season Winter brings hearty soups, slow-cooked stews, and holiday baking, so the kitchen deserves attention now. Deep clean the refrigerator inside and out: remove shelves and drawers, wash them in warm, soapy water, and wipe every interior surface. This also forces a useful inventory before you stock up for the holidays. Clean the oven well before the turkey goes in, using the self-cleaning function or a manual baking soda and vinegar method so it heats evenly without smoke or odors. Finally, declutter the pantry and take stock of baking supplies and staples so meal prep runs smoothly. Winter Deep Cleaning Checklist Vacuum vents and wash vent covers; replace the furnace filter. Remove, clean, and store window screens; clean glass, tracks, and sills. Launder stored bedding and throws; vacuum curtains and upholstery seams. Wipe the mantel and hearth; book a professional chimney sweep. Deep vacuum carpets with slow, overlapping passes. Clean the fridge and oven; organize the pantry. Winter Cleaning Priorities at a Glance Area Why It Matters Top Task Vents and filter First furnace run can spread dust and allergens Wash covers, replace the filter Windows and screens Maximizes scarce winter light Clean glass and store screens Fabrics and upholstery Removes dust mites and musty odors Launder bedding, vacuum sofas Fireplace and floors Prevents dust plumes and fiber wear Wipe hearth, deep vacuum carpets Kitchen Ready for holiday cooking and guests Clean fridge, oven, and pantry Frequently Asked Questions How often should I replace my furnace filter before winter? Check it monthly and replace it at least once before the heating season starts. A clogged filter makes the furnace work harder, increases energy use, and lets dust and allergens recirculate, so a fresh filter is the cheapest air quality upgrade you can make. Do I really need to clean window screens in winter? Yes. Screens trap dust and pollen all summer, and cleaning them before storage keeps grime from transferring to your glass. Storing them dry also protects the mesh from snow and ice damage and lets more natural light into the room. Can I clean my own chimney? No. The interior of the chimney should be inspected and swept by a certified professional, because built-up creosote is a fire hazard. What you can do yourself is clean the mantel, hearth, and tools before the first fire of the season. Should I hire a professional for

5 Key Areas to Deep Clean Before Winter Sets In Read More »

5 Reasons Why Hiring a Cleaning Service is the Best Form of Self-Care

Why hire a specialized cleaning service? The modern home is a hub of activity, a place of work, rest, and family life. Yet, maintaining its cleanliness can feel like a relentless, never-ending task. The dust settles almost as soon as it’s wiped away, the floors seem to attract dirt, and the kitchen and bathrooms demand constant attention. For many, the weekend, which should be a time for relaxation and recharging, is instead consumed by a long list of chores. This constant cycle of cleaning can become a significant source of stress and a drain on our most valuable resource: time. It is in this gap between the desire for a clean, peaceful environment and the reality of a busy life that a residential house cleaning service finds its purpose, offering not just a service, but a solution to a pervasive modern problem. 1.Quality of Life Hiring a professional cleaning service is often viewed as a luxury, but it is more accurately described as an investment in your quality of life. Consider the hours spent each week sweeping, mopping, scrubbing, and dusting. For a moderately sized home, this can easily add up to four, five, or even more hours. A professional service reclaims those hours for you, handing them back to be spent on what truly matters. This could mean more time with family, pursuing a hobby, exercising, or simply enjoying a well-deserved rest. The cumulative effect of this reclaimed time is profound, reducing burnout and allowing for a better work-life balance. It transforms the home from a place of constant obligation into a true sanctuary, a space you can enter after a long day and immediately feel at ease, rather than being confronted with a list of tasks that need doing. 2.Quality of Cleanliness Beyond the gift of time, there is the undeniable difference in the quality of the clean itself. A professional cleaner brings a level of expertise and efficiency that is difficult for the average homeowner to replicate. They are trained in the most effective methods and understand the specific needs of different surfaces. They know which products to use on natural stone versus laminate, how to clean stainless steel without leaving streaks, and the best techniques for removing stubborn soap scum from glass shower doors. This knowledge prevents costly damage that can result from using the wrong chemical or an abrasive sponge on a delicate surface. Furthermore, professional services come equipped with commercial-grade tools and supplies that are often more powerful and effective than standard consumer products. Their high-powered vacuums with HEPA filters can capture a significantly higher percentage of dust, allergens, and pet dander, leading to improved indoor air quality. This is particularly beneficial for households with allergy sufferers, asthmatics, children, or pets. The result is not just a home that looks clean, but one that feels and is, on a microscopic level, healthier. The process of a professional clean is systematic and thorough. Cleaners typically work with a detailed checklist, ensuring that no area is overlooked. They employ methodical strategies, such as cleaning from top to bottom to ensure dust and debris fall downwards before the floors are addressed, and working from one side of a room to the other. This structured approach guarantees consistency and completeness. A standard recurring clean will typically involve a comprehensive dusting of all surfaces, including furniture, shelves, and window sills; cleaning and disinfecting kitchen countertops, sinks, and appliance exteriors; scrubbing toilets, showers, tubs, and bathroom vanities; and vacuuming carpets and mopping hard floors. This regular maintenance keeps the home at a consistent level of cleanliness, preventing the deep buildup of grime. 3.Deep Cleaning For homes that have gone some time without a thorough cleaning or for clients new to a service, a deep clean is often recommended. This is a far more intensive and detailed service that addresses the areas often missed in a regular routine. A deep clean will include all the tasks of a standard clean but will go much further. It can involve washing baseboards and trim, cleaning light fixtures and ceiling fans, wiping down doors and door frames, cleaning behind and underneath furniture and appliances, scrubbing grout lines, and cleaning the interior of windows. This is the reset button for your home, tackling the accumulated dirt and dust in every nook and cranny, and establishing a new baseline of clean that makes subsequent maintenance easier. Specialized services like move-in and move-out cleanings are another critical offering. Preparing a home for sale or ensuring a new home is pristine before you unpack is an enormous task on top of the already stressful process of moving. A move-out clean is designed to leave the property in immaculate condition for the next occupants, often a requirement for retrieving a security deposit. This is the most exhaustive clean of all, performed on an empty home. Every interior surface is addressed, including the inside of all cabinets, drawers, closets, the oven, and the refrigerator. It ensures the home is presented in its best possible light, which can be a significant factor for real estate agents and potential buyers. Conversely, a move-in clean provides immense peace of mind, sanitizing the space and ensuring you are starting your new chapter in a fresh, thoroughly cleaned environment. 4.Trust and Security One of the most significant barriers for people considering a cleaning service is the idea of trust and security. Inviting someone into your personal space requires confidence in their professionalism and integrity. This is why reputable cleaning companies place such a high emphasis on their hiring and training processes. They conduct background checks on their employees and ensure they are thoroughly vetted. Furthermore, professional services are bonded and insured. Bonding provides protection against theft, while insurance covers any accidental damage that might occur to your property during the cleaning process. This comprehensive protection offers homeowners the peace of mind that they are working with a trustworthy organization that stands behind its work and its people. The relationship with a cleaning service is

5 Reasons Why Hiring a Cleaning Service is the Best Form of Self-Care Read More »

The Power of Citric Acid

The Power of Citric Acid: Your Solution for Limescale and Grime

In the world of cleaning, there’s citric acid, and countless products that promise miraculous results, often based on complex chemical formulations and strong scents. Yet, hiding in plain sight, often in the baking aisle of the grocery store, is a simple, effective, and remarkably versatile compound: citric acid. This white crystalline powder, derived naturally from citrus fruits like lemons and limes, is a powerhouse cleaner that can tackle some of the most stubborn household problems, particularly those related to mineral deposits and hard water. Its strength lies in its chemical nature as a weak organic acid, which allows it to dissolve grime, limescale, and soap scum without the corrosive intensity of stronger mineral acids. Chelation The primary mechanism that makes citric acid so effective is a process called chelation. In areas with hard water, the water is rich in dissolved minerals, primarily calcium and magnesium. When this water evaporates, it leaves behind a chalky, crusty residue known as limescale. This is the buildup you see inside your kettle, on your showerheads, and as a cloudy film on your glassware. Citric acid works by binding to these mineral ions, forming a compound called a chelate. This new compound is water-soluble, meaning the stubborn, stuck-on mineral deposit is transformed into something that can be easily rinsed away. This is a far more effective approach than simply trying to scrub the deposit off, which is often a losing battle and can damage the surface underneath. Kettle One of the most satisfying applications for citric acid is restoring a kettle caked with mineral deposits. Over time, the inside of a kettle can become layered with a thick, white scale that not only looks unpleasant but can also impair its heating efficiency and flake off into your water. To effortlessly clean it, simply fill the kettle about halfway with water, add one to two tablespoons of citric acid powder, and bring it to a boil. Once it has boiled, turn it off and let the solution sit for twenty to thirty minutes. You will often be able to see the limescale fizzing and dissolving. After the waiting period, pour out the solution and rinse the kettle thoroughly with fresh water a few times. The interior will be left sparkling clean, looking almost new, with no scrubbing required. This same principle applies perfectly to automatic coffee makers, which also suffer from internal mineral buildup that can slow down the brewing process and affect the taste of your coffee. To descale a coffee machine, fill the water reservoir with your normal amount of water and dissolve a tablespoon or two of citric acid into it. Run a full brewing cycle with this solution (without any coffee grounds). Afterwards, run at least two more full cycles with only fresh, plain water to ensure all traces of the acid are rinsed out of the machine’s internal components. Dishwasher This descaling power extends to the workhorse of the kitchen, the dishwasher. A dishwasher in a hard water area can quickly become inefficient as its spray arms, filter, and interior walls get coated in a film of limescale and soap scum. This not only looks grimy but can prevent the machine from cleaning your dishes properly, leaving them spotty and cloudy. To deep clean your dishwasher, ensure it is completely empty. Pour about half a cup of citric acid powder into the bottom of the machine, or place it in the main detergent dispenser. Then, run the dishwasher on its hottest, longest cycle. The hot water will activate the acid, which will circulate throughout the entire system, dissolving mineral deposits from the jets, pipes, and walls, leaving the stainless steel interior gleaming and helping the appliance run more efficiently. Beyond descaling appliances, citric acid makes an excellent all-purpose cleaning spray for various kitchen surfaces. To create a general cleaning solution, dissolve one to two tablespoons of citric acid powder in about a liter of warm water in a spray bottle. Shake it well until the crystals are fully dissolved. This spray is fantastic for cutting through grease and grime on countertops, cleaning sinks, and shining up stainless steel faucets and appliances. It effectively removes water spots and leaves a streak-free shine. It can also be used to disinfect and deodorize cutting boards. Simply sprinkle a small amount of the powder onto a damp board, scrub with a sponge, let it sit for a few minutes, and then rinse thoroughly. However, a critical word of caution is necessary here: because it is an acid, this solution should never be used on natural stone surfaces like marble, granite, or travertine. The acid will react with the calcium carbonate in the stone, causing permanent etching and dulling the finish. Bathroom Moving from the kitchen to the bathroom, citric acid proves its worth against the relentless duo of soap scum and limescale. Soap scum, the grimy film that builds up on shower doors, tiles, and bathtubs, is formed when the fatty acids in soap react with the mineral ions in hard water. Citric acid is uniquely suited to tackle both components of this problem. Using your prepared spray solution, generously coat the affected surfaces. Let it sit for ten to fifteen minutes to allow the acid time to break down the deposits. Then, scrub with a non-abrasive sponge or brush and rinse well with water. For shower doors plagued by cloudy water spots, this method will restore clarity and shine. Showerheads are another common casualty of hard water, becoming clogged with limescale until the water sprays out in uneven, weak jets. To clean a clogged showerhead without removing it, fill a plastic bag with your citric acid and water solution, submerge the showerhead completely in the liquid, and secure the bag in place with a rubber band or twist tie. Leave it to soak for at least an hour, or even overnight for severe buildup. After soaking, remove the bag and run the shower on hot for a minute to flush out any remaining

The Power of Citric Acid: Your Solution for Limescale and Grime Read More »