Appliance Cleaning

a clean and organized garage

Garage Cleaning: 5 Effective Strategies to Keep Your Garage Organized

The garage is the forgotten room. It is the one space in the home that is allowed to descend into a state of organized, and then disorganized, chaos. It begins as a home for your car, a place for your tools. But slowly, inevitably, it becomes the household’s dumping ground. It is the final destination for items that have no other place: the broken lawnmower, the half-empty cans of paint, the boxes from a move that happened five years ago, the sporting equipment for a hobby long since abandoned. Before you know it, parking a car inside is a distant memory, and finding a specific screwdriver requires an archaeological dig. Cleaning the garage is not like cleaning a kitchen. It is not a simple task of wiping surfaces and mopping floors. It is a project. It is an act of reclamation, of taking back a significant portion of your home’s square footage and returning it to a state of function and purpose. It is a process that can feel overwhelming, but when broken down into a systematic, manageable plan, it is entirely achievable. This is not about a quick tidy-up; this is about a full-scale reset. 1.Preparation and Strategy Before a single box is moved, the project must be planned. The single biggest mistake people make when tackling a garage is underestimating the scope of the job. This is not a two-hour task. For the average cluttered garage, you need to dedicate an entire weekend. Block it out on your calendar. Arrange for kids or pets to be elsewhere. Treat it with the seriousness of a home renovation project, because in many ways, it is. The second part of preparation is gathering your supplies. Going into this battle unarmed is a recipe for frustration and failure. You will need a specific set of tools for sorting, and another for the deep cleaning that will follow. For Sorting and Decluttering: Heavy-Duty Trash Bags: You will generate more trash than you think. Get more bags than you think you will need. Sturdy Boxes or Bins: These will be for items you intend to keep, donate, or sell. A Labeling System: A thick permanent marker and either labels or masking tape are essential. Every box must be clearly marked with its intended destination. For Cleaning: Safety Gear: At a minimum, you need heavy-duty work gloves to protect your hands from dirt, sharp objects, and chemicals. A dust mask is also critical, as you will be kicking up years of dust, dirt, and potentially mold spores. Safety glasses are a good idea, especially when sweeping and dealing with chemicals. Broom and Dustpan: A stiff-bristled push broom is ideal for the large floor surface. Shop-Vac: A standard household vacuum is no match for a garage. A shop-vac can handle everything from fine dust and sawdust to dead leaves, cobwebs, and small debris. Buckets: You will need at least one large bucket for your cleaning solution. Scrub Brushes: A long-handled deck brush is excellent for the floor, and a smaller, handheld stiff brush is good for corners and stubborn spots. Cleaning Agents: A heavy-duty degreaser is non-negotiable for tackling oil and fluid stains on the concrete floor. You may also want a powdered concrete cleaner or a simple, strong all-purpose cleaner. Rags and Sponges: A large supply of old rags is necessary for wiping down surfaces and for the final detailing. 2.Evacuation and Purge The most effective, albeit intimidating, method for decluttering a garage is to remove everything. Every single item must come out. The goal is to get the garage completely empty, creating a blank canvas for the deep clean and a forcing mechanism for decision-making. Wait for a clear, dry day and use your driveway as a staging area. As you pull items out, immediately begin sorting them into four distinct categories. This is where your boxes and labels come into play. Keep: This category is exclusively for items that you use, need, and that belong in the garage. Be ruthless. If you haven’t used a tool in over a year, do you really need to keep it? Is that box of old cables for electronics you no longer own providing any value? The garage is functional space, not a museum of past projects. Donate/Sell: These are items that are in good, usable condition but no longer serve a purpose for you. Old sporting equipment, tools you have duplicates of, functional but unused garden supplies. Place these directly into designated boxes. Once a box is full, tape it shut and label it. This prevents you from second-guessing your decisions. Trash/Recycle: This will likely be your largest category. Be prepared to fill several bags. This includes broken tools, expired chemicals, dried-up paint, rotten wood, and anything that is simply junk. Pay close attention to hazardous waste. Old paint, motor oil, pesticides, and other chemicals cannot simply be thrown in the regular trash. Check with your local municipality for hazardous waste drop-off locations and procedures. Group these items together for a separate, responsible disposal run. Relocate: You will inevitably find things that do not belong in the garage. Kitchen appliances, sentimental photo albums, out-of-season clothing. These items have been stored in the garage out of convenience, not logic. Put them in a “Relocate” box to be moved to their proper place inside the house later. Do not get sidetracked by taking them inside now; stay focused on the garage purge. As you work, you will be tempted to create a “maybe” pile. Resist this urge. Indecision is the enemy of progress. If you truly cannot decide on an item, place it in a single “quarantine box.” Seal the box and write a date on it six months in the future. If you have not needed to open that box by that date, take the entire unopened box directly to a donation center. 3.The Deep Clean With the garage completely empty, you can now see the true state of the space. It is time for the top-to-bottom clean. This is a fundamental principle of cleaning: start high and work your way

Garage Cleaning: 5 Effective Strategies to Keep Your Garage Organized Read More »

5 Mistakes You Need To Stop Making When Using The Duster

Dust is an unavoidable reality of any indoor space. It is a complex and ever-changing collection of microscopic particles, including dead skin cells, fabric fibers from clothing and furniture, pollen, pet dander, soil particles brought in from outside, and even microscopic meteorite debris. This combination of organic and inorganic matter settles on every horizontal surface, creating a fine gray layer that dulls the appearance of a home and can have a significant impact on indoor air quality. For individuals with allergies, asthma, or other respiratory conditions, dust is not just an aesthetic issue; it is a health concern, as it can harbor dust mites and other allergens that trigger symptoms. Duster The primary tool in the constant battle against this accumulation is the duster. In its simplest form, a duster is any implement designed to remove dust from surfaces. However, the evolution of this humble tool reveals a deeper understanding of what dust is and how it behaves. The goal of effective dusting is not simply to move dust from one surface to another, a common failing of older methods, but to capture and remove it from the environment entirely. The most iconic and traditional image of a duster is the feather duster. Typically made from ostrich, turkey, or chicken feathers attached to a handle, these tools have been used for centuries. Their appeal lies in their softness and ability to get into nooks and crannies of delicate objects. However, the feather duster is fundamentally flawed in its design when it comes to modern standards of cleanliness. The feathers are not particularly effective at trapping dust. Instead, their primary action is to dislodge dust particles, sending them airborne only to settle elsewhere minutes or hours later. While a high-quality ostrich feather duster can perform slightly better due to the fine, interlocking barbules on the feathers creating a minor static charge, it still largely functions by displacing, rather than capturing, dust. For a truly clean environment, the feather duster is more of a decorative antique than a functional tool. A significant step up from the feather duster is the lambswool duster. Made from genuine sheep’s wool, these dusters leverage the natural properties of the fiber. Lambswool contains lanolin, a natural oil that, combined with the static charge generated by the wool fibers, actively attracts and holds onto dust particles. Unlike feathers that merely push dust away, a lambswool duster actually lifts and collects it. The dense, soft fibers are excellent for general dusting on a variety of surfaces and are gentle enough for most furniture. They are particularly effective for dusting large, flat surfaces like tables and shelves. Microfiber The true revolution in dusting technology, however, came with the invention of microfiber. Microfiber is a synthetic material, typically a blend of polyester and polyamide (nylon), that is composed of fibers split into incredibly fine strands. These strands are many times smaller than a human hair, creating a vast surface area within a single cloth or duster head. This structure is what gives microfiber its almost magical cleaning ability. The split fibers create a net-like surface that physically traps dust, dirt, and even bacteria. Furthermore, when used dry, the fibers generate a positive static charge that attracts and holds onto negatively charged dust particles. Microfiber does not require chemical sprays to be effective; it works through its physical and electrostatic properties. It is the pinnacle of dust capture and removal. Microfiber dusters come in a wide array of shapes and sizes, each designed for a specific purpose, making them the most versatile option available. Handheld Microfiber Dusters: These are the workhorses for everyday dusting. With a fluffy head of microfiber strands, they are perfect for cleaning furniture, electronics, picture frames, and general household surfaces. Many have a flexible head that can be bent to clean the tops of ceiling fan blades or the tops of tall bookcases. Extendable Microfiber Dusters: For high and hard-to-reach places, an extendable duster is indispensable. With a telescoping pole that can reach ceilings, light fixtures, high corners, and the tops of cabinets, these tools eliminate the need for a stepladder in most situations. They prevent the neck and shoulder strain associated with trying to reach overhead and ensure that no part of the room is neglected. Slim or Flat Microfiber Dusters: Designed with a long, thin profile, these dusters are made to slide into tight spaces where other tools can’t go. They are perfect for cleaning underneath appliances like the refrigerator and oven, between cabinets, and alongside the washing machine and dryer—areas where thick layers of dust and lint can accumulate unseen. Microfiber Cloths: While not a “duster” in the traditional sense, a simple, high-quality microfiber cloth is one of the most effective tools for detailed dusting. Used dry, it picks up dust from delicate surfaces. Lightly dampened with water, it can remove smudges and more stubborn grime without leaving streaks.  Disposable Duster Another category in the modern dusting arsenal is the disposable duster. These tools typically consist of a reusable handle and disposable heads made from fluffy synthetic fibers designed to trap dust via static electricity. Their primary advantage is convenience. After use, the dirty head is simply thrown away, eliminating the need for cleaning the tool itself. While effective for light, regular dusting, they are less environmentally friendly and can become more expensive over the long term compared to a washable microfiber duster. The technique used for dusting is just as important as the tool itself. Without proper methodology, even the best microfiber duster can be ineffective. The single most important principle of cleaning any room is to work from top to bottom. Gravity dictates that any dust dislodged from a high surface will fall downward. Therefore, dusting should always be the first step in cleaning a room, before wiping down lower surfaces or vacuuming the floor. Start with the highest points: ceiling corners, light fixtures, and the tops of ceiling fans. An extendable duster is essential for this. Next, move to the tops of tall furniture

5 Mistakes You Need To Stop Making When Using The Duster Read More »

scale buildup in an espresso machine

Descaling Agent: Essential Tips On How To Use This Cleaning Product

The silent buildup of limescale that infiltrates our appliances is a common household problem, but don’t underestimate the descaling agent. This is limescale, the mineral residue left behind by hard water. As water evaporates, it leaves behind deposits of calcium carbonate and magnesium, which harden over time into a stubborn, crusty layer. This scale doesn’t just look unsightly; it is an active threat to the efficiency, longevity, and even the hygiene of some of our most-used appliances. To combat this, a specific type of cleaning product is required: the descaling agent. Understanding the role of a descaling agent is understanding basic chemistry. Limescale is an alkaline substance. The most effective way to break it down is with an acid. A descaling agent is, at its core, an acidic solution formulated to dissolve these mineral deposits safely and effectively. When the acid comes into contact with the calcium carbonate, a chemical reaction occurs that breaks the scale down into water-soluble substances that can be easily flushed away. This process is essential for maintaining a healthy and functional home. Neglecting it leads to appliances that work harder, consume more energy, and ultimately fail sooner. The most critical application for descaling agents is in appliances that heat water. Heating elements are magnets for limescale. As water is heated, the minerals precipitate out of the solution more rapidly, causing them to coat the heating element in a thick, insulating layer. This forces the appliance to use significantly more energy to achieve the same temperature, driving up electricity bills. Over time, the constant overheating can cause the element to burn out completely. This is true for electric kettles, coffee makers, washing machines, and dishwashers. Descaling is not just a cleaning task; it’s preventative maintenance that saves money and extends the life of your investments. There are two primary categories of descaling agents: those you can find in your pantry and those formulated commercially. Both have their place in a comprehensive cleaning routine. Household Descaling Agents For many common descaling tasks, simple, non-toxic household acids are perfectly effective. White Vinegar (Acetic Acid): This is the most well-known and accessible descaling agent. Its acetic acid is strong enough to dissolve light to moderate limescale buildup. It’s inexpensive, readily available, and multi-purpose. However, it has a strong, lingering odor that requires thorough rinsing, and its potency may not be sufficient for very heavy, long-term scale. It is the ideal choice for routine maintenance of kettles, drip coffee makers, and showerheads. Citric Acid: Often sold in powder form in grocery or bulk food stores, citric acid is a step up from vinegar. It is a more powerful acid, allowing it to work faster and more effectively on tougher scale. Its biggest advantage is that it is completely odorless, making it a far superior choice for coffee machines and kettles where a vinegar aftertaste would be unpleasant. Many commercial “eco-friendly” descalers are primarily citric acid-based. It is a highly effective and safe option for most applications. Lemon Juice: Containing a weaker form of citric acid, lemon juice can be used for very light descaling tasks, such as removing water spots and light film from faucets and fixtures. While not powerful enough for heavy buildup inside appliances, it is useful for surface cleaning and leaves a fresh, pleasant scent. Commercial Descaling Agents For more serious buildup or for delicate, high-end appliances, a commercial descaler is often the recommended choice. These products are specifically formulated to work quickly and safely on particular materials. Formic Acid or Sulfamic Acid-Based Descalers: These are more powerful, industrial-strength acids that are common in descalers designed for high-performance espresso machines and other specialized equipment. They work very quickly and are extremely effective at removing heavy scale. However, they are more potent and must be handled with care, strictly following the manufacturer’s instructions regarding dilution, contact time, and safety precautions like wearing gloves. Lactic Acid-Based Descalers: Often marketed as a gentler, plant-derived, and biodegradable option, lactic acid is still highly effective. It is less corrosive than stronger acids, making it a safe choice for a wide range of appliances while still providing excellent descaling power. Practical Descaling Applying the right descaling agent correctly is key to success. Electric Kettles: This is one of the easiest and most satisfying descaling tasks. Fill the kettle about halfway with a solution of equal parts white vinegar and water. Bring it to a boil, then turn it off and let it sit for an hour. Pour out the solution and rinse thoroughly. For an odorless clean, use citric acid: add one to two tablespoons of citric acid powder to a kettle half-full of water, boil, let it sit, and rinse. The scale will have dissolved completely. Drip Coffee Makers: Limescale buildup in a coffee maker slows down the brewing process, affects the water temperature, and can impart a bitter, chalky taste to your coffee. To descale, fill the water reservoir with a solution of equal parts white vinegar and water. Place a clean filter in the basket and run a full brewing cycle. Discard the hot vinegar solution. Run two to three more cycles with plain fresh water to completely rinse out any vinegar residue and taste. Espresso Machines (Single-Serve Pod and Traditional): This is where using the right product is critical. Always consult your user manual. Many manufacturers advise against using vinegar, as its strong acidity can damage sensitive internal components like aluminum parts and rubber seals over time. They will recommend a specific commercial descaler. The process generally involves running the descaling solution through the machine via the water reservoir, followed by extensive rinsing cycles to ensure all traces of the agent are flushed out. Regular descaling is non-negotiable for preserving the taste of your espresso and the health of the machine. Washing Machines and Dishwashers: Hard water affects these appliances by coating the heating elements and leaving a chalky film on the interior drum and spray arms. To descale, run an empty machine on the hottest, longest cycle. For washing machines, add two cups of white vinegar or a

Descaling Agent: Essential Tips On How To Use This Cleaning Product Read More »

cleaning front-laod washing machine

Cleaning Front-Load Washing Machine: Detailed Guide to a Sanitized Machine

A front-load washing machine is a marvel of modern engineering. It uses less water, is gentler on clothes, and its high-speed spin cycle extracts more moisture, reducing drying time. For all its benefits, however, it possesses a significant flaw that many owners discover too late: the tendency to develop a persistent, musty odor that can transfer to clean laundry. This smell is not a sign that your machine is broken; it is a sign that it needs a thorough cleaning. The very design that makes it so efficient, the airtight door seal and lower water usage, creates a perfect breeding ground for mold, mildew, and bacteria fed by soap scum and body soil. Understanding how to properly clean your front-load washer is not just about eliminating odors; it’s about maintaining the machine’s performance, ensuring the hygiene of your clothes, and extending the appliance’s lifespan. A regular, deep cleaning routine is a non-negotiable part of owning a front-loader. Understanding the Problem Areas Before diving into the cleaning process, it’s essential to identify the key components that harbor grime and odor. Unlike top-loaders that are constantly exposed to air, front-loaders trap moisture in several key places. The Gasket (The Rubber Door Seal): This is the primary culprit. The flexible rubber seal, with its deep folds, traps water, lint, hair, and detergent residue after every cycle. This dark, damp, and nutrient-rich environment is an ideal incubator for mold and mildew, which manifests as black spots and a sour smell. The Drum and Tub: While the stainless-steel drum itself is resistant to buildup, the outer, unseen tub that holds the water can accumulate a slimy film of soap scum and biofilm. This residue can break off in flakes and redeposit onto your clothes. The Detergent Dispenser Drawer: Over time, undissolved detergent, fabric softener, and bleach can build up in the dispenser drawer and its housing. This sticky residue can also become a food source for mold. The Filter/Drain Pump Trap: At the bottom of every front-load washer is a small trap designed to catch foreign objects like coins, buttons, lint, and hair before they reach the drain pump. If this filter is not cleaned regularly, the trapped, decomposing debris and stagnant water will create a powerful, unpleasant odor. The Comprehensive Cleaning Process To thoroughly clean your machine, you need to address each of these problem areas individually. Set aside about an hour of active time for this process, plus the time for the machine to run its cleaning cycles. 1. Clean the Gasket This is the most hands-on part of the job and provides the most immediate results. Preparation: Mix a solution of either equal parts white vinegar and water, or a solution of one gallon of water with a half-cup of chlorine bleach. Never mix vinegar and bleach. Vinegar is excellent for dissolving soap scum and killing mold, while bleach is a powerful disinfectant for stubborn mildew. For general maintenance, vinegar is often sufficient. If you see visible black mold, bleach is more effective. Wear rubber gloves to protect your hands. Application: Dip a clean cloth or sponge into your chosen solution. Gently pull back the rubber gasket, exposing the area between the seal and the drum. You will likely find a surprising amount of gunk. Meticulously wipe down the entire surface of the gasket, both inside and out. Pay close attention to the deep folds and the underside. Scrubbing: For stubborn mold spots or caked-on residue, use a soft-bristled brush (an old toothbrush works perfectly) dipped in the solution to scrub the affected areas. Be firm but not so aggressive as to damage the rubber. Rinsing and Drying: Once the gasket is clean, use a separate cloth dampened with plain water to wipe away any remaining cleaning solution. Finally, and this is a crucial step, dry the gasket completely with a clean, dry towel. Removing all moisture is key to preventing immediate regrowth of mildew. 2. Clean the Drum and Tub This two-cycle process will clean the parts of your machine you can’t see. Cycle 1 (The Sanitizing Cycle): Start with an empty machine. Pour one cup of chlorine bleach directly into the detergent dispenser’s bleach compartment. Do not add any detergent. Run the washing machine on the hottest, longest cycle available. Many modern machines have a dedicated “Tub Clean” or “Clean Washer” cycle; use this if available. If not, a “Heavy Duty” or “Sanitary” cycle with the highest temperature setting will work. The bleach will kill any mold, mildew, and bacteria lurking in the drum and the outer tub. Cycle 2 (The Descaling Cycle): After the bleach cycle is complete, it’s time to remove soap scum and mineral deposits. Pour one cup of distilled white vinegar directly into the drum or into the detergent dispenser. Again, run the machine on the hottest, longest cycle. The vinegar’s acidity will dissolve any lingering residue, deodorize the machine, and help to clear out any remaining traces of bleach. This two-step process ensures you are sanitizing and descaling without creating dangerous chemical reactions. 3. Clean the Detergent Dispenser Drawer This component is often overlooked but can be a significant source of buildup. Removal: Pull the dispenser drawer out as far as it will go. There is usually a release tab or button (often marked “Push”) on the back of the drawer that you can press to remove it completely from the machine. Soaking: Take the drawer to a sink and soak it in hot water and white vinegar for about 30 minutes. This will help to loosen any caked-on detergent and fabric softener. Scrubbing: Use a small brush to scrub all the compartments of the drawer, removing any residue. Pay attention to the small channels and the underside of the components. Cleaning the Housing: While the drawer is soaking, use your brush and cleaning solution to scrub inside the drawer housing on the machine itself. Mold can often grow on the “ceiling” of this cavity. Rinsing and Drying: Rinse the drawer thoroughly with warm water, dry it completely, and slide it back into place until it clicks. 4. Clean the Filter/Drain

Cleaning Front-Load Washing Machine: Detailed Guide to a Sanitized Machine Read More »

Cooktop Cleaning

Cooktop Cleaning: The Ultimate Guide for a Sparkling Space

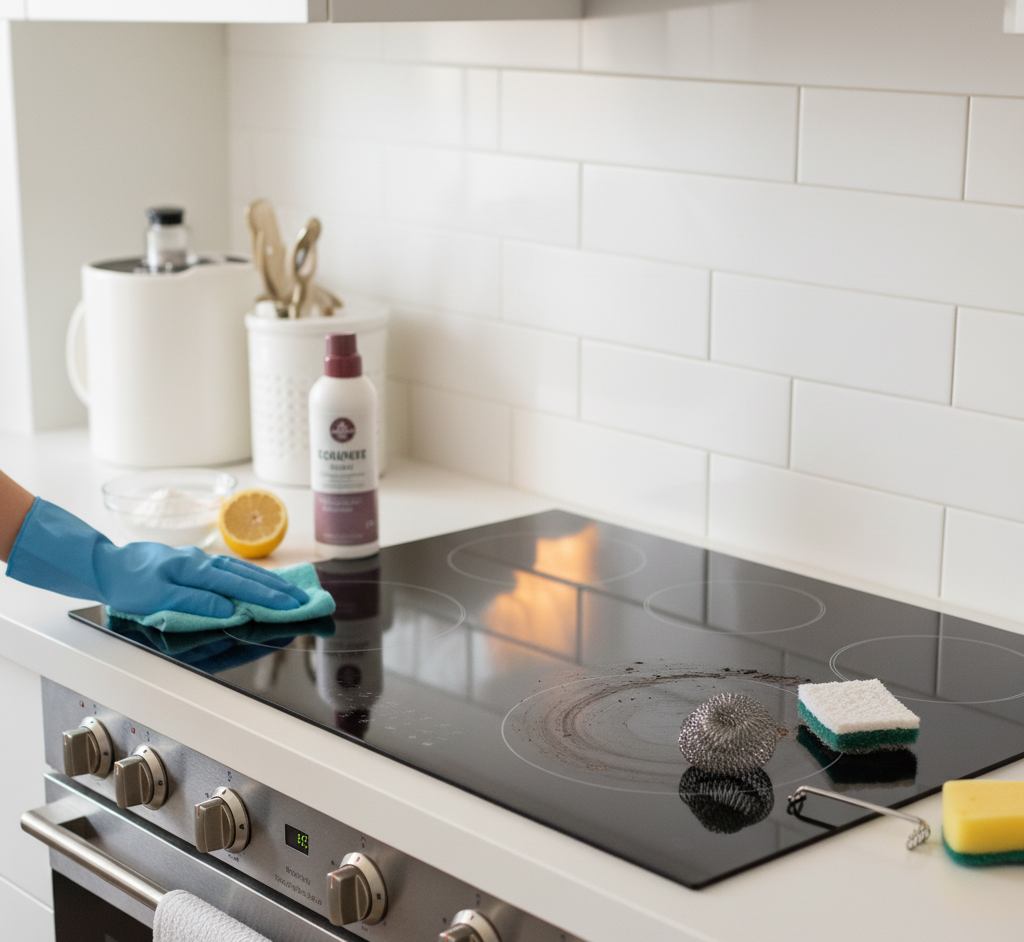
Keeping your cooktop clean is more than just an aesthetic concern; it’s fundamental for kitchen hygiene, food safety, and the longevity of your appliance. The kitchen is the heart of many homes, and the cooktop, invariably, is its focal point. Splattered grease, burnt-on food, and spills can not only compromise its appearance but also create a breeding ground for bacteria and unpleasant odors. Ignoring regular cleaning can turn small stains into stubborn grime, requiring much greater effort in the future and, in some cases, even damaging your equipment’s finish. A systematic approach and the use of the correct products and techniques are key to keeping your stovetop sparkling and functioning perfectly for years to come. Fundamental Principles for Cooktop Cleaning Regardless of the type of stovetop you own, some universal principles should always be followed to ensure effective and safe cleaning. First and foremost, safety is paramount. Before starting any cleaning, always unplug an electric stovetop or turn off the gas supply. This prevents accidental electric shocks or gas leaks. Second, ensure the cooktop is completely cool. Attempting to clean a hot surface is not only dangerous, causing burns, but can also cause residues to burn further onto the surface or damage materials. Third, avoid using abrasive products or tools. Steel wool sponges, scouring pads, and cleaning products with abrasive particles can permanently scratch delicate surfaces like glass, ceramic, and even stainless steel, compromising the cooktop’s aesthetics and functionality. At the end, quick action is a determining factor. Spills and splatters should be cleaned as soon as possible. The longer dirt remains, the more it burns and adheres to the surface, making removal exponentially more difficult. A quick daily wipe after use, combined with a weekly deep clean, forms the basis for an immaculate cooktop. Cleaning Gas Cooktops Gas cooktops are common and feature removable components that require individual attention. The main components are the grates, burner caps, burner heads, and the cooktop surface itself. Daily Cleaning: After each use and once the cooktop is cool, simply wipe the cooktop surface with a damp cloth and a little mild dish soap to remove crumbs and small spills. This prevents dirt from building up. Weekly/Deep Cleaning: Disassembly: Remove the grates and burner caps. Some models also have removable burner heads. Soaking: For the grates and burner caps, it’s best to soak them in warm water with plenty of dish soap. For more persistent dirt and baked-on grease, you can add some white vinegar or a specific degreaser. Let them soak for at least 30 minutes, or for a few hours if the dirt is very heavy. Cleaning Removable Parts: After soaking, scrub the grates and caps with a firm-bristled brush (non-abrasive) or a sponge. Make sure to remove all residues. For the burner heads, check that the gas ports are clear. Use a toothpick or an unfolded paper clip to carefully unclog any blocked holes. Caution: Never use wooden toothpicks that might break and get stuck. Cleaning the Surface: Clean the cooktop surface. If it’s stainless steel, use a stainless steel cleaner and a microfiber cloth to prevent streaks and add shine. For enamel surfaces, an all-purpose cleaner or a paste of baking soda and water can be effective for stain removal. Apply the paste, let it sit for 15-20 minutes, and gently scrub. Rinsing and Drying: Rinse all removable parts and the cooktop surface thoroughly with a clean damp cloth to remove any product residue. Dry completely before reassembling. Residual moisture can cause rust on the grates and make it difficult for the burners to ignite. Reassembly: Place the burner heads, caps, and grates back in their proper positions. Cleaning Electric Coil Cooktops Electric coil cooktops also present their own challenges, mainly with spills falling into the drip pans. Daily Cleaning: Wipe the cooktop surface with a damp cloth and detergent. Prevent dirt from accumulating. Weekly/Deep Cleaning: Disassembly: Ensure the stovetop is unplugged and completely cool. Lift each heating element and pull it out carefully. Remove the drip pans located underneath the heating elements. Cleaning Drip Pans: These pans are often the dirtiest spot. Soak them in very hot water with dish soap. For stubborn dirt, a paste of baking soda and vinegar can be applied: cover the pans with baking soda, spray vinegar, and let it sit for several hours or overnight. Scrub with a brush. In extreme cases, a commercial oven cleaner can be used on the drip pans (follow manufacturer instructions and use in a ventilated area). Cleaning Heating Elements: Never submerge heating elements in water. Simply wipe them with a damp cloth and a little detergent. For burnt-on residue, use a plastic scraper to gently scrape (with the element cold) or apply a baking soda paste, let it sit, and then wipe clean. Cleaning the Surface: Clean the cooktop surface with a damp cloth. Rinsing and Drying: Rinse and thoroughly dry all drip pans before replacing them. Make sure the heating elements are dry as well. Reassembly: Reinsert the drip pans and heating elements, ensuring they are properly seated. Cleaning Glass/Ceramic (Smooth Top) Cooktops These cooktops are elegant but require specific care to avoid scratches and stains. Daily Cleaning: After each use and once the cooktop is cool, clean the surface with a damp cloth and a little mild dish soap. This is crucial to prevent spills from drying and becoming difficult to remove. Weekly/Deep Cleaning: Apply Cleaner: Apply a specific cleaner for glass/ceramic cooktops (usually creamy or liquid) generously over the entire surface, especially on stained areas. Allow Product to Work: Let the product sit for a few minutes (follow manufacturer instructions). Scrubbing: With a non-abrasive sponge (often included with the cleaner) or a microfiber cloth, scrub the surface in circular motions. Removing Burnt-on Food: For burnt-on food or melted sugar (which can cause damage if not removed correctly), use a single-edge razor blade, holding it at a low angle (about 30-45 degrees) to the surface. Scrape very carefully to lift residues, always pushing the dirt away from you and never scraping directly down to avoid scratches. Caution: Never use the blade flat against the surface. Remove Product Residue: Use a

Cooktop Cleaning: The Ultimate Guide for a Sparkling Space Read More »

getting ready for fall cleaning

September Cleaning: 7 Quick And Easy Steps To Get Ready For Fall

September in Canada marks an essential transition, the end of summer and the beginning of preparations for autumn and winter. This period demands a thorough house cleaning, not just to get rid of accumulated dust and clutter from the warmer months, but also to prepare the home for the long periods when we spend more time indoors. An effective September cleanup is the foundation for a healthy, organized, and welcoming environment during the colder seasons, contributing to both physical and mental well-being. The approach should be systematic, starting with planning and decluttering, and moving on to detailed cleaning of each area of the house. 1.Planning Preparation for the September cleanup begins with creating an action plan and decluttering. It is essential to adopt an organized approach to avoid feeling overwhelmed. Start by scheduling specific time blocks for different areas or types of tasks. This transforms what seems like a gigantic chore into manageable steps. Take an inventory of your cleaning supplies. Make sure you have microfiber cloths, a vacuum cleaner with various attachments, a mop, buckets, protective gloves, and a variety of cleaning products such as an all-purpose cleaner, disinfectant, glass cleaner, bathroom cleaner, and floor cleaner. Consider investing in eco-friendly and non-toxic products, especially if there are children, pets, or people with allergies in the home. 2.Three-Box Method Decluttering should be the first step in every room before any cleaning begins. This process is crucial for freeing up space and facilitating deep cleaning. Adopt the “three-box method”: one for items to keep and organize, one for donating or selling, and another for trash or recycling. Start with seasonal summer items, putting away beach gear, garden decorations, and summer clothes. Evaluate clothing, toys, books, and stationery. Getting rid of excess not only organizes the space but also reduces the amount of dust and clutter to clean. In the kitchen, clear out the pantry and refrigerator, discarding expired food and reorganizing the rest. In living areas, collect and categorize papers, magazines, and personal items. In bedrooms, perform a wardrobe rotation, putting away summer clothes and preparing for autumn/winter. Once decluttering is complete, plan to deliver items for donation or recycling. 3.Focus On The Kitchen With decluttering done, cleaning of each room can begin. The kitchen, being a hub of activity, requires special attention. Perform a deep clean of appliances. The oven should be cleaned internally, removing grease and residue. The microwave needs a complete internal and external cleaning. Empty the refrigerator, discard old food, clean shelves and drawers, and wash the interior with mild soap and water. The dishwasher should be run with a vinegar cycle to remove deposits and odors. Clean all cabinets and drawers, both inside and out, and wash countertops and backsplashes. Disinfect the sink and faucets, and pay attention to cleaning the garbage disposal, if you have one. Finish by mopping or steaming the floor. 4.Bathroom In bathrooms, hygiene is paramount. Scrub toilets, showers, and bathtubs, paying attention to tile grout to remove mold and mildew. Wash or replace shower curtains and liners. Clean mirrors, light fixtures, and all contact surfaces, such as faucets, doorknobs, and light switches, with an effective disinfectant. The bathroom floor should be thoroughly washed and disinfected. Organize medicine cabinets and drawers, discarding expired or unused products. In bedrooms, start by washing all bedding (sheets, duvets, blankets) and curtains. Vacuum the mattress and consider flipping or rotating it to extend its lifespan. Dust all surfaces, furniture, light fixtures, and ceiling fans. Vacuum or mop the floor, including under the bed and furniture. Reorganize closets and drawers, taking the opportunity for the seasonal clothing swap prepared during decluttering. 5.Living Room Living and common areas also require detailed cleaning. Dust all furniture, electronics, and decorative items. Vacuum or clean upholstery on sofas and chairs. Clean windows and window treatments, such as blinds and curtains. Vacuum or mop floors. Dedicate time to cleaning high-touch surfaces, such as remote controls, light switches, and doorknobs. Hallways and entryways, which are the first points of contact with the outdoors, need to be kept free of clutter. Clean and organize shoe racks and coat hooks. Wipe down walls to remove any marks or scuffs. Deeply vacuum or mop floors in these areas, removing any salt, mud, or debris that may have been tracked in. 6.Laundry Room In the laundry room, wipe down the exterior of the washing machine and dryer. Clean the dryer’s lint trap thoroughly to ensure efficiency and fire safety. Wash the utility sink, if present, and organize detergents and cleaning supplies. Beyond the main rooms, there are often overlooked areas that need attention during the September cleanup. Windows, both inside and out, should be cleaned to maximize natural light during the darker months. Clean walls and baseboards to remove marks and accumulated dust. Doors and doorframes also accumulate fingerprints and dust, requiring thorough cleaning. Light fixtures and ceiling fans should be dusted and cleaned. A crucial step is cleaning or replacing air filters in heating and air conditioning systems. This significantly improves indoor air quality, which is essential when windows remain closed. Wash and disinfect trash cans in all rooms. Small appliances like toasters, coffee makers, and kettles also deserve a thorough cleaning. Although the focus is internal, a brief outdoor preparation to put away summer items, such as patio furniture and barbecues, is also part of the transition to autumn. 7.Maintenance Maintaining a clean and organized home after the big September cleanup requires implementing long-term maintenance strategies. Reinforce daily “mini-cleaning” habits to prevent dirt accumulation. Create a weekly schedule for deeper cleaning tasks, rotating areas so none are neglected. Conduct seasonal check-ins to plan future cleanups, adapting them to the needs of each season. Invest in smart storage solutions to maintain organization and reduce clutter. Delegate responsibilities among family members so that maintenance is a joint effort. Considering the Canadian lifestyle, with its distinct seasons, the September cleanup is particularly important for preparing the home for colder months. This includes storing summer equipment, such as

September Cleaning: 7 Quick And Easy Steps To Get Ready For Fall Read More »

Home Clean and Organized

Home Clean and Organized: 5 Tips From Cleaning Experts For a Stunning Home

Keeping a clean and organized home is an ongoing process that demands more than just sporadic cleaning sessions. It involves adopting a proactive mindset and integrating simple habits into daily life. An organized home is not just aesthetically pleasing; it contributes significantly to mental well-being, reducing stress and increasing productivity. The physical environment we live in has a direct impact on our mental clarity and energy. When the house is in order, there are fewer distractions, and the sense of control over one’s space translates into greater tranquility and focus in other areas of life. The key to this consistency lies in functional and practical strategies that transform the task of maintaining the home into a habit, rather than an overwhelming burden. 1.Small Continuous Efforts The foundation for an always clean and organized home begins with forming consistent daily habits. Instead of viewing cleaning as a monumental task reserved for a single day of the week, adopt the philosophy of small, continuous efforts. The “one-minute rule” is a fundamental example: if a task takes less than a minute to complete, do it immediately. This could be putting away a book, wiping up a spill, or putting away a cup. These quick actions prevent the accumulation of small messes that, together, become overwhelming. Another essential habit is the “daily reset.” This means dedicating 10-15 minutes at the end of the day to tidy up the main rooms, such as the kitchen and living room. Put away dishes, wipe countertops, arrange sofa cushions. Waking up in a tidy environment sets a positive tone for the day. Involving all household members in this routine is crucial. Assign responsibilities and encourage collaboration. When everyone contributes, the load is shared, and the result is a collective benefit. Having “a place for everything and everything in its place” is the maxim of organization. This means every item in your home should have a designated storage location. When you use something, the natural habit should be to return it to its place, eliminating the accumulation of misplaced objects and reducing the need for large tidying sessions. 2.The Most Important Rooms The kitchen is undoubtedly one of the rooms that requires the most daily attention due to its constant use. After each meal, the routine should include immediately washing dishes and utensils or loading the dishwasher. Wipe countertops with a damp cloth and an all-purpose cleaner to remove crumbs and spills. Quickly sweep or vacuum the floor to pick up debris. Once a week, kitchen cleaning should be more thorough. This includes cleaning the inside and outside of the microwave, the stovetop and oven surface (if necessary), the sink, and faucets, ensuring no grease or food residue accumulates. Check and wipe the exterior of the refrigerator and other appliances, and empty and clean the trash can. Bathrooms also require strict daily and weekly attention. Daily, quickly wipe the sink, mirror, and countertop to remove splashes and stains. A quick scrub of the toilet can prevent dirt buildup. Weekly, perform a thorough cleaning: disinfect the toilet inside and out, clean the shower or bathtub (paying attention to mold and mildew), wash the floor, and wipe all surfaces with an appropriate disinfectant. Wash towels and shower curtains regularly. In living areas and bedrooms, daily organization is key. In the living room, arrange sofa cushions, fold blankets, and put away remote controls, magazines, and other personal items. In bedrooms, the simple act of making the bed every morning already transforms the room’s appearance. Put dirty clothes in the hamper and clean clothes in drawers or the closet. Weekly, vacuum or sweep floors in all living areas and bedrooms. Use a microfiber cloth to dust all surfaces, furniture, shelves, and electronics. Don’t forget to clean mirrors and glass surfaces. 3.High-Traffic Areas Hallways and entryways, often high-traffic areas, need to be kept free of clutter. Ensure shoes, coats, and bags have a designated spot and are put away immediately after use. Sweep or vacuum these areas frequently, as they are the first to accumulate dirt from outside. Decluttering and organization are the pillars of long-term home cleanliness. The “one in, one out” principle is effective: every time you buy a new item, donate, sell, or discard a similar old item. This prevents unnecessary accumulation. Start by categorizing and containing items. Group similar objects and use boxes, baskets, drawer dividers, and organizers to keep them together and accessible. Vertical organization is an excellent way to maximize space, using shelves, wall organizers, and hooks. Labels are simple but powerful tools that ensure everyone in the house knows where each item belongs, facilitating both organization and the return of items to their place. Beyond physical decluttering, digital organization also contributes to mental clarity. Organize files on your computer, clean your email inbox, and get rid of unused apps on your devices. 4.Right tools The correct choice and use of cleaning tools and techniques are crucial for efficiency. Always start from top to bottom: when dusting or cleaning, begin with the highest surfaces and work your way down. This ensures any dust or dirt that falls is cleaned up at the end. Invest in the right tools: microfiber cloths are excellent for capturing dust and polishing surfaces without leaving lint. A good vacuum cleaner with various attachments is indispensable for different floor types and surfaces. Also have an appropriate mop, cleaning brushes, and sponges. Regarding products, an all-purpose cleaner, a glass cleaner, a disinfectant, a floor cleaner, and a bathroom cleaner are essential. Consider eco-friendly and non-toxic options, especially if there are children, pets, or people with allergies in the home. Always wear protective gloves to protect your hands and ensure good ventilation when using chemical products. It is crucial to know your home’s surfaces and use appropriate products to avoid damage. For example, never use abrasive products on delicate surfaces like marble or sealed wood. Addressing specific daily life challenges requires adapted strategies. If you have pets, frequent cleaning is a necessity. Vacuum regularly to

Home Clean and Organized: 5 Tips From Cleaning Experts For a Stunning Home Read More »

House Cleaning Services Calgary

House Cleaning Services Calgary: Have a Spotless Home Today

Modern life in Calgary, with its demands and opportunities, often leaves little time for essential household chores. Residents of the city, whether busy professionals, parents with packed schedules, or outdoor enthusiasts, frequently find themselves seeking solutions to optimize their time and enhance their quality of life. In this scenario, house cleaning services Calgary emerge as a practical and increasingly popular answer. Maintaining a clean and organized home is fundamental for well-being, providing a tranquil and healthy refuge amidst daily hustle. For many in Calgary, delegating cleaning to specialists is not a luxury, but a necessity that allows them to focus on personal and professional priorities, or simply to enjoy more of what the city offers. Professional Cleaning Services The scope of professional cleaning services extends far beyond a simple tidy-up. Specialized companies in Calgary offer a diverse range of options, designed to meet the specific needs of each residence and lifestyle. Regular maintenance cleaning forms the basis for many, including essential tasks like dusting surfaces, vacuuming carpets and floors, mopping, and cleaning countertops and mirrors. The focus here is consistency, ensuring the home always remains in a pleasant and hygienic state, preventing the accumulation of dirt and clutter that could become overwhelming. Many choose house cleaning services Calgary for this consistent upkeep. For times when dirt accumulates or the house needs deeper care, deep cleaning is the solution. This service is more intensive and detailed, targeting areas often neglected in daily routines. This can include interior cleaning of appliances like ovens and refrigerators, scrubbing grout in bathrooms and kitchens, thorough disinfection of toilets and showers, and meticulous attention to baseboards and corners. Deep cleaning revitalizes the environment, eliminating dirt and germs that can compromise the health and comfort of the home. Move-in/move-out Beyond routine and deep cleaning, there are specialized services for transitional moments. Move-in/move-out cleaning is essential for those relocating. For those moving out, it ensures the property is returned in impeccable condition, which can be crucial for security deposit recovery. For those moving in, it prepares the new home for fresh and hygienic occupancy, allowing new residents to start on the right foot. This type of cleaning is exhaustive, covering every inch of the house from top to bottom. The demand for house cleaning services Calgary during moves is significant. Post-renovation cleaning is another vital service in a city where property renovation is common. Renovations leave behind a considerable amount of construction dust and debris, which require specific equipment and techniques for effective and safe removal. Cleaning professionals are equipped to handle this challenge, ensuring the renovated space is ready to be enjoyed without any remnants of the work. Additionally, many service providers in Calgary offer special cleanings such as window washing, steam carpet cleaning, and upholstery cleaning, which can be contracted separately or as complements to standard cleaning packages. Flexibility is a key feature, allowing house cleaning services Calgary to be tailored to meet the individual needs of each client and the particularities of each home. The benefits of hiring professional cleaning services are numerous and positively impact the quality of life. The most evident is recovering time. Instead of spending hours cleaning, Calgary residents can dedicate that time to more enjoyable activities, work, family, hobbies, or simply rest. This freedom is one of the biggest attractions of house cleaning services Calgary. Another significant benefit is consistent cleanliness and hygiene. Professionals are trained to maintain high cleaning standards, using effective products and methods to remove dust, allergens, bacteria, and viruses. This contributes to a healthier home environment, reducing the spread of illnesses and improving indoor air quality, which is especially important for people with allergies or respiratory problems. Professional house cleaning services Calgary ensure this level of consistency. The reduction of stress is an often underestimated impact. The sight of a dirty or disorganized home can generate anxiety and guilt. By delegating this task, residents alleviate this mental burden, fostering a sense of calm and well-being. The home becomes a true sanctuary, free from the worries of daily maintenance, thanks to dedicated house cleaning services Calgary. Trained Team Professional expertise and equipment are also clear advantages. Cleaning companies invest in high-quality industrial tools and effective, safe cleaning products, often unavailable to the average consumer. Furthermore, staff are trained in efficient cleaning techniques, ensuring the work is done thoroughly and without damage to surfaces. This level of professionalism is a hallmark of top house cleaning services Calgary. At the end, the longevity of the home benefits. Regular and proper cleaning protects the materials, surfaces, and appliances in the house. Removing dirt and dust before they become ingrained helps prevent wear and tear and extends the lifespan of floors, furniture, and finishes, representing a form of preventive property maintenance. This is an often-overlooked advantage of house cleaning services Calgary. Calgary itself presents characteristics that make cleaning services particularly relevant. Busy lifestyles are a constant, with many Calgarians engaged in demanding careers, which limits the time available for household chores. As a family-oriented city, Calgary has many families who need to balance work, school, and children’s extracurricular activities, where house cleaning time is often the first to be sacrificed. Moreover, a passion for outdoor activities is a hallmark of Calgary, given its proximity to the Rocky Mountains and numerous parks. This means mud, dust, snow, and other natural elements are frequently tracked indoors, requiring more frequent and robust cleaning. House cleaning services Calgary are well-equipped to manage this. Seasonal Changes Seasonal changes in Calgary also pose specific cleaning challenges. In winter, salt and slush from snow and ice are tracked indoors, demanding constant attention to floors. Spring brings pollen and accumulated winter grime. Summer, with more outdoor activities, increases foot traffic and, consequently, general dirt. Autumn, in turn, introduces leaves and debris. Professional house cleaning services Calgary are equipped to handle these seasonal challenges, offering tailored solutions for each period of the year. All these factors converge to make professional cleaning a practical necessity for many Calgarian homes. When choosing a cleaning service in Calgary, it is crucial to consider several factors to ensure a satisfactory and safe experience. Reputation and reliability are the starting point. Researching online reviews on platforms

House Cleaning Services Calgary: Have a Spotless Home Today Read More »

The Dirtiest Places In Your Home

The Dirtiest Places In Your Home Can Be Harmful To Your Health

A house is merely a structure until the dirt from the garden, the dust from the road, and the smudges of daily life turn it into a home. Beneath the surface of tidy countertops and vacuumed floors, a complex ecosystem of bacteria, viruses, mold, and fungi thrives, often in the very places we overlook during our routine cleaning. We are conditioned to tackle the visible dirt, the spill on the rug, the smudges on the window, but the most significant threats to our household hygiene are microscopic and insidious. They multiply in the damp, the dark, and on the surfaces we touch most frequently. Understanding this hidden microbial landscape is the key to elevating your cleaning from a superficial chore to a meaningful act of health protection. KITCHEN The kitchen, the very place we prepare our food, is paradoxically the most germ-laden room in the house. Its combination of raw food, moisture, and high-touch surfaces creates a paradise for pathogens. The kitchen sink is ground zero for contamination. Far from being self-cleaning, the sink basin is a repository for food particles rinsed from plates and cutting boards. These particles create a sticky, invisible layer known as a biofilm, a complex community of microorganisms that adheres to the sink surface and drain. This biofilm can host dangerous bacteria like E. coli and Salmonella. Every time you turn on the faucet, water can splash these germs from the basin onto your hands, counters, or clean dishes. The garbage disposal adds another layer of risk, as running it can aerosolize bacteria-laden water droplets into the surrounding air. The faucet handles and the small, damp aerator cap at the end of the spout are also hotspots, collecting both germs from our hands and trapping biofilm within their small components. SPONGES The tools we use to clean the kitchen are often the dirtiest items of all. The kitchen sponge is a notorious microbial incubator. Its porous, absorbent structure remains damp for hours, providing the perfect environment for bacteria to multiply exponentially. A single sponge can harbor billions of bacteria, including Campylobacter, a leading cause of foodborne illness. When you wipe a surface with a contaminated sponge, you are not cleaning; you are performing a microbial transfer, spreading a film of germs across your counters. Dishcloths are no better, as they hold moisture and trap food particles. CUTTING BOARDS Cross-contamination is a constant threat. Cutting boards, particularly those with deep knife grooves, are a major culprit. Bacteria from raw meat and poultry become embedded in these cuts and can survive even vigorous washing, ready to contaminate the salad vegetables you chop next. For this reason, using separate, color-coded boards for raw meats and produce is a critical food safety practice. Appliance handles and knobs, on the refrigerator, microwave, oven, and dishwasher, are the Grand Central Station of household germs. We touch them constantly, often after handling raw foods and before washing our hands. Viruses like influenza can survive on stainless steel surfaces for up to 48 hours, making these handles a primary vector for transmission within a family. Even the coffee maker’s water reservoir, a dark and perpetually damp container, is a prime breeding ground for mold and yeast, which you then brew into your morning cup. The knife block, with its dark, narrow slots, is another forgotten hazard, trapping moisture and debris that can contaminate supposedly clean knives. TOILET In the bathroom, our focus is often misplaced. While the toilet bowl receives regular attention, the surrounding area is frequently ignored. Every flush without the lid down creates a “toilet plume,” an aerosolized mist of microscopic water droplets containing fecal bacteria that can travel up to six feet and settle on every surface, including the floor, countertops, and your toothbrush. The flush handle itself is one of the most contaminated touchpoints. Your toothbrush holder is another cesspool, collecting drips of water and toothpaste that form a murky sludge at the bottom where bacteria like Staphylococcus and mold can flourish, just inches from the toothbrush you put in your mouth. SHOWER AND BATH The shower and bathtub are a battleground against mold and mildew. The primary fuel for this fungal growth is soap scum. This is not just dried soap; it’s a stubborn, waxy compound of soap fats and hard water minerals like calcium and magnesium. It provides a food source and a protective, water-resistant layer for mold to grow underneath. This is where you find the common pink “mold” (actually a bacterium called Serratia marcescens) and more dangerous black molds. The showerhead itself is another hidden danger. Its nozzles can harbor biofilms containing bacteria like Mycobacterium avium, which can cause pulmonary infections, especially in those with compromised immune systems. These bacteria are then aerosolized in the warm shower mist and inhaled directly into the lungs. Damp bath mats, which rarely dry completely, become breeding grounds for mold and bacteria, which are then tracked around the bathroom. EVERYDAY ITEMS Throughout the rest of the house, the primary sources of filth are us. The items we touch the most are often the ones we clean the least. These objects, known as fomites, are inanimate surfaces capable of carrying infectious agents. Remote controls, light switches, doorknobs, and game controllers are handled by everyone, dropped on the floor, and exposed to coughs and sneezes, yet are rarely disinfected. They accumulate a sticky film of skin oils, sweat, and grime that helps germs adhere and thrive. Our personal electronics are even worse. The average mobile phone has been proven to carry more bacteria than a toilet seat, a direct result of being constantly touched and placed on various surfaces. Computer keyboards are a catch-all for crumbs, dead skin, and oils, creating a microbial buffet between the keys. CARPETS Soft surfaces act as giant filters, trapping and holding contaminants. Carpets and upholstery collect dust, pet dander, pollen, tracked-in dirt, and food particles. More insidiously, they are home to colonies of dust mites. These microscopic arachnids don’t bite, but they feast on the 1.5

The Dirtiest Places In Your Home Can Be Harmful To Your Health Read More »

old Toothbrushes For Cleaning services

8 Efficient And Economical Ways To Use Old Toothbrushes For Cleaning

Before you discard that old toothbrush, consider its second life as a precision cleaning instrument. Its small head, firm bristles, and ergonomic handle make it an unparalleled tool for tackling the grime that accumulates in the tightest, most awkward spaces in your home. Its utility extends far beyond the bathroom sink, reaching into every room to restore detail and cleanliness where larger tools cannot. 1.Floor Joints In the kitchen, the toothbrush becomes an indispensable ally. Start with the grout lines on your tiled floor or backsplash. These porous channels are magnets for spilled coffee, sauce splatters, and general kitchen debris. A standard mop or sponge glides over them, but a toothbrush gets right in. Create a paste using baking soda and a small amount of water or, for tougher stains, a bit of hydrogen peroxide. Apply the paste directly to the grout and let it sit for a few minutes. Then, take your old toothbrush and scrub in small, circular motions. The bristles will agitate the paste and lift the embedded grime, restoring the grout to its original color. This same method works wonders on countertop grout where crumbs and food particles become trapped. 2.Sink Move to the kitchen sink. The area around the base of the faucet is a breeding ground for mineral deposits and soap scum. The angled head of a toothbrush can get right up against the fixture, scrubbing away the chalky white residue. Dip the brush in white vinegar to help dissolve hard water stains. Don’t forget the faucet’s aerator; unscrew it and use the toothbrush to scrub the fine mesh screen, clearing any blockages that affect water pressure. The sink drain itself, particularly the rubber splash guard in a garbage disposal, is another target. Lift the rubber flaps and use the toothbrush with a degreasing dish soap to scrub away the slimy, foul-smelling buildup on the underside. It’s a task no one enjoys, but one for which the toothbrush is perfectly designed. 3.Microwave Appliances are filled with nooks that a cloth can’t reach. The control knobs on your stove can be removed and scrubbed individually. The tiny crevice between the cooktop and the counter is a trap for crumbs; a dry toothbrush can flick them out before you wipe the area down. The seal around your microwave or oven door collects grease and food splatter. A toothbrush dipped in a mild cleaning solution can gently scrub this gasket clean without causing damage. The vents on the front of your dishwasher, the control panel buttons, and even the intricate filter system inside can all be detailed with a toothbrush. For small appliances, its use is even more pronounced. The blades of a blender, the cutting gear of a can opener, and the grates of a toaster oven are all easily and safely cleaned with a toothbrush. A particularly clever use is for cleaning a cheese grater. Instead of shredding your sponge, scrub the grater from the inside out with a soapy toothbrush to dislodge every last bit of dried-on cheese. 4.Bathroom The bathroom presents its own set of detailed cleaning challenges. Shower and tub grout is constantly exposed to moisture, soap, and body oils, leading to mildew and soap scum. A toothbrush, paired with a specialized tile cleaner or a potent mixture of vinegar and dish soap, is the ultimate weapon. Its bristles are stiff enough to scour away the grime without scratching the tile. The track for a sliding shower door is notoriously difficult to clean. It’s a narrow channel that collects a disgusting combination of hard water deposits, soap scum, and hair. A dry toothbrush can first be used to loosen and sweep out the dry debris. Follow up by spraying a cleaner into the track and using the toothbrush to scrub it from end to end, reaching into the corners. The result is a smoothly gliding door and a far more hygienic shower environment. Look closely at your bathroom fixtures. The overflow hole in the sink is a dark, damp space that can develop odors and mildew. A toothbrush can be inserted and scrubbed around the opening to clean it thoroughly. The base of the toilet, where it meets the floor, collects dust and other unpleasantries. A dedicated, clearly marked toothbrush can be used to scrub this crevice clean. The most overlooked area is the toilet seat hinges. The complex plastic and metal parts are impossible to clean with a cloth. A toothbrush can get into every single gap, removing the grime that builds up around the bolts and hinges, a detail that makes the entire toilet look and feel cleaner. The jets under the rim of the toilet bowl, often clogged with mineral deposits, can be individually scrubbed with a toothbrush dipped in toilet bowl cleaner to ensure a powerful, effective flush. 5.Windows And Doors Beyond the kitchen and bath, the toothbrush proves its worth throughout the house. Window and sliding door tracks are a prime example. Dust, dirt, dead insects, and outdoor debris collect in these channels. A dry toothbrush works perfectly to loosen and sweep this material into a pile that can be easily vacuumed up with a crevice tool. For caked-on mud, a wet toothbrush will do the job. The delicate fins of heating and air conditioning vents are dust magnets. A dry toothbrush can gently brush the dust off each fin without bending or damaging them. 6.Electronics For electronics, a completely dry, clean toothbrush is essential. Gently brush it over your computer keyboard to dislodge crumbs, dust, and hair from between the keys. Do the same for the ports and vents on a laptop, gaming console, or television. The fine bristles can get into these areas without causing static damage, provided the brush is dry. The intricate patterns on furniture, such as carved wood on a headboard or the detailed legs of an antique table, can also be dusted with a dry toothbrush, which removes dust from crevices a cloth would miss. 7.Clothes Its applications in laundry

8 Efficient And Economical Ways To Use Old Toothbrushes For Cleaning Read More »