Appliance Cleaning

green cleaning products

4 Incredible Tips On How To Use Non-toxic Cleaning Products

The Case Against Harsh Cleaners in Your Home Modern cleaning is sold as brightly colored liquids promising to disinfect, degrease, and deodorize, and many of us equate that sharp chemical smell with freshness. It is a paradox worth pausing on: we wave potentially hazardous chemicals through the spaces where we eat, sleep, and play in order to make them healthier. A truly clean home is not one sterilized by synthetic compounds but one free of both dirt and harmful residues. Switching to non-toxic cleaning products sacrifices no results. It returns you to simpler, smarter, safer tools that have worked for generations. Tip 1: Understand What Conventional Cleaners Cost You The argument for change runs on three tracks: health, environment, and money. Many commercial cleaners release volatile organic compounds, or VOCs, the moment you spray. Inhaled, VOCs have been linked to headaches, dizziness, respiratory problems, and long-term organ damage, and that vague word “fragrance” on a label often hides dozens of undeclared chemicals. Among them are phthalates, known endocrine disruptors. Anyone with asthma, allergies, or chemical sensitivities can react immediately. Health Canada’s overview of indoor air contaminants details VOCs and their health effects. The environmental damage follows the wipe-down. Rinsed-down-drain chemicals reach waterways, where phosphates can fuel algal blooms that disrupt aquatic ecosystems, and many synthetic compounds are not readily biodegradable, persisting for years. The economic angle is the simplest. The cleaning aisle sells a specialist for glass, another for countertops, another for floors, another for the bathroom, plus a dedicated stove degreaser. That hyper-specialized market is a marketing win, not a cleaning need. A few basic non-toxic staples do all those jobs for a fraction of the cost. Tip 2: Build a Five-Ingredient Toolkit Everything effective in a green closet comes down to ingredients you probably own. Distilled white vinegar. Acetic acid dissolves mineral deposits like hard-water stains and limescale, cuts grease, deodorizes, and disrupts the cell structure of many bacteria and molds. A 50/50 spray handles glass, mirrors, floors, and general surfaces; it also descales coffee pots and shower heads and works as a fabric softener substitute. Never use it on marble, granite, or travertine, since the acid etches and dulls stone, and keep it off waxed floors and cast iron. Baking soda. A mild alkali and gentle abrasive that absorbs and neutralizes odors rather than masking them. Its fine crystals scrub sinks, tubs, and toilets without scratching most surfaces, and paired with an acid, the fizz helps dislodge clogs and lift stubborn dirt. Sprinkle on damp surfaces or paste it with water or dish soap for stovetops and grout, boost your laundry detergent, and deodorize refrigerators, carpets, and drains. Test the paste on high-gloss finishes first. Hydrogen peroxide. A disinfectant and natural bleaching agent that breaks down into nothing but oxygen and water, killing mold, mildew, and bacteria. Spray countertops, cutting boards, or grout straight from the bottle, let it bubble for 5 to 10 minutes, then wipe; it also whitens laundry as a bleach alternative. Light degrades it, so keep the dark bottle, and test colored fabrics because of the mild bleaching effect. Castile soap. A vegetable-based true soap, traditionally from olive oil, that is fully biodegradable. As a surfactant it breaks water’s surface tension so grease and dirt rinse away. A few drops in a spray bottle or a teaspoon per mop bucket covers all-purpose cleaning, dishes, floors, and foaming hand soap. One firm rule: never combine it with vinegar in the same bottle. The acid unsaponifies the soap into a white, filmy residue, though using one after the other is fine. Lemons or citric acid. Citric acid cuts grease, disinfects, shines chrome, and freshens garbage disposals without the vinegar smell. Rub a cut lemon, mix juice with water, or combine citric powder with baking soda for a scouring powder. Like vinegar, it etches natural stone and can bleach. Tip 3: Keep Five Recipes Ready Those five ingredients replace nearly every specialized bottle under the sink. Recipe Mix and method Use it on All-purpose cleaner Equal parts white vinegar and water in a spray bottle; optional castile soap for power (shake first) and 10 to 15 drops of lemon or tea tree essential oil. General surfaces, avoiding natural stone. Glass and mirror cleaner Same 1:1 mix; spray and wipe with microfiber or a squeegee. Glass, streak-free. Heavy-duty soft scrub Baking soda plus enough castile soap for a thick paste. Sinks, tubs, tile, stubborn stovetop spots. Floor cleaner Into a gallon of hot water, stir roughly two tablespoons of castile soap, then add half a cup of vinegar. Tile, vinyl, linoleum. Drain freshener Half a cup baking soda down the drain, then half a cup vinegar; fizz 15 to 20 minutes, flush with boiling water. Kitchen and bathroom drains. Tip 4: Shop Green Cleaners Like a Detective If you prefer ready-made products, the booming “green” aisle demands scrutiny: the space is rife with greenwashing. Labels boasting “natural,” “eco-friendly,” or “botanical” carry no regulated definition, so the claim can be meaningless. Instead, check three things. Demand transparency: reputable brands list every ingredient, not just the active ones. Avoid the key offenders, especially ammonia, chlorine bleach, phthalates hidden under “fragrance,” and parabens. Then look for third-party certification such as the EPA’s Safer Choice program or the EWG Verified seal, which means reviewers examined the formula’s safety and ingredients. If you keep a bleach bottle for occasional disinfecting, follow the CDC’s rules for cleaning and disinfecting with bleach, including never mixing it with any other cleaner, and Health Canada’s guide to household chemical safety covers buying, storing, and disposing of everything in the cabinet. Non-Toxic Cleaning FAQ Are non-toxic products actually effective? When matched to the job, yes. Acid dissolves mineral scale, alkali neutralizes odors, and soap lifts grease and dirt. The catch is contact time: let solutions sit several minutes instead of expecting an instant wipe. Can I mix vinegar and baking soda in one bottle? Not for storage. They fizz into mostly water and carbon dioxide, cancelling

4 Incredible Tips On How To Use Non-toxic Cleaning Products Read More »

Washing Machine Cycles: 4 Tips Everyone Should Know For Spotless Fabrics

Stop Guessing at the Laundry Room Dial A modern washing machine is a marvel of convenience, yet its panel of cryptic dials and symbols can look like an airplane cockpit. Most people default to Normal for nearly every load and hope for the best. That habit shortchanges your clothes, your utility bills, and the machine itself: each named cycle is a calibrated recipe of temperature, agitation, and time for particular fabrics and soil levels. Reading those recipes turns laundry from guesswork into fabric care, deciding whether garments last for years or fade, shrink, and wear out early. The Three Variables Behind Every Cycle Every button adjusts one of three fundamentals, and once you see them, no dial is mysterious. Water Temperature Hot, typically 130 F (54 C) and above, is the most powerful cleaner: it attacks heavy grime, kills germs and dust mites, and lifts oily, greasy stains. The costs are energy, color fading, and real shrinkage in natural fibers like cotton and wool, so save it for sturdy, colorfast loads: whites, cotton underwear and socks, bed linens, and grime-caked work clothes. Warm, near 90 F (32 C), balances cleaning against care, handling everyday soils with less fading or shrinking, ideal for colors, synthetics, and moderately dirty loads. Cold, from 60 to 80 F (15 to 27 C), is the gentlest and most efficient setting: perfect for bleeding darks and brights, plus delicate silk, lace, and anything shrink-prone. Modern cold-water detergents close much of the cleaning gap, though heavy grease still needs heat. Spin Speed Measured in revolutions per minute, spin controls how much water the drum extracts at the end of the cycle. A high spin, 1000 to 1400 RPM or more, removes the most moisture, cutting drying time and energy on sturdy cottons and denim, but it can set deep wrinkles and punish delicates. Medium is the all-purpose compromise, often paired with Permanent Press to limit creasing in synthetics. Slow leaves clothes damp but protects hand-washable items and loosely woven sweaters, and no-spin exists for garments that should feel no centrifugal force at all. Agitation and Tumble This is the machine’s scrubbing action: the agitator’s speed and intensity on a top-loader, the drum’s tumbling pattern on a front-loader. High agitation adds friction and cleaning power for durable fabrics; low agitation swishes gently to shield fragile fibers. The Four Cycles You Will Use Most Normal (Cotton or Regular). The workhorse for everyday cotton, linen, and durable synthetics: high agitation, high spin, usually a warm default you can adjust. Its home is t-shirts, jeans, socks, underwear, towels, and sheets. Skip it for delicates and anything prone to shrinking or wrinkles. Heavy Duty. Longer wash time, stronger agitation, hot water by default, built for sturdy fabrics with serious grime: beach towels with set-in dirt, kids’ play clothes, work clothes caked in mud, durable bedding. Using it on normal loads causes needless wear, and it is far too aggressive for anything heat- or movement-sensitive. Delicates (Hand Wash). The machine imitating your hands: low agitation, short wash, slow spin, almost always cold. Lingerie, silk, lace, sheers, and loose sweaters belong here, each inside a mesh laundry bag. This gentle action will not fully clean heavily soiled items. Permanent Press (Wrinkle Control or Casual). The most useful misunderstood setting, designed for wrinkling synthetics and blends like polyester, rayon, and knits. It washes warm to relax fibers and release creases, then switches to a cool rinse and slower spin so new wrinkles never set. Use it for dress shirts, blouses, and slacks; leave aggressive cleaning jobs and true delicates alone. Specialty Cycles Worth Knowing Cycle What it does When to use it Bulky (Sheets or Bedding) Extra water saturates and rinses large items; reduced spin keeps the machine balanced. Comforters, blankets, sleeping bags, pillows. Whites A supercharged Normal: hottest water, long aggressive wash, built to pair with the bleach dispenser. Colorfast white loads that need brightening. Quick Wash (Speed or Express) Shortened wash and rinse plus a fast spin to cut drying time. Small, lightly soiled loads in a hurry. It freshens; it cannot handle stained or genuinely dirty clothes. Rinse and Spin Skips the main wash, simply rinsing the load and spinning out water. Hand-washed items needing water extraction, or stored clothes needing a rinse. Sanitize Hottest water possible, often with an internal heater, reaching temperatures that kill 99.9 percent of common household bacteria. Long and energy-intensive. When germs matter: baby clothing, cloth diapers, any bedding used during an illness, and allergen concerns. Steam Steam loosens tough stains for deep cleaning, or refreshes dry items without a full wash. Heavily soiled loads, plus de-wrinkling and deodorizing between washes. A Four-Question System for Every Load What are the fabrics? Care labels are the primary guide: mostly cottons and durable material means Normal or Heavy Duty is safe; delicates go to the Delicates cycle. How dirty is it? Everyday wear suits Normal; mud, grease, and heavy grime need Heavy Duty. A soil-level setting on many machines extends wash time within a cycle for dirtier loads. What are the colors? Whites take hot water, mixed colors prefer warm, and darks or brights need cold to prevent fading. Do wrinkles matter? Synthetic dress clothes call for Permanent Press. Mastering the dial means understanding how temperature, spin, and agitation combine and applying them on purpose: garments live longer, utility use drops, and results beat any one-size-fits-all default. Detergent choices deserve equal care: Health Canada’s page on household product safety covers laundry detergents and packets, including keeping pods away from children. And for germ control, the CDC’s guide to when and how to clean and disinfect your home explains why thorough cleaning always comes before disinfecting. Washing Machine Cycle FAQ What counts as hot water in a washing machine? Typically 130 F (54 C) and above. That range lifts oily stains and defeats germs and dust mites, which is why the Whites and Sanitize cycles lean on it. Why does Permanent Press change temperatures mid-cycle? Warm water relaxes synthetic

Washing Machine Cycles: 4 Tips Everyone Should Know For Spotless Fabrics Read More »

a clean and organized garage

Garage Cleaning: 5 Effective Strategies to Keep Your Garage Organized

The garage is the forgotten room. It is the one space in the home that is allowed to descend into a state of organized, and then disorganized, chaos. It begins as a home for your car, a place for your tools. But slowly, inevitably, it becomes the household’s dumping ground. It is the final destination for items that have no other place: the broken lawnmower, the half-empty cans of paint, the boxes from a move that happened five years ago, the sporting equipment for a hobby long since abandoned. Before you know it, parking a car inside is a distant memory, and finding a specific screwdriver requires an archaeological dig. Cleaning the garage is not like cleaning a kitchen. It is not a simple task of wiping surfaces and mopping floors. It is a project. It is an act of reclamation, of taking back a significant portion of your home’s square footage and returning it to a state of function and purpose. It is a process that can feel overwhelming, but when broken down into a systematic, manageable plan, it is entirely achievable. This is not about a quick tidy-up; this is about a full-scale reset. 1.Preparation and Strategy Before a single box is moved, the project must be planned. The single biggest mistake people make when tackling a garage is underestimating the scope of the job. This is not a two-hour task. For the average cluttered garage, you need to dedicate an entire weekend. Block it out on your calendar. Arrange for kids or pets to be elsewhere. Treat it with the seriousness of a home renovation project, because in many ways, it is. The second part of preparation is gathering your supplies. Going into this battle unarmed is a recipe for frustration and failure. You will need a specific set of tools for sorting, and another for the deep cleaning that will follow. For Sorting and Decluttering: Heavy-Duty Trash Bags: You will generate more trash than you think. Get more bags than you think you will need. Sturdy Boxes or Bins: These will be for items you intend to keep, donate, or sell. A Labeling System: A thick permanent marker and either labels or masking tape are essential. Every box must be clearly marked with its intended destination. For Cleaning: Safety Gear: At a minimum, you need heavy-duty work gloves to protect your hands from dirt, sharp objects, and chemicals. A dust mask is also critical, as you will be kicking up years of dust, dirt, and potentially mold spores. Safety glasses are a good idea, especially when sweeping and dealing with chemicals. Broom and Dustpan: A stiff-bristled push broom is ideal for the large floor surface. Shop-Vac: A standard household vacuum is no match for a garage. A shop-vac can handle everything from fine dust and sawdust to dead leaves, cobwebs, and small debris. Buckets: You will need at least one large bucket for your cleaning solution. Scrub Brushes: A long-handled deck brush is excellent for the floor, and a smaller, handheld stiff brush is good for corners and stubborn spots. Cleaning Agents: A heavy-duty degreaser is non-negotiable for tackling oil and fluid stains on the concrete floor. You may also want a powdered concrete cleaner or a simple, strong all-purpose cleaner. Rags and Sponges: A large supply of old rags is necessary for wiping down surfaces and for the final detailing. 2.Evacuation and Purge The most effective, albeit intimidating, method for decluttering a garage is to remove everything. Every single item must come out. The goal is to get the garage completely empty, creating a blank canvas for the deep clean and a forcing mechanism for decision-making. Wait for a clear, dry day and use your driveway as a staging area. As you pull items out, immediately begin sorting them into four distinct categories. This is where your boxes and labels come into play. Keep: This category is exclusively for items that you use, need, and that belong in the garage. Be ruthless. If you haven’t used a tool in over a year, do you really need to keep it? Is that box of old cables for electronics you no longer own providing any value? The garage is functional space, not a museum of past projects. Donate/Sell: These are items that are in good, usable condition but no longer serve a purpose for you. Old sporting equipment, tools you have duplicates of, functional but unused garden supplies. Place these directly into designated boxes. Once a box is full, tape it shut and label it. This prevents you from second-guessing your decisions. Trash/Recycle: This will likely be your largest category. Be prepared to fill several bags. This includes broken tools, expired chemicals, dried-up paint, rotten wood, and anything that is simply junk. Pay close attention to hazardous waste. Old paint, motor oil, pesticides, and other chemicals cannot simply be thrown in the regular trash. Check with your local municipality for hazardous waste drop-off locations and procedures. Group these items together for a separate, responsible disposal run. Relocate: You will inevitably find things that do not belong in the garage. Kitchen appliances, sentimental photo albums, out-of-season clothing. These items have been stored in the garage out of convenience, not logic. Put them in a “Relocate” box to be moved to their proper place inside the house later. Do not get sidetracked by taking them inside now; stay focused on the garage purge. As you work, you will be tempted to create a “maybe” pile. Resist this urge. Indecision is the enemy of progress. If you truly cannot decide on an item, place it in a single “quarantine box.” Seal the box and write a date on it six months in the future. If you have not needed to open that box by that date, take the entire unopened box directly to a donation center. 3.The Deep Clean With the garage completely empty, you can now see the true state of the space. It is time for the top-to-bottom clean. This is a fundamental principle of cleaning: start high and work your way

Garage Cleaning: 5 Effective Strategies to Keep Your Garage Organized Read More »

5 Mistakes You Need To Stop Making When Using The Duster

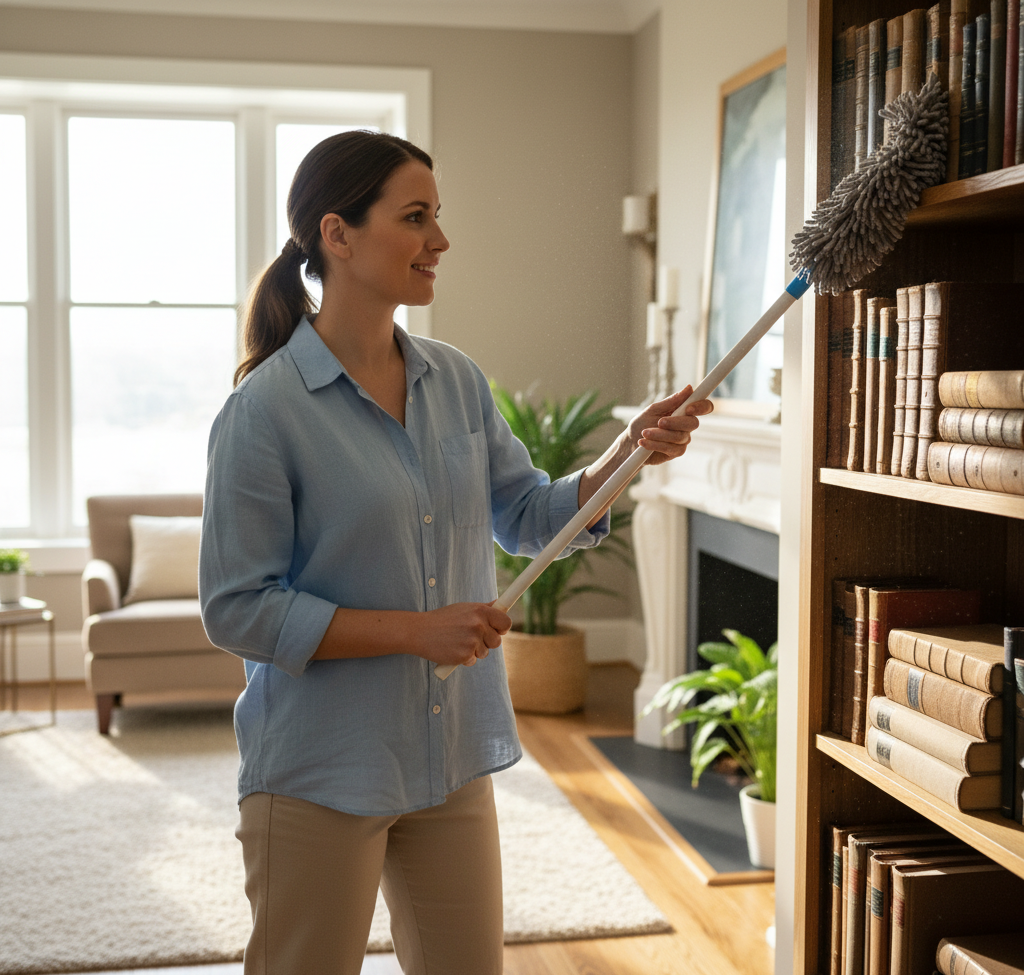
5 Mistakes You Need To Stop Making When Using The Duster Dust is an unavoidable reality of every indoor space: a shifting mix of dead skin cells, fabric fibers, pollen, pet dander, soil tracked in from outside, and even microscopic meteorite debris. It settles on every horizontal surface as a fine gray layer that dulls your home’s look and quietly degrades indoor air quality; for people with allergies or asthma it is a genuine health concern, since it harbors dust mites and other allergens. The duster is your primary weapon, but most people use it badly. The goal of effective dusting is to capture dust and remove it from the environment entirely, not to move it from one surface to another. Here are the five mistakes to stop making. Mistake 1: Trusting a Feather Duster The feather duster, usually made from ostrich, turkey, or chicken feathers on a handle, is the iconic image of dusting and the least effective tool on this list. Its feathers trap little dust; their main action is dislodging particles and sending them airborne to resettle elsewhere minutes or hours later. A high-quality ostrich feather duster performs slightly better because the fine, interlocking barbules create a minor static charge, but it still mostly displaces rather than captures. For a truly clean home, the feather duster is closer to a decorative antique than a working tool. Mistake 2: Using One Duster for Every Surface The real revolution in dusting was microfiber: a synthetic blend of polyester and polyamide (nylon) whose fibers are split into strands many times smaller than a human hair, creating enormous surface area. The split-fiber net physically traps dust, dirt, and even bacteria, and used dry, it generates a positive static charge that pulls in negatively charged dust particles. No chemical sprays are needed. The right lineup covers the whole house: Handheld microfiber dusters: the everyday workhorse for furniture, electronics, picture frames, and general surfaces, with flexible heads that bend under ceiling fan blades and on top of tall bookcases. Extendable dusters: a telescoping pole reaches ceilings, light fixtures, high corners, and cabinet tops, eliminating the stepladder and the neck and shoulder strain of overhead work. Slim or flat dusters: a long, thin profile slides under refrigerators and ovens, between cabinets, and alongside the washer and dryer, where thick layers of unseen dust and lint collect. Microfiber cloths: dry for delicate surfaces, lightly dampened for smudges and stubborn grime without streaks. Lambswool dusters: genuine sheep’s wool contains lanolin, a natural oil that together with the wool’s static charge actively attracts and holds dust instead of pushing it away, making them excellent and gentle on large flat surfaces like tables and shelves. Disposable dusters: a reusable handle with throwaway synthetic heads that trap dust by static; convenient for light, regular dusting, but less environmentally friendly and more expensive over the long term than washable microfiber. Mistake 3: Dusting in the Wrong Order Technique matters as much as the tool, and the single most important principle is to work from top to bottom, because gravity carries any dislodged dust downward. Dusting should come before anything else in a room: wipe lower surfaces and vacuum only after you finish. Start at the highest points: ceiling corners, light fixtures, and fan blades, using an extendable duster. Move down to cabinet tops, bookcases, and wall shelves, then picture frames, window sills, tables, desks, and dressers. Finish at the baseboards and only then vacuum the floor to capture whatever settled. Health Canada’s overview of indoor air contaminants and health is a good reminder that settled dust is tied to the particulates you breathe, so order and method genuinely reduce exposure. Mistake 4: Swiping Aggressively and Ignoring Tricky Surfaces Let the fibers make contact with the surface and lift the dust; aggressive swiping just sends it flying. For heavily dusted surfaces, a slow, single-direction pass works best. Then adjust by surface: Surface What to Do Instead Blinds Use a multi-pronged duster that cleans several slats at once, or close the blinds, dust the whole surface with a handheld duster, reverse the slats, and dust the other side Electronics Turn off and unplug first; TVs and computers build static fields that attract dust. Wipe screens and casings with a clean, dry microfiber cloth, blow dust from keyboards and vents with compressed air, then wipe again Delicate items A very soft, clean paintbrush or new makeup brush works as a precision duster on chandeliers, collectibles, and artificial plants, lifting dust without damage Mistake 5: Never Cleaning the Duster Itself A duster saturated with dust cannot pick up more; it simply spreads the old load around. Cleaning the tool is part of the routine, not an afterthought. The CDC’s guidance on when and how to clean and disinfect your home makes the same point about surfaces: cleaning first is what makes everything else work. Microfiber wins here, since most duster heads are removable and machine washable: wash with regular detergent but no fabric softener, which clogs the microscopic fibers and destroys the static-trapping ability, then air-dry or tumble on low heat. For a lambswool duster, spin it outdoors between your hands to release loose dust, then hand-wash in lukewarm water with mild detergent, rinse thoroughly, and air-dry. How Often Should You Dust? Dusting is continuous maintenance, not a one-time task. For most homes, thorough dusting once a week keeps levels under control. Homes with pets or allergy sufferers, neighborhoods with high pollen counts, and areas near construction need more frequent passes. A consistent routine removes the allergens and particles that affect well-being, not just the visible film. For a comprehensive clean that catches dust from crown corners to the tightest crevices, our regular maid service builds systematic dusting into every visit, and a seasonal deep cleaning clears the accumulated layers. Frequently Asked Questions About Dusting What is the best duster for allergies? A microfiber duster, used dry. Its split fibers and static charge capture dust, dander, and even bacteria rather than displacing them

5 Mistakes You Need To Stop Making When Using The Duster Read More »

scale buildup in an espresso machine

Descaling Agent: Essential Tips On How To Use This Cleaning Product

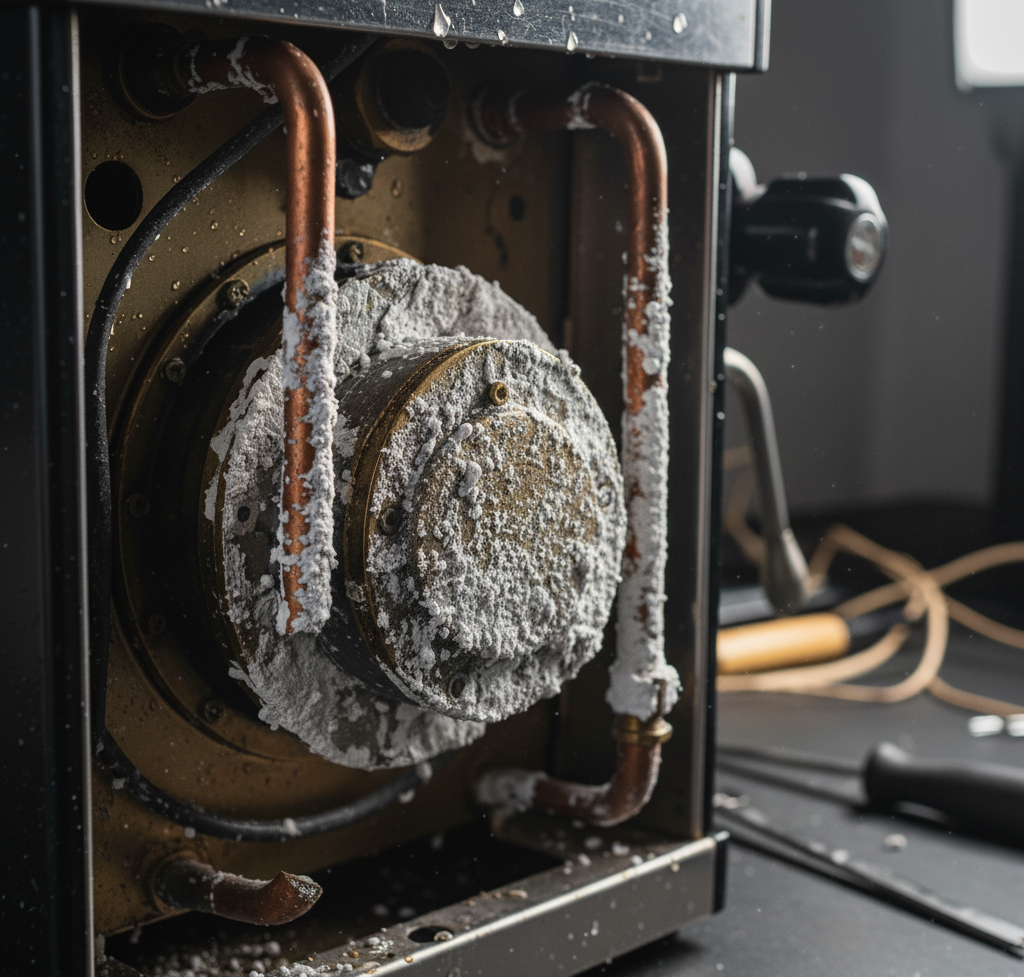
Descaling Agent: Essential Tips on How to Use This Cleaning Product Limescale is the silent buildup that infiltrates appliances wherever hard water flows. Every time water evaporates, traces of calcium carbonate and magnesium stay behind, hardening over time into a stubborn crust. That scale is not just unsightly; it threatens how efficiently your most-used appliances run, how long they last, and even their hygiene. The countermeasure is a descaling agent, and knowing how to choose and apply one turns a vague chore into simple preventative upkeep that saves money and adds years of life to your machines. The Chemistry: Why Acid Dissolves Limescale Understanding a descaler is understanding basic chemistry. Limescale is alkaline, so only an acid can dismantle it. A descaling agent is essentially a buffered acidic liquid engineered to attack mineral crusts safely: the acid reacts with calcium carbonate and converts the scale into water-soluble substances you can flush away. The stakes are highest in appliances that heat water. Heating elements attract limescale: as water heats, minerals precipitate faster and coat the element in an insulating layer. The machine then burns noticeably more energy to hit the same temperature, driving up electricity bills, and chronic overheating can eventually burn the element out. Kettles, coffee makers, washers, and dishwashers all qualify. Pantry Descaling Agents: Vinegar, Citric Acid, and Lemon For many routine jobs, simple non-toxic household acids work perfectly, and Health Canada’s tips for using household chemicals safely apply to them just as they do to commercial bottles: read labels, ventilate, and protect your skin. White vinegar (acetic acid): the most accessible descaler, strong enough for light to moderate buildup. It is inexpensive and multi-purpose, but the strong, lingering odor demands thorough rinsing, and it may lack punch against very heavy, long-term scale. Use it for routine care of kettles, drip coffee makers, and showerheads. Citric acid: sold as a powder in grocery and bulk food stores, it is a more powerful acid that works faster on tougher scale, and its big advantage is being completely odorless, so it will not leave a vinegar aftertaste in coffee or tea. Most commercial eco-friendly descalers are simply citric acid in a box, and it is highly effective and safe for most applications. Lemon juice: a weaker form of citric acid for very light tasks like faucet water spots and surface film. Not strong enough for appliance interiors, but useful externally, and it leaves a fresh scent. Commercial Descalers: When to Buy the Bottle Serious buildup or delicate, high-end appliances call for a formulated product. Health Canada’s overview of household product safety reminds you to follow label directions on dilution and contact time for any cleaning chemical. Two families dominate: Formic acid or sulfamic acid descalers: industrial-strength acids common in products designed for high-performance espresso machines and specialized equipment. They work very quickly and remove heavy scale extremely well, but they are potent: handle them with care, follow the label’s dilution and contact-time instructions precisely, and wear gloves. Lactic acid descalers: a gentler, plant-derived, biodegradable option. Because lactic acid is less corrosive than the stronger acids, it stays safe across a wide range of appliances while still delivering excellent descaling power. Practical Descaling Methods Appliance by Appliance Appliance Method Electric kettle Fill halfway with equal parts white vinegar and water, boil, then let it sit for an hour before pouring out and rinsing thoroughly. For an odorless clean, boil one to two tablespoons of citric acid powder in a half-full kettle, let it sit, and rinse: the scale dissolves completely. Drip coffee maker Scale slows brewing, disrupts water temperature, and makes coffee taste bitter and chalky. Run a reservoir of equal parts vinegar and water through a full brew cycle with a clean filter in place, discard it, then run two to three cycles of fresh water to rinse out all residue and taste. Espresso machine Check the user manual first. Many makers warn that vinegar’s acidity can harm internal aluminum parts and rubber seals over time, so they specify a commercial descaler instead. Typically you run the solution through via the reservoir, then rinse extensively so every trace is flushed out. Washing machine and dishwasher Run the empty machine on the hottest, longest cycle. In the washer, add two cups of white vinegar or half a cup of citric acid to the detergent dispenser. In the dishwasher, set a bowl holding a cup of vinegar on the top rack, or sprinkle half a cup of citric acid across the bottom. This clears scale plus soap scum. Showerhead and faucet Erratic spray or reduced flow usually means scale. For the baggie method, pour white vinegar into a sturdy plastic bag, submerge the head or aerator, and secure the bag with a rubber band or twist tie. Soak several hours or overnight, remove the bag, run the water to flush dissolved scale, and scrub leftovers with an old toothbrush. Safety Precautions Before You Pour Know your materials: acids etch unsealed natural stone such as marble, travertine, and limestone, so keep vinegar and other acidic cleaners off them, and show caution with cast iron and some aluminum surfaces. Follow commercial descaler directions precisely for dilution and contact time. Ventilate the area, since fumes from vinegar and stronger descalers are irritating. Rinse thoroughly, especially in anything that handles food or beverages; multiple fresh-water passes prevent residue and aftertaste. Wear gloves with any descaling product, natural or not, to avoid skin irritation. Descaling belongs inside a proper deep clean, and if mineral neglect has spread beyond your kettle, our deep cleaning service tackles hard-water buildup through the whole house. Lighter upkeep fits a regular maid schedule, and prep for a move is covered under move in and out cleaning. Frequently Asked Questions About Descaling Agents Which is better for a kettle, vinegar or citric acid? Both dissolve scale well. Vinegar comes straight from the pantry but leaves a strong odor and needs rinsing; citric acid is odorless, works faster, and is the safer bet if

Descaling Agent: Essential Tips On How To Use This Cleaning Product Read More »

cleaning front-laod washing machine

Cleaning Front-Load Washing Machine: Detailed Guide to a Sanitized Machine

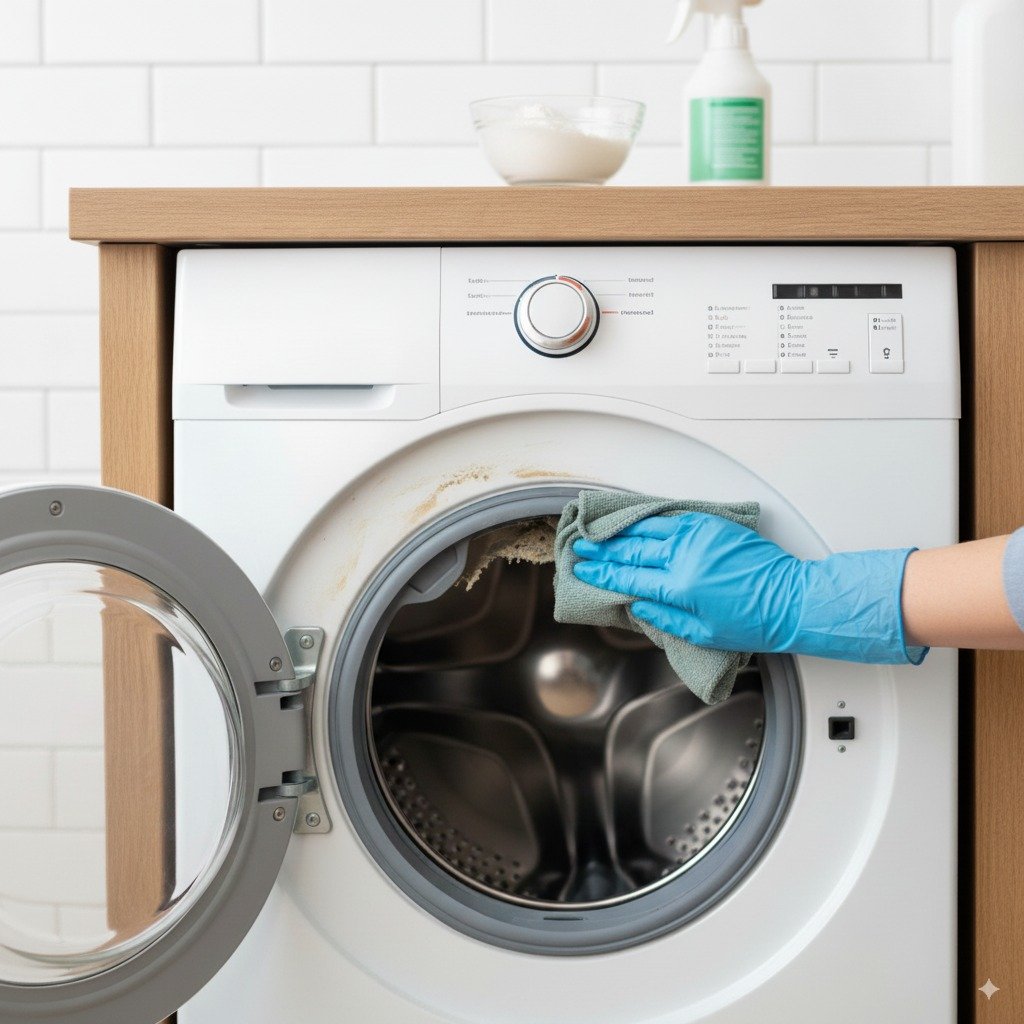
Why Front-Load Washing Machines Get Musty A front-load washer is efficient engineering: it uses less water than a top-loader, treats fabrics gently, and spins fast enough to pull extra moisture out of the load, which shortens drying time. The flip side of that design is an airtight door seal and low water levels that leave standing dampness inside the drum. Mold, mildew, and bacteria feed on leftover detergent and body soil in those damp zones and produce a sour smell that transfers to clean laundry. That odour is a maintenance flag, not a breakdown. Learning how to clean a front-load washing machine protects its performance, keeps your clothes hygienic, and adds years to the appliance. Where Grime Collects in a Front-Loader Top-loaders dry out between loads; front-loaders do not. They trap moisture in four places, and each needs its own treatment before the smell goes away. Rubber door gasket: the deep folds hold water, lint, hair, and a detergent film after every cycle. That dark, damp layer is an incubator for mold and mildew, visible as black spots and a sour smell. Drum and outer tub: the stainless drum resists buildup, but the hidden outer tub collects a slimy film of soap scum and biofilm that can break off in flakes and redeposit on clothes. Detergent dispenser drawer: undissolved detergent, fabric softener, and bleach cake up inside the drawer and its housing, feeding more mold. Drain pump filter: a trap at the bottom of the machine catches coins, buttons, lint, and hair. Left unmaintained, decomposing debris and stagnant water create a powerful, unpleasant odour. Mold spreads wherever moisture lingers, and the CDC’s mold resources explain why drying damp spots is the first line of defence. How to Deep-Clean a Front-Load Washer, Step by Step Set aside about an hour of hands-on work plus the run time for two empty cleaning cycles. Grab rubber gloves, clean cloths, a soft-bristled brush or an old toothbrush, distilled white vinegar, and chlorine bleach, then treat each problem area individually. Step 1: Scrub the gasket Mix equal parts white vinegar and water, or add half a cup of chlorine bleach to a gallon of water, and never mix vinegar and bleach together. Vinegar dissolves soap scum and discourages mold; bleach is the stronger choice once black mildew spots appear. Pull the seal back to reach the gap between gasket and drum, wipe every fold inside and out, scrub stubborn spots with the brush, rinse the area with a cloth dampened in plain water, and dry the gasket fully. Removing the moisture is what stops mildew from returning the same week. Step 2: Sanitize and descale the drum and tub With the machine empty, pour one cup of chlorine bleach into the dispenser’s bleach compartment, skip detergent, and run the hottest, longest cycle available, ideally a Tub Clean or Clean Washer setting or a heavy-duty or sanitary one. This kills the mold, mildew, and bacteria living in the drum and outer tub. Then run a second hot, long cycle with one cup of distilled white vinegar poured directly into the drum. The acid dissolves lingering residue, clears out traces of bleach, and deodorizes the machine, and the two-cycle order follows the same logic as the CDC guidance on disinfecting with bleach: sanitize first, rinse the chemistry out afterward. Step 3: Soak the dispenser drawer Pull the drawer out until it stops, then press the release tab, often marked Push, to free it completely. Soak the drawer in hot water with white vinegar for about 30 minutes, scrub every compartment including the narrow channels and undersides, and brush out the empty housing while the drawer soaks, because mold often grows on the ceiling of that cavity. Rinse, dry, and slide the drawer back in until it clicks. Step 4: Clear the drain pump filter Check your manual for the exact procedure; most front-loaders hide the filter behind a small access door at the bottom front. Lay a thick towel on the floor and keep a shallow pan close by, because trapped water escapes the moment you open it. Unscrew the cap slowly, let the water drain, and pull the filter out. Pick away lint, hair, coins, and buttons, rinse the filter under running water, wipe the housing inside, and screw the cap back tightly to prevent leaks. For many owners, this step finally kills the smell. Problem area What collects there What to use Rubber gasket Water, lint, hair, detergent film, black mildew spots Vinegar-and-water solution, or 1/2 cup chlorine bleach per gallon of water Drum and outer tub Soap scum and biofilm 1 cup bleach on a hot cycle, then 1 cup distilled white vinegar on a second hot cycle Dispenser drawer Undissolved detergent, fabric softener, bleach residue 30-minute soak in hot water and vinegar, plus a small brush Drain pump filter Coins, buttons, hair, stagnant water Running water, a towel, and a shallow pan for the spill Daily Habits That Keep a Front-Load Washer Fresh A deep clean resets the machine; small habits keep it reset. Leave the door ajar after every wash so air circulates through the drum and seal. Wipe the gasket with a dedicated cloth after the last load of the day to lift out standing water. Use only high-efficiency detergent, measured to the label. Regular detergent over-suds and leaves a residue mold feeds on, and more soap never means cleaner clothes. Move wet laundry to the dryer as soon as the cycle ends so nothing sits damp in a closed drum. Run one empty hot cycle with bleach or vinegar every month to hold buildup at bay. Front-Load Washer Cleaning FAQ How often does a front-load washer need a real deep clean? Wipe the gasket after every use and run a monthly maintenance cycle. Take the full four-step approach, including the filter and dispenser drawer, whenever odours return or every few months with heavy use. Can I clean the whole machine with vinegar alone? For general upkeep, yes. Vinegar dissolves

Cleaning Front-Load Washing Machine: Detailed Guide to a Sanitized Machine Read More »

Cooktop Cleaning

Cooktop Cleaning: The Ultimate Guide for a Sparkling Space

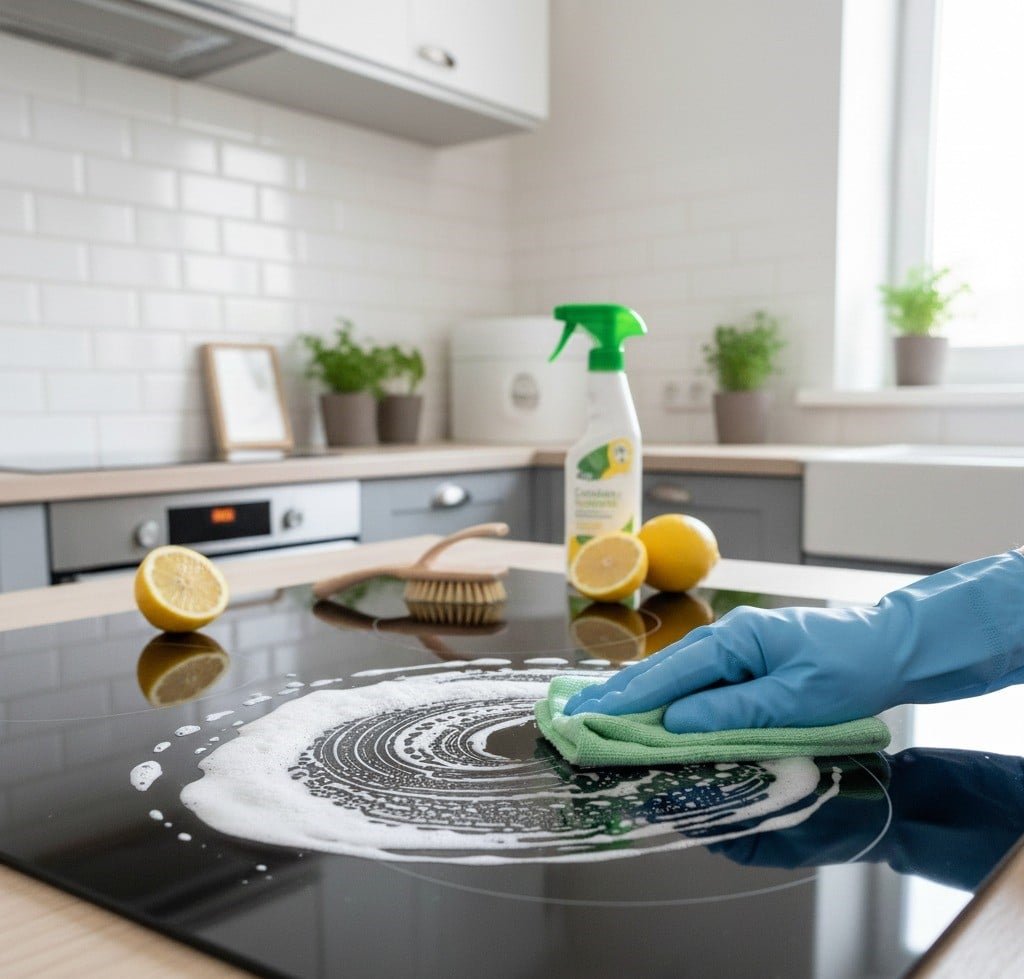
Why Cooktop Cleaning Matters Beyond Looks The cooktop sits at the centre of the kitchen, so it collects the most splatter in the house. Burnt-on food, grease film, and boiled-over sauces do more than dull the finish: they host bacteria, release odours, and slowly damage the surface itself. A spill that waits a week turns into grime that takes an hour of scrubbing, and harsh attempts to remove it can scar glass or stainless for good. The practical answer is a system: quick daily wipes, a weekly clean matched to your cooktop type, and the right tools so nothing scratches. Work through this guide and the stovetop stays sanitary and sharp-looking for years. Four Rules That Apply to Every Cooktop Cut the power or gas first. Unplug an electric stovetop or shut off the gas supply before you start, so there is no risk of shock or a leak. Wait for it to cool. Cleaning a hot surface burns you and bakes residue harder onto the finish. Keep abrasives away. Steel wool, scouring pads, and powders with grit can permanently scratch glass, ceramic, and even stainless steel. Act fast. The longer grease sits, the harder it bonds. A quick wipe after each use plus one weekly deep clean prevents almost every tough-job scenario. For product safety around the kitchen, Health Canada’s page on using household chemicals safely is a good reminder to wear gloves and keep strong cleaners away from children. Cleaning a Gas Cooktop Gas units come apart, so clean the pieces and the surface separately. Every day, once the surface is cool, run a damp cloth with a drop of mild dish soap over it to lift crumbs and small spills. Once a week, take a deeper route: Remove the grates and burner caps; some models also lift out the burner heads. Soak grates and caps in warm water with plenty of dish soap for at least 30 minutes, or a few hours for baked-on grease, adding white vinegar or a degreaser for stubborn grime. Scrub the soaked parts with a firm, non-abrasive brush or sponge. Check the burner head ports and clear any clog with a toothpick or an unfolded paper clip. Never use a wooden toothpick that can snap off inside a hole. Treat the surface by material: stainless steel cleaner and a microfiber cloth on steel, an all-purpose cleaner or a baking soda paste left for 15-20 minutes on enamel. Rinse every part with a clean damp cloth and dry completely before reassembly, since leftover moisture rusts grates and keeps burners from igniting. Cleaning an Electric Coil Cooktop Coil stoves hide their worst mess in the drip pans beneath the elements. With the stove unplugged and cool, lift each heating element out and remove its pan. Soak the pans in very hot water with dish soap. For heavy buildup, cover them with baking soda, spray with vinegar, and let the mixture work for several hours or overnight before scrubbing; a commercial oven cleaner, used exactly as the label directs in a ventilated space, handles extreme cases. Never submerge the elements: wipe them with a damp cloth and a little detergent, then lift stuck-on residue with a plastic scraper while cold, or apply a baking soda paste, let it sit, and wipe it off. Rinse and dry the pans fully, seat the elements properly, and wipe the surrounding surface. Cleaning a Glass or Ceramic Smooth-Top Smooth tops are elegant but unforgiving, so daily care matters most: once the surface is cool, wipe it with a damp cloth and mild dish soap so spills never dry on. For the weekly clean, apply a creamy or liquid cooktop cleaner made for glass ceramic generously, especially over stained zones, let it dwell as the product instructs, and work it in circles with a non-abrasive sponge or microfiber cloth. Melted sugar and hardened food need a single-edge razor blade held at a low 30-45 degree angle, always pushing debris away from you and never pressing the blade flat, which scratches the glass. Wipe away all product residue with a clean damp cloth, then polish with a dry microfiber cloth for a streak-free shine. Cleaning an Induction Cooktop Induction surfaces are glass ceramic, so follow the smooth-top routine above. The advantage is physics: only the pan bottom gets hot, so spills burn on far less often and you will rarely reach for the blade. Flat, smooth-bottomed pans keep the surface marked-free, and a silicone mat made for induction adds protection without blocking the magnetic field. Troubleshooting the Usual Cooktop Problems Problem Best fix by cooktop type Burnt-on food Gas and coil: thick baking soda paste left 15-30 minutes to soften. Glass and induction: dedicated cooktop cleaner, then a razor blade at a low angle. Grease buildup Commercial degreaser or hot water with strong dish soap, left to sit; grates do best soaked. Streaks and scratches Streaks disappear with a dry microfiber polish. Scratches usually stay, so prevention means no abrasive pads or scouring powders. Water spots and limescale Spray white vinegar, let it sit a few minutes, and wipe clean. The Cooktop Cleaning Kit Worth Keeping Keep these items under the sink and the weekly clean takes minutes: microfiber cloths for wiping and polishing without scratching, non-abrasive sponges, a firm-bristled brush for grates, a plastic scraper or single-edge razor for glass tops, mild dish soap, baking soda for pastes and deodorizing, white vinegar as a natural disinfectant and limescale cutter, an all-purpose cleaner, a specific glass-ceramic cooktop cleaner, stainless steel cleaner for steel finishes, and protective gloves for every chemical step. Health Canada’s overview of household product safety covers storing these products properly between uses. Prevention beats recovery: wipe spills while they are fresh, use lids to cut splatter, avoid overfilling pots, keep cast iron off unprotected glass, and hold a regular deep-clean schedule. Cooktop Cleaning FAQ How often should a cooktop be deep cleaned? Wipe the surface after every cooking session and deep clean once a week. Gas grates

Cooktop Cleaning: The Ultimate Guide for a Sparkling Space Read More »

getting ready for fall cleaning

September Cleaning: 7 Quick And Easy Steps To Get Ready For Fall

Why September Is the Month to Reset Your Home In Canada, September closes out summer and opens the long indoor season. The house needs more than a dust-off: it needs a cleanout that removes the clutter and grime of the warm months and readies every room for the weeks when windows stay shut and family time moves inside. A systematic September cleaning pays off twice, once in a healthier, calmer home right away and again in easier living all winter. Work in order, from planning and decluttering through room-by-room detail, and the whole project becomes manageable instead of overwhelming. Plan the Project Before You Spray Anything Start by scheduling time blocks for each area or task type, which turns a mountain into a list of afternoon-sized steps. Then take inventory of your supplies so you are never hunting for a bottle mid-task. Microfiber cloths, a vacuum with attachments, a mop, buckets, and protective gloves All-purpose cleaner, disinfectant, glass cleaner, bathroom cleaner, and floor cleaner Eco-friendly, non-toxic products if children, pets, or allergy sufferers live in the house Declutter First With the Three-Box Method Every room gets sorted before any cleaning starts, using three boxes: keep and organize, donate or sell, and trash or recycling. Begin with summer gear, so beach equipment, garden decorations, and warm-weather clothes get packed away. Work through clothing, toys, books, and stationery; clear the pantry and refrigerator of expired food and regroup what stays; gather papers and magazines into categories; and rotate the wardrobe so autumn layers sit at the front. Fewer objects means less dust to chase and fewer surfaces to wipe. When you finish, deliver the donation box the same week so it does not become clutter again. Kitchen Deep Clean for the Season The kitchen earns the most attention because it feeds everyone. Clean the oven interior and its grease and residue, wash the microwave inside and out, and empty the refrigerator fully, wiping shelves and drawers with mild soap and water. Run the dishwasher on a vinegar cycle to clear deposits and odours. Wipe cabinets and drawers inside and out, scrub countertops and backsplashes, disinfect the sink and faucets, and freshen the garbage disposal. Finish by mopping or steaming the floor. Bathrooms, Bedrooms, and Living Areas Bathrooms Scrub toilets, showers, and tubs, and attack the tile grout where mold and mildew settle. Wash or replace the shower curtain and liner, clean mirrors and light fixtures, disinfect every contact point from faucets to doorknobs and switches, then wash and disinfect the floor. Toss expired products from the medicine cabinet while you are in there. Excess moisture is what invites bathroom mold in the first place, and Health Canada’s advice on reducing humidity, moisture, and mould is worth applying to every damp room before winter closes the house up. Bedrooms Launder all sheets, duvets, and blankets along with the curtains. Vacuum the mattress and flip or rotate it to extend its life. Dust furniture, light fixtures, and ceiling fans, vacuum or mop including under the bed, and rebuild the closets with the seasonal clothing swap you prepped during decluttering. Living spaces Dust every piece of furniture, electronic, and decorative item, vacuum or shampoo the upholstery, clean the windows and the blinds or curtains covering them, and refresh the floors. Give extra passes to remote controls, light switches, and doorknobs, the surfaces everyone touches and nobody cleans. Entryways, Laundry Room, and the Spots Everyone Forgets Hallways and entryways take the first hit from outdoors, so clear shoe racks and coat hooks, wipe scuff marks off the walls, and vacuum or mop deeply to lift tracked-in mud and debris. In the laundry room, wipe the washer and dryer exteriors, scrub the dryer lint trap thoroughly for efficiency and fire safety, wash the utility sink, and organize detergents. Then walk the house for the overlooked list: Area September task Why it matters before winter Windows Clean inside and out Maximizes the weak natural light of the darker months HVAC filters Clean or replace Indoor air quality suffers once windows stay closed, and Health Canada’s overview of indoor air contaminants explains the health stakes Walls, baseboards, doors, and frames Wash away marks and dust Trapped grime ages fast under winter heating Light fixtures and ceiling fans Dust and wash Dull fixtures dim every room Trash cans and small appliances Disinfect bins; wash toaster, coffee maker, kettle Odours build quickly in closed-up houses Patio furniture, barbecue, bikes, garden tools Clean, then store Protects equipment through freeze-thaw weather Carpets and rugs Deep clean Removes summer grit before winter traffic grinds it in Maintenance: Keep the Reset From Slipping The September clean buys you a fresh baseline; daily habits defend it. Reinforce quick mini-cleaning sessions after dinner, hold a weekly schedule that rotates deeper tasks room by room, and do a seasonal check-in each quarter to adjust for what the new weather demands. Smart storage solutions protect your organization gains, and delegating tasks among household members keeps the workload shared instead of dumped on one person. September Cleaning FAQ How long does a full September cleanup take? Most homes need several sessions across one or two weekends once you plan, declutter, and clean room by room. Time-blocking the rooms in advance keeps any single day from feeling impossible. Should carpets really be cleaned in the fall? Yes. Summer drags in dirt and allergens that settle deep into pile, and a clean carpet improves indoor air for the months when windows barely open and foot traffic moves indoors. What is the one step people skip most? Replacing heating and air conditioning filters. It is quick, cheap, and it does more for winter air quality than any surface scrub. When should I outsource the whole project? If the season’s cleanout lands in one packed weekend, a professional deep clean handles the rooms and details while you handle everything else. Pair it with a move-in or move-out service if the fall also brings a lease change. Treat the September reset as an investment

September Cleaning: 7 Quick And Easy Steps To Get Ready For Fall Read More »

Home Clean and Organized

Home Clean and Organized: 5 Tips From Cleaning Experts For a Stunning Home

A Clean, Organized Home Is a Habit, Not an Event Keeping a home clean and organized takes more than heroic weekend sessions. It works best as a set of small habits wired into daily life, because the physical environment shapes how the mind feels: an orderly space lowers stress, sharpens focus, and builds a sense of control that carries into everything else. When surfaces are clear and objects have homes, there are fewer distractions and less to clean later. The strategies below turn upkeep into an automatic routine instead of a recurring crisis. Build the Daily Habits That Do the Heavy Lifting The one-minute rule: if a task takes under a minute, do it on the spot. Hang the book, wipe the spill, put the mug away. Tiny actions stop small messes from combining into an overwhelming one. The daily reset: spend 10-15 minutes at day’s end tidying the kitchen and living room. Wash dishes, wipe counters, straighten cushions. Waking up to a tidy space sets the tone for the next day. Shared responsibility: assign roles to every household member. When the load is distributed, upkeep stops being one person’s burden. A place for everything: give each item a designated spot, and the habit of returning it removes the drift that forces giant tidying sessions. Room-by-Room Routines That Actually Stick Room Daily habit Weekly habit Kitchen Wash dishes or load the dishwasher after each meal, wipe countertops, quick sweep of the floor Clean the microwave inside and out, scrub the stovetop and oven front, freshen the sink and faucets, wipe appliance exteriors including the fridge, empty and scrub the trash can Bathrooms Wipe sink, mirror, and counter; quick scrub of the toilet bowl Disinfect the toilet inside and out, clean shower or tub before mold and mildew take hold, wash the floor, launder towels and the shower curtain Living room and bedrooms Arrange cushions, fold blankets, return remotes and magazines; make the bed every morning; clothes into hamper or drawers Vacuum or sweep all floors, dust furniture, shelves, and electronics with a microfiber cloth, clean mirrors and glass Entryway and hallways Shoes, coats, and bags go to their designated spot on arrival Sweep or vacuum frequently, since these paths carry the outdoors inside Decluttering Rules That Keep the Clutter Out Organization is the other half of cleanliness, and it starts with honest culling. The “one in, one out” principle keeps volume constant: every new item bought means a similar old one gets donated, sold, or recycled. Inside the cupboards, group similar objects together and contain them with boxes, baskets, drawer dividers, and organizers. Think vertically with shelves, wall racks, and hooks to free up surfaces. Labels look trivial but work: everyone in the house can see where each thing belongs, so things go back without negotiation. Do not ignore the digital clutter either, because a clear inbox, organized files, and deleted apps lighten the mind the same way a clear counter does. The CDC’s basics on when and how to clean and disinfect your home make a good pairing with these habits: clean visibly dirty surfaces first, then disinfect the high-touch ones. Use the Right Tools, Top to Bottom Technique decides how much effort a clean costs. Always dust from the highest surfaces downward so falling dirt gets collected in the final pass instead of landing on freshly wiped shelves. Microfiber cloths trap dust and polish without lint; a vacuum with attachments, a proper mop, brushes, and sponges round out the kit. Stock the five essential products (all-purpose cleaner, glass cleaner, disinfectant, floor cleaner, bathroom cleaner) and check labels carefully, since the surface dictates what is safe. Never put abrasive products on marble or sealed wood. Wear gloves and open a window whenever chemicals are out; Health Canada’s tips for using household chemicals safely are worth a skim before stocking a cleaning caddy. If children, pets, or allergies share the house, lean toward eco-friendly, non-toxic formulas. Adapting to Real Life Every household has its own friction points, and each has a workaround. Pets: vacuum often for hair, keep lint rollers and upholstery tools handy, store supplies neatly, and wash food and water bowls daily. Children: define play zones, use toy boxes and low shelves kids can reach, and invite them to tidy early so responsibility becomes normal. Packed schedules: never try to clean everything at once. A focused 15-20 minute block per day in one area prevents buildup and keeps cleaning un-intimidating. Dust and allergies: dust with microfiber, vacuum with a HEPA filter, and change heating and air conditioning filters on schedule. Staying Motivated, and Knowing When to Delegate Motivation is a system too. Set realistic goals, since no home is perfect daily; celebrate small wins; break large tasks into steps; reward yourself after big jobs; and take before-and-after photos for proof of progress. Music or a podcast makes the time pass differently. A steady routine eventually runs on autopilot, which is the point. For the heavy categories, professionals are the smart shortcut: steam carpet cleaning, exterior window washing, and post-renovation dust demand equipment most homes lack, and life events such as moving, a big party, or a newborn make outside help an investment in sanity rather than a luxury. A scheduled regular cleaning visit locks in the maintenance, and a periodic deep clean resets whatever winter piled up. Home Organization FAQ What is the fastest way to start if my home feels chaotic? Stop trying to fix everything at once. Pick the kitchen counter and the entryway first, apply the one-minute rule for one week, and add a 10-minute daily reset once those stick. How often should a whole house be really cleaned? Daily habits handle surfaces, weekly sessions handle floors and bathrooms, and a thorough room-by-room deep clean belongs on the calendar a few times a year or whenever the reset is due. Does decluttering really reduce cleaning time? Directly. Every object on a surface is a pause while dusting, every pile is a place dirt hides.

Home Clean and Organized: 5 Tips From Cleaning Experts For a Stunning Home Read More »

House Cleaning Services Calgary

House Cleaning Services Calgary: Have a Spotless Home Today

Modern life in Calgary, with its demands and opportunities, often leaves little time for essential household chores. Residents of the city, whether busy professionals, parents with packed schedules, or outdoor enthusiasts, frequently find themselves seeking solutions to optimize their time and enhance their quality of life. In this scenario, house cleaning services Calgary emerge as a practical and increasingly popular answer. Maintaining a clean and organized home is fundamental for well-being, providing a tranquil and healthy refuge amidst daily hustle. For many in Calgary, delegating cleaning to specialists is not a luxury, but a necessity that allows them to focus on personal and professional priorities, or simply to enjoy more of what the city offers. Professional Cleaning Services The scope of professional cleaning services extends far beyond a simple tidy-up. Specialized companies in Calgary offer a diverse range of options, designed to meet the specific needs of each residence and lifestyle. Regular maintenance cleaning forms the basis for many, including essential tasks like dusting surfaces, vacuuming carpets and floors, mopping, and cleaning countertops and mirrors. The focus here is consistency, ensuring the home always remains in a pleasant and hygienic state, preventing the accumulation of dirt and clutter that could become overwhelming. Many choose house cleaning services Calgary for this consistent upkeep. For times when dirt accumulates or the house needs deeper care, deep cleaning is the solution. This service is more intensive and detailed, targeting areas often neglected in daily routines. This can include interior cleaning of appliances like ovens and refrigerators, scrubbing grout in bathrooms and kitchens, thorough disinfection of toilets and showers, and meticulous attention to baseboards and corners. Deep cleaning revitalizes the environment, eliminating dirt and germs that can compromise the health and comfort of the home. Move-in/move-out Beyond routine and deep cleaning, there are specialized services for transitional moments. Move-in/move-out cleaning is essential for those relocating. For those moving out, it ensures the property is returned in impeccable condition, which can be crucial for security deposit recovery. For those moving in, it prepares the new home for fresh and hygienic occupancy, allowing new residents to start on the right foot. This type of cleaning is exhaustive, covering every inch of the house from top to bottom. The demand for house cleaning services Calgary during moves is significant. Post-renovation cleaning is another vital service in a city where property renovation is common. Renovations leave behind a considerable amount of construction dust and debris, which require specific equipment and techniques for effective and safe removal. Cleaning professionals are equipped to handle this challenge, ensuring the renovated space is ready to be enjoyed without any remnants of the work. Additionally, many service providers in Calgary offer special cleanings such as window washing, steam carpet cleaning, and upholstery cleaning, which can be contracted separately or as complements to standard cleaning packages. Flexibility is a key feature, allowing house cleaning services Calgary to be tailored to meet the individual needs of each client and the particularities of each home. The benefits of hiring professional cleaning services are numerous and positively impact the quality of life. The most evident is recovering time. Instead of spending hours cleaning, Calgary residents can dedicate that time to more enjoyable activities, work, family, hobbies, or simply rest. This freedom is one of the biggest attractions of house cleaning services Calgary. Another significant benefit is consistent cleanliness and hygiene. Professionals are trained to maintain high cleaning standards, using effective products and methods to remove dust, allergens, bacteria, and viruses. This contributes to a healthier home environment, reducing the spread of illnesses and improving indoor air quality, which is especially important for people with allergies or respiratory problems. Professional house cleaning services Calgary ensure this level of consistency. The reduction of stress is an often underestimated impact. The sight of a dirty or disorganized home can generate anxiety and guilt. By delegating this task, residents alleviate this mental burden, fostering a sense of calm and well-being. The home becomes a true sanctuary, free from the worries of daily maintenance, thanks to dedicated house cleaning services Calgary. Trained Team Professional expertise and equipment are also clear advantages. Cleaning companies invest in high-quality industrial tools and effective, safe cleaning products, often unavailable to the average consumer. Furthermore, staff are trained in efficient cleaning techniques, ensuring the work is done thoroughly and without damage to surfaces. This level of professionalism is a hallmark of top house cleaning services Calgary. At the end, the longevity of the home benefits. Regular and proper cleaning protects the materials, surfaces, and appliances in the house. Removing dirt and dust before they become ingrained helps prevent wear and tear and extends the lifespan of floors, furniture, and finishes, representing a form of preventive property maintenance. This is an often-overlooked advantage of house cleaning services Calgary. Calgary itself presents characteristics that make cleaning services particularly relevant. Busy lifestyles are a constant, with many Calgarians engaged in demanding careers, which limits the time available for household chores. As a family-oriented city, Calgary has many families who need to balance work, school, and children’s extracurricular activities, where house cleaning time is often the first to be sacrificed. Moreover, a passion for outdoor activities is a hallmark of Calgary, given its proximity to the Rocky Mountains and numerous parks. This means mud, dust, snow, and other natural elements are frequently tracked indoors, requiring more frequent and robust cleaning. House cleaning services Calgary are well-equipped to manage this. Seasonal Changes Seasonal changes in Calgary also pose specific cleaning challenges. In winter, salt and slush from snow and ice are tracked indoors, demanding constant attention to floors. Spring brings pollen and accumulated winter grime. Summer, with more outdoor activities, increases foot traffic and, consequently, general dirt. Autumn, in turn, introduces leaves and debris. Professional house cleaning services Calgary are equipped to handle these seasonal challenges, offering tailored solutions for each period of the year. All these factors converge to make professional cleaning a practical necessity for many Calgarian homes. When choosing a cleaning service in Calgary, it is crucial to consider several factors to ensure a satisfactory and safe experience. Reputation and reliability are the starting point. Researching online reviews on platforms

House Cleaning Services Calgary: Have a Spotless Home Today Read More »