Appliance Cleaning

The Dirtiest Places In Your Home

The Dirtiest Places In Your Home Can Be Harmful To Your Health

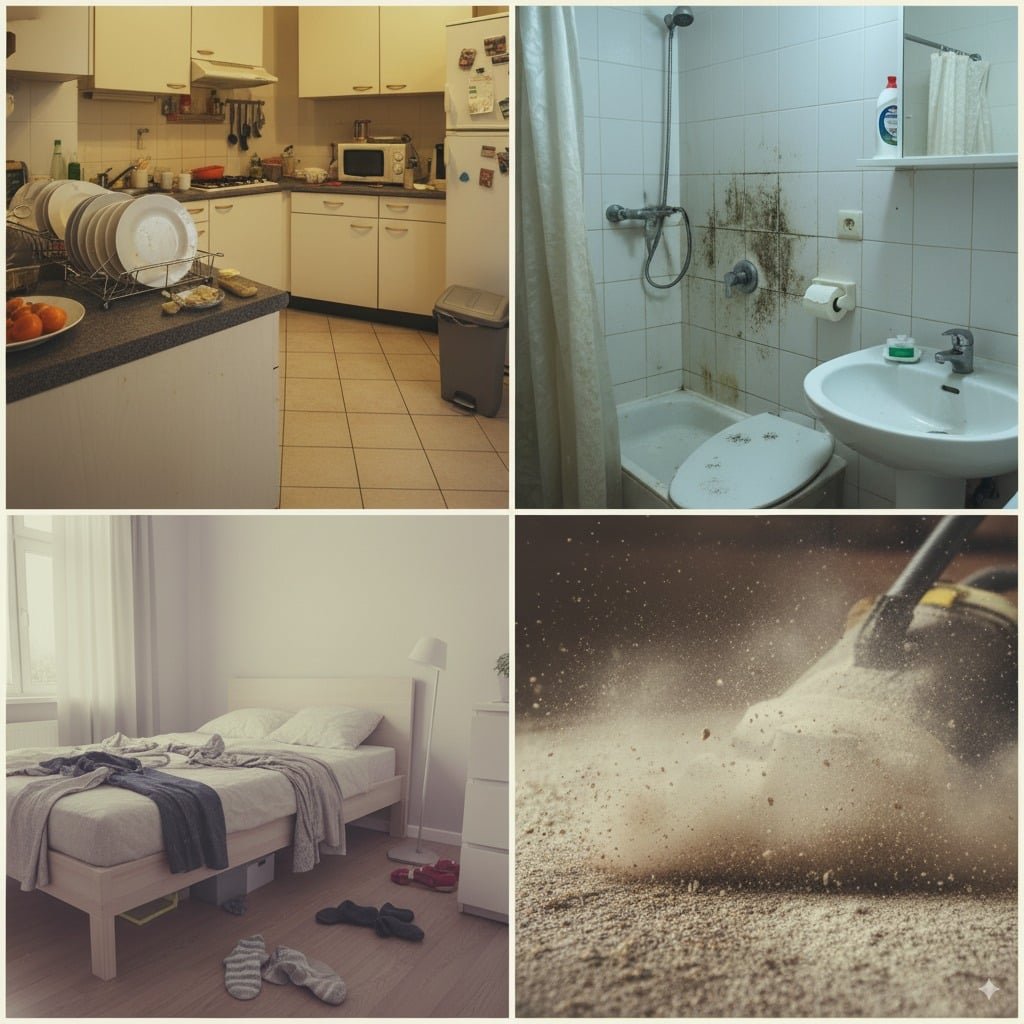
The Dirt You Cannot See Is the Dirt That Counts A house becomes a home through use, and use leaves residue: garden soil, road dust, fingerprints, and an entire invisible ecosystem of bacteria, viruses, mold, and fungi thriving exactly where routine cleaning never reaches. Most people scrub what looks dirty and ignore what actually is, yet the biggest hygiene threats are microscopic and prefer damp corners, dark crevices, and the surfaces touched most often. Mapping that hidden microbial landscape changes cleaning from a cosmetic chore into genuine health protection. Here are the dirtiest spots and why each earns the title. Kitchen Hotspots Where Germs Breed The food-prep room is paradoxically the germiest in most houses: raw food, moisture, and constant touching combine perfectly there. The sink: ground zero for contamination. Food rinsed off plates and boards settles into a sticky biofilm on the basin and drain that can host E. coli and Salmonella, and every faucet turn splashes those germs onto hands, counters, and clean dishes. A running disposal aerosolizes bacteria-laden droplets into the air, and the faucet handles plus the damp aerator cap collect their own film of grime. Sponges and dishcloths: the cleaning tools are often filthier than what they wipe. A sponge stays damp for hours, and its porous body lets bacteria multiply exponentially, including Campylobacter, a leading cause of foodborne illness. Wiping a counter with a contaminated sponge is microbial transfer, not cleaning. Cutting boards: knife grooves trap bacteria from raw meat and poultry below the reach of vigorous washing, ready to contaminate the next salad. Separate, color-coded boards for raw meat and produce are a critical food-safety habit. Appliance handles: refrigerator, microwave, oven, and dishwasher knobs get touched after handling raw food and before washing hands. Influenza viruses can survive up to 48 hours on stainless steel, making these grips a primary transmission route inside a family. Coffee maker reservoir and knife block: one is dark and perpetually damp, breeding mold and yeast you end up brewing into coffee; the other’s narrow slots keep moisture and debris on supposedly clean blades. Bathroom Hotspots Beyond the Bowl The toilet bowl gets scrubbed while everything around it is ignored. Every flush with the lid up launches a toilet plume, an aerosol mist of microscopic droplets carrying fecal bacteria that can travel up to six feet onto floors, counters, and toothbrushes. The flush handle itself ranks among the most contaminated touchpoints in the house, and toothbrush holders collect dripping water and toothpaste into a murky sludge where Staphylococcus and mold flourish inches from the brush that goes in your mouth. The tub and shower fight a running battle against mold and mildew, and the fuel is soap scum: soap fats hardened by calcium and magnesium from hard water into a waxy, water-resistant layer that feeds fungi and shelters them underneath. That film is where the common pink growth lives, actually a bacterium called Serratia marcescens, alongside more dangerous black molds. Showerhead nozzles can harbor biofilms containing bacteria such as Mycobacterium avium, a pulmonary risk especially for people with weakened immune systems, aerosolized into the warm mist you breathe. Damp bath mats that never fully dry complete the circuit and track growth onto the floor. Objects, Soft Surfaces, and the Bedroom Around the rest of the house, the filth source is us. Fomites, the technical name for inanimate surfaces that carry infectious agents, means the remote controls, light switches, doorknobs, and game controllers everyone handles but nobody disinfects, under a sticky film of skin oils and sweat that helps germs cling. Personal electronics are worse: the average mobile phone has been shown to carry more bacteria than a toilet seat, and keyboards are crumb-and-skin buffets between the keys. Soft surfaces act like giant filters, holding dust, pet dander, pollen, tracked-in dirt, and food scraps, plus colonies of dust mites. Mites do not bite, but they feast on roughly 1.5 grams of dead skin the average person sheds each day, and their waste and decaying bodies are potent allergens kicked up by footsteps and vacuuming, linked to asthma and respiratory problems. Bedrooms are no sanctuary either. Pillows and mattresses soak up sweat, oil, and shed skin so steadily that a two-year-old pillow can be one-third dead skin, mites, and allergenic waste by weight, feeding nighttime congestion and restless sleep. The laundry hamper, loaded with damp towels and gym clothes, becomes a humid incubator of mold and odor bacteria that cross-contaminates whole loads. Finally, the mobile contaminants: purse and backpack bottoms touch restroom, restaurant, and transit floors, pick up everything from E. coli to MRSA, then ride onto kitchen counters. Reusable grocery bags, unwashed, carry leakage from meat packages. Pet bowls grow a slimy biofilm that can contain Salmonella and Listeria without daily scrubbing. A Quick Reference for the Worst Offenders Hotspot What lives there What to do Kitchen sink and drain Biofilm with E. coli and Salmonella Scrub the basin daily; sanitize handles and the aerator Sponge and dishcloths Billions of bacteria including Campylobacter Replace often; never wipe with a damp, sour sponge Touchpoints: remotes, switches, knobs, phone Germs from every hand, viruses on steel for up to 48 hours Disinfect on a schedule; the CDC’s home cleaning and disinfecting guidance backs up high-touch routines Shower, tub, mat Soap scum, Serratia marcescens, mold, damp-mat growth Wipe after use, wash mats hot, treat grout monthly Pillows, mattress, carpet Dust mites and their allergenic waste Vacuum deep, rotate mattresses, wash bedding hot Bags, grocery totes, pet bowls Transit-floor bacteria, meat-drip pathogens, bowl biofilm Wipe bag bottoms, launder totes, scrub bowls daily Dirtiest Places FAQ Which single spot should I attack first? The kitchen sponge and the sink. They feed each other: a soaked sponge dragged across a biofilm sink just moves germs around. Start with a fresh sponge and a scrubbed basin, then build the rest of the routine outward. Are toilet plumes really a health issue? Flushing unlidded toilets aerosolizes particles that settle across the room, including on toothbrushes. Close

The Dirtiest Places In Your Home Can Be Harmful To Your Health Read More »
old Toothbrushes For Cleaning services

8 Efficient And Economical Ways To Use Old Toothbrushes For Cleaning

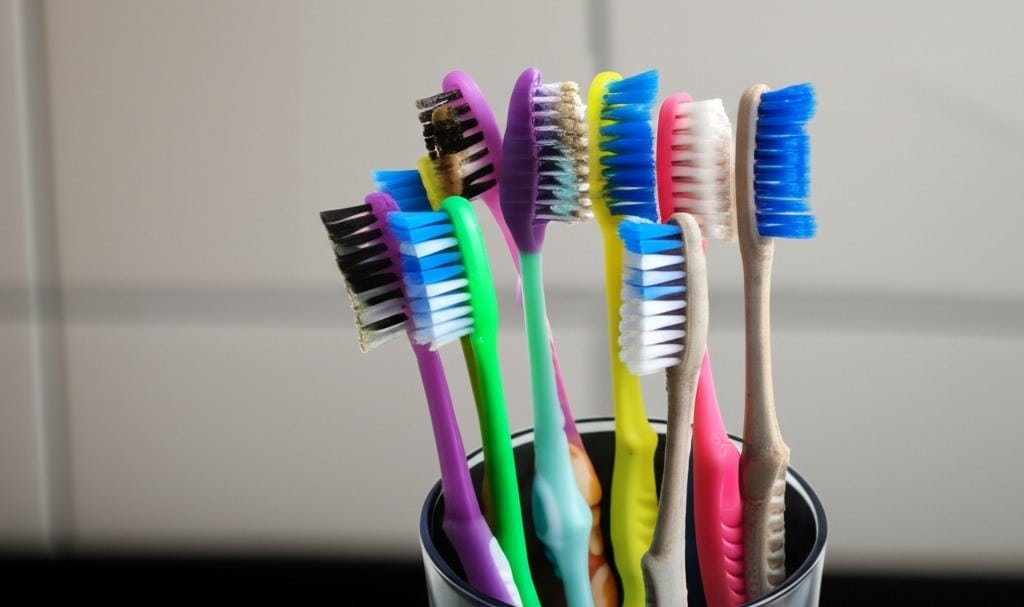
Before you discard that old toothbrush, consider its second life as a precision cleaning instrument. Its small head, firm bristles, and ergonomic handle make it an unparalleled tool for tackling the grime that accumulates in the tightest, most awkward spaces in your home. Its utility extends far beyond the bathroom sink, reaching into every room to restore detail and cleanliness where larger tools cannot. 1.Floor Joints In the kitchen, the toothbrush becomes an indispensable ally. Start with the grout lines on your tiled floor or backsplash. These porous channels are magnets for spilled coffee, sauce splatters, and general kitchen debris. A standard mop or sponge glides over them, but a toothbrush gets right in. Create a paste using baking soda and a small amount of water or, for tougher stains, a bit of hydrogen peroxide. Apply the paste directly to the grout and let it sit for a few minutes. Then, take your old toothbrush and scrub in small, circular motions. The bristles will agitate the paste and lift the embedded grime, restoring the grout to its original color. This same method works wonders on countertop grout where crumbs and food particles become trapped. 2.Sink Move to the kitchen sink. The area around the base of the faucet is a breeding ground for mineral deposits and soap scum. The angled head of a toothbrush can get right up against the fixture, scrubbing away the chalky white residue. Dip the brush in white vinegar to help dissolve hard water stains. Don’t forget the faucet’s aerator; unscrew it and use the toothbrush to scrub the fine mesh screen, clearing any blockages that affect water pressure. The sink drain itself, particularly the rubber splash guard in a garbage disposal, is another target. Lift the rubber flaps and use the toothbrush with a degreasing dish soap to scrub away the slimy, foul-smelling buildup on the underside. It’s a task no one enjoys, but one for which the toothbrush is perfectly designed. 3.Microwave Appliances are filled with nooks that a cloth can’t reach. The control knobs on your stove can be removed and scrubbed individually. The tiny crevice between the cooktop and the counter is a trap for crumbs; a dry toothbrush can flick them out before you wipe the area down. The seal around your microwave or oven door collects grease and food splatter. A toothbrush dipped in a mild cleaning solution can gently scrub this gasket clean without causing damage. The vents on the front of your dishwasher, the control panel buttons, and even the intricate filter system inside can all be detailed with a toothbrush. For small appliances, its use is even more pronounced. The blades of a blender, the cutting gear of a can opener, and the grates of a toaster oven are all easily and safely cleaned with a toothbrush. A particularly clever use is for cleaning a cheese grater. Instead of shredding your sponge, scrub the grater from the inside out with a soapy toothbrush to dislodge every last bit of dried-on cheese. 4.Bathroom The bathroom presents its own set of detailed cleaning challenges. Shower and tub grout is constantly exposed to moisture, soap, and body oils, leading to mildew and soap scum. A toothbrush, paired with a specialized tile cleaner or a potent mixture of vinegar and dish soap, is the ultimate weapon. Its bristles are stiff enough to scour away the grime without scratching the tile. The track for a sliding shower door is notoriously difficult to clean. It’s a narrow channel that collects a disgusting combination of hard water deposits, soap scum, and hair. A dry toothbrush can first be used to loosen and sweep out the dry debris. Follow up by spraying a cleaner into the track and using the toothbrush to scrub it from end to end, reaching into the corners. The result is a smoothly gliding door and a far more hygienic shower environment. Look closely at your bathroom fixtures. The overflow hole in the sink is a dark, damp space that can develop odors and mildew. A toothbrush can be inserted and scrubbed around the opening to clean it thoroughly. The base of the toilet, where it meets the floor, collects dust and other unpleasantries. A dedicated, clearly marked toothbrush can be used to scrub this crevice clean. The most overlooked area is the toilet seat hinges. The complex plastic and metal parts are impossible to clean with a cloth. A toothbrush can get into every single gap, removing the grime that builds up around the bolts and hinges, a detail that makes the entire toilet look and feel cleaner. The jets under the rim of the toilet bowl, often clogged with mineral deposits, can be individually scrubbed with a toothbrush dipped in toilet bowl cleaner to ensure a powerful, effective flush. 5.Windows And Doors Beyond the kitchen and bath, the toothbrush proves its worth throughout the house. Window and sliding door tracks are a prime example. Dust, dirt, dead insects, and outdoor debris collect in these channels. A dry toothbrush works perfectly to loosen and sweep this material into a pile that can be easily vacuumed up with a crevice tool. For caked-on mud, a wet toothbrush will do the job. The delicate fins of heating and air conditioning vents are dust magnets. A dry toothbrush can gently brush the dust off each fin without bending or damaging them. 6.Electronics For electronics, a completely dry, clean toothbrush is essential. Gently brush it over your computer keyboard to dislodge crumbs, dust, and hair from between the keys. Do the same for the ports and vents on a laptop, gaming console, or television. The fine bristles can get into these areas without causing static damage, provided the brush is dry. The intricate patterns on furniture, such as carved wood on a headboard or the detailed legs of an antique table, can also be dusted with a dry toothbrush, which removes dust from crevices a cloth would miss. 7.Clothes Its applications in laundry

8 Efficient And Economical Ways To Use Old Toothbrushes For Cleaning Read More »

cleaning services in Edmonton

Edmonton Move-Out Cleaning: Common Mistakes to Avoid

Edmonton Move-Out Cleaning: The Mistakes That Cost Tenants Their Deposits Moving is a study in controlled chaos: boxes stacked into fortresses, furniture wrapped and disassembled, every day a countdown to a new beginning. In that whirlwind, one critical task looks backward, and it is not your average weekly tidy. A move-out clean is a forensic-level deep clean, the final act of stewardship for a space you once called home, and often the single most important factor in getting your full security deposit back from your Edmonton landlord. Lost deposits trace back to a handful of predictable mistakes. Here is how to avoid every one of them. Mistake 1: Reading “Broom-Swept” Too Literally The rental agreement, signed and filed away, suddenly becomes the most important document in the move. Clauses describing the condition the property must be left in are no longer fine print; they are your departure checklist. The phrase “broom-swept condition” is dangerously misleading. To a tenant, it can sound like a quick vacuum and a wipe of the counters. To a property manager preparing to show the unit to prospective tenants, it means a property that is not just empty but immaculate, as close as possible to the day you moved in. The gap between those interpretations is where deposits are lost. Every move-out clean begins with one mindset shift: you are cleaning for someone else’s inspection, so you need the critical eye of a landlord who is financially motivated to find fault. Mistake 2: Washing the Floors and Missing Everything Else Mistake 2 covers the details landlords actually inspect. Work high to low, and skip nothing on this list. Ceiling corners cleared of cobwebs; light fixtures and fans wiped down, because they are dust magnets. Walls, doors, and doorframes washed: scuffs, switch-plate fingerprints, and smudges visible only in certain light all count. Baseboards on hands and knees, every inch, since they trace every room and collect surprising grit. Windows cleaned inside and out where accessible, with real effort on sills and tracks, where dust and dead insects collect; a brush and vacuum attachment signals a thorough job. Closets fully emptied, with shelving, rods, and walls wiped, then floors vacuumed and mopped. Carpets: a professional steam clean is often stipulated in the lease or simply expected, since a household vacuum cannot lift deep-set dirt, allergens, and odors from a year of foot traffic. Mistake 3: Going Soft on the Kitchen The kitchen is the heart of the move-out challenge: a zone of grease, food splatter, and built-up grime. Every cabinet and drawer gets emptied and cleaned inside out, including interior shelves, drawer bottoms, handles, and cabinet faces, with special attention to the sticky film of aerosolized grease above and around the stove. Then the appliances, the main event. The refrigerator is emptied completely, its shelves and drawers washed separately in warm soapy water, its interior scrubbed, its exterior wiped including the top, and the unit pulled from the wall to clear the forgotten landscape of dust and crumbs behind and beneath it, vacuuming the coils so the next tenant inherits an efficient fridge. The oven draws the most dread: baked-on grease and carbonized food need a powerful cleaner, serious scrubbing, soaked racks, scraped interior walls, and door glass cleaned until transparent. Burners get cleaned, drip pans scrubbed or replaced, and the surface degreased. The range hood is degreased and its filter cleaned or replaced per the manufacturer’s instructions. The dishwasher gets its filter cleared of food debris and a cleaning cycle with a dishwasher-specific product to break down soap scum and hard water deposits. Finally, sink, faucet, countertops, and backsplash are scrubbed, disinfected, and polished to the CDC’s cleaning and disinfecting standard. Mistake 4: Treating the Bathroom as a Five-Minute Wipe-Down Bathrooms are judged on soap scum, hard water stains, and sanitation. The toilet is cleaned and disinfected top to bottom: tank, exterior bowl, seat and its hinges, and the base where it meets the floor, a notorious collection point for dust and grime. The shower and tub need heavy-duty work to lift soap scum from walls and glass doors and mineral deposits from fixtures, and grout lines usually demand a stiff brush and a dedicated cleaner to clear mildew and discoloration. The vanity and sink are cleared out and cleaned inside and out like the kitchen cabinets, the sink and faucet scrubbed and polished free of toothpaste residue and water spots, the mirror cleaned to a streak-free shine, and the exhaust fan cover taken down and washed to remove its thick dust coating. The floor is swept and mopped meticulously, including the corners and behind the toilet. Mistake 5: Assuming DIY Is the Cheap Option Once the checklist above lands, the do-it-yourself question becomes practical. DIY looks cost-effective at first glance, then the hidden costs appear. Hidden cost of DIY What it actually takes Supplies Degreasers, oven cleaner, glass cleaner, grout cleaner, floor polish, and disinfectants, plus cloths, brushes, a good mop, and a powerful vacuum; see Health Canada’s household products guidance before buying chemical cleaners Time One person can easily spend one or two full days of hard physical labour, exactly when your energy belongs to the move itself Inadequacy risk Deposit deductions for missed details can easily exceed the cost of hiring professionals Professionals run this checklist daily. They bring industrial-strength products and efficient systems, they know what landlords look for, they accomplish in a few hours with a team what takes one person a full weekend, and they are insured and often guarantee the work, returning to fix anything flagged at the final walkthrough. Edmonton Move-Out Cleaning FAQ What does “broom-swept condition” really require? In practice, landlords expect a clean close to move-in ready: spotless floors, wiped walls and baseboards, empty and cleaned cabinets and closets, and sanitized appliances. Assume the strict reading, because the lenient one is how deposits get deducted. Do I really need to steam clean the carpets? Check your lease. Steam cleaning is frequently stipulated in writing, and where

Edmonton Move-Out Cleaning: Common Mistakes to Avoid Read More »

Different Types of Cleaning Cloths

Different Types of Cleaning Cloths: Clean Your Home Without Damaging it

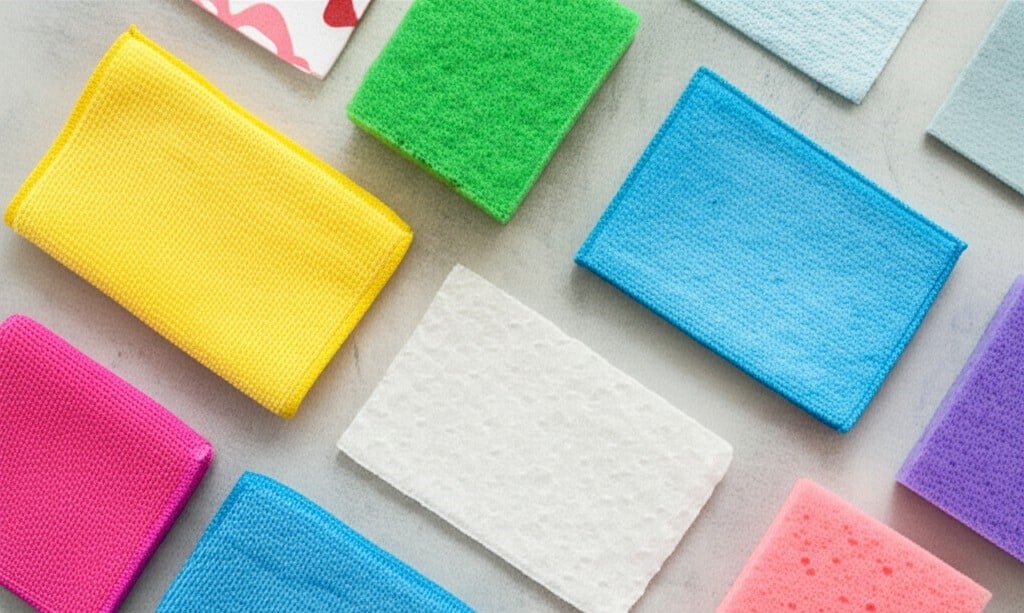
The cleaning cloths is the single most fundamental tool in the arsenal of both the professional and the homeowner. Its importance is often overlooked in favor of powerful chemical solutions or advanced machinery, yet the success of any cleaning task hinges on the material used to wipe, scrub, and polish a surface. The wrong cloth can leave behind lint, create streaks, fail to absorb liquid, or, in the worst-case scenario, scratch and permanently damage the very surface it is meant to clean. A deep understanding of the different types of cleaning cloths is not a minor detail; it is the foundation of effective and efficient cleaning. The market is filled with various cleaning cloths, each designed with a specific purpose in mind. Microfiber Microfiber has revolutionized the cleaning industry over the past few decades, and for good reason. It is not a single type of cloth but a category of textiles made from incredibly fine synthetic fibers, typically a blend of polyester and polyamide. For a fiber to be classified as a microfiber, it must be finer than one denier, which is approximately the diameter of a silk strand. Most cleaning-grade microfibers are significantly finer than that. The true genius of microfiber lies in its manufacturing process. The fibers are split into a star-like or wedge-shaped cross-section. This creates an enormous amount of surface area within the cloth and a network of microscopic hooks that are exceptionally effective at trapping dust, dirt, grime, and microbes. Unlike traditional cotton cleaning cloths, which tend to push larger particles around, a microfiber cloth actively grabs and holds onto debris. Furthermore, the material possesses a natural positive electrostatic charge when dry, which acts like a magnet for negatively charged dust particles. This makes it an unparalleled tool for dusting without the need for chemical sprays. When used damp, microfiber’s effectiveness shifts to its capillary action. The vast network of fibers can absorb between seven and eight times its own weight in liquid. This incredible absorbency allows it to lift and remove dirt and grease with minimal water, often eliminating the need for harsh cleaning chemicals. The fine fibers can penetrate microscopic pores and irregularities on a surface that other cloths simply skim over. However, not all microfiber is created equal; the weave and pile of the cloth dictate its best use, making the selection of specific microfiber cleaning cloths a crucial decision for achieving optimal results. All-Purpose Microfiber: This is the most common and versatile type. It has a looped pile, similar to a traditional terry cloth towel but much finer. This texture is excellent for scrubbing and trapping larger particles of dirt and grime. It’s the workhorse for general cleaning tasks like wiping down countertops, cleaning spills, scrubbing bathrooms, and washing general household surfaces. Its high absorbency makes it effective for both wet and dry applications. Waffle Weave Microfiber: Characterized by a distinctive grid-like pattern of recessed squares, this weave significantly increases the cloth’s surface area. This design is engineered for maximum absorbency and quick drying. Waffle weave cloths are the superior choice for drying tasks. They can absorb large amounts of water without becoming oversaturated quickly, making them perfect for drying dishes, glassware, and especially for automotive detailing, where leaving a streak-free finish on a car’s body is paramount. Glass and Polishing Microfiber: These cloths have a very tight, flat, suede-like weave with no pile. This smooth surface is designed to glide effortlessly over reflective surfaces. Because it lacks the looped fibers of a terry weave, it is virtually lint-free. Its primary purpose is to clean and polish glass, mirrors, windows, stainless steel appliances, and chrome fixtures without leaving behind streaks, smudges, or fibers. For best results, one of these flat-weave cleaning cloths is often used slightly damp to clean, followed by a second, dry one to polish to a perfect shine. High-Pile or Plush Microfiber: These cloths feature long, soft, fluffy fibers. The primary advantage of this design is its ability to trap and hold large quantities of dust deep within its pile, preventing it from being released back into the air. This makes it the ultimate reusable dusting tool, far superior to disposable static cloths. The plushness also makes it ideal for delicate tasks like buffing car wax without scratching the paint or for applying polish to fine furniture. Proper care is essential to maintain microfiber’s unique properties. They should be washed only with other microfiber or non-linting synthetic materials. Washing them with cotton will cause lint to become embedded in the fibers, ruining their effectiveness. Crucially, fabric softener and bleach must never be used. Fabric softener clogs the microscopic gaps in the fibers, destroying their ability to absorb and trap dirt. Bleach degrades the synthetic fibers, causing them to break down. Washing these cleaning cloths correctly ensures they last for hundreds of uses while maintaining their superior cleaning power. Cotton Before the advent of microfiber, cotton was the undisputed king of cleaning cloths. Derived from a natural plant fiber, cotton is known for its softness and high absorbency. It is durable and can withstand harsh chemicals like bleach and high washing temperatures, which can be useful for sanitization when dealing with heavy contamination. Cotton Terry Cloth: These are the familiar towels found in bathrooms and kitchens. Their looped pile is designed for absorbing large volumes of water. While effective for mopping up significant spills or for heavy-duty scrubbing where potential linting is not a concern, these cotton cleaning cloths are not ideal for fine cleaning. They tend to smear dirt more than lift it and often leave behind noticeable lint, especially on glass and dark surfaces. Flour Sack Towels: These are thin, tightly woven cotton cloths, historically made from the sacks used for flour. Their key advantage is that they are virtually lint-free. This makes them an excellent, classic choice for drying glassware and polishing silverware to a brilliant shine. They are less absorbent than terry cloth, but their smooth surface makes them superior finishing cleaning cloths for specific tasks where a perfect, clear finish is required. Cotton Rags: The most economical option is often a repurposed old

Different Types of Cleaning Cloths: Clean Your Home Without Damaging it Read More »

Airbnb Cleaning Service

How to Choose The Best Airbnb Cleaning Services in Toronto: 5 Key Factors

Airbnb Cleaning Services in Toronto: 5 Key Factors for a Five-Star Turnover A successful short-term rental lives or dies by one process: the turnover. This is not a simple tidy-up; it is a complete, systematic reset of the guest experience. In a world-class city the standards are exceptionally high, and the smallest oversight, a stray hair or a sticky spot on the counter, can compromise an entire stay. If you are choosing between companies offering Airbnb cleaning services in Toronto, here are the five factors that separate a professional reset from a rushed wipe-down. Factor 1: A Systematic Process That Starts at Checkout The moment a guest departs, the clock begins. The first action is ventilation: all windows and balcony doors open to flush out stale air and lingering odors from cooking or fragrances, creating a neutral, fresh canvas while the space airs out. During this window, a professional crew runs a preliminary walkthrough for assessment, not cleaning, scanning each room for new damage such as scuffs on walls, carpet stains, or broken items. Issues are documented immediately with clear, time-stamped photographs and reported to the host, standard operating procedure for any reliable service. Beds are stripped completely, and all towels, bathmats, and kitchen cloths go into laundry bags to prevent cross-contamination. Factor 2: Bedroom and Bathroom Detail Work The bedroom is a guest’s sanctuary, and its cleanliness must be absolute. After the linens come off, the mattress protector and pillows are inspected for staining and laundered or replaced as needed, and the mattress itself is vacuumed with an upholstery attachment to lift dust, allergens, and skin cells. Fresh linens go back on with intent: taut sheets, hotel-style corners, and a wrinkle-free duvet, because the bed is a presentation. Headboards, nightstands, and dressers are wiped down, drawers and closets are opened and checked for items left behind, and picture frames, lamps, and window sills are dusted before the floor is vacuumed under the bed and behind furniture. Nowhere is cleanliness scrutinized more intensely than the bathroom. A quality disinfectant goes on the shower, bathtub, toilet, and sink, then sits for several minutes to dissolve soap scum, grime, and bacteria, following the CDC’s logic for cleaning and disinfecting surfaces at home. The shower and tub are scrubbed wall to wall with special brushes for grout lines and drains, and glass doors are squeegeed to a streak-free finish. The toilet is disinfected inside and out, from bowl and seat to tank and the entire base down to the floor. Once sanitized, the space is restocked: ample toilet paper, fresh hand soap, full shampoo, conditioner, and body wash bottles, and three freshly laundered towels per guest, a bath towel, hand towel, and washcloth, folded neatly. The floor is mopped last, and light switches, door handles, and the exhaust fan cover get a final wipe. Factor 3: Kitchen Disinfection and Restocking The kitchen is where guest trust is won or lost. Turnover cleaning starts by emptying the refrigerator and freezer of any food left behind, then wiping every interior shelf, drawer, and door seal with a food-safe disinfectant. Appliance exteriors and handles are polished, the microwave is cleared of splatters, the oven is inspected for spills, and the stovetop is degreased until it shines. Countertop items like the coffee maker and toaster are lifted so the surfaces underneath can be fully sanitized. The sink is scoured, the faucet polished, and cupboards and drawers spot-checked, with all provided dinnerware, glassware, and cutlery inspected. When it is a DIY job, follow Health Canada’s advice on using household chemicals safely; a professional crew handles those products for you. Restocking is part of the service: fresh paper towels, a new sponge, dish soap, dishwasher pods, a cleaned and full coffee station, and bins emptied, wiped, and relined before the floor is swept and mopped. Factor 4: Living Areas and the Extra-Mile Details The living room is where first impressions form, so every surface from coffee tables to the television stand and bookshelves is dusted. Upholstery is vacuumed with cushions removed to clean the frame beneath, cushions are fluffed and arranged, and throw blankets are folded. Books and magazines are organized, rugs are straightened and vacuumed, and the floor is finished with attention to corners and baseboards. Then come the details that elevate a clean from standard to exceptional: Baseboards wiped down to remove scuffs and dust. Door frames, doorknobs, and light switches sanitized as high-touch points. Interior windows checked for fingerprints and smudges. Every light bulb checked so none are burnt out for the arriving guest. Factor 5: The Final Walkthrough and Handoff The last step is quality control with fresh eyes: a supervisor or the cleaner tours the property as a newly arriving guest would, checking that pillows are perfectly arranged, the welcome mat is straight, and the air smells neutrally clean. The thermostat is set to a comfortable temperature, blinds are adjusted to a uniform position, and only then is the property securely locked and a confirmation message sent to the host. For hosts aiming for Superhost status, this level of turnover is not a luxury; it is a strategic necessity. Toronto Shine Cleaning serves properties across the city and the GTA, which you can confirm on our locations page. The Turnover at a Glance Area Reset essentials Restocking and checks Bedroom Vacuumed mattress, hotel-style bed-making, wiped surfaces Fresh linens, lost-item sweep of drawers Bathroom Disinfected and scrubbed tub, shower, toilet; squeegeed glass Three fresh towels per guest, soap and TP stocked Kitchen Disinfected fridge, degreased stove, scoured sink Coffee station, dish supplies, relined bins Living areas Dusted surfaces, vacuumed upholstery, finished floors Bulbs, blinds, thermostat, final walkthrough Airbnb Cleaning FAQs How quickly can a turnover crew reset my unit? Professional crews work from a fixed checklist and arrive fully equipped, built around tight turnover windows between late checkouts and evening arrivals. Book a company that treats those windows as non-negotiable and confirms completion after every visit. Do Airbnb cleaners handle laundry as well? A

How to Choose The Best Airbnb Cleaning Services in Toronto: 5 Key Factors Read More »

housekeeper deep cleaning

Deep Cleaning Services in Toronto, We Do It Right!

Deep Cleaning Services in Toronto: The Complete Reset Your Home Needs A regular cleaning keeps surfaces tidy, but the grime that accumulates below the surface quietly builds up over the months. That is the domain of specialized deep cleaning services in Toronto. Unlike standard housekeeping, a deep clean is a comprehensive, methodical process that tackles dirt in every often-overlooked, hidden corner of your home: a fundamental reset that restores your space to a truly pristine state. What Makes a Deep Clean Different? Professional deep cleaning focuses on a thorough, top-to-bottom reset of every room, targeting buildup that routine visits simply do not reach. It goes far beyond the surface and into the details: grease on cabinet fronts, dust in air vents, limescale on fixtures, and grime in grout lines. The scope demands expertise and specialized equipment, and more and more Toronto homeowners and businesses are investing in it, whether for a spring reset or as part of ongoing maintenance. For a fuller breakdown of what a session covers, see our guide to deep cleaning services in Toronto. Kitchen Deep Cleaning: Degreasing and Appliance Interiors In kitchens, the work is all about degreasing and disinfecting, starting inside your cupboards. Crews empty cupboards and pantries to inspect for spills, sticky residue, forgotten food, and signs of pests, then degrease and sanitize every interior surface. Handles and cabinet fronts get attention too, because repeated hand contact leaves a sticky film. Appliances receive treatment they almost never get at home: Oven: racks soaked, interior carbon buildup scrubbed, door glass cleaned for a like-new view. Stovetop: grates and burner caps removed and cleaned, boiled-over residue scrubbed from the surface. Range: pulled out so the sides, the floor behind it, and the wall are reached and wiped clean. Refrigerator and freezer: emptied, shelves and drawers washed, door gaskets detailed with a small brush, condenser coils vacuumed of dust to support efficiency and lifespan. Small appliances: toaster crumb trays emptied, coffee makers and kettles descaled, microwave interiors scrubbed, including the often-splattered ceiling. Bathroom Deep Cleaning: Soap Scum, Limescale, and Grout Bathrooms are scrubbed and sanitized top to bottom, dissolving soap scum and body residue from tubs and showers with specialized agents made for stubborn film. Shower doors and glass enclosures are cleaned until streak-free, the tracks at the base are cleared of accumulated gunk, and tiles and grout lines are meticulously scrubbed to lift mildew and dirt from porous grout. Stubborn mold and mildew in damp bathrooms are common culprits, and the CDC’s guidance on mold and your health explains why proper removal matters. Health Canada also recommends keeping indoor humidity low and fixing moisture sources so mould cannot take hold in the first place. Fixtures get their shine back as limescale and mineral deposits are removed from faucets and showerheads, and chrome is polished. Toilets are cleaned inside the bowl and across the entire exterior, from the tank lid and handle to the seat, hinges, base, and surrounding floor, plus the often-ignored overflow hole inside the tank, flushed clean with disinfectant. Vanity and medicine cabinets are emptied and wiped inside, and exhaust fan covers are removed and washed, because a dusty fan cannot ventilate properly and traps the humidity that leads to mildew. Living Areas and Bedrooms: A Top-to-Bottom Reset Crews work from the ceiling down to the floor in every room. Cobwebs are removed from corners and ceiling edges, light fixtures and ceiling fan blades are dusted, and the tops of bookcases, wardrobes, and cabinets are reached. Walls are spot-cleaned of scuffs and splatters, and baseboards, door frames, window frames, and switch plates are hand-wiped one by one. The process continues behind and beneath the obvious. Furniture is moved so the floors underneath are reached, and upholstery is vacuumed with crevice tools to extract dust, skin cells, and allergens from fabric. Wood furniture is polished, lampshades and blinds are dusted, and the air system itself is addressed: vents and grilles are vacuumed and wiped, and HVAC return air covers are pulled and dusted out. Professional crews rely on HEPA-filter vacuums that capture microscopic allergens rather than recirculating them, and steam cleaners that sanitize without harsh chemicals. When Toronto Homes Need a Deep Clean Most Deep cleaning requests tend to follow life events: Moving into or out of a home, when deposits and first impressions are at stake. Post-renovation cleanup after the construction dust settles in every crack. Seasonal refreshes, especially the annual spring clean. Before hosting an event or gathering, such as a wedding at home or the holidays. Preparing a space for a new baby or toddler who will crawl across every floor. Allergy season, when dust, dander, and pollen accumulate indoors. How to Choose a Professional Deep Cleaning Company Not all services are created equal, so choose carefully. Look for a company that offers a range of deep cleaning options with a detailed, transparent list of what each package includes. Prioritize experienced, trained professionals who understand the right products and techniques for different surfaces, and verify that the company is insured and bonded to protect your home and belongings. What to check Why it matters Transparent scope and checklist You can compare packages and know what is covered before booking. Trained, vetted crew Correct products and techniques protect finishes instead of damaging them. Insurance and bonding Toronto Shine carries a $1,000,000 insurance policy and a $10,000 accidental breakage and surety bond. Flat, upfront pricing Our deep clean starts at $270.38 before HST for a studio or one-bedroom, shown on our pricing page. Deep Cleaning Service FAQs What is included in a deep cleaning service in Toronto? A full reset of each room: kitchen cabinets and appliances inside and out, bathrooms degreased and descaled with grout scrubbed, walls spot-cleaned, baseboards and switch plates wiped, vents dusted, furniture moved, and floors and carpets thoroughly cleaned. How is deep cleaning different from regular housekeeping? Regular visits maintain cleanliness on visible surfaces. A deep clean restores the areas maintenance skips, which is why many homes pair

Deep Cleaning Services in Toronto, We Do It Right! Read More »

August cleaning preparation

How To Prepare For August Cleaning: 7 Steps Fast and Easy

August cleaning is a specific kind of reset, the air in Toronto during August carries a distinct weight. This is the month where summer hits its peak just before beginning its slow retreat. Inside your home, the evidence of a season lived to its fullest is everywhere. Preparing for the August cleaning isn’t just about tidying; it’s about resetting the home after months of high activity and preparing it for the shift into autumn. The purpose of a dedicated August cleaning is to systematically remove the specific grime of summer and create a clean foundation for the indoor months to come. 1.HVAC A critical first step in any thorough August cleaning is addressing the air your family breathes. With windows open for weeks, allergens, city dust, and pollen have infiltrated every room. Your HVAC system has been in constant use, and its filter is the first line of defense. Changing it is a non-negotiable starting point for your August cleaning. A clogged, grey filter is not only inefficient but also circulates the very particles you want to remove. Once replaced, use a vacuum with a brush attachment to clean all intake and outtake vents. This foundational task sets the stage for the rest of your August cleaning, ensuring the air moving through your home is as clean as possible. 2.Windows and Doors Now, turn your attention to the windows and doors. The screens have been interceptors of bugs, leaves, and dirt all summer. A proper August cleaning demands they be removed and washed. A soft brush, mild soap, and a gentle spray from a garden hose will dislodge the grime. While they dry, focus on the window tracks and sills. These channels are graveyards for dust and insects. Vacuum the loose debris and use an old toothbrush to scrub the caked-on dirt. This level of detail is a hallmark of a successful August cleaning. Washing the glass, inside and out, on an overcast day will prevent streaking and let pristine light into your newly refreshed space. Completing this part of the August cleaning makes an immediate, visible difference to the brightness of your home. 3.The Floors The floors hold the story of summer. Sand from The Beaches, soil from the garden, and grass from the park have been ground into every surface. A deep floor treatment is non-negotiable for a proper August cleaning. For hard floors, a thorough mopping, perhaps even twice in high-traffic areas, is required to lift the settled-in dirt. For carpets and area rugs, this is the time for a deep extraction clean. Renting or owning a carpet cleaner is essential for this part of the August cleaning, as it pulls out the deep-set allergens and grit that a standard vacuum cannot reach. The murky water you dispose of is proof of the effectiveness of this task. Moving furniture to clean underneath is a vital step in a comprehensive August cleaning; the dust and lost items accumulated over three months need to be addressed. This aspect of the August cleaning removes the literal grit of the season from your home. 4.Fat in the Kitchen The kitchen August cleaning is a project in itself. The refrigerator has been a revolving door of summer treats and barbecue ingredients. Empty it completely. Wash all shelves and drawers in warm, soapy water. Wipe the interior with a food-safe cleaner, checking expiration dates as you go. The exterior and handles, covered in fingerprints, also need attention. Summer cooking often involves more frying and grilling, leaving a sticky film of grease on cabinets, the backsplash, and especially the range hood. A good degreaser is your best tool for this part of the August cleaning. Spray it on, let it work for a few minutes, then wipe clean. Don’t forget the hidden areas during your August cleaning; pull out the oven and stove to clean the sides and the floor underneath, which are magnets for crumbs and grease. This part of the August cleaning is about health as much as it is about aesthetics. 5.Sofa Cushion Your living room August cleaning should focus on soft surfaces where dust and dander settle. If your sofa cushion covers are machine-washable, now is the time to launder them. For all other upholstery, a meticulous vacuuming with the correct attachment is key. Go into every seam and crevice. For a deeper refresh, sprinkling baking soda over the fabric, letting it sit to absorb odors, and then vacuuming it up is a great technique to include in your August cleaning schedule. All throw blankets and pillows should be washed or cleaned according to their care tags. Dusting is another crucial element. Use a damp microfiber cloth to trap dust, not just move it. The goal of this August cleaning is to touch every surface, including the tops of picture frames, ceiling fan blades, and lamp shades. This comprehensive dusting is what makes an August cleaning so effective. Think of this as resetting the comfort zones of your home with your August cleaning. 6.Bathroom The bathroom August cleaning targets the buildup from summer humidity and increased traffic. Go beyond the basic wipe-down and scrub the grout lines on the floor and in the shower where soap scum and mineral deposits have accumulated. A paste of baking soda and vinegar is an effective, natural solution. Wash the shower curtain and its liner. The exhaust fan cover, likely caked with dust, should be removed and cleaned to ensure it can effectively pull moisture from the air. A successful August cleaning restores these high-use spaces to a state of hygienic freshness. Take the time to empty and wipe out medicine cabinets and vanities, organizing the contents as you go. 7.The Summer Gear A key part of the August cleaning process is managing the transition of seasonal items. The summer gear pool toys, beach chairs, inflatable rafts needs to be cleaned, deflated, and stored properly to protect it for next year. The barbecue grill deserves a deep clean after a season of heavy

How To Prepare For August Cleaning: 7 Steps Fast and Easy Read More »

Isopropyl Alcohol

Isopropyl Alcohol – 101 Simple and Safe Ways to Clean Your Home

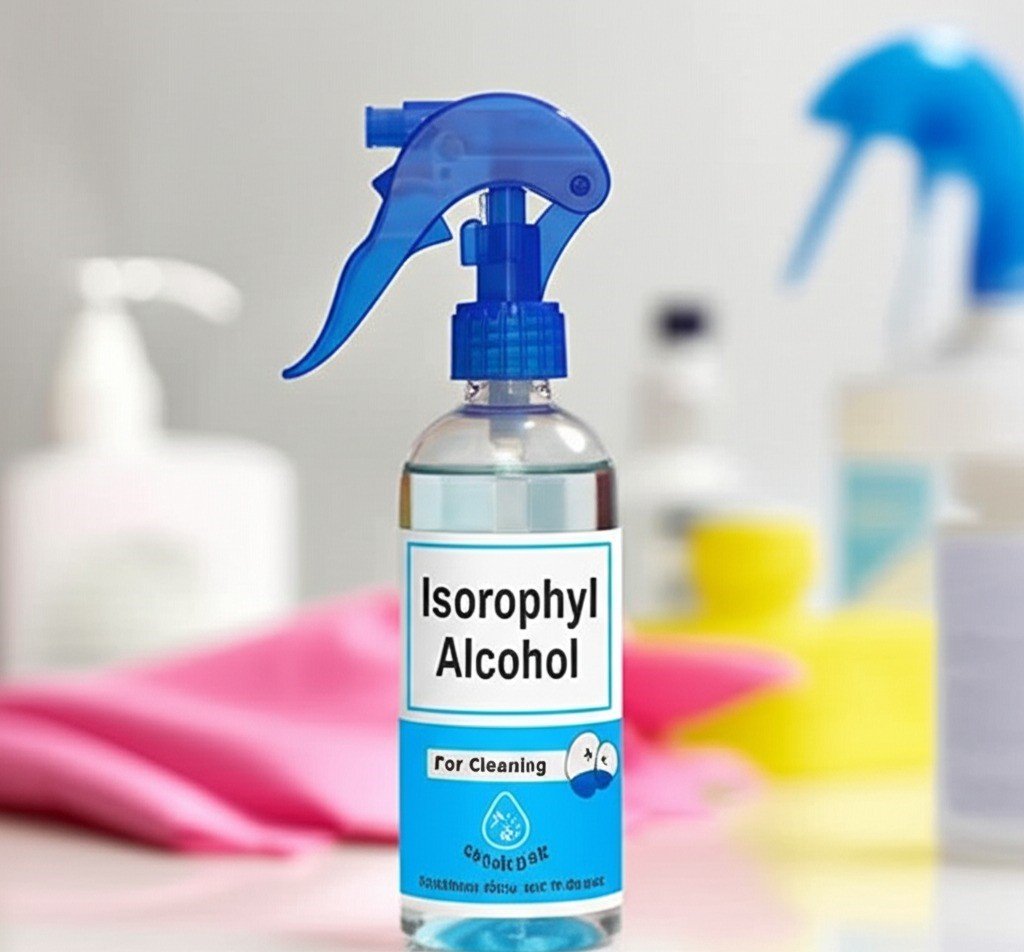
Isopropyl alcohol, often referred to as rubbing alcohol, is a staple in first-aid kits, but its utility extends far beyond disinfecting minor scrapes. In the realm of cleaning, it is a formidable, versatile, and cost-effective agent. Its chemical properties-specifically its ability to act as a solvent and its rapid evaporation rate-make it an indispensable tool for tackling a wide array of messes throughout the home. The primary strength of isopropyl alcohol lies in its solvent capabilities. It effectively dissolves a range of non-polar compounds, which includes many of the common culprits behind household grime: oils, greases, adhesives, and certain inks. Unlike water, which can struggle with these substances, alcohol breaks them down chemically, lifting them from surfaces with minimal effort. This is immediately apparent when cleaning stainless steel appliances. Fingerprints, smudges, and cooking grease residue can make stainless steel look dull and streaky. A simple wipe with a microfiber cloth lightly dampened with isopropyl alcohol will cut through the oily film instantly. Because the alcohol evaporates almost immediately, it leaves behind a pristine, streak-free finish that water-based cleaners often fail to achieve. The alcohol lifts the grease, and its fast evaporation prevents new water spots or streaks from forming as it dries. This same principle applies to glass and mirrors. Commercial glass cleaners often contain ammonia or other chemicals to achieve a streak-free shine. Isopropyl alcohol accomplishes the same goal more simply. A solution of one part alcohol to one part water in a spray bottle creates a highly effective glass cleaner. It cuts through haze, hairspray residue on bathroom mirrors, and smudges on windows, evaporating quickly for a perfectly clear result. For chrome fixtures in the bathroom and kitchen, rubbing alcohol removes water spots and soap scum, restoring their reflective shine without leaving behind any film. Beyond its solvent action, isopropyl alcohol is a potent disinfectant. The most common concentration available, 70%, is considered an optimal grade for this purpose. The presence of 30% water is crucial; the water acts as a catalyst, helping the alcohol to penetrate the cell wall of bacteria, viruses, and fungi more effectively. Once inside, the alcohol denatures the essential proteins and enzymes of the microorganism, causing it to die. This makes it an excellent choice for sanitizing high-touch surfaces. Light switches, doorknobs, remote controls, keyboards, and mobile phones are breeding grounds for germs. Regularly wiping these items with a cloth dampened with 70% isopropyl alcohol can significantly reduce the transmission of pathogens in a household. When cleaning electronics, it is crucial to apply the alcohol to the cloth first, never directly onto the device, to prevent liquid from seeping into sensitive components. The higher concentrations, such as 91% or 99% isopropyl alcohol, have their own specific advantages, particularly where water content is a concern. For cleaning sensitive electronic components, like computer motherboards or CPU contacts, 99% alcohol is the professional standard. Its extremely low water content means it evaporates almost instantly and carries virtually no risk of causing short circuits or corrosion. It effectively removes dust, grime, and old thermal paste without leaving any conductive residue. One of the most celebrated uses for isopropyl alcohol is stain removal, particularly on resilient materials. It is famously effective at removing permanent marker from hard, non-porous surfaces. If a marker finds its way onto a countertop, a plastic toy, or a laminate floor, a small amount of alcohol on a cotton ball will typically dissolve the ink, allowing it to be wiped away. It can also be a lifesaver for fabric, though a spot test in an inconspicuous area is always mandatory. For ink stains on sturdy upholstery or clothing, gently blotting the stain with a cloth soaked in alcohol can lift the ink out of the fibers. The key is to blot, not rub, to prevent the stain from spreading. This solvent power is especially valuable for microfiber upholstery. Microfiber is sensitive to water, which can leave behind rings and change the texture of the fabric. Because isopropyl alcohol evaporates so quickly, it can be used to clean microfiber couches and chairs without this risk. By spraying a light mist of alcohol onto a stained area and gently scrubbing with a soft-bristled brush, you can lift dirt and grime. Once dry, the stiffened area can be brushed again to restore its soft texture. This method effectively cleans the material without the water damage associated with traditional upholstery cleaners. Adhesive residue is another common frustration that isopropyl alcohol handles with ease. Price tags on new glassware, labels on plastic containers, or the sticky residue left behind by tape can be stubborn. Soaking the residue with alcohol for a few minutes will break down the adhesive, allowing it to be scraped or wiped off cleanly without damaging the surface underneath. This is far gentler and often more effective than abrasive scrubbing, which can scratch glass, plastic, or metal. In the bathroom, the fight against mold and mildew can be persistent. While not a substitute for a dedicated fungicide in cases of heavy infestation, isopropyl alcohol can be used as a preventative measure. Its disinfecting properties kill mold spores on contact, and its drying action helps to create an environment less hospitable to their growth. A regular wipe-down of grout lines, shower corners, and other damp areas with alcohol can help keep mildew at bay. It also works wonders on soap scum buildup on glass shower doors, dissolving the greasy film and leaving the glass sparkling. The applications continue into more niche areas. Isopropyl alcohol can be used to clean and sanitize makeup brushes, dissolving oily makeup residue and killing bacteria that can cause skin breakouts. It can be used to clean jewelry, removing lotions and oils to restore sparkle to gemstones and metals (though care should be taken with delicate or porous stones like opals or pearls). It can even be used to de-ice car windows and frozen locks in the winter; the alcohol lowers the freezing point of water, causing the ice to melt quickly.

Isopropyl Alcohol – 101 Simple and Safe Ways to Clean Your Home Read More »

How to Clean Your Microwave – 6 Amazing Tips

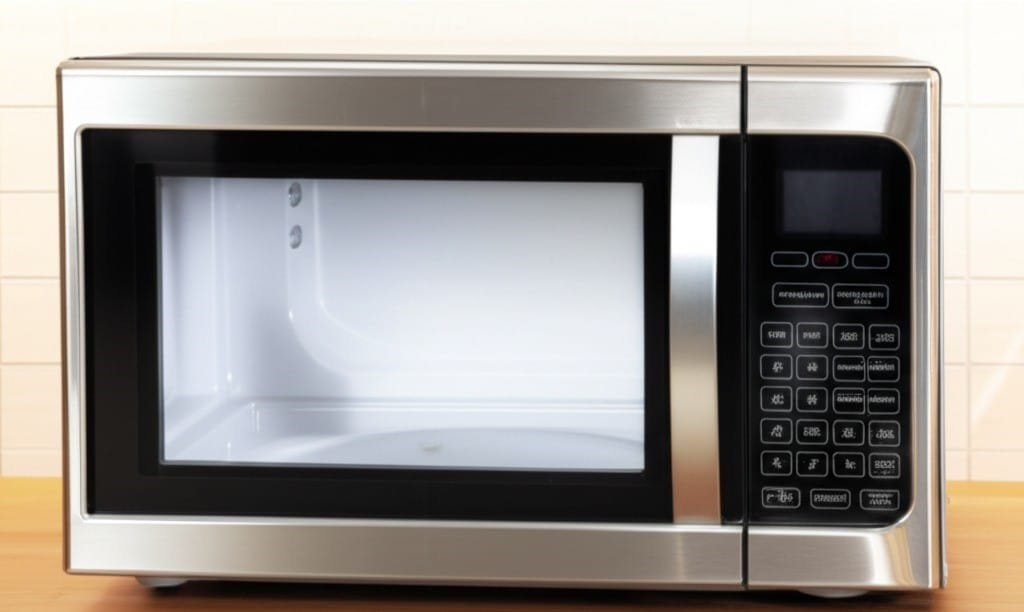
How to Clean Your Microwave Without Harsh Chemicals Few kitchen appliances see as much daily use as the microwave, and few collect grime as quickly. Reheated meals splatter, soups boil over, and sauces pop, leaving dried residue on the walls, ceiling, and door of the unit. Many people respond with abrasive scrubbers and strong chemical sprays, which risk scratching the interior coating and leaving fumes behind. A better approach relies on steam, mild acids, and gentle abrasives that dissolve messes without damaging the appliance. These microwave cleaning tips keep the process quick and safe. For homes that want every corner handled, Toronto Shine Cleaning offers a full deep cleaning package for the kitchen and beyond. Steam: The Gentle Way to Lift Stubborn Splatters Steam is the most effective weapon against baked-on messes because it softens residue so it wipes away with almost no effort. Fill a large glass measuring cup or another microwave-safe container with one cup of water, then stir in two tablespoons of white vinegar along with the juice squeezed from half a lemon. Drop in the squeezed lemon halves too, so their oils can freshen the air as the water heats. Run the microwave on high for three to five minutes, until the water boils and condensation covers the door window. Then leave the door closed for five to ten minutes. That pause holds the hot, acidic steam inside, where it loosens caked-on splatters everywhere. Do not rush: wiping too early is less effective and risks burns from hot steam. Wipe the Interior From Top to Bottom Once the steam has done its work, open the door carefully and remove the bowl with an oven mitt. Use a clean microfiber cloth to wipe from the ceiling down across the side walls, back wall, and floor, since loosened grime drips downward. Most splatters, even old ones, lift away easily. For spots that resist, dip the cloth into the warm vinegar or lemon water, or use the soft side of a non-scratch sponge. Never use steel wool, scouring pads, or abrasive metal scrubbers; they permanently scratch the interior surface. Don’t Forget the Turntable, Roller Ring, and Door The glass turntable and the plastic roller ring beneath it are prime hiding spots for drips and crumbs. Wash the glass plate by hand in warm, soapy water; most models also allow top-rack dishwasher cleaning. Scrub the roller ring the same way, using an old toothbrush on the small wheels where grease and particles get trapped and slow the rotation. Wipe the floor of the unit once more, then return the ring to its track and set the plate on top. Wipe the door’s interior with that same vinegar or lemon mixture, paying special attention to the mesh screen. Never spray cleaner straight at the control panel; liquid can work its way behind the buttons and ruin the electronics. Spray the cloth first instead. Stainless steel exteriors do best with a dedicated stainless cleaner wiped with the grain. Health Canada’s household product safety guidance also covers microwave ovens and the safe use of cleaning products. Baking Soda Paste for Burnt-On Food When steam alone cannot handle heavily carbonized spots, baking soda comes to the rescue. Stir roughly two parts of baking soda to one part of water until you get a thick, spreadable paste. Apply it only to the problem areas and let it sit for at least fifteen minutes so it can break down the burnt food. Gently scrub in circular motions with a damp cloth or a soft non-scratch sponge, rinsing the cloth often. Finish with a fresh, damp cloth to remove every trace of the paste. Over-the-Range Models: Clean the Grease Filters Over-the-range microwaves rely on grease filters underneath to trap airborne grease, and those filters are easy to forget. Slide the latch to remove them, then soak them for twenty minutes or more in a sink of very hot water with plenty of degreasing dish soap. For heavy buildup, sprinkle a quarter cup of the baking soda into the water. Scrub with a soft-bristled brush, rinse thoroughly with hot water, and let the filters air dry completely before sliding them back in. If your model has a charcoal filter for recirculated air, it is not washable and must be replaced on the manufacturer’s schedule. Odor Control and Everyday Prevention Lingering smells such as burnt popcorn usually vanish after a steam clean with lemon or vinegar. For a stubborn smell, leave a small dish of baking soda uncovered in the unit overnight, or set out a bowl of coffee grounds. Keeping the microwave clean also supports safe food handling; the CDC’s food safety basics page explains how germs spread through food. Prevention is the best maintenance strategy: Cover food with a splatter guard or a paper towel before heating. Wipe fresh spills right away, before they bake on during the next use. Do a quick damp-cloth wipe-down weekly to stop buildup. Microwave Cleaning Methods at a Glance Problem Best Method Key Detail Light splatters Vinegar or lemon steam Wait 5-10 minutes before wiping Burnt-on food Baking soda paste Let the paste sit for 15 minutes Greasy filters Hot soapy water soak Add baking soda for heavy grease Bad odors Baking soda or coffee grounds Leave inside overnight, door shut Frequently Asked Questions How often should you clean your microwave? A full steam clean once a week keeps most kitchens fresh, while the turntable and interior can be wiped more often if you use the microwave daily. Grease filters on over-the-range models need attention every few weeks depending on how much you cook. Is vinegar safe for the inside of a microwave? Yes. Distilled white vinegar is a mild acid that cuts grease and neutralizes odors without harming the interior coating, and it is safe around food. Just keep vinegar away from unsealed natural stone surfaces; microwave interiors are not a concern. Can you use baking soda in a microwave? Yes, as a gentle abrasive paste for burnt-on spots.

How to Clean Your Microwave – 6 Amazing Tips Read More »

Dishwasher

5 Common Dishwasher Cleaning Mistakes You Need to Stop Making

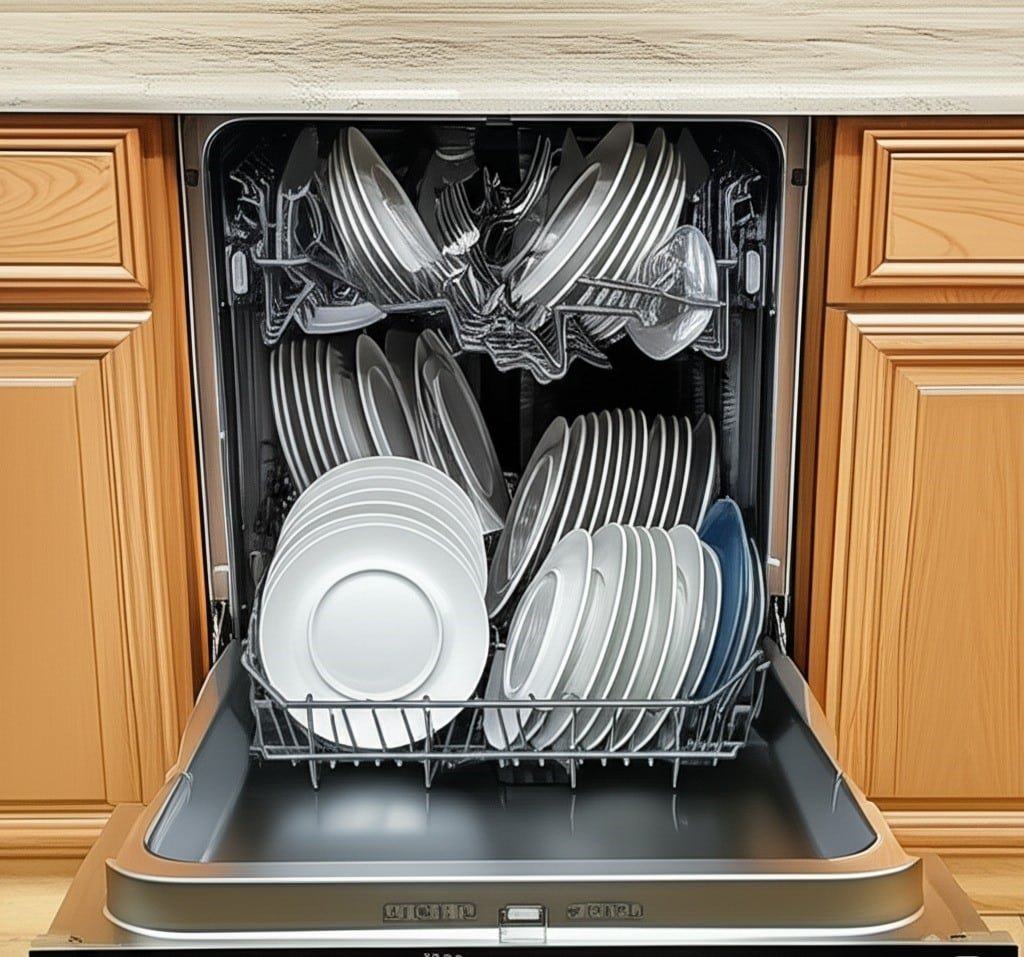
The critical Dishwasher Cleaning Mistakes that are ruining your dishes, dishwasher is an instrument of precision, not a brute-force cleaning bin. Its ability to produce sparkling, sanitized dishes is entirely dependent on the user’s understanding of its mechanical and chemical processes. When dishes emerge still dirty, streaked, or wet, the fault lies not with the machine, but with a series of preventable and often repeated Dishwasher Cleaning Mistakes. Rectifying these errors transforms the appliance from a source of frustration into the reliable workhorse it was designed to be. 1.Loading The most fundamental failures originate with loading. The core principle of a dishwasher is the systematic spraying of every dish surface with high-pressure, hot, detergent-laden water. Anything that obstructs this spray guarantees a failed cleaning. Overcrowding is the most common violation of this principle. The temptation to fit one more plate or bowl is strong, but doing so creates “water shadows.” A large bowl placed incorrectly can block the spray from reaching half a dozen smaller items behind it. This leads not only to the shielded items remaining dirty but to a more insidious problem: food particles trapped on those dishes can become loosened by the heat and steam, only to be blasted across the machine during the rinse cycle. This is the source of the dreaded gritty film that can coat supposedly clean glasses and plates. These types of Dishwasher Cleaning Mistakes actively make other dishes dirtier. Each item requires clearance on all sides for the water to circulate.   2.Right Position Equally important is the orientation of the dishes. The primary spray arms are located at the bottom of the tub and often underneath the top rack, meaning the water’s primary trajectory is upward. As a consequence, all soiled surfaces must face down and be angled toward the center of the machine where the spray is most concentrated. Placing a bowl upright is a classic example of Dishwasher Cleaning Mistakes; its interior will remain a dry, dirty island. Cups, glasses, and bowls belong on the top rack, angled downward between the tines to maximize exposure. Plates on the bottom rack should be arranged in the tines so they face the central spray, not all aligned in one direction against the side. The tines themselves are angled to achieve this optimal positioning. Large, flat items like cutting boards and baking sheets must be placed on the periphery along the sides or back of the bottom rack. Placing one at the front can physically block the detergent door from opening or impede the rotation of the lower spray arm, effectively neutralizing the entire wash cycle and creating one of the most frustrating Dishwasher Cleaning Mistakes to diagnose. The division of the racks is deliberate. The bottom rack is a zone of high intensity, situated directly above the main heating element and in the path of the most powerful water jets. This area is reserved for durable items: ceramic plates, stainless steel pots, and sturdy pans. The top rack provides a gentler wash, making it the safe haven for more delicate items. All plastics, even those labeled “dishwasher safe,” must be placed on the top rack. The intense, direct heat from the lower heating element will inevitably warp or melt plastic placed on the bottom rack, a permanent form of damage that ranks high among costly Dishwasher Cleaning Mistakes. The heat can also cause certain plastics to degrade and potentially leach chemicals. Delicate glassware, too, belongs on the top rack, secured between tines to prevent it from rattling against other items and chipping. Utensil loading is a science in itself. Simply dumping cutlery into the basket leads to “nesting,” where identical shapes, especially spoons, fit together and form a waterproof seal. To prevent this, utensils must be mixed. Alternate placing some handles up and some handles down. Distribute forks, spoons, and knives across different compartments. This simple act of separation is vital to avoid these common Dishwasher Cleaning Mistakes. For safety, sharp knives should always be placed blade-down, though it must be stressed that fine cutlery should never be subjected to a dishwasher’s harsh environment. 3.Be Careful This leads to arguably the most destructive category of Dishwasher Cleaning Mistakes: washing items that are not dishwasher-safe. The damage is often irreversible. Wood, including cutting boards, utensils, and knife handles, will absorb the hot water and swell, then crack and split as the heat-dry cycle rapidly removes the moisture. Cast iron cookware will be stripped of its vital seasoning-the polymerized oil layer that provides its non-stick quality. The harsh detergents are designed to dissolve grease and oil, so they directly attack this layer, exposing the raw iron which will immediately begin to rust. High-carbon steel chef’s knives suffer a dual assault: the chemicals in the detergent micro-corrode the fine blade edge, while the physical jostling against racks dulls it. Most non-stick pans will have their delicate coatings slowly abraded by the detergents. Fine china with metallic trim or hand-painted patterns will be chemically stripped by the heat and powerful cleaning agents. Insulated travel mugs can lose their vacuum seal due to the extreme temperature fluctuations, rendering them useless. These are not minor mishaps; they are severe Dishwasher Cleaning Mistakes that ruin valuable kitchen tools. 4.Very Clean Paradoxically, being too clean before loading is also an error. Many modern dishwashers are equipped with soil sensors, often a turbidity sensor that shines a light through the wash water to measure how dirty it is. When you pre-rinse dishes to a squeaky-clean state, the sensor detects very little soil in the water. The machine’s logic then concludes it’s a light load and runs a shorter, more energy-efficient cycle. This may be insufficient for any genuinely dirty pots or pans elsewhere in the load. Furthermore, modern detergents are packed with enzymes like amylase and protease, which are designed to break down starches and proteins. These enzymes need a substrate food to work on. By pre-rinsing, you are essentially washing away the target of the detergent, making it less effective. Scraping off large chunks of food is all

5 Common Dishwasher Cleaning Mistakes You Need to Stop Making Read More »