Appliance Cleaning

small office

Making Your Small Office a Pleasant Place to Work – 5 Expert Tips

Making Your Small Office a Pleasant Place to Work A tidy office does more than impress visitors; it protects staff health, lifts morale, and helps people focus. Clients and job candidates start forming opinions before a word is spoken, at the front door, and employees feel the difference every day in how the space looks, smells, and functions. Break the workload into five zones: Entrance and reception, where first impressions form. Workstations, where the team spends its day. The kitchen and breakroom, shared by everyone. Restrooms, which need daily sanitation. Periodic deep tasks that keep the whole office fresh. Tip 1: Make the Entrance and Reception Sparkle First impressions start at the door. Keep the glass panels free of fingerprints and smudges, and disinfect the handle daily, since it is the first thing everyone touches. Vacuum or mop the entryway floor every day so dirt, salt, and moisture stay at the threshold instead of traveling through the building. In the reception area, clear the desk of clutter, dust it thoroughly, and wipe it with a product that dries streak-free. Sanitize the telephone, keyboard, and mouse, arrange any brochures neatly, and wipe down guest chairs, including legs and armrests, vacuuming upholstery to remove dust and crumbs. Tip 2: Keep Workstations Clean and Disinfected The main workspace is where your team spends most of its day, so its condition directly affects health and productivity. Empty trash and recycling bins and replace the liners. Dust from high to low so dislodged particles land on surfaces you clean next, covering shelves, cabinet tops, picture frames, and partition ledges before desks. Wipe monitors with a dry microfiber cloth so they are not scratched. Then move everything on each desk and clean the surface with a pH-neutral product safe for wood, laminate, and glass. Disinfect the high-touch items: the phone handset and keypad, the mouse, and the keyboard, using compressed air to blow crumbs from between the keys first. Wipe chair armrests, adjustment levers, and bases, and vacuum fabric seats. Finish by vacuuming the floor around every desk, reaching underneath and behind the chair. The CDC’s guidance on when and how to clean and disinfect explains why regular cleaning of high-touch surfaces is usually enough to keep germs from spreading. Tip 3: Give the Kitchen and Breakroom Daily Attention The breakroom is the social heart of a small office and the hardest area to keep clean. Clear the counters and wipe them with a food-safe disinfectant so no crumbs or sticky coffee rings remain. Scrub the sink with a non-abrasive cleaner, then disinfect the basin and the faucet hardware. That microwave gets a daily wipe-down, inside and out; a few minutes of heating a bowl of lemon water loosens dried food so it wipes away easily. Sanitize the fridge handle and door, check the interior regularly for expired food, and clean the door seals. Wash the coffee maker carafe and filter basket and wipe the machine’s exterior. Clean breakroom tables and chairs, then sweep and mop the floor with a degreasing disinfectant. Handwashing is part of the same hygiene picture: the CDC’s handwashing guidance notes that clean hands are one of the best ways to prevent the spread of germs in shared spaces. Tip 4: Keep Restrooms Sanitized and Stocked A clean, well-stocked restroom signals a well-managed office. Check toilet paper, paper towels, and soap dispensers first, then empty and sanitize the trash receptacles and fit fresh liners. Clean mirrors with a glass cleaner so they stay free of spots, and scour sinks and faucets, focusing on the handles and the soap dispenser surround. For toilets, use a hospital-grade disinfectant and respect its dwell time, the period the product must stay wet on the surface to kill germs. Work from the handle and top of the tank down to the lid, both sides of the seat, the exterior of the bowl, and the base. Scrub the inside of the bowl with a dedicated brush and bowl cleaner. Keep separate cloth colors assigned to the toilet zone so they never double as sink or counter rags, wipe partitions from top to bottom, and finish by mopping the floor with a disinfectant cleaner. Tip 5: Schedule Deeper Cleaning for the Whole Office Beyond the daily routine, a small office needs periodic deep tasks that keep the space truly healthy. Meeting rooms should be presentation-ready at all times: wipe the table, clean chairs, erase whiteboards with a proper whiteboard cleaner to remove ghosting, dust televisions, projectors, and conference phones, and vacuum. Along hallways, vacuum carpets edge to edge, sweep and mop hard floors, and disinfect light switches and door handles while wiping railings and baseboards periodically. Then book the deeper work on a schedule: interior window cleaning for natural light, hot water carpet extraction to remove embedded dirt and allergens, and high dusting of ceiling fan blades, shelves, vents, and light fixtures. Small Office Cleaning Priorities at a Glance Zone Focus Points Suggested Routine Entrance and reception Glass, handles, desk, guest seating Daily wipe-downs and floor care Workstations Desks, phones, keyboards, chairs Daily tidy, weekly full clean Kitchen and breakroom Counters, sink, microwave, fridge Daily wipe-downs, weekly deep scrub Restrooms Toilets, sinks, mirrors, supplies Daily sanitation, stock checks Common areas Windows, carpets, vents, light fixtures Periodic professional deep clean Frequently Asked Questions How often should a small office be cleaned? High-touch surfaces such as door handles, kitchen counters, and restroom fixtures should be cleaned daily. Workstations and floors need attention several times a week, and deep tasks like carpet extraction and window cleaning are typically done quarterly or twice a year. What is the difference between cleaning and disinfecting? Cleaning removes dirt and most germs with soap or detergent, while disinfecting uses a product that kills remaining germs on the surface. In an office, clean first, then disinfect the high-touch areas where illness spreads most easily. Why does my office still look dusty after vacuuming? Dust settles on high surfaces such as shelves, vents, and light fixtures and

Making Your Small Office a Pleasant Place to Work – 5 Expert Tips Read More »
dishwasher

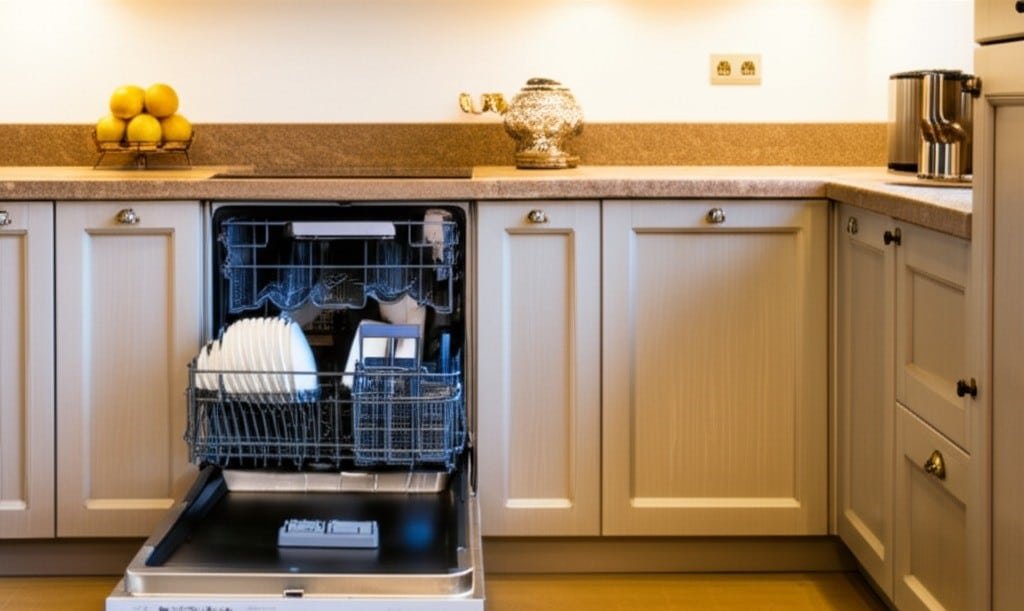
6 Easy Tips On How To Clean Your Dishwasher With Vinegar

How to Clean Your Dishwasher With Vinegar Your dishwasher works hard washing plates, glasses, and cutlery, but it never washes itself. Food particles, soap scum, and hard water minerals gradually build up inside the tub, on the filter, and in the spray arms. The first signs are cloudy spots or film on glasses, a musty smell, and loads that come out less clean than they should. A regular vinegar cycle dissolves that buildup with a product that is cheap, natural, and safe. These six tips cover the whole process, from prepping the machine to keeping it fresh between cycles. Why White Distilled Vinegar Works So Well The active ingredient in white distilled vinegar is acetic acid, typically at about 5 percent concentration. That mild acid dissolves limescale and hard water deposits, the chalky film you see inside the tub and on glassware. It cuts through grease and soap scum and neutralizes odors instead of covering them with fragrance. It also discourages mold and mildew in damp areas, is non-toxic and safe around food and pets, and biodegrades completely. Used as directed, it will not harm stainless steel interiors, plastic parts, or rubber seals. Stick with clear white vinegar; apple cider vinegar can stain the interior and leave a sugary residue. Tip 1: Empty the Dishwasher and Clean the Filter First Preparation decides how well the vinegar cycle works. Remove every dish and piece of cutlery so the solution reaches all internal surfaces. Then take out the filter, usually a removable cylinder or multi-part assembly at the bottom of the tub, and rinse it under hot running water. You will likely find food scraps, labels, and greasy buildup; loosen them with an old toothbrush or scrub brush, using a little dish soap for stubborn grime. Check the manual for how the filter locks back into place. A clogged filter blocks water circulation and keeps the vinegar from reaching the whole machine. While you are there, wipe the door edges, rubber gaskets, and lower spray arm. Tip 2: Run the Vinegar Cycle on the Hottest Setting Pour two cups of the white distilled vinegar into an open, dishwasher-safe glass or ceramic bowl, and set the bowl on the top rack. The open bowl lets the vinegar mix into the wash water while its vapors spread through the cavity. Make sure the detergent and rinse aid dispensers are empty; the vinegar cycle must run on its own. Select the hottest and longest cycle your machine offers, often labeled Heavy Duty, Sanitize, or Pots and Pans. Hot water makes the acid noticeably more effective at dissolving minerals and grease. Tip 3: Never Mix Vinegar With Bleach Never combine vinegar with chlorine bleach: mixing them releases chlorine gas, which can cause serious respiratory problems and eye irritation. Check that no bleach products or residues are in the machine first. For guidance on handling cleaning products safely, see Health Canada’s household product safety pages. When someone is sick, a sanitize cycle is a good extra step; the CDC’s cleaning and disinfecting guidance explains when sanitizing is worth the effort. Tip 4: Wipe Seals, Gaskets, and Spray Arms After the Cycle Once the cycle finishes and the machine cools, open the door and inspect; cloudy surfaces should look clearer and odors gone. The folds of the rubber door seals can still hide grime and mildew; wipe them with a damp cloth and diluted vinegar or dish soap, and check around both dispensers for residue. If the vinegar smell lingers, run a short rinse cycle to flush it out. Between vinegar cleans, keep the spray arms clear: their small nozzles clog with hard water deposits, leaving dishes with unwashed spots. Clear blocked holes with a toothpick, a straightened paperclip, or a small wire. Clean the filter manually every week or two, scrubbing it under hot water, since a neglected filter makes the machine work harder and shortens its life. Tip 5: Clean the Exterior and the Daily Details The outside deserves attention too. For stainless steel doors, use a microfiber cloth with a stainless cleaner or diluted vinegar, then rinse with plain water to prevent streaking. Other finishes clean well with an all-purpose product. Good daily habits reduce how often you need a deep cycle: Scrape leftover food off plates before you load them; heavy pre-rinsing is rarely needed. Do not overload the racks or block the spray arms so water reaches every surface. Run full loads to save water and energy. Give the bottom edge of the door a regular wipe; water and food settle there. Tip 6: Know How Often to Run a Vinegar Cycle Most households benefit from a vinegar clean every one to three months. If you have hard water or run the dishwasher several times a day, clean it monthly. Watch for film on glasses, a persistent odor, or declining performance; any of these means a vinegar cycle is due. Dishwasher Problems and Vinegar Solutions Sign Likely Cause Fix Cloudy film on glassware Hard water deposits Run a vinegar cycle monthly Musty odor Food and grime in filter or seals Clean filter, wipe seals, vinegar cycle Spots on dishes Clogged spray arm nozzles Clear holes with a toothpick Weak cleaning results Blocked filter or buildup Full filter clean plus vinegar cycle Frequently Asked Questions Is it safe to run vinegar through a dishwasher? Yes. White distilled vinegar is non-corrosive to dishwasher components when used as directed. Still, check your user manual for any model-specific warnings before starting. Why does my dishwasher smell like vinegar after cleaning it? A temporary vinegar smell means the cycle did its job and usually fades within a few hours or after the next wash. If it bothers you, run a short rinse cycle right after the vinegar clean. Dishes are still dirty after a vinegar cycle. What now? Confirm the filter is clean and seated properly, clear any blocked spray arm nozzles, and make sure your hot water tank delivers roughly 120-140 F (49-60 C). Detergent type

6 Easy Tips On How To Clean Your Dishwasher With Vinegar Read More »

disorganized home

Why Hiring A Professional Organizer Is Important – 5 Key Factors

Thinking about hiring a professional organizer? Then we will help you. The sheer weight of accumulated belongings can become a quiet, pervasive burden in any home. It starts subtly, an item here, a stack there, until spaces that once felt open and functional begin to feel constricted, heavy. This isn’t just about untidiness; it’s about the way clutter can insidiously affect daily life, breeding a sense of low-grade stress, making simple tasks feel more complicated, and, critically, turning the act of cleaning into a monumental, often futile, effort. When surfaces are obscured and floors are pathways through obstacles, true cleanliness remains elusive. Dust settles not just on shelves, but within an environment of disorder, making it harder to breathe easy, both literally and figuratively. Many find that no matter how much they wipe, scrub, or vacuum, the underlying disarray prevents a feeling of genuine, lasting cleanliness. This is often the point where the realization dawns that something more fundamental than cleaning is required; a strategic approach to the items themselves. This is where the expertise of a professional organizer becomes invaluable. These individuals are more than just people who like to tidy; they are specialists in creating order from chaos, developing sustainable systems, and transforming living spaces into environments that support, rather than hinder, daily life. Their work is a methodical process, beginning with an in-depth consultation. This initial step involves understanding your specific challenges, how you use your space, what your frustrations are, and what your vision is for a more functional home. They assess the scope of the clutter, the types of items involved, and the underlying habits or circumstances that may have contributed to the situation. It’s a non-judgmental exploration designed to tailor a plan that aligns with your lifestyle and goals. 1.Do You Need All The Objects? The heart of the organizing process, and often the most daunting phase for homeowners, is decluttering. A professional organizer acts as a calm, objective guide through this potentially emotional journey. They help you confront your possessions, item by item or category by category, and make decisions about what stays and what goes. This isn’t about indiscriminately throwing things away; it’s about thoughtful evaluation. Questions like “Do I use this?”, “Do I love this?”, “Do I need this?” become central. For sentimental items, which often carry the heaviest emotional weight, organizers provide strategies for honoring memories without being overwhelmed by physical objects. They might suggest digitizing photos or letters, or creating a dedicated, contained memory box. For general household clutter, from overflowing kitchen cabinets to jumbled linen closets, they bring a systematic approach, helping you to see your belongings with fresh eyes and make choices that serve your current life, not a past or imagined future one. They also assist with the responsible disposal of unwanted items, coordinating donations to charities, identifying items for sale, or ensuring proper recycling and waste removal.   2.Sorting And Categorizing Once the excess is cleared, the next stage involves sorting and categorizing what remains. Items are grouped logically, all baking supplies together, all office stationery in one area, all cleaning products consolidated. This “like with like” principle is fundamental to creating intuitive systems. It might sound simple, but in a home where items have migrated and been stashed haphazardly over years, this step alone can be revealing, showing you exactly what you own and highlighting redundancies. With items sorted, the professional organizer then moves into space planning and system implementation. This is where their strategic thinking truly shines. They analyze the available space, closets, cabinets, shelves, drawers, even vertical space and design solutions to store items efficiently and accessibly. In a kitchen, this might involve reconfiguring pantry shelves, introducing clear, stackable containers for dry goods, implementing a first-in-first-out system to reduce food waste, using drawer dividers for utensils and gadgets, or finding clever solutions for awkward items like pot lids or baking sheets. The goal is to create a workflow that makes cooking and cleaning smoother. 3.Closets In closets, organizers might introduce uniform hangers to save space and create visual calm, demonstrate effective folding techniques that maximize drawer capacity, suggest shoe storage solutions that keep pairs together and visible, and implement systems for accessories like scarves, belts, and jewelry. They often help with seasonal wardrobe rotation, ensuring that out-of-season clothes are stored properly and easily retrieved when needed. For home offices, the focus is on creating an environment conducive to productivity. This can involve setting up effective paper management systems (e.g., action files, reference files, archives), advising on digital organization strategies, optimizing desk layout for ergonomic comfort, and ensuring essential supplies are within easy reach. Children’s playrooms and bedrooms benefit immensely from an organizer’s touch. Systems are designed to make it easier for children to find their toys and, crucially, to put them away. This often involves clear bins, picture labels for younger children, and strategies for toy rotation to prevent overwhelm and keep engagement high. Even daunting spaces like garages, basements, or attics are tackled methodically. Organizers can help install heavy-duty shelving, utilize clear, durable storage bins, and create designated zones for tools, sporting equipment, holiday decorations, and long-term storage, transforming these areas from dumping grounds into functional extensions of the home. 4.Labeling A critical component of any organizing system is labeling. Clear, consistent, and easy-to-read labels are the signposts that help everyone in the household understand where things belong. This simple step is vital for the long-term maintenance of order, preventing items from slowly migrating back into disorganized piles. The professional organizer doesn’t just set up these systems and leave; a key part of their service often involves coaching on how to maintain them. They understand that lasting organization requires a shift in habits. They might provide tips for quick daily or weekly resets, help establish routines for managing incoming mail or putting away groceries, and sometimes offer follow-up sessions to tweak systems as needs evolve or to provide a refresher. The benefits of engaging a professional organizer extend far beyond

Why Hiring A Professional Organizer Is Important – 5 Key Factors Read More »

summer cleaning woman

Preparing for Summer Cleaning – 6 Easy Steps

Preparing For Summer Cleaning: The Setup That Does Half The Work A summer cleaning session feels very different when the house is ready for it. Instead of wrestling through piles, running for missing supplies, and burning out by noon, you walk into a clear space with a plan, and every task goes faster and lands better. These six preparation steps turn a vague, overwhelming weekend into a series of manageable actions, and the same habits carry over into year-round upkeep. If preparation is not your strong suit, a professional team handles the whole job in one visit with deep cleaning services built for seasonal resets. Step 1: Declutter First With the Four Box Method Unnecessary objects soak up dust, harbor allergens, and slow down every surface you wipe around, so decluttering is the highest-leverage move you can make. Walk through the house room by room, or by category if that suits you better: clothes, books, papers, kitchen gadgets, old electronics. Give every item a conscious decision using four labeled boxes: Keep, Donate or Sell, Trash, and Relocate for things that belong in another room. Less stuff means less to clean and organize, and the open, calm feeling of a decluttered room is a benefit in itself: an organized home stays faster to maintain all year. Step 2: Turn Your Plan Into a Written Checklist A vague intention to clean up fizzles; a concrete roadmap does not. List every specific task you want to cover: degreasing the oven, emptying the fridge, washing interior glass and drapes, scrubbing floors and baseboards, dusting ceiling fans and light fixtures, and dealing with the deck or patio. Organize the list by room, kitchen tasks then bathroom tasks, or by activity type, dusting, vacuuming, mopping, whichever matches how you work. A written checklist gives direction, lets you watch progress pile up (genuinely motivating), keeps important areas from being forgotten, and lets you prioritize the tasks with the biggest visual impact before your energy runs out. Step 3: Gather Supplies and Test Your Equipment Nothing kills momentum like a mid-scrub store run. Inventory your products, cloths, sponges, brushes, buckets, and specialty equipment, then buy replacements for anything low, expired, or worn out before cleaning day. Do a quick function check too: fresh vacuum bags or an emptied canister, clean filters, fresh mop heads, spray bottles that mist rather than sputter. Decide in advance whether you will use commercial products or simple homemade solutions like white vinegar and baking soda, and stock the ingredients you chose. Check product labels and safety information as you shop; Health Canada’s overview of indoor air contaminants is a good reminder that strong-smelling chemicals deserve careful use in closed homes. All-purpose cleaner, glass cleaner, and disinfectant for shared and touch surfaces Microfiber cloths in quantity, plus sponges, scrub brushes, and an old toothbrush for grout A vacuum with crevice and dusting attachments, mop, bucket, and rubber gloves DIY staples if chosen: white vinegar, baking soda, lemons, dish soap Drop cloths or old sheets, trash bags, and boxes for the sorting step Step 4: Schedule Blocks That Fit Your Real Life Decide how you will spend your time before you spend it. One approach assigns specific days or weekends to rooms or task types: Saturday morning for the kitchen, a weeknight afternoon for every window in the house. The alternative is a little and often, thirty to sixty minutes daily crossing off one or two checklist items. Either way, put the blocks on your calendar like any other commitment, protect your energy for each task instead of sprinting through one marathon weekend, and estimate generously, because tasks almost always take longer than planned. Fitting cleaning into the schedule you already have produces consistency, and consistency is what actually finishes the job. Step 5: Protect the Space and Yourself Before Scrubbing Prepare the room to be cleaned as carefully as you prepare the task list. Open windows and set fans to circulate air, especially in warm months when fumes linger in stagnant rooms. Cover furniture and floors you are not working on with old sheets, plastic sheeting, or canvas drop cloths, move small furniture clear of the zone, and keep walkways unobstructed to prevent trips while carrying buckets. Strip knick-knacks and clutter off the surfaces themselves so you can wipe in long, uninterrupted strokes. Dress for the work too: old clothes, closed-toe shoes, and rubber gloves, with eye protection for overhead spraying or ladder work. When the job involves disinfecting as well as cleaning, the CDC’s page on when and how to clean and disinfect your home explains the sequence that matters: visibly dirty surfaces need soap and water first, because soil can stop a disinfectant from working. Step 6: Recruit the Household and Keep Morale Up Solo projects stall; family projects finish. Assign tasks matched to each person’s age and ability, state expectations clearly, and demonstrate anything new rather than hoping for it. Splitting the workload turns a chore into a team effort toward a shared result, teaches kids responsibility, and, with upbeat music playing and a payoff planned, stops feeling like a punishment. Rewards can be small: ordering takeout when the last room is done, or a family movie night once the checklist is empty. Prep step Core action Typical time Declutter Four boxes: Keep, Donate/Sell, Trash, Relocate A full day or spread over a week Plan Write a room-by-room or task-by-task checklist 30-45 minutes Supplies Inventory, buy missing items, test equipment 1 hour plus shopping Schedule Book room blocks or 30-60 minute daily slots 10 minutes to plan Protection Ventilate, cover, clear walkways, glove up 15-20 minutes per room Team up Assign tasks, set music, plan a reward 5 minutes to delegate Frequently Asked Questions About Summer Cleaning Prep What is the four box method? A decluttering system using boxes labeled Keep, Donate or Sell, Trash, and Relocate. Every item you touch gets an instant verdict, so sorting decisions happen once and clutter leaves the room as you work. How long

Preparing for Summer Cleaning – 6 Easy Steps Read More »

4 Easy Home Deep Cleaning Tips You Need to Try

4 Easy Home Deep Cleaning Tips You Need to Try Home deep cleaning goes far beyond routine tidying. Where regular cleaning maintains surface-level order, deep cleaning removes accumulated dirt, stubborn grime, bacteria, and hidden allergens that build up over time in every part of a home. It is a methodical, top-to-bottom process that restores a home to its best hygienic condition, and these four tips make it manageable. 1. Deep Clean the Kitchen From Top to Bottom The kitchen needs the most intensive work because grease, food particles, and bacteria collect there. Clean the interior and exterior of major appliances: degrease ovens inside and out, including racks and doors, clean microwaves internally and externally, wipe refrigerator and dishwasher exteriors, and degrease range hoods and their filters. Wipe cabinet exteriors to remove fingerprints and splatters, descale and polish sinks, faucets, and fixtures, sanitize countertops and backsplashes with attention to grout lines, and scrub floors including edges, corners, and under movable appliances. 2. Say No to Mold, Hard Water, and Dust in Bathrooms Bathrooms are high-moisture areas prone to mold, mildew, and soap scum. Scrub showers and bathtubs, including walls, doors, and tracks, to remove soap scum, hard water deposits, and signs of mildew. Disinfect toilets thoroughly, both inside the bowl and on all exterior surfaces, including the base and surrounding floor. Clean and polish sinks, vanities, countertops, and mirrors, and scrub tiles and grout on floors and walls to restore brightness. Dust light fixtures, exhaust fans, and vents, and descale chrome faucets and showerheads. 3. Dust High, Clean Low, and Don’t Skip the Details Work from top to bottom so dust falls onto surfaces you have not cleaned yet. Dust ceiling fans, light fixtures, picture rails, and curtain rods, then move to baseboards, skirting boards, and electrical outlet covers. Vacuum furniture, including under cushions, and move pieces where possible to clean underneath and behind. Wipe window sills, ledges, tracks, and frames, remove cobwebs from ceilings and corners, and clean interior windows and mirrors. Finish with floors: vacuum carpets thoroughly, including edges and high-traffic areas with spot treatment for stains, and mop hard floors with a suitable cleaning solution, paying attention to corners. 4. Call a Professional Home Deep Cleaning Service Professional cleaners bring training, industrial-grade equipment, and specialized solutions that most homes do not have. They work from a detailed checklist so every agreed area is covered consistently, and a full house deep clean can take many hours or even days of strenuous work when done alone. Reputable companies are insured and bonded: Toronto Shine Cleaning carries a $1,000,000 insurance policy plus a $10,000 accidental breakage and surety bond. The process starts with a consultation to define the scope and finishes with a walk-through so you can confirm the results. The CDC’s cleaning and disinfecting guidance explains why removing dirt before disinfecting matters, and Health Canada’s indoor air quality information covers the allergens a deep clean removes. For mold-prone areas, the CDC’s mold resources explain why moisture control is essential. Signs it is time for a home deep cleaning: Persistent musty odors despite regular cleaning Visible dust build-up in corners or on less-disturbed surfaces Grease build-up in the kitchen or hard water stains in the bathroom Allergy symptoms that worsen indoors A big event, move, sale, or renovation on the calendar Room Deep Cleaning Focus Tools That Help Kitchen Appliances, range hood, cabinets, grout, floors Degreaser, microfiber cloths, scrub brush Bathroom Shower, toilet, tiles, grout, fixtures Disinfectant, descaler, grout brush Living areas and bedrooms Ceiling fans, baseboards, furniture, windows Vacuum attachments, extendable duster Whole home Vents, door frames, switches, floors Vacuum, mop, step ladder Make Deep Cleaning a Seasonal Habit Spring and autumn are natural triggers, and many homeowners book an annual or semi-annual deep clean to maintain a consistently high standard, especially before hosting events or after renovations. Once the professionals finish, ongoing regular maid service keeps the baseline high, while a professional home deep cleaning resets the whole house. Review pricing or find your GTA location, then call (647) 424-0355 to book. How often should I deep clean my home? Many homes benefit from a deep clean once or twice a year, typically in spring and autumn. You may want one more often before or after events, when moving in or out, before selling or renting a property, or after renovations. How long does a professional deep clean take? It depends on the size of the home, its initial condition, and the tasks involved. A full house deep clean can take many hours or even days of work, which is why professional teams working from a checklist are faster and more consistent. Is a professional deep cleaning service insured? Reputable companies are insured and bonded. Toronto Shine Cleaning carries a $1,000,000 insurance policy and a $10,000 accidental breakage and surety bond, so you are protected against accidental damage or liability. What is the difference between regular and deep cleaning? Regular cleaning maintains surface-level order: dusting, wiping counters, and tidying. Deep cleaning removes accumulated grease, soap scum, limescale, dust, and allergens from hard-to-reach places such as behind appliances, inside ovens, and along baseboards, and it sanitizes areas that routine cleaning misses.

4 Easy Home Deep Cleaning Tips You Need to Try Read More »

2 people using a kitchen degreaser to clean

5 Best Ways to Use a Kitchen Degreaser for Kitchen and Home Cleaning

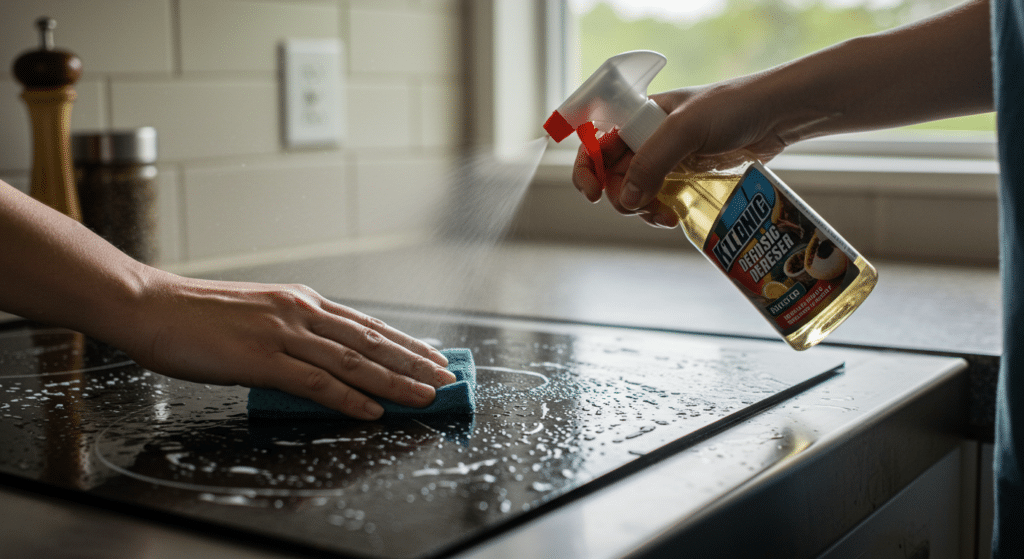
5 Best Ways to Use a Kitchen Degreaser, at the Stove and Beyond Ordinary cleaners slide right off old grease, but a degreaser is formulated to dissolve it, which changes what you can finish in one afternoon. Stovetop spatter, tacky cabinet fronts, a range hood filter you stopped thinking about, and the oil track on the garage slab all respond when the product gets the dwell time it needs. The five techniques below show where to spray, how long to wait, and when to rinse, so the bottle earns its place under your sink instead of being reserved for emergencies. Way 1: Deep-Clean the Stovetop and Cooktop Cooktops collect bubbling sauces and frying oil until the surface looks dull even after a wipe. Once the burner is cool, spray the degreaser across the cooktop and leave it for several minutes before wiping with a damp cloth. That pause is the entire method: the chemistry lifts the hardened film so heavy scrubbing, and the scratching risk that comes with it, becomes unnecessary. On a gas range, pull the burner grates and soak those too, since they quietly collect the thickest buildup of anything on the stove. Finish with a rinse cloth, dry the surface, and fold the routine into your weekly kitchen pass so the grime never gets a head start. Way 2: Clear the Range Hood and Its Metal Filter Steam and cooking fat combine above the stove into a sticky layer on the hood and a nearly invisible mat inside the filter. Spray the housing, wait around five minutes, and wipe it down. For the metal grease filter, pull it free and let it soak in the sink filled with hot water and a squirt of degreaser for ten to fifteen minutes; the released grease is genuinely alarming. After a gentle scrub and a thorough rinse, the fan pulls air the way it did when new, kitchen odors disperse faster, and the fan blades, motor cover, and light covers stay in better shape between cleanings. Way 3: Degrease Cabinet Fronts Without Lifting the Finish Cabinet doors near the cooktop feel slick or sticky long before they look dirty, from cooking aerosols plus the oil on human hands. Spray the degreaser onto your cloth rather than directly onto the cabinetry, then wipe in gentle passes, focusing on handles, hinges, and the row of doors above the stove. Follow with a clean damp cloth to rinse, and always test an inconspicuous area first, because some finishes are temperamental even with quality products. White cabinets, which reveal every smudge, respond especially well and come back bright rather than blotchy. For cabinetry that has hardened into a sticky film over years, a professional deep cleaning is often faster than a weekend of arm work. Way 4: Reset the Trash Can Inside and Out Bin walls collect leaky bag juice and greasy ring residue at the rim. Coat the interior and exterior with degreaser, let it sit about ten minutes, then scrub with a sponge or brush and rinse completely before the liner goes back. Give the lid, pedal, and handle the same treatment, since those surfaces are touched constantly and skipped during quick wipe-downs. A weekly pass keeps the can odor-free, stops the sticky rim feeling, and removes the grime that bacteria enjoy, which matters for kitchen hygiene in any home. Way 5: Attack Garage Floors and Utility Areas Oil drips, greasy footprints, and the tracked-in slush line near the door are jobs that mop water cannot win. Flood the affected patch with degreaser, wait at least ten minutes, then agitate with a stiff brush and rinse. Tough stains usually take a second round, and the method works on concrete, tile, and sealed floors in laundry corners and utility rooms alike. Ventilate any enclosed space while you work, since concentrated cleaner fumes hang low, and check Health Canada’s guidance on safe use of household chemical products for storage and handling habits that protect kids and pets. The same household products resources also cover reading the label dwell times most degreasers print in small type. A degreased floor stops feeling slippery underfoot and keeps less grease walking itself back into your hallway, a real win in homes with kids running in from the driveway. How Long Should a Degreaser Sit? Surface Dwell time Technique Cool stovetop Several minutes Spray, wipe with damp cloth, rinse Range hood housing About 5 minutes Spray and wipe, repeat heavy spots Metal filter 10-15 minutes soaked Hot water plus degreaser, scrub, rinse Cabinet fronts Short passes Apply to cloth, wipe, rinse with second cloth Trash bin About 10 minutes Coat, brush, rinse fully, dry Garage slab At least 10 minutes Saturate, stiff brush, rinse, repeat Simple habits that cut grease buildup down Wipe splashes beside the cooktop while the surface is still warm rather than waiting for Friday. Run the hood fan whenever you fry, so less aerosol grease settles on cabinets. Dedicate one cloth to grease jobs so oily rags never touch your glassware. Soak burner grates and filter meshes on the same day you wipe the hood. Keep a degreaser bottle near the garage door for fresh oil drips, when they lift easiest. Degreaser Questions, Answered Can I use degreaser on laminate countertops? Spot-clean carefully after testing a hidden section, and never let the product dry on the surface. Laminate seams can lift with repeated saturation, so a quick spray-and-wipe is safer than a long dwell. Does degreaser need rinsing? Yes. Left behind, most degreasers dry into their own sticky film that attracts fresh dust and grease, which is why every method above ends with a clean damp cloth. Is a natural option like vinegar strong enough? For light, fresh grease, a diluted acid wipe often works. Cured, amber-colored buildup is where a purpose-made degreaser saves you real labor. How often should the hood filter come out? Roughly monthly in a home that fries often, quarterly for lighter cooking. The soak test is quick: water beading

5 Best Ways to Use a Kitchen Degreaser for Kitchen and Home Cleaning Read More »

Cleaning with alcohol at home, spray bottle and cleaning gloves

7 Smart Ways to Clean with Alcohol at Home

Rubbing alcohol is one of those products we all have lying around but don’t always know how to use. Whether it’s 70% or 90% isopropyl, this simple product can actually be a cleaning superhero. When you clean with alcohol, you get fast-drying, streak-free results while also killing germs. From glass to electronics, there are tons of surfaces that benefit from cleaning with alcohol. Check out these 7 smart ways to use it around your home. 1. Clean and Sanitize Your Phone Our phones go with us everywhere, which means they pick up dirt, germs, and oils constantly. That’s why it’s so important to clean with alcohol regularly. A soft cloth or cotton pad with a small amount of rubbing alcohol can safely remove smudges and sanitize your phone. Since alcohol evaporates quickly, it won’t damage your screen or ports when used properly. Plus, you don’t have to worry about leftover moisture like with water-based cleaners. Just a light wipe-down leaves your phone cleaner and germ-free. Make it a habit to clean with alcohol at least once a week. It keeps your device looking great and helps prevent the spread of bacteria from one touch to the next. It’s one of the simplest ways to keep things clean without extra effort. 2. Disinfect High-Touch Surfaces Doorknobs, remotes, light switches-these spots get touched constantly and are easy to forget. When you clean with alcohol, you can disinfect them quickly without leaving a mess behind. It dries fast, kills bacteria, and doesn’t need rinsing, making it a perfect everyday cleaner. Spray a little alcohol onto a microfiber cloth and wipe down these high-traffic areas. It’s especially helpful if someone in your home is sick or if you’ve had guests over. Cleaning with alcohol is a smart way to keep surfaces safe and sanitized. This method also works well on electronics, like keyboards and controllers, that you can’t clean with soap and water. Keeping these items germ-free is simple when you regularly clean with alcohol. 3. Make Your Mirrors and Glass Shine If you’re tired of streaky glass and foggy mirrors, try switching up your routine and clean with alcohol instead. It cuts through fingerprints, hairspray, and toothpaste with zero streaks. Plus, it evaporates super fast, so you don’t have to worry about drip marks. Just mix equal parts alcohol and water in a spray bottle, spritz your mirror lightly, and wipe it down with a lint-free cloth. The result is a crystal-clear reflection with almost no effort. Cleaning with alcohol is especially useful in high-humidity spots like bathrooms. Use it on windows, glass tabletops, and even shower doors. Once you start to clean with alcohol, you’ll notice how easy it is to get that perfect shine-no extra scrubbing or polishing needed. 4. Remove Sticky Residue and Labels Sticker gunk, tape residue, and old labels can be super frustrating to clean. One of the easiest solutions is to clean with alcohol. Just apply some to a cotton pad or cloth and rub the sticky area gently. The adhesive starts to dissolve, making cleanup a breeze. This method is great on glass, plastic, metal, and even some finished wood. Always test a small spot first to be safe. If you’re removing labels from jars or price tags from new items, cleaning with alcohol gets the job done quickly. No more scraping with your fingernails or using harsh removers. When you clean with alcohol, the process is smooth, fast, and totally fuss-free. 5. Clean Your Makeup Tools Makeup brushes and beauty tools get dirty fast, and if you don’t clean them regularly, they can collect bacteria that ends up on your skin. That’s where cleaning with alcohol comes in handy. It’s perfect for a quick disinfect between deep washes. Spray your brushes lightly with alcohol and wipe them on a tissue to remove product buildup. You can also clean with alcohol on tools like tweezers, nail clippers, and eyelash curlers. It’s a fast way to keep everything sanitary and fresh. While it doesn’t replace a soapy deep clean, using alcohol in between keeps bacteria at bay and your tools ready to use. It’s another reason to always have rubbing alcohol on hand. 6. Freshen Up Bathroom Fixtures Faucets and towel bars can collect water spots and fingerprints fast. To bring back their shine, simply clean with alcohol using a soft cloth. It cuts through grime quickly and leaves chrome and stainless steel looking polished. Unlike soapy cleaners, cleaning with alcohol doesn’t leave a residue. It also helps prevent bacteria from building up, especially around sink handles and other high-touch areas. Since it dries instantly, there’s no need for rinsing or buffing. Add this to your weekly bathroom routine and your fixtures will always look fresh. It’s another simple reason to clean with alcohol when you want fast results and a cleaner look. 7. Disinfect Reusable Items Like Keys and Glasses You carry your keys, glasses, and wallet everywhere-so they’re bound to collect dirt and germs. It’s easy to overlook them, but taking a moment to clean with alcohol makes a big difference. A quick wipe-down can keep these everyday items cleaner and safer. Use a microfiber cloth with a little rubbing alcohol to clean glasses and sunglasses without streaks. For keys, just give them a good wipe to kill germs and remove any gunk from frequent handling. Cleaning with alcohol also works on headphones, debit cards, and your mouse. It only takes a minute to build this habit into your weekly routine. When you clean with alcohol, you’re staying ahead of the grime-and keeping your hands and face safer, too. Clean with Alcohol for the Small Stuff, Call Toronto Shine for the Big Stuff Knowing how to clean with alcohol gives you a powerful tool for quick, easy home cleaning. It’s affordable, fast-drying, and super effective for disinfecting and polishing everything from electronics to mirrors. Adding these habits to your weekly routine will help you stay on top of messes and keep germs at bay.

7 Smart Ways to Clean with Alcohol at Home Read More »

Cleaning with a dirty cloth and dirting ever more

5 Common House Cleaning Mistakes You Need to Stop Making

Keeping your home clean might seem simple, but many people unknowingly make house cleaning mistakes that make their efforts less effective. These errors can lead to wasted time, frustration, and even a dirtier home in the long run. The good news is that with a few small changes, you can clean smarter, not harder. Let’s take a look at five of the most common house cleaning mistakes and how to fix them. 1. Using Too Much Cleaning Product It’s easy to think that using extra cleaning products will make your home cleaner, but this is one of the biggest house cleaning mistakes you can make. Overusing cleaning solutions can leave behind sticky residues that attract dust and dirt, making surfaces look dull and grimy over time. This is especially true for floors, countertops, and glass surfaces, where too much cleaner creates a film that’s hard to remove. Another issue with using too much product is that it can take longer to clean. If you don’t rinse or wipe properly, you’ll be left with streaks or buildup, which means you’ll have to clean the same area again sooner than expected. Instead, always follow the recommended amounts on the label and use a damp microfiber cloth to remove any excess cleaner. For a more efficient clean, try using multi-purpose cleaners that require minimal effort. Microfiber cloths and steam cleaning can also help reduce the need for excessive chemicals. When it comes to house cleaning mistakes, remember that less is more-a small amount of the right product goes a long way! 2. Ignoring High-Touch Areas One of the most overlooked house cleaning mistakes is forgetting to clean high-touch areas. While most people focus on visible surfaces like floors, counters, and sinks, areas like door handles, light switches, remote controls, and refrigerator handles accumulate germs quickly. These spots are touched multiple times a day, making them breeding grounds for bacteria and viruses. Not cleaning these areas regularly can lead to the spread of illness among family members. Even if the rest of your home is spotless, ignoring these high-contact surfaces means germs can easily transfer from person to person. Using disinfectant wipes or a simple microfiber cloth with a sanitizing solution once a day can help keep germs at bay. To make sure you don’t forget, create a checklist of high-touch areas in your home and include them in your regular cleaning routine. A quick daily wipe-down can make a big difference in keeping your home healthier and safer for everyone. Avoiding this house cleaning mistake will help maintain a truly clean environment. 3. Cleaning from the Bottom Up If you’ve ever cleaned your floors first, only to find dust and crumbs falling from your countertops later, you’re not alone. Many people make the mistake of cleaning from the bottom up, which means they have to redo their work multiple times. This inefficient approach is one of the most common house cleaning mistakes that can make cleaning feel like an endless cycle. The correct cleaning order is to start from the top and work your way down. Begin by dusting ceiling fans, light fixtures, and shelves before wiping down furniture and countertops. This way, any dust or dirt that falls will be cleaned up when you vacuum or mop the floors last. This simple switch can save you time and ensure a more thorough clean. For even better results, use a microfiber duster to trap dust rather than spreading it around. When vacuuming, go from room to room systematically to prevent tracking dirt back into areas you’ve already cleaned. Following this step-by-step approach will leave your home cleaner and make your cleaning routine more efficient. 4. Using the Same Cloth for Everything Reusing the same cloth to clean different areas might seem convenient, but it actually spreads bacteria and dirt from one surface to another. For example, if you use the same rag to wipe down your bathroom sink and then move to your kitchen counters, you could be transferring germs from one area to a food preparation space. This is a major house cleaning mistake that many people don’t realize they’re making. To avoid this mistake, have separate cleaning cloths for different areas of your home. Use color-coded microfiber cloths-one color for the kitchen, another for the bathroom, and a different one for dusting furniture. This simple method ensures that germs stay contained and don’t spread throughout your home. Another great tip is to wash your cloths regularly. Dirty rags can hold bacteria, so make sure to toss them in the laundry after each use. Keeping a stash of fresh, clean cloths on hand will make cleaning more effective and help maintain a healthier home. Avoiding this house cleaning mistake will make a noticeable difference in your cleaning results. 5. Forgetting to Clean Your Cleaning Tools Cleaning tools themselves need to be cleaned! Sponges, mop heads, vacuum filters, and even brooms collect dirt, bacteria, and grime over time. If you don’t clean them regularly, you might just be spreading dirt around instead of removing it. A dirty sponge or mop can leave behind a foul odor and make your home less sanitary. This is one of the most overlooked house cleaning mistakes that can impact the cleanliness of your space. To keep your tools effective, wash sponges and dishcloths in hot water or replace them frequently. Mop heads should be cleaned after each use-many are machine washable, making it easy to maintain them. Vacuum filters should be emptied and cleaned to ensure optimal suction and prevent dust from being blown back into your home. By taking a few minutes to clean your tools after each use, you’ll ensure they work better and last longer. Plus, you’ll avoid the frustration of re-cleaning areas that didn’t actually get clean the first time! Avoiding this house cleaning mistake will make your cleaning routine more efficient and effective. Let Toronto Shine Cleaning Do the Hard Work for You! House cleaning takes time and effort, and avoiding

5 Common House Cleaning Mistakes You Need to Stop Making Read More »

Paper written home cleaning routine

6 Expert Tips for a Home Cleaning Routine

6 Expert Tips for a Home Cleaning Routine A clean home does not come from heroic weekend scrubbing; it comes from a system of small, repeated actions. A realistic home cleaning routine keeps dust, clutter, and grime from gaining ground, and it supports better indoor air quality because regular vacuuming and dusting remove particles that build up in carpets, bedding, and upholstery. Health Canada points to indoor air contaminants as a key factor in comfortable living spaces. The six expert tips below will help you build a routine that fits your household and stays easy to follow. Declutter First So Cleaning Goes Faster Clutter makes every cleaning task harder. Extra items collect dust, block surfaces, and turn a ten-minute wipe into a half-hour project. Start by going through each room and setting aside anything you have not used in the past year, then donate or discard it. Fewer belongings means less dust, better air circulation, and a calmer room. To keep things from piling up again, spend 10-15 minutes each day tidying one specific zone, such as a counter, a shelf, or a closet corner. This short daily habit prevents messes from compounding and keeps your main cleaning sessions focused on actual cleaning instead of shuffling stuff around. Create a Schedule With Daily, Weekly, and Monthly Tasks Consistency beats intensity. Divide chores into daily, weekly, and monthly buckets so no zone goes neglected. Daily tasks cover the essentials: wipe kitchen counters, wash dishes, and vacuum the floors people walk on most. Weekly jobs go deeper, with furniture dusting, bathroom scrubbing, and fresh bed linens. Monthly work such as washing windows, organizing closets, and steam-cleaning carpets keeps the whole home refreshed. A posted schedule turns cleaning from a chore into a habit, and it makes delegation easy. Assign each family member the tasks they can handle, and rotate regularly so nobody gets stuck with the same job forever. Choose the Right Cleaning Products for Every Surface The right tools make the routine faster and protect your surfaces. Microfiber cloths trap dust instead of pushing it around, which makes them ideal for dusting and polishing. Disinfecting products belong on high-touch points such as doorknobs, light switches, and countertops; the CDC’s guide to when and how to clean and disinfect your home explains how to use them safely. For stainless steel, granite, and hardwood, choose products made for those materials so you keep their finish looking new. If you prefer greener options, many plant-based cleaners deliver strong results without harsh ingredients. Matching the product to the task keeps your routine efficient and your family safe. Work From Top to Bottom in Every Room Order matters. When you dust ceiling fans, light fixtures, and shelves first, the falling debris lands on surfaces you have not cleaned yet. Move down to counters, tables, and appliances, and finish each room with the floors, either vacuuming or mopping last. This top-to-bottom flow prevents re-cleaning and makes the whole session feel shorter. Use the same sequence whether you are doing a quick daily pass or a full deep clean, and you will cover every level of the room exactly once. Give High-Traffic Areas Extra Attention and Share the Work The kitchen, bathrooms, and entryway take the most abuse, so they deserve the most attention. In the kitchen, disinfect counters, stovetops, and sinks daily, since food residue attracts bacteria quickly. In bathrooms, scrub showers and sink areas regularly to stop mold and mildew before they start. At the entryway, doormats trap dirt, and frequent vacuuming or mopping keeps it from traveling through the house. Finally, make the routine a team effort. Even young kids can take on simple tasks, and turning chores into a game, such as a 10-minute tidy-up race with a timer or a small reward, boosts participation. When everyone contributes, the workload shrinks and the habit sticks. A sample rhythm for a manageable routine looks like this: Frequency Core Tasks Focus Areas Daily Wipe kitchen counters, wash dishes, vacuum high-traffic floors Kitchen and entryways Weekly Dust furniture, scrub bathrooms, change bed linens Bathrooms and bedrooms Monthly Wash windows, organize closets, steam-clean carpets Whole home If you only have 15 minutes, this order delivers the biggest visible win: Tidy one cluttered zone and put stray items away. Wipe the kitchen counters and sink. Spot-clean the bathroom mirror and fixtures. Vacuum or sweep the busiest walkways. Empty trash bins that are nearly full. Set out supplies so tomorrow’s session starts instantly. Frequently Asked Questions About Cleaning Routines How much time should a daily cleaning routine take? Around 10-15 minutes of targeted tidying keeps messes under control between deeper sessions. Save the thorough work for a weekly block, and you will never face an overwhelming, all-day cleanup. Can a cleaning routine improve indoor air quality? Yes. Dust, allergens, and bacteria collect quickly in carpets, bedding, and soft furnishings. Consistent vacuuming, dusting, and laundering help keep those particles in check, and Health Canada’s indoor air contaminants guidance covers the basics of humidity and ventilation at home. What should I do when I fall behind on my routine? Shrink the list back to the essentials, ask family members to take two tasks each, and consider a professional catch-up visit. A deep cleaning service can reset the whole house, after which a lighter routine is much easier to maintain. How do I get my family to help with cleaning? Assign age-appropriate tasks, rotate responsibilities, and add a lighthearted element such as a timed tidy-up or a small reward. Shared ownership makes the routine faster and keeps resentment out of the chore chart. A good home cleaning routine is built from realistic steps: declutter, schedule, use the right products, work top to bottom, and share the load. If your household needs backup, Toronto Shine Cleaning offers regular home cleaning and one-time deep cleans at clear, published prices. Call (647) 424-0355 today, and let us help you keep the routine on track.

6 Expert Tips for a Home Cleaning Routine Read More »

Cornstach being used for cleaning

6 Clever Uses for Cornstarch in Household Cleaning

Cornstarch isn’t just for cooking-it’s one of the most versatile household cleaning hacks you can use. If you’re looking for eco-friendly cleaning solutions, cornstarch can help remove grease, polish surfaces, and freshen up fabrics. Unlike harsh chemical cleaners, cornstarch is non-toxic, affordable, and highly effective at tackling common household messes. Want to know the best uses for cornstarch in cleaning? Here are six clever ways to use this simple ingredient for a spotless and fresh home. 1. Remove Grease Stains from Fabric One of the most effective uses for cornstarch is its ability to absorb grease stains from fabric. Whether it’s a cooking oil spill on your shirt or a greasy mark on your couch, cornstarch can lift stains without damaging the material. To start, sprinkle a generous amount of cornstarch for stain removal directly onto the affected area. Let it sit for at least 15 minutes so it can absorb the oil or grease. Then, gently brush off the excess powder with a dry cloth or vacuum. If the stain remains, repeat the process before washing the fabric as usual. This method works on clothing, upholstery, and carpets, making it one of the most useful household uses for cornstarch. Instead of reaching for chemical stain removers, try this natural and effective cleaning trick. 2. Polish Stainless Steel Without Streaks If you’re struggling with streaky stainless steel appliances, cornstarch is an excellent natural polisher. Many store-bought cleaners leave behind a residue, but cornstarch for cleaning stainless steel gives a streak-free shine. To use, mix a small amount of cornstarch with water to create a paste. Apply the mixture to your stainless steel fridge, sink, or faucets using a microfiber cloth. Gently buff the surface in circular motions, then wipe it dry with a clean cloth. Using cornstarch as a polishing agent is a great way to maintain your appliances without using harsh chemicals. It works wonders on kitchen appliances, cookware, and even stainless steel fixtures, making it a must-try in your cleaning routine. 3. Freshen Up Carpets and Rugs Did you know that one of the best deodorizing uses for cornstarch is freshening up carpets and rugs? Over time, carpets can trap odors from pets, food, and general foot traffic. Instead of using artificial deodorizers, cornstarch provides a natural way to eliminate odors. Simply sprinkle cornstarch generously over your carpet, focusing on high-traffic areas. Let it sit for 30 minutes to an hour, allowing it to absorb moisture and neutralize odors. Then, vacuum up the cornstarch to reveal a fresher, cleaner carpet. This technique is especially useful for pet owners looking for safe and non-toxic ways to deodorize carpets. Regular use of cornstarch will keep your rugs smelling clean without the need for artificial fragrances. 4. Clean Windows and Mirrors If you’re tired of streaky glass, cornstarch for window cleaning is a game-changer. Many commercial glass cleaners leave behind smudges, but cornstarch helps break down grime and prevents streaks. To make a DIY glass cleaner, mix cornstarch with water and a small amount of dish soap. Apply the mixture to windows, mirrors, and glass surfaces using a microfiber cloth. Gently wipe in circular motions to remove dust and fingerprints, then buff with a dry cloth for a streak-free shine. This trick works wonders for bathroom mirrors, shower doors, and glass tabletops. It’s one of the most underrated uses for cornstarch, but once you try it, you’ll never go back to store-bought glass cleaners. 5. Deodorize Shoes Naturally Smelly shoes? Cornstarch is a natural shoe deodorizer that absorbs moisture and eliminates odors without any artificial fragrances. To use, sprinkle a small amount of cornstarch inside your shoes before bed. Let it sit overnight so it can absorb sweat and neutralize odors. In the morning, shake out the excess powder or wipe the insides with a dry cloth. This method works well for sneakers, leather shoes, and even gym bags. Using cornstarch regularly will help keep your shoes fresh, dry, and odor-free. If you’re looking for simple yet effective uses for cornstarch, this one is a must-try. 6. Remove Furniture Polish Buildup Over time, excessive use of furniture polish can leave behind a dull residue on wooden surfaces. One of the best household uses for cornstarch is removing this buildup while restoring the natural shine of your furniture. Lightly sprinkle cornstarch onto wooden tables, cabinets, or shelves, then wipe it away with a soft cloth. The cornstarch will absorb excess oils and polish, leaving your furniture looking clean and refreshed. For deeper cleaning, mix cornstarch with a small amount of water to create a paste and gently rub it into the wood before wiping clean. This technique is safe for all types of wood surfaces and helps maintain your furniture without causing damage. Instead of relying on store-bought polish, use cornstarch for a natural and effective shine. Keep Your Home Clean with Toronto Shine Cleaning While cornstarch is an excellent natural cleaning solution, keeping up with household chores can be overwhelming. If you need professional help, Toronto Shine Cleaning offers top-quality cleaning services to keep your home spotless. Our expert team provides deep cleaning, regular home maintenance, and customized cleaning plans tailored to your needs. Whether you need a one-time deep clean or ongoing cleaning services, we’ve got you covered. Contact Toronto Shine Cleaning today for a cleaner, fresher home-so you can enjoy the benefits of a tidy space without the hassle!

6 Clever Uses for Cornstarch in Household Cleaning Read More »