Bathroom Cleaning

Bathroom Cleaning

Isopropyl Alcohol

Isopropyl Alcohol 101: Simple and Safe Ways to Clean Your Home

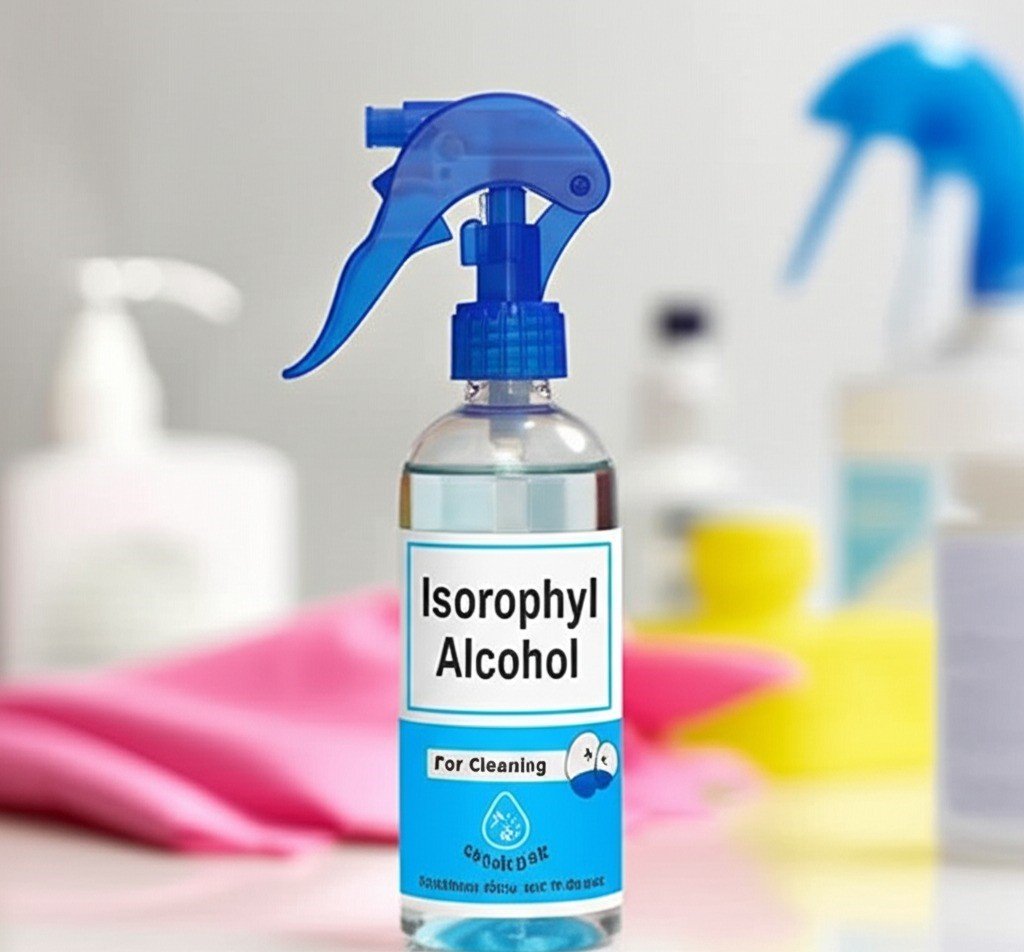
One Cheap Bottle, a Dozen Jobs Isopropyl alcohol, the rubbing alcohol sitting in most first-aid kits, quietly outworks half the cleaning products under the sink. Its value comes down to two chemical talents: it dissolves the oily, sticky, inky family of substances that water shrugs off, and it evaporates so fast it leaves no residue behind. Add a genuine disinfecting capability at the right strength and you have a solvent, sanitizer, stain lifter, and streak-free glass cleaner in one inexpensive bottle. This guide covers where it shines, which concentration to buy, and the safety rules that keep it a helper rather than a hazard. Why It Cuts Grease and Ink That Water Bounces Off As a solvent, isopropyl alcohol breaks down non-polar compounds, the chemical family that includes oils, greases, adhesives, and many inks. Wipe a microfiber cloth lightly dampened with it across stainless steel appliances and the fingerprint film dissolves instantly; because the liquid flashes off almost immediately, there are no water spots or streaks in its wake, which is exactly where water-based cleaners fail. The same property makes a simple mix of one part alcohol and one part water in a spray bottle an effective glass and mirror cleaner, cutting haze and bathroom-mirror hairspray with a perfectly clear finish. Chrome fixtures surrender their water spots and soap film to it the same way, with no residue. 70 Percent, 91 Percent, or 99: Choosing a Strength The common 70% solution is the disinfecting grade, and the 30% water it contains is not dilution wasted: water helps the alcohol penetrate the cell walls of bacteria, viruses, and fungi, after which the alcohol denatures the proteins that keep the microorganism alive. That makes it ideal for high-touch surfaces such as light switches, doorknobs, remote controls, keyboards, and phones; the CDC’s guidance on when and how to clean and disinfect your home backs regular attention to exactly these spots. The higher strengths trade germ-killing for dryness, which is why electronics technicians keep 99% on the shelf. On circuit boards and CPU contacts it evaporates almost instantly with virtually no water to cause shorts or corrosion, and it lifts old thermal paste without conductive residue. Strength Best for Watch out for 70% Disinfecting high-touch surfaces, general wipes Unnecessary on bare electronics 91% Faster-drying wipes, prep before adhesives Dries skin faster than 70% 99% Motherboards, contacts, thermal paste removal Flammable; keep off sparks and flame The Daily Disinfecting Pass The objects your family touches dozens of times a day rarely get cleaned, and they are exactly where germs travel from person to person: light switches, doorknobs, remote controls, keyboards, and the phone that rides along into every room. A cloth dampened with 70% isopropyl alcohol wiped over these breeding grounds measurably cuts pathogen transmission in a household. Always apply the alcohol to the cloth rather than the device so no liquid seeps into seams, and let small electronics dry before they go back to work. The CDC’s handwashing guidance makes the complementary point: clean hands plus clean surfaces protect a household together, and the fast-drying bottle earns its keep in both halves of that routine. Jobs It Handles Better Than a Specialty Product Permanent marker on countertops, plastic toys, or laminate floors: a cotton ball with alcohol dissolves the ink so it lifts away. Ink on sturdy fabric or upholstery: blot gently, never rub, and always spot-test hidden areas first. Microfiber couches, which water can ring and stiffen: mist the stain lightly, work it with a soft-bristled brush, then brush the nap back once dry. Sticky residue from price tags and tape: soak the spot for a few minutes and the adhesive wipes off without the scratching that mars glass and plastic. Soap scum on shower doors and mildew in grout lines and shower corners, where it kills surface spores and dries fast; persistent growth needs a dedicated fungicide, as the CDC’s mold page explains. Makeup brushes, where it dissolves oily residue and sanitizes bristles; jewelry, sparing delicate porous stones like opals and pearls; and even frozen car locks and windshields, since alcohol depresses water’s freezing point. Safety Rules Before You Reach for the Bottle Isopropyl alcohol is highly flammable and its fumes are strong, so work in a ventilated room, far from open flame, sparks, and high heat. Prolonged contact dries skin, so wear gloves on big jobs. Surface compatibility matters: it can strip shellac, lacquer, and varnish, so never use it on finished wood, and some plastics and synthetic fabrics discolor or degrade, which is why a hidden spot-test precedes every large area. When cleaning electronics, apply the alcohol to the cloth, never spray the device, so liquid cannot seep into components. Used well, it replaces a cabinet of specialty products: pure function without added fragrance or dye, from the greasy backsplash to the germ-heavy remote. Understanding a single versatile liquid beats owning twelve single-purpose ones. Isopropyl Alcohol Questions, Answered Can I disinfect with 91% or 99% instead of 70%? The 70% grade is formulated for disinfecting because its water content helps alcohol penetrate microbial cell walls. Higher strengths evaporate so quickly that contact time suffers, so reserve them for electronics and other moisture-sensitive jobs. Will it damage my quartz or laminate countertops? On most hard, non-porous surfaces it is gentle, and it famously lifts marker ink from them. Still spot-test an inconspicuous area first, and keep it away from wood with any applied finish, which it can strip. How do I clean a sticky price tag without scratching the glass? Soak the residue with alcohol for a few minutes, then wipe or gently scrape with a plastic edge. The solvent breaks the adhesive’s bond, so abrasives never enter the argument. Is a bottle of rubbing alcohol enough to simplify my kit? It covers degreasing, disinfecting, streak-free glass, ink, adhesive, and microfiber cleaning. When the remaining jobs are whole-home scale, our deep cleaning service brings the same surface knowledge with professional equipment, and recurring upkeep lives at our regular maid service.

Isopropyl Alcohol 101: Simple and Safe Ways to Clean Your Home Read More »

How Mental Health and House Cleaning are Completely Linked

How Mental Health and House Cleaning Are Completely Linked Your home spends most of its hours absorbing your inner weather. When stress, overwhelm, or low mood take hold, mail stacks up on the counter, laundry lingers in the basket, and dust settles on surfaces you no longer have the energy to notice. When you feel calm and in control, the rooms tend to follow. That mirror is not a coincidence; it is a two-way relationship. Cleaning, often dismissed as a chore, is one of the most accessible tools available for managing how you feel, because it is physical work with visible results that feeds back into your mind. Here is the mechanics of that loop. Cleaning Restores a Sense of Control Life is unpredictable at scale. You cannot steer global events, the economy, other people, or the surprises your career and personal life throw at you, and that helplessness feeds anxiety. A home is different: it is a small, manageable universe where your actions land with direct, immediate consequences. You pick the cleaner, you put in the effort, and the floor goes from grimy to gleaming because you decided it would. Sorting a chaotic pantry or closet offers a contained problem with a clear solution, a rare thing in a world of ambiguous ones. That feeling of efficacy does not stay in the kitchen; confidence earned on a small, winnable task ripples outward into bigger challenges. The Repetitive Motion Is an Active Meditation Scrubbing, wiping, sweeping, and folding are rhythmic, and rhythm grounds a racing mind. When anxious thoughts loop over past regrets or future worries, the sensory demands of cleaning pull attention into the present: warm soapy water on your hands, the back-and-forth hum of the vacuum, the scent of lemon polish, a cloth squeaking across glass. This is a core principle of mindfulness, anchoring you in the now and granting a break from mental chatter. Focused activity lets the nervous system settle, lowering cortisol and easing physical stress signs like a rapid heart rate and shallow breathing. Stay with it and you can slip into flow, that state where time fades and you surface feeling refreshed and centered. A Finished Room Is a Dose of Dopamine Brains are wired to enjoy accomplishment. Watching a filthy, cluttered room become an orderly one through your own effort releases dopamine, the neurotransmitter tied to pleasure, motivation, and satisfaction, so the before-and-after is chemically rewarding, not merely Instagram-worthy. It is evidence of your own competence. This is why making your bed each morning shifts an entire day: it is the first completed task, the first small win that sets a precedent. Every cleared counter and polished surface reinforces capability, which cuts directly against the lethargy, apathy, and futility that depression feeds on. Clutter Charges You Rent on Your Attention The flip side is real too. Clutter is excessive sensory input: every object in view sends a signal, and a crowded room bombards the brain. Paper piles whisper about unfinished tasks, an overflowing laundry basket nags about pending chores, and the visual noise drains focus even below conscious awareness. Living like this keeps stress mildly elevated, makes relaxation hard, and steals the cognitive resources you wanted for work, hobbies, or conversation. Decluttering removes the noise and hands your mind clear space. The benefits of moving your body while you do it stack on top, which the CDC documents in its research on the benefits of physical activity, including reduced short-term anxiety and a lower risk of depression and anxiety over time. Public Health Agency of Canada resources on mental health and wellness and being active for your health make the same connection from the Canadian side. What a Tidy Space Does for Focus, Ritual, and Sleep Beyond mood, order supports performance. A desk buried in old mugs and stray papers fractures attention, and minutes vanish hunting for a pen. A clear workspace minimizes distraction and smooths workflow, and the principle travels: a tidy kitchen makes cooking pleasant, a neat living room becomes actual rest rather than low-grade agitation. Cleaning also marks life transitions, which is why spring cleaning persists across cultures as a way to sweep out the old and make room for the new: Scrubbing after a breakup reclaims your space and closes a chapter Cleaning after an illness signals recovery and a fresh start Preparing a nursery or a home office is an act of hope and readiness Finally, there is sleep, which underpins mood regulation and cognitive function. A cluttered, dusty bedroom fights rest, while a clean sanctuary, fresh sheets pulled back, tells the brain the day is over. Waking rested makes stress easier to carry. Small Cleaning Habits and What They Give Back If you feel Try this What it returns Overwhelmed A ten-minute timer on one counter or shelf A finished task and proof you can start Anxious Rhythmic wiping or vacuuming, no phone Present-moment focus and calmer breathing Stuck or flat Make the bed, then one drawer An early dopamine win to build on Distracted Clear the desk you work at Fewer visual signals competing for attention Restless at night Tidy the bedroom before bed A cue that the day is done, better sleep If even the small version feels unreachable this season, that is exactly when outside help works best, because a professional reset removes the backlog so the habit can actually start. Toronto Shine Cleaning offers thorough, judgment-free service: a one-time deep cleaning restores the baseline, and regular maid visits keep it from sliding back, with rates on the pricing page and coverage across every GTA area listed in our locations. Mental Health and Cleaning FAQ Does a messy house mean I have a mental health problem? No. Homes get messy through busy seasons, illness, moves, and plain fatigue, and one messy weekend proves nothing. The connection runs both ways, but diagnosis belongs to professionals. If clutter consistently feels impossible to face and drains your mood for weeks, that is worth discussing with a

How Mental Health and House Cleaning are Completely Linked Read More »

different types of cleaning sponges

10 Tips on How to Use Sponges That You Should Know

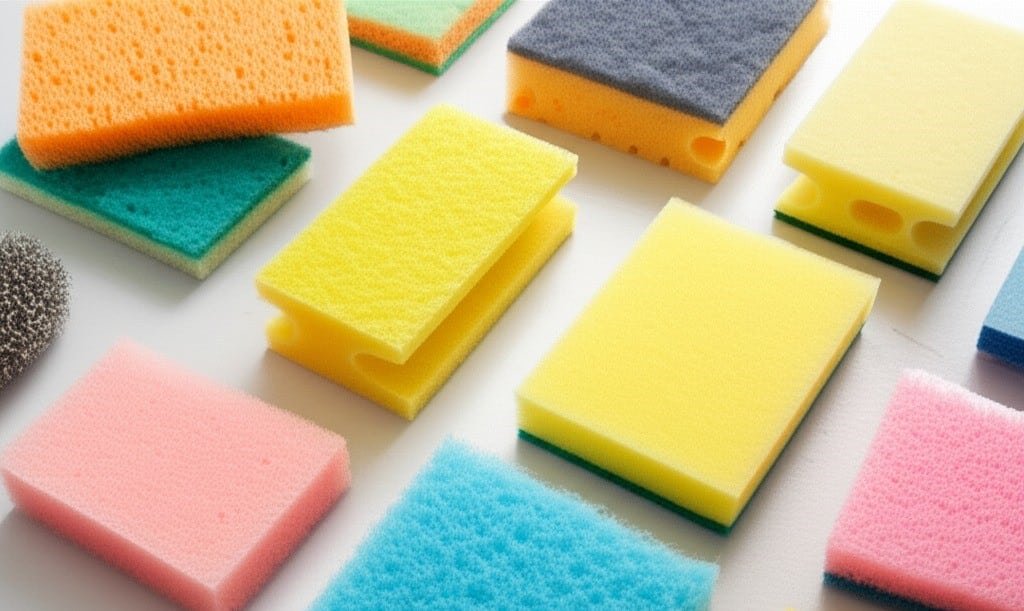
Types of Sponges for Cleaning: Pick the Right Tool for Every Surface The humble sponge decides whether a dish sparkles or a countertop gets scratched. Choose wrong and non-stick pans dull, polished stone etches, or soot smears across a wall. Each type trades absorbency, abrasion, and lifespan differently, so match the tool to the job. These ten types cover everything from daily dishes to fire-damage restoration. 1. Cellulose Sponge: The Everyday Absorber Made from wood pulp and plant fibers, the standard kitchen sponge holds up to twenty times its weight in liquid, ideal for spills, dishes, and wiping counters or sealed granite without scratching. Organic fibers invite bacteria, so sanitize it on the dishwasher’s top rack or damp and microwave one to two minutes. Bleach disintegrates the fibers; replace it every two to three weeks or as soon as it smells or crumbles. 2. Dual-Sided Scrub Sponge: A Kitchen Workhorse One side is cellulose for absorbing and sudsing; the other, usually green, is abrasive nylon for real friction: burnt-on food in pots and pans, oven interiors, barbecue grates, and grime on concrete or unsealed tile. Never use the green side on non-stick cookware, glass cooktops, polished counters, acrylic tubs, or painted surfaces: it etches permanent scratches. 3. Anti-Scratch Scrub Sponge: Power Without Damage These look like their green-backed cousins, but the abrasive layer is a finer nylon weave or plastic mesh, often blue or white to signal the difference. It lifts stuck food without gouging, making it the safe pick for non-stick pans, glass cooktops, ceramic dishes, stainless steel sinks, chrome, and plastic containers. Not for baked-on carbon, but ideal for daily dishwashing. 4. Natural Sea Sponges: Delicate and Self-Protecting Harvested from the ocean floor, these are the skeletons of simple marine organisms: hard when dry, silky soft when wet, and more absorbent and durable than synthetic cellulose. Natural enzymes inhibit mold, mildew, and bacteria, so a cared-for sea sponge stays hygienic and outlasts synthetics. Use it for fine china, crystal, silver, cars, or windows, or for bathing; rinse, air dry, never wring hard, and keep harsh chemicals away. 5. Melamine Foam Sponges: The Magic Eraser Effect Melamine foam, widely sold as Magic Eraser, needs no soap: wet, its microscopic structure acts like super-fine sandpaper that wears stains away. It erases crayon, marker, and scuffs from painted walls, cuts shower soap scum, and revives vinyl flooring and sneakers. Because it abrades whatever it touches, it can dull glossy finishes and scratch delicate plastics. It cannot be sanitized: discard when worn. 6. Steel Wool and Metal Scourers: Maximum Friction Fine steel filaments or woven stainless ribbons make these the last-resort tools for cast iron, rust removal, paint stripping, and filthy grill grates and oven racks. Never use them on non-stick surfaces, ceramic, glass, enamel, polished metal, or coatings: the scratches are deep and permanent. Fragments can rust, so rinse afterward; expect one or two uses per pad. 7. Silicone Sponges: Hygienic and Built to Last Food-grade, non-porous silicone absorbs nothing, so bacteria, mold, and odors never take hold, and boiling, microwaving, or a dishwasher cycle sanitizes it instantly. One sponge lasts years. Its soft bristles work like flexible scrapers: great for pre-dishwasher scraping, light dishes, and scrubbing root vegetables, weak on spills and heavy grease. 8. Microfiber Sponges: Chemical-Free Cleaning Power A foam or cellulose core wrapped in microfiber combines absorbency with electrostatic attraction: millions of split synthetic fibers trap dust and grime, so it cleans with little or no chemical help. It is gentle enough for fine furniture, stainless steel, glass, and cars. Machine-wash regularly, never with fabric softener, which clogs the fibers and ruins its power. 9. Dry Sponges: For Soot and Delicate Surfaces Dry sponges, also called chemical or soot sponges, are vulcanized natural rubber used completely dry: a porous, tacky surface pulls soot, smoke residue, dust, and pet hair into its pores. Restoration pros lift smoke and soot from walls, ceilings, and upholstery without smearing, and it suits lampshades, wallpaper, acoustic tiles, and pool-table felt. Wipe gently, slice off the dirty layer, and never wet it. 10. Grout Sponges: The Tile Installer’s Tool Built for tile installation, grout sponges are larger and denser than cellulose versions, with rounded edges. Density lets them hold rinse water without collapsing into soft grout lines and pulling grout out before it sets, and rounded corners never dig as you wipe haze off fresh tile. No other sponge does that job as cleanly. Sponge Quick-Reference Table Sponge type Best for Avoid on Care Cellulose Spills, dishes, gentle wiping Harsh chemicals Replace every 2 to 3 weeks Dual-sided scrub Burnt-on food, ovens, grills Non-stick, glass cooktops Sanitize weekly Anti-scratch scrub Non-stick pans, ceramics, sinks Heavy baked-on carbon Sanitize weekly Natural sea China, crystal, cars, bathing Boiling water, harsh chemicals Air dry; lasts months Melamine foam Walls, scuffs, soap scum Glossy and clear-coated surfaces Discard when worn Steel wool Cast iron, rust, grill grates Non-stick, enamel, glass One or two uses Silicone Pre-rinse scraping, light dishes Spills, heavy grease Lasts years; boil to clean Microfiber Dusting, polishing, glass Fabric softener ruins it Machine wash plain Dry sponge Soot, lampshades, wallpaper Any wet cleaning Slice off dirty layers Grout sponge Tile installation, grout haze General heavy scrubbing Rinse and air dry Keep Germs Out of Your Sponge Routine Whatever you pick, hygiene decides how long it stays useful. Follow three simple rules: Rinse and squeeze sponges dry after every use Sanitize wet sponges weekly and replace them on schedule Keep sponges out of standing water and away from raw meat juices Clean tools and clean hands stop germs moving between surfaces and people, a point the CDC makes in its handwashing guidance, while Health Canada’s household product safety hub covers any cleaner you pair with your sponge. When a surface needs more than a sponge, a professional hand protects your finishes: Toronto Shine Cleaning matches materials to each job, whether you need a one-time deep clean, a regular maid service, or a move-day reset,

10 Tips on How to Use Sponges That You Should Know Read More »

7 Best Homemade Cleaning Solutions to Make Your Home Look Like New

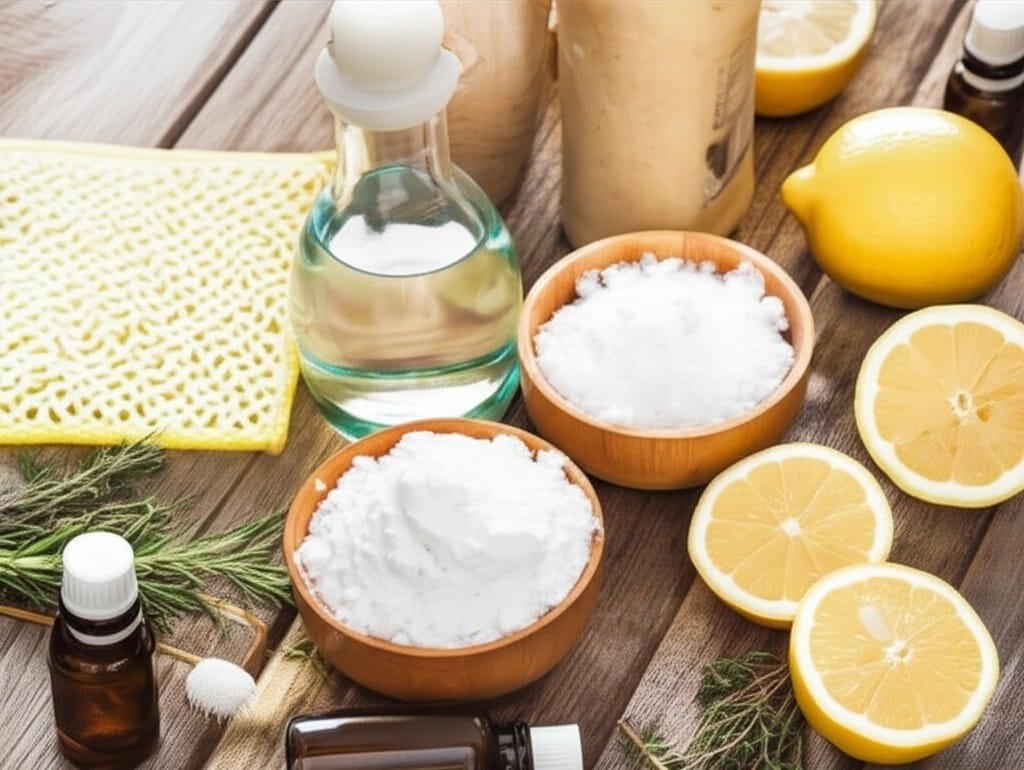
The Case for Mixing Your Own Cleaners Making cleaning solutions at home is chemistry applied with a spoon: a handful of inexpensive staples, used with understanding of what each one does. There is no single magic formula, just targeted recipes for specific jobs, which is why DIY beats a closet of mystery sprays. You save money, control every ingredient touching your counters, skip aggressive fragrance, and cut the plastic waste of disposable bottles. The seven recipes below cover the house from glass to grout, followed by the safety rules that keep pantry chemistry harmless. Your Five-Ingredient Starter Kit White vinegar: acetic acid that cuts grease, dissolves hard-water and soap-scum deposits, and disinfects. Baking soda: a gentle, non-scratching abrasive and a natural deodorizer for fridges, drains, and carpets. Lemon: citric acid, polish, and a clean scent for sinks. Castile soap: lifts grime into suspension so it rinses away. Rubbing alcohol: evaporates fast, which is the secret to streak-free glass. Vinegar plus baking soda fizzes on contact, physically loosening stubborn buildup; the pairing recurs below. Recipe 1: All-Purpose Surface Spray Mix equal parts white vinegar and water in a spray bottle, then add 10 to 15 drops of an essential oil such as lemon, tea tree, or lavender for scent and extra antibacterial punch. It handles laminate countertops, sealed granite, appliance exteriors, painted walls, fingerprints, and light grease. The one hard boundary: never use vinegar solutions on marble or unsealed granite, because acid etches and dulls natural stone. The CDC’s guide to cleaning and disinfecting at home is a good reference for which surfaces deserve attention most often. Recipe 2: Streak-Free Glass Cleaner Combine one part rubbing alcohol, one part white vinegar, and two parts water. The alcohol flashes off as it dries, carrying the liquids with it before they can leave streaks. Spray the mixture onto a microfiber cloth rather than the pane to avoid drips, wipe the glass, then buff with a second dry cloth for a crystal finish on windows and mirrors. Recipe 3: Stovetop and Oven Degreaser Paste Make a paste of baking soda with a little warm water and spread it over greasy splatters on the cooktop, backsplash, or oven interior. Let it sit 15 to 20 minutes, then work the paste off with a soft sponge and a clean wet cloth. For baked-on crud, spray the paste with white vinegar, let the fizz lift the grime, then scrub again. Recipe 4: Sink and Disposal Polish Sprinkle baking soda generously over the empty basin, then scrub with a lemon half cut crosswise. The mild abrasive, citric acid, and fresh scent clean, polish, and deodorize the sink and the garbage disposal at once. Finish with a thorough hot-water rinse. Recipe 5: Tub, Tile, and Toilet Scrub For soap scum and mildew, blend one cup of baking soda with roughly a quarter cup of liquid castile soap into a thick scrubby paste. Work it onto tubs, showers, and tile with a brush, then rinse. Stubborn mildew stains respond to a spray of equal parts vinegar and water left to sit for at least 30 minutes before scrubbing; ventilate the room, because vinegar fumes concentrate fast. For the toilet bowl, pour about a cup of vinegar in, leave it an hour or overnight to dissolve the mineral ring, then add a sprinkle of baking soda, brush, and flush. Recipe 6: Floor Wash for Hard Surfaces Tile, vinyl, and linoleum: add half a cup of white vinegar plus a few drops of castile soap to a gallon of warm water; the vinegar cuts dirt while the soap lifts it, and a light hand with soap prevents a sticky film. Hardwood demands the timid version: only a quarter cup of vinegar to the gallon, a mop wrung nearly dry, and no pooling water anywhere near the boards. Recipe 7: Drain Refresher and Deodorizer For slow or smelly drains, pour half a cup of baking soda down, follow with half a cup of vinegar, cover the drain, and let the reaction work 15 to 30 minutes, then flush with a kettle of boiling water to carry off dissolved soap, grease, and pipe odor. That rinse is far gentler on plumbing than caustic chemical openers. Bonus Moves: Carpets, Wood, and Steel Beyond the core seven: dust dry baking soda over carpet, wait 30 minutes, then vacuum for whole-room deodorizing, and lift fresh stains with one teaspoon each of clear dish soap and white vinegar in a cup of warm water, blotted from the outside in, never rubbed. Feed furniture a wood polish of one part lemon juice to two parts olive oil, wiped along the grain and buffed dry. On stainless, a film of olive or mineral oil on a cloth resists fingerprints. The Recipe Card Job Mix Dwell time All-purpose surfaces 1:1 vinegar and water, 10-15 drops essential oil Wipe immediately Glass and mirrors 1 alcohol, 1 vinegar, 2 water Wipe and buff Grease paste Baking soda with warm water 15-20 minutes Tub and tile paste 1 cup baking soda, 1/4 cup castile soap Scrub and rinse Toilet descale 1 cup vinegar, then baking soda 1 hour to overnight Drain refresh 1/2 cup each baking soda and vinegar, then boiling water 15-30 minutes Safety Rules: Label, Store, and Never Improvise Homemade does not mean careless. Label every bottle with its contents and job, and store them in a cool, dark place beyond the reach of children and pets; food-safe ingredients are still not food. And never improvise chemistry. Vinegar plus hydrogen peroxide forms corrosive peracetic acid, and vinegar plus bleach releases toxic chlorine gas, a hazard the CDC’s page on cleaning and disinfecting with bleach warns about directly: keep bleach in its own bottle, and mix solutions in small, fresh batches. Homemade Cleaner Questions, Answered Can I use the all-purpose vinegar spray on every counter? No. It suits laminate, sealed granite, appliances, and painted walls, but acid etches marble and unsealed stone. Uncertain surface? Test a hidden spot or clean with soapy

7 Best Homemade Cleaning Solutions to Make Your Home Look Like New Read More »

small office

Making Your Small Office a Pleasant Place to Work – 5 Expert Tips

Making Your Small Office a Pleasant Place to Work A tidy office does more than impress visitors; it protects staff health, lifts morale, and helps people focus. Clients and job candidates start forming opinions before a word is spoken, at the front door, and employees feel the difference every day in how the space looks, smells, and functions. Break the workload into five zones: Entrance and reception, where first impressions form. Workstations, where the team spends its day. The kitchen and breakroom, shared by everyone. Restrooms, which need daily sanitation. Periodic deep tasks that keep the whole office fresh. Tip 1: Make the Entrance and Reception Sparkle First impressions start at the door. Keep the glass panels free of fingerprints and smudges, and disinfect the handle daily, since it is the first thing everyone touches. Vacuum or mop the entryway floor every day so dirt, salt, and moisture stay at the threshold instead of traveling through the building. In the reception area, clear the desk of clutter, dust it thoroughly, and wipe it with a product that dries streak-free. Sanitize the telephone, keyboard, and mouse, arrange any brochures neatly, and wipe down guest chairs, including legs and armrests, vacuuming upholstery to remove dust and crumbs. Tip 2: Keep Workstations Clean and Disinfected The main workspace is where your team spends most of its day, so its condition directly affects health and productivity. Empty trash and recycling bins and replace the liners. Dust from high to low so dislodged particles land on surfaces you clean next, covering shelves, cabinet tops, picture frames, and partition ledges before desks. Wipe monitors with a dry microfiber cloth so they are not scratched. Then move everything on each desk and clean the surface with a pH-neutral product safe for wood, laminate, and glass. Disinfect the high-touch items: the phone handset and keypad, the mouse, and the keyboard, using compressed air to blow crumbs from between the keys first. Wipe chair armrests, adjustment levers, and bases, and vacuum fabric seats. Finish by vacuuming the floor around every desk, reaching underneath and behind the chair. The CDC’s guidance on when and how to clean and disinfect explains why regular cleaning of high-touch surfaces is usually enough to keep germs from spreading. Tip 3: Give the Kitchen and Breakroom Daily Attention The breakroom is the social heart of a small office and the hardest area to keep clean. Clear the counters and wipe them with a food-safe disinfectant so no crumbs or sticky coffee rings remain. Scrub the sink with a non-abrasive cleaner, then disinfect the basin and the faucet hardware. That microwave gets a daily wipe-down, inside and out; a few minutes of heating a bowl of lemon water loosens dried food so it wipes away easily. Sanitize the fridge handle and door, check the interior regularly for expired food, and clean the door seals. Wash the coffee maker carafe and filter basket and wipe the machine’s exterior. Clean breakroom tables and chairs, then sweep and mop the floor with a degreasing disinfectant. Handwashing is part of the same hygiene picture: the CDC’s handwashing guidance notes that clean hands are one of the best ways to prevent the spread of germs in shared spaces. Tip 4: Keep Restrooms Sanitized and Stocked A clean, well-stocked restroom signals a well-managed office. Check toilet paper, paper towels, and soap dispensers first, then empty and sanitize the trash receptacles and fit fresh liners. Clean mirrors with a glass cleaner so they stay free of spots, and scour sinks and faucets, focusing on the handles and the soap dispenser surround. For toilets, use a hospital-grade disinfectant and respect its dwell time, the period the product must stay wet on the surface to kill germs. Work from the handle and top of the tank down to the lid, both sides of the seat, the exterior of the bowl, and the base. Scrub the inside of the bowl with a dedicated brush and bowl cleaner. Keep separate cloth colors assigned to the toilet zone so they never double as sink or counter rags, wipe partitions from top to bottom, and finish by mopping the floor with a disinfectant cleaner. Tip 5: Schedule Deeper Cleaning for the Whole Office Beyond the daily routine, a small office needs periodic deep tasks that keep the space truly healthy. Meeting rooms should be presentation-ready at all times: wipe the table, clean chairs, erase whiteboards with a proper whiteboard cleaner to remove ghosting, dust televisions, projectors, and conference phones, and vacuum. Along hallways, vacuum carpets edge to edge, sweep and mop hard floors, and disinfect light switches and door handles while wiping railings and baseboards periodically. Then book the deeper work on a schedule: interior window cleaning for natural light, hot water carpet extraction to remove embedded dirt and allergens, and high dusting of ceiling fan blades, shelves, vents, and light fixtures. Small Office Cleaning Priorities at a Glance Zone Focus Points Suggested Routine Entrance and reception Glass, handles, desk, guest seating Daily wipe-downs and floor care Workstations Desks, phones, keyboards, chairs Daily tidy, weekly full clean Kitchen and breakroom Counters, sink, microwave, fridge Daily wipe-downs, weekly deep scrub Restrooms Toilets, sinks, mirrors, supplies Daily sanitation, stock checks Common areas Windows, carpets, vents, light fixtures Periodic professional deep clean Frequently Asked Questions How often should a small office be cleaned? High-touch surfaces such as door handles, kitchen counters, and restroom fixtures should be cleaned daily. Workstations and floors need attention several times a week, and deep tasks like carpet extraction and window cleaning are typically done quarterly or twice a year. What is the difference between cleaning and disinfecting? Cleaning removes dirt and most germs with soap or detergent, while disinfecting uses a product that kills remaining germs on the surface. In an office, clean first, then disinfect the high-touch areas where illness spreads most easily. Why does my office still look dusty after vacuuming? Dust settles on high surfaces such as shelves, vents, and light fixtures and

Making Your Small Office a Pleasant Place to Work – 5 Expert Tips Read More »

Hot Water and Cold Water

Hot Water vs Cold Water – Which is More Efficient at Cleaning?

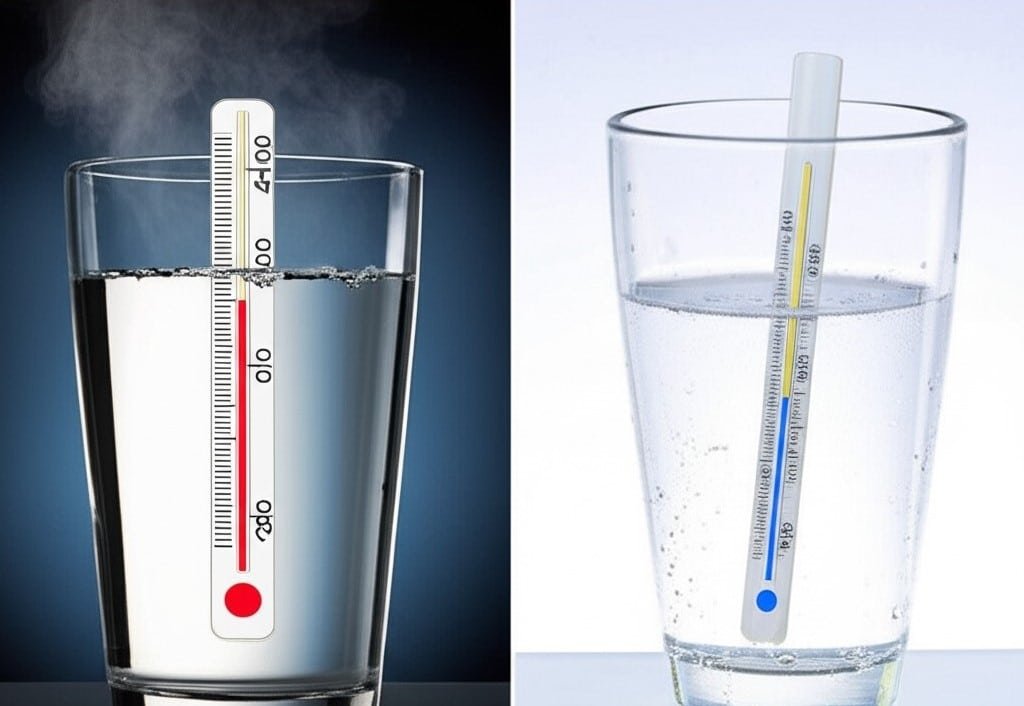
Hot Water vs Cold Water – Which is More Efficient at Cleaning? Choosing between hot and cold water is not a matter of taste. Temperature decides whether a stain lifts away or sets permanently, and whether a surface is truly sanitized or merely wiped. Knowing what each does best is the foundation of efficient cleaning. Why Hot Water Beats Grease Heat is where hot water earns its reputation. Molecules move faster and carry more kinetic energy, which lowers the surface tension of water so it spreads and penetrates soil more easily. The bigger advantage shows with fats, oils, and grease: warmed grease becomes less viscous, softening and liquefying so detergent and scrubbing can lift it away. Picture a frying pan coated in cold grease, where the film stays stubborn and solid. Add hot water and that coating melts into a liquid soap can emulsify and rinse clean. The same thinking applies to kitchen backsplashes spattered with cooking oil, range hoods coated in greasy vapor, and dining tables holding oily residue. Hot Water as a Sanitizer True sterilization calls for boiling water at 100 C (212 F), which is impractical for housework. Tap water at roughly 49 to 60 C (120 to 140 F) is a different story: it kills a large share of common household bacteria, germs, and viruses, which makes heat the better pick wherever hygiene matters most. Counters used for raw meat, cutting boards, sinks, and garbage disposals all come cleaner with hot water. In the bathroom it helps on toilets, sinks, and shower surfaces, and it works especially well on soap scum, a blend of mineral deposits and body oils that softens quickly under heat. Where Hot Water Earns Its Keep in the Laundry In the wash, heat suits heavy soiling: work clothes, sports uniforms, and reusable cleaning cloths. Whites, bedding, and towels come out brighter and more hygienic, with dust mites and allergens knocked back. Powdered detergents also dissolve and activate more completely in hot water, while a cool wash can leave them clumped on fabric. The Risk Side of Heat The same energy that melts grease can ruin materials. Polyester and rayon may warp or melt, wool and silk shrink and lose shape, and colors bleed or fade, which is why hot water is a poor match for dark or vivid garments. Prolonged heat also warps unsealed wood, damages some floor finishes, and makes certain plastics brittle. Protein stains are the biggest trap: blood, egg, dairy, and mud contain proteins that coagulate when heated, in effect cooking into the fibers, and hot water sets them so firmly they can become nearly impossible to remove. Why Cold Water Wins on Delicates and Stains Cold water is gentler by nature, which makes it the default for lace, silk, and woolens and the safest choice for dark and vibrant colors. Its most important job is removing protein-based soil. Because it does not cook the proteins, cold water helps break them down and flush them out. Soak or rinse a bloodstain on a shirt, spilled milk on carpet, or egg yolk on a tablecloth in cold water before any cleaning product touches it. Detergent science has closed much of the gap. Most liquid detergents and cold-water powders now rely on enzymes – proteases for proteins, amylases for starches, lipases for fats – that work best in cool temperatures, with results comparable to hot water on lightly and moderately soiled loads. Energy, Cost, and Everyday Surfaces Heating water is one of the most energy-hungry jobs in a home. Energy experts estimate that roughly 90 percent of the energy a washing machine consumes goes toward heating water, so switching most loads to cold lowers utility bills over a year and shrinks a household’s carbon footprint. Cold water is also plenty for walls, baseboards, and furniture paired with an all-purpose cleaner, and it is the better choice for windows and mirrors, since hot water evaporates too quickly and leaves streaks. Matching Water Temperature to the Job Grease and baked-on messes: hot water with a degreaser. Raw-meat boards, disposals, bins: hot water plus disinfectant. Wool, silk, lace, and dark colors: cold water only. Fresh blood, egg, or dairy stains: cold rinse first. Everyday mixed laundry: cold with an enzyme detergent. Scenario Best choice Why it works Oven caked with baked-on grease Hot plus a degreaser Heat softens hardened grease so the cleaner can penetrate. Fresh blood on a pillowcase Cold first Hot water sets the iron in blood into a permanent mark. Mixed weekly laundry Cold with enzyme detergent Protects colors and is gentler on synthetic blends. Greasy kitchen floor Hot plus a floor degreaser Softened film lifts instead of smearing under the mop. Home after an illness Hot plus a disinfectant Combines thermal and chemical action on knobs and switches. Hot water is the heavy-duty tool: use it on baked-on messes, greasy surfaces, colorfast durables, and any job where reducing microbes is the goal. Cold water is for preservation and economy: delicate fibers, dark colors, protein stains, and the routine loads that make up most laundry. Wipe down shared surfaces with a clean cloth, then wash your hands with soap and running water. The CDC hand hygiene page covers when soap is needed and when a sanitizer with at least 60 percent alcohol is enough, and the CDC cleaning and disinfecting guidelines are a practical reference for keeping kitchen and bathroom surfaces hygienic week to week. Frequently Asked Questions Does hot water kill germs on its own? It reduces them, but it is not sterilization. Boiling water at 100 C (212 F) is what true sterilization requires, while typical tap water at 49 to 60 C (120 to 140 F) eliminates many common household bacteria, germs, and viruses. For real disinfection on counters and bathroom fixtures, pair hot water with an appropriate disinfectant. Why does hot water make a bloodstain worse? Blood, egg, dairy, and mud contain proteins that coagulate when heated, essentially cooking into the fibers. Once that happens the

Hot Water vs Cold Water – Which is More Efficient at Cleaning? Read More »

cleaning professional

4 Reasons Why You Should Hire a Cleaning Service

4 Reasons Why You Should Hire a Cleaning Service Hiring a cleaning service is usually framed as a simple trade of money for convenience. The real return runs much deeper than that. What you are actually buying is time you cannot manufacture, a healthier indoor environment, a calmer household, and a home whose floors, fixtures, and finishes last longer because someone maintains them properly. Here are four reasons that calculation usually tips in favour of hiring help. 1. You Get Your Time Back A home is meant to be a sanctuary, a place of rest after the demands of the day, yet keeping that sanctuary in shape can become a second job. Hours spent dusting, vacuuming, mopping, and scrubbing are hours that never come back. Those hours could go to family, personal interests, professional growth, or simply resting. Delegating the cleaning does not just buy clean floors; it buys back the most finite resource you own. Think of the weekend as two days to live rather than two days of catching up on chores. The quality gap matters too. A professional cleaner brings expertise and speed that most homeowners cannot match, having refined a system over hundreds of homes. They know which product is safe on which surface, how to lift stubborn soap scum without damaging tile, and how to leave glass genuinely streak-free. They also notice the details a hurried weekly wipe-down misses: dust gathering on baseboards, grime on cabinet doors, fingerprints on switch plates, and the forgotten corners behind furniture. 2. Professional Standards, Better Tools, Better Air That standard is backed by equipment. Instead of a household vacuum and a few all-purpose sprays, a service arrives with high-filtration vacuums that trap fine dust and allergens instead of blowing them back into the room, plus a color-coded microfiber system that stops cross-contamination between the bathroom and the kitchen. Task-specific solutions do their jobs faster and better, and you no longer have to research, buy, and store a shelf of chemicals that mostly sit unused. Health is where this pays off most. Looking clean and being hygienically clean are two different standards. Dust carries skin cells, fabric fibers, pollen, pet dander, and dust mites, and every one of those irritates allergies and asthma. Thorough professional dusting and vacuuming lowers those airborne irritants and improves indoor air quality. The kitchen and bathroom need special attention because they can become breeding grounds for bacteria, mold, and mildew. A good service does more than wipe counters; it sanitizes them, disinfects toilets, sinks, and showers, and spots the conditions that let mold take hold before it becomes a bigger repair. For pet owners, the CDC healthy pets guidance is a useful reminder of how much dander and tracked-in soil animals add to a home, and the CDC mold and moisture guidance explains why damp bathrooms and kitchens need consistent attention. 3. Less Stress, Calmer Household Living in a cluttered or dirty space raises levels of the stress hormone cortisol, and the low-grade awareness that chores are waiting wears on the mind. Stepping into a home that stays clean and orderly brings an immediate sense of calm and control. The relief is not limited to the hours the cleaner is present, because the task stops occupying your thoughts entirely once it is scheduled. Cleaning is also a frequent source of domestic friction. Arguments over whose turn it is, or over what the word clean even means, create tension between partners and family members. Outsourcing removes the dispute altogether. It becomes a neutral, scheduled service that holds one consistent standard for everyone in the household. Kitchens and bathrooms scrubbed, sanitized, and reset. Floors vacuumed and mopped on a set schedule. Dust removed from surfaces, sills, and vents. Supplies and scheduling handled for you. 4. Consistency That Protects Your Home Life gets busy, and cleaning is the first thing postponed. One skipped week becomes two, and grime settles in deeper and takes more effort to remove later. A scheduled service restores the home to a baseline on a regular rhythm, whether that is weekly, bi-weekly, or monthly, which prevents heavy buildup and preserves floors, fixtures, and surfaces over the long term. That proactive care can save money later on restoration or replacement work you would otherwise need. Certain life moments turn a cleaning service from a luxury into a near-necessity. Moving into a new home deserves a deep clean so you start with a fresh, sanitized space. A move-out clean is often required for renters to recover a deposit. Post-renovation work is its own specialty, since construction leaves a fine, pervasive dust that needs specific techniques and equipment. Hosting a holiday party or overnight guests is stressful enough without a top-to-bottom clean on the list. And for new parents, older adults, or anyone recovering from illness or injury, professional help makes daily life manageable and safe. Service Best for What it covers Regular cleaning Weekly, bi-weekly, or monthly upkeep Kitchens, bathrooms, floors, dusting, and the high-touch points that get dirty fastest. Deep cleaning First visits, seasonal resets, pre-event prep Baseboards, tile, grout, appliance interiors, vents, and the corners a routine clean skips. Move-in and move-out cleaning Tenancy changes and post-renovation work Empty-unit detailing, inside cabinets, construction dust, and deposit-standard finishes. For routine hygiene between visits, the CDC guidance on cleaning and disinfecting your home is a clear primer on where germs collect and which surfaces deserve daily attention. Frequently Asked Questions How often should I book a cleaning service? Most households do well with bi-weekly visits, which keeps dust and grime from building between appointments. Busy homes with pets or children often choose weekly service, while smaller homes or single occupants can stay comfortable on a monthly rhythm. A deep clean is worth adding for a first visit or after a long gap. Do I need to be home during the clean? No. Many clients provide access instructions and return to a finished home. If you would rather be present for the first visit, that works

4 Reasons Why You Should Hire a Cleaning Service Read More »

preparing for the July cleaning

How to Prepare for July Cleaning: 4 Steps Fast and Easy

How to Prepare for July Cleaning: 4 Steps Fast and Easy July puts a particular strain on a home. The days are longer, everyone is in and out more often, and guests arrive with sand, pollen, and outdoor grime on their shoes. Preparing for a thorough July clean is less about buying supplies than about setting up a system, because good preparation makes the work faster, calmer, and far more complete. 1. Prepare Your Mind Before You Start Begin by getting your head into the job, not just your calendar. Set aside real time and commit to steady, systematic effort rather than sporadic bursts. A significant clean takes energy and focus, so break the house into manageable zones instead of planning to do everything at once, which is the fastest route to burnout. Picture the finished, organized space and let that image drive the plan, and keep a rough written outline so important areas do not slip through. Think about who else can pitch in, even with small jobs. Drink water, wear comfortable clothing, and put on music that keeps your energy up. This mental preparation is the quiet, underestimated first step. 2. Declutter One Room at a Time Decluttering is not tidying. It is the deliberate removal of anything that blocks access or prevents a surface from being cleaned properly. Clutter traps dust, hides spills, and makes it impossible to vacuum a floor or wipe a counter completely. Work through one area at a time, starting with the busiest spaces such as the kitchen or living room. Clear every countertop, lifting small appliances rather than sliding them, and wipe beneath each one. Empty the sink of dirty dishes and load them into the dishwasher or wash them right away. Sort accumulated mail and papers into action, filing, and recycling piles. Check the pantry and fridge for expired food before it becomes a smell or a mess. Clear, unobstructed surfaces let your tools reach every corner and crevice, which is what makes the rest of the work effective. 3. Gather and Check Your Supplies First Nothing is more frustrating than starting a task and discovering the bottle is empty or the attachment is missing. Take inventory before you begin. Confirm you have all-purpose, glass, bathroom, and floor cleaners suited to your flooring, plus enough dish soap and hand soap. Count your microfiber cloths and separate them by job, one set for dusting, one for glass, and one for bathrooms, so cross-contamination never happens. Check that sponges, brushes, a toilet brush, and a squeegee are in good shape, and inspect the mop and bucket. Empty the vacuum canister or replace the bag, clear blockages, and make sure all attachments are present. Add a dustpan, brush, and gloves, and keep everything in a caddy so you can carry supplies from room to room. 4. Clear and Pre-Treat, Room by Room With clutter handled, remove what should not be there during a deep clean. In the kitchen, empty the toaster crumb tray, pre-wipe a splattered microwave or steam a bowl of water inside it to loosen grime, and clear the area around the sink. Greasy oven racks can soak in hot, soapy water before scrubbing. In the bathroom, lift the toilet lid and seat to wipe the exterior of the bowl, scrub around the fixture base and faucet fittings, take down a moldy shower curtain, and clear hair from the drains. In bedrooms, strip the beds, put personal items away in their proper places, push under-bed containers fully under or pull them clear for vacuuming, and empty or close open hampers. In living areas, pull furniture away from the walls, shake throws and cushions outdoors, and take down curtains due for a wash. In hallways, shake entry mats outside, and clear consoles of keys and mail. Finish by wiping the tops of the washer and dryer, which collect lint. Summer Conditions That Change the Plan July brings two specific challenges. The first is humidity, so open windows during and after cleaning to let surfaces dry fully and discourage mold and mildew; the CDC mold and moisture guidance explains how quickly damp indoor conditions turn into a growth problem. The second is traffic. More time outdoors means more dirt, dust, and pollen comes inside, so good doormats at every entrance and a no-shoes habit pay off. If guests are coming, prioritize the guest bedroom and bathroom, and schedule the heaviest work for the cooler morning or evening hours. Read product labels, wear gloves, and never mix bleach with vinegar or ammonia-based cleaners, as the CDC bleach safety guidance warns. Work from top to bottom and from the back of each room toward the door. The Four Preparation Steps at a Glance Step What it involves Why it helps 1. Prepare your mind Block time, set zones, plan breaks Prevents burnout and keeps the work systematic. 2. Declutter Clear counters, dishes, mail, and old food Removes barriers that trap dust and block access. 3. Check supplies Inventory cleaners, cloths, tools, and vacuum Avoids mid-job interruptions and wasted trips. 4. Clear and pre-treat Remove items and pre-treat stains and racks Lets cleaners work while you move to another room. For the routines that keep a home hygienic in between big cleans, the CDC guidance on cleaning and disinfecting your home is a good reference on where germs gather and what deserves regular attention. Frequently Asked Questions How long does a July deep clean take? Plan on three to five hours of active work for an average home, split across two days if your schedule allows. Preparation adds about an hour, but it saves more than that later by removing clutter and pre-treating stains before you start scrubbing. Should I open windows while cleaning in July? Yes, whenever the weather allows. Ventilation clears stale air and cleaning fumes, and it helps surfaces dry faster in humid conditions. Damp bathrooms and kitchens are where mold and mildew establish themselves most easily, so airflow there is especially valuable.

How to Prepare for July Cleaning: 4 Steps Fast and Easy Read More »

protective items for cleaning the house

Why do You Need Protection To Clean Your House? – 6 Essential Items

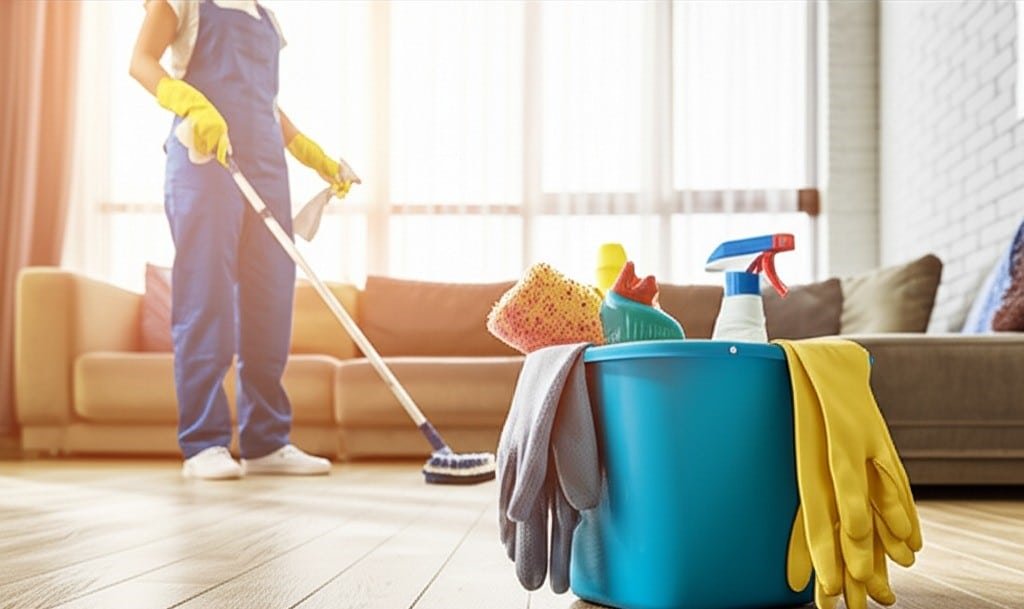
Why Do You Need Protection To Clean Your House? Cleaning looks harmless from the outside, but the person holding the spray bottle carries the real risk. Dust, dirt, and germs are only half the story. Household chemicals, biological waste, and hours of kneeling, reaching, and scrubbing all leave a mark on the body, and the damage ranges from dry, cracked hands to chemical burns, breathing trouble, and joint pain that lingers for years. Suiting up properly is not overthinking a simple chore. It is the mark of a careful, professional approach to work that puts you in direct contact with chemicals and heavy physical effort. Here are the six items that matter most, along with the hazard each one neutralizes. What Are the Real Risks of Cleaning? Each part of the body faces a different threat, so it helps to know what you are defending against. Skin damage: water breaks down the skin’s natural oil barrier, leading to redness, cracking, and a higher chance of infection. Chemical injury: detergents, degreasers, disinfectants, and acidic or alkaline products can cause contact dermatitis, allergic reactions, and serious burns from concentrated oven or drain cleaners. Airway irritation: fumes and volatile organic compounds from bleach, ammonia glass cleaners, and self-cleaning ovens irritate the nose, throat, and lungs, and people with asthma or allergies may wheeze or struggle to breathe. Eye injury: one splash from an aerosol nozzle or an overhead droplet can cause intense pain and permanent corneal damage. Physical strain: prolonged kneeling inflames the kneecaps, while wet floors invite slip-and-fall accidents. Mixing products adds another layer of danger. Bleach combined with ammonia produces toxic chloramine gas, while bleach plus an acidic cleaner releases chlorine gas. The CDC explanation of bleach safety shows why one product at a time is the only safe habit. The 6 Essential Items Every Cleaning Kit Needs 1. Gloves Hands do most of the work, so they absorb most of the punishment. Disposable nitrile gloves resist chemicals better than latex and sidestep latex allergies, which makes them ideal for countertops, fixtures, and soiled laundry, and you can throw them away to stop germs travelling between the kitchen and the bathroom. For hot dishwater, floor scrubbing, and mold removal, switch to thick reusable rubber or PVC gloves with longer cuffs and a flock lining for comfort. Wash gloves with soap and water while they are still on your hands, then let them air dry inside and out so bacteria and mold cannot take hold. Adding proper hand hygiene after the job protects you even further. 2. Ventilation and Respiratory Gear Airflow is the first line of defense. Open windows for a cross-breeze and run an exhaust fan to dilute airborne chemicals. When a task throws up dust, pet dander, or debris, such as sweeping a garage, deep-cleaning carpets, or clearing a neglected storage area, a well-fitted N95 respirator filters at least 95 percent of fine particles. Aggressive solvents, paint strippers, and heavy-duty oven cleaners call for an elastomeric half-mask with cartridges rated for organic vapours. 3. Safety Glasses Ordinary prescription glasses or sunglasses barely help, because splashes enter from the sides, top, and bottom. Sealed safety goggles give full 360-degree protection, while wrap-around glasses with side shields suit lighter work. Look for chemical splash resistance, a recognized certification such as ANSI Z87.1, and an anti-fog coating for steamy bathrooms. 4. An Apron Chlorine bleach is the worst offender, stripping colour from fabric instantly, but many other cleaners stain or degrade textiles too. Keep a dedicated set of cleaning clothes, then add a waterproof or water-resistant apron made from PVC or treated canvas to shield your torso and upper legs. Pockets keep a cloth, a detail brush, or spare gloves close at hand. Disposable coveralls are worth having for hoarding cleanouts or flood cleanup. 5. Knee Pads Scrubbing floors, wiping baseboards, and reaching into low cabinets force long periods on your knees, which bruises and inflames the joints. A simple pair of foam or gel knee pads spreads your weight and prevents cumulative damage. The same ergonomic thinking applies to long-handled dusters and brushes, a sturdy step stool instead of a chair, and a bucket on wheels. 6. Shoes Freshly mopped tile, vinyl, and hardwood are the classic setting for a household fall. Closed-toe, non-slip shoes with a deep rubber tread keep you stable, and a water-resistant upper keeps your feet dry. Set aside one dedicated pair for cleaning so you never track outdoor dirt into the rooms you just finished. Protection at a Glance Item Main Hazard It Reduces Best Uses Nitrile gloves Skin irritation, cross-contamination Wiping, polishing, laundry Rubber or PVC gloves Burns, hot water, harsh detergent Floors, dishes, mold removal N95 respirator Dust, dander, allergens Garages, carpets, storage areas Half-mask with cartridges Solvent and cleaner vapours Oven cleaners, paint strippers Sealed goggles Chemical splash, airborne debris Bathrooms, overhead surfaces Knee pads, non-slip shoes Joint strain, slips and falls Floors, tubs, baseboards Good gear only helps if it fits. A respirator that leaks around the edges or gloves that slip off mid-scrub leave you exposed, so test each item before a big job. The CDC guide to cleaning and disinfecting your home is a solid companion reference for safe routines. Frequently Asked Questions Are disposable gloves enough for every cleaning task? No. Thin disposables are fine for quick dusting and wiping, but hot water, strong detergents, floor scrubbing, and mold removal call for heavy-duty reusable gloves that resist tears and splashes. Can I just open a window instead of wearing a respirator? Ventilation lowers the concentration of fumes, but it does not remove every particle or vapour. Any job that raises heavy dust or uses aggressive solvents needs respiratory protection on top of good airflow. Which cleaners should never be mixed? Bleach with ammonia creates toxic chloramine gas, and bleach with an acidic cleaner releases chlorine gas. Use one product at a time and never combine them in the same bucket or bowl. Do I really need separate shoes

Why do You Need Protection To Clean Your House? – 6 Essential Items Read More »

disorganized home

Why Hiring A Professional Organizer Is Important – 5 Key Factors

Why Hiring A Professional Organizer Is Important Belongings pile up quietly. An item here, a stack there, and rooms that once felt open start to feel cramped and heavy. This is not simply untidiness. Clutter raises the background level of stress at home, makes ordinary tasks harder, and turns cleaning into a losing battle. When counters disappear under paper and floors become obstacle courses, real cleanliness stays out of reach. That is when many people realize the problem is not the cleaning at all. It is the sheer volume of stuff, and a professional organizer solves it with a methodical plan instead of another round of tidying. How Clutter Quietly Takes Over Dust settles in every gap between objects, so surfaces never feel clean. Cleaning takes longer because piles must be moved before anything can be wiped. Time disappears into hunting for keys, documents, or one ingredient. Duplicate purchases happen when you cannot find what you own. Stress builds from a space that feels out of your control. The work starts with an in-depth consultation. The organizer asks how you use each space, what frustrates you, and what a more functional home would look like, then assesses the scope of the clutter and the habits behind it. It is a judgment-free conversation that produces a plan to fit your life. 5 Key Factors That Make an Organizer Worth It 1. Do You Really Need All the Objects? Decluttering is the heart of the process and usually the hardest part. An organizer guides you through it calmly and objectively, one category at a time, so you can decide what stays and what goes. Three plain questions settle it: Is it useful? Do I love it? Do I need it? Sentimental pieces get respectful strategies, such as digitizing photos and letters or building one memory box, so memories are honoured without a room full of boxes. Anything left over leaves responsibly by way of charity donations, resale, recycling, or waste disposal. 2. Sorting and Categorizing With the excess cleared, remaining items are grouped by kind, a like-with-like principle that puts all baking supplies together, all stationery in one spot, and all cleaning products with each other. In a home where things have drifted for years, this step reveals what you own and where duplicates hide. The organizer then plans the space, studying closets, cabinets, shelves, drawers, and vertical room before designing storage that is efficient and easy to reach. In a kitchen that might mean reconfiguring pantry shelves, adding clear stackable containers, setting up a first-in-first-out rotation to cut food waste, and finding homes for pot lids and baking sheets. 3. Closets, Rooms, and Awkward Spaces In closets, uniform hangers save space and create visual calm, folding techniques expand drawer capacity, shoe storage keeps pairs visible, and accessories such as scarves, belts, and jewelry get their own systems, plus seasonal rotation so off-season clothing is stored properly. Home offices gain paper management for action, reference, and archive files, digital organization advice, an ergonomic desk layout, and supplies within reach. Children’s rooms work better with clear bins, picture labels, and toy rotation. Garages, basements, and attics get heavy-duty shelving, durable clear bins, and zones for tools, sporting gear, and holiday decorations. 4. Labeling and Maintenance Coaching Clear, consistent labels tell everyone in the household where things belong, and they keep a system from slowly collapsing. A good organizer does not simply set up shelves and leave. They coach you on daily or weekly resets and routines for handling mail and groceries, and often offer follow-up sessions to fine-tune the system as needs change. 5. Time and Money Reclaimed The benefits reach far beyond a tidier house. An organized space brings calm and control, and the minutes saved each week add up to hours for something you enjoy. Knowing what you own prevents duplicate buys, an organized pantry and fridge reduce food waste, and papers are less likely to be misplaced, so late fees are avoided. Best of all, organizers maximize the space you already have, so a small home feels bigger and you may skip the storage unit entirely. An orderly home is also far easier to clean, because dust and grime have fewer places to hide. Where Organizing Helps Most Situation Main Benefit Why It Matters Moving Only pay to transport what you need Systems are set up in the new home from day one New baby, empty nest, downsizing, blended household Guidance through changing space needs Transitions stay smooth, not chaotic Chronic disorganization Tailored, compassionate strategies Support where habits or ADHD have built a wall Preparing a home for sale Better photos, better showings Can command a higher price and sell faster After a renovation Resettling into the improved space Keeps the new layout functional and beautiful Three myths still stop people from asking for help. One is that organizing is a luxury for the wealthy, when it is really an investment in time and a home that works. Another is the fear that a stranger will force you to throw away cherished possessions, though the final decision always rests with you. The third is shame, the idea that you should manage alone, even though organizing is a specialized skill just like plumbing or electrical work. Frequently Asked Questions Will an organizer make me throw out things I love? No. Professional organizers work collaboratively, and every decision about what stays rests with you. Sentimental items get strategies for honouring them without keeping everything. How long does a typical organizing project take? It depends on the space and how much clutter has accumulated. A single closet can be finished in one session, while a whole home takes several visits plus follow-up coaching. Does an organized home really stay cleaner? Yes. Fewer objects mean fewer surfaces for dust to settle, fewer obstacles to move before cleaning, and easier access to floors and corners. Can I hire help for just one room? Absolutely. Single-project help is a common way to start, and many

Why Hiring A Professional Organizer Is Important – 5 Key Factors Read More »