Carpet and Rug Cleaning

housekeeper deep cleaning

Deep Cleaning Services in Toronto, We Do It Right!

Deep Cleaning Services in Toronto: The Complete Reset Your Home Needs A regular cleaning keeps surfaces tidy, but the grime that accumulates below the surface quietly builds up over the months. That is the domain of specialized deep cleaning services in Toronto. Unlike standard housekeeping, a deep clean is a comprehensive, methodical process that tackles dirt in every often-overlooked, hidden corner of your home: a fundamental reset that restores your space to a truly pristine state. What Makes a Deep Clean Different? Professional deep cleaning focuses on a thorough, top-to-bottom reset of every room, targeting buildup that routine visits simply do not reach. It goes far beyond the surface and into the details: grease on cabinet fronts, dust in air vents, limescale on fixtures, and grime in grout lines. The scope demands expertise and specialized equipment, and more and more Toronto homeowners and businesses are investing in it, whether for a spring reset or as part of ongoing maintenance. For a fuller breakdown of what a session covers, see our guide to deep cleaning services in Toronto. Kitchen Deep Cleaning: Degreasing and Appliance Interiors In kitchens, the work is all about degreasing and disinfecting, starting inside your cupboards. Crews empty cupboards and pantries to inspect for spills, sticky residue, forgotten food, and signs of pests, then degrease and sanitize every interior surface. Handles and cabinet fronts get attention too, because repeated hand contact leaves a sticky film. Appliances receive treatment they almost never get at home: Oven: racks soaked, interior carbon buildup scrubbed, door glass cleaned for a like-new view. Stovetop: grates and burner caps removed and cleaned, boiled-over residue scrubbed from the surface. Range: pulled out so the sides, the floor behind it, and the wall are reached and wiped clean. Refrigerator and freezer: emptied, shelves and drawers washed, door gaskets detailed with a small brush, condenser coils vacuumed of dust to support efficiency and lifespan. Small appliances: toaster crumb trays emptied, coffee makers and kettles descaled, microwave interiors scrubbed, including the often-splattered ceiling. Bathroom Deep Cleaning: Soap Scum, Limescale, and Grout Bathrooms are scrubbed and sanitized top to bottom, dissolving soap scum and body residue from tubs and showers with specialized agents made for stubborn film. Shower doors and glass enclosures are cleaned until streak-free, the tracks at the base are cleared of accumulated gunk, and tiles and grout lines are meticulously scrubbed to lift mildew and dirt from porous grout. Stubborn mold and mildew in damp bathrooms are common culprits, and the CDC’s guidance on mold and your health explains why proper removal matters. Health Canada also recommends keeping indoor humidity low and fixing moisture sources so mould cannot take hold in the first place. Fixtures get their shine back as limescale and mineral deposits are removed from faucets and showerheads, and chrome is polished. Toilets are cleaned inside the bowl and across the entire exterior, from the tank lid and handle to the seat, hinges, base, and surrounding floor, plus the often-ignored overflow hole inside the tank, flushed clean with disinfectant. Vanity and medicine cabinets are emptied and wiped inside, and exhaust fan covers are removed and washed, because a dusty fan cannot ventilate properly and traps the humidity that leads to mildew. Living Areas and Bedrooms: A Top-to-Bottom Reset Crews work from the ceiling down to the floor in every room. Cobwebs are removed from corners and ceiling edges, light fixtures and ceiling fan blades are dusted, and the tops of bookcases, wardrobes, and cabinets are reached. Walls are spot-cleaned of scuffs and splatters, and baseboards, door frames, window frames, and switch plates are hand-wiped one by one. The process continues behind and beneath the obvious. Furniture is moved so the floors underneath are reached, and upholstery is vacuumed with crevice tools to extract dust, skin cells, and allergens from fabric. Wood furniture is polished, lampshades and blinds are dusted, and the air system itself is addressed: vents and grilles are vacuumed and wiped, and HVAC return air covers are pulled and dusted out. Professional crews rely on HEPA-filter vacuums that capture microscopic allergens rather than recirculating them, and steam cleaners that sanitize without harsh chemicals. When Toronto Homes Need a Deep Clean Most Deep cleaning requests tend to follow life events: Moving into or out of a home, when deposits and first impressions are at stake. Post-renovation cleanup after the construction dust settles in every crack. Seasonal refreshes, especially the annual spring clean. Before hosting an event or gathering, such as a wedding at home or the holidays. Preparing a space for a new baby or toddler who will crawl across every floor. Allergy season, when dust, dander, and pollen accumulate indoors. How to Choose a Professional Deep Cleaning Company Not all services are created equal, so choose carefully. Look for a company that offers a range of deep cleaning options with a detailed, transparent list of what each package includes. Prioritize experienced, trained professionals who understand the right products and techniques for different surfaces, and verify that the company is insured and bonded to protect your home and belongings. What to check Why it matters Transparent scope and checklist You can compare packages and know what is covered before booking. Trained, vetted crew Correct products and techniques protect finishes instead of damaging them. Insurance and bonding Toronto Shine carries a $1,000,000 insurance policy and a $10,000 accidental breakage and surety bond. Flat, upfront pricing Our deep clean starts at $270.38 before HST for a studio or one-bedroom, shown on our pricing page. Deep Cleaning Service FAQs What is included in a deep cleaning service in Toronto? A full reset of each room: kitchen cabinets and appliances inside and out, bathrooms degreased and descaled with grout scrubbed, walls spot-cleaned, baseboards and switch plates wiped, vents dusted, furniture moved, and floors and carpets thoroughly cleaned. How is deep cleaning different from regular housekeeping? Regular visits maintain cleanliness on visible surfaces. A deep clean restores the areas maintenance skips, which is why many homes pair

Deep Cleaning Services in Toronto, We Do It Right! Read More »
August cleaning preparation

How To Prepare For August Cleaning: 7 Steps Fast and Easy

August cleaning is a specific kind of reset, the air in Toronto during August carries a distinct weight. This is the month where summer hits its peak just before beginning its slow retreat. Inside your home, the evidence of a season lived to its fullest is everywhere. Preparing for the August cleaning isn’t just about tidying; it’s about resetting the home after months of high activity and preparing it for the shift into autumn. The purpose of a dedicated August cleaning is to systematically remove the specific grime of summer and create a clean foundation for the indoor months to come. 1.HVAC A critical first step in any thorough August cleaning is addressing the air your family breathes. With windows open for weeks, allergens, city dust, and pollen have infiltrated every room. Your HVAC system has been in constant use, and its filter is the first line of defense. Changing it is a non-negotiable starting point for your August cleaning. A clogged, grey filter is not only inefficient but also circulates the very particles you want to remove. Once replaced, use a vacuum with a brush attachment to clean all intake and outtake vents. This foundational task sets the stage for the rest of your August cleaning, ensuring the air moving through your home is as clean as possible. 2.Windows and Doors Now, turn your attention to the windows and doors. The screens have been interceptors of bugs, leaves, and dirt all summer. A proper August cleaning demands they be removed and washed. A soft brush, mild soap, and a gentle spray from a garden hose will dislodge the grime. While they dry, focus on the window tracks and sills. These channels are graveyards for dust and insects. Vacuum the loose debris and use an old toothbrush to scrub the caked-on dirt. This level of detail is a hallmark of a successful August cleaning. Washing the glass, inside and out, on an overcast day will prevent streaking and let pristine light into your newly refreshed space. Completing this part of the August cleaning makes an immediate, visible difference to the brightness of your home. 3.The Floors The floors hold the story of summer. Sand from The Beaches, soil from the garden, and grass from the park have been ground into every surface. A deep floor treatment is non-negotiable for a proper August cleaning. For hard floors, a thorough mopping, perhaps even twice in high-traffic areas, is required to lift the settled-in dirt. For carpets and area rugs, this is the time for a deep extraction clean. Renting or owning a carpet cleaner is essential for this part of the August cleaning, as it pulls out the deep-set allergens and grit that a standard vacuum cannot reach. The murky water you dispose of is proof of the effectiveness of this task. Moving furniture to clean underneath is a vital step in a comprehensive August cleaning; the dust and lost items accumulated over three months need to be addressed. This aspect of the August cleaning removes the literal grit of the season from your home. 4.Fat in the Kitchen The kitchen August cleaning is a project in itself. The refrigerator has been a revolving door of summer treats and barbecue ingredients. Empty it completely. Wash all shelves and drawers in warm, soapy water. Wipe the interior with a food-safe cleaner, checking expiration dates as you go. The exterior and handles, covered in fingerprints, also need attention. Summer cooking often involves more frying and grilling, leaving a sticky film of grease on cabinets, the backsplash, and especially the range hood. A good degreaser is your best tool for this part of the August cleaning. Spray it on, let it work for a few minutes, then wipe clean. Don’t forget the hidden areas during your August cleaning; pull out the oven and stove to clean the sides and the floor underneath, which are magnets for crumbs and grease. This part of the August cleaning is about health as much as it is about aesthetics. 5.Sofa Cushion Your living room August cleaning should focus on soft surfaces where dust and dander settle. If your sofa cushion covers are machine-washable, now is the time to launder them. For all other upholstery, a meticulous vacuuming with the correct attachment is key. Go into every seam and crevice. For a deeper refresh, sprinkling baking soda over the fabric, letting it sit to absorb odors, and then vacuuming it up is a great technique to include in your August cleaning schedule. All throw blankets and pillows should be washed or cleaned according to their care tags. Dusting is another crucial element. Use a damp microfiber cloth to trap dust, not just move it. The goal of this August cleaning is to touch every surface, including the tops of picture frames, ceiling fan blades, and lamp shades. This comprehensive dusting is what makes an August cleaning so effective. Think of this as resetting the comfort zones of your home with your August cleaning. 6.Bathroom The bathroom August cleaning targets the buildup from summer humidity and increased traffic. Go beyond the basic wipe-down and scrub the grout lines on the floor and in the shower where soap scum and mineral deposits have accumulated. A paste of baking soda and vinegar is an effective, natural solution. Wash the shower curtain and its liner. The exhaust fan cover, likely caked with dust, should be removed and cleaned to ensure it can effectively pull moisture from the air. A successful August cleaning restores these high-use spaces to a state of hygienic freshness. Take the time to empty and wipe out medicine cabinets and vanities, organizing the contents as you go. 7.The Summer Gear A key part of the August cleaning process is managing the transition of seasonal items. The summer gear pool toys, beach chairs, inflatable rafts needs to be cleaned, deflated, and stored properly to protect it for next year. The barbecue grill deserves a deep clean after a season of heavy

How To Prepare For August Cleaning: 7 Steps Fast and Easy Read More »

summer deep cleaning

Why Summer Is The Best Season To Do a Deep Cleaning At Home

Why Summer Is the Best Season for Home Deep Cleaning Summer brings longer days, warmer temperatures, and a natural opportunity to refresh your home. A home deep cleaning in summer is easier, faster, and more effective than at any other time of year. Open windows create cross-breezes, bright sunlight reveals grime that stayed hidden all winter, and warm air dries carpets and upholstery quickly. If you have been putting off a thorough clean, these summer advantages make now the right moment to start. 1. Better Ventilation Dries Surfaces Faster Ventilation is the biggest advantage of summer deep cleaning. When windows and doors stay open, fresh air quickly clears the fumes from cleaning products, so the process is more comfortable and safer. Moisture from mopping floors, steam cleaning carpets, or washing upholstery dries fast, and rapid drying prevents mold and mildew, which thrive in damp, stagnant spaces. The CDC’s mold prevention guidance stresses controlling moisture, and summer airflow makes that much easier than in winter, when closed windows trap dampness. 2. Sunlight and Warmth Boost Cleaning Power Sunlight is a natural disinfectant. Its ultraviolet rays kill bacteria and other microorganisms on surfaces, which is especially useful after months of closed-up rooms. Bright summer light also shows dirt that stays invisible in dim conditions: window streaks, wall smudges, and dust in corners all become obvious, so you clean more thoroughly. Warm temperatures help cleaning solutions break down grease and grime with less scrubbing, which means less product and less effort. The CDC’s cleaning and disinfecting guidance is a useful reference for building a healthy routine around these conditions. 3. Take Cleaning Outdoors Summer lets you extend the cleaning zone beyond the house. Rugs can be beaten and aired in the sun, cushions scrubbed and left to dry quickly, and mattresses refreshed with a few hours of sun exposure. Patios, decks, outdoor furniture, and BBQ grills collect grime all year, and warm water plus a hose makes them manageable now. Cleaning these spaces flows naturally into a deeper clean of the indoor areas beside them, creating a seamless reset from the interior to the exterior of your home. 4. Tackle Basements, Garages, and Closets Attics, basements, garages, and closets are less inviting in cold months. Summer warmth makes it comfortable to sort, declutter, and clean them, and items can be carried outside for cleaning or disposal. Clothing can be aired out, seasonal items laundered and stored, and closet shelves wiped down and organized without the rush of cooler weather. 5. Improve Indoor Air Quality Before Fall After a long, closed-up winter, dust, allergens, and stagnant air accumulate in the home. A comprehensive summer deep clean removes dust mites, pet dander, and other pollutants, which supports healthier indoor air quality as the cooler months approach and windows are sealed again. Health Canada notes that indoor air can hold contaminants that build up in tightly closed homes, so a seasonal reset makes a real difference. A practical summer deep cleaning plan covers the tasks that benefit most from warm, dry weather: Wash windows and screens, and let them dry in the sun Steam clean carpets and upholstery with windows open and fans running Scrub patio furniture, decks, and BBQ grills with a hose Beat and air rugs, cushions, and mattresses outdoors Declutter and wipe down the basement, garage, and closets Dust air conditioning units and vents while the weather is dry Task Why Summer Helps Windows and screens Streaks dry clear and screens dry fast in the sun Carpets and upholstery Open windows and fans speed drying and prevent musty odors Patio and deck Warm water and a hose make grime easy to remove Basement and garage Comfortable to work in, and items can be aired outside AC units and vents Dry weather suits dusting and maintenance When to Call a Professional Deep Cleaning Service Even with perfect summer conditions, a full home deep cleaning takes hours of strenuous work. Toronto Shine Cleaning handles the job with trained cleaners, professional equipment, and a systematic checklist, and the company is bonded and insured. Book a home deep cleaning for a thorough refresh, add regular maid service to keep it that way, review cleaning prices, or check whether we serve your neighbourhood in the GTA. Call (647) 424-0355 to book. Why is summer better than spring for deep cleaning? Summer offers longer daylight, warmer temperatures, and the ability to open windows wide. Moisture dries faster, cleaning products work better in warmth, and you can move rugs, cushions, and furniture outdoors. Spring often stays cool and damp, which slows drying and can leave carpets and upholstery at risk of mildew. Can sunlight really disinfect surfaces? Yes. The ultraviolet rays in sunlight kill bacteria and other microorganisms on surfaces, which is why airing rugs, cushions, and mattresses in direct sun is a traditional and effective practice. Sunlight also reveals dirt and streaks that are hard to see in dim winter light. How do I prevent mold after cleaning with water? Dry everything quickly. Open windows and doors for a cross-breeze, run fans, and use a dehumidifier in damp areas like basements. The CDC recommends controlling moisture to prevent mold, and summer ventilation makes that much easier than in winter. Does Toronto Shine Cleaning offer summer deep cleaning? Yes. Toronto Shine Cleaning provides professional deep cleaning across the GTA, and summer is a great time to book because windows can stay open while the team works. Call (647) 424-0355 or request a quote online, and the team brings all supplies and equipment.

Why Summer Is The Best Season To Do a Deep Cleaning At Home Read More »

Isopropyl Alcohol

Isopropyl Alcohol – 101 Simple and Safe Ways to Clean Your Home

Isopropyl alcohol, often referred to as rubbing alcohol, is a staple in first-aid kits, but its utility extends far beyond disinfecting minor scrapes. In the realm of cleaning, it is a formidable, versatile, and cost-effective agent. Its chemical properties-specifically its ability to act as a solvent and its rapid evaporation rate-make it an indispensable tool for tackling a wide array of messes throughout the home. The primary strength of isopropyl alcohol lies in its solvent capabilities. It effectively dissolves a range of non-polar compounds, which includes many of the common culprits behind household grime: oils, greases, adhesives, and certain inks. Unlike water, which can struggle with these substances, alcohol breaks them down chemically, lifting them from surfaces with minimal effort. This is immediately apparent when cleaning stainless steel appliances. Fingerprints, smudges, and cooking grease residue can make stainless steel look dull and streaky. A simple wipe with a microfiber cloth lightly dampened with isopropyl alcohol will cut through the oily film instantly. Because the alcohol evaporates almost immediately, it leaves behind a pristine, streak-free finish that water-based cleaners often fail to achieve. The alcohol lifts the grease, and its fast evaporation prevents new water spots or streaks from forming as it dries. This same principle applies to glass and mirrors. Commercial glass cleaners often contain ammonia or other chemicals to achieve a streak-free shine. Isopropyl alcohol accomplishes the same goal more simply. A solution of one part alcohol to one part water in a spray bottle creates a highly effective glass cleaner. It cuts through haze, hairspray residue on bathroom mirrors, and smudges on windows, evaporating quickly for a perfectly clear result. For chrome fixtures in the bathroom and kitchen, rubbing alcohol removes water spots and soap scum, restoring their reflective shine without leaving behind any film. Beyond its solvent action, isopropyl alcohol is a potent disinfectant. The most common concentration available, 70%, is considered an optimal grade for this purpose. The presence of 30% water is crucial; the water acts as a catalyst, helping the alcohol to penetrate the cell wall of bacteria, viruses, and fungi more effectively. Once inside, the alcohol denatures the essential proteins and enzymes of the microorganism, causing it to die. This makes it an excellent choice for sanitizing high-touch surfaces. Light switches, doorknobs, remote controls, keyboards, and mobile phones are breeding grounds for germs. Regularly wiping these items with a cloth dampened with 70% isopropyl alcohol can significantly reduce the transmission of pathogens in a household. When cleaning electronics, it is crucial to apply the alcohol to the cloth first, never directly onto the device, to prevent liquid from seeping into sensitive components. The higher concentrations, such as 91% or 99% isopropyl alcohol, have their own specific advantages, particularly where water content is a concern. For cleaning sensitive electronic components, like computer motherboards or CPU contacts, 99% alcohol is the professional standard. Its extremely low water content means it evaporates almost instantly and carries virtually no risk of causing short circuits or corrosion. It effectively removes dust, grime, and old thermal paste without leaving any conductive residue. One of the most celebrated uses for isopropyl alcohol is stain removal, particularly on resilient materials. It is famously effective at removing permanent marker from hard, non-porous surfaces. If a marker finds its way onto a countertop, a plastic toy, or a laminate floor, a small amount of alcohol on a cotton ball will typically dissolve the ink, allowing it to be wiped away. It can also be a lifesaver for fabric, though a spot test in an inconspicuous area is always mandatory. For ink stains on sturdy upholstery or clothing, gently blotting the stain with a cloth soaked in alcohol can lift the ink out of the fibers. The key is to blot, not rub, to prevent the stain from spreading. This solvent power is especially valuable for microfiber upholstery. Microfiber is sensitive to water, which can leave behind rings and change the texture of the fabric. Because isopropyl alcohol evaporates so quickly, it can be used to clean microfiber couches and chairs without this risk. By spraying a light mist of alcohol onto a stained area and gently scrubbing with a soft-bristled brush, you can lift dirt and grime. Once dry, the stiffened area can be brushed again to restore its soft texture. This method effectively cleans the material without the water damage associated with traditional upholstery cleaners. Adhesive residue is another common frustration that isopropyl alcohol handles with ease. Price tags on new glassware, labels on plastic containers, or the sticky residue left behind by tape can be stubborn. Soaking the residue with alcohol for a few minutes will break down the adhesive, allowing it to be scraped or wiped off cleanly without damaging the surface underneath. This is far gentler and often more effective than abrasive scrubbing, which can scratch glass, plastic, or metal. In the bathroom, the fight against mold and mildew can be persistent. While not a substitute for a dedicated fungicide in cases of heavy infestation, isopropyl alcohol can be used as a preventative measure. Its disinfecting properties kill mold spores on contact, and its drying action helps to create an environment less hospitable to their growth. A regular wipe-down of grout lines, shower corners, and other damp areas with alcohol can help keep mildew at bay. It also works wonders on soap scum buildup on glass shower doors, dissolving the greasy film and leaving the glass sparkling. The applications continue into more niche areas. Isopropyl alcohol can be used to clean and sanitize makeup brushes, dissolving oily makeup residue and killing bacteria that can cause skin breakouts. It can be used to clean jewelry, removing lotions and oils to restore sparkle to gemstones and metals (though care should be taken with delicate or porous stones like opals or pearls). It can even be used to de-ice car windows and frozen locks in the winter; the alcohol lowers the freezing point of water, causing the ice to melt quickly.

Isopropyl Alcohol – 101 Simple and Safe Ways to Clean Your Home Read More »

7 Best Homemade Cleaning Solutions to Make Your Home Look Like New

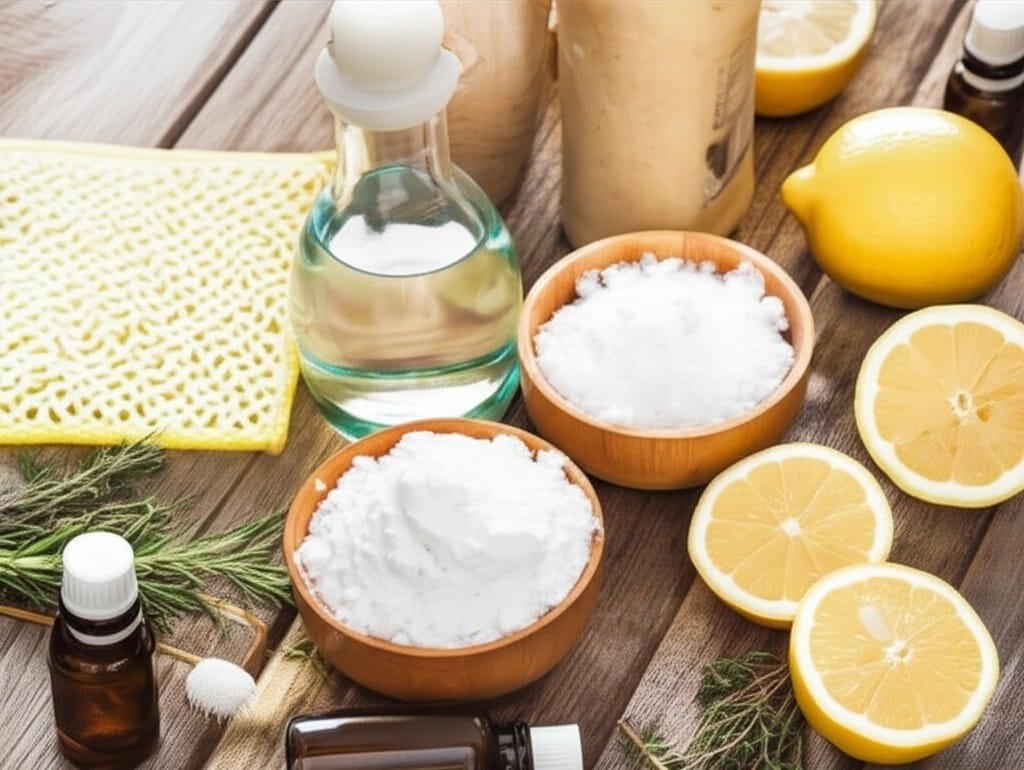
Creating your own homemade cleaning solutions is a direct approach to maintaining your home using simple, accessible ingredients. The effectiveness of these homemade cleaning solutions lies in understanding the properties of each component and how they interact with different surfaces and types of grime. There is no single magic formula; rather, a collection of recipes tailored for specific tasks. Many people turn to homemade cleaning solutions for their simplicity and cost-effectiveness. 1.White Vinegar The foundation of most homemade cleaning solutions rests on a few key ingredients. White vinegar, with its acetic acid content, is a powerful degreaser and disinfectant, capable of breaking down mineral deposits from hard water, soap scum, and everyday grime. Baking soda acts as a gentle, non-scratching abrasive, perfect for scrubbing surfaces without causing damage. It also serves as a natural deodorizer, absorbing and neutralizing unpleasant odors in refrigerators, drains, and carpets. The combination of these two ingredients creates a fizzing reaction that can help dislodge stubborn buildup, making them a dynamic duo in the world of DIY cleaning. The key to successful homemade cleaning solutions is understanding the ingredients. 2.Lemon For an all-purpose cleaner suitable for a majority of household surfaces, a simple mixture is highly effective. Combine one part white vinegar with one part water in a spray bottle. For a more pleasant scent and added antibacterial properties, add 10-15 drops of an essential oil like lemon, tea tree, or lavender. This specific homemade cleaning solution is excellent for wiping down laminate countertops, sealed granite, appliance exteriors, and painted walls. It cuts through fingerprints and light grease with ease. However, this vinegar-based homemade cleaning solution should not be used on natural stone surfaces like marble or unsealed granite, as the acid can etch and dull the finish. The versatility of this simple recipe demonstrates why so many rely on homemade cleaning solutions for daily upkeep. When it comes to glass and mirrors, achieving a streak-free shine is the primary goal. A superior homemade cleaning solution for this task involves mixing one part rubbing alcohol, one part white vinegar, and two parts water in a spray bottle. The rubbing alcohol is the key ingredient here; it evaporates quickly, preventing the water and vinegar from leaving behind streaks as they dry. Spray the solution directly onto a microfiber cloth rather than the glass surface to prevent drips. Wipe the surface clean, then use a second, dry microfiber cloth to buff it to a perfect shine. This is one of the most reliable homemade cleaning solutions for achieving crystal-clear windows and mirrors. 3.Baking Soda The kitchen presents a variety of cleaning challenges, from greasy stovetops to stained sinks. A powerful degreasing homemade cleaning solution can be made by creating a paste of baking soda and a small amount of warm water. Apply this paste directly to greasy splatters on the stovetop, backsplash, or inside the oven. Let it sit for 15-20 minutes to break down the grease, then scrub gently with a non-abrasive sponge and wipe clean with a damp cloth. For tougher, baked-on food, you can spray the baking soda paste with white vinegar to create that fizzing action, which helps lift the grime. This method showcases the targeted power of specific homemade cleaning solutions. To clean and deodorize a kitchen sink, sprinkle a generous amount of baking soda over the entire basin. Cut a lemon in half and use it to scrub the baking soda into the sink surface. The mild abrasiveness of the soda, combined with the citric acid and fresh scent of the lemon, will clean, polish, and deodorize the sink and garbage disposal simultaneously. Rinse thoroughly with hot water. This technique is a classic example of how natural, food-safe homemade cleaning solutions can be incredibly effective. 4.Natural Deodorant In the bathroom, soap scum and mildew are the primary adversaries. For tubs, showers, and tile, a highly effective homemade cleaning solution involves mixing one cup of baking soda with about a quarter-cup of liquid castile soap to form a thick, scrubby paste. Apply this paste to the surfaces and scrub with a brush or sponge. The baking soda provides the scrubbing power, while the castile soap helps lift and wash away the grime and soap scum. For tough mildew stains, a spray made of equal parts white vinegar and water can be used. Spray it on the affected areas, let it sit for at least 30 minutes, and then scrub away. It’s important to have good ventilation when working with these homemade cleaning solutions, particularly vinegar. Toilet bowls can be cleaned and sanitized without harsh chemicals. Pour about one cup of white vinegar into the toilet bowl and let it sit for at least an hour, or even overnight. The acid will work to dissolve mineral rings and stains. Afterward, sprinkle baking soda into the bowl, scrub with a toilet brush, and flush. The fizzing action provides an extra cleaning boost. This is a straightforward yet potent homemade cleaning solution for a task many people dislike. The power of homemade cleaning solutions extends to every corner of the house.   5.Dilute Floors require different approaches based on their material. For tile, vinyl, or linoleum floors, a simple and effective homemade cleaning solution consists of a gallon of warm water mixed with a half-cup of white vinegar and a few drops of castile soap. The vinegar disinfects and cuts through dirt, while the soap helps to lift it. Be careful not to use too much soap, as it can leave a sticky residue. For hardwood floors, the approach must be much more delicate. A heavily diluted homemade cleaning solution is necessary to prevent damage to the wood’s finish. Mix a gallon of warm water with just a quarter-cup of white vinegar. Wring the mop out until it is barely damp before applying it to the floor. Never let water pool on a hardwood surface. The development of specialized homemade cleaning solutions for different floor types is crucial for proper care. 6.Sprinkle Even carpets can

7 Best Homemade Cleaning Solutions to Make Your Home Look Like New Read More »

Hot Water and Cold Water

Hot Water vs Cold Water – Which is More Efficient at Cleaning?

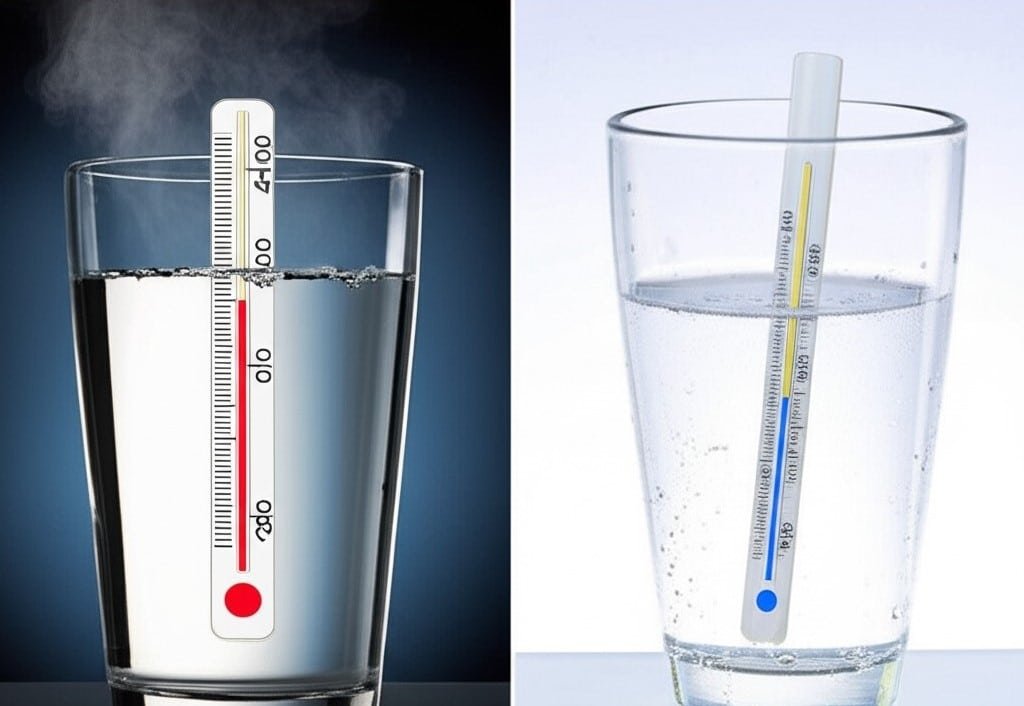
The temperature of hot or cold water used for cleaning is not a matter of preference; it is a fundamental variable that determines the effectiveness, safety and efficiency of the task at hand. The choice between hot and cold water can mean the difference between a stain being removed permanently and being set forever, or between a surface being sanitized and simply being wiped. Understanding the distinct properties and applications of each is essential for proper cleaning. 1.Greasy Hot water’s primary advantage lies in its thermal energy. Molecules in hot water move faster and with more kinetic energy than those in cold water. This increased energy translates directly into enhanced cleaning power in several ways. First, it lowers the surface tension of water, allowing it to spread more easily and penetrate soils and fabrics more effectively. Second, and most critically, heat excels at dealing with fats, oils, and grease. When heated, these substances become less viscous they soften, liquefy, and break down. This makes them significantly easier for detergents and mechanical action (scrubbing) to lift and wash away. Think of washing a greasy frying pan. Using cold water, the grease remains a stubborn, solid film. With hot water, the grease melts into a liquid that can be readily emulsified by soap and rinsed away. This principle applies to kitchen backsplashes coated in cooking oil, range hoods accumulating greasy vapor, and dining tables with oily residues from food. Beyond its effect on grease, heat acts as a powerful sanitizer. While boiling water (100°C or 212°F) is required for true sterilization, the hot water from a typical tap (usually between 49°C and 60°C or 120°F and 140°F) is sufficient to kill a significant number of common household bacteria, germs, and viruses. This makes hot water the superior choice for cleaning areas where hygiene is paramount. Kitchen countertops where raw meat has been prepared, cutting boards, sinks, and garbage disposals all benefit from the sanitizing action of hot water. In the bathroom, hot water is effective for cleaning toilets, sinks, and shower surfaces, helping to reduce the microbial load and control the spread of germs. It also works exceptionally well on soap scum, which is composed of mineral deposits and body oils. The heat helps to soften this tough buildup, making it much easier to scrub away. 2.Fabrics In laundry, hot water is a powerful tool for specific applications. It is most effective for washing heavily soiled items, such as work clothes, sports uniforms, and reusable cleaning cloths. It is the best choice for white cottons, bedding, and towels, as it not only removes dirt and body oils more effectively but also helps to sanitize the items, killing dust mites and allergens. The heat helps to brighten whites and can handle robust fabrics that are not at risk of shrinking or color loss. Furthermore, many powdered detergents are formulated with ingredients that activate and dissolve more completely in hot water, unleashing their full cleaning potential. Without sufficient heat, these detergents can clump and leave a residue on clothes. However, the power of hot water is also its primary source of risk and limitation. The same heat that melts grease can also damage a wide range of materials. It can cause synthetic fabrics like polyester and rayon to warp or melt, and natural fibers like wool and silk to shrink and lose their shape. Hot water is notorious for causing colors to bleed and fade, which is why it is generally unsuitable for washing dark or brightly colored garments. It can also damage certain surfaces around the home. Prolonged exposure to hot water can warp unsealed wood, damage the finish on some types of flooring, and cause certain plastics to become brittle or misshapen. A critical mistake in stain removal is applying hot water to protein-based stains. Stains from blood, egg, dairy, or mud contain proteins that coagulate when heated essentially, they cook. Applying hot water will permanently set these stains into the fabric fibers, making them nearly impossible to remove. 3.Cold Water Cold water, on the other hand, operates on a different set of principles and offers its own distinct advantages. Its primary benefit is its gentle nature. Lacking the intense thermal energy of hot water, it is significantly safer for a vast majority of materials and fabrics. This makes it the default and recommended choice for washing delicate items, such as lace, silk, and woolens, as it prevents shrinkage, stretching, and damage to the fibers. It is also the best option for washing dark and vibrant colors, as it minimizes the risk of dye bleeding and fading, preserving the life and look of the garments. The most crucial application for cold water is in stain removal for protein-based soils. Unlike hot water, which sets these stains, cold water helps to break them down and flush them out of the fabric without cooking the proteins. Any time you are dealing with a bloodstain on a shirt, a spilled glass of milk on the carpet, or an egg yolk on a tablecloth, the first and most important step is to use cold water. Soaking or rinsing the affected area in cold water before applying any cleaning agent is the correct protocol. Modern advancements in detergent technology have greatly expanded the utility of cold water for general cleaning and laundry. While older detergents required heat to be effective, most liquid detergents and specialized cold-water powders today are formulated with enzymes. These enzymes are biological catalysts designed to target and break down specific types of stains proteases for proteins, amylases for starches, and lipases for fats and they function optimally in cool or cold temperatures. Using a high-quality, enzyme-based detergent allows cold water to achieve cleaning results that are comparable to hot water for many types of lightly to moderately soiled loads, effectively removing everyday dirt and grime without the risks associated with heat. Beyond its material safety and stain-specific effectiveness, the use of cold water has significant economic and environmental benefits. Heating water is

Hot Water vs Cold Water – Which is More Efficient at Cleaning? Read More »

disorganized home

Why Hiring A Professional Organizer Is Important – 5 Key Factors

Thinking about hiring a professional organizer? Then we will help you. The sheer weight of accumulated belongings can become a quiet, pervasive burden in any home. It starts subtly, an item here, a stack there, until spaces that once felt open and functional begin to feel constricted, heavy. This isn’t just about untidiness; it’s about the way clutter can insidiously affect daily life, breeding a sense of low-grade stress, making simple tasks feel more complicated, and, critically, turning the act of cleaning into a monumental, often futile, effort. When surfaces are obscured and floors are pathways through obstacles, true cleanliness remains elusive. Dust settles not just on shelves, but within an environment of disorder, making it harder to breathe easy, both literally and figuratively. Many find that no matter how much they wipe, scrub, or vacuum, the underlying disarray prevents a feeling of genuine, lasting cleanliness. This is often the point where the realization dawns that something more fundamental than cleaning is required; a strategic approach to the items themselves. This is where the expertise of a professional organizer becomes invaluable. These individuals are more than just people who like to tidy; they are specialists in creating order from chaos, developing sustainable systems, and transforming living spaces into environments that support, rather than hinder, daily life. Their work is a methodical process, beginning with an in-depth consultation. This initial step involves understanding your specific challenges, how you use your space, what your frustrations are, and what your vision is for a more functional home. They assess the scope of the clutter, the types of items involved, and the underlying habits or circumstances that may have contributed to the situation. It’s a non-judgmental exploration designed to tailor a plan that aligns with your lifestyle and goals. 1.Do You Need All The Objects? The heart of the organizing process, and often the most daunting phase for homeowners, is decluttering. A professional organizer acts as a calm, objective guide through this potentially emotional journey. They help you confront your possessions, item by item or category by category, and make decisions about what stays and what goes. This isn’t about indiscriminately throwing things away; it’s about thoughtful evaluation. Questions like “Do I use this?”, “Do I love this?”, “Do I need this?” become central. For sentimental items, which often carry the heaviest emotional weight, organizers provide strategies for honoring memories without being overwhelmed by physical objects. They might suggest digitizing photos or letters, or creating a dedicated, contained memory box. For general household clutter, from overflowing kitchen cabinets to jumbled linen closets, they bring a systematic approach, helping you to see your belongings with fresh eyes and make choices that serve your current life, not a past or imagined future one. They also assist with the responsible disposal of unwanted items, coordinating donations to charities, identifying items for sale, or ensuring proper recycling and waste removal.   2.Sorting And Categorizing Once the excess is cleared, the next stage involves sorting and categorizing what remains. Items are grouped logically, all baking supplies together, all office stationery in one area, all cleaning products consolidated. This “like with like” principle is fundamental to creating intuitive systems. It might sound simple, but in a home where items have migrated and been stashed haphazardly over years, this step alone can be revealing, showing you exactly what you own and highlighting redundancies. With items sorted, the professional organizer then moves into space planning and system implementation. This is where their strategic thinking truly shines. They analyze the available space, closets, cabinets, shelves, drawers, even vertical space and design solutions to store items efficiently and accessibly. In a kitchen, this might involve reconfiguring pantry shelves, introducing clear, stackable containers for dry goods, implementing a first-in-first-out system to reduce food waste, using drawer dividers for utensils and gadgets, or finding clever solutions for awkward items like pot lids or baking sheets. The goal is to create a workflow that makes cooking and cleaning smoother. 3.Closets In closets, organizers might introduce uniform hangers to save space and create visual calm, demonstrate effective folding techniques that maximize drawer capacity, suggest shoe storage solutions that keep pairs together and visible, and implement systems for accessories like scarves, belts, and jewelry. They often help with seasonal wardrobe rotation, ensuring that out-of-season clothes are stored properly and easily retrieved when needed. For home offices, the focus is on creating an environment conducive to productivity. This can involve setting up effective paper management systems (e.g., action files, reference files, archives), advising on digital organization strategies, optimizing desk layout for ergonomic comfort, and ensuring essential supplies are within easy reach. Children’s playrooms and bedrooms benefit immensely from an organizer’s touch. Systems are designed to make it easier for children to find their toys and, crucially, to put them away. This often involves clear bins, picture labels for younger children, and strategies for toy rotation to prevent overwhelm and keep engagement high. Even daunting spaces like garages, basements, or attics are tackled methodically. Organizers can help install heavy-duty shelving, utilize clear, durable storage bins, and create designated zones for tools, sporting equipment, holiday decorations, and long-term storage, transforming these areas from dumping grounds into functional extensions of the home. 4.Labeling A critical component of any organizing system is labeling. Clear, consistent, and easy-to-read labels are the signposts that help everyone in the household understand where things belong. This simple step is vital for the long-term maintenance of order, preventing items from slowly migrating back into disorganized piles. The professional organizer doesn’t just set up these systems and leave; a key part of their service often involves coaching on how to maintain them. They understand that lasting organization requires a shift in habits. They might provide tips for quick daily or weekly resets, help establish routines for managing incoming mail or putting away groceries, and sometimes offer follow-up sessions to tweak systems as needs evolve or to provide a refresher. The benefits of engaging a professional organizer extend far beyond

Why Hiring A Professional Organizer Is Important – 5 Key Factors Read More »

3 Best Tips How To Keep Your Living Area Clean

3 Best Tips to Keep Your Living Area Clean The living room is the hardest-working space in a Toronto home: it hosts family evenings, visitors, snacks, and pets, so it collects clutter, dust, and grime faster than any other room. A systematic routine keeps it welcoming without eating your whole weekend. Start with the three pillars below, then layer in small daily habits. If you would rather spend your free time relaxing than dusting, Toronto Shine Cleaning’s regular cleaning service keeps living areas fresh on a schedule you choose. Tip 1: Declutter Surfaces Before You Clean Anything Cleaning around clutter wastes time and misses spots, so clear the room first. Work one surface at a time, starting with the coffee table, then side tables, media cabinets, and shelves. As you handle each item, sort it into one of four destinations: trash, donate, another room, or a proper home in the living area. The usual suspects are mail, old magazines, stray remotes, and things carried in from other rooms, so give frequent-use items such as remotes and current reading a designated spot, and clear the rest away. Decluttering also makes the space feel calmer, and it reveals the true scope of the cleaning ahead. Tip 2: Dust Top to Bottom, and Don’t Skip the Details Dust falls, so always work from the ceiling down: start with fan blades, light fixtures, and the tops of tall shelving, then move to lower shelves, picture frames, and furniture. Microfiber cloths trap dust instead of moving it around, and an extendable duster reaches high corners. On shelves full of objects, lift the items off, dust the shelf, dust the items, and replace them. Electronics such as TVs, consoles, and speakers attract dust too: turn them off and unplug them, wipe screens with a dry microfiber cloth, and clear vents with compressed air, never liquid. Treat the rest of the room by surface type: Item Cleaning method Watch out for Lampshades Vacuum fabric shades with a brush attachment; wipe plastic or paper shades dry Rough handling can crease paper shades Blinds and shutters Wipe each slat with a microfiber cloth or blind tool Slats snap back if wiped too hard Wood furniture Dust with the grain; polish sparingly, applied to the cloth Excess polish and silicone sprays attract dust Glass tabletops Glass cleaner with a lint-free cloth Streaks appear when cleaner dries before wiping Tip 3: Refresh Sofas and Floors With the Right Routine Upholstered furniture traps dust, crumbs, pet hair, and odors. Vacuum sofas and armchairs regularly with the upholstery attachment, remove the cushions to reach the base and seams, and use the crevice tool along edges and under cushions. Act fast on spills: blot with a clean cloth from the outside in, never rub, and test any cleaning product on a hidden spot first, following the manufacturer’s care label when you can. For musty fabric, sprinkle baking soda lightly, let it sit for 15-30 minutes, and vacuum it up. Finish with the floor. Hardwood and laminate need a sweep or vacuum on the hard-floor setting, then a barely damp flat microfiber mop with a pH-neutral cleaner; a wet mop is the fastest way to damage wood. Tile tolerates more water and standard tile cleaners, vinyl is happy with mild all-purpose cleaner, and any hard floor benefits from extra passes in corners and under furniture. Carpets ask for slow, overlapping vacuum passes in two directions to lift embedded grit that grinds down fibers, plus the crevice tool along baseboards; treat stains by blotting and testing first, and rent a carpet machine or hire professionals for a periodic deep refresh. Health Canada’s dust and dust mites page notes that regular vacuuming keeps dust levels down in carpets, furniture, and bedding, while the CDC’s home cleaning and disinfecting guidance explains that plain cleaning with soap or detergent removes most germs from everyday surfaces. Small Habits That Keep the Room Guest-Ready Tidy surfaces for five minutes each evening: remotes back, mail sorted, cushions fluffed Deal with spills the moment they happen, blotting rather than rubbing Vacuum high-traffic zones weekly and the whole room every one to two weeks Open windows briefly when weather allows to air the room out Rotate decorative pillows and fold throws so the room always looks arranged A clean living area is a place people want to linger, and maintaining it is mostly about rhythm: quick daily tidying, weekly vacuuming, and a monthly top-to-bottom dusting keep deep cleaning sessions short. Frequently Asked Questions What order should I clean a living room? Declutter first, then dust from the ceiling down, refresh upholstery, and clean the floor last so you pick up everything that fell during the earlier steps. How often should I vacuum my sofa? Once a week for sofas in regular use, or every few days with pets; remove cushions and use the crevice tool to keep debris from working into the frame. Is it safe to use baking soda on upholstery? A light sprinkle left for 15-30 minutes and vacuumed up neutralizes odors on most fabrics, but test an inconspicuous spot first and avoid it on delicate materials. How do I stop my living room from getting dusty so fast? Use microfiber cloths for dusting, vacuum with a HEPA-equipped machine, wash throws and cushion covers regularly, and keep windows closed on high-pollen days. Consistent routines protect your investment in furniture and flooring, and a fresh living area makes every evening more relaxing. For a deeper reset, our deep cleaning service tackles baseboards, vents, and upholstery in one visit. Call (647) 424-0355 or see our pricing page to book your clean.

3 Best Tips How To Keep Your Living Area Clean Read More »

different types of carpets

How to Clean Different Types of Carpets – 4 Best Ways

How to Clean Different Types of Carpets: 4 Best Ways Cleaning carpet effectively depends on the material. Different fibers react differently to water, vacuuming, and cleaning solutions, and the wrong method can shrink, fade, or mat the pile. These four approaches cover the carpet types found in most Toronto homes, from durable synthetics to delicate natural fibers like wool and sisal. 1. Synthetic Carpets: Nylon, Polyester, and Olefin Synthetic carpets are popular for durability and stain resistance. Nylon is very resilient, polyester is soft with natural stain and fade resistance, and olefin (polypropylene) resists moisture and mildew, which makes it common in basements. Vacuum high-traffic areas daily or every other day and the whole carpet at least twice a week, using a beater bar or rotating brush to lift embedded dirt before it grinds down the fibers. For spills, scoop up solids with a dull knife or spoon, then blot liquids immediately with a clean white cloth, working from the outside in. Never rub. A quarter teaspoon of mild, non-bleach dishwashing liquid in one cup of lukewarm water handles most spills, but test any solution in a hidden spot first. Rinse with a light mist of cool water, blot dry, and leave weighted paper towels over the area overnight. For deep cleaning, hot water extraction (steam cleaning) is the most effective method, and drying usually takes 6 to 12 hours with good ventilation. 2. Wool Carpets: Gentle Care for Natural Fibers Wool is luxurious, durable, and naturally soil resistant, but it is sensitive to harsh chemicals, high pH levels, and excessive moisture. Vacuum with strong suction, and set the beater bar to its highest pile setting or use a suction-only attachment, because aggressive beater bars make wool fuzz or pill. Use only WoolSafe or pH-neutral cleaners; alkaline detergents or bleach can yellow and weaken wool fibers. Blot spills rather than rubbing, dry quickly with fans or a dehumidifier, and avoid direct heat. For deep cleaning, low-moisture methods such as dry foam cleaning are safer than traditional steam cleaning. 3. Cotton and Viscose Rugs: Handle With Care Cotton is soft and absorbent but can shrink, brown, or bleed color, while viscose (rayon) is extremely delicate when wet, losing up to 50 percent of its strength. Vacuum these rugs with the beater bar disengaged or on the highest setting. Before any spot treatment, run a colorfastness test in a hidden area. Use a highly diluted pH-neutral cleaner applied with a barely damp cloth, blot gently, and dry immediately with fans or a cool hairdryer. Deep cleaning is best left to professionals who specialize in delicate fibers, and steam cleaning viscose can cause irreversible damage. 4. Plant Fiber Carpets: Sisal, Jute, Seagrass, and Coir Natural plant fiber carpets are highly absorbent and extremely sensitive to water. Moisture can cause browning, water stains, shrinkage, and mildew. Vacuum frequently with a suction-only cleaner, at least twice a week, from different directions to remove grit trapped in the weave. Blot spills immediately and thoroughly, scrape off solids, and avoid water when possible. For stains, use a dry-cleaning solvent or dry carpet cleaning powder, brushed in and vacuumed up. Never steam clean these fibers; professional dry or very low-moisture cleaning is the safe choice. A quick spill response that works on most carpets: Blot liquids immediately with a clean white cloth, outside in Scoop solids with a dull knife or spoon, never rub Test any cleaning solution in a hidden spot first Use minimal moisture, then dry the area quickly Weight down paper towels overnight for stubborn damp spots Carpet Type Vacuuming Spot Cleaning Deep Cleaning Synthetic (nylon, polyester, olefin) Beater bar, twice weekly Mild dish soap and water Hot water extraction Wool High pile setting or suction only WoolSafe, pH-neutral cleaner Low-moisture professional cleaning Cotton and viscose Suction only, gentle Diluted pH-neutral, minimal water Professional delicate-fiber cleaning Sisal, jute, seagrass, coir Suction only, twice weekly Dry-cleaning solvent or powder Dry methods only, no steam Keep Carpets Clean Between Deep Cleans Vacuuming and quick spill response extend the life of any carpet, but dirt and allergens build up inside the fibers over time. Dust mites and pet dander are common indoor allergens linked to asthma symptoms, according to the CDC, and Health Canada also lists them among indoor air contaminants that affect respiratory health. Whenever moisture is involved, dry the carpet fast, because the CDC’s mold guidance stresses that moisture control prevents mold growth. When to Call Professional Carpet Cleaners Toronto Shine Cleaning handles all carpet materials with the care and specialized techniques they deserve. Our home deep cleaning service includes thorough carpet vacuuming and spot treatment as part of a full clean, and our regular maid service keeps high-traffic areas fresh between deep cleans. Check our pricing page or see if we serve your neighbourhood in the GTA. Call (647) 424-0355 to book. Can I steam clean a wool carpet? Traditional steam cleaning can introduce too much moisture for wool. Use low-moisture methods such as dry foam cleaning or low-moisture hot water extraction with minimal water and rapid drying, ideally handled by professionals experienced with wool. How long does carpet take to dry after steam cleaning? With good ventilation, most synthetic carpets dry in 6 to 12 hours, sometimes longer. Open windows, run fans, and use a dehumidifier to speed up drying and prevent musty odors or mold. What should I do about grease, ink, or wine stains? Use a stain remover designed for your carpet type and follow the product instructions carefully. Test it in an inconspicuous spot first, apply it to a cloth rather than the carpet, and blot from the outside in. Can wet viscose rugs be saved? Act immediately: blot with a clean white cloth, never rub, dry with fans or a cool hairdryer, and groom the pile back into place while drying. For set stains, contact a professional who specializes in delicate natural fiber rugs.

How to Clean Different Types of Carpets – 4 Best Ways Read More »

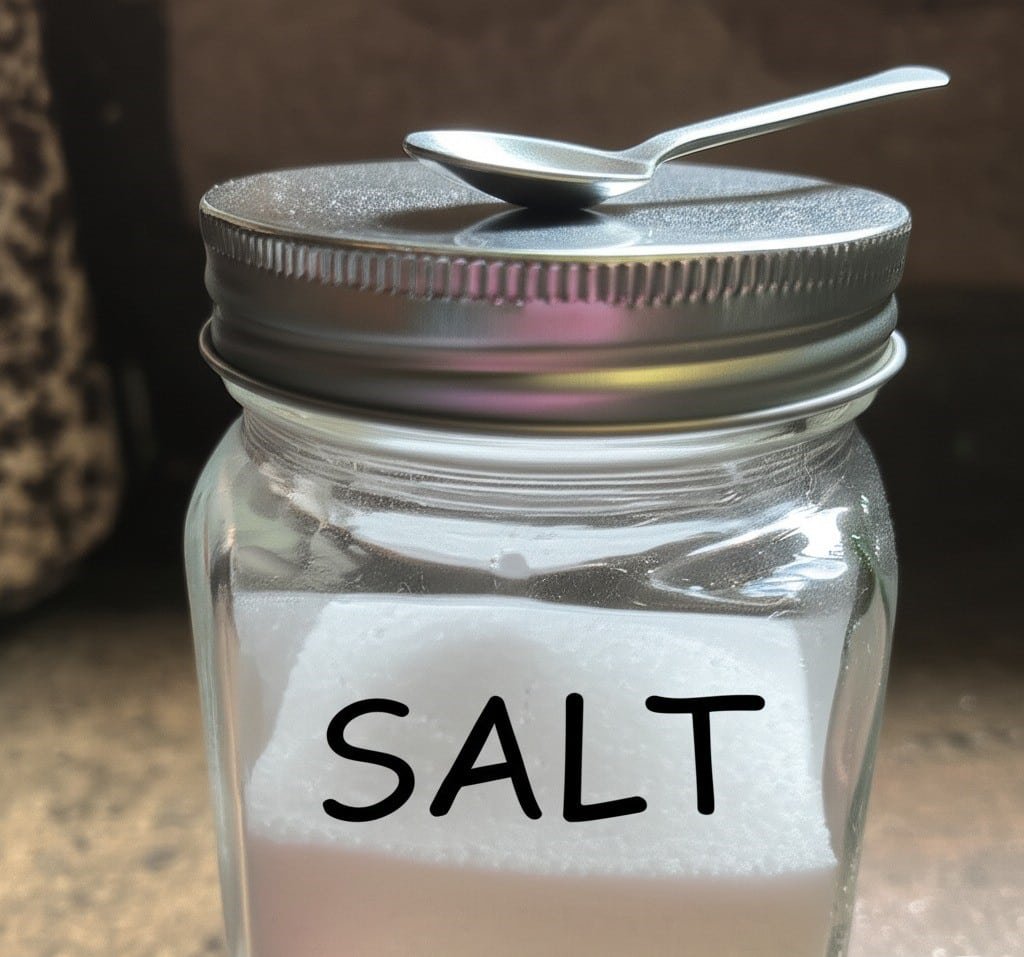
salt on recipient

6 Tips On The Benefits Of Salt For Cleaning – You Need To Know

The Benefits Of Salt For Cleaning Around Your Home Salt is far more than a seasoning. Its crystalline grit, its hunger for water, and its ability to react with stains and odors make it one of the cheapest, most versatile tools in the house, often with fewer harsh chemicals than commercial cleaners demand. The six uses below cover the full range, from burnt pans to brightened laundry, along with the cautions that keep this pantry staple from becoming an abrasive mistake. 1. Use Salt As a Gentle Abrasive Scrub Salt’s granules scour without the aggression of steel wool or chemical powders. Sprinkle crystals inside a stainless steel or enamel pot with caked-on food, add a little water to form a paste, and scrub with a damp sponge, brush, or even a halved potato; non-stick surfaces tolerate a gentle paste if you use care. Coarse kosher or sea salt handles tough jobs while fine table salt suits lighter ones. A halved lemon dipped in salt brightens stainless and porcelain sinks, coffee and tea rings lift off mugs with a damp, salty cloth, and grout lines and cooled oven spills clean up with a salty paste and an old toothbrush. Test hidden spots on polished surfaces first, because grit can mark them. 2. Let Salt Absorb Fresh Spills Salt is hygroscopic, meaning it pulls water molecules toward itself, which makes it a fast-response team for liquid accidents. Knock red wine onto the carpet and a thick bed of salt drawn over the damp spot will wick the staining liquid out of the fibers through osmosis; leave it until the crystals darken and seem saturated, often a few hours, then vacuum. Speed matters, since the salt works before the stain sets. Greasy splatters on floors, counters, or fabric respond the same way, and a ridge of salt can even dam a spreading spill on a hard surface. A bowl of salt in a closet draws out some dampness and musty air, though its capacity is small next to commercial desiccants such as silica gel. 3. Deodorize With an Open Box of Salt Because odor-causing bacteria and mold thrive in moisture, salt’s drying nature makes it a fair deodorizer. Try these quick applications: Refrigerator: an open bowl of salt gradually pulls food smells and excess damp from the air Drains: flush dry crystals followed by hot water, or add baking soda and vinegar for an effervescent scrub Wooden cutting boards: scrub with coarse salt moistened with lemon, then rinse in very hot water Shoes: sprinkle inside overnight to absorb moisture, shake out in the morning Carpets: salt lightly, rest an hour, then vacuum to lift musty odors 4. Lift Stubborn Stains With Salt Pastes Combined with an acid or a soak, salt handles stains that outlast fresh-spill rescue. Rust on fabric or porcelain fades under a paste of salt and lemon juice or white vinegar: the acid dissolves the iron oxide while the grains scour away the loosened particles. On colorfast fabric, sun exposure afterward can boost the lightening, with a careful test first. Coffee or tea marks on tablecloths and shirts respond to a soak in strong hot salt water before laundering, unnoticed grease spots lift after rubbing in a salt paste, and yellowed underarm and collar stains often improve after an hour or two under a hot-water salt paste. Fresh blood comes out in a cold-water salt soak. Always test colored or delicate material in a hidden area first. 5. Flush Drains the Non-Corrosive Way Drains collect grease, soap, hair, and food daily, and salt offers gentle maintenance. Tip a half cup of salt mixed with a half cup of baking soda down the dry drain, add a cup of warmed white vinegar for a vigorous fizz that breaks up grease, let it sit 15 to 30 minutes, then flush with several gallons of boiling water so the abrasive grains scour the pipe walls on their way down. A simpler weekly or biweekly habit is a strong brine, about a half cup dissolved in a gallon of very hot water, poured down to slow buildup and quiet odors. Be realistic: salt will not drive out a fully blocked drain the way a plumber’s snake or chemical opener can, but steady use prevents many clogs and spares your pipes the corrosion that harsh openers invite. Cleaning job Salt recipe Method Burnt pot residue Coarse salt plus a splash of water Scrub with sponge or halved potato, then rinse Fresh wine spill Thick layer of table salt Wait until crystals darken, then vacuum Rust on fabric Salt and lemon juice paste Apply, rest, sun-boost if colorfast, rub and rinse Slow, smelly drain Half cup salt, half cup baking soda, cup of warmed vinegar Fizz, rest 15-30 minutes, flush with boiling water Dingy colors in laundry Half cup salt in the wash Add to the cycle to set dyes and brighten 6. Boost Your Laundry With Table Salt The laundry room benefits too. About a half cup of salt in the wash helps set dye in new cottons and linens, so bright colors bleed less and look fresher, best during a garment’s first few washes. Salt paste pre-treats grease spots, cold brine soaks out fresh blood, and mildew marks on shower curtains or cotton canvas lift after rubbing with a salt-and-lemon paste, drying in the sun, then laundering. Because brine softens water slightly, detergent lathers and rinses better where water is moderately hard, though salt cannot replace a softener unit in truly hard water. Skip direct salt scrubs on silk and fine synthetics, since the crystals can damage delicate weaves. Frequently Asked Questions About Using Salt to Clean What kind of salt cleans best? Coarse kosher or sea salt gives the most scrubbing power for pots, grout, and oven spills, while inexpensive table salt works for pastes, soaks, drains, and laundry because it dissolves quickly. Can salt scratch my surfaces? It can mark highly polished or soft finishes. Test an inconspicuous corner before scrubbing

6 Tips On The Benefits Of Salt For Cleaning – You Need To Know Read More »