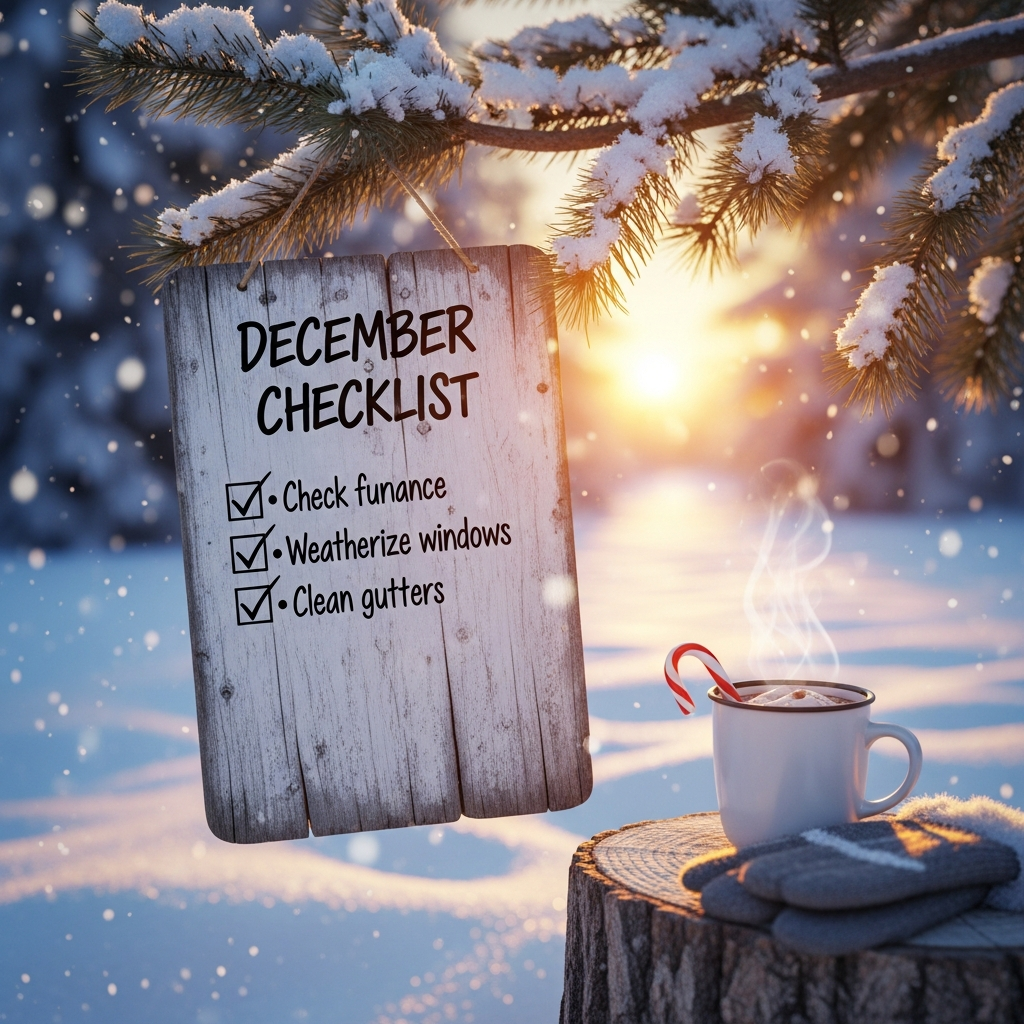
Cleaning Checklist

dry leather

5 Tips for Caring for Dry Leather That You Need to Know to Make It Last Longer

Dry Leather requires specific care to maintain its appearance and longevity. As a natural material derived from animal hides, its unique structure is sensitive to conventional cleaning methods. Different types of leather, such as full-grain, top-grain, suede, or nubuck, possess distinct characteristics that influence how they react to cleaning agents and processes. The porous nature of leather means it can readily absorb liquids, oils, and dirt, which can become embedded within its fibers. If not cleaned correctly, leather can suffer irreversible damage, becoming dry leather that is prone to cracking, discoloration, stiffness, or loss of its natural texture. Understanding these inherent properties is fundamental to appreciating why specialized cleaning approaches are necessary for its upkeep and to avoid the problems associated with dry leather. 1.Why does dry leather require care? The primary reason leather often necessitates dry cleaning is its adverse reaction to water and common detergents. Water can strip leather of its essential natural oils. These oils are crucial for keeping the material supple, flexible, and resilient. When these oils are depleted, the material becomes dry leather, brittle, and prone to cracking. Furthermore, water can cause unsightly stains, spotting, and even color bleeding, particularly on leathers that are unfinished or have minimal protective coatings, often leading to a dry leather appearance. Many detergents used in standard laundry practices are too alkaline or contain harsh chemicals that can damage the leather’s finish, strip its dyes, and further deplete its natural emollients, accelerating the transformation into dry leather. The physical agitation from a washing machine can also be detrimental, potentially distorting the shape of leather garments, causing stretching, or damaging seams and structural components. Dry cleaning, in contrast, utilizes solvents that clean effectively without the damaging effects of excessive moisture, offering a gentler yet thorough cleaning solution tailored to leather’s sensitivities and preventing the onset of dry leather. The professional leather dry cleaning process is a multi-stage operation that requires expertise and specialized equipment. It begins with a thorough inspection. A trained cleaner examines the leather item meticulously, identifying the type of leather, its construction, any pre-existing damage including signs of dry leather, the nature of visible stains, and the presence of any embellishments like buttons, zippers, or decorative elements that might require special attention or removal. A crucial part of this initial assessment is a colorfastness test, typically performed on an inconspicuous area of the item to ensure the cleaning process will not cause adverse color changes. Specific stains, such as those from ink, oil, food, or beverages, are noted and may undergo pre-treatment. This involves the careful application of specialized spotting agents formulated for use on leather. The choice of agent and application technique is critical to lift the stain without harming the leather’s surface or color, or worsening any existing conditions like dry leather. 2.Hydrocarbon solvents Following inspection and any necessary pre-spotting, the item moves to the cleaning phase. Leather dry cleaning utilizes specific solvents designed to dissolve and remove grease, oils, and general soiling. While traditional dry cleaning solvents like perchloroethylene (perc) have been used, the industry is increasingly shifting towards newer, more leather-friendly alternatives. Hydrocarbon solvents, for example, are generally considered gentler and pose less risk of causing color loss, shrinkage, or damage to the leather’s delicate finish, which is especially important for items already showing signs of becoming dry leather. These solvents clean effectively without relying on water, thus bypassing the issues associated with aqueous cleaning methods. The actual cleaning takes place in specialized dry cleaning machines. These machines are distinct from domestic washing machines and are designed to handle delicate materials. The cleaning cycles are carefully controlled in terms of solvent temperature, mechanical action (tumbling), and duration. Settings are often optimized specifically for leather to minimize stress on the material. To prevent issues like dye transfer or abrasion from other garments, leather items are typically cleaned separately or with other similar leather pieces. The machine gently agitates the garments in the solvent, which lifts the dirt and oils. After the cleaning cycle, the solvent is drained, and the items go through an extraction phase to remove most of the residual solvent, followed by a carefully controlled drying process designed to avoid making the material dry leather. 3.Steam clean Post-cleaning care is perhaps the most critical stage in professional leather dry cleaning and significantly differentiates it from standard fabric dry cleaning. The cleaning process, even with gentle solvents, can remove some of the leather’s natural oils. To counteract this, and to prevent the material from becoming dry leather, a re-oiling or “fatliquoring” step is essential. Specialized oils, conditioners, and fatliquors are applied to the leather. These products penetrate the fibers, replenishing lost moisture and emollients, thereby restoring the leather’s suppleness, flexibility, and characteristic feel. Without this step, the material becomes dry leather, which is stiff and more susceptible to cracking over time. After re-oiling, further finishing processes may be undertaken. This can include measures to restore or even out color if any minor fading has occurred, though significant color restoration is a more specialized service. Protective finishes might be reapplied to enhance resistance to future soiling and moisture, further safeguarding against conditions that lead to dry leather. The item is then professionally pressed or steamed to restore its original shape, remove wrinkles, and improve its overall appearance. The techniques used for pressing leather are different from those for fabrics, often involving lower temperatures and specialized equipment to avoid damaging the surface, especially if it’s delicate or prone to becoming dry leather. For certain types of smooth leather, a glazing process might be employed to restore a high-gloss finish. The entire process ensures the leather is not only clean but also properly conditioned and finished to look its best and to prevent it from turning into dry leather. 4.Professional leather dry A wide variety of leather items are suitable for professional dry cleaning. Common examples include leather jackets, coats, and vests, which are frequently exposed to the elements and daily wear that can lead to dry leather if not maintained. Leather trousers, skirts, and dresses also benefit from this

5 Tips for Caring for Dry Leather That You Need to Know to Make It Last Longer Read More »

5 Best Tips To Keep Your Pet’s Area Clean And Odor-Free

Cleaning your pet’s area brings joy, companionship and a unique atmosphere to your life.. Of course, your pet also brings its own set of cleaning concerns—from loose fur and paw prints to the specific needs of their dining and bathroom areas. The goal isn’t just to deal with the mess, but to create a healthy, comfortable, and enjoyable environment for all family members, whether they have two or four legs. 1. Fundamental routines The foundation of a consistently clean, pet-friendly home lies in establishing clear routines and carefully designated zones for your pet’s main activities. Pets, like humans, often thrive on predictability, and a regular cleaning routine not only tackles messes as they occur, but also prevents them from escalating into larger, more daunting tasks. This routine naturally encompasses daily actions such as a quick sweep or vacuum of high-traffic pet areas, wiping down the perimeters of food bowls, and, for cat owners, the crucial daily cleaning of the litter box. In addition to these immediate daily needs, a weekly routine should include more thorough cleanings such as washing your pet’s bedding, vacuuming more deeply under furniture where hair tends to accumulate, and thoroughly cleaning food and water bowls. Periodically, perhaps monthly, even more intensive tasks such as deep cleaning carpets or washing pet toys should be incorporated. Concurrent with establishing these routines is the importance of thoughtfully designating specific areas within your home for your pet’s core activities. This means creating an intentional space for feeding, a comfortable and secure spot for sleeping, and a consistent location for elimination. For cats, this typically involves strategically placing their litter box in a quiet, accessible, yet somewhat private location. For dogs, especially puppies or those who use indoor potty pads, having a clearly defined potty spot is essential. The advantage of such designated zones is multifaceted. It helps to contain the inevitable messes associated with these activities – stray kibble, water splashes, litter scatter, or an occasional accident – to more manageable and predictable areas. This targeted approach makes cleaning more efficient and less overwhelming. Furthermore, the selection of materials within these zones can significantly impact ease of cleaning. Opting for pet bedding with removable, machine-washable covers, choosing food and water bowls made from non-porous, easily sanitized materials like stainless steel or ceramic, and selecting litter boxes that are simple to scrub and disinfect all contribute to a more hygienic environment with less intensive cleaning effort. This initial stage of thoughtful planning and routine-building lays a crucial foundation upon which all other cleaning efforts will more effectively rest.     2. Hair, Dandruff and Paw Marks One of the most ubiquitous challenges faced by pet owners is the relentless presence of pet hair and dander, along with the inevitable paw prints that chart their adventures through our homes. Effectively managing these elements is a continuous process, but with the right approach, it becomes a manageable part of maintaining a clean environment. Regular and thorough vacuuming stands as the primary defense. A vacuum cleaner with strong suction power, ideally one designed with pet owners in mind, can make a significant difference. Features such as effective beater brushes for carpets, specialized upholstery attachments, and a good quality filtration system, like a HEPA filter, can help capture not only visible hair but also finer dander particles that can contribute to allergies. Your vacuuming efforts should encompass all surfaces where hair accumulates – carpets and rugs will require slow, overlapping passes, while hard floors benefit from an attachment that prevents hair from scattering. Don’t overlook upholstery, as sofas and armchairs are often favorite lounging spots for pets. Beyond vacuuming, other methods can be employed to tackle pet hair on fabrics and surfaces. Simple tools like lint rollers are invaluable for quick touch-ups on clothing and furniture. A slightly dampened rubber glove, when wiped across upholstery, can create friction that miraculously gathers embedded fur into clumps for easy removal. For hard surfaces where dust and hair settle, microfiber cloths are excellent at trapping particles rather than just pushing them around. The battle against dander also extends to the air itself. Using an air purifier, particularly one equipped with a HEPA filter, in rooms where your pet spends a lot of time can help to significantly reduce airborne allergens and fine hairs, contributing to a fresher feeling home. And while our focus is on cleaning the environment, it’s worth acknowledging that regular grooming of your pet – consistent brushing to remove loose fur before it sheds onto your floors and furniture – is a powerful preventative measure that complements your cleaning efforts. Similarly, keeping a mat and a towel near entry points to wipe paws after outdoor excursions can drastically reduce the amount of dirt and mud tracked into the house, simplifying your floor cleaning tasks. 3. Food and Water The area where your pet eats and drinks is a critical zone for maintaining hygiene, not only for the cleanliness of your home but, more importantly, for the health and well-being of your pet. Food and water bowls can quickly become breeding grounds for bacteria if not cleaned regularly and properly. It is a good practice to wash food and water bowls daily. Warm, soapy water is generally sufficient for this task, ensuring all food residue and biofilm are scrubbed away. Stainless steel, ceramic, or glass bowls are often recommended as they are non-porous and easier to sanitize thoroughly compared to some plastic alternatives, which can develop scratches that harbor bacteria. After washing, rinse them well to remove any soap residue. Protecting the floor around the feeding station is also a wise measure. Pets can be enthusiastic, and sometimes messy, eaters and drinkers. Placing an easy-to-clean placemat or a shallow tray beneath their bowls can catch stray kibble and water splashes, preventing them from soiling your floor or carpet. These mats should also be wiped down or washed regularly. Any spills that occur around the feeding area should be addressed promptly. Dried-on food can be difficult

5 Best Tips To Keep Your Pet’s Area Clean And Odor-Free Read More »

5 Expert Tips for Cleaning With Hot Water At Home

The Power of Hot Water I’m highlighting one of the most fundamental yet profoundly effective allies in our quest for cleanliness: plain, unadulterated hot water. In our modern world, filled with a variety of specialized cleaning solutions and devices, it’s easy to overlook the sheer effectiveness of this readily available resource. Yet for generations, hot water has been the foundation of effective cleaning, and its power remains undiminished. Today, we’re going to delve into the remarkable benefits of incorporating hot water into our cleaning routines, exploring how its thermal energy works to break down dirt, improve hygiene, and ultimately make the task of maintaining a sparkling home significantly easier and more satisfying. The cleaning magic of hot water isn’t just an old wives’ tale; it’s rooted in basic principles of physics and chemistry. When water is heated, its molecules gain energy and move much more quickly. This increased molecular activity translates directly into increased cleaning power. These energized water molecules are better able to break the bonds that hold dirt, grease, and other residues to surfaces. They can penetrate dirt more effectively, loosening its grip and making it much easier to wipe or rinse away. Additionally, hot water often works to reduce the surface tension of the water itself, allowing it to spread more evenly and wet surfaces more thoroughly, which in turn helps cleaning agents, if used, work more effectively. Understanding this fundamental action helps us understand why hot water is not just a preference, but often a necessity for achieving a deep, satisfying clean. Let’s consider its application in the heart of the home, the kitchen, where some of the most challenging cleaning tasks reside. Think of a sink full of greasy dishes after a hearty meal. Attempting to tackle this with cold water can be a frustrating, smeary affair. Introduce hot water, however, and the scenario changes dramatically. The elevated temperature begins to liquefy fats and oils almost immediately, allowing them to be more easily emulsified by dish soap and rinsed away cleanly. The same principle applies to greasy stovetops, oven doors splattered with cooking residues, or countertops where oily spills have occurred. Hot water, often combined with a suitable degreasing agent, dramatically reduces the amount of physical effort – the scrubbing and scraping – required to lift these stubborn substances, leaving behind surfaces that are not only visibly clean but also feel less tacky to the touch. Even the kitchen sink itself, prone to a build-up of food particles and greasy films, benefits immensely from a regular wash and rinse with hot water, helping to keep drains clearer and the basin more hygienic. 2. Moving to the bathroom, another area where hygiene is paramount, hot water continues to prove its worth. Soap scum, that resilient film left behind by soap and hard water minerals, can be particularly stubborn on shower doors, tiles, and bathtubs. Hot water helps to soften and dissolve these deposits, making them more susceptible to removal by bathroom cleaners or even a simple scrubbing with a non-abrasive pad. When cleaning toilets, while specialized cleaners are often used in the bowl, wiping down the exterior surfaces with hot water and a disinfectant can contribute to a more thorough sanitization. For bathroom floors, mopping with hot water not only helps to lift dirt and footprints but also contributes to a faster drying time, reducing the chance of slips and leaving the room feeling fresher overall. The steam generated by hot water during a shower can even play a small role in loosening grime on surrounding surfaces, making them a bit easier to wipe down afterwards.   3. The benefits of hot water extend significantly to our laundry routines. Most laundry detergents are formulated to perform optimally in warm or hot water. The heat helps the detergent to dissolve completely and to activate its cleaning enzymes and surfactants more effectively, allowing them to penetrate fabric fibers more deeply and release trapped dirt, oils, and stains. For heavily soiled items, or for ensuring the effective sanitization of items like bedding or towels, particularly during times of illness, a hot water wash can be invaluable. It aids in killing germs and dust mites, contributing to a healthier home environment. While cold water washing has its place for delicate fabrics or energy saving, the sheer cleaning power for general laundry and stubborn stains is often best unlocked with the assistance of appropriately heated water. 4. Beyond these specific areas, the general application of hot water for cleaning various surfaces around the home brings tangible advantages. When mopping hard floors, whether tile, vinyl, or sealed wood, hot water helps to cut through accumulated grime more effectively than cold. It can make the task quicker and leave floors looking brighter and feeling cleaner underfoot. For wiping down painted walls, baseboards, or other washable surfaces, dampening a cloth with hot water can often be sufficient to remove light marks and dust, sometimes reducing the need for chemical cleaners altogether. The warmth can help to soften adhered dirt, making it easier to lift without excessive scrubbing that could potentially damage the surface. 5. One of the overarching benefits of utilizing hot water in our cleaning endeavors is the reduction in physical effort often required. Because hot water is inherently more effective at loosening and dissolving dirt and grease, we often find ourselves scrubbing less vigorously and for shorter periods. This not only makes the cleaning process less physically demanding but can also help to preserve the surfaces we are cleaning by minimizing wear and tear from excessive abrasion. Furthermore, by enhancing the action of soaps and detergents, hot water can sometimes allow us to use less product to achieve the same level of cleanliness, which can be both economically and environmentally beneficial. The faster evaporation rate of hot water also means surfaces tend to dry more quickly, reducing streaks and water spots, and getting the cleaned area back into use sooner. In essence, the consistent and thoughtful use of hot water elevates

5 Expert Tips for Cleaning With Hot Water At Home Read More »

drains

7 Tricks To Keep Your Drains Clean And Odor-Free

When your drains are working properly, you barely notice them. However, when problems arise, from slow drains to unpleasant odors or even complete blockages, the disruption can be significant. This guide will walk you through seven essential steps to understanding and maintaining your drains, helping you prevent common problems and ensuring that your home’s plumbing system runs smoothly, keeping your home clean and efficient 1. Your Home’s Drains Before we dive into maintenance, it’s important to understand the vital role that drains play. Every sink, tub, shower, toilet, and washing machine in your home is connected to a drainage system designed to safely and efficiently channel wastewater to the main sewer or septic system. Kitchen drains primarily carry dishwashing water, often mixed with small food particles and grease. Bathroom drains contain residue from soap, hair, toothpaste, and other personal care products. Laundry drains carry water laden with detergent and lint. Each of these pathways is crucial, and a problem in one can sometimes indicate a larger problem. Recognizing that these systems are constantly in operation helps underscore the importance of consistent care, preventing minor annoyances from turning into larger, inconvenient, and potentially costly plumbing emergencies. A well-functioning drainage system is the foundation of a healthy and pleasant home environment.   2. Protecting What Goes Down The most effective approach to drain maintenance is proactive prevention, starting with being aware of what we allow into the system. Many common drain clogs are entirely preventable if we exercise caution. In the kitchen, cooking fats, oils, and grease are the leading culprits. While liquid when hot, these substances solidify as they cool inside the pipes, creating sticky, persistent clogs that trap other debris. Coffee grounds, tea leaves, and fibrous food scraps like vegetable peels are also significant contributors to clogs. In the bathroom, hair is a major culprit, tangling together to form dense webs that trap soap scum and other particles. So-called “toilet-flush” wet wipes, despite their name, are notorious for causing clogs because they don’t break down the way toilet paper does. Dental floss, cotton swabs, and feminine hygiene products should also never be flushed down the toilet. By consciously keeping these problematic items out of your drains, you’re taking the most significant step toward keeping your pipes clean and trouble-free. 3. Daily Habits Incorporating a few simple habits into your daily and weekly routines can make a substantial difference in the long-term health of your drain. One of the easiest, yet most effective, measures is to consistently use drain strainers or screens in all sink and shower drains. These inexpensive devices catch hair, food particles, and other debris before they enter the pipes. The key is to empty these strainers regularly, ideally after each shower and several times a day in a busy kitchen sink. Another beneficial habit, especially for the kitchen sink, is to run hot water for a minute or two after washing dishes, especially if greasy items are involved. This helps remove any remaining grease particles while they are still slightly liquefied. For all drains, a weekly flush with very hot water (not boiling water, which can damage some PVC pipes) can help dissolve early buildup of soap scum or grease, keeping your drains cleaner. These small, consistent actions work like preventative medicine for your plumbing. 4. Impending Drain Problems Being aware of the subtle signs your drains may be sending can help you address potential problems before they turn into serious clogs. One of the earliest and most common indicators is a drain that begins to empty more slowly than usual. Water may remain in the sink or shower for a long time after use. Another telltale sign is the gurgling sounds that emanate from the drains as the water passes through. These noises often suggest that air is being trapped and displaced by a partial obstruction within the pipe. Unpleasant odors rising from a drain can also indicate the buildup of decaying food particles, grease, or other organic matter trapped in the pipes or trap. In more advanced cases, you may notice water backing up into other fixtures—for example, water appearing in the bathtub when you flush the toilet could signal a more significant clog in the future. Paying attention to these early signs allows for timely intervention. 5. Gentle DIY Approaches to Fixing Minor Drain Problems When faced with a slightly slow drain, there are a few gentle, homemade methods that can often provide relief without resorting to harsh chemicals. One common and often effective technique involves using a combination of baking soda and vinegar. First, pour about half a cup of baking soda into the affected drain, followed by an equal amount of white vinegar. The mixture will fizz, which can help unclog minor buildup. After about 30 minutes to an hour, flush the drain thoroughly with plenty of hot water. For physical blockages closer to the drain opening, a plunger can be effective. Make sure there is enough water in the sink or tub to cover the top of the plunger, create a good seal over the drain, and use firm, steady pushes and pulls. For P-traps in your sink that are easily accessible, and if you feel comfortable doing so, placing a bucket underneath and carefully unscrewing the trap may allow you to manually remove any accumulated debris. It is generally advisable to avoid commercial drain-unclogging chemicals, as they can be corrosive to pipes, harmful to the environment, and pose safety risks if not handled properly or if they fail to clear the blockage. 6. Regular Flushing  In addition to your daily habits and troubleshooting of minor issues, incorporating a regular, more dedicated maintenance flush into your routine can go a long way toward keeping your drains in good working order. This isn’t about fixing an existing clog, but rather about proactively cleaning your pipes to prevent buildup from taking hold. Once a month, or at least once a quarter, consider performing a more thorough flush. This could involve filling each

7 Tricks To Keep Your Drains Clean And Odor-Free Read More »

oil diffusers and flowers

6 Expert Tips For Getting Rid Of Odors In Your Home

How to prevent odors and have a home that smells good, either conjuring comfort and cleanliness or, if neglected, a sense of discomfort. Creating a space that always welcomes you with a breath of fresh air is less about masking odors and more about a deliberate, multifaceted approach. Today, we’ll walk you through five essential steps to transform your home into a fragrant sanctuary, where freshness is a constant and comforting presence. 1. Eliminating Sources of Odors Our first and most crucial step on the path to a sweet-smelling home lies in the uncompromising elimination of existing and potential odor sources through thorough, regular cleaning. Before any thought is given to introducing pleasant fragrances, the priority must be to neutralize the very things that cause unwelcome smells. This involves a commitment to consistent cleanliness across all areas. Kitchen waste bins, especially those holding food scraps, require daily emptying and periodic washing to prevent lingering odors. Similarly, bathroom bins and other refuse containers must be managed with diligence. Spills in the kitchen, whether on countertops, the stovetop, or the floor, need immediate attention, as decomposing food particles are a primary odor culprit. Sink drains in both the kitchen and bathroom should be regularly flushed and cleaned to prevent build-up. In the bathroom, combating moisture through ventilation and ensuring towels dry completely is key to preventing musty smells. Essentially, this initial stage is about removing the “bad” before we even consider adding the “good,” creating a truly clean slate. 2. Consistent Ventilation With a foundation of cleanliness established, our second vital step involves actively inviting fresh air into our homes. Consistent and effective ventilation is a remarkably simple yet profoundly effective tool in maintaining a pleasant indoor atmosphere. The daily practice of opening windows, even for a short duration when weather conditions permit, allows for the crucial exchange of stale, odor-laden indoor air with clean, fresh outdoor air. This natural circulation works wonders to dissipate lingering cooking smells, general household stuffiness, and a myriad of airborne particles that can otherwise contribute to a less-than-fresh environment. To maximize this effect, aim for cross-ventilation whenever possible by opening windows on opposite sides of a room or the home, creating a gentle but powerful current that sweeps away impurities and revitalizes the air within your living spaces. This regular “breathing” of your home is fundamental to its olfactory well-being. 3. Fabric Odors Our third significant step focuses on managing items within our homes that are particularly prone to trapping and holding onto odors: fabrics. Carpets, upholstered furniture, curtains, bedding, and clothing can all act like sponges, absorbing smells from cooking, pets, smoke, or general daily life. Regular vacuuming of carpets and upholstery is essential, not just for removing visible dirt but also for lifting odor-carrying particles. Bed linens should be laundered frequently, and dirty laundry, especially damp items or sportswear, should not be allowed to accumulate, as it can quickly become a source of unpleasant smells. Ensure all laundered items are completely dry before being stored to prevent mildew. For deeper-seated odors in carpets or large upholstered pieces, periodic professional steam cleaning or the use of appropriate fabric refreshers (preferably natural or unscented initially) can make a substantial difference, effectively neutralizing trapped smells and restoring freshness to these often-overlooked odor reservoirs. 4. Pet Areas The fourth step requires targeted attention to specific zones within the home that are inherently more susceptible to developing persistent odors. For households with pets, this means diligent management of pet-related smells. Regular grooming of animals, frequent cleaning of their bedding, and meticulous daily scooping and regular changing of litter boxes are non-negotiable. Any pet accidents must be addressed immediately with enzymatic cleaners designed to break down odor-causing proteins. High-moisture areas, primarily bathrooms but also potentially poorly ventilated laundry rooms or basements, need consistent strategies to combat mustiness. This includes ensuring good airflow, promptly repairing any leaks, and using dehumidifiers if necessary. The refrigerator also falls into this category; regular clearing out of old food and wiping down interior surfaces prevents it from becoming an odor source. By proactively managing these specific “hotspots,” we prevent localized odors from permeating the entire home. 5. Natural Fragrances Having diligently addressed cleanliness, ventilation, fabric care, and specific odor zones, our fifth and final step involves the artful and thoughtful introduction of subtle, natural fragrances to enhance the home’s ambiance. The aim here is not to overpower the senses with artificial chemicals but to add a delicate layer of pleasing scent that complements the underlying freshness. Consider placing fresh flowers or a bowl of citrus fruits in living areas for a light, natural aroma. Simmering a pot of water on the stove with ingredients like cinnamon sticks, cloves, and citrus peels can gently perfume the air, especially during cooler months. Essential oil diffusers, used responsibly with high-quality oils like lavender, citrus, or eucalyptus, can customize the scent profile of a room. Good quality candles made from natural waxes and scented with essential oils can also contribute, provided they are used safely and with adequate ventilation. The key is subtlety and a preference for natural sources, ensuring these added scents enhance, rather than compete with, the genuine cleanliness you’ve worked to achieve. 6. Maintenance Habits The sixth pillar emphasizes the critical importance of establishing and sticking to regular cleaning routines and habits. While the initial deep cleaning (Pillar One) is essential for a reset, it’s consistent and ongoing maintenance that truly keeps your home smelling great. This involves integrating small cleaning tasks into your daily and weekly routines. Daily habits might include wiping down kitchen counters after every meal, quickly sweeping or vacuuming high-traffic kitchen floors, making sure the sink is free of dirty dishes before bed, and quickly cleaning the bathroom sink. Weekly habits might include vacuuming and dusting all rooms more thoroughly, changing bed linens, cleaning bathroom fixtures more thoroughly, and mopping floors. By breaking down larger cleaning tasks into regular, manageable activities, you can prevent the buildup of dirt, grime, and odor-causing

6 Expert Tips For Getting Rid Of Odors In Your Home Read More »

micro fiber cloth colorful

Best 5 Tips You Need To Know About Microfiber Cloths

Far from being just another option in the cleaning arsenal, microfiber cloth offers a unique combination of effectiveness, versatility, and durability that elevates it to the status of indispensable for those seeking superior results with less effort and, often, fewer chemicals. We’ll explore its remarkable capabilities in five key steps of understanding and application. 1. The Science Behind the Sparkle To truly appreciate why microfiber cloths are such game-changers in the world of cleaning, we must first delve into the unique structure that gives them their power. The term “microfiber” itself refers to the incredibly fine synthetic fibers – typically a blend of polyester and polyamide (nylon) – that are woven together to create the fabric. These individual fibers are astonishingly thin, often many times finer than a single strand of human hair. What makes them even more effective is that during the manufacturing process, these fibers are frequently split or “fragmented.” This splitting process vastly increases the surface area of each fiber and creates millions of microscopic nooks, crannies, and tiny “claws” along each strand. It is this intricate, engineered architecture at a microscopic level that bestows microfiber cloths with their remarkable ability to attract, lift, and trap dirt, dust, and grime. Unlike traditional cotton cloths which might simply push particles around or require significant liquid to suspend dirt, the microfibers actively grab onto debris. Furthermore, the polyester component often carries a natural positive electrical charge, which acts like a magnet for negatively charged dust particles, pulling them from surfaces and holding them securely within the cloth’s weave until it is laundered. This fundamental understanding of their construction is key to recognizing why they perform so exceptionally well in various cleaning applications. 2. Mastering Dry Dusting One of the most immediate and visibly impressive applications of microfiber cloths is their proficiency in dry dusting. When used without any moisture, these cloths transform into highly efficient dust magnets. Imagine gliding a dry microfiber cloth across a dusty bookshelf, an antique wooden table, intricate window blinds, or the delicate surfaces of your electronic devices. You will observe how the dust seems to cling effortlessly to the fabric, leaving behind a surface that is not only visibly cleaner but also smoother to the touch, free from the fine particulate layer that can dull its appearance. The crucial difference compared to traditional feather dusters or less advanced cloths is that microfiber doesn’t merely displace dust, scattering it into the air only for it to settle elsewhere moments later. Instead, the fine, charged fibers actively capture and tenaciously hold onto these dust particles. This superior trapping ability not only enhances the aesthetic appeal of your home by keeping surfaces looking pristine for longer but also contributes significantly to a healthier indoor environment by reducing airborne allergens and irritants, a particularly valuable benefit for households with allergy sufferers or individuals sensitive to dust.     3.Unleashing Wet Cleaning Wonders When a microfiber cloth is dampened with plain water, its cleaning capabilities expand dramatically, turning it into a versatile workhorse for a multitude of cleaning tasks. The absorbent nature of microfiber is quite remarkable; these cloths can typically hold several times their own weight in liquid. This makes them exceptionally effective for quickly and efficiently soaking up spills, whether it’s a splash of juice on the kitchen counter or water around the bathroom sink. Beyond simple spill absorption, a damp microfiber cloth becomes a powerful tool for general surface cleaning. The combination of the microfibers’ scrubbing action and their ability to lift and trap grime means that they can tackle everyday messes like food splatters, sticky fingerprints, soap scum, and light layers of grease with surprising ease, often requiring nothing more than water. For more resistant or greasy build-up, a minimal amount of a mild, pH-neutral cleaning solution can be added to the water, but one of the most significant advantages of microfiber is its capacity to clean effectively and hygienically with little to no reliance on harsh chemical cleaners. This gentle yet powerful action makes damp microfiber cloths ideal for use on kitchen countertops, bathroom tiles and fixtures, appliance exteriors, and dining tables, consistently leaving behind a thoroughly clean and satisfyingly streak-free finish.   4. The Microfiber Advantage on Glass and Polished Surfaces The task of cleaning glass, mirrors, and other highly polished surfaces is an area where microfiber cloths truly demonstrate their superiority, delivering results that are often described as brilliantly clear. Anyone who has previously battled with the frustrating streaks, smudges, and lint residue left behind by conventional cleaning cloths or paper towels when attempting to clean windows, mirrors, or shiny chrome fixtures will find the performance of microfiber to be a revelation. When a microfiber cloth is lightly dampened – either with just a touch of water, or for exceptionally stubborn marks or a professional gleam, with a specialized glass cleaning spray or a diluted solution of water and white vinegar – it glides almost effortlessly across these smooth surfaces. It efficiently lifts away dirt, grime, fingerprints, and water spots. Crucially, due to the fineness of the fibers and the tight weave of the cloth, it dries very quickly and leaves behind virtually no lint or streaks, resulting in an impeccable, crystal-clear finish. This ability to clean without leaving any trace of itself behind is what makes microfiber the go-to choice for ensuring that reflective surfaces throughout the home are not just clean, but flawlessly transparent and sparkling.   5. The Long-Term Value of Microfiber Beyond their immediate cleaning prowess, the durability and inherent reusability of microfiber cloths are fundamental aspects that contribute significantly to their overall value and their standing as an environmentally conscious cleaning choice. Unlike disposable paper towels that contribute to waste after a single use, or traditional cotton cloths that can quickly fray, lose their shape, and diminish in cleaning effectiveness, high-quality microfiber cloths are engineered to withstand hundreds of washing cycles without degrading their unique cleaning properties. To ensure their longevity and maintain peak performance, a

Best 5 Tips You Need To Know About Microfiber Cloths Read More »

5 Bathroom Cleaning Tips Every Toronto Home Should Follow

Sparkling and Serene Bathroom Sanctuary in Five Stages A truly clean bathroom isn’t just about surface shine; it’s about deep hygiene, a fresh atmosphere, and the peace of mind that comes from knowing this essential space is well cared for. Today, we’re going to move beyond the mere mechanics of a quick wipe-down and unveil the pathway to transforming your bathroom into a sparkling, serene haven, a place that genuinely contributes to your well-being, by guiding you through five focused stages. 1. Conquering the Commode with Diligence Our journey to a revitalized bathroom appropriately begins with the fixture that handles the most essential, yet often least glamorous, tasks: the toilet. Giving this cornerstone of the bathroom thorough and meticulous attention is paramount for establishing a truly hygienic environment. The process extends beyond a mere cursory swish within the bowl. We commence by applying a good quality toilet bowl cleaner, ensuring it reaches under the rim and is allowed to coat the surfaces as it works its way down. This initial application needs a few minutes to effectively tackle unseen build-up and begin its sanitizing work. Following this brief pause, a dedicated toilet brush is brought into action to scrub the interior of the bowl with diligence, ensuring every curve and surface is reached and thoroughly cleaned. However, our care for this fixture does not conclude there. The exterior surfaces of the toilet – including the tank, the lid, the seat (addressing both sides and the often-overlooked underside), the pedestal itself, and critically, the floor area immediately surrounding its base – all require careful wiping with a reliable disinfectant cleaner. This comprehensive approach ensures that this vital fixture is not just visibly clean to the eye but is also hygienically sound, making a significant contribution to the overall freshness and health of the bathroom.   2.The Bath and Shower Having addressed the toilet, our attention naturally gravitates towards the area specifically designed for washing away the day’s cares and starting afresh: the bath and shower. This zone, with its constant exposure to water and soap, can quickly become a challenging battleground against the persistent trio of soap scum, stubborn hard water stains, and, in environments prone to dampness, the unwelcome beginnings of mildew if not regularly and effectively addressed. The methodical approach here involves applying a suitable bathroom cleaner, one specifically formulated to break down and dissolve these common bathroom culprits, to all the integral surfaces. This includes the shower walls (whether they are composed of tile, fiberglass, or acrylic), the shower door (be it glass or plastic), or, if applicable, the shower curtain. Allowing this cleaning solution to sit for a few crucial moments gives it the necessary time to penetrate and effectively loosen the accumulated grime. Once the cleaner has had time to work, a non-abrasive scrub sponge or a dedicated bathroom brush is employed to gently but firmly work away the softened residue. For tiled shower enclosures, paying close attention to the grout lines is particularly important; a specialized grout brush or even an old toothbrush can be effectively utilized to clean these often-neglected areas. We must not forget the fixtures themselves – the showerhead, the taps, and the drain cover – which also benefit immensely from a good clean and a final polish to remove unsightly water spots and mineral build-up. If your bathroom features a bathtub, the same meticulous principles apply: a thorough cleaning of the entire basin, with particular attention paid to the waterline where residue frequently collects, and ensuring the taps and overflow drain are left sparkling. A meticulously cleaned shower or bath area is not merely about visual appeal; it fundamentally enhances the experience of using it, making it far more pleasant, hygienic, and invigorating.   3.The Vanity, Sink, and Mirror From the cleansing zone of the shower and bath, we logically progress to the vanity area, a multifaceted space that typically encompasses the sink, the surrounding countertops, and the mirror. The sink basin, much like the toilet, is a high-use fixture that sees constant activity. Consequently, toothpaste splatters, soap residue, and persistent water spots can accumulate with surprising speed. An effective, yet gentle, cream cleanser or a versatile spray bathroom cleaner can be used to thoroughly scrub the basin, ensuring the drain area is also free of debris and build-up. The faucets and handles, items that are touched multiple times throughout the day, deserve special attention; they should be wiped down carefully and polished to a brilliant shine, effectively removing fingerprints and water marks. The countertops that frame the sink also demand regular care, diligently wiping away any spills from toiletries, accumulated dust, or product residue. And then, of course, there is the mirror – a clear, impeccably streak-free mirror possesses the remarkable ability to instantly make the entire bathroom feel brighter, larger, and more welcoming. Applying a quality glass cleaner and wiping with a clean, lint-free microfiber cloth, often using methodical overlapping strokes, is the tried-and-true key to achieving that coveted, flawless streak-free finish. Taking an additional moment to neatly organize any items typically left on the countertop also contributes significantly to the overall feeling of a calm, uncluttered, and orderly space. 4.The Bathroom Floor The foundational surface of any room, and this certainly holds true for the bathroom, is its floor. This particular surface often bears the visible brunt of daily foot traffic, collecting stray hairs, inevitable water splashes, dust, and other assorted debris. Before any wet cleaning methods are introduced, it is absolutely essential to remove all loose particles and dirt from the floor. This preparatory step can be accomplished with a thorough sweep using a soft-bristled broom, paying attention to corners and edges, or, for an even more effective result, with a vacuum cleaner, utilizing an appropriate attachment to meticulously clean along baseboards and around the base of fixtures like the toilet and vanity. Once the floor is entirely free of loose dirt, hair, and other surface debris, it is ready to be mopped. The specific type

5 Bathroom Cleaning Tips Every Toronto Home Should Follow Read More »

clean oven

The Best Way To Clean Your Oven And Make It Shine In 5 Steps

Facing a dirty oven can feel like gearing up for battle, right? That baked-on grime and mysterious splatters can seem invincible. But trust me, with a clear plan, you can conquer that oven and get it sparkling again. It’s not just about looks; a clean oven cooks better and keeps your kitchen smelling fresh. So, roll up your sleeves, and let’s walk through five straightforward steps to make this chore totally manageable. 1. Prep Work First things first: safety and setup are key to a successful oven clean. Make absolutely sure your oven is completely cold before you begin – no exceptions! Attempting to clean a warm or hot oven is a recipe for burns and can cause cleaning fumes to become more intense. Now, carefully pull out those oven racks. They often carry a lot of grime and will need their own cleaning session, so set them aside for now, perhaps in your sink or even in a bathtub lined with an old towel to prevent scratches. Next, grab anything else that might be lurking inside your oven – think pizza stones, oven thermometers, or that forgotten baking tray. With the oven empty, it’s time to tackle the loose bits and pieces. Use a small brush and dustpan, or even your vacuum cleaner’s crevice tool attachment, to gently sweep or suck up all those crumbs, ash, and charred food particles from the oven floor. Getting rid of this loose debris now prevents you from simply making a muddy mess when you apply your cleaner later. Finally, protect your kitchen floor by laying down some newspaper or old towels in front of and beneath the oven door to catch any potential drips or spills. Don’t forget to ensure good ventilation by cracking open a window or switching on your kitchen’s extractor fan. Good preparation really does make the whole job smoother and safer. 2. Apply the Cleaner With your oven prepped like a pro, it’s time to bring in your chosen cleaning solution. Whether you’re using a heavy-duty commercial oven spray specifically formulated for tough grease, or a homemade paste perhaps made from baking soda and water, the main goal here is to achieve an even and thorough coat. Before you start, pop on some sturdy rubber gloves to protect your skin – and consider safety glasses, especially if you’re using a strong chemical spray – because some cleaning agents can be quite potent. Carefully apply your chosen solution to all the interior surfaces of the oven: this means the sides, the back panel, the bottom surface, and the inside of the oven door. Try to avoid spraying or applying the cleaner directly onto any visible heating elements or internal fans, as these components can be sensitive. Don’t be shy with the product, particularly on those really stubborn, baked-on spots that look like they’ve been there for ages. A thorough and even coating of cleaner now means significantly less elbow grease will be required from you later on. Ensure you get the cleaner everywhere the grime is hiding!   3.The Waiting Game Now for the part of the process that requires a little patience: allowing your cleaner adequate time to work its magic. This isn’t wasted time; in fact, it’s when the really tough de-greasing action happens! Your cleaning solution is busy penetrating and breaking down all that stubborn, caked-on grease and food residue. It’s crucial to check your product’s label for the manufacturer’s recommended dwell time – this could be anything from 30 minutes for a lighter clean to several hours, or even overnight for exceptionally dirty ovens or if you’re using a gentler homemade paste like baking soda. Whatever the recommendation, don’t rush this stage. While you’re waiting for the cleaner to do its thing inside the oven, you can productively turn your attention to those oven racks you removed earlier. Soaking them in hot, soapy water in your sink or bathtub can help loosen the grime on them too. Giving your cleaner the full, uninterrupted time it needs to work inside the oven is absolutely key to making the next step of scrubbing and wiping much, much easier. Think of this waiting period as your secret weapon against excessive scrubbing. 4. Scrub and Wipe Okay, the wait is over and it’s time to get to work – the big clean! Your cleaning solution has probably done the heavy lifting, so the built-up grime should be significantly looser and easier to remove. Gather your tools: a non-scratch abrasive pad, a heavy-duty sponge, and a few clean rags are essential. For those super stubborn, caked-on spots that refuse to come off easily, a plastic scraper (even an old credit card will work in a pinch, if used carefully) can come in handy. Start wiping and scrubbing the interior surfaces. It’s often helpful to work systematically – perhaps starting at the top of the oven and working your way down, or tackling one section at a time, don’t forget to clean the glass panes too. You’ll find that the dirt, grease, and food deposits come off much more easily now than if you tried to scrub them with cold water. Remember to rinse the sponge or rag in a bucket of clean water frequently. This prevents you from simply spreading loose dirt around the oven. Pay special attention to the corners, crevices and around any recesses where grease and dirt love to hide. This is when you’ll really see the transformation taking place and your oven starting to shine again! 5. Rinse, Dry, Reassemble  We’re on the home stretch now! The fifth and final step is to meticulously rinse away all traces of the cleaning product, thoroughly dry the oven’s interior, and then put everything back together. It’s super important to remove every last bit of cleaning product; any residue left behind can create nasty fumes or affect your food’s taste the next time you bake. Take a clean, damp cloth (you’ll likely need several, or rinse one very

The Best Way To Clean Your Oven And Make It Shine In 5 Steps Read More »

Middle aged man work as a professional cleaner while brooming

7 Must-Know Tips Before Hiring a Cleaning Service

1. Check Online Reviews for the Cleaning Service Hiring a cleaning service without checking online reviews is a big risk. Before you commit, take some time to read what other customers are saying. Sites like Google, Yelp, and even Facebook can show you real feedback on how reliable the company is. A well-reviewed cleaning service is usually a safe bet. Look for reviews that mention things like consistency, punctuality, and how well the cleaners do their job. When hiring a cleaning service, you want to see comments from happy customers who regularly book them. This tells you that the team delivers results every time—not just once in a while. Negative reviews also give you valuable info when you’re hiring a cleaning service. If people are complaining about missed spots or poor communication, that’s a sign to keep looking. You deserve a cleaning company that shows up, does the job right, and values your time and money. 2. Ask If the Cleaning Service Is Insured and Bonded One of the most important things to ask before hiring a cleaning service is whether they’re insured and bonded. This protects you in case something breaks or someone gets hurt while working in your home. It’s not just about safety—it’s about peace of mind. A professional company will have no problem sharing proof of insurance. If a cleaning service hesitates or avoids the question, that’s a red flag. When you’re hiring a cleaning service, choose one that takes legal and safety matters seriously. It shows they’re running a trustworthy business. Being bonded is just as important. When hiring a cleaning service, you’re trusting people in your home. A bonded company adds an extra layer of security in case anything goes missing. Don’t skip this step—it’s worth the few extra questions to make sure you’re covered. 3. Make Sure They Bring Their Own Cleaning Supplies Before hiring a cleaning service, always ask if they bring their own supplies. Some companies expect you to provide everything, which can be frustrating. A professional cleaning service should arrive fully prepared with the right tools and products for the job. When hiring a cleaning service, it’s a good sign if they use high-quality and safe cleaning products. It shows they care about doing the job properly without damaging your home’s surfaces. Plus, you won’t have to stress about running out of cleaning sprays or mop heads. Also, remember that not all surfaces are cleaned the same way. Hiring a cleaning service with experience means they’ll know what to use and where. Letting the pros bring their own supplies saves you time, effort, and guesswork. 4. Ask What’s Included in the Cleaning Service Package Transparency matters when you’re hiring a cleaning service. Not all companies offer the same level of detail, so it’s important to ask what’s included. Some might do basic dusting and vacuuming, while others go deep into kitchen appliances and bathroom tiles. Get a written or digital checklist before hiring a cleaning service, so you know exactly what to expect. This way, you won’t be left wondering why certain areas were skipped or partially done. A clear outline helps both you and the cleaning company stay on the same page. If you’re looking for extras like inside fridge cleaning or baseboard scrubbing, ask if they’re available as add-ons. When hiring a cleaning service, knowing what’s included up front helps avoid confusion and guarantees you’re getting what you pay for. 5. Know Who’s Coming into Your Home It’s normal to feel a little nervous about hiring a cleaning service and letting people into your home. That’s why it’s a good idea to ask whether they send the same team or rotate staff. Familiar faces build trust and comfort over time. Also, ask if the cleaning company does background checks on their workers. When hiring a cleaning service, you want to be sure the people entering your home are reliable and professionally screened. A company that takes this step seriously is worth trusting. Some cleaning services will even send you profiles or quick intros about who’s coming. That personal touch can make hiring a cleaning service feel less formal and more comfortable. When you know who’s cleaning your home, it’s easier to relax and enjoy the results. 6. Look for Flexibility in the Cleaning Service Schedule Life doesn’t always follow a set routine, and neither should your cleaning schedule. When hiring a cleaning service, look for companies that offer flexible booking options. Whether it’s weekly, bi-weekly, or one-time, the service should fit your lifestyle. Flexibility also means you can reschedule when needed without penalties or hassle. If you suddenly have guests coming or your plans change, you’ll be glad you chose a cleaning service that works around your needs. Hiring a cleaning service with easy booking is a game changer. Some companies even offer online booking or last-minute availability. When hiring a cleaning service, these extras show that the company is modern, organized, and focused on making things easy for you. That convenience can make a huge difference in your day-to-day routine. 7. Compare Pricing, But Don’t Just Go for the Cheapest Everyone wants to save money, but when it comes to hiring a cleaning service, cheaper isn’t always better. Some companies offer low rates but don’t deliver consistent or thorough results. That can leave you doing extra work—or rebooking with someone else. Instead, look at what’s included in the price. Are they insured? Do they bring their own supplies? Do they offer guarantees? These are all things to consider when hiring a cleaning service. Paying a little more for a team that checks all the boxes is often the better investment. Think of it this way—hiring a cleaning service is about value, not just cost. You’re paying for peace of mind, saved time, and a job done right the first time. A trustworthy company will be upfront about pricing and deliver results that are worth every dollar. Final Thoughts: Trust Toronto Shine Cleaning for the Job Finding

7 Must-Know Tips Before Hiring a Cleaning Service Read More »

Spring cleaning essentials, tools for cleaning

Spring Cleaning Essentials: Must-Have Products for a Sparkling Home

Spring is finally here, which means it’s time for a deep cleaning session to refresh your home after the long winter. To get the best results, you need the right spring cleaning essentials that make the job easier, faster, and more effective. From dusting to disinfecting, having high-quality cleaning products ensures your home looks and feels fresh. Here are the top seven must-have products for a thorough spring cleaning routine. 1. Microfiber Cloths – The Best Dusting Essential When it comes to spring cleaning essentials, microfiber cloths are a must-have. Unlike regular cloths or paper towels, microfiber is designed to trap dust, dirt, and bacteria without spreading it around. They’re perfect for dusting furniture, wiping down countertops, and even cleaning delicate surfaces like glass and electronics. One of the best features of microfiber cloths is their versatility. Use them dry to remove dust, or dampen them slightly with water or an all-purpose cleaner to wipe away grime. They also work well on stainless steel appliances, leaving a streak-free shine. Another reason to love microfiber cloths is their reusability. They can be washed and reused multiple times, making them an eco-friendly and cost-effective option on your Spring Cleaning Essentials checklist. Keep a stack of these on hand to tackle dust and dirt all over your home. 2. All-Purpose Cleaner – A Must for Every Surface An all-purpose cleaner is a key item on any spring cleaning essentials list. It helps cut through grease, grime, and bacteria on various surfaces, including kitchen counters, bathroom sinks, and even walls. Instead of juggling multiple products, a good all-purpose cleaner simplifies your cleaning routine. Look for a multi-surface formula that’s safe for tile, wood, and laminate surfaces. Some all-purpose cleaners also have disinfecting properties, which are especially useful for high-touch areas like doorknobs, light switches, and appliance handles. For a greener alternative, opt for a non-toxic, biodegradable cleaner. These options are just as effective without harsh chemicals, making them safer for kids and pets. No matter what formula you choose, an all-purpose cleaner is one of the top Spring Cleaning Essentials products to have on hand. 3. A High-Powered Vacuum – Essential for Deep Cleaning No spring cleaning routine is complete without a powerful vacuum cleaner. Over the winter months, dust, dirt, and pet hair accumulate deep in carpets and upholstery, making a deep-cleaning vacuum an absolute necessity. Choose a vacuum with strong suction power and multiple attachments to clean beyond just floors. A HEPA-filter vacuum is ideal for trapping allergens, making it a great choice for those with allergies. Attachments like a crevice tool and an upholstery brush help you clean hard-to-reach spots, blinds, and even mattresses. Don’t forget to vacuum behind furniture, baseboards, and under the bed as part of your Spring Cleaning Essentials checklist. A good vacuum ensures your home is free from dust, allergens, and dirt, leaving it fresh and clean. 4. Scrub Brushes – Tough on Grime and Stains Certain areas of your home require more than just a wipe-down. That’s where scrub brushes come in handy. A durable scrub brush with stiff bristles is essential for tackling bathroom tiles, grout, and kitchen sinks, removing built-up dirt and soap scum. For deep-cleaning tight spaces, a smaller detail brush is perfect for areas like faucets, shower corners, and window tracks. Even stubborn stains on stovetops and bathtubs can be removed with a good scrub brush and the right cleaner. If you want to save time and effort, consider using an electric scrub brush. These battery-powered tools provide extra scrubbing power, making it easier to remove grime without exhausting your arms. Having scrub brushes in your spring cleaning kit ensures every part of your home gets a thorough clean. 5. Glass Cleaner – Streak-Free Shine for Windows and Mirrors Spring brings in more sunshine, which highlights every fingerprint and smudge on your windows and mirrors. A high-quality glass cleaner is one of the most important spring cleaning essentials for getting a streak-free shine. For the best results, use a microfiber cloth instead of paper towels, as it prevents lint and streaks. Clean both the inside and outside of your windows to remove dust, pollen, and smudges that built up over winter. Glass cleaner is also useful for shiny surfaces like glass tables, shower doors, and even stainless steel appliances. A few sprays and a quick wipe will leave your home looking spotless and refreshed. 6. Storage Bins – Declutter and Organize Spring Cleaning Essentials isn’t just about deep cleaning, it’s also about decluttering and organizing. Storage bins help you sort and store seasonal clothing, household items, and paperwork efficiently. Clear plastic bins allow you to see what’s inside, making organization easier. Using labeled bins can help streamline your home. Sort items into categories like “Winter Clothes,” “Holiday Décor,” and “Donate” to keep things in order. Stackable bins are perfect for small spaces, maximizing storage in closets, garages, and under beds. Decluttering your home during spring cleaning not only makes it feel fresher but also helps reduce stress. Having a storage system in place makes it easier to maintain a tidy home all year long. 7. Rubber Gloves – Protect Your Hands While Cleaning With all the scrubbing, disinfecting, and handling of cleaning chemicals, your hands need protection. Rubber gloves are a must-have for your Spring Cleaning Essentials checklist to prevent skin irritation and dryness caused by exposure to harsh cleaners. Gloves aren’t just for dealing with chemicals—they also protect your hands when tackling germ-prone areas like toilets, garbage bins, and pet messes. A good pair of gloves with a non-slip grip makes cleaning safer and more comfortable. Invest in durable, reusable rubber gloves to keep your hands soft and irritation-free. After all, the goal of spring cleaning is a fresh home, not dry and damaged skin! Let Toronto Shine Cleaning Handle Your Spring Cleaning! Spring cleaning can be time-consuming and exhausting, but you don’t have to do it alone! Toronto Shine Cleaning offers professional deep cleaning services to make your home sparkle. Whether you

Spring Cleaning Essentials: Must-Have Products for a Sparkling Home Read More »