Clothes Cleaning

Distilled Water: 5 Simple Secrets on How to Use Distilled Water

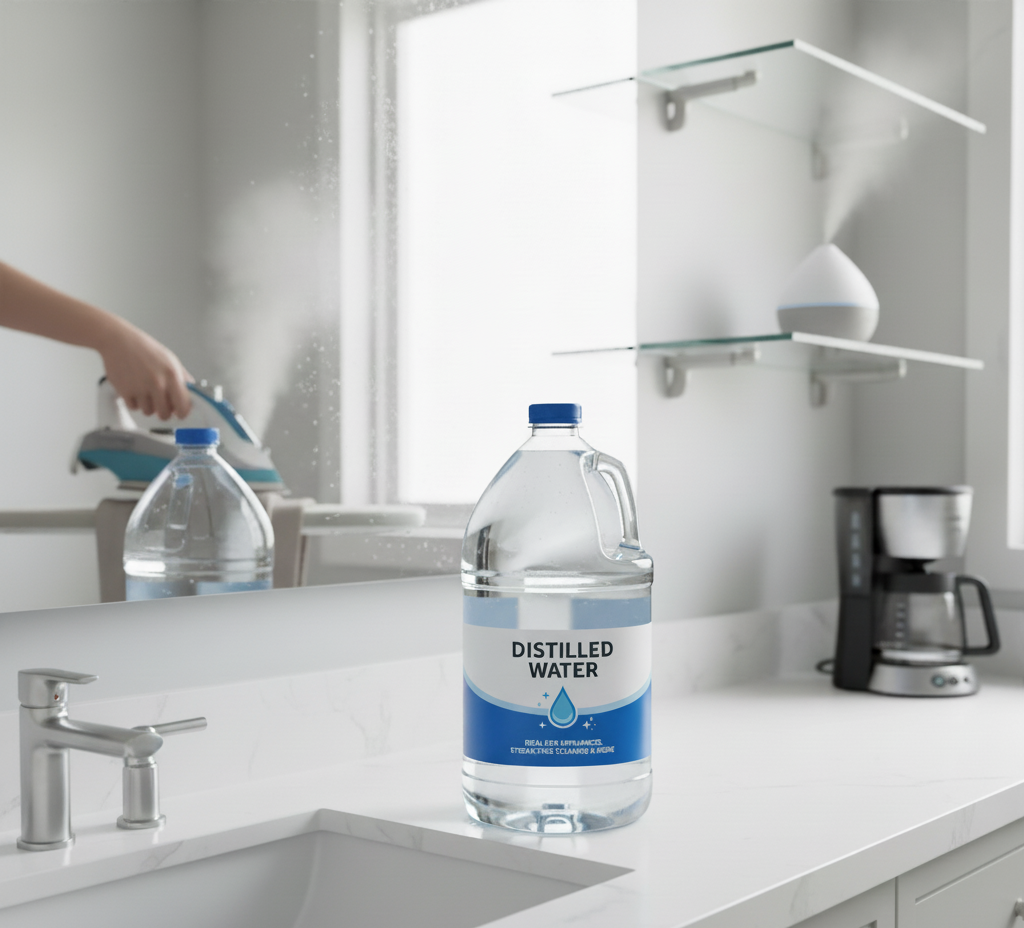
The secret to a perfect, streak-free clean is not found in a bottle of expensive, high-tech cleaning solution. It is not achieved through a special microfiber cloth woven with miraculous fibers, nor is it the result of a secret scrubbing technique passed down through generations. The real secret to a flawless, residue-free finish is something far more fundamental and surprisingly simple. It is the water itself. More specifically, it is the absence of minerals in that water. The single most transformative, yet overlooked, tool in any advanced cleaning arsenal is a simple jug of distilled water. We are conditioned to see water as a simple cleaning agent, but the water that flows from our taps is far from pure. It is a complex liquid, carrying a dissolved cargo of minerals and trace elements from its journey through the ground and pipes. The most common of these are calcium and magnesium, the primary culprits behind “hard water.” When you clean a surface with tap water and it evaporates, it leaves these microscopic mineral deposits behind. This is the root cause of nearly every common cleaning frustration: the hazy film on your hardwood floors, the stubborn white spots on your shower door, the frustrating streaks on your windows, and the cloudy residue on your stainless steel appliances. You can scrub and polish for hours, but if you are using tap water, you are fighting a battle against an invisible enemy that you are simultaneously reapplying with every wipe. Distilled water is the elegant solution to this problem. It is water that has been purified back to its most basic, elemental state: pure H₂O. By understanding what it is and how it works, you can elevate your cleaning from a chore of constant frustration to a science of predictable, perfect results. What Exactly Is Distilled Water, and Why Does It Matter? The process of distillation is a simple act of separation. Regular water is boiled into steam. As the water turns into a gas, it leaves behind everything that is not water: minerals, salts, heavy metals, and other contaminants. This pure water vapor is then collected and condensed back into its liquid form. The result is water that is stripped of all its baggage, a true “blank slate.” This purity is precisely what makes it a secret weapon for cleaning. Because distilled water contains no dissolved solids, when it evaporates, it leaves absolutely nothing behind. There are no minerals to create spots, no salts to leave a film. It dries completely clean. This unique property gives it two significant advantages in a cleaning context: It Prevents Residue: As mentioned, it eliminates the source of spots and streaks. This is its most obvious and celebrated benefit. It Is a More Effective Cleaner: Because distilled water is free of dissolved minerals, it is chemically “hungry.” It has a greater capacity to dissolve and absorb other substances, like dirt and soap, making it a more effective solvent than tap water. This means you often need less cleaning solution to achieve the same result. Key Applications for Distilled Water in Your Home Switching to distilled water for specific tasks is a small change that yields disproportionately large results. Here are the most impactful ways to incorporate it into your cleaning routine. 1. The Ultimate Streak-Free Window and Mirror Cleaner This is the classic and most transformative use. For a truly professional, invisible finish on glass, distilled water is non-negotiable. The Problem: The minerals in tap water are the primary cause of streaks on windows and mirrors. No matter how well you squeegee, as the last microscopic droplets of water dry, they leave mineral deposits behind, creating a faint but frustrating haze. The Solution: Create your own professional-grade glass cleaner. In a clean spray bottle, mix a solution of 50% distilled water and 50% distilled white vinegar. The vinegar acts as a powerful cleaning agent, cutting through grease and grime, while the distilled water ensures that once you wipe or squeegee it away, the surface will dry to a perfectly clear, spot-free shine. This simple, cheap solution will outperform almost any commercial glass cleaner on the market. 2. Flawless Stainless Steel and Chrome Stainless steel appliances are notorious for showing every fingerprint and water spot. Distilled water is the key to winning this battle. The Problem: Wiping down stainless steel with a cloth dampened with tap water is a recipe for frustration. As the water dries, it leaves behind a constellation of mineral spots that mar the finish. The Solution: For routine cleaning, simply dampen a clean microfiber cloth with distilled water and wipe the appliance, always following the direction of the grain. For a final polish, use a second, completely dry microfiber cloth to buff the surface. The absence of minerals means no spots will form as it dries. For greasy fingerprints, you can add a single drop of dish soap to your damp cloth, then “rinse” with a separate cloth dampened with only distilled water before buffing dry. The same principle applies to chrome faucets and fixtures in the kitchen and bathroom. 3. A Haze-Free Finish for Hardwood and Laminate Floors If your hard-surface floors look dull and cloudy even after mopping, the culprit is likely a buildup of mineral residue from your tap water. The Problem: Over time, mopping with tap water (even with a floor cleaner) can leave behind a cumulative, hazy film that dulls your floor’s natural shine. The Solution: This is especially effective with a spray mop system. Fill the mop’s reservoir with mostly distilled water and a small splash (a few tablespoons) of white vinegar. The vinegar helps to break down any existing film, while the distilled water ensures no new film is created. The result is a floor that is truly clean, without the dulling residue that compromises its appearance. 4. Spot-Cleaning Carpets and Upholstery Without Leaving a Ring Have you ever cleaned a small spot on your carpet, only to be left with a noticeable ring or outline after it dries? That ring is often caused

Distilled Water: 5 Simple Secrets on How to Use Distilled Water Read More »
5 Rust Removal Tips: The Ultimate Solution for Stubborn Rust Stains

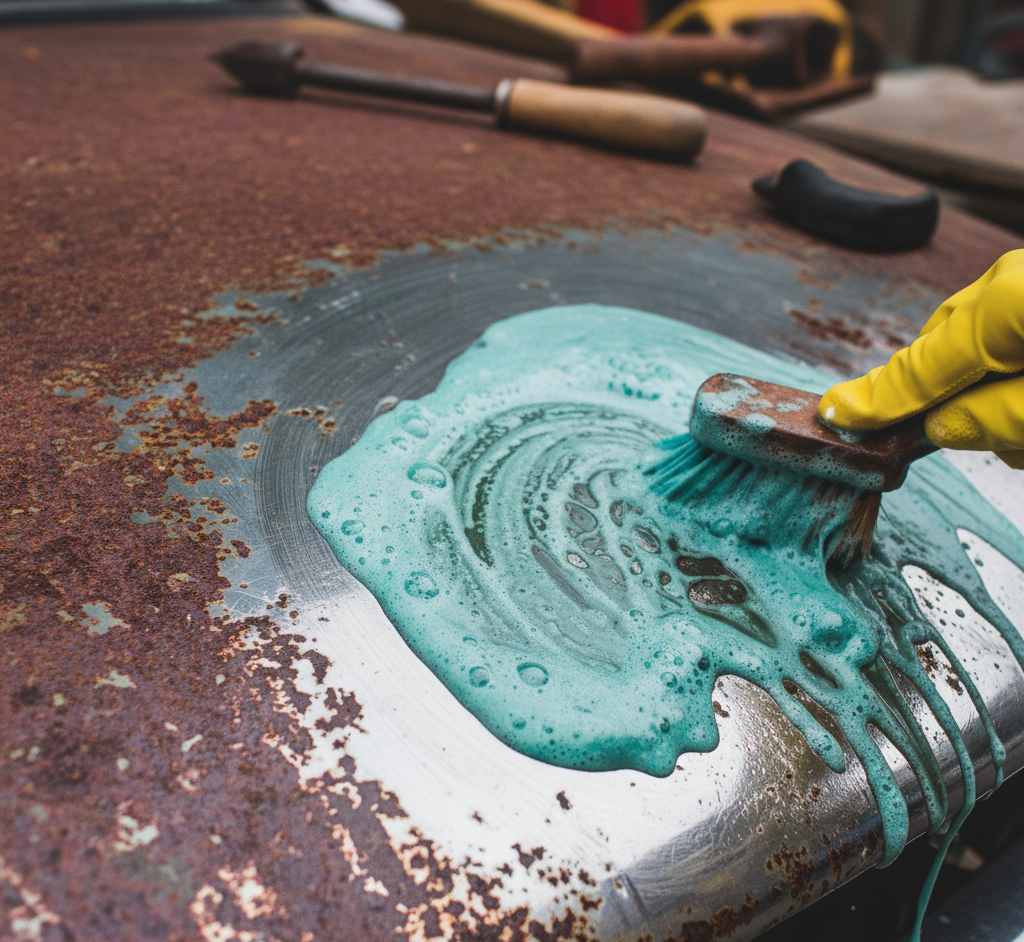
Rust Is Eating Your Metal, and a Sponge Alone Will Not Stop It Rust creeps into bathrooms, kitchens, garages, and patios without warning, staining fixtures, seizing tools, and quietly weakening the metal you depend on. The familiar reddish-brown mark is more than cosmetic. Rust is an active chemical reaction that eats away at metal and leaves discoloration ordinary scrubbing cannot lift. Controlling it takes two coordinated moves: eliminating the conditions that let it form, and matching the right removal technique to the surface you are cleaning. What Rust Actually Is In everyday terms, iron oxide is what we call rust. It appears through oxidation, whenever iron or a steel alloy stays in contact with oxygen and water too long. Add salt and the process accelerates: vehicles in cities with salted winter roads deteriorate faster. The recipe is always the same: metal, oxygen, moisture. You cannot remove the object or the air, so every effective prevention plan comes down to one goal: moisture control. Where Rust Attacks a Home Bathrooms. The epicenter. Toilet bowl rings usually trace back to iron in the supply water or aging cast iron pipes, and corroding parts inside the tank add their own marks. Wet shower caddies, the damp base of a shaving cream can, and a stray bobby pin all stain porcelain and fiberglass, while drains, shower heads, and faucets corrode over time. Kitchens. A stainless sink resists rust but is not immune: leave a wet cast iron pan or a soaked pad of steel wool in the basin and marks follow. Cast iron cookware depends on its seasoning, a layer of polymerized oil, or it oxidizes almost on contact with air. Chipped vinyl on a dishwasher rack exposes metal that can spot your clean dishes. Laundry rooms. Metal buttons, zippers, and rivets transfer marks onto other garments mid-cycle, as does a forgotten nail or screw in a pocket. Garages, basements, patios. Steel hand tools corrode fast in damp storage. Paint-scratched wrought iron or steel patio furniture starts flaking, and grill grates endure a constant cycle of heat and moisture. Tip 1: Stop Rust Before It Starts The cheapest repair is the one you never need. Keep surfaces dry: wipe the kitchen sink after the dishes, run a squeegee over shower walls after use, and dry tools before storage. Run the bathroom exhaust fan during and after showers, and put a dehumidifier in a damp basement. Coat outdoor furniture, railings, and grills in corrosion-inhibiting paint, inspect those pieces yearly, and touch up chips immediately. A light film of machine oil shields tools, and a maintained seasoning layer shields cast iron. Never park wet metal on susceptible surfaces: no damp cans on the tub ledge, no pans soaking overnight in the sink, no wet steel wool on the counter. If fixtures keep staining after cleaning, the water may be the culprit, and a water softener or iron filter on the house supply is worth considering. Tip 2: Dissolve Light to Moderate Rust with Natural Acids Mild acid dissolves iron oxide, which makes your pantry a capable workshop. Soak small items, like tools, nuts, and bolts, in white vinegar for several hours or overnight, then brush off the dissolved corrosion. On gentler surfaces such as fabric or countertops, work in a paste of lemon juice and salt: citric acid breaks the buildup down while the salt acts as a mild abrasive. For the mildest option, spread baking soda into a thick paste with water, let it sit a few hours, then scrub. And for light surface rust on a knife, halve a potato, dip the cut end in dish soap or baking soda, and rub hard, because potatoes carry oxalic acid that dissolves the layer. Tip 3: Scrub Heavy Corrosion Off Durable Metal When buildup is thick and flaky, physical abrasion wins, but it scratches, so reserve it for surfaces where the finish is irrelevant, like old tools or grill grates. A wire brush, sandpaper, steel wool, or even foil crumpled into a ball will strip oxidation away. Start with a little water or oil as lubricant, move from coarse grit to fine, then wash, dry, and coat the bare metal right away or the rust returns immediately. Tip 4: Reach for Chemical Removers on Stubborn Cases Commercial products use stronger acids, typically oxalic or phosphoric, to dissolve corrosion faster than pantry remedies. Bar Keepers Friend, powered by oxalic acid, handles porcelain and stainless steel, and gel and spray formulas exist for heavy-duty jobs. Treat them as the powerful chemicals they are: gloves on, eyes protected, air moving, and the manufacturer’s label followed exactly. Health Canada’s page on using household chemicals safely covers buying, storing, and handling acidic cleaners around family. Tip 5: Match the Method to the Surface Different materials demand different tactics, and the wrong one can make a stain permanent. Surface Best removal method Watch out for Clothing and fabric Lemon juice and salt first; if that fails, a commercial laundry stain remover made for rust. Never chlorine bleach. It reacts with iron oxide and can set the stain forever. The CDC’s guide to disinfecting with bleach also warns against mixing it with other cleaners. Porcelain and ceramic sinks, tubs, toilets A wet pumice scouring stick lifts reddish rings without scratching the glaze, or use a Bar Keepers Friend and water paste. Metal scrapers that gouge the finish. Concrete garage floors and driveways Trisodium phosphate (TSP) solution worked in with a stiff brush lifts the discoloration. Gloves and ventilation when handling TSP. Small steel tools, nuts, bolts Overnight vinegar soak, then brush. Dry and oil the metal after soaking. Grill grates, old hand tools Abrasive scrubbing, coarse to fine. Coat cleaned metal immediately. Rust Removal FAQ How long should something soak in vinegar to remove rust? Several hours handles light corrosion; overnight works through heavier buildup. Scrub off the softened residue, rinse, and dry the item completely. Will baking soda remove rust? On mild cases, yes. A thick baking soda-and-water paste left for

5 Rust Removal Tips: The Ultimate Solution for Stubborn Rust Stains Read More »

Washing Machine Cycles: 4 Tips Everyone Should Know For Spotless Fabrics

Stop Guessing at the Laundry Room Dial A modern washing machine is a marvel of convenience, yet its panel of cryptic dials and symbols can look like an airplane cockpit. Most people default to Normal for nearly every load and hope for the best. That habit shortchanges your clothes, your utility bills, and the machine itself: each named cycle is a calibrated recipe of temperature, agitation, and time for particular fabrics and soil levels. Reading those recipes turns laundry from guesswork into fabric care, deciding whether garments last for years or fade, shrink, and wear out early. The Three Variables Behind Every Cycle Every button adjusts one of three fundamentals, and once you see them, no dial is mysterious. Water Temperature Hot, typically 130 F (54 C) and above, is the most powerful cleaner: it attacks heavy grime, kills germs and dust mites, and lifts oily, greasy stains. The costs are energy, color fading, and real shrinkage in natural fibers like cotton and wool, so save it for sturdy, colorfast loads: whites, cotton underwear and socks, bed linens, and grime-caked work clothes. Warm, near 90 F (32 C), balances cleaning against care, handling everyday soils with less fading or shrinking, ideal for colors, synthetics, and moderately dirty loads. Cold, from 60 to 80 F (15 to 27 C), is the gentlest and most efficient setting: perfect for bleeding darks and brights, plus delicate silk, lace, and anything shrink-prone. Modern cold-water detergents close much of the cleaning gap, though heavy grease still needs heat. Spin Speed Measured in revolutions per minute, spin controls how much water the drum extracts at the end of the cycle. A high spin, 1000 to 1400 RPM or more, removes the most moisture, cutting drying time and energy on sturdy cottons and denim, but it can set deep wrinkles and punish delicates. Medium is the all-purpose compromise, often paired with Permanent Press to limit creasing in synthetics. Slow leaves clothes damp but protects hand-washable items and loosely woven sweaters, and no-spin exists for garments that should feel no centrifugal force at all. Agitation and Tumble This is the machine’s scrubbing action: the agitator’s speed and intensity on a top-loader, the drum’s tumbling pattern on a front-loader. High agitation adds friction and cleaning power for durable fabrics; low agitation swishes gently to shield fragile fibers. The Four Cycles You Will Use Most Normal (Cotton or Regular). The workhorse for everyday cotton, linen, and durable synthetics: high agitation, high spin, usually a warm default you can adjust. Its home is t-shirts, jeans, socks, underwear, towels, and sheets. Skip it for delicates and anything prone to shrinking or wrinkles. Heavy Duty. Longer wash time, stronger agitation, hot water by default, built for sturdy fabrics with serious grime: beach towels with set-in dirt, kids’ play clothes, work clothes caked in mud, durable bedding. Using it on normal loads causes needless wear, and it is far too aggressive for anything heat- or movement-sensitive. Delicates (Hand Wash). The machine imitating your hands: low agitation, short wash, slow spin, almost always cold. Lingerie, silk, lace, sheers, and loose sweaters belong here, each inside a mesh laundry bag. This gentle action will not fully clean heavily soiled items. Permanent Press (Wrinkle Control or Casual). The most useful misunderstood setting, designed for wrinkling synthetics and blends like polyester, rayon, and knits. It washes warm to relax fibers and release creases, then switches to a cool rinse and slower spin so new wrinkles never set. Use it for dress shirts, blouses, and slacks; leave aggressive cleaning jobs and true delicates alone. Specialty Cycles Worth Knowing Cycle What it does When to use it Bulky (Sheets or Bedding) Extra water saturates and rinses large items; reduced spin keeps the machine balanced. Comforters, blankets, sleeping bags, pillows. Whites A supercharged Normal: hottest water, long aggressive wash, built to pair with the bleach dispenser. Colorfast white loads that need brightening. Quick Wash (Speed or Express) Shortened wash and rinse plus a fast spin to cut drying time. Small, lightly soiled loads in a hurry. It freshens; it cannot handle stained or genuinely dirty clothes. Rinse and Spin Skips the main wash, simply rinsing the load and spinning out water. Hand-washed items needing water extraction, or stored clothes needing a rinse. Sanitize Hottest water possible, often with an internal heater, reaching temperatures that kill 99.9 percent of common household bacteria. Long and energy-intensive. When germs matter: baby clothing, cloth diapers, any bedding used during an illness, and allergen concerns. Steam Steam loosens tough stains for deep cleaning, or refreshes dry items without a full wash. Heavily soiled loads, plus de-wrinkling and deodorizing between washes. A Four-Question System for Every Load What are the fabrics? Care labels are the primary guide: mostly cottons and durable material means Normal or Heavy Duty is safe; delicates go to the Delicates cycle. How dirty is it? Everyday wear suits Normal; mud, grease, and heavy grime need Heavy Duty. A soil-level setting on many machines extends wash time within a cycle for dirtier loads. What are the colors? Whites take hot water, mixed colors prefer warm, and darks or brights need cold to prevent fading. Do wrinkles matter? Synthetic dress clothes call for Permanent Press. Mastering the dial means understanding how temperature, spin, and agitation combine and applying them on purpose: garments live longer, utility use drops, and results beat any one-size-fits-all default. Detergent choices deserve equal care: Health Canada’s page on household product safety covers laundry detergents and packets, including keeping pods away from children. And for germ control, the CDC’s guide to when and how to clean and disinfect your home explains why thorough cleaning always comes before disinfecting. Washing Machine Cycle FAQ What counts as hot water in a washing machine? Typically 130 F (54 C) and above. That range lifts oily stains and defeats germs and dust mites, which is why the Whites and Sanitize cycles lean on it. Why does Permanent Press change temperatures mid-cycle? Warm water relaxes synthetic

Washing Machine Cycles: 4 Tips Everyone Should Know For Spotless Fabrics Read More »

child with a sense of responsibility and organizing the house

Discover Why Involving Your Child In Daily Cleaning Is More Important Than You Think

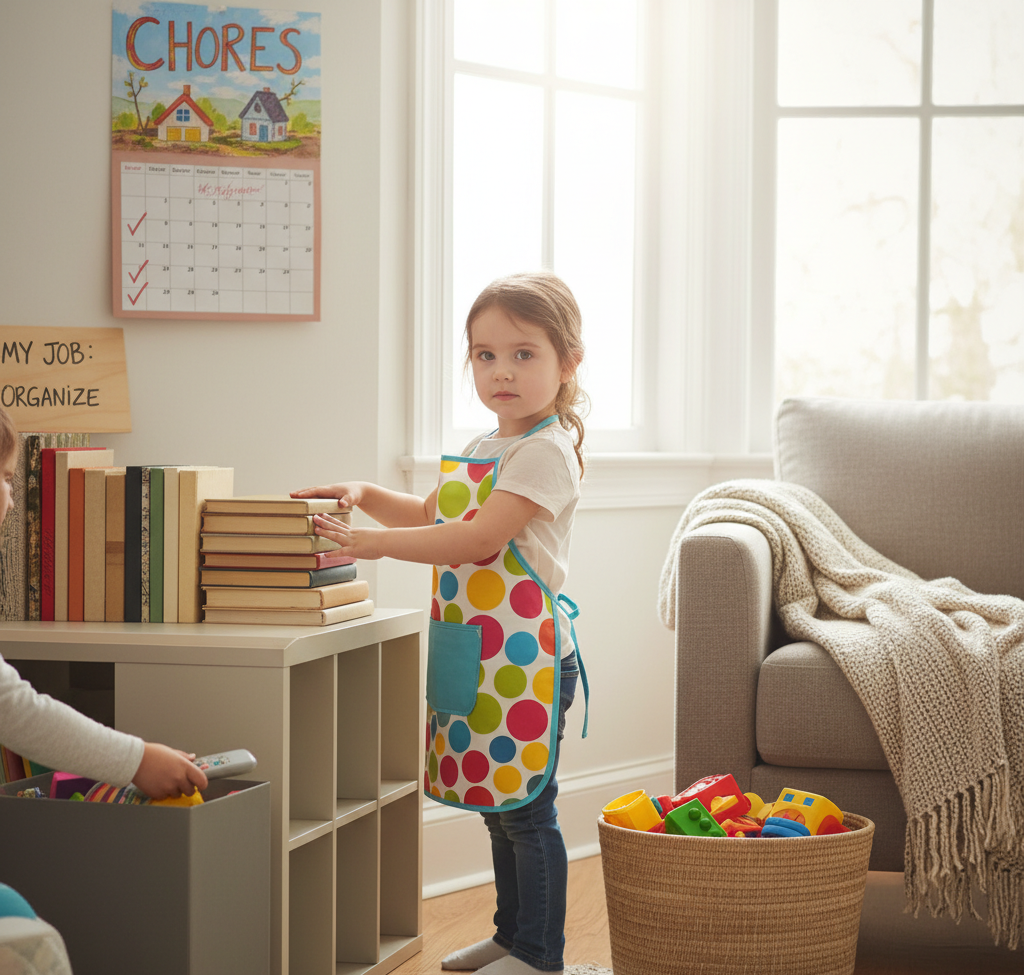
The question many parents have is how do I teach my child to be more responsible? In the bustling rhythm of modern family life, the daily upkeep of a home can often feel like a relentless and overwhelming task, a never-ending cycle of tidying, wiping, and washing that falls heavily on the shoulders of the parents. In this constant battle against clutter and mess, one of the most powerful yet frequently underutilized resources is sitting right at the dinner table: the children. Involving children in daily cleaning is not about offloading parental responsibility or achieving a flawlessly pristine home. It is a profound and deliberate act of teaching, a foundational lesson in responsibility, respect, life skills, and the intrinsic value of contributing to a shared environment. Building Character Transforming chores from a dreaded obligation into a natural and expected part of the daily routine is a process that builds character and strengthens family bonds. It shifts the household dynamic from one where parents are the service providers and children are the consumers, to one of a collaborative team working towards a common goal. When a child learns to wipe up their own spills, put away their own toys, or help set the table, they are internalizing a powerful message: “I am a capable and valuable member of this family. My actions matter, and I have a role to play in the well-being of our home.” This sense of belonging and competence is a cornerstone of healthy self-esteem. The benefits of integrating children into daily cleaning routines extend far beyond the immediate advantage of having an extra pair of hands. Cultivating Responsibility and Accountability: Consistently performing a chore, no matter how small, teaches a child to be responsible for their own space and their own belongings. It instills a sense of ownership and accountability. They learn that a clean room or a tidy living area is not something that magically happens, but is the result of conscious effort. This understanding of cause and effect is a critical life lesson that translates into academic, social, and eventually, professional success. Developing Essential Life Skills: The ability to maintain a clean and organized living space is a fundamental life skill that many young adults find themselves lacking when they first leave home. By teaching children how to properly sweep a floor, load a dishwasher, or do a load of laundry, you are equipping them with the practical knowledge they will need to live independently. These are not just chores; they are lessons in self-sufficiency. Fostering Respect for Property and People: When children are actively involved in the effort it takes to clean and maintain a home, they develop a greater appreciation for it. A child who has just spent time vacuuming the living room carpet is far less likely to carelessly track mud across it. They begin to understand the work that goes into creating a pleasant environment and, by extension, develop more respect for the efforts of others. Building a Strong Work Ethic: The discipline of completing a task, even when it’s not particularly fun, is the foundation of a strong work ethic. Learning to see a job through to completion and taking pride in the result is a value that will serve a child throughout their entire life. Enhancing Motor Skills and Coordination: For younger children, many cleaning tasks are excellent for developing both fine and gross motor skills. Scrubbing a surface, using a spray bottle, sorting laundry, or sweeping with a small broom all help to improve coordination, strength, and dexterity. Strengthening Family Bonds: Working together on household tasks can be a valuable opportunity for connection. It’s a time to talk, to teach, and to work side-by-side. Turning on some music and tackling the after-dinner cleanup as a family can transform a mundane chore into a positive, shared experience. It reinforces the idea that the family is a team. The key to successfully involving children in cleaning is to start early and to make the tasks age-appropriate. The goal is not perfection, but participation and learning. Toddlers (Ages 2-3) At this age, children are naturally inclined to imitate their parents and are often enthusiastic about “helping.” The focus should be on simple, game-like tasks that are within their physical capabilities. Putting Toys Away: This is the most fundamental chore. Make it a game by singing a “clean-up song” or timing how quickly they can fill the toy box. Clear, labeled bins with pictures can help them learn where everything goes. Wiping Up Spills: Keep a small, designated cloth or sponge accessible for them. When a small spill occurs, encourage them to wipe it up themselves. It won’t be a perfect job, but it teaches immediate responsibility. Placing Clothes in the Hamper: This simple task teaches them where dirty clothes belong. “Dusting” with a Cloth: Give them a small microfiber cloth and let them wipe down low, safe surfaces like baseboards or the legs of a coffee table while you do the real dusting. Preschoolers (Ages 4-5) Preschoolers can handle more complex, multi-step tasks. They are developing more coordination and can follow simple instructions. Setting the Table: They can be responsible for putting out napkins, placemats, and silverware. Clearing Their Own Plate: Teach them to carry their own plate to the sink or countertop after a meal. Making Their Bed: It won’t be hotel-perfect, but they can learn to pull up the duvet or comforter. Keep bedding simple to make this task easier for them. Feeding Pets: Filling a pet’s food or water bowl (with supervision) is an excellent way to teach responsibility and empathy for another living being. Helping with Groceries: They can help unload groceries, putting away non-breakable items in low cupboards. Early Elementary (Ages 6-8) At this age, children can take on more responsibility and begin to perform chores independently. Sweeping or Using a Small Handheld Vacuum: They can be responsible for sweeping the kitchen floor after meals or vacuuming up small messes. Loading and Unloading the Dishwasher: They can learn how to place dishes in the dishwasher (with guidance on sharp items) and can

Discover Why Involving Your Child In Daily Cleaning Is More Important Than You Think Read More »

cleaning front-laod washing machine

Cleaning Front-Load Washing Machine: Detailed Guide to a Sanitized Machine

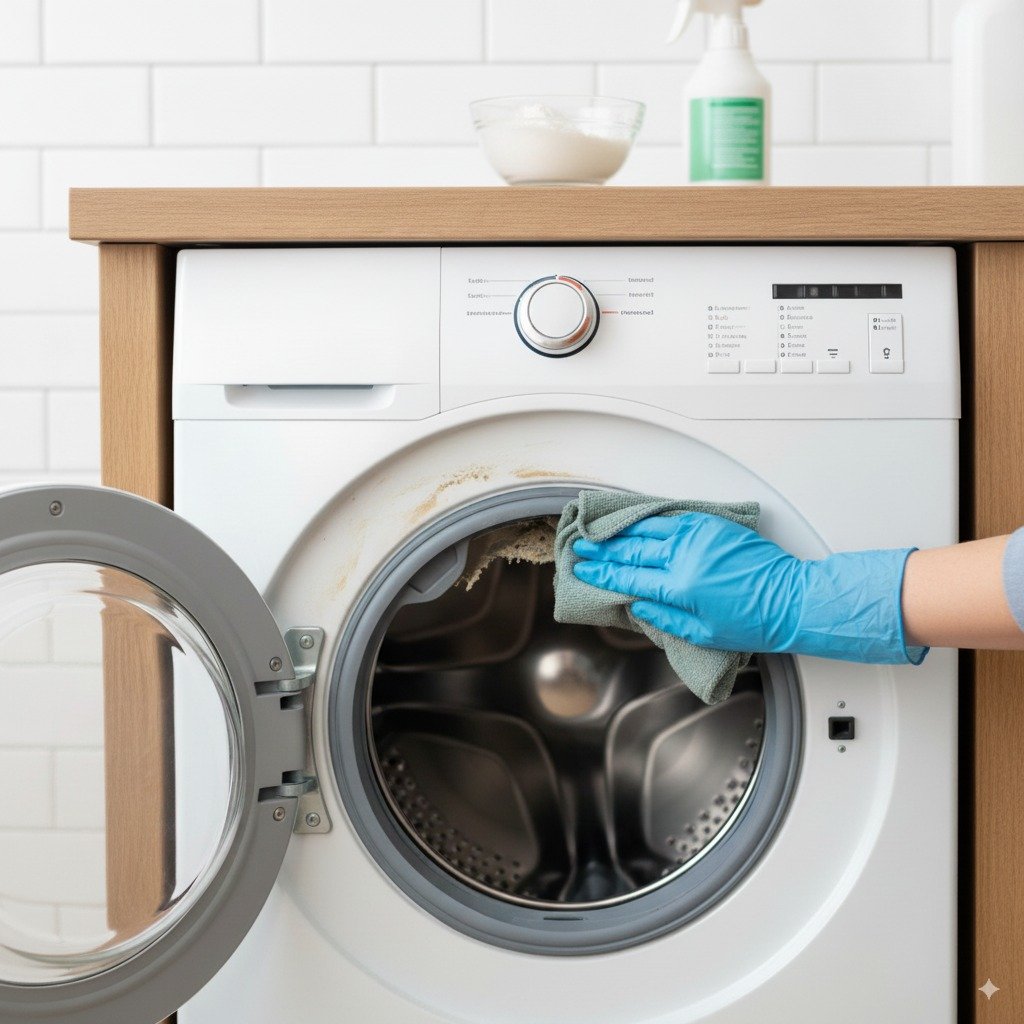
Why Front-Load Washing Machines Get Musty A front-load washer is efficient engineering: it uses less water than a top-loader, treats fabrics gently, and spins fast enough to pull extra moisture out of the load, which shortens drying time. The flip side of that design is an airtight door seal and low water levels that leave standing dampness inside the drum. Mold, mildew, and bacteria feed on leftover detergent and body soil in those damp zones and produce a sour smell that transfers to clean laundry. That odour is a maintenance flag, not a breakdown. Learning how to clean a front-load washing machine protects its performance, keeps your clothes hygienic, and adds years to the appliance. Where Grime Collects in a Front-Loader Top-loaders dry out between loads; front-loaders do not. They trap moisture in four places, and each needs its own treatment before the smell goes away. Rubber door gasket: the deep folds hold water, lint, hair, and a detergent film after every cycle. That dark, damp layer is an incubator for mold and mildew, visible as black spots and a sour smell. Drum and outer tub: the stainless drum resists buildup, but the hidden outer tub collects a slimy film of soap scum and biofilm that can break off in flakes and redeposit on clothes. Detergent dispenser drawer: undissolved detergent, fabric softener, and bleach cake up inside the drawer and its housing, feeding more mold. Drain pump filter: a trap at the bottom of the machine catches coins, buttons, lint, and hair. Left unmaintained, decomposing debris and stagnant water create a powerful, unpleasant odour. Mold spreads wherever moisture lingers, and the CDC’s mold resources explain why drying damp spots is the first line of defence. How to Deep-Clean a Front-Load Washer, Step by Step Set aside about an hour of hands-on work plus the run time for two empty cleaning cycles. Grab rubber gloves, clean cloths, a soft-bristled brush or an old toothbrush, distilled white vinegar, and chlorine bleach, then treat each problem area individually. Step 1: Scrub the gasket Mix equal parts white vinegar and water, or add half a cup of chlorine bleach to a gallon of water, and never mix vinegar and bleach together. Vinegar dissolves soap scum and discourages mold; bleach is the stronger choice once black mildew spots appear. Pull the seal back to reach the gap between gasket and drum, wipe every fold inside and out, scrub stubborn spots with the brush, rinse the area with a cloth dampened in plain water, and dry the gasket fully. Removing the moisture is what stops mildew from returning the same week. Step 2: Sanitize and descale the drum and tub With the machine empty, pour one cup of chlorine bleach into the dispenser’s bleach compartment, skip detergent, and run the hottest, longest cycle available, ideally a Tub Clean or Clean Washer setting or a heavy-duty or sanitary one. This kills the mold, mildew, and bacteria living in the drum and outer tub. Then run a second hot, long cycle with one cup of distilled white vinegar poured directly into the drum. The acid dissolves lingering residue, clears out traces of bleach, and deodorizes the machine, and the two-cycle order follows the same logic as the CDC guidance on disinfecting with bleach: sanitize first, rinse the chemistry out afterward. Step 3: Soak the dispenser drawer Pull the drawer out until it stops, then press the release tab, often marked Push, to free it completely. Soak the drawer in hot water with white vinegar for about 30 minutes, scrub every compartment including the narrow channels and undersides, and brush out the empty housing while the drawer soaks, because mold often grows on the ceiling of that cavity. Rinse, dry, and slide the drawer back in until it clicks. Step 4: Clear the drain pump filter Check your manual for the exact procedure; most front-loaders hide the filter behind a small access door at the bottom front. Lay a thick towel on the floor and keep a shallow pan close by, because trapped water escapes the moment you open it. Unscrew the cap slowly, let the water drain, and pull the filter out. Pick away lint, hair, coins, and buttons, rinse the filter under running water, wipe the housing inside, and screw the cap back tightly to prevent leaks. For many owners, this step finally kills the smell. Problem area What collects there What to use Rubber gasket Water, lint, hair, detergent film, black mildew spots Vinegar-and-water solution, or 1/2 cup chlorine bleach per gallon of water Drum and outer tub Soap scum and biofilm 1 cup bleach on a hot cycle, then 1 cup distilled white vinegar on a second hot cycle Dispenser drawer Undissolved detergent, fabric softener, bleach residue 30-minute soak in hot water and vinegar, plus a small brush Drain pump filter Coins, buttons, hair, stagnant water Running water, a towel, and a shallow pan for the spill Daily Habits That Keep a Front-Load Washer Fresh A deep clean resets the machine; small habits keep it reset. Leave the door ajar after every wash so air circulates through the drum and seal. Wipe the gasket with a dedicated cloth after the last load of the day to lift out standing water. Use only high-efficiency detergent, measured to the label. Regular detergent over-suds and leaves a residue mold feeds on, and more soap never means cleaner clothes. Move wet laundry to the dryer as soon as the cycle ends so nothing sits damp in a closed drum. Run one empty hot cycle with bleach or vinegar every month to hold buildup at bay. Front-Load Washer Cleaning FAQ How often does a front-load washer need a real deep clean? Wipe the gasket after every use and run a monthly maintenance cycle. Take the full four-step approach, including the filter and dispenser drawer, whenever odours return or every few months with heavy use. Can I clean the whole machine with vinegar alone? For general upkeep, yes. Vinegar dissolves

Cleaning Front-Load Washing Machine: Detailed Guide to a Sanitized Machine Read More »

How to Tackle Tough Stains on Clothes: 5 Proven Methods

How to Tackle Tough Stains on Clothes: 5 Proven Methods Coffee on a white shirt, red wine at a dinner party, grass stains after a park afternoon: stains are universal, but panic is optional. The difference between a saved garment and a casualty is rarely luck. It is speed, technique, and knowing which family a stain belongs to. Here is the complete playbook, organized by stain type, with the household tools that do the work. Three Rules Before Any Treatment Act fast: a fresh stain is a temporary problem, while a set-in stain bonds with the fibers and becomes a long-term challenge. Blot, never rub: rubbing grinds particles deeper, spreads the stain wider, and frays the fabric; use a clean white cloth and work from the outside edges inward. Test first: try any solution on an inside seam or hem to rule out discoloration. And the rule that saves the most clothes: never put a stained garment in the dryer, because heat permanently sets most stains. Air dry until the stain is verifiably gone, and repeat treatment if even a faint trace remains. Your Stain Removal Toolkit No cabinet of specialty products required: Cold water, the first response for unknown and protein-based stains Clear dish soap, without bleach, the gentle degreaser for oil-based stains White vinegar, the mild acid that breaks down tannins like coffee, tea, and juice Baking soda, the gentle abrasive and deodorizer that forms a lifting paste 3% hydrogen peroxide, a mild oxygen bleach for blood and grass, test on colors first Rubbing alcohol, the solvent for ink and some dye stains Enzyme cleaner, built for protein stains like blood, sweat, and dairy Whatever you reach for, read the label and keep products in their lane; Health Canada’s household products guidance is the reference for using any cleaner safely, and its chemical safety page explains why products should never be mixed on a whim. Method 1: Tannin Stains, the Plant-Based Family Coffee, tea, red wine, juice, berries, and grass are all plant dyes. For coffee and tea, blot immediately and flush cold water from the back of the fabric to push the stain out, then apply equal parts white vinegar and water for 10 to 15 minutes, followed by a baking soda paste and a soft brush if needed. For red wine, speed is everything: blot thoroughly, cover the stain completely with salt, and let it draw the wine out for at least an hour before scraping and rinsing cold. Treat any residue with a paste of hydrogen peroxide and dish soap for 30 minutes. Grass stains respond to dish soap or enzyme cleaner worked in for 15 minutes, with rubbing alcohol dabbed on stubborn spots before a cold rinse. Method 2: Oil-Based Stains, the Greasy Family Cooking oil, butter, salad dressing, grease, and most makeup will not budge with water alone. Cover the fresh stain with an absorbent powder, baking soda, cornstarch, or talcum, and let it sit at least 30 minutes to draw oil out of the fibers, then scrape it off. Work clear dish soap directly into the spot and let it sit 10 to 15 minutes, then wash in the hottest water the fabric tolerates. For foundation and lipstick, scrape off the excess first, apply dish soap or an oil-free makeup remover, and use a dab of rubbing alcohol to break down waxy components. Method 3: Protein Stains, Always Cold Blood, sweat, dairy, egg, and mud share one non-negotiable rule: cold water only. Hot water cooks the protein and sets it permanently. Flush fresh blood with cold running water from the back of the fabric, soak set-in traces in cold salt water for an hour, then apply 3% hydrogen peroxide directly and watch it bubble as it lifts the stain. Yellow underarm marks come from antiperspirant reacting with body oils; scrub them with one part dish soap to two parts hydrogen peroxide, sprinkle baking soda over, and let it work for an hour. Mud is the counterintuitive one: let it dry completely, brush off the solids, then treat the residue with detergent for 15 minutes and wash cold. Method 4: Dye Stains, the Toughest Family Ink and mustard are pigment problems. For ballpoint ink, place a paper towel under the fabric to absorb what gets lifted, then dab with rubbing alcohol using a clean cloth; the ink should transfer to the cloth in stages, refreshing the cloth section as you go, before a thorough cold rinse. Mustard’s turmeric is a potent dye: scrape, flush cold, apply vinegar, then treat remaining yellowing with dish soap and hydrogen peroxide and, if possible, let the garment sit in direct sunlight, which naturally bleaches the stain. Method 5: The Overnight Rescue for Old Stains Set-in stains reward patience. Soak the garment in an oxygen-based bleach solution, mixed per the product directions in the warmest water the fabric safely tolerates, for several hours or overnight; enzyme cleaners handle old protein stains the same way. After the soak, treat any survivor with the matching method above and launder. Delicates like silk and wool sit outside all of this: no hot water, no harsh scrubbing, mild detergent and gentle hand washing only, or a professional dry cleaner when the item is precious. Stain Family Fastest Fix Coffee or tea Tannin Cold flush, then vinegar and water, 10 to 15 minutes Red wine Tannin Salt blanket for an hour, then peroxide paste Cooking oil Oil-based Absorbent powder, then dish soap, hot wash Blood Protein Cold water only, then 3% hydrogen peroxide Ink Dye Alcohol dabbing over an absorbent towel Stain Removal FAQs Why does the dryer ruin my chances? Heat permanently bonds stains to fibers, which is why the check before drying matters more than any product. If the stain is fully gone, dry normally; if not, re-treat and re-wash, and keep air drying until it disappears. Can hydrogen peroxide go on any fabric? It is safe on most whites and colorfast fabrics but can lift dye, so always test

How to Tackle Tough Stains on Clothes: 5 Proven Methods Read More »

Back to School and Home Clean

Back to School: 7 Effective Ways to Keep Your Home From Turning Into Chaos

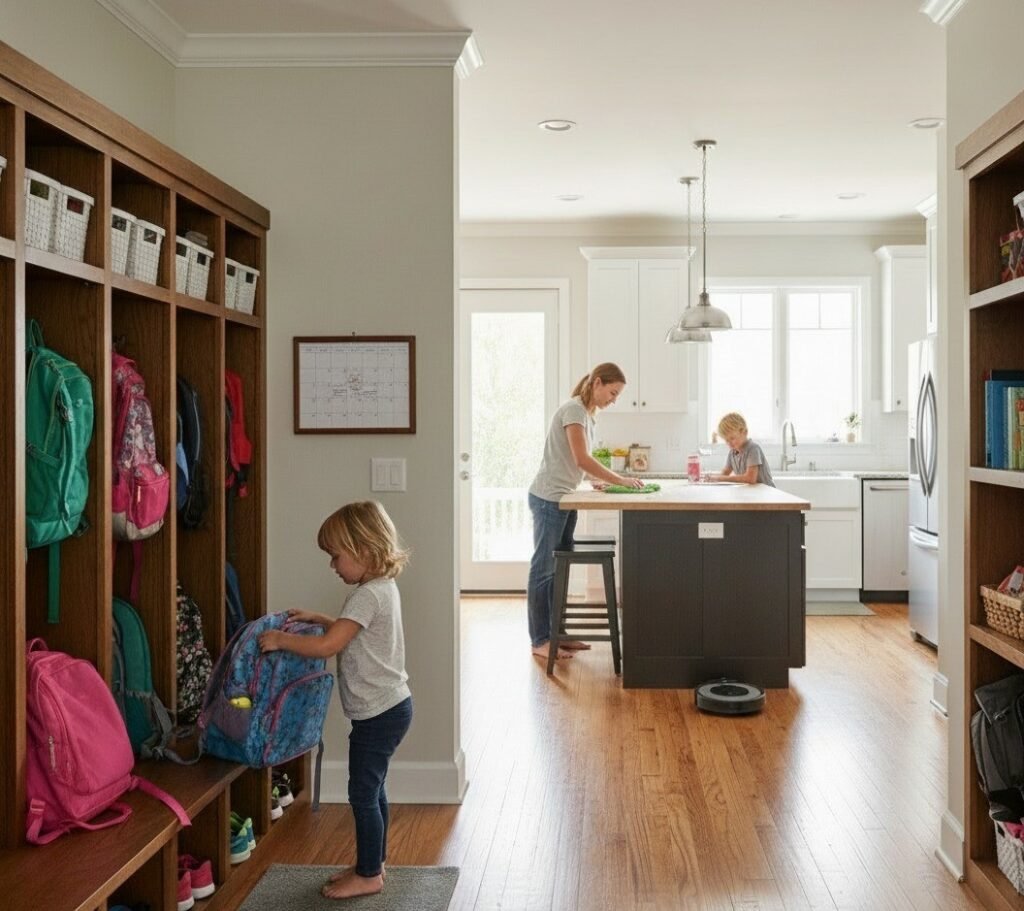
September in Canada is a vibrant month of energy and back to school time. The leaves begin to change color, the air grows crisp, and the country prepares for the autumn season. At the heart of every home, the most significant transition is the much-anticipated Back to School period. Mornings become more hurried, evenings are filled with homework and extracurricular activities, and the constant flow of backpacks, lunchboxes, and outdoor shoes can quickly transform an organized house into chaos. For Canadian families, this Back to School period demands more than just buying school supplies; it requires an adaptation of household routines, especially in cleaning and organizing, to ensure that the home remains a sanctuary of peace and order amidst the bustle of the new Back to School season. A well-managed home during this time is not only more pleasant to live in but also a fundamental pillar for the well-being and productivity of all its members. The Chaos of the Back to School Period The end of summer and the start of the academic year bring with them a host of new challenges for home organization and hygiene. Suddenly, the spaces that once housed summer play now need to accommodate school uniforms, books, art supplies, and gear for countless after-school activities. The increased traffic of children and teenagers entering and leaving the house means more dirt, more germs, and often, more clutter. Backpacks dropped by the entrance, papers scattered across the kitchen table, damp gym clothes on the bedroom floor, these are familiar scenarios for many Canadian families as the Back to School rush begins in September. Furthermore, the school environment is a fertile ground for the spread of germs. Children bring home not only new knowledge but also the viruses and bacteria circulating in classrooms, elevating the importance of cleaning focused on disinfection. Adapting cleaning strategies to face this new rhythm is essential for maintaining health and sanity at home during the Back to School transition. 1.Key Areas of Focus for Back to School Clean-up To combat the chaos of the Back to School season, it’s crucial to concentrate cleaning and organizing efforts in areas most impacted by the school routine: Entrances and Mudrooms: These are the first lines of defense against outdoor dirt. In many Canadian homes, the mudroom or entry area quickly becomes a repository for dirty shoes, coats, backpacks, and lunchboxes as everyone rushes for Back to School. To prevent dirt from spreading throughout the house and to maintain order: Create Designated Zones: Install hooks for coats and backpacks, and trays or shelves for shoes. This prevents items from piling up on the floor. Daily Cleaning: Sweep or vacuum this area daily. In Calgary and other Canadian cities, shoes track in a lot of dirt, especially as the weather begins to change. Regular Disinfection: Wipe down doorknobs and surfaces that hands frequently touch with a disinfectant, vital during Back to School germ season. The Kitchen: The kitchen shifts from a place of relaxed summer meals to a headquarters for lunchbox prep and quick meals, a core part of the Back to School routine. Lunchbox Organization: Dedicate a cupboard or shelf for lunchboxes and water bottles. Wash them immediately after use and allow them to dry. Countertop Cleaning: Wipe and disinfect countertops after each food and snack preparation. Crumbs and spills are inevitable. Refrigerator Organization: With more food being prepared and stored, keep the refrigerator organized and clean up spills immediately. Spotless Sink: Encourage immediate washing of dishes or loading the dishwasher to prevent accumulation. Study Areas and Desks: With homework in full swing, these areas can quickly become disorganized as part of the Back to School workload. Keep It Simple: Encourage a clean and minimalist study space to reduce distractions. Material Storage: Use desk organizers, drawers, and shelves to store pens, papers, books, and school supplies. Regular Cleaning: Dust and wipe down desk surfaces regularly. Encourage children to put away their materials after each study session. Bedrooms: Bedrooms can easily become clutter zones with clothes and personal items, especially with the morning Back to School rush. Make the Bed: The habit of making the bed every day creates a foundation of order for the room. Laundry Hampers: Ensure each bedroom has a laundry hamper to prevent clothes from ending up on the floor. Quick Tidy-Up Routine: Teach children to spend 5-10 minutes before bedtime tidying their rooms, putting away clothes and toys. Bathrooms: With increased exposure to germs at school, bathrooms need extra attention during the Back to School period. Daily Wipe-Down: Quickly wipe down the sink and toilet to remove visible dirt. Frequent Disinfection: Use a disinfectant on doorknobs, faucets, toilets, and light switches several times a week. Clean Towels: Encourage the use of clean face and hand towels daily or every other day. 2.Implementing New Routines The secret to maintaining order during the Back to School season is establishing routines that become habits: Daily Power Clean (15-20 Minutes): At the end of the day, just before the family settles down, do a collective 15-20 minute “power clean.” Each family member can have a task: one tidies the living room, another puts away dishes, another wipes kitchen countertops. This ensures you wake up to a relatively organized home, setting a positive tone for the next day as the Back to School routine begins again. Weekly Zone Cleaning: Instead of trying to clean the entire house in one day, divide the house into “zones” and dedicate one day of the week to each. This approach is highly effective for managing cleaning tasks alongside Back to School schedules. Envolve the Children: Cleaning should not solely be the parents’ responsibility. Assign age-appropriate chores to children. Making cleaning a family effort not only distributes the load but also teaches responsibility and the value of a clean environment, crucial lessons during the Back to School transition. 3.Fighting Back-to-School Germs With increased social interaction at schools, disease prevention becomes a priority. High-Touch Surfaces: Focus on regularly disinfecting doorknobs, light switches, remote controls, cell phones, and other frequently touched surfaces, especially important as children bring home germs during Back to School. Hand Hygiene: Reinforce the habit of frequent handwashing, especially upon returning home from school, before meals, and after using the bathroom. Keep hand sanitizer available in strategic areas. Lunchboxes and Water Bottles: Wash lunchboxes and water

Back to School: 7 Effective Ways to Keep Your Home From Turning Into Chaos Read More »

liquid detergent being poured

Complete Laundry Detergent Guide: Understand Your Formula And How To Use It

Understand Your Laundry Detergent Formula and Use It Right The real job of laundry detergent is to lift soil, oils, and stains off fabric and hold them in the wash water until the rinse cycle flushes them away. Behind that simple task sits a carefully engineered blend of compounds. Plain soap struggles in hard water: it reacts with calcium and magnesium ions to form an insoluble soap scum that clings to fibers, leaving clothes dingy, stiff, and quick to trap new dirt. Quality detergent includes builders that neutralize those minerals so the cleaning agents can work at full strength in any water. Knowing what is inside the bottle, and how much to pour, makes the difference between fresh laundry and residue-laden fabric. How Laundry Detergent Works: Surfactants and Builders Surfactants, short for surface-active agents, are the primary cleaners in every detergent. Each molecule carries a water-loving head and an oil-loving tail. During the agitation of a wash cycle, the tails latch onto soil particles and pry them loose from the fibers, while the heads stay in the water and pull each particle away, keeping it suspended so it cannot settle back onto other clothes before the rinse. Most formulas blend surfactant types: anionic surfactants are the workhorses for lifting and suspending particulate dirt, while nonionic surfactants, which carry no electrical charge, excel at emulsifying oily soils and perform very well in cooler water. Builders soften the water so the surfactant system can do its job. Phosphates once dominated this market, prized for their cleaning power, until detergent makers dropped them over environmental damage: nutrient runoff fed algae overgrowth that starved lakes and rivers of oxygen, an effect now called eutrophication. Formulas today lean on alternatives such as sodium citrate and zeolites, which handle mineral hardness with a far lighter environmental footprint. Liquid, Powder, Pods, or Sheets: Pick the Format That Fits Detergent reaches your laundry room in four main formats, each with trade-offs in convenience, cost, and cleaning power. Format Best For Watch Out For Liquid Cold-water washes and pretreating greasy spots like salad dressing or body oil Bulky packaging and easy overdosing Powder Ground-in dirt such as mud and grass, plus whites boosted by oxygen bleach White residue in very cold water; clumping when stored damp Pods Perfectly dosed loads with no measuring or spillage Highest cost per load; a safety risk near small children Sheets Lightweight, low-waste laundry with plastic-free cardboard packaging Less punch on heavy-duty stains Liquids dissolve completely at any wash temperature, which makes them a reliable choice for energy-saving cold washes, and you can apply them directly to stains so the surfactants start working immediately. Powder is usually the most economical option per load, and it can carry oxygen-based bleaches such as sodium percarbonate more stably than liquid can, delivering superior whitening; keep it in a dry spot so it does not clump. Pods hold highly concentrated detergent in pre-measured, water-soluble packets, removing guesswork and preventing overuse, but you pay more per load and cannot scale the dose down for small or lightly soiled loads. Their candy-like appearance also makes safe storage essential, and Health Canada warns that detergent packets are attractive to children, so keep them out of sight and reach. Sheets, the newest format, are dehydrated compressed detergent that dissolves in the wash; they are mess-free, ultra-light, and typically packed in recyclable cardboard, though some heavy-duty stains may still call for a concentrated liquid or powder. The Support Cast: Enzymes, Polymers, and pH Modifiers Modern formulas lean on enzymes, which are biological catalysts that break specific stains into smaller pieces. A typical enzyme blend includes: Protease for protein-based stains such as blood, grass, and dairy. Amylase for starch-based stains such as gravy and potato. Lipase for fats and oils, from cooking grease to lipstick. Cellulase for cotton blends, which releases soil and trims the fuzzy microfibrils that cause pilling. Polymers are quieter heroes: anti-redeposition polymers keep loosened dirt suspended so it cannot settle back and cause dinginess, while soil-release polymers deposit an invisible shield on synthetics like polyester that makes future stains easier to wash away. pH modifiers such as sodium carbonate raise the alkalinity of the wash water, helping to break down fats and oils for a stronger clean. Dosage and Fabric Softener: Two Common Mistakes Using too much detergent is the single most frequent error, and it never results in cleaner clothes. Excess product leaves a residue that dulls colors, stiffens fabrics, irritates skin, and traps odor-causing bacteria; it also accumulates inside the machine, where it encourages mold and biofilm growth. Always measure precisely. It also pays to respect the chemistry with fabric softener: most detergents are anionic, or negatively charged, while softener is cationic, or positively charged, so the two are designed to attract. If they mix prematurely they neutralize each other into a residue, which is exactly why washing machines have separate dispensers that release them at different points in the cycle. Is Homemade Laundry Detergent Worth It? Popular recipes built from washing soda, borax, and grated bar soap sound thrifty, but they create soap, not a modern detergent. In all but the softest water, that soap forms scum that builds up on your clothes and inside the machine. These mixes are also not low-sudsing, which makes them damaging to high-efficiency washers, and they can even void your machine warranty. If your goal is a greener laundry routine, Health Canada’s guidance on household products is a useful starting point for choosing safer options, from concentrated eco detergents to sheets. Frequently Asked Questions About Laundry Detergent How much detergent should I use per load? Follow the dose markings on the cap and reduce the amount for small or lightly soiled loads. More product does not mean cleaner clothes, and excess leaves residue on fabric and inside the washer. Is liquid detergent better for cold water washes? Yes. Liquid dissolves completely at any wash temperature, so it is a dependable pick when you wash in cold water to save energy

Complete Laundry Detergent Guide: Understand Your Formula And How To Use It Read More »

Natural Cleaning Products

Amazing Natural Cleaning Products To Add To Your Daily Routine

Amazing Natural Cleaning Products to Add to Your Daily Routine Switching to natural cleaning is not a step backward into grandma’s pantry; it is a practical application of basic chemistry. Most messes in a home, grease, mineral deposits, organic stains, and soap scum, are chemical compounds that simpler ingredients can dissolve or lift away. Once you grasp the acid-alkali interplay, gentle abrasion, and the surfactant power of true soap, a few inexpensive staples replace a whole shelf of specialized products. Distilled White Vinegar: The Acid Workhorse The acid-alkali dynamic drives most natural cleaning: use an acid to dissolve an alkaline mess, or an alkali to neutralize an acidic one. On the acidic side, distilled white vinegar is the champion. Its roughly 5% acetic acid gives it a pH of about 2.5, perfect for dissolving the mineral deposits behind hard water stains and limescale. A vinegar solution makes glassware, faucets, and shower doors sparkle, and a soak can descale a coffee maker or showerhead and restore its flow. A cup of vinegar in the rinse cycle also acts as a fabric softener by dissolving leftover alkaline detergent residue. The hard rule: vinegar’s acidity etches acid-sensitive stone such as marble, granite, and travertine, so keep it off them. Baking Soda and Washing Soda: Gentle but Powerful Scrubs On the alkaline end sits baking soda, or sodium bicarbonate, a mild alkali whose fine, consistent abrasive texture makes it the ideal scouring agent for sinks, fiberglass tubs, and stovetops that harsher powders would scratch. Its stronger cousin, washing soda, or sodium carbonate, runs at a pH around 11 and is a powerful degreaser and water softener that anchors homemade detergent recipes. Baking soda also deodorizes by chemistry, not masking: an alkaline substance neutralizes acidic, sour odors like garbage disposal smells. The fizzy vinegar-and-baking-soda reaction is widely misunderstood: the two form unstable carbonic acid that instantly decomposes into carbon dioxide gas and water. The real power is the agitation of the bubbles, which loosens grime in drains and toilet bowls. Apply the baking soda first, then the vinegar, so the reaction happens on the surface you are cleaning. Liquid Castile Soap: A True Soap for Every Room Castile soap, made from saponified vegetable oils, behaves differently from synthetic detergents. Its molecules are surfactants with a water-loving head and an oil-loving tail: the tail grabs grease and dirt while the head clings to water, so grime gets encapsulated and rinsed away. Dilution makes it endlessly adaptable: shake a couple of drops into a water-filled spray bottle for an everyday all-purpose mist, stir one tablespoon into a pail of hot water for a floor-washing solution, or mix one part soap with three parts water in a foaming dispenser for gentle hand soap. Hydrogen Peroxide: Whitening and Disinfecting Without Chlorine For disinfection and whitening, 3% hydrogen peroxide is the natural alternative to chlorine bleach. As an oxidizer, it breaks down organic material such as bacteria, viruses, and mold spores, which makes it a strong disinfectant for kitchen and bathroom surfaces. A paste of hydrogen peroxide and baking soda works wonders on stubborn white countertop stains and discolored grout: let it sit for 10-15 minutes while it bubbles, then scrub and rinse. The same combination makes a non-chlorine oxygen bleach that brightens laundry without chlorine’s harsh fumes and fabric damage; for comparison, the CDC explains how chlorine bleach disinfects and how to handle it safely. Staple Main Strength Top Uses Distilled white vinegar Acid that dissolves mineral scale Glass, faucets, shower doors, coffee makers Baking soda Mild abrasive alkali Sinks, tubs, stovetops, odor control Castile soap True soap surfactant All-purpose mist, floors, hand soap Hydrogen peroxide Oxidizer and disinfectant Counters, grout, laundry brightening Essential Oils That Earn Their Place Beyond the core staples, essential oils add function, not just fragrance. The properties that matter most for cleaning include: Tea tree oil: antiseptic, antifungal, and antibacterial, ideal for bathroom sprays and mildew-prone areas. Citrus oils from lemon, orange, or grapefruit: excellent degreasers thanks to their d-limonene content, with a fresh uplifting scent. Eucalyptus oil: a natural disinfectant and decongestant; add it to mopping water when someone in the house is sick. Peppermint oil: deters pests like ants and spiders when a few drops sit on cotton balls in corners or entry points. Clove oil: a top choice for slowing mold growth. Putting Natural Cleaning to Work, Room by Room In the kitchen, coat the oven interior, avoiding the heating elements, with a thick paste of baking soda and water and leave it overnight; the softened grease wipes away the next day, and a final vinegar spray neutralizes any soda residue. For stainless steel, mist on vinegar, then polish with a microfiber cloth and one tiny drop of olive oil. In the bathroom, spritz the shower walls after every use with a light blend of water, vinegar, and tea tree oil drops, which stops soap scum and mildew from building up; for discolored grout, work a hydrogen peroxide and baking soda paste into the lines with an old toothbrush, wait about 15 minutes while it bubbles, then scrub and rinse. In the laundry room, pretreat stains with equal parts water and hydrogen peroxide plus a squirt of castile soap, rub castile soap into grease spots, and let hydrogen peroxide handle organic stains like grass or blood. To refresh towels and sheets that have lost absorbency, soak them in hot water with washing soda or borax and a little detergent to pull out built-up residue. Natural Cleaning Tips: Dwell Time and Tools Natural solutions reward patience: most benefit from a few minutes of dwell time to break down grime before you wipe. Tools matter too: microfiber cloths grab dust with static charge far better than cotton rags, stiff and soft brushes cover most scrubbing, and glass spray bottles beat plastic, which some essential oils can degrade over time. Toronto Shine Cleaning brings this health-conscious, eco-friendly approach to every corner of your home through our regular cleaning service and deep cleaning plans.

Amazing Natural Cleaning Products To Add To Your Daily Routine Read More »

old Toothbrushes For Cleaning services

8 Efficient And Economical Ways To Use Old Toothbrushes For Cleaning

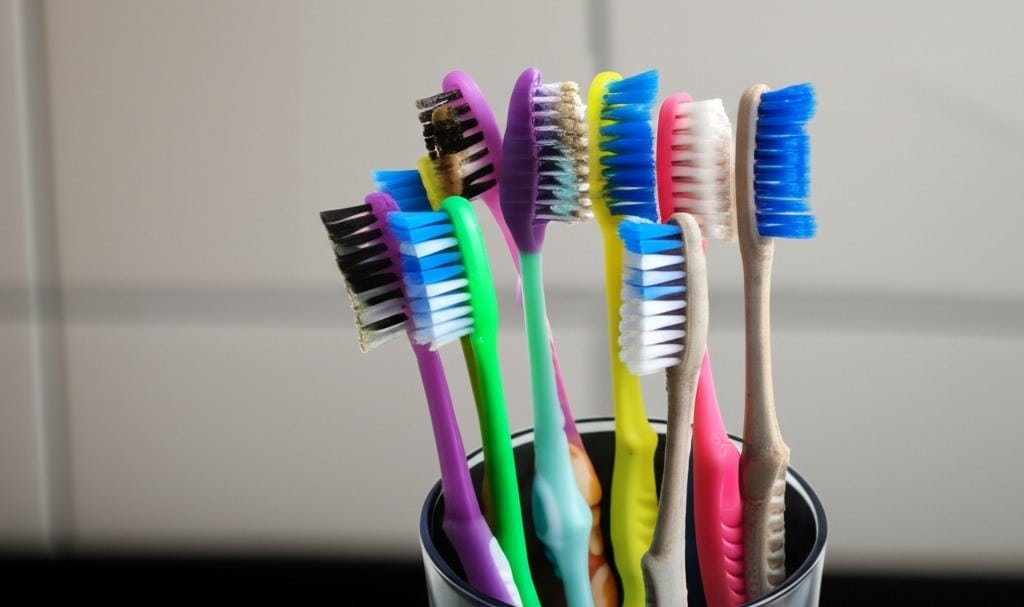
Before you discard that old toothbrush, consider its second life as a precision cleaning instrument. Its small head, firm bristles, and ergonomic handle make it an unparalleled tool for tackling the grime that accumulates in the tightest, most awkward spaces in your home. Its utility extends far beyond the bathroom sink, reaching into every room to restore detail and cleanliness where larger tools cannot. 1.Floor Joints In the kitchen, the toothbrush becomes an indispensable ally. Start with the grout lines on your tiled floor or backsplash. These porous channels are magnets for spilled coffee, sauce splatters, and general kitchen debris. A standard mop or sponge glides over them, but a toothbrush gets right in. Create a paste using baking soda and a small amount of water or, for tougher stains, a bit of hydrogen peroxide. Apply the paste directly to the grout and let it sit for a few minutes. Then, take your old toothbrush and scrub in small, circular motions. The bristles will agitate the paste and lift the embedded grime, restoring the grout to its original color. This same method works wonders on countertop grout where crumbs and food particles become trapped. 2.Sink Move to the kitchen sink. The area around the base of the faucet is a breeding ground for mineral deposits and soap scum. The angled head of a toothbrush can get right up against the fixture, scrubbing away the chalky white residue. Dip the brush in white vinegar to help dissolve hard water stains. Don’t forget the faucet’s aerator; unscrew it and use the toothbrush to scrub the fine mesh screen, clearing any blockages that affect water pressure. The sink drain itself, particularly the rubber splash guard in a garbage disposal, is another target. Lift the rubber flaps and use the toothbrush with a degreasing dish soap to scrub away the slimy, foul-smelling buildup on the underside. It’s a task no one enjoys, but one for which the toothbrush is perfectly designed. 3.Microwave Appliances are filled with nooks that a cloth can’t reach. The control knobs on your stove can be removed and scrubbed individually. The tiny crevice between the cooktop and the counter is a trap for crumbs; a dry toothbrush can flick them out before you wipe the area down. The seal around your microwave or oven door collects grease and food splatter. A toothbrush dipped in a mild cleaning solution can gently scrub this gasket clean without causing damage. The vents on the front of your dishwasher, the control panel buttons, and even the intricate filter system inside can all be detailed with a toothbrush. For small appliances, its use is even more pronounced. The blades of a blender, the cutting gear of a can opener, and the grates of a toaster oven are all easily and safely cleaned with a toothbrush. A particularly clever use is for cleaning a cheese grater. Instead of shredding your sponge, scrub the grater from the inside out with a soapy toothbrush to dislodge every last bit of dried-on cheese. 4.Bathroom The bathroom presents its own set of detailed cleaning challenges. Shower and tub grout is constantly exposed to moisture, soap, and body oils, leading to mildew and soap scum. A toothbrush, paired with a specialized tile cleaner or a potent mixture of vinegar and dish soap, is the ultimate weapon. Its bristles are stiff enough to scour away the grime without scratching the tile. The track for a sliding shower door is notoriously difficult to clean. It’s a narrow channel that collects a disgusting combination of hard water deposits, soap scum, and hair. A dry toothbrush can first be used to loosen and sweep out the dry debris. Follow up by spraying a cleaner into the track and using the toothbrush to scrub it from end to end, reaching into the corners. The result is a smoothly gliding door and a far more hygienic shower environment. Look closely at your bathroom fixtures. The overflow hole in the sink is a dark, damp space that can develop odors and mildew. A toothbrush can be inserted and scrubbed around the opening to clean it thoroughly. The base of the toilet, where it meets the floor, collects dust and other unpleasantries. A dedicated, clearly marked toothbrush can be used to scrub this crevice clean. The most overlooked area is the toilet seat hinges. The complex plastic and metal parts are impossible to clean with a cloth. A toothbrush can get into every single gap, removing the grime that builds up around the bolts and hinges, a detail that makes the entire toilet look and feel cleaner. The jets under the rim of the toilet bowl, often clogged with mineral deposits, can be individually scrubbed with a toothbrush dipped in toilet bowl cleaner to ensure a powerful, effective flush. 5.Windows And Doors Beyond the kitchen and bath, the toothbrush proves its worth throughout the house. Window and sliding door tracks are a prime example. Dust, dirt, dead insects, and outdoor debris collect in these channels. A dry toothbrush works perfectly to loosen and sweep this material into a pile that can be easily vacuumed up with a crevice tool. For caked-on mud, a wet toothbrush will do the job. The delicate fins of heating and air conditioning vents are dust magnets. A dry toothbrush can gently brush the dust off each fin without bending or damaging them. 6.Electronics For electronics, a completely dry, clean toothbrush is essential. Gently brush it over your computer keyboard to dislodge crumbs, dust, and hair from between the keys. Do the same for the ports and vents on a laptop, gaming console, or television. The fine bristles can get into these areas without causing static damage, provided the brush is dry. The intricate patterns on furniture, such as carved wood on a headboard or the detailed legs of an antique table, can also be dusted with a dry toothbrush, which removes dust from crevices a cloth would miss. 7.Clothes Its applications in laundry

8 Efficient And Economical Ways To Use Old Toothbrushes For Cleaning Read More »