Clothes Cleaning

Different Types of Cleaning Cloths

Different Types of Cleaning Cloths: Clean Your Home Without Damaging it

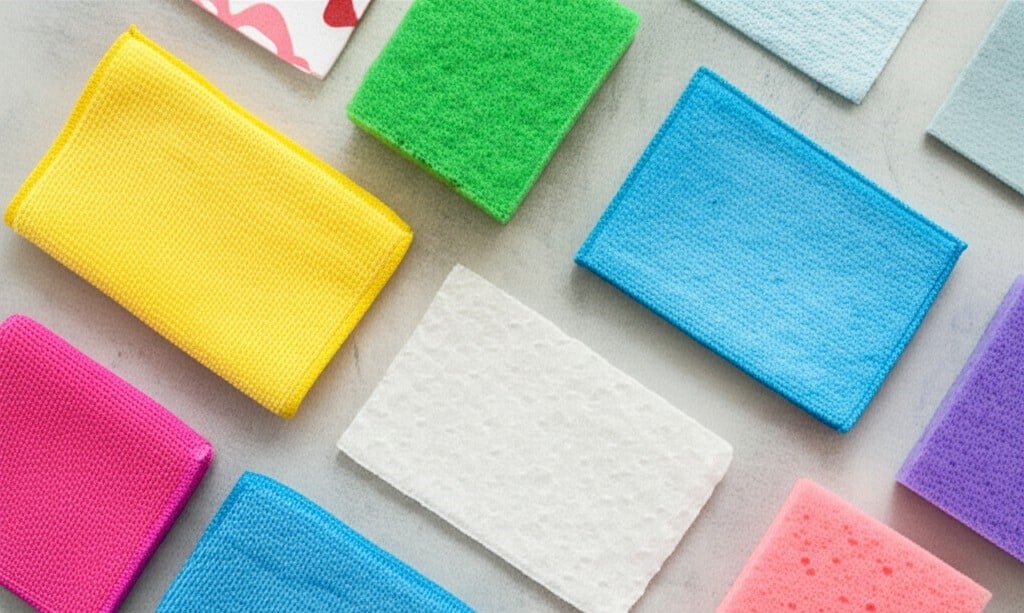
The cleaning cloths is the single most fundamental tool in the arsenal of both the professional and the homeowner. Its importance is often overlooked in favor of powerful chemical solutions or advanced machinery, yet the success of any cleaning task hinges on the material used to wipe, scrub, and polish a surface. The wrong cloth can leave behind lint, create streaks, fail to absorb liquid, or, in the worst-case scenario, scratch and permanently damage the very surface it is meant to clean. A deep understanding of the different types of cleaning cloths is not a minor detail; it is the foundation of effective and efficient cleaning. The market is filled with various cleaning cloths, each designed with a specific purpose in mind. Microfiber Microfiber has revolutionized the cleaning industry over the past few decades, and for good reason. It is not a single type of cloth but a category of textiles made from incredibly fine synthetic fibers, typically a blend of polyester and polyamide. For a fiber to be classified as a microfiber, it must be finer than one denier, which is approximately the diameter of a silk strand. Most cleaning-grade microfibers are significantly finer than that. The true genius of microfiber lies in its manufacturing process. The fibers are split into a star-like or wedge-shaped cross-section. This creates an enormous amount of surface area within the cloth and a network of microscopic hooks that are exceptionally effective at trapping dust, dirt, grime, and microbes. Unlike traditional cotton cleaning cloths, which tend to push larger particles around, a microfiber cloth actively grabs and holds onto debris. Furthermore, the material possesses a natural positive electrostatic charge when dry, which acts like a magnet for negatively charged dust particles. This makes it an unparalleled tool for dusting without the need for chemical sprays. When used damp, microfiber’s effectiveness shifts to its capillary action. The vast network of fibers can absorb between seven and eight times its own weight in liquid. This incredible absorbency allows it to lift and remove dirt and grease with minimal water, often eliminating the need for harsh cleaning chemicals. The fine fibers can penetrate microscopic pores and irregularities on a surface that other cloths simply skim over. However, not all microfiber is created equal; the weave and pile of the cloth dictate its best use, making the selection of specific microfiber cleaning cloths a crucial decision for achieving optimal results. All-Purpose Microfiber: This is the most common and versatile type. It has a looped pile, similar to a traditional terry cloth towel but much finer. This texture is excellent for scrubbing and trapping larger particles of dirt and grime. It’s the workhorse for general cleaning tasks like wiping down countertops, cleaning spills, scrubbing bathrooms, and washing general household surfaces. Its high absorbency makes it effective for both wet and dry applications. Waffle Weave Microfiber: Characterized by a distinctive grid-like pattern of recessed squares, this weave significantly increases the cloth’s surface area. This design is engineered for maximum absorbency and quick drying. Waffle weave cloths are the superior choice for drying tasks. They can absorb large amounts of water without becoming oversaturated quickly, making them perfect for drying dishes, glassware, and especially for automotive detailing, where leaving a streak-free finish on a car’s body is paramount. Glass and Polishing Microfiber: These cloths have a very tight, flat, suede-like weave with no pile. This smooth surface is designed to glide effortlessly over reflective surfaces. Because it lacks the looped fibers of a terry weave, it is virtually lint-free. Its primary purpose is to clean and polish glass, mirrors, windows, stainless steel appliances, and chrome fixtures without leaving behind streaks, smudges, or fibers. For best results, one of these flat-weave cleaning cloths is often used slightly damp to clean, followed by a second, dry one to polish to a perfect shine. High-Pile or Plush Microfiber: These cloths feature long, soft, fluffy fibers. The primary advantage of this design is its ability to trap and hold large quantities of dust deep within its pile, preventing it from being released back into the air. This makes it the ultimate reusable dusting tool, far superior to disposable static cloths. The plushness also makes it ideal for delicate tasks like buffing car wax without scratching the paint or for applying polish to fine furniture. Proper care is essential to maintain microfiber’s unique properties. They should be washed only with other microfiber or non-linting synthetic materials. Washing them with cotton will cause lint to become embedded in the fibers, ruining their effectiveness. Crucially, fabric softener and bleach must never be used. Fabric softener clogs the microscopic gaps in the fibers, destroying their ability to absorb and trap dirt. Bleach degrades the synthetic fibers, causing them to break down. Washing these cleaning cloths correctly ensures they last for hundreds of uses while maintaining their superior cleaning power. Cotton Before the advent of microfiber, cotton was the undisputed king of cleaning cloths. Derived from a natural plant fiber, cotton is known for its softness and high absorbency. It is durable and can withstand harsh chemicals like bleach and high washing temperatures, which can be useful for sanitization when dealing with heavy contamination. Cotton Terry Cloth: These are the familiar towels found in bathrooms and kitchens. Their looped pile is designed for absorbing large volumes of water. While effective for mopping up significant spills or for heavy-duty scrubbing where potential linting is not a concern, these cotton cleaning cloths are not ideal for fine cleaning. They tend to smear dirt more than lift it and often leave behind noticeable lint, especially on glass and dark surfaces. Flour Sack Towels: These are thin, tightly woven cotton cloths, historically made from the sacks used for flour. Their key advantage is that they are virtually lint-free. This makes them an excellent, classic choice for drying glassware and polishing silverware to a brilliant shine. They are less absorbent than terry cloth, but their smooth surface makes them superior finishing cleaning cloths for specific tasks where a perfect, clear finish is required. Cotton Rags: The most economical option is often a repurposed old

Different Types of Cleaning Cloths: Clean Your Home Without Damaging it Read More »

Laundry Room Cleaning 101: The Ultimate Guide to a Sparkling Space

Laundry Room Cleaning 101: The Ultimate Guide to a Sparkling Space A laundry room only works well when it is clean, decluttered, and logically arranged. The fastest route to that goal is a full reset: empty the room, deep clean every surface, and rebuild the space around the way you actually do laundry. This guide walks through the whole process so the room stops being a chore and starts being a calm, efficient workspace. Step 1: Empty the Room Completely Pull out every bottle of detergent, every box of dryer sheets, every hamper, and every stray sock. Move furniture aside until the room is bare. Only then can you see the space you truly have and break the habits that created the clutter. Sort everything into three groups as you go: keep, donate or discard, and relocate. That half-empty fabric softener you never reach for? Pour it out and recycle the bottle. The pile of wire hangers from the dry cleaner? Recycle them. Tools that wandered in by accident? Return them to the garage or toolbox. This ruthless purge is the foundation of every later step. Step 2: Deep Clean From the Top Down With the room empty, clean it properly, starting high and working low. Dust ceiling corners and light fixtures, then wash walls and baseboards with warm water and an all-purpose cleaner. Pay special attention behind the washer and dryer, where lint, dust, and lost items accumulate. Then tackle the appliances: Pull the machines away from the wall and vacuum the dryer vent hose and wall opening with a long attachment or vent brush; impacted lint here is a fire hazard, not just an eyesore Wipe down the exterior of both machines Run an empty cleaning cycle in the washer with a washing machine cleaner or a vinegar and baking soda mix to remove soap scum and mildew odours Wash the dryer lint trap with soap and water to clear the fabric softener film that restricts airflow Scrub the now-accessible floor, reaching the corners behind the machines Moisture control matters in this room: Health Canada’s mould and humidity guidance explains why damp, poorly ventilated spaces grow mould, and its dust mite advice notes how regular hot washing of bedding and towels keeps allergens down. A vented dryer, an open window, or a small dehumidifier keeps the room dry between loads. Step 3: Plan Zones That Follow the Workflow Think of laundry as a production line: dirty clothes arrive and get sorted, move to the washer, pass through the dryer, land on a clear folding surface, and finally leave the room. Arrange the room to follow that flow so clean items never mix with dirty ones and you never backtrack. Every laundry room benefits from four zones: sorting, washing and drying, folding and stain treatment, and supply storage. Zone Purpose Key items Sorting Separate loads as they come in Multi-bin hamper on wheels, labelled bins Washing and drying Run the machines Detergent, softener, stain remover within reach Folding Clear surface for warm laundry Countertop over front-loaders or a sturdy table Supply storage Keep products tidy and visible Uniform containers, shelves, labelled baskets Step 4: Use Vertical Space and the Walls Most laundry rooms are compact, so build upward. Wall-mounted shelving positioned over the pair of machines holds daily-use products in clear containers or uniform baskets, while closed cabinets hide less attractive stock. If you have front-loading machines, a countertop across them creates the single most useful surface in the room: a dedicated spot for sorting, treating stains, and folding straight from the dryer, which prevents the mountain of clean laundry that lives in a basket for days. A freestanding table works just as well when a built-in counter is not possible. Wall-mounted, collapsible drying racks fold flat for delicates and athletic wear, a pegboard holds small baskets, hooks, and a lint roller in endlessly adjustable arrangements, and a wall-mounted ironing board holder frees a corner completely. Step 5: Tame the Supplies and the Sorting Mismatched, brightly coloured bottles make any room feel chaotic. Decant detergents, softeners, and stain removers into a matching set of clear containers with waterproof labels; glass beverage dispensers suit liquids, while large canisters with scoops work for powders. You see at a glance when a product is running low, and the shelves instantly look calmer. Group like items together, all stain treatments in one tray, all wash products in another, so nothing is ever hunted for. For dirty clothes, replace the single hamper with a three-bin sorter on wheels, one bin each for whites, darks, and colours, or add a fourth for delicates and heavily soiled workwear. Labelling the bins means clothes are pre-sorted as they are dropped in, and wash day becomes simply grabbing a full bin. Step 6: Add the Finishing Details Small systems prevent the room from sliding back into chaos. Keep a lidded trash can beside the dryer for lint and used dryer sheets. Set a visible dish or basket as a lost-and-found for pocket finds and the inevitable lone sock. Mount a small whiteboard for the shopping list or a stain removal cheat sheet. Good lighting is worth the upgrade, too: a brighter LED fixture or under-cabinet strip over the folding surface makes stains easier to spot and the room feel larger. Finally, build a five-minute reset into the end of every laundry day: put supplies back, wipe the folding surface, empty the lint trap and trash, and return lost-and-found items. That small routine is what keeps the system working for years. Laundry Room Cleaning FAQs How often should I clean my washing machine? Run a cleaning cycle once a month, or more often in hard water areas or homes with heavy use. Leave the door ajar between loads so the drum dries out and never smells musty. Why is dryer vent cleaning so important? Lint is highly flammable, and a blocked vent traps heat inside the dryer, raising the risk of fire. Vacuum the hose and vent opening

Laundry Room Cleaning 101: The Ultimate Guide to a Sparkling Space Read More »

organizing child's wardrobe

Organizing Your Child’s Closet – Stop Making These Mistakes

A child’s closet can quickly become a zone of chaos. It starts with a few misplaced shirts and, before you know it, transforms into a jumble of clothes that may or may not fit, single shoes, forgotten toys, and mystery items that defy categorization, all crammed into the child’s closet. Restoring order to a child’s closet is not just about making it look tidy; it’s about creating a functional system that a child can understand and, most importantly, help maintain. The goal is to move from a space that causes daily frustration to one that simplifies routines, from dressing in the morning to cleaning up at night. 1.Empty Everything The first, and often most overwhelming, step is to pull everything out of the child’s closet. Every single item must be removed from the child’s closet and placed in an open area, like the middle of the bedroom floor. This includes every piece of clothing, every shoe, every belt, every long-forgotten stuffed animal, and every piece of sports equipment tucked into a corner of the child’s closet. The initial sight of this pile will likely be daunting. It will look significantly worse before it gets better. This is a necessary part of the process. It allows you to see the true volume of what you’re dealing with and prevents you from simply rearranging clutter. Before you begin, have four distinct containers ready: large bags or boxes labeled Keep, Donate, Trash, and Outgrown. This preparation prevents you from having to make decisions about where things go mid-sort. With the closet completely empty, you can begin the sorting process. This is a critical stage that requires ruthless honesty. Pick up each item one by one and make a decision. For clothing, ask a series of questions. Does it currently fit the child? If the answer is no, it does not belong back in the child’s closet. Is it stained, ripped, or damaged beyond reasonable repair? If so, it belongs in the “Trash” bag. Is it in good condition but simply isn’t worn? Perhaps the fabric is itchy, the style is disliked, or it’s for an occasion that never arises. These items, along with clothes in good condition that are too small, can go in the “Donate” box.   2.Boxes The “Outgrown” box serves a specific purpose for families planning to have more children or who have younger relatives to pass things down to. This is for high-quality items that are too small but are worth saving. Be selective here. Only keep the best of the outgrown items; otherwise, you are simply shifting clutter from one storage area to another. Once this box is full, label it clearly with the sizes and season (e.g., “Boys Clothes, 3T, Summer”) and store it away from the primary closet space, perhaps in the attic, basement, or a storage bin under a bed. Involving the child in this sorting phase can be beneficial, but it must be managed carefully. For a very young child, their involvement might be minimal. For a child old enough to have opinions, their input is valuable for items in the “Keep” pile. You can ask, “Do you still love wearing this shirt?” This gives them a sense of control and ownership over their belongings. However, be prepared to make the final executive decision on items that are clearly too small or damaged. Avoid asking questions like, “Do you want to get rid of this?” as the answer will almost always be no. Frame it differently: “Let’s put this in the donation box so another little boy who needs a coat can stay warm.” This reframes the act from one of loss to one of generosity. Once the sorting is complete and the piles have been dealt with trash taken out, donations placed in the car to be dropped off turn your attention to the now-empty child’s closet. Do not skip this step. This is your chance to create a truly clean slate. Wipe down every surface within the child’s closet: the shelves, the hanging rod, the walls, and the baseboards. Vacuum the floor of the closet thoroughly, getting into the corners. This is also the perfect time to make any small improvements. A fresh coat of light-colored paint can make a small, dark child’s closet feel brighter and larger. Consider adding a battery-operated, motion-sensor puck light if the closet is dim. This small touch makes finding things easier and the space more inviting for a child. Now, with a clean and empty space, you can design the system for the child’s closet. The single most important principle for a child’s closet is accessibility. If a child cannot reach their clothes, they cannot dress themselves independently or put their clothes away. The standard child’s closet configuration with a high shelf and a high hanging rod is designed for adults, not for children. 3.Adjust The Wardrobe Rod The most impactful change you can make in a child’s closet is to adjust the clothing rod. In many a child’s closet, this is a simple fix. If you can, lower the main rod to a height where your child can easily see and reach their hanging clothes. If you cannot move the existing rod, a simple and inexpensive solution is a closet doubler. This is an adjustable second rod that hangs from the top rod, instantly creating a lower, kid-height hanging space. This one change can be revolutionary for a child’s independence. Use this lower rod for their everyday clothes: shirts, dresses, and jackets. The higher, original rod can then be used for out-of-season items, special occasion outfits, or costumes that are used less frequently. Shelving and bins are the next core components for an organized child’s closet. Children are not naturally inclined to create neat, folded stacks of clothes. Bins and baskets bypass this issue by providing a designated “home” for categories of items. Use open-top bins or baskets on the child’s closet shelves or floor for bulky items. Assign one bin for pajamas, one for

Organizing Your Child’s Closet – Stop Making These Mistakes Read More »

closet

How To Organize Your Closet The Easy Way – 4 Incredible Tips

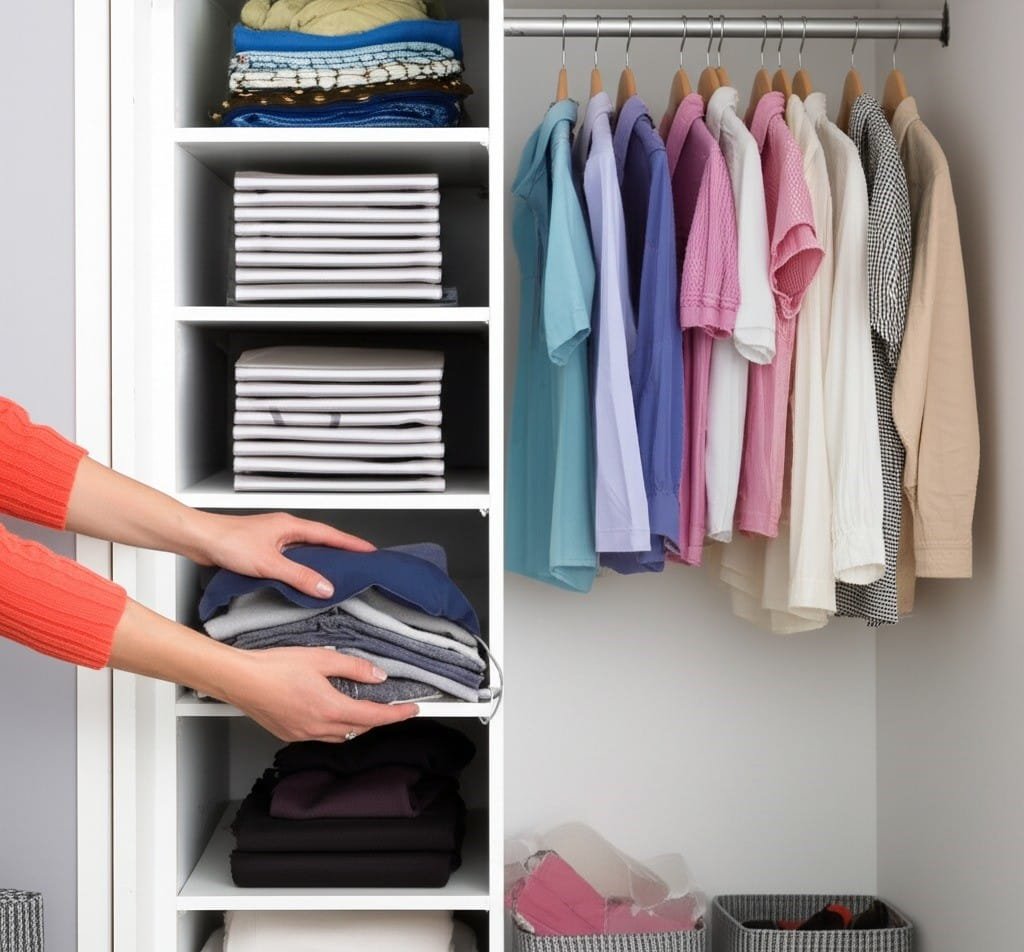
How to Organize Your Closet the Easy Way: 4 Proven Tips An organized closet is not about buying matching boxes and hangers. It is a simple four-step system: empty the space, screen every item, group what remains, and maintain the result. Each step takes decision-making off your shoulders, and when it is done you will see everything you own at a glance and start each day faster. Here is the easy way to get there. Tip 1: Empty the Closet and Start Clean Set aside a real block of time, a full afternoon for most closets, and gather supplies first: heavy-duty trash bags, donation bags or boxes, a box for items needing repair, microfiber cloths, an all-purpose cleaner, and a vacuum with its crevice and upholstery attachments. Then remove everything, every garment from the rod, every shoe from the floor, every shelf and drawer emptied, and pile it all on the bed. Seeing the full volume of your wardrobe in one place is the honest reality check that makes the next step easier. With the closet bare, deep clean it from top to bottom: dust the shelves and rod, wipe walls and baseboards, vacuum corners and floor with the crevice tool. This is also the moment to inspect for dampness, mould, or pests while everything is visible, because a clean, dry closet is the only foundation worth rebuilding on. Tip 2: Screen Every Item Into Four Piles Work through the mountain one item at a time with no shortcuts, sorting into four piles: keep, donate, trash, and repair. Ask these five questions for each piece: Have I worn it in the last year? Seasonal coats and holiday pieces count, but an everyday shirt untouched for twelve months is unlikely to be worn again Does it fit me right now? Store for the body you have today, not a future size; an aspirational piece you love can live in a separate box, not your main closet Is it in good condition? Permanent stains and irreparable damage mean trash or textile recycling, never donation, while a missing button or small tear goes to the repair pile with a two-week deadline Does it match my current life and style? Jobs, seasons, and tastes change, and the wardrobe should reflect the present How does it make me feel? Clothing that itches, pinches, or makes you self-conscious is not serving you Be ruthless with duplicates, keep the best black t-shirt and the favourite pair of jeans rather than six near-identical versions, and park truly sentimental pieces in a labelled memory box instead of the active wardrobe. When the piles are done, move the trash out immediately and load the donation boxes into the car the same day, before second-guessing starts. Tip 3: Group Like With Like and Assign a Home Sort the keep pile by category, all t-shirts together, all trousers together, all dresses together, and plan the layout around how you get dressed. The eye-level, easy-reach zone is prime real estate and belongs to frequently worn items; formal wear and off-season pieces go higher or further back. Then decide what hangs and what folds. Blouses, button-downs, dresses, skirts, trousers, jackets, and blazers wrinkle easily and belong on hangers. Heavy knit sweaters stretch out when hung, so fold them, along with t-shirts, jeans, and activewear. Switch to uniform slim velvet hangers: they grip clothes that wire and plastic hangers let slip, take far less rod space, and create the clean look that makes each item visible. Hang by category, and within each category from light to dark, for faster outfit choices. For folded items, file folding changes everything. Fold each piece into a rectangle and stand it upright like a file, so every shirt is visible at a glance without digging through a stack. Drawer dividers keep socks and undergarments contained, labelled baskets or clear bins hold scarves, belts, and hats, and transparent shoeboxes and a compact rack keep footwear off the floor. Add an over-the-door organizer for extras and wall hooks for robes, purses, and daily jackets to use every inch of vertical space. Tip 4: Maintain With Simple Daily Rules An organized closet maintains itself with three habits. First, one in, one out: every new purchase means an old item is donated or discarded. Second, a five-minute reset each evening or week that returns clothes, shoes, and accessories to their homes, so nothing piles up on a chair or the floor. Third, seasonal rotation: pack off-season clothing into sealed totes stowed under the bed, on high shelves, or in another dry spot, freeing prime closet space for what you wear now. Health Canada’s dust mite guidance recommends regular washing of clothing and bedding to control allergens, and the CDC’s mould overview notes that sealed storage in dry conditions keeps fabric safe from damp and mildew between seasons. A little weekly upkeep beats another full overhaul next year. Pile Rule of thumb Destination Keep Worn recently, fits now, feels great Back into the organized closet Donate Good condition, just not for you Charity drop-off within days Trash Stained, damaged beyond repair Bin or textile recycling Repair Small fix needed Mended within two weeks Memory box Sentimental, never worn Separate labelled storage Closet Organization FAQs How long does organizing a closet take? Plan for two to four hours for a standard closet, or a full day for a large walk-in. The sorting step takes the longest, so work in focused blocks and finish the donation drop-off the same day to avoid second-guessing. Should I fold or hang my clothes? Hang anything that wrinkles easily, such as blouses, dresses, trousers, jackets, and button-down shirts, and fold heavy knits that stretch on hangers, plus t-shirts, jeans, and activewear. Uniform velvet hangers save space and stop slipping. How do I stop my closet from getting messy again? Adopt one-in-one-out for new purchases, do a five-minute reset when clothes come off, and rotate seasonal items into sealed storage bins. These habits prevent the slow accumulation that created the

How To Organize Your Closet The Easy Way – 4 Incredible Tips Read More »

Ammonia – 3 Essential Tips On How To Use

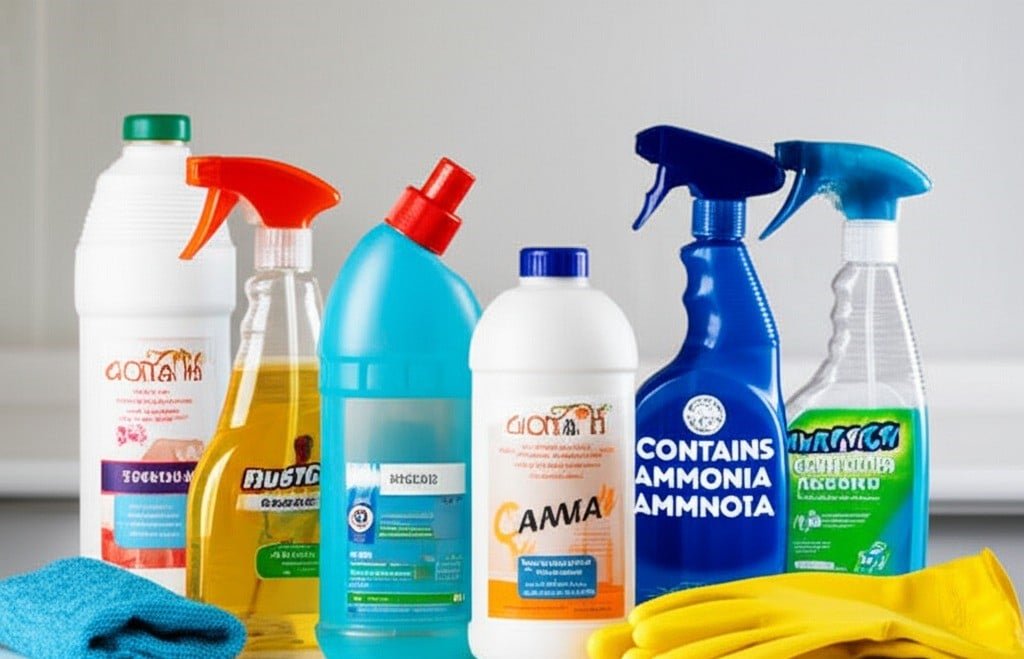
Ammonia Cleaning Done Right: Where This Powerful Cleaner Helps and Where It Harms Ammonia is a nitrogen-hydrogen compound that has anchored serious cleaning routines for generations. It dissolves in water to form ammonium hydroxide, an alkaline solution that shrugs off grease and grime that gentler products leave behind. In pure form it is a gas with a sharp, instantly recognizable smell. That strength comes with real rules: used carelessly, ammonia can create toxic fumes or dull expensive surfaces. Here is how to get its benefits while avoiding every common trap. Why Ammonia Cuts Grease and Leaves Glass Streak-Free Ammonia cleans because it is strongly alkaline. It sits near the top of the pH scale, the standard measure of how acidic or alkaline a substance is. That position makes it brutal on acidic soils: kitchen grease, cooking oils, and the oily films behind fingerprint smudges. The solution emulsifies fats, breaking them into small water-soluble particles you can wipe away. This process, saponification, works the same way soap is made, which is why range hoods and stovetops clean with far less scrubbing than you would expect. Ammonia also evaporates quickly and completely. It does not leave a film behind, which explains its long run as the key ingredient in glass and mirror cleaners. Soap-based detergents can streak; an ammonia solution clears the glass and simply dissipates. Stainless steel appliances, chrome fixtures, and other high-shine non-porous surfaces benefit from the same no-residue behaviour, since water spots and haze never get a chance to form. Where Household Ammonia Earns Its Place You will meet ammonia in many commercial bottles, sometimes without it shouting from the front label: glass cleaners, heavy-duty all-purpose cleaners for kitchens and bathrooms, oven cleaners built on concentrated ammonium hydroxide, certain floor cleaners for no-wax vinyl and linoleum, and even diluted formulas in jewelry solutions for hard gemstones and precious metals. Around the home, ammonia-based products handle: Greasy cabinet doors, backsplashes, and range hoods with a diluted solution Fingerprint-prone stainless steel refrigerators and dishwashers, wiped clean and streak-free Ovens, where the chemistry reduces how much physical scrubbing you must do Sinks, tubs, and bathroom tile, lifting soap scum and body oils, and restoring chrome faucets and showerheads Windows and mirrors, for a transparent finish few other cleaners can match Laundry duty: pretreating organic stains like blood or grass, and adding a cup to white linens to brighten them and strip detergent residue Many households skip the branded bottles entirely and buy plain household ammonia to dilute with water, which is an economical, versatile mix for the jobs above. The One Rule That Cannot Be Overstated: Never Mix Ammonia with Bleach Combining ammonium hydroxide with sodium hypochlorite (bleach) releases chloramine gas, which is highly toxic. Inhaling it can trigger coughing, shortness of breath, chest pain, nausea, and watery eyes, and heavy or prolonged exposure can cause serious lung damage or even death. The danger is not limited to deliberately blending two liquids in a bucket. Using a bleach cleaner and then an ammonia cleaner on the same surface without a thorough rinse in between can release chloramine right where you are standing, for example in an enclosed toilet bowl. Reading labels on every product you use is how you avoid building a dangerous cocktail by accident. Health Canada’s guidance on using household chemicals safely walks through buying, using, storing, and disposing of products like these, and the CDC explains how to clean and disinfect with bleach without inviting trouble. Ventilation and Protective Gear Are Part of the Job Even alone, ammonia fumes irritate the eyes, nose, throat, and lungs, and a poorly ventilated room invites headaches, dizziness, and respiratory irritation. Open windows and doors and run an exhaust fan before any ammonia task, from glass spray to heavy-duty oven cleaner, so the fumes dissipate instead of pooling around your face. Because the solution is caustic, waterproof gloves protect skin from irritation or burns during long sessions, and safety glasses or goggles are a wise shield against splashes, which can damage eyes immediately. Surfaces That Must Never See Ammonia Surface or material Ammonia safe? What goes wrong Porous stone: marble, limestone, travertine No It reacts with calcium carbonate and etches the finish permanently Hardwood floors No Strips the protective finish, dries the wood, discolors it Waxed surfaces No Strips the wax bare Wool and silk fabrics No Weakens and damages delicate natural fibers Glass, chrome, stainless steel Yes Dissolves oily films and evaporates without streaks Ammonia-Free Alternatives When the Smell Wins The pungent odor is ammonia’s biggest drawback, and sensitivity to it is a legitimate reason to switch. Vinegar-based solutions are acidic and excel on mineral deposits. Isopropyl alcohol also delivers a streak-free shine on glass. pH-neutral cleaners are gentler across a wider range of surfaces, though they lack ammonia’s heavy degreasing muscle. More ideas on product hazards, from cookware to cleaning products and craft materials, are collected by Health Canada. Treat ammonia as a specialized tool rather than a universal solvent, and it stays valuable instead of dangerous. Skip the Guesswork with Professional Deep Cleaning If matching strong chemistry to every surface sounds like too much risk for one Saturday, that is fair. Our team brings the correct products to every job. Book a deep cleaning or a regular cleaner, compare plans on the pricing page, or call Toronto Shine Cleaning at (647) 424-0355. Ammonia Safety FAQ Can I mix ammonia with vinegar? This combination is less dangerous than ammonia plus bleach, but it neutralizes both products into a weak solution that wastes your effort. Acid and alkali cancel each other out, so keep them in separate tasks with a full rinse between them, and always check labels before pairing any two cleaners. Is household ammonia the same as what is in glass cleaner? Glass cleaners use a diluted form of the same ingredient, ammonium hydroxide, along with surfactants and solvents. Straight household ammonia is stronger and must be diluted with water before most jobs, which gives you control over the

Ammonia – 3 Essential Tips On How To Use Read More »

Isopropyl Alcohol

Isopropyl Alcohol – 101 Simple and Safe Ways to Clean Your Home

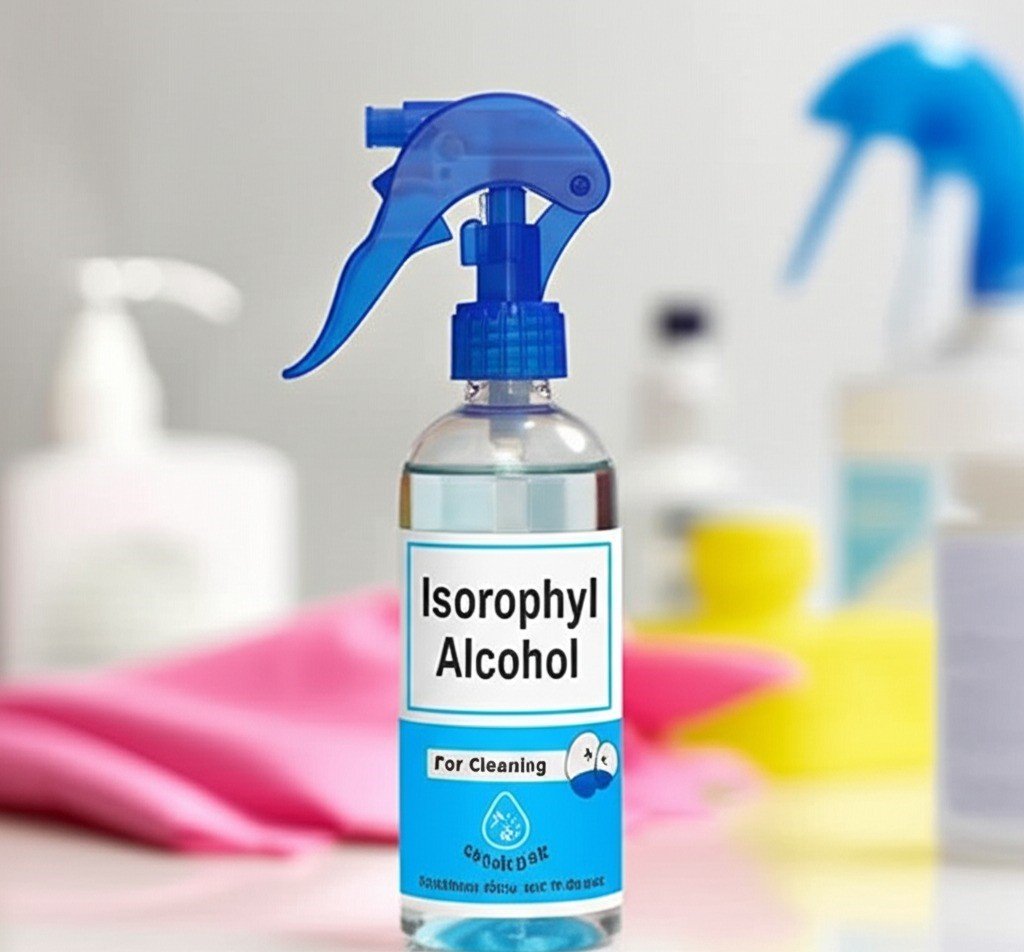
Isopropyl alcohol, often referred to as rubbing alcohol, is a staple in first-aid kits, but its utility extends far beyond disinfecting minor scrapes. In the realm of cleaning, it is a formidable, versatile, and cost-effective agent. Its chemical properties-specifically its ability to act as a solvent and its rapid evaporation rate-make it an indispensable tool for tackling a wide array of messes throughout the home. The primary strength of isopropyl alcohol lies in its solvent capabilities. It effectively dissolves a range of non-polar compounds, which includes many of the common culprits behind household grime: oils, greases, adhesives, and certain inks. Unlike water, which can struggle with these substances, alcohol breaks them down chemically, lifting them from surfaces with minimal effort. This is immediately apparent when cleaning stainless steel appliances. Fingerprints, smudges, and cooking grease residue can make stainless steel look dull and streaky. A simple wipe with a microfiber cloth lightly dampened with isopropyl alcohol will cut through the oily film instantly. Because the alcohol evaporates almost immediately, it leaves behind a pristine, streak-free finish that water-based cleaners often fail to achieve. The alcohol lifts the grease, and its fast evaporation prevents new water spots or streaks from forming as it dries. This same principle applies to glass and mirrors. Commercial glass cleaners often contain ammonia or other chemicals to achieve a streak-free shine. Isopropyl alcohol accomplishes the same goal more simply. A solution of one part alcohol to one part water in a spray bottle creates a highly effective glass cleaner. It cuts through haze, hairspray residue on bathroom mirrors, and smudges on windows, evaporating quickly for a perfectly clear result. For chrome fixtures in the bathroom and kitchen, rubbing alcohol removes water spots and soap scum, restoring their reflective shine without leaving behind any film. Beyond its solvent action, isopropyl alcohol is a potent disinfectant. The most common concentration available, 70%, is considered an optimal grade for this purpose. The presence of 30% water is crucial; the water acts as a catalyst, helping the alcohol to penetrate the cell wall of bacteria, viruses, and fungi more effectively. Once inside, the alcohol denatures the essential proteins and enzymes of the microorganism, causing it to die. This makes it an excellent choice for sanitizing high-touch surfaces. Light switches, doorknobs, remote controls, keyboards, and mobile phones are breeding grounds for germs. Regularly wiping these items with a cloth dampened with 70% isopropyl alcohol can significantly reduce the transmission of pathogens in a household. When cleaning electronics, it is crucial to apply the alcohol to the cloth first, never directly onto the device, to prevent liquid from seeping into sensitive components. The higher concentrations, such as 91% or 99% isopropyl alcohol, have their own specific advantages, particularly where water content is a concern. For cleaning sensitive electronic components, like computer motherboards or CPU contacts, 99% alcohol is the professional standard. Its extremely low water content means it evaporates almost instantly and carries virtually no risk of causing short circuits or corrosion. It effectively removes dust, grime, and old thermal paste without leaving any conductive residue. One of the most celebrated uses for isopropyl alcohol is stain removal, particularly on resilient materials. It is famously effective at removing permanent marker from hard, non-porous surfaces. If a marker finds its way onto a countertop, a plastic toy, or a laminate floor, a small amount of alcohol on a cotton ball will typically dissolve the ink, allowing it to be wiped away. It can also be a lifesaver for fabric, though a spot test in an inconspicuous area is always mandatory. For ink stains on sturdy upholstery or clothing, gently blotting the stain with a cloth soaked in alcohol can lift the ink out of the fibers. The key is to blot, not rub, to prevent the stain from spreading. This solvent power is especially valuable for microfiber upholstery. Microfiber is sensitive to water, which can leave behind rings and change the texture of the fabric. Because isopropyl alcohol evaporates so quickly, it can be used to clean microfiber couches and chairs without this risk. By spraying a light mist of alcohol onto a stained area and gently scrubbing with a soft-bristled brush, you can lift dirt and grime. Once dry, the stiffened area can be brushed again to restore its soft texture. This method effectively cleans the material without the water damage associated with traditional upholstery cleaners. Adhesive residue is another common frustration that isopropyl alcohol handles with ease. Price tags on new glassware, labels on plastic containers, or the sticky residue left behind by tape can be stubborn. Soaking the residue with alcohol for a few minutes will break down the adhesive, allowing it to be scraped or wiped off cleanly without damaging the surface underneath. This is far gentler and often more effective than abrasive scrubbing, which can scratch glass, plastic, or metal. In the bathroom, the fight against mold and mildew can be persistent. While not a substitute for a dedicated fungicide in cases of heavy infestation, isopropyl alcohol can be used as a preventative measure. Its disinfecting properties kill mold spores on contact, and its drying action helps to create an environment less hospitable to their growth. A regular wipe-down of grout lines, shower corners, and other damp areas with alcohol can help keep mildew at bay. It also works wonders on soap scum buildup on glass shower doors, dissolving the greasy film and leaving the glass sparkling. The applications continue into more niche areas. Isopropyl alcohol can be used to clean and sanitize makeup brushes, dissolving oily makeup residue and killing bacteria that can cause skin breakouts. It can be used to clean jewelry, removing lotions and oils to restore sparkle to gemstones and metals (though care should be taken with delicate or porous stones like opals or pearls). It can even be used to de-ice car windows and frozen locks in the winter; the alcohol lowers the freezing point of water, causing the ice to melt quickly.

Isopropyl Alcohol – 101 Simple and Safe Ways to Clean Your Home Read More »

Hot Water and Cold Water

Hot Water vs Cold Water – Which is More Efficient at Cleaning?

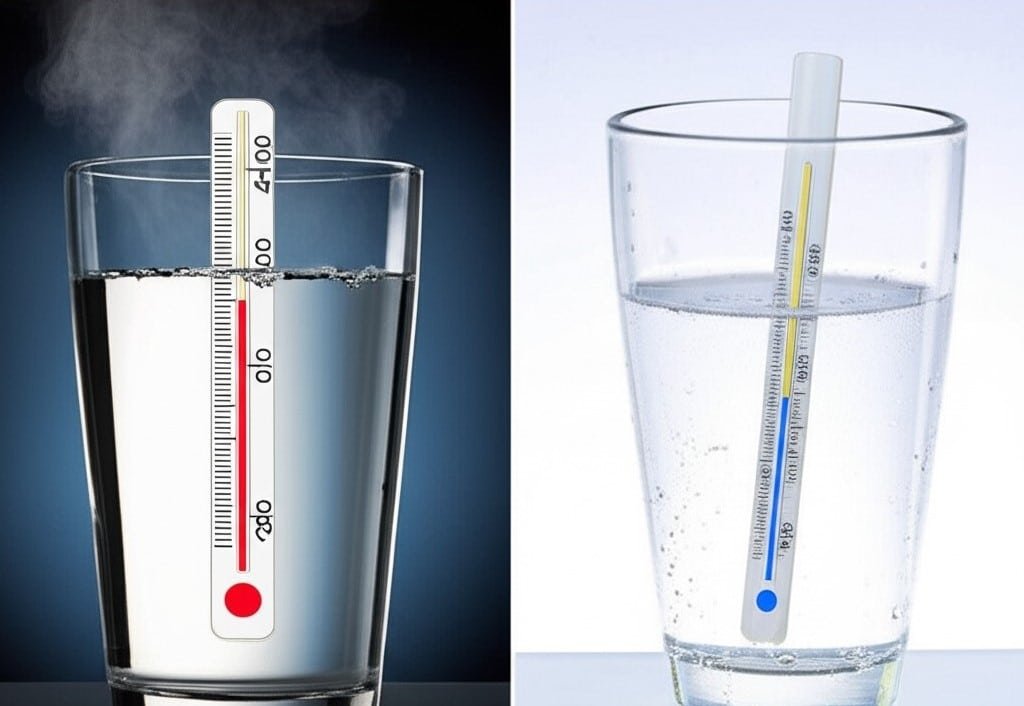
The temperature of hot or cold water used for cleaning is not a matter of preference; it is a fundamental variable that determines the effectiveness, safety and efficiency of the task at hand. The choice between hot and cold water can mean the difference between a stain being removed permanently and being set forever, or between a surface being sanitized and simply being wiped. Understanding the distinct properties and applications of each is essential for proper cleaning. 1.Greasy Hot water’s primary advantage lies in its thermal energy. Molecules in hot water move faster and with more kinetic energy than those in cold water. This increased energy translates directly into enhanced cleaning power in several ways. First, it lowers the surface tension of water, allowing it to spread more easily and penetrate soils and fabrics more effectively. Second, and most critically, heat excels at dealing with fats, oils, and grease. When heated, these substances become less viscous they soften, liquefy, and break down. This makes them significantly easier for detergents and mechanical action (scrubbing) to lift and wash away. Think of washing a greasy frying pan. Using cold water, the grease remains a stubborn, solid film. With hot water, the grease melts into a liquid that can be readily emulsified by soap and rinsed away. This principle applies to kitchen backsplashes coated in cooking oil, range hoods accumulating greasy vapor, and dining tables with oily residues from food. Beyond its effect on grease, heat acts as a powerful sanitizer. While boiling water (100°C or 212°F) is required for true sterilization, the hot water from a typical tap (usually between 49°C and 60°C or 120°F and 140°F) is sufficient to kill a significant number of common household bacteria, germs, and viruses. This makes hot water the superior choice for cleaning areas where hygiene is paramount. Kitchen countertops where raw meat has been prepared, cutting boards, sinks, and garbage disposals all benefit from the sanitizing action of hot water. In the bathroom, hot water is effective for cleaning toilets, sinks, and shower surfaces, helping to reduce the microbial load and control the spread of germs. It also works exceptionally well on soap scum, which is composed of mineral deposits and body oils. The heat helps to soften this tough buildup, making it much easier to scrub away. 2.Fabrics In laundry, hot water is a powerful tool for specific applications. It is most effective for washing heavily soiled items, such as work clothes, sports uniforms, and reusable cleaning cloths. It is the best choice for white cottons, bedding, and towels, as it not only removes dirt and body oils more effectively but also helps to sanitize the items, killing dust mites and allergens. The heat helps to brighten whites and can handle robust fabrics that are not at risk of shrinking or color loss. Furthermore, many powdered detergents are formulated with ingredients that activate and dissolve more completely in hot water, unleashing their full cleaning potential. Without sufficient heat, these detergents can clump and leave a residue on clothes. However, the power of hot water is also its primary source of risk and limitation. The same heat that melts grease can also damage a wide range of materials. It can cause synthetic fabrics like polyester and rayon to warp or melt, and natural fibers like wool and silk to shrink and lose their shape. Hot water is notorious for causing colors to bleed and fade, which is why it is generally unsuitable for washing dark or brightly colored garments. It can also damage certain surfaces around the home. Prolonged exposure to hot water can warp unsealed wood, damage the finish on some types of flooring, and cause certain plastics to become brittle or misshapen. A critical mistake in stain removal is applying hot water to protein-based stains. Stains from blood, egg, dairy, or mud contain proteins that coagulate when heated essentially, they cook. Applying hot water will permanently set these stains into the fabric fibers, making them nearly impossible to remove. 3.Cold Water Cold water, on the other hand, operates on a different set of principles and offers its own distinct advantages. Its primary benefit is its gentle nature. Lacking the intense thermal energy of hot water, it is significantly safer for a vast majority of materials and fabrics. This makes it the default and recommended choice for washing delicate items, such as lace, silk, and woolens, as it prevents shrinkage, stretching, and damage to the fibers. It is also the best option for washing dark and vibrant colors, as it minimizes the risk of dye bleeding and fading, preserving the life and look of the garments. The most crucial application for cold water is in stain removal for protein-based soils. Unlike hot water, which sets these stains, cold water helps to break them down and flush them out of the fabric without cooking the proteins. Any time you are dealing with a bloodstain on a shirt, a spilled glass of milk on the carpet, or an egg yolk on a tablecloth, the first and most important step is to use cold water. Soaking or rinsing the affected area in cold water before applying any cleaning agent is the correct protocol. Modern advancements in detergent technology have greatly expanded the utility of cold water for general cleaning and laundry. While older detergents required heat to be effective, most liquid detergents and specialized cold-water powders today are formulated with enzymes. These enzymes are biological catalysts designed to target and break down specific types of stains proteases for proteins, amylases for starches, and lipases for fats and they function optimally in cool or cold temperatures. Using a high-quality, enzyme-based detergent allows cold water to achieve cleaning results that are comparable to hot water for many types of lightly to moderately soiled loads, effectively removing everyday dirt and grime without the risks associated with heat. Beyond its material safety and stain-specific effectiveness, the use of cold water has significant economic and environmental benefits. Heating water is

Hot Water vs Cold Water – Which is More Efficient at Cleaning? Read More »

protective items for cleaning the house

Why do You Need Protection To Clean Your House? – 6 Essential Items

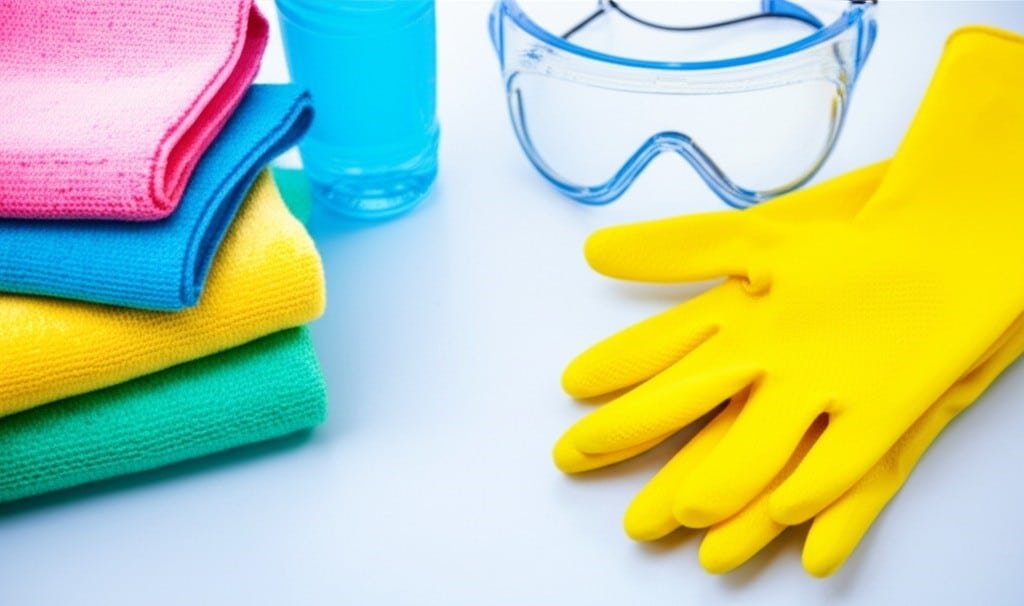
Cleaning your home without protection can be dangerous. It’s a battle against dust, dirt, germs, and clutter. In this battle, we arm ourselves with an arsenal of tools: powerful chemical sprays, abrasive sponges, powerful vacuum cleaners, and microfiber cloths. However, amidst the focus on eliminating dirt from our surroundings, one critical element is often overlooked: protecting the combatant. The cleaning process exposes individuals to a variety of occupational hazards, ranging from the seemingly minor, such as dry skin, to the extremely serious, such as chemical burns, respiratory distress, and lasting physical injuries. Wearing a full complement of protective gear is not a sign of over-meticulousness; it’s the hallmark of a smart, safe, and professional approach to a task that involves direct contact with chemicals, biological contaminants, and significant physical exertion. 1.Gloves The most immediate and constant point of contact in any cleaning endeavor is the hands. They are the primary instruments, manipulating cloths, holding spray bottles, and scrubbing surfaces. The skin, our body’s largest organ, provides a remarkable natural barrier, but it is a barrier with limits. Continuous exposure to water, a universal solvent, systematically strips away the skin’s protective layer of sebum, leading to dehydration, redness, painful cracking, and a compromised ability to defend against infection. Introduce cleaning chemicals into this equation, and the risks escalate dramatically. Detergents, degreasers, disinfectants, and acidic or alkaline solutions can induce contact dermatitis, trigger severe allergic reactions, and, in the case of concentrated agents like oven cleaners or drain unblockers, inflict serious chemical burns. Therefore, gloves are not an optional accessory; they are an indispensable piece of personal protective equipment. A truly prepared cleaning kit contains multiple types of gloves for different applications. For light-duty tasks requiring high dexterity, such as wiping down countertops, polishing fixtures, or handling soiled laundry, disposable gloves are the superior choice. Nitrile gloves are often preferred over latex due to their superior chemical resistance and the prevalence of latex allergies. They provide a reliable shield against germs and chemicals for short-term use and can be discarded immediately, which is a crucial step in preventing cross-contamination between different areas of the home, like the kitchen and the bathroom. For more demanding jobs, a pair of heavy-duty, reusable gloves is required. Tasks like washing dishes in very hot water, scrubbing floors with strong detergents, or cleaning a mold-affected area call for the robust protection of thick rubber or PVC gloves. These are more durable, less prone to tearing, and often feature longer cuffs that extend up the forearm, providing a crucial defense against splashes. Opting for a pair with a flock lining can significantly increase comfort by absorbing perspiration, allowing them to be worn for longer periods without discomfort. Proper care extends the life and safety of these gloves. After each use, they must be rinsed thoroughly while still on the hands, washed with soap and water, then removed and allowed to air dry completely, both inside and out, to inhibit the growth of bacteria and mold within them. 2.Ventilation As we move from contact hazards to airborne ones, the protection of the respiratory system becomes paramount. Many of the most effective cleaning products achieve their results through chemical reactions that release fumes and volatile organic compounds (VOCs) into the air. When a cleaner is sprayed, it is aerosolized, creating a fine mist of chemical droplets that are easily inhaled. The acrid scent of bleach, the sharp, pungent odor of ammonia-based glass cleaners, or the powerful fumes from a self-cleaning oven cycle are all indicators of airborne chemicals that can irritate the delicate mucous membranes of the nose, throat, and lungs. For individuals with asthma, allergies, or other respiratory sensitivities, this exposure can trigger wheezing, coughing, and shortness of breath. Even for those without pre-existing conditions, chronic, long-term inhalation of these fumes can contribute to a range of health problems. The first line of defense is always ventilation. Opening windows and doors to create a cross-breeze and using an exhaust fan can significantly dilute the concentration of airborne chemicals. However, ventilation alone is not always sufficient, especially in enclosed spaces like small bathrooms or when dealing with particularly potent substances or large amounts of particulates. In these cases, respiratory protection is essential. For tasks that kick up a lot of dust, pet dander, or debris, such as sweeping a dusty garage, deep-cleaning carpets, or clearing out a long-neglected storage area a well-fitting N95 respirator is the appropriate choice. Unlike a simple dust mask, an N95 is certified to filter out at least 95 percent of fine airborne particles, providing meaningful protection against allergens and irritants that can penetrate deep into the lungs. When working with aggressive chemicals known to produce harmful vapors, such as certain solvents, paint strippers, or heavy-duty oven cleaners, a more advanced respirator is warranted. An elastomeric half-mask respirator with interchangeable cartridges designed to filter organic vapors offers a much higher level of protection. It is also a vital piece of safety knowledge that mixing certain household cleaners can create lethal gases. The most infamous combination, bleach and ammonia, produces toxic chloramine gas, while mixing bleach with acidic cleaners can release chlorine gas. Proper respiratory protection, coupled with unwavering adherence to the rule of never mixing cleaning products, is a foundational principle of household safety. 3.Safety Glasses The eyes, with their delicate and irreplaceable tissues, are uniquely vulnerable to cleaning-related injuries. A single misdirected splash of a chemical cleaner can cause immediate, intense pain and has the potential to inflict permanent corneal damage and vision loss. These incidents can happen with surprising ease: a toilet brush flicking contaminated water upwards, an aerosol spray nozzle sputtering unexpectedly, or gravity pulling droplets down as you clean a surface overhead, like a showerhead or a ceiling fan. Standard eyeglasses or sunglasses offer minimal protection, as splashes can easily enter from the sides, top, or bottom. The gold standard for eye protection during cleaning is a pair of safety goggles. Goggles are designed to form a seal around the eye

Why do You Need Protection To Clean Your House? – 6 Essential Items Read More »

lemon

Lemon For Cleaning – 4 Best Tips On How To Use It

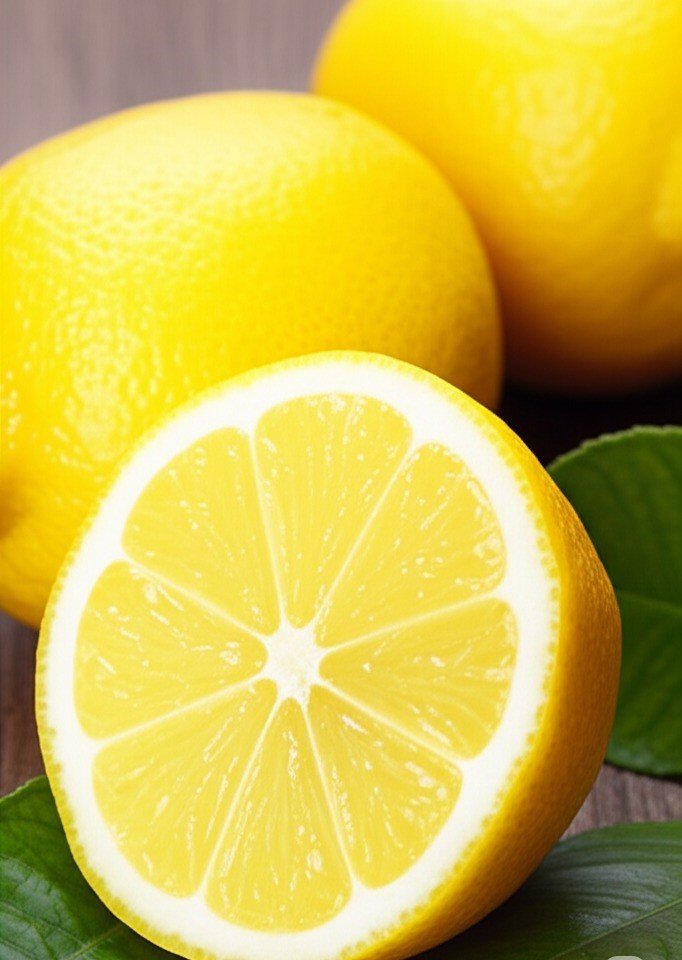
Lemons are a testament to nature’s ingenuity in providing effective cleaning solutions, offering a powerful yet fundamentally gentle alternative to many commercial synthetic products. Their remarkable cleaning ability is no accident; it comes from a sophisticated combination of natural compounds, most notably their high concentration of citric acid. This organic acid is the star of the show, with its characteristic acidity and, crucial to cleaning, its formidable ability to chemically break down and dissolve common household enemies such as grease, stubborn dirt, hard water mineral deposits and alkaline substances such as soap scum. The inherently low pH environment created by the juice, typically ranging from 2 to 3, proves inhospitable to the growth of many common household bacteria and various types of mold, and gives it significant natural disinfectant qualities. Scientific understanding suggests that this acidic environment can disrupt the cellular integrity of certain microbes, inhibiting their growth and activity. 1.The Benefits Of Lemon In addition to its strong acidity, it is also rich in other beneficial compounds. Lemon oil, predominantly found in the peel, contains d-limonene, a powerful natural solvent. Limonene contributes significantly to the degreasing capacity, helping to remove oily residues that water alone cannot remove. Furthermore, the universally appealing fresh, clean scent of lemon is not just a pleasant masking agent. The volatile organic compounds present in lemon actively interact with many malodorous molecules, particularly those of an alkaline nature, neutralizing them, leading to genuine odor elimination rather than just a temporary masking. This synergistic combination of potent acidity to dissolve and disinfect, solvent action to degrease, and inherent aromatic compounds to deodorize makes lemon an exceptionally versatile, effective, and sensorially pleasing cleaning agent for a multitude of household tasks. The kitchen, the heart of the home where food preparation demands the highest standards of hygiene and cleanliness, is one of the main areas where this citrus fruit demonstrates its multiple cleaning capabilities. Consider the humble cutting board, whether made of traditional wood or modern plastic. These surfaces are continually exposed to raw meats, spicy vegetables like onions and garlic, and a variety of other foods, making them potential breeding grounds for bacteria and lingering odors. When a cut lemon half is methodically rubbed across the surface of the board, the citric acid goes to work. It penetrates the microscopic grooves and knife cuts, where its low pH helps neutralize bacteria and break down residual organic matter. Visually, a subtle lightening of food stains can be observed, and aromatically, the strong, clean aroma of lemon gradually overwhelms and replaces any lingering food odors, leaving the board feeling refreshed and more hygienic. Greasy stovetops, oven doors and kitchen panels, often coated with a stubborn film of polymerized cooking oils, present another challenge perfectly suited to the degreasing nature of this critical fruit. Limonene in lemon peel, combined with citric acid, works to emulsify these fats. Whether applied directly by rubbing with a lemon wedge, or sprayed as a diluted solution, the juice begins to loosen the stubborn grip of grease. After a short contact time, the greasy layer becomes noticeably easier to clean, revealing the clean surface beneath without the need for harsh chemical solvents. Even the inside of a microwave, often plagued by dried-on, caked-on food splatters that seem to resist all but the most vigorous scrubbing, yields to the gentle power of lemon-infused steam. By heating a bowl of water and generous amounts of slices (or a few tablespoons of juice) to a rolling boil and filling the microwave cavity with steam, dried-on food particles are effectively softened and rehydrated. The acidic, aromatic steam not only loosens the grime, but also helps deodorize the interior. The subsequent cleaning process becomes remarkably easy, turning a frustrating task into a breeze, leaving behind a fresh citrus scent instead of the smell of stale food. 2.Lemon Juice Sinks and faucets, especially those made of stainless steel or chrome, often have unsightly marks from hard water deposits and soap scum build-up. Lemon juice, with its ability to dissolve these mineral build-ups, acts as a natural polish. Applying a slice directly to these surfaces, followed by gentle rubbing and thorough rinsing, can visibly restore their original shine, making them shine like new, free of cloudy films and water spots. The notorious garbage disposal, a common source of unpleasant kitchen odors, can be effectively cleaned and deodorized by grinding a few lemon peels (or a whole, cut lemon) into it. As the blades pulverize the peel, the abrasive action of the peel itself, along with the released oils and juice, cleans the grinding chamber, while the potent citrus fragrance powerfully neutralizes unpleasant odors emanating from trapped food particles. Similarly, the often-stained surfaces of stainless steel appliances, from refrigerators to dishwashers, can be restored to their sleek, pristine appearance. Wiping them down with a cloth dampened with lemon juice, followed by buffing with a clean, dry cloth, can remove fingerprints and smudges, leaving a polished, streak-free shine. Even stubborn food stains and lingering odors that have built up on plastic food storage containers can be significantly reduced. Soaking the container in a solution of lemon juice and water, or rubbing the inside of the container with a sliced lemon and letting it sit for a while before washing as usual, can lighten the discoloration and neutralize accumulated odors, extending the life of these containers. The bathroom environment, with its constant humidity and specific types of soiling, presents a distinct set of cleaning challenges, most notably persistent soap scum, dulling hard water stains, and the potential for mildew growth. Lemon, with its characteristic acidity and fresh scent, is remarkably well-equipped to address these issues effectively. Glass shower doors, ceramic tiles, and porcelain bathtubs frequently develop a tenacious, cloudy film of soap scum, which is an alkaline residue formed from the reaction of soap with hard water minerals. The citric acid in lemon directly counteracts and dissolves this alkaline buildup. Applying lemon juice liberally to these surfaces, either by spraying a solution or rubbing

Lemon For Cleaning – 4 Best Tips On How To Use It Read More »

salt on recipient

6 Tips On The Benefits Of Salt For Cleaning – You Need To Know

This common kitchen staple, salt, extends its utility far beyond seasoning food. Its inherent properties make it a surprisingly effective and economical cleaning agent for various household tasks. From scrubbing surfaces to neutralizing odors, and tackling stubborn stains, this inexpensive compound offers a natural alternative to many commercial cleaners, often with fewer harsh chemicals. The granular nature of salt, combined with its chemical characteristics, provides a multifaceted approach to maintaining a cleaner home environment. 1.The Power Of Salt  One of the most straightforward benefits of this common mineral in cleaning lies in its abrasive nature. The crystalline structure of the granules provides a gentle yet effective scouring action, suitable for tackling grime on various surfaces without being overly harsh like some chemical scouring powders or steel wool, which can damage more delicate materials. For instance, caked-on food remnants on pots and pans, especially those made of stainless steel, enamel, or even some non-stick surfaces (when used carefully as a paste), can often be loosened. Creating a paste with the crystalline substance and a little water allows for targeted scrubbing. Alternatively, directly sprinkling the granules onto the affected area and scrubbing with a damp sponge, brush, or even a halved potato can dislodge stubborn residues. This method is particularly useful for materials that might be scratched by more aggressive abrasives. Coarse varieties of this kitchen staple, like kosher or sea variants, offer more pronounced scrubbing power for tougher jobs, while finer table versions can be used for more delicate applications. Kitchen sinks, especially those made of stainless steel or porcelain, can be brightened and cleaned by scrubbing with these white crystals. A mixture of the salt with lemon juice or white vinegar can enhance this cleaning power. The acidity of the liquid helps to dissolve grease, hard water stains and mineral deposits, while the abrasive particles do the physical cleaning, removing loose dirt. This combination not only cleans but also leaves a fresh scent. Even stubborn coffee or tea stains inside mugs and pitchers can be easily scrubbed with a damp cloth soaked in the cleaner. Beyond the kitchen, this abrasive quality also helps to remove dirt from tile grout. A paste applied to the grout lines and scrubbed with an old toothbrush can significantly improve their appearance. For oven spills, once they cool, a generous application of the granules can absorb some of the dirt, and then the abrasive action helps to scrub away the burnt-on residue, often minimizing the need for harsh oven cleaners. Care must be taken with highly polished or delicate surfaces, and it’s always advisable to test on an inconspicuous area first, but for many common cleaning challenges that require a little effort, readily available salt offers a reliable option. 2.Absorbs Spills  The hygroscopic nature of salt, meaning its ability to attract and hold water molecules from its surroundings, makes it an excellent first response for various spills, particularly liquids. When accidents happen, such as knocking over a glass of red wine on a carpet or upholstery, quick action with the kitchen staple can significantly mitigate the stain. By generously covering the fresh spill with a thick layer of the white crystals, they will begin to draw the liquid out of the fibers through osmosis. The absorbent material should be left to sit for a period, sometimes several hours or until it appears to have absorbed the maximum amount of moisture, often changing color as it does so. Once the substance has done its work, it can be vacuumed up. This method is effective because it physically removes much of the staining agent before it has a chance to fully set and bond with the fibers. The quicker the application, the more effective it tends to be. The same principle applies to greasy spills. If oil, butter, or a fatty sauce splatters on the floor, a countertop, or even some fabrics, covering it with the granular cleaner can help absorb the grease. The particles wick the oil into themselves, making the remaining residue easier to wipe or scrape away. For fabric, after this initial treatment, any remaining discoloration might require further spot cleaning, but the initial damage will likely be far less severe. This absorbent property is also why this compound is sometimes used in homemade desiccant packs to reduce humidity in small, enclosed spaces like closets or drawers, helping to prevent mustiness, though its capacity is limited compared to commercial desiccants like silica gel. For liquid spills on hard surfaces that might spread, creating a border with the granules can help contain the spill before covering it entirely. 3.Deodorizers  In addition to its visual cleaning ability, table salt can also be a powerful ally in neutralizing unwanted odors around the home. Its ability to absorb moisture, which often harbors and encourages the growth of odor-causing bacteria and mold, contributes significantly to this effect. For example, a smelly refrigerator can benefit from an open container or small bowl of the mineral; the salt crystals will gradually absorb the strange odors from food and excess moisture that can contribute to a smelly environment. This principle is similar to using baking soda, but offers an alternative if baking soda is not available or if you prefer to use this more readily available item. Drains, which can often be sources of unpleasant odors due to the accumulation of organic matter, grease, and soap scum, can be deodorized. Pouring a strong solution of the granules dissolved in hot water down the drain, or a mixture of the dry crystals followed by hot water, can help break down some of the grease and deodorize the pipes. Adding baking soda and vinegar to the mixture can create an effervescent action that further helps remove buildup. Cutting boards, especially wooden ones that can absorb juices and strong odors from foods like onions, garlic, and fish, can be effectively deodorized. Scrubbing them with coarse crystals, possibly moistened with a little lemon juice for added antibacterial effect and a fresh scent, can lift food particles from

6 Tips On The Benefits Of Salt For Cleaning – You Need To Know Read More »