Floor Cleaning

3 Best Tips How To Keep Your Living Area Clean

3 Best Tips to Keep Your Living Area Clean The living room is the hardest-working space in a Toronto home: it hosts family evenings, visitors, snacks, and pets, so it collects clutter, dust, and grime faster than any other room. A systematic routine keeps it welcoming without eating your whole weekend. Start with the three pillars below, then layer in small daily habits. If you would rather spend your free time relaxing than dusting, Toronto Shine Cleaning’s regular cleaning service keeps living areas fresh on a schedule you choose. Tip 1: Declutter Surfaces Before You Clean Anything Cleaning around clutter wastes time and misses spots, so clear the room first. Work one surface at a time, starting with the coffee table, then side tables, media cabinets, and shelves. As you handle each item, sort it into one of four destinations: trash, donate, another room, or a proper home in the living area. The usual suspects are mail, old magazines, stray remotes, and things carried in from other rooms, so give frequent-use items such as remotes and current reading a designated spot, and clear the rest away. Decluttering also makes the space feel calmer, and it reveals the true scope of the cleaning ahead. Tip 2: Dust Top to Bottom, and Don’t Skip the Details Dust falls, so always work from the ceiling down: start with fan blades, light fixtures, and the tops of tall shelving, then move to lower shelves, picture frames, and furniture. Microfiber cloths trap dust instead of moving it around, and an extendable duster reaches high corners. On shelves full of objects, lift the items off, dust the shelf, dust the items, and replace them. Electronics such as TVs, consoles, and speakers attract dust too: turn them off and unplug them, wipe screens with a dry microfiber cloth, and clear vents with compressed air, never liquid. Treat the rest of the room by surface type: Item Cleaning method Watch out for Lampshades Vacuum fabric shades with a brush attachment; wipe plastic or paper shades dry Rough handling can crease paper shades Blinds and shutters Wipe each slat with a microfiber cloth or blind tool Slats snap back if wiped too hard Wood furniture Dust with the grain; polish sparingly, applied to the cloth Excess polish and silicone sprays attract dust Glass tabletops Glass cleaner with a lint-free cloth Streaks appear when cleaner dries before wiping Tip 3: Refresh Sofas and Floors With the Right Routine Upholstered furniture traps dust, crumbs, pet hair, and odors. Vacuum sofas and armchairs regularly with the upholstery attachment, remove the cushions to reach the base and seams, and use the crevice tool along edges and under cushions. Act fast on spills: blot with a clean cloth from the outside in, never rub, and test any cleaning product on a hidden spot first, following the manufacturer’s care label when you can. For musty fabric, sprinkle baking soda lightly, let it sit for 15-30 minutes, and vacuum it up. Finish with the floor. Hardwood and laminate need a sweep or vacuum on the hard-floor setting, then a barely damp flat microfiber mop with a pH-neutral cleaner; a wet mop is the fastest way to damage wood. Tile tolerates more water and standard tile cleaners, vinyl is happy with mild all-purpose cleaner, and any hard floor benefits from extra passes in corners and under furniture. Carpets ask for slow, overlapping vacuum passes in two directions to lift embedded grit that grinds down fibers, plus the crevice tool along baseboards; treat stains by blotting and testing first, and rent a carpet machine or hire professionals for a periodic deep refresh. Health Canada’s dust and dust mites page notes that regular vacuuming keeps dust levels down in carpets, furniture, and bedding, while the CDC’s home cleaning and disinfecting guidance explains that plain cleaning with soap or detergent removes most germs from everyday surfaces. Small Habits That Keep the Room Guest-Ready Tidy surfaces for five minutes each evening: remotes back, mail sorted, cushions fluffed Deal with spills the moment they happen, blotting rather than rubbing Vacuum high-traffic zones weekly and the whole room every one to two weeks Open windows briefly when weather allows to air the room out Rotate decorative pillows and fold throws so the room always looks arranged A clean living area is a place people want to linger, and maintaining it is mostly about rhythm: quick daily tidying, weekly vacuuming, and a monthly top-to-bottom dusting keep deep cleaning sessions short. Frequently Asked Questions What order should I clean a living room? Declutter first, then dust from the ceiling down, refresh upholstery, and clean the floor last so you pick up everything that fell during the earlier steps. How often should I vacuum my sofa? Once a week for sofas in regular use, or every few days with pets; remove cushions and use the crevice tool to keep debris from working into the frame. Is it safe to use baking soda on upholstery? A light sprinkle left for 15-30 minutes and vacuumed up neutralizes odors on most fabrics, but test an inconspicuous spot first and avoid it on delicate materials. How do I stop my living room from getting dusty so fast? Use microfiber cloths for dusting, vacuum with a HEPA-equipped machine, wash throws and cushion covers regularly, and keep windows closed on high-pollen days. Consistent routines protect your investment in furniture and flooring, and a fresh living area makes every evening more relaxing. For a deeper reset, our deep cleaning service tackles baseboards, vents, and upholstery in one visit. Call (647) 424-0355 or see our pricing page to book your clean.

3 Best Tips How To Keep Your Living Area Clean Read More »

different types of carpets

How to Clean Different Types of Carpets – 4 Best Ways

How to Clean Different Types of Carpets: 4 Best Ways Cleaning carpet effectively depends on the material. Different fibers react differently to water, vacuuming, and cleaning solutions, and the wrong method can shrink, fade, or mat the pile. These four approaches cover the carpet types found in most Toronto homes, from durable synthetics to delicate natural fibers like wool and sisal. 1. Synthetic Carpets: Nylon, Polyester, and Olefin Synthetic carpets are popular for durability and stain resistance. Nylon is very resilient, polyester is soft with natural stain and fade resistance, and olefin (polypropylene) resists moisture and mildew, which makes it common in basements. Vacuum high-traffic areas daily or every other day and the whole carpet at least twice a week, using a beater bar or rotating brush to lift embedded dirt before it grinds down the fibers. For spills, scoop up solids with a dull knife or spoon, then blot liquids immediately with a clean white cloth, working from the outside in. Never rub. A quarter teaspoon of mild, non-bleach dishwashing liquid in one cup of lukewarm water handles most spills, but test any solution in a hidden spot first. Rinse with a light mist of cool water, blot dry, and leave weighted paper towels over the area overnight. For deep cleaning, hot water extraction (steam cleaning) is the most effective method, and drying usually takes 6 to 12 hours with good ventilation. 2. Wool Carpets: Gentle Care for Natural Fibers Wool is luxurious, durable, and naturally soil resistant, but it is sensitive to harsh chemicals, high pH levels, and excessive moisture. Vacuum with strong suction, and set the beater bar to its highest pile setting or use a suction-only attachment, because aggressive beater bars make wool fuzz or pill. Use only WoolSafe or pH-neutral cleaners; alkaline detergents or bleach can yellow and weaken wool fibers. Blot spills rather than rubbing, dry quickly with fans or a dehumidifier, and avoid direct heat. For deep cleaning, low-moisture methods such as dry foam cleaning are safer than traditional steam cleaning. 3. Cotton and Viscose Rugs: Handle With Care Cotton is soft and absorbent but can shrink, brown, or bleed color, while viscose (rayon) is extremely delicate when wet, losing up to 50 percent of its strength. Vacuum these rugs with the beater bar disengaged or on the highest setting. Before any spot treatment, run a colorfastness test in a hidden area. Use a highly diluted pH-neutral cleaner applied with a barely damp cloth, blot gently, and dry immediately with fans or a cool hairdryer. Deep cleaning is best left to professionals who specialize in delicate fibers, and steam cleaning viscose can cause irreversible damage. 4. Plant Fiber Carpets: Sisal, Jute, Seagrass, and Coir Natural plant fiber carpets are highly absorbent and extremely sensitive to water. Moisture can cause browning, water stains, shrinkage, and mildew. Vacuum frequently with a suction-only cleaner, at least twice a week, from different directions to remove grit trapped in the weave. Blot spills immediately and thoroughly, scrape off solids, and avoid water when possible. For stains, use a dry-cleaning solvent or dry carpet cleaning powder, brushed in and vacuumed up. Never steam clean these fibers; professional dry or very low-moisture cleaning is the safe choice. A quick spill response that works on most carpets: Blot liquids immediately with a clean white cloth, outside in Scoop solids with a dull knife or spoon, never rub Test any cleaning solution in a hidden spot first Use minimal moisture, then dry the area quickly Weight down paper towels overnight for stubborn damp spots Carpet Type Vacuuming Spot Cleaning Deep Cleaning Synthetic (nylon, polyester, olefin) Beater bar, twice weekly Mild dish soap and water Hot water extraction Wool High pile setting or suction only WoolSafe, pH-neutral cleaner Low-moisture professional cleaning Cotton and viscose Suction only, gentle Diluted pH-neutral, minimal water Professional delicate-fiber cleaning Sisal, jute, seagrass, coir Suction only, twice weekly Dry-cleaning solvent or powder Dry methods only, no steam Keep Carpets Clean Between Deep Cleans Vacuuming and quick spill response extend the life of any carpet, but dirt and allergens build up inside the fibers over time. Dust mites and pet dander are common indoor allergens linked to asthma symptoms, according to the CDC, and Health Canada also lists them among indoor air contaminants that affect respiratory health. Whenever moisture is involved, dry the carpet fast, because the CDC’s mold guidance stresses that moisture control prevents mold growth. When to Call Professional Carpet Cleaners Toronto Shine Cleaning handles all carpet materials with the care and specialized techniques they deserve. Our home deep cleaning service includes thorough carpet vacuuming and spot treatment as part of a full clean, and our regular maid service keeps high-traffic areas fresh between deep cleans. Check our pricing page or see if we serve your neighbourhood in the GTA. Call (647) 424-0355 to book. Can I steam clean a wool carpet? Traditional steam cleaning can introduce too much moisture for wool. Use low-moisture methods such as dry foam cleaning or low-moisture hot water extraction with minimal water and rapid drying, ideally handled by professionals experienced with wool. How long does carpet take to dry after steam cleaning? With good ventilation, most synthetic carpets dry in 6 to 12 hours, sometimes longer. Open windows, run fans, and use a dehumidifier to speed up drying and prevent musty odors or mold. What should I do about grease, ink, or wine stains? Use a stain remover designed for your carpet type and follow the product instructions carefully. Test it in an inconspicuous spot first, apply it to a cloth rather than the carpet, and blot from the outside in. Can wet viscose rugs be saved? Act immediately: blot with a clean white cloth, never rub, dry with fans or a cool hairdryer, and groom the pile back into place while drying. For set stains, contact a professional who specializes in delicate natural fiber rugs.

How to Clean Different Types of Carpets – 4 Best Ways Read More »

clean shower walls

How to Keep Your Shower Walls Shining – 5 Best Tips You Need to Know

How to Keep Your Shower Walls Shining Shower walls take a beating every single day: soap, body oils, minerals, and constant moisture team up into films, crust, and black specks that make even a recently scrubbed bathroom look dingy. The fix is not one heroic Saturday battle but a short, repeatable system that matches the cleaner to the grime and the wall material, gives the chemistry time to work, and then prevents buildup from returning. The five tips below walk through exactly that, from diagnosis to daily habits, so your tile, fiberglass, or stone surround stays bright with far less effort. Tip 1: Know What You Are Cleaning Off the Walls Three offenders cause almost all shower-wall grime. Soap scum forms when fatty acids in bar soap react with calcium and magnesium in tap water, creating a sticky, grayish film that hardens into stubborn layers if ignored. Hard water stains are the chalky white spots or cloudy haze left behind when mineral-rich water evaporates, mostly calcium and magnesium carbonate, and they show up worst on dark tile and glass. Mold and mildew are fungi that love warm, damp, poorly ventilated enclosures; mold tends to sit on the surface as a powdery growth, while mildew can sink deeper into grout and corners as black, green, or pink spots. Beyond looking bad, these growths can trouble some people’s health, which is why the CDC keeps reference information on mold and health. Tip 2: Prep the Bay and Yourself Before Scrubbing Clear every bottle, loofah, and razor off the walls so nothing blocks your access, then assemble your kit. Good preparation makes the difference between a fifteen-minute wash and an hour of frustration. A spray bottle with your chosen solution, homemade or commercial Non-abrasive sponges, soft cloths, and microfiber towels, plus brushes with different bristle stiffness for your wall material An old toothbrush or dedicated grout brush for the lines between tiles Waterproof gloves, and safety glasses when working with strong sprays overhead The exhaust fan running or a window open for ventilation during and after Tip 3: Match the Cleaner to the Grime and the Surface For routine soap scum and light mineral haze, equal parts white vinegar and warm water works well because acetic acid dissolves both. Add a squirt of dish soap to help the mixture cling to vertical surfaces and cut oily residue, or make a baking soda paste when you need gentle abrasion. Hydrogen peroxide sprayed on mildew spots is an effective first-line attack. Commercial bathroom cleaners can handle the same jobs with more convenience; read the label for dwell times, safety warnings, and material compatibility before buying. Material choice matters most: ceramic and porcelain tolerate vigorous scrubbing and most cleaners, though their porous grout suffers from repeated harsh acid. Fiberglass and acrylic surrounds scratch easily, so use soft cloths and non-abrasive cleaners only. Natural stone such as marble, granite, limestone, or travertine needs a pH-neutral stone cleaner; vinegar, lemon, and bleach can all corrode or stain it. Wall material Safe cleaners Avoid Ceramic or porcelain tile Vinegar solution, baking soda paste, most bathroom sprays Repeated harsh acids on grout Fiberglass or acrylic Mild detergent, non-abrasive sprays, soft sponge Scouring powders, steel wool, stiff brushes Natural stone pH-neutral cleaner formulated for stone Vinegar, lemon juice, bleach Glass doors Vinegar spray or diluted lemon juice, squeegee finish Abrasive pads that scratch When trying any new product, test a small inconspicuous patch first to rule out discoloration or etching. Tip 4: Follow a Top-to-Bottom Wash Routine Rinse the walls with warm water to loosen surface dirt, then apply your cleaner from the top down so dirty runoff never crosses freshly treated areas. Let it dwell: 5 to 10 minutes for light cleaning, and 15 to 30 minutes or longer for heavy scum or mildew, because dwell time is what breaks the bond between grime and wall. Scrub in systematic strokes from top to bottom with a tool suited to your material, concentrating on corners, crevices, and fixture bases, and tackle grout lines with your toothbrush or grout brush, using hydrogen peroxide or a grout cleaner for discolored seams. Rinse thoroughly from the top down so no residue remains to attract fresh dirt, then squeegee each wall in overlapping downward strokes, wiping the blade as you go, or dry with an absorbent microfiber towel. Leave the fan on so the enclosure dries completely. Tip 5: Handle Stubborn Problems and Prevent New Ones Thick scum that survives a first round can take a stronger commercial remover with an extended dwell, and gentle plastic scraper work can lift heavy layers, never metal on delicate surrounds. Severe limescale on glass or hardy tile may call for a calcium, lime, and rust remover used exactly as directed with excellent ventilation. For persisting mildew on bleach-safe ceramic and grout, one part bleach to ten parts water, applied for 10 to 15 minutes before scrubbing and rinsing, kills spores that surface wiping misses. Never mix that bleach with ammonia or vinegar-based cleaners, since the combination releases dangerous gases. If mold keeps returning despite your best scrubbing, suspect a deeper moisture or airflow problem; Health Canada’s guide to air contaminants and health explains how to dry out damp spaces for good. Prevention is cheap and fast: squeegee the walls after every shower, mist with a daily shower spray, run the exhaust fan during showers and for 20 to 30 minutes afterward, and give the enclosure a quick weekly wipe with a mild cleaner. Frequently Asked Questions About Shower Wall Cleaning What removes soap scum from shower walls naturally? Equal parts white vinegar and warm water, optionally with a drop of dish soap so it clings, dissolved scum after a 15 to 30 minute dwell. Baking soda paste adds gentle abrasion for patches that resist wiping. How do I get black mold out of grout? Spray hydrogen peroxide first and scrub with a grout brush. On bleach-safe tile and grout, a ten-to-one water-and-bleach solution left for 10 to

How to Keep Your Shower Walls Shining – 5 Best Tips You Need to Know Read More »

cleaning hard water

How to Clean Hard Water – 2 Easy Steps for a Sparkling Home

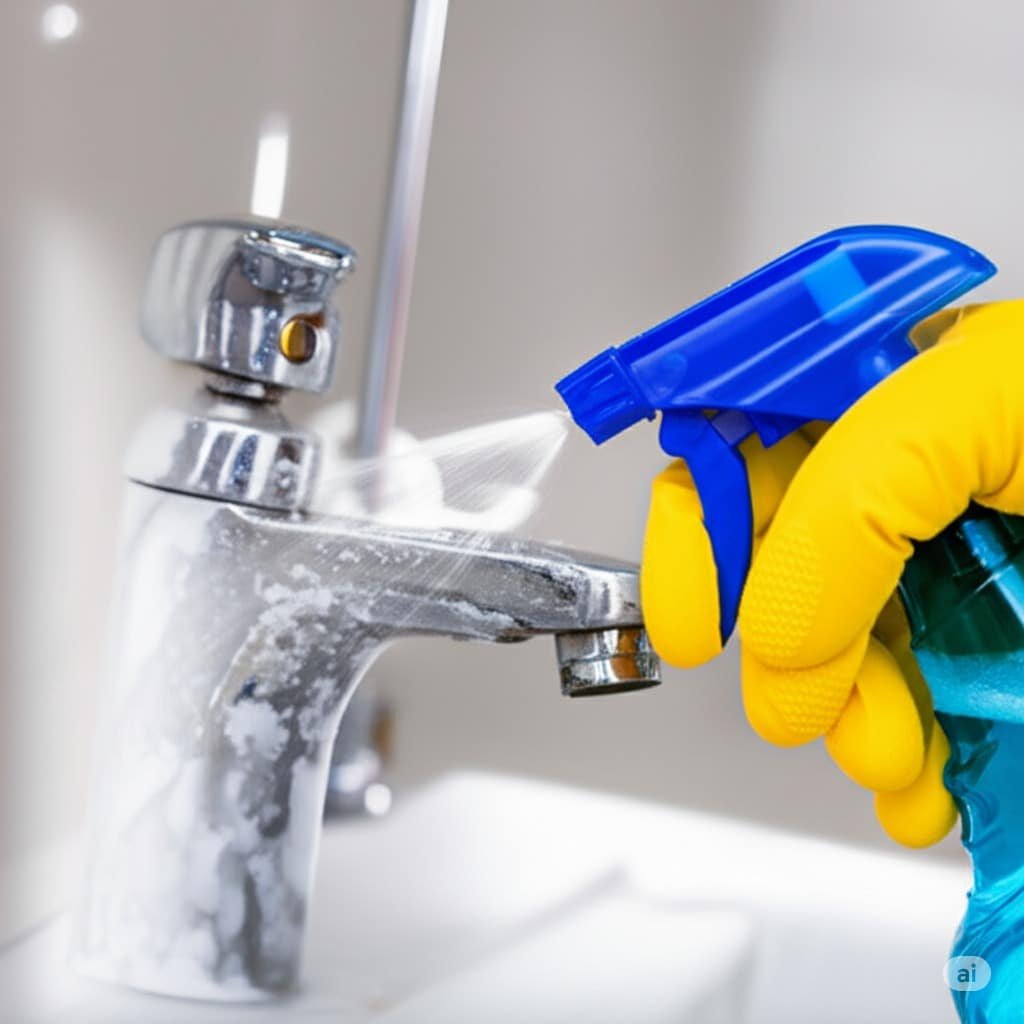
Hard water deposits, those chalky white or sometimes rusty stains, are a common nuisance in many homes. These marks are primarily composed of minerals like calcium and magnesium left behind as water evaporates. They can accumulate on various surfaces, diminishing their appearance and sometimes affecting their functionality. Addressing these buildups requires understanding how to dissolve these mineral deposits effectively. 1.Bathrooms In bathrooms, faucets and showerheads are frequent victims of hard water. The buildup can clog nozzles, reducing water flow and creating an unsightly crust. To clean these fixtures, undiluted white vinegar is a powerful ally. For faucets, you can soak a cloth or paper towel in vinegar and wrap it around the affected area. Let it sit for at least an hour, or longer for stubborn deposits. Afterward, scrub gently with an old toothbrush or a non-scratch sponge and rinse thoroughly. For showerheads, if removable, submerge them in a bowl or bag filled with white vinegar. Ensure the spray holes are completely covered. Let it soak for several hours, or even overnight for severe cases. After soaking, use a small brush or pin to clear any remaining debris from the nozzles and rinse with water before reattaching. Glass shower doors and enclosures often develop a cloudy film or streaks from hard water. A spray bottle filled with a solution of equal parts white vinegar and water can be used here. Spray the solution generously onto the glass and let it sit for 15 to 30 minutes. This allows the acetic acid in the vinegar to begin breaking down the mineral deposits. Then, scrub the surface with a non-scratch pad or a microfiber cloth. For more resistant stains, a paste made from baking soda and a small amount of vinegar can be applied and gently scrubbed before rinsing. Rinse the glass thoroughly with clean water and dry with a squeegee or a clean, lint-free cloth to prevent new spots from forming. Sinks and bathtubs, whether porcelain, ceramic, or stainless steel, can also suffer from hard water stains. For general cleaning, spraying with a vinegar solution and letting it sit before wiping and rinsing works well. For more concentrated stains, apply white vinegar directly or create a paste of vinegar and baking soda. Apply the paste to the stained areas, let it sit for about 30 minutes, then scrub with a soft brush or sponge. Rinse thoroughly with water. Be cautious with colored grout or natural stone, as vinegar’s acidity can sometimes affect these materials; test in an inconspicuous area first. Toilets often develop a hard water ring at the waterline. To address this, pour about one to two cups of white vinegar directly into the toilet bowl, ensuring it covers the ring. Let it sit for at least an hour, or preferably overnight for tough rings. After soaking, scrub the ring with a toilet brush. The minerals should loosen and come off more easily. Flush the toilet to rinse. For very stubborn stains below the waterline, you might need to empty the bowl of water first (by turning off the water supply and flushing) before applying vinegar directly to the stains. 2.Kitchen In the kitchen, appliances like kettles and coffee makers are prone to internal mineral buildup, often called scale. This scaling can affect the taste of your beverages and the efficiency of the appliance. To descale a kettle, fill it with a solution of equal parts white vinegar and water. Bring the solution to a boil, then turn off the kettle and let it sit for an hour or two. Empty the kettle and rinse it thoroughly several times with fresh water to remove any vinegar residue and taste. For coffee makers, fill the water reservoir with the same vinegar-water solution and run a brewing cycle without coffee grounds. Afterward, run two to three cycles with plain water to rinse the system completely. Dishwashers can also accumulate hard water deposits, leading to spotty dishes and a less effective cleaning cycle. To clean your dishwasher, place a dishwasher-safe cup or bowl filled with one to two cups of white vinegar on the top rack of the empty dishwasher. Run a regular hot water cycle. The vinegar will circulate through the machine, helping to dissolve mineral buildup on the interior components and spray arms. Washing machines, especially in hard water areas, can suffer from mineral buildup that affects their performance and can even leave deposits on clothes. To clean your washing machine, you can run an empty cycle with hot water and add about two to four cups of white vinegar directly into the drum or the detergent dispenser. Allow the machine to complete a full wash and rinse cycle. This helps to remove scale and soap scum from the drum and hoses. For tiles and grout in kitchens and bathrooms, a vinegar solution can be effective against hard water stains. Spray the solution onto the tiles, let it sit for a short period, then scrub with a brush, paying extra attention to grout lines. Rinse thoroughly with water. As mentioned, always test vinegar on a small, hidden area of tiles, especially if they are natural stone or colored, as acidity can sometimes cause etching or discoloration. While vinegar is a common and effective household cleaner for hard water, lemon juice, another natural acid, can also be used in a similar manner for smaller areas or as an alternative. Commercial descaling products are also available and can be very effective, especially for severe buildup or for appliances where manufacturers recommend specific descalers. Always follow the product instructions carefully when using commercial cleaners. Regular cleaning of affected surfaces can prevent severe buildup, making the task easier over time. Consistent attention to areas prone to hard water can keep your fixtures and appliances looking their best and functioning properly. Hard water stains and mineral buildup can be challenging, but with the right approach, these deposits can be effectively removed from various household surfaces. Understanding how to dissolve these minerals using common household items

How to Clean Hard Water – 2 Easy Steps for a Sparkling Home Read More »

summer cleaning woman

Preparing for Summer Cleaning – 6 Easy Steps

Preparing For Summer Cleaning: The Setup That Does Half The Work A summer cleaning session feels very different when the house is ready for it. Instead of wrestling through piles, running for missing supplies, and burning out by noon, you walk into a clear space with a plan, and every task goes faster and lands better. These six preparation steps turn a vague, overwhelming weekend into a series of manageable actions, and the same habits carry over into year-round upkeep. If preparation is not your strong suit, a professional team handles the whole job in one visit with deep cleaning services built for seasonal resets. Step 1: Declutter First With the Four Box Method Unnecessary objects soak up dust, harbor allergens, and slow down every surface you wipe around, so decluttering is the highest-leverage move you can make. Walk through the house room by room, or by category if that suits you better: clothes, books, papers, kitchen gadgets, old electronics. Give every item a conscious decision using four labeled boxes: Keep, Donate or Sell, Trash, and Relocate for things that belong in another room. Less stuff means less to clean and organize, and the open, calm feeling of a decluttered room is a benefit in itself: an organized home stays faster to maintain all year. Step 2: Turn Your Plan Into a Written Checklist A vague intention to clean up fizzles; a concrete roadmap does not. List every specific task you want to cover: degreasing the oven, emptying the fridge, washing interior glass and drapes, scrubbing floors and baseboards, dusting ceiling fans and light fixtures, and dealing with the deck or patio. Organize the list by room, kitchen tasks then bathroom tasks, or by activity type, dusting, vacuuming, mopping, whichever matches how you work. A written checklist gives direction, lets you watch progress pile up (genuinely motivating), keeps important areas from being forgotten, and lets you prioritize the tasks with the biggest visual impact before your energy runs out. Step 3: Gather Supplies and Test Your Equipment Nothing kills momentum like a mid-scrub store run. Inventory your products, cloths, sponges, brushes, buckets, and specialty equipment, then buy replacements for anything low, expired, or worn out before cleaning day. Do a quick function check too: fresh vacuum bags or an emptied canister, clean filters, fresh mop heads, spray bottles that mist rather than sputter. Decide in advance whether you will use commercial products or simple homemade solutions like white vinegar and baking soda, and stock the ingredients you chose. Check product labels and safety information as you shop; Health Canada’s overview of indoor air contaminants is a good reminder that strong-smelling chemicals deserve careful use in closed homes. All-purpose cleaner, glass cleaner, and disinfectant for shared and touch surfaces Microfiber cloths in quantity, plus sponges, scrub brushes, and an old toothbrush for grout A vacuum with crevice and dusting attachments, mop, bucket, and rubber gloves DIY staples if chosen: white vinegar, baking soda, lemons, dish soap Drop cloths or old sheets, trash bags, and boxes for the sorting step Step 4: Schedule Blocks That Fit Your Real Life Decide how you will spend your time before you spend it. One approach assigns specific days or weekends to rooms or task types: Saturday morning for the kitchen, a weeknight afternoon for every window in the house. The alternative is a little and often, thirty to sixty minutes daily crossing off one or two checklist items. Either way, put the blocks on your calendar like any other commitment, protect your energy for each task instead of sprinting through one marathon weekend, and estimate generously, because tasks almost always take longer than planned. Fitting cleaning into the schedule you already have produces consistency, and consistency is what actually finishes the job. Step 5: Protect the Space and Yourself Before Scrubbing Prepare the room to be cleaned as carefully as you prepare the task list. Open windows and set fans to circulate air, especially in warm months when fumes linger in stagnant rooms. Cover furniture and floors you are not working on with old sheets, plastic sheeting, or canvas drop cloths, move small furniture clear of the zone, and keep walkways unobstructed to prevent trips while carrying buckets. Strip knick-knacks and clutter off the surfaces themselves so you can wipe in long, uninterrupted strokes. Dress for the work too: old clothes, closed-toe shoes, and rubber gloves, with eye protection for overhead spraying or ladder work. When the job involves disinfecting as well as cleaning, the CDC’s page on when and how to clean and disinfect your home explains the sequence that matters: visibly dirty surfaces need soap and water first, because soil can stop a disinfectant from working. Step 6: Recruit the Household and Keep Morale Up Solo projects stall; family projects finish. Assign tasks matched to each person’s age and ability, state expectations clearly, and demonstrate anything new rather than hoping for it. Splitting the workload turns a chore into a team effort toward a shared result, teaches kids responsibility, and, with upbeat music playing and a payoff planned, stops feeling like a punishment. Rewards can be small: ordering takeout when the last room is done, or a family movie night once the checklist is empty. Prep step Core action Typical time Declutter Four boxes: Keep, Donate/Sell, Trash, Relocate A full day or spread over a week Plan Write a room-by-room or task-by-task checklist 30-45 minutes Supplies Inventory, buy missing items, test equipment 1 hour plus shopping Schedule Book room blocks or 30-60 minute daily slots 10 minutes to plan Protection Ventilate, cover, clear walkways, glove up 15-20 minutes per room Team up Assign tasks, set music, plan a reward 5 minutes to delegate Frequently Asked Questions About Summer Cleaning Prep What is the four box method? A decluttering system using boxes labeled Keep, Donate or Sell, Trash, and Relocate. Every item you touch gets an instant verdict, so sorting decisions happen once and clutter leaves the room as you work. How long

Preparing for Summer Cleaning – 6 Easy Steps Read More »

4 Easy Home Deep Cleaning Tips You Need to Try

4 Easy Home Deep Cleaning Tips You Need to Try Home deep cleaning goes far beyond routine tidying. Where regular cleaning maintains surface-level order, deep cleaning removes accumulated dirt, stubborn grime, bacteria, and hidden allergens that build up over time in every part of a home. It is a methodical, top-to-bottom process that restores a home to its best hygienic condition, and these four tips make it manageable. 1. Deep Clean the Kitchen From Top to Bottom The kitchen needs the most intensive work because grease, food particles, and bacteria collect there. Clean the interior and exterior of major appliances: degrease ovens inside and out, including racks and doors, clean microwaves internally and externally, wipe refrigerator and dishwasher exteriors, and degrease range hoods and their filters. Wipe cabinet exteriors to remove fingerprints and splatters, descale and polish sinks, faucets, and fixtures, sanitize countertops and backsplashes with attention to grout lines, and scrub floors including edges, corners, and under movable appliances. 2. Say No to Mold, Hard Water, and Dust in Bathrooms Bathrooms are high-moisture areas prone to mold, mildew, and soap scum. Scrub showers and bathtubs, including walls, doors, and tracks, to remove soap scum, hard water deposits, and signs of mildew. Disinfect toilets thoroughly, both inside the bowl and on all exterior surfaces, including the base and surrounding floor. Clean and polish sinks, vanities, countertops, and mirrors, and scrub tiles and grout on floors and walls to restore brightness. Dust light fixtures, exhaust fans, and vents, and descale chrome faucets and showerheads. 3. Dust High, Clean Low, and Don’t Skip the Details Work from top to bottom so dust falls onto surfaces you have not cleaned yet. Dust ceiling fans, light fixtures, picture rails, and curtain rods, then move to baseboards, skirting boards, and electrical outlet covers. Vacuum furniture, including under cushions, and move pieces where possible to clean underneath and behind. Wipe window sills, ledges, tracks, and frames, remove cobwebs from ceilings and corners, and clean interior windows and mirrors. Finish with floors: vacuum carpets thoroughly, including edges and high-traffic areas with spot treatment for stains, and mop hard floors with a suitable cleaning solution, paying attention to corners. 4. Call a Professional Home Deep Cleaning Service Professional cleaners bring training, industrial-grade equipment, and specialized solutions that most homes do not have. They work from a detailed checklist so every agreed area is covered consistently, and a full house deep clean can take many hours or even days of strenuous work when done alone. Reputable companies are insured and bonded: Toronto Shine Cleaning carries a $1,000,000 insurance policy plus a $10,000 accidental breakage and surety bond. The process starts with a consultation to define the scope and finishes with a walk-through so you can confirm the results. The CDC’s cleaning and disinfecting guidance explains why removing dirt before disinfecting matters, and Health Canada’s indoor air quality information covers the allergens a deep clean removes. For mold-prone areas, the CDC’s mold resources explain why moisture control is essential. Signs it is time for a home deep cleaning: Persistent musty odors despite regular cleaning Visible dust build-up in corners or on less-disturbed surfaces Grease build-up in the kitchen or hard water stains in the bathroom Allergy symptoms that worsen indoors A big event, move, sale, or renovation on the calendar Room Deep Cleaning Focus Tools That Help Kitchen Appliances, range hood, cabinets, grout, floors Degreaser, microfiber cloths, scrub brush Bathroom Shower, toilet, tiles, grout, fixtures Disinfectant, descaler, grout brush Living areas and bedrooms Ceiling fans, baseboards, furniture, windows Vacuum attachments, extendable duster Whole home Vents, door frames, switches, floors Vacuum, mop, step ladder Make Deep Cleaning a Seasonal Habit Spring and autumn are natural triggers, and many homeowners book an annual or semi-annual deep clean to maintain a consistently high standard, especially before hosting events or after renovations. Once the professionals finish, ongoing regular maid service keeps the baseline high, while a professional home deep cleaning resets the whole house. Review pricing or find your GTA location, then call (647) 424-0355 to book. How often should I deep clean my home? Many homes benefit from a deep clean once or twice a year, typically in spring and autumn. You may want one more often before or after events, when moving in or out, before selling or renting a property, or after renovations. How long does a professional deep clean take? It depends on the size of the home, its initial condition, and the tasks involved. A full house deep clean can take many hours or even days of work, which is why professional teams working from a checklist are faster and more consistent. Is a professional deep cleaning service insured? Reputable companies are insured and bonded. Toronto Shine Cleaning carries a $1,000,000 insurance policy and a $10,000 accidental breakage and surety bond, so you are protected against accidental damage or liability. What is the difference between regular and deep cleaning? Regular cleaning maintains surface-level order: dusting, wiping counters, and tidying. Deep cleaning removes accumulated grease, soap scum, limescale, dust, and allergens from hard-to-reach places such as behind appliances, inside ovens, and along baseboards, and it sanitizes areas that routine cleaning misses.

4 Easy Home Deep Cleaning Tips You Need to Try Read More »

5 Best Tips To Keep Your Pet’s Area Clean And Odor-Free

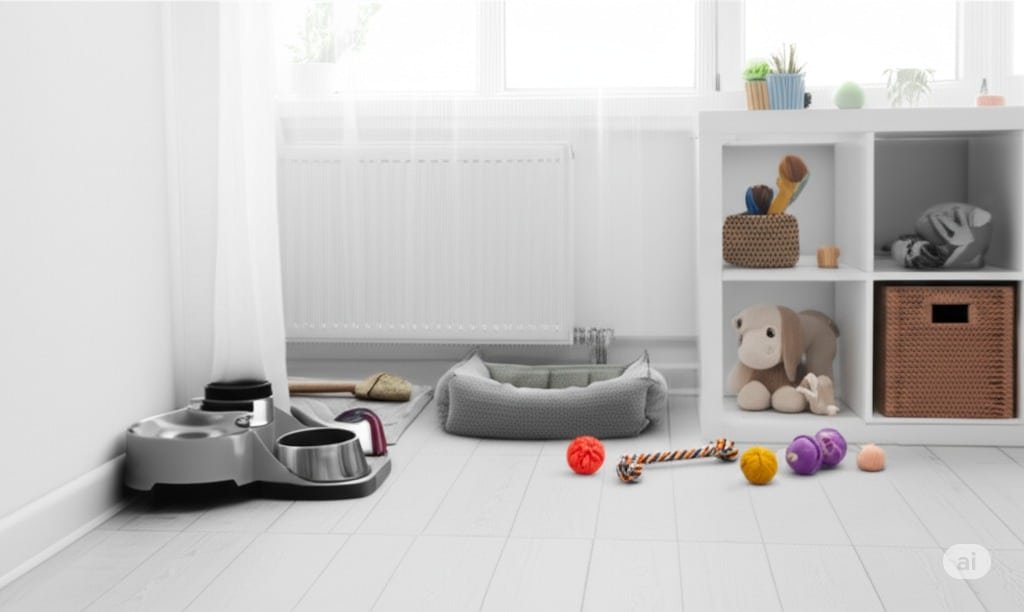
5 Best Tips To Keep Your Pet’s Area Clean And Odor-Free Pets bring companionship, energy, and plenty of love, and they also bring fur, paw prints, and messes around their feeding and bathroom zones. Keeping their area fresh is not just about appearances: it protects your family’s health and your pet’s comfort too. A clean environment means fewer allergens, fewer odors, and fewer chances for bacteria to spread between bowls, bedding, and litter boxes. You do not need elaborate equipment, just consistent routines and the right habits. These five tips cover every pet zone, from the food station to the carpet, so two-legged and four-legged family members can enjoy a fresh space. Tip 1: Set Up Routines and Designated Pet Zones Pets thrive on predictability, and so does your cleaning schedule. Daily tasks keep messes from compounding: sweep or vacuum high-traffic areas, wipe the perimeter around food bowls, and scoop the litter box every day for cats. Weekly, wash pet bedding, vacuum under furniture where fur collects, and give food and water bowls a thorough cleaning. Monthly, add the heavier jobs such as deep-cleaning carpets or washing pet toys. Pair this schedule with dedicated zones: a set spot for feeding, a comfortable sleeping corner, and a consistent elimination area. Choose bedding with removable, machine-washable covers, non-porous stainless steel or ceramic bowls, and an easy-scrub litter box. Daily: sweep or vacuum pet traffic areas, wipe bowl perimeters, scoop the litter box Weekly: wash bedding, vacuum under furniture, deep-clean food and water bowls Monthly: shampoo carpets or steam-clean upholstery, wash toys, launder crate pads Tip 2: Manage Fur, Dander, and Paw Prints Pet hair and dander are constant companions for animal owners, but the right tools keep them under control. Vacuum regularly with strong suction, and choose a model with a HEPA filter if you can, since it captures fine dander particles as well as visible hair and helps allergy sufferers breathe easier. Go slowly with overlapping passes so hair is pulled up rather than pushed down, use the right attachment on hard floors so fur does not scatter, and do not skip the sofa, a favorite lounging spot. Lint rollers handle quick touch-ups on clothing and furniture, and a slightly damp rubber glove wiped across fabric gathers embedded fur into easy-to-remove clumps. Microfiber cloths trap dust on hard surfaces instead of pushing it around. Regular grooming removes loose fur before it reaches your floors, and a mat and towel by entry points catch muddy paws. Tip 3: Keep Food and Water Stations Hygienic The feeding area matters for your pet’s health, not just your floors. Wash food and water bowls daily in warm, soapy water, scrub away food residue and biofilm, and rinse well so no soap remains. Stainless steel, ceramic, and glass bowls resist bacteria better than plastic, which develops scratches that harbor germs. Slide an easy-to-clean placemat or shallow tray under the bowls to catch stray kibble and splashes, and wipe it down regularly. Deal with spills promptly, since dried food attracts ants and other pests and feeds lingering odors. Store dry kibble in an airtight container to keep it fresh and pest-free, cover and refrigerate opened wet food, and throw out uneaten portions quickly. Wash your own hands after handling pet bowls and waste, following the CDC’s hand hygiene guidance. Tip 4: Stay on Top of the Litter Box and Potty Areas Elimination areas decide how your whole home smells. For cats, scoop the litter box daily: it cuts odor, keeps the box inviting so accidents stay unlikely, and lets you notice changes in your cat’s habits. Choose a litter that suits your cat, clumping clay, silica gel, or natural pine or corn options, and do a complete change and box wash weekly or bi-weekly depending on the number of cats. Scrub with mild soap and hot water, avoid ammonia products, which cats dislike, rinse fully, and dry completely before refilling. A textured mat at the entrance traps litter scatter. For dogs, remove used potty pads promptly, clean any seepage, and handle accidents fast: blot the liquid, then treat with an enzymatic cleaner that breaks down urine compounds and neutralizes the scent so your dog is not drawn back. Avoid ammonia cleaners, whose smell can mimic urine. Scoop dog waste from the yard regularly to cut odors and limit parasites. Tip 5: Deodorize and Deep Clean on a Cycle Daily habits prevent most smells, but a deeper cycle keeps pet areas truly fresh. Wash bedding in hot water with a pet-safe detergent when the fabric allows, which helps control bacteria and dust mites, and dry it completely before returning it, since dampness breeds mildew. Clean toys by material: hard plastic and rubber toys wash in hot soapy water or on the dishwasher’s top rack, while plush toys usually survive a machine wash. Once or twice a year, have carpets and upholstered furniture steam cleaned professionally, or rent a machine, to lift deep-set dirt and allergens. For everyday odor control, open windows for ventilation, leave open boxes of baking soda in pet rooms or sprinkle it on carpets before vacuuming, and only use air fresheners labeled pet-safe. A HEPA air purifier in main living areas removes odor-carrying particles and dander; the CDC’s healthy pets information offers more on keeping animals and households well together. Pet zone Core task Frequency Food and water bowls Wash in warm soapy water, rinse, dry Daily Pet bedding Machine wash with pet-safe detergent, dry fully Weekly Litter box Scoop daily; full change and scrub Weekly to bi-weekly Toys Wash by material in soapy water or machine Monthly Carpets and upholstery Professional steam cleaning Once or twice a year Frequently Asked Questions About Pet Area Cleaning How often should I wash my pet’s food and water bowls? Daily is best: warm, soapy water removes residue and biofilm, followed by a thorough rinse so no soap remains. How often should I completely change the litter? Most homes do a full change and box scrub weekly

5 Best Tips To Keep Your Pet’s Area Clean And Odor-Free Read More »

5 Expert Tips for Cleaning With Hot Water At Home

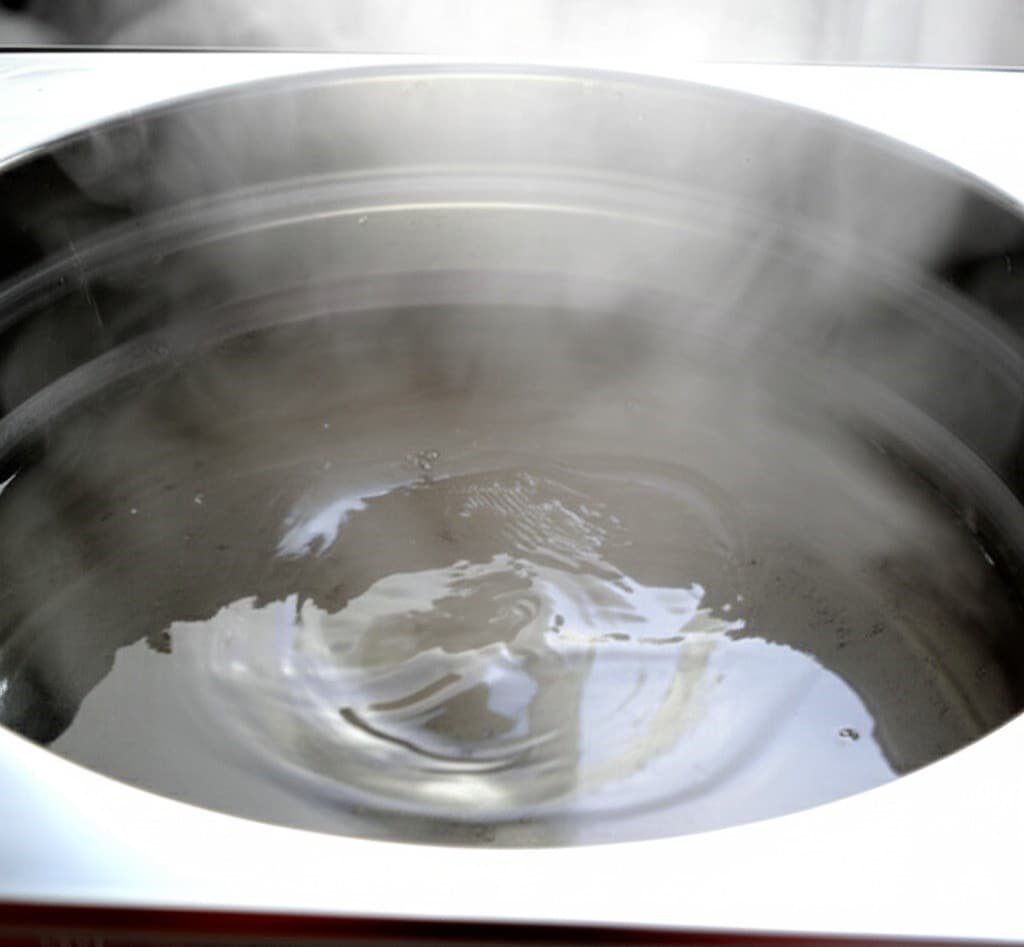
5 Expert Tips for Cleaning With Hot Water At Home Hot water is one of the oldest and most effective cleaning tools we own, yet it is easy to overlook in a world of specialty sprays and gadgets. Its power comes from simple physics: heat energizes water molecules, helping them break the bonds that hold grease, dirt, and residue to surfaces. Warm water also lowers surface tension, so it spreads evenly and wets surfaces more thoroughly, which lets soaps and detergents work harder. Used thoughtfully, hot water cuts scrubbing time, improves hygiene, and leaves surfaces drying faster. These five expert tips show you exactly where hot water earns its keep, from the kitchen sink to the laundry room, plus the few places where cooler water is the wiser choice. Tip 1: Use Hot Water to Conquer Kitchen Grease The kitchen holds the toughest cleaning jobs, and hot water is the grease fighter’s best friend. Fats and oils liquefy the moment they meet heat, so hot water lets dish soap emulsify them and rinse them away instead of smearing them around. Fill the sink with hot water for greasy dishes, and use it on stovetops, oven doors splattered with cooking residue, and countertops after oily spills: the warmth lifts stubborn buildup with far less scrubbing, and surfaces come away less tacky to the touch. Give the sink basin itself a regular hot rinse too, since it collects food particles and greasy film that can dull drains over time. In the kitchen, follow basic food hygiene, such as washing hands and surfaces properly, as outlined in the CDC’s food safety guidance. Tip 2: Break Down Bathroom Soap Scum and Grime Bathrooms demand hygiene, and hot water delivers it. Soap scum, that stubborn film of soap residue and hard water minerals, softens and dissolves far faster under hot water, so shower doors, tiles, and bathtubs need less chemical firepower and less elbow grease. Wipe toilet exteriors with hot water and a disinfectant for a more thorough clean, and mop bathroom floors with hot water, which lifts dirt and footprints while drying quickly to reduce slips and leave the room fresher. Even the steam from a hot shower works for you by loosening grime on surrounding surfaces, making a post-shower wipe-down quicker. Add hot water and soap at the sink for handwashing, following the CDC’s guidance on hand hygiene, to keep germs from spreading around the household. Tip 3: Boost Your Laundry With Warm and Hot Washes Detergents are formulated to perform best in warm or hot water. Heat dissolves detergent completely and activates its enzymes and surfactants, letting them penetrate fabric fibers more deeply to release trapped dirt, oils, and stains. For heavily soiled items, and for bedding and towels that need a hygienic refresh, such as during illness, a hot wash helps reduce germs and dust mites and keeps the linen closet healthier. Reserve cold water for delicate fabrics and for loads where saving energy matters, but reach for heat when you need genuine cleaning power. Always check care labels, since some modern fabrics are built for cooler washes, and dry everything completely so damp laundry never becomes a source of musty smells. Tip 4: Mop Floors and Wipe Walls the Smart Way Beyond the obvious spots, hot water improves general surface cleaning across the home. When mopping tile, vinyl, or sealed wood floors, hot water cuts through accumulated grime more effectively than cold, so floors look brighter and feel cleaner with the same effort. For painted walls, baseboards, and other washable surfaces, a cloth dampened with hot water often removes light marks and dust on its own, sometimes eliminating the need for chemical cleaners altogether. The warmth softens adhered dirt so it lifts without the aggressive scrubbing that can damage finishes. Surfaces also dry faster after a hot water clean, which means fewer streaks and water spots and a room that is ready to use sooner. Tip 5: Let Heat Reduce Your Effort and Product Use One of the quietest benefits of hot water is the effort it saves you. Because heat loosens dirt and grease so effectively, you scrub less vigorously and for less time, which is easier on your body and gentler on the surfaces you clean, since abrasion wears finishes down over the years. Hot water also boosts the action of soaps and detergents, so you can often use less product for the same result, a win for both your budget and the environment. Faster evaporation means less time waiting for wet surfaces to dry, fewer streaks, and fewer chances for grime to resettle. Combined, these advantages turn hot water into a genuine labor-saving tool for every weekly clean. Hot water is not the answer everywhere, so keep these exceptions in mind: Delicate fabrics labeled for cold washing, which heat can shrink or damage Unsealed wood floors and furniture that water can stain or warp Caked-on grime that needs soaking time rather than heat alone Energy-conscious loads where cold water and the right detergent do the job Area Why hot water helps Best practice Kitchen surfaces and dishes Liquefies fats and oils for easy rinsing Hot water plus dish soap; rinse the sink after use Bathroom tile and tubs Softens soap scum and mineral film Hot water with a non-abrasive pad or bathroom cleaner Laundry Activates detergent enzymes for deep cleaning Warm or hot washes for bedding, towels, and heavy soil Floors, walls, baseboards Lifts grime with less scrubbing and dries fast Hot water mop or cloth; avoid unsealed wood Frequently Asked Questions About Cleaning With Hot Water Is hotter water always better for cleaning? Not always: very hot water can damage delicate fabrics, unsealed wood, and some surfaces, so match water temperature to the material and check care labels first. Does hot water alone disinfect surfaces? No: hot water cleans by lifting dirt and grease, but disinfection needs an appropriate disinfectant applied according to its label, so clean first and disinfect where needed. Why does hot

5 Expert Tips for Cleaning With Hot Water At Home Read More »

oil diffusers and flowers

6 Expert Tips For Getting Rid Of Odors In Your Home

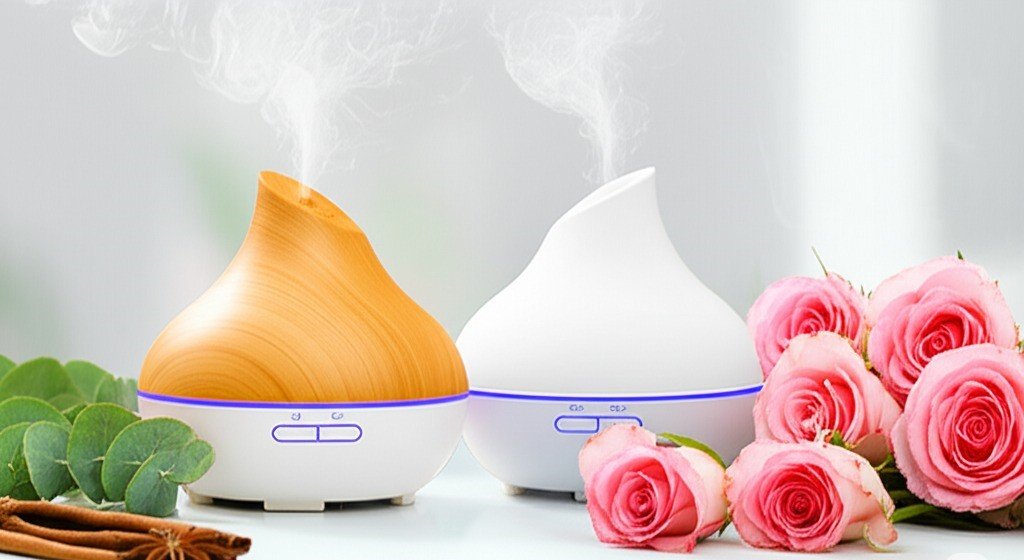
6 Expert Tips For Getting Rid Of Odors In Your Home A fresh-smelling home is more than a pleasure: it signals cleanliness, comfort, and care to everyone who walks through the door. The secret is not masking smells with sprays but removing their causes and keeping the air moving. Most odors start with something simple, a bin of food scraps, a damp towel, a litter box, or a pile of laundry, and they build when those sources are neglected. These six expert tips give you a complete system for getting rid of odors at the source, refreshing the air, and keeping your home consistently welcoming. Tip 1: Eliminate Odor Sources Before Adding Fragrance Fragrance cannot fix a home that has not been cleaned, so start by removing whatever creates the smell. Empty kitchen waste bins daily, especially when they hold food scraps, and wash the bins periodically. Deal with spills on countertops, stovetops, and floors immediately, because decomposing food particles are prime odor culprits. Flush and clean kitchen and bathroom sink drains regularly so trapped debris does not ferment, and keep bathroom moisture in check by running the vent fan and letting towels dry completely between uses. Think of this as creating a clean slate before adding anything good; Health Canada’s information on indoor air contaminants explains what can build up in household air. Tip 2: Ventilate Daily to Swap Stale Air for Fresh Clean homes still smell stale if the air never changes, so make ventilation a daily habit. Open windows whenever the weather allows, even briefly, to exchange odor-laden indoor air for fresh outdoor air. Cooking smells, household stuffiness, and fine airborne particles all dissipate faster with a real air current, so open windows on facing sides of a room or across the house to create a steady flow. Bathrooms and kitchens benefit most, since they generate moisture and odors, but every room deserves regular airing. Tip 3: Refresh Fabrics That Trap Household Smells Carpets, upholstered furniture, curtains, bedding, and clothing act like sponges for cooking smells, pet odors, and everyday life. Vacuum carpets and upholstery regularly to lift odor-carrying particles along with visible dirt, and launder bed linens frequently. Do not let dirty laundry pile up, especially damp towels and sportswear, and dry everything fully before storage, since damp fabric breeds mildew. For deeper odors in carpets or large upholstered pieces, schedule a professional steam cleaning once or twice a year, or use a fabric refresher, preferably a natural or unscented formula, to neutralize trapped smells rather than cover them. Tip 4: Target the Hotspots That Breed Odors Some zones generate smells continuously and need dedicated attention. Pet areas top the list: groom animals regularly, wash their bedding often, scoop litter boxes daily, change the litter on schedule, and treat accidents immediately with an enzymatic cleaner that breaks down the odor-causing proteins. High-moisture areas are next: bathrooms, poorly ventilated laundry rooms, and basements stay musty without good airflow, so ventilate them, repair leaks promptly, and run a dehumidifier if needed; the CDC’s mould health and cleanup guidance explains why dry air is healthier air. The refrigerator belongs on the list too: clear out old food and wipe the interior so it never becomes a hidden odor source. Kitchen bin and recycling: empty daily, wash weekly Sink drains: flush with hot water weekly Pet bedding and litter box: wash and scoop on schedule Bathroom towels and mats: wash often, dry fully Refrigerator: clear expired food and wipe shelves weekly Tip 5: Add Subtle Natural Fragrances as a Finishing Layer Once the sources are gone and the air moves freely, a light natural fragrance makes a home feel finished: a delicate layer of scent that complements genuine cleanliness. Place fresh flowers or a bowl of citrus in living areas, or simmer a pot of water with cinnamon sticks, cloves, and citrus peels for a gentle perfume during cooler months. Essential oil diffusers with quality oils such as lavender, citrus, or eucalyptus let you customize each room’s scent, and candles made from natural waxes scented with essential oils work well when burned safely with adequate ventilation. Tip 6: Lock In Freshness With Maintenance Habits The final tip ties everything together: consistency beats occasional marathons. Small daily habits stop odors before they start: wipe kitchen counters after every meal, sweep or vacuum high-traffic kitchen floors, keep the sink free of dirty dishes overnight, and give the bathroom sink a quick clean each evening. Weekly, vacuum and dust every room, change bed linens, clean bathroom fixtures thoroughly, and mop floors. Breaking the work into manageable pieces prevents buildup and beats a draining once-a-month marathon. These habits become the backbone of a home that smells as fresh as it looks. Area Daily habit Weekly habit Kitchen Wipe counters, clear the sink, empty food scraps Wash the bin, flush drains, wipe the fridge shelves Bathroom Quick sink wipe, hang towels to dry fully Scrub fixtures, wash towels and bath mats Floors and carpets Sweep or vacuum high-traffic areas Vacuum all rooms, mop hard floors Bedding and laundry Never leave damp clothes piled up Change linens, launder and dry everything fully Pet zones Scoop litter, spot-clean accidents Wash bedding, refresh the litter box Frequently Asked Questions About Household Odors Why does my home smell musty even though I clean it? Musty smells usually come from moisture: check for damp towels, poor ventilation, leaky pipes, or humid basements, since reducing humidity is the real cure for mildew odors. Do air fresheners actually remove odors? Most only mask them; lasting freshness requires removing the odor source first, then using natural scents or ventilating to keep the air genuinely clean. How can I get pet odors out of my carpet? Treat fresh accidents with an enzymatic cleaner, vacuum regularly, sprinkle baking soda before vacuuming for ongoing freshness, and steam clean carpets once or twice a year. How often should I wash bedding to keep bedrooms fresh? Weekly washing of sheets and pillowcases removes the body oils, skin

6 Expert Tips For Getting Rid Of Odors In Your Home Read More »

5 Bathroom Cleaning Tips Every Toronto Home Should Follow

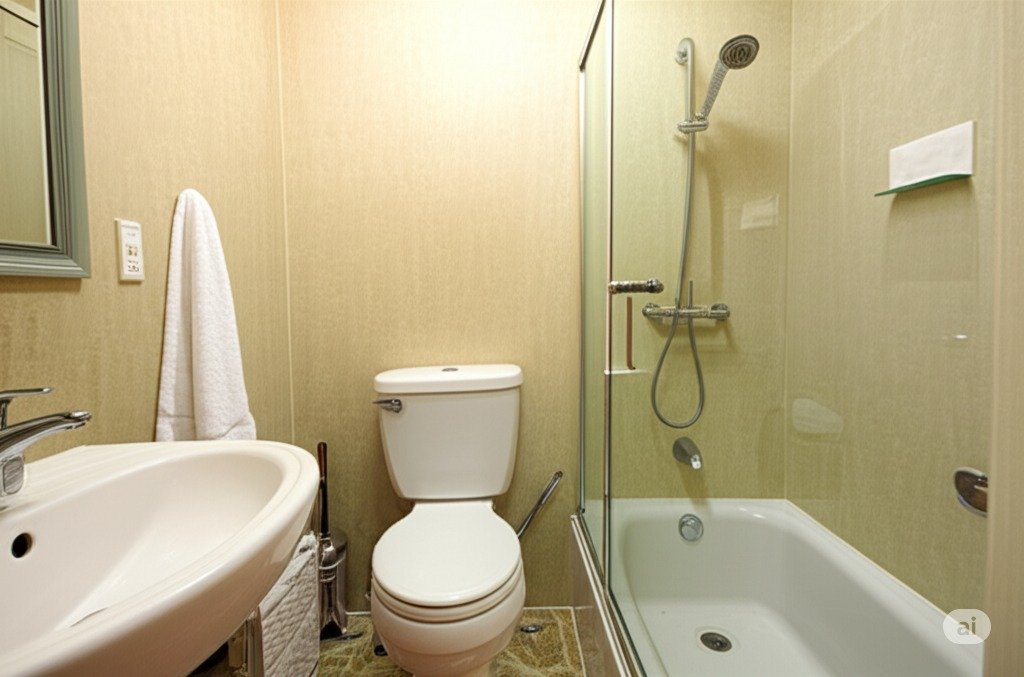
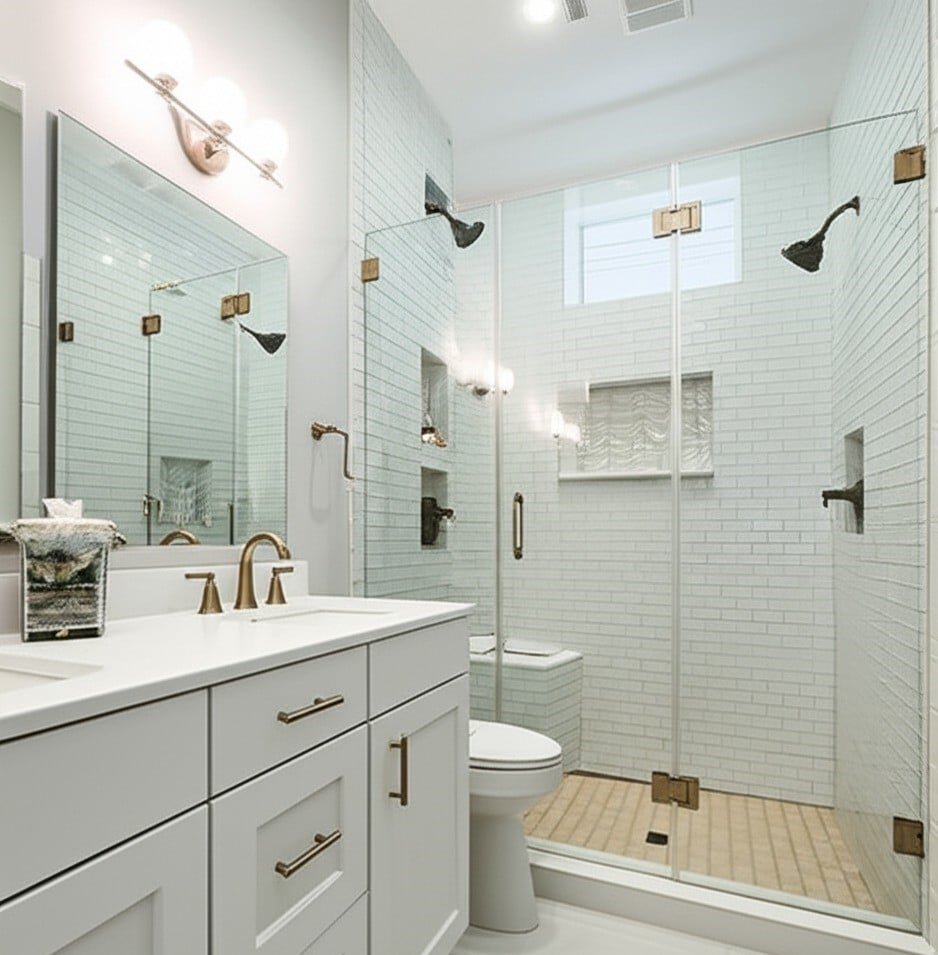
5 Bathroom Cleaning Tips Every Toronto Home Should Follow A truly clean bathroom is more than surface shine. It is deep hygiene, fresh air, and the quiet confidence that the most hardworking room in the house is properly cared for. These five stages take a bathroom from wiped down to genuinely serene, and they work for every Toronto bathroom from a downtown condo ensuite to a family home’s main bath. Assemble the kit once and all five stages get faster: Toilet bowl cleaner and a dedicated toilet brush A soap-scum formula cleaner and non-abrasive sponges A grout brush or an old toothbrush Cream cleanser, glass cleaner, and lint-free microfiber cloths pH-neutral floor cleaner and a well-wrung mop Tip 1: Conquer the Commode with Diligence Start where hygiene matters most. Apply a quality toilet bowl cleaner so it reaches under the rim and coats the surfaces as it flows down, and give it a few minutes to dissolve the buildup you cannot see. Scrub the entire interior with a dedicated toilet brush, reaching every curve. Then do the part most cleanings skip: the exterior. Wipe the tank, the lid, both sides of the seat including the often-forgotten underside, the pedestal, and the floor around the base with a disinfectant cleaner. That full-fixture approach is the difference between a toilet that looks clean and one that is hygienically sound. Tip 2: Win the Battle Against Soap Scum in the Bath and Shower The shower fights a constant war against soap scum, hard water stains, and, in damp conditions, the early stages of mildew. Choose a bathroom cleaner formulated to dissolve exactly those three, apply it to every surface, whether the walls are tile, fiberglass, or acrylic, along with the shower door or curtain, and let it sit for a few minutes so it can actually loosen the grime. Scrub with a non-abrasive sponge, and give the grout lines a dedicated pass with a grout brush or an old toothbrush; grout is where mildew claims its first territory. Polish the showerhead, taps, and drain cover last to remove water spots and mineral buildup. For a bathtub, same principles with special attention to the waterline where residue collects. Tip 3: Make the Vanity and Mirror Sparkle The sink basin collects toothpaste splatter and water spots at remarkable speed. A gentle cream cleanser or a versatile spray cleaner handles it, including the drain area where debris accumulates. Wipe and polish the faucets and handles, touched dozens of times a day, until they shine without fingerprints. Clear the countertops of product residue, then finish with the mirror: quality glass cleaner and a lint-free microfiber cloth in overlapping strokes for the streak-free finish that instantly makes the whole room feel brighter and larger. Thirty seconds of countertop tidying completes the calm, orderly look. Tip 4: Treat the Floor as a System Floors collect stray hairs, splash dust, and debris, so remove the loose material before any wet cleaning: sweep with a soft broom or vacuum with an attachment along the baseboards and around the toilet and vanity. Then mop with a pH-neutral floor cleaner diluted per the manufacturer’s instructions, safe for ceramic tile, vinyl, or linoleum alike. Wring the mop well, since over-saturating the floor is hard on unsealed grout. Work the edges of the room, the lip under the vanity if accessible, and carefully around the toilet base, the spots that make the difference between mopped and actually clean. Tip 5: Finish with Freshness That Lasts The details after the cleaning determine how long it lasts. Run the extractor fan during and after every shower to pull humidity down, which starves mildew and musty odors before they start; Health Canada’s humidity and mould guidance treats ventilation as the front line of bathroom health. Empty the bin before it overflows, wipe the light switches and door handles that every family member touches, and skip the overpowering artificial fragrances in favor of simply fresh air. A bathroom that smells like nothing is the one that feels genuinely clean. Stage Focus Key Tool Toilet Bowl interior plus full exterior and floor Toilet brush and disinfectant Bath and shower Soap scum, hard water, grout lines Non-abrasive sponge, grout brush Vanity and mirror Basin, faucets, streak-free glass Cream cleanser, microfiber cloth Floor Dry removal first, then a damp mop pH-neutral cleaner, well-wrung mop Finishing Ventilation, touchpoints, fresh air Extractor fan and a damp cloth Bathroom Cleaning FAQs How often should a bathroom be deep cleaned? A light weekly routine covering toilet, sink, and mirror keeps a bathroom presentable, with a full five-stage session monthly. Large households, or bathrooms with poor ventilation, deserve the deep session every two weeks. What removes soap scum without scratching? A cleaner formulated for soap scum, given dwell time, plus a non-abrasive sponge. Never reach for abrasive powders or pads on acrylic, fiberglass, or glossy tile, because the scratches they leave then hold grime and scum returns faster. How do I stop mildew from coming back? Ventilation first: run the fan during showers and for a while after, and leave the door open when possible. Keep a small squeegee by the shower for a ten second glass wipe, and treat grout lines with a mildew remover at the first dark speck. Where bleach-based products are part of the plan, follow the label carefully; the CDC’s bleach safety guidance covers ventilation and the combinations to avoid. Is professional bathroom cleaning worth it? For the deep session, absolutely: pros bring grout brushes, proper disinfectants, and the routine to keep mildew permanently behind. Many Toronto homes pair a monthly deep clean with their own weekly touch-ups and get the best of both. Your Bathroom Sanctuary, Maintained Toronto Shine Cleaning’s deep cleaning service delivers all five stages in one visit, and recurring housekeeping keeps the sparkle between deep cleans. A regular studio or one bedroom clean starts at $212.63 before HST, with every option on the pricing page. Call (647) 424-0355 and let the bathroom become the easiest room to

5 Bathroom Cleaning Tips Every Toronto Home Should Follow Read More »