Kitchen Cleaning

laminate floor cleaning

Best Ways To Clean Laminate Flooring Without Damage

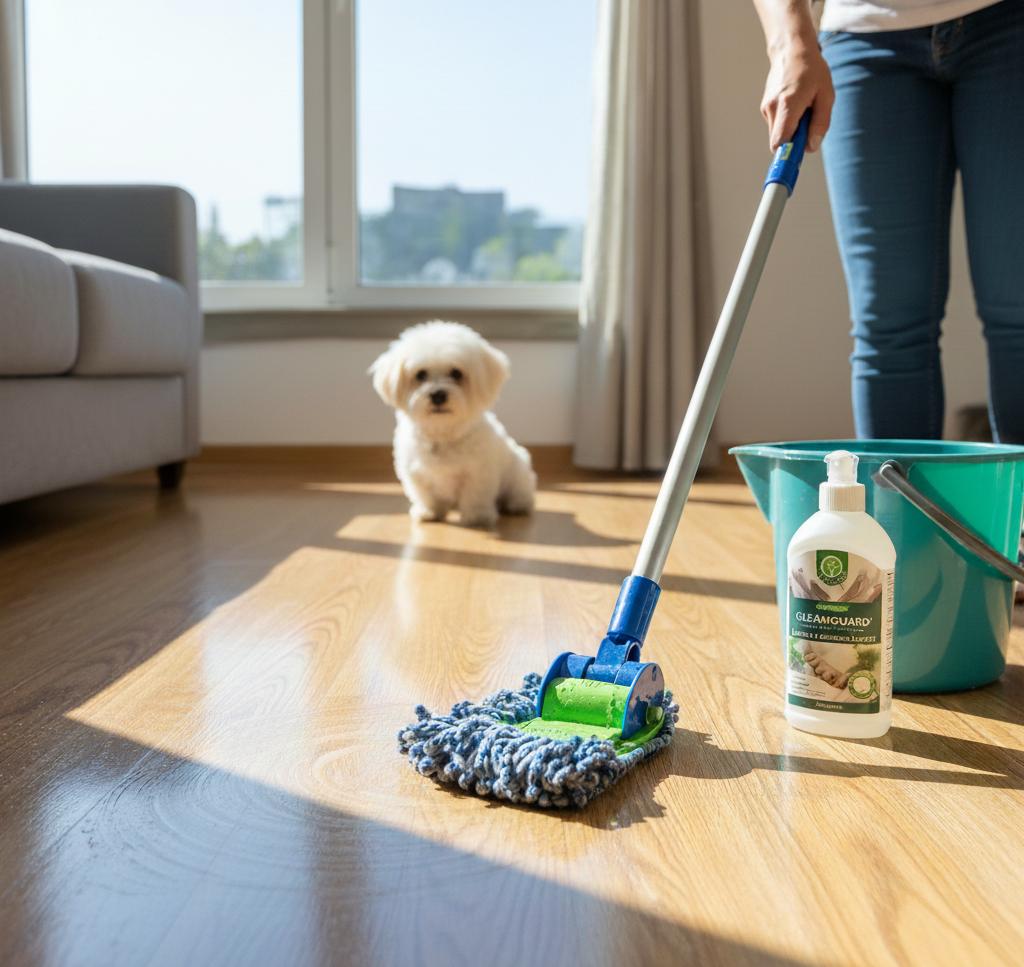
Laminate flooring is a triumph of modern engineering, offering the sophisticated look of hardwood, stone, or tile without the high cost and demanding maintenance. Its popularity in homes across the world is a testament to its durability, versatility, and ease of care. Composed of multiple layers fused together through a lamination process, this flooring is designed to withstand the rigors of a busy household. The top layer is a tough, transparent wear layer that protects the decorative, high-resolution image layer beneath it. Below that, a dense inner core of fiberboard provides stability and impact resistance, and a final backing layer adds moisture resistance. This multi-layered construction is what gives laminate its strength, but it also dictates a very specific set of cleaning and maintenance rules. The greatest vulnerability of laminate flooring lies in its core and seams. While the top wear layer is highly water-resistant, the fiberboard core is not. Excessive moisture that seeps between the planks can cause the core to swell, warp, and buckle, leading to irreparable damage. Therefore, the cardinal rule of laminate floor care is simple: water is the enemy. Understanding how to clean your laminate floors effectively is not about soaking and scrubbing, but about using the right tools and techniques to remove dirt and grime while using the absolute minimum amount of liquid. The Foundation of Laminate Care The best way to keep your laminate floors looking their best is through consistent, preventative cleaning. The goal is to remove the daily accumulation of dust, dirt, and grit before it has a chance to damage the floor’s surface. Small particles of sand and dirt act like fine-grit sandpaper underfoot, creating microscopic scratches in the wear layer that will, over time, dull the floor’s finish. Your Essential Toolkit: A Soft-Bristled Broom or a Dust Mop: This is your first line of defense. A dust mop with a microfiber head is superior to a traditional broom, as it traps dust and pet hair using a static charge rather than just pushing it around. A Vacuum Cleaner with a Hard Floor Setting: A vacuum is excellent for picking up debris from between the planks. Crucially, you must use a vacuum that either has a dedicated hard floor head (with soft bristles) or allows you to turn off the beater bar/brush roll. A stiff, rotating beater bar designed for carpet can scratch and damage the surface of your laminate. A High-Quality Microfiber Mop: This is the most important tool for actually “washing” your laminate floors. Its absorbent pads are designed to clean effectively with very little water. A pH-Neutral Floor Cleaner (or a DIY solution): You need a cleaner that won’t leave a hazy residue or damage the floor’s protective layer. Daily Maintenance The most effective daily habit you can adopt is a quick sweep with a dust mop or a soft-bristled broom. This takes only a few minutes and is the single best thing you can do to prevent long-term wear and tear. Place high-quality doormats at every entrance to your home to trap a significant amount of dirt, grit, and moisture before it even reaches your floors. Weekly Cleaning Once a week, a more thorough cleaning is in order. Dry Clean First: Always begin by thoroughly removing all loose dust and debris. Use your dust mop or vacuum (with the beater bar turned off) to clean the entire floor. This step is crucial; if you start mopping a dirty floor, you are essentially just pushing around a slurry of abrasive grit, which can cause scratches. Spot-Treat Stains: Inspect the floor for any spots or spills and treat them individually before you mop. For most common spots, a damp microfiber cloth is sufficient. For tougher marks like scuffs or ink, you can use a small amount of isopropyl (rubbing) alcohol on a cloth. Prepare Your Mopping Solution: This is where the “less is more” principle is vital. You have several options for a safe and effective cleaning solution: Commercial Laminate Floor Cleaner: This is often the safest bet. Choose a pH-neutral, water-based cleaner specifically formulated for laminate. Always follow the dilution instructions on the bottle. DIY Vinegar Solution: For a simple, inexpensive option, mix a solution of one part white vinegar to ten parts warm water in a spray bottle. The vinegar helps to dissolve grime and won’t leave a residue. (For a very large area, you can use a ratio of a half-cup of vinegar to a gallon of water). DIY Alcohol Solution: For a quick-drying, streak-free clean, mix equal parts water, isopropyl alcohol, and white vinegar in a spray bottle.Important: Never use oil-based soaps (like Murphy Oil Soap), wax, or any product that promises to add a “shine” to your floor. These products will leave a dull, streaky film that is very difficult to remove and can create a dangerously slippery surface. The Damp-Mop Technique: This is the most critical part of the process. Never flood your laminate floor with water. Your microfiber mop pad should be damp, not wet. If you are using a mop and bucket, submerge the mop head in your cleaning solution and then wring it out until it is almost dry to the touch. The superior method is to use a spray bottle. Lightly mist a small section of the floor with your chosen cleaning solution and then immediately wipe it up with your dry microfiber mop. Work in small, manageable sections, misting and wiping as you go. This technique ensures that no standing water is left on the floor to seep between the seams. Dry If Necessary: A properly damp-mopped floor should air-dry in a minute or two. If you see any areas that are still wet, wipe them with a clean, dry microfiber cloth to prevent water spots. Tackling Common Spills and Stains The protective wear layer on laminate flooring makes it highly resistant to stains, but quick action is always the best policy. Liquid Spills (Water, Juice, Soda): Wipe up immediately with a clean, dry cloth. For sticky spills, use a cloth dampened with your regular cleaning solution, then wipe with a clean, water-dampened

Best Ways To Clean Laminate Flooring Without Damage Read More »

Cleaning Quartz Countertops: How to Clean Efficiently and Quickly

Quartz countertops have become a hallmark of the modern kitchen and bathroom, celebrated for their stunning aesthetics, vast range of colours, and remarkable durability. But what truly sets quartz apart from natural stones like granite or marble is its engineering. A quartz countertop is a composite material, typically made of about 90-95% ground natural quartz crystals bound together with a polymer resin and pigments. This manufacturing process creates a surface that is non-porous, a crucial feature that lies at the heart of its easy maintenance and superior hygiene. Unlike natural stone, which has microscopic pores that can absorb liquids and harbor bacteria, the resin in quartz seals the surface completely. This means spills are less likely to cause permanent stains, and germs have nowhere to hide. However, this engineered perfection does not mean quartz is indestructible. The very resin that provides its non-porous shield is also the component most vulnerable to damage from improper cleaning methods. Understanding how to care for your quartz countertops is essential to preserving their beauty and ensuring they last a lifetime. The Golden Rules of Quartz Care Before diving into specific cleaning methods, it’s vital to internalize a few fundamental principles. These rules are designed to protect the resin that binds the quartz together, which is the key to its longevity. Be Gentle: Your primary cleaning tools should be soft. Abrasive scrubbers and harsh chemicals are the enemies of a quartz surface. Act Fast: The non-porous nature of quartz gives you a grace period, but it’s not infinite. Wiping up spills, especially acidic or highly pigmented ones, as soon as they happen is the best way to prevent potential staining. Use a Simple Solution: For the vast majority of cleaning tasks, a simple solution of mild dish soap and warm water is all you will ever need. Avoid Extreme Heat: The resin used in quartz countertops can be damaged by sudden and extreme temperature changes (thermal shock). Always use trivets or hot pads for pots and pans coming directly from the stove or oven. Your Daily Cleaning Routine The beauty of quartz is that its daily maintenance is incredibly straightforward. A few minutes each day is all it takes to keep your countertops looking pristine. You Will Need: A soft sponge or microfiber cloth Mild dish soap A spray bottle with warm water A clean, dry microfiber cloth The Process: Clear the Surface: Remove any crumbs, food particles, and debris from the countertop with a soft, dry cloth or a soft-bristled brush. Create Your Cleaning Solution: In your spray bottle, mix warm water with a few drops of a gentle, pH-neutral dish soap. You don’t need a lot of soap; too much will leave a hazy film. Spray and Wipe: Lightly mist the entire surface of the countertop with the soap and water solution. Using your soft sponge or microfiber cloth, wipe down the entire area in gentle, circular motions. Rinse (If Necessary): If you used a bit too much soap, you may need to rinse the surface. Wipe the countertop with a separate cloth dampened with plain water to remove any soap residue. Dry and Buff: This is a crucial step that many people skip. Using your clean, dry microfiber cloth, thoroughly dry the entire countertop. This not only prevents water spots and streaks but also buffs the surface to a beautiful, lustrous shine. Tackling Tougher Spills and Stains Even with diligent daily cleaning, stubborn spots and spills are bound to happen. The non-porous surface of quartz gives you an advantage, but some substances require a bit more effort. Dried-On Food: If you encounter hardened food, resist the urge to scrape it off with a metal knife or scour pad. Instead, spray the spot with your water and soap solution and let it sit for 5-10 minutes to soften the residue. Then, gently lift the food away using a flexible plastic putty knife or a plastic pan scraper. Once the gunk is removed, clean the area as usual. Grease and Oil: Quartz is highly resistant to grease stains, but splatters can leave a film. For greasy spots, a good degreasing dish soap is your best friend. Apply a small amount directly to the greasy area, add a little water, and work it into a lather with a soft sponge. Wipe away the residue and rinse thoroughly to ensure no soap film is left behind. Stubborn Stains (Wine, Coffee, Tea, Permanent Marker): For more persistent stains that don’t lift with soap and water, you have a few safe options. Isopropyl Alcohol: Dampen a soft cloth with isopropyl (rubbing) alcohol and apply it to the stain. Let it sit for a minute, then rub gently in a circular motion. The alcohol acts as a solvent that can break down many stubborn pigments. Once the stain is gone, rinse the area with plain water and dry. Baking Soda Paste: For a gentle abrasive option, create a paste of baking soda and a small amount of water. Apply the paste to the stain and let it sit for a few minutes. Using a soft sponge, gently scrub the area. The baking soda provides a very fine grit that can help lift stains without scratching the resin. Rinse thoroughly and dry. Hard Water Stains: If you live in an area with hard water, you may notice a chalky film or mineral deposits, especially around the faucet. For this, white vinegar can be used-but with extreme caution. While quartz is generally resistant to acid, prolonged exposure can potentially dull the finish of the resin. Spray a small amount of a 50/50 vinegar and water solution onto the hard water spot, let it sit for no more than one minute, then immediately rinse the area thoroughly with plain water and dry completely. What to AVOID Protecting your investment is just as much about what you don’t do as what you do. Using the wrong product can cause irreversible damage to the resin, leading to discoloration, dulling, and a breakdown of the surface. NEVER Use Harsh or Abrasive Chemicals: This is the most important rule. Keep the following far

Cleaning Quartz Countertops: How to Clean Efficiently and Quickly Read More »

Autumn Allergy

Autumn Allergy: 4 Essential Cleaning Plan For a Healthy Home

September brings a welcome stunning display of autumn colours. But this seasonal shift also signals the start of the miserable autumn allergy season, a time of sneezing, itchy eyes, and respiratory discomfort. While the beauty of fall is enjoyed outdoors, inside our homes, a battle against invisible intruders begins. The primary culprits of a Canadian autumn allergy are ragweed pollen, which can travel for hundreds of kilometers on the wind, and mold spores, which thrive in the damp conditions of early fall. These allergens infiltrate our homes, settling on surfaces, embedding in fabrics, and circulating through the air we breathe. Creating a healthy indoor environment is the most effective strategy for finding relief from a persistent autumn allergy. An essential, targeted cleaning plan can dramatically reduce the presence of these allergens, transforming your home from a source of misery into a true sanctuary. This is not about a simple tidy-up; it’s a strategic deep clean focused on eliminating the triggers of your autumn allergy where they live and breed. 1.The Bedroom We spend roughly a third of our lives in the bedroom, making it the most critical area to address for allergy relief. Soft furnishings like bedding, curtains, and mattresses are magnets for allergens. Bedding: Your sheets, pillowcases, and duvet covers accumulate a nightly collection of dust mites, their waste, pet dander, and pollen brought in on your hair and clothes. To combat this, all bedding must be washed weekly. The key is to use hot water, at least 130°F (54°C), as this temperature is required to kill dust mites. If your fabrics are too delicate for hot water, a warm wash followed by a cycle in a hot dryer for at least 15 minutes can achieve a similar result. Don’t forget your pillows and duvets themselves; wash them every few months. Using allergen-proof covers for your mattress and pillows is also a highly effective solution that creates an impermeable barrier against the triggers of an autumn allergy. Curtains and Window Treatments: Curtains act like large filters, trapping airborne dust and pollen that can make allergy symptoms worse. In the fall, take down all curtains and launder them. For non-washable window treatments like blinds, a thorough cleaning is necessary. Use a damp microfiber cloth to meticulously wipe down each slat. This simple step removes a significant amount of settled pollen that would otherwise aggravate your allergies every time you open or close them. Mattresses: Your mattress can harbor millions of dust mites, a year-round problem that exacerbates any autumn allergy. A deep clean in September is essential. Use the upholstery attachment on your vacuum cleaner to go over the entire surface of the mattress. This process is fundamental to creating a low-allergen sleeping environment and finding significant relief. 2.Floors and Air Quality Carpets and rugs can hold up to eight times their weight in dust, dirt, and allergens. Your cleaning method here is crucial for improving the air you breathe and managing your seasonal allergies. Vacuuming with a HEPA Filter: The single most important tool in your allergy-fighting arsenal is a vacuum cleaner equipped with a High-Efficiency Particulate Air (HEPA) filter. Standard vacuums often just stir up fine particles like pollen, making allergy symptoms worse. A HEPA filter, by contrast, is designed to capture 99.97% of tiny particles, ensuring that allergens are trapped and removed from your home. This is non-negotiable for anyone suffering from a severe autumn allergy. Proper Vacuuming Technique: Move slowly and methodically, making multiple overlapping passes over your carpets. This gives the vacuum enough time to pull up allergens from deep within the carpet fibers. Aim to vacuum high-traffic areas at least twice a week during the peak autumn allergy season. 3.Controlling Moisture and Eliminating Mold Mold is a major autumn allergy trigger, and its growth is directly linked to moisture. The cooler, damper weather of early fall can create ideal conditions for mold to thrive. Bathrooms: The bathroom is a prime location for mold growth. Use an exhaust fan during and for at least 20 minutes after every shower to vent moisture outside. Regularly clean tile grout with a mixture of vinegar and water to kill any emerging spores. Controlling moisture here is a critical step in managing mold-related allergies. Basements and Crawl Spaces: These below-ground areas are naturally prone to dampness. Invest in a good dehumidifier to keep the humidity level below 50%. The musty smell often found in basements is a clear sign of a problem that can significantly worsen allergy symptoms. Kitchens: Always use the exhaust fan over your stove when cooking. Regularly check under the sink and around the dishwasher for any leaks. Preventing mold growth is a proactive way to fight these allergies before they start. 4.General Household Cleaning for Autumn Allergy Relief Pollen and dust settle on every surface. A comprehensive cleaning plan must include these often-overlooked areas to provide true allergy relief. Dusting Technique: Dry dusting merely displaces allergens. The most effective method is to use a damp microfiber cloth, which traps dust particles instead of sending them airborne and triggering allergy symptoms. Always work from the top of a room down to the bottom. HVAC System Maintenance: Your home’s HVAC system can either help or hinder your fight against allergies. Before you turn on your furnace for the first time in the fall, replace the filter. Consider upgrading to a high-efficiency filter designed to capture smaller particles like pollen and mold spores. Upholstery and Soft Furnishings: Sofas and armchairs are just as susceptible to allergen buildup as carpets. Vacuum them weekly using the upholstery attachment to minimize allergen buildup. A proactive and thorough cleaning plan is your best defense against the onslaught of the autumn allergy season. By systematically targeting the areas where pollen, mold, and dust mites accumulate, you can significantly improve your home’s indoor air quality and create a healthier, more comfortable living space for your family during the fall season in Canada. A comprehensive cleaning plan is your best defense against the misery of an autumn allergy. To ensure every allergen is thoroughly removed from your home, from washing textiles to deep vacuuming and controlling moisture, consider the expert

Autumn Allergy: 4 Essential Cleaning Plan For a Healthy Home Read More »

scale buildup in an espresso machine

Descaling Agent: Essential Tips On How To Use This Cleaning Product

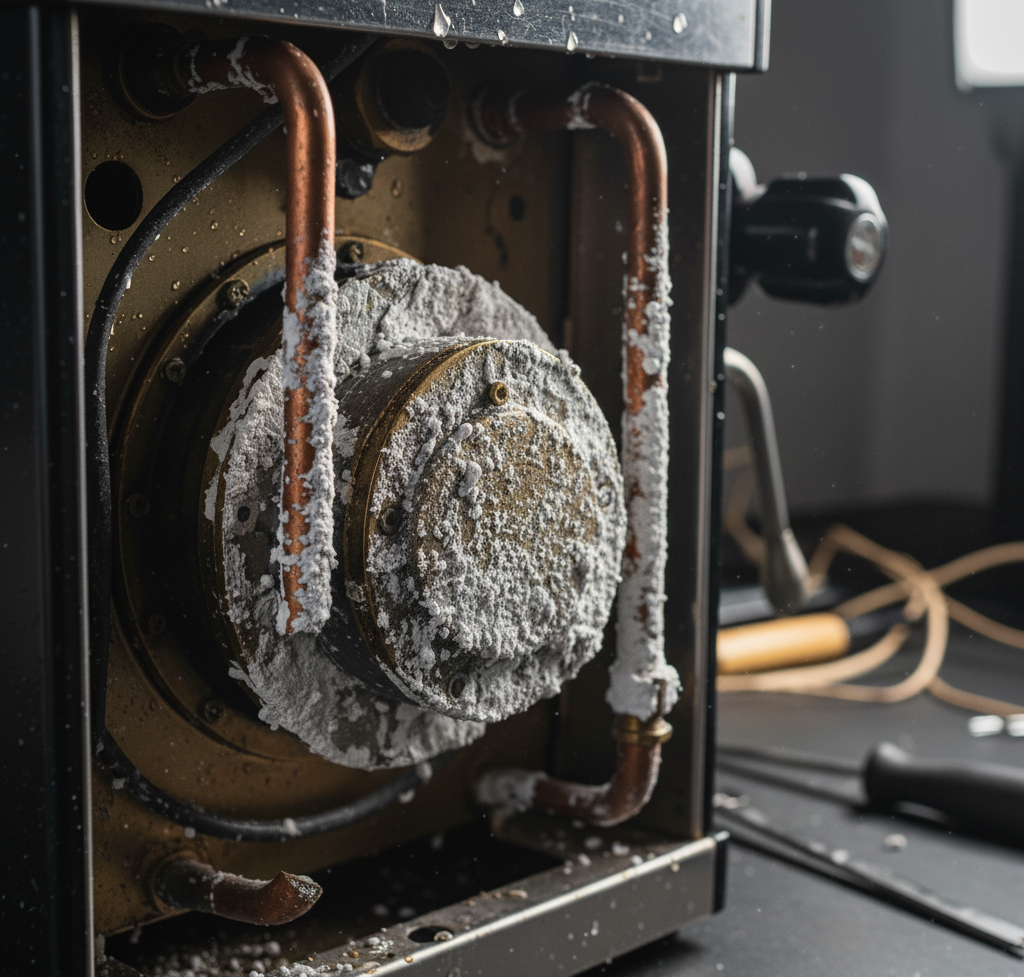
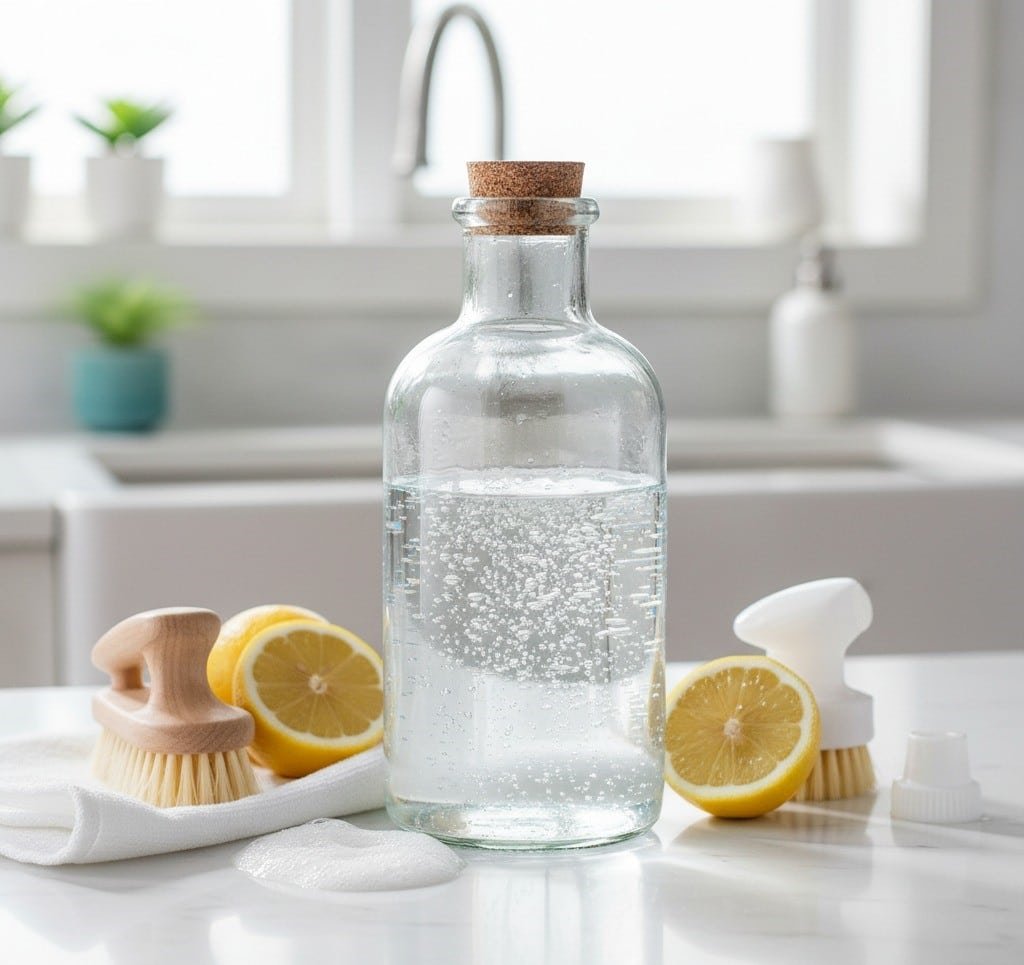
The silent buildup of limescale that infiltrates our appliances is a common household problem, but don’t underestimate the descaling agent. This is limescale, the mineral residue left behind by hard water. As water evaporates, it leaves behind deposits of calcium carbonate and magnesium, which harden over time into a stubborn, crusty layer. This scale doesn’t just look unsightly; it is an active threat to the efficiency, longevity, and even the hygiene of some of our most-used appliances. To combat this, a specific type of cleaning product is required: the descaling agent. Understanding the role of a descaling agent is understanding basic chemistry. Limescale is an alkaline substance. The most effective way to break it down is with an acid. A descaling agent is, at its core, an acidic solution formulated to dissolve these mineral deposits safely and effectively. When the acid comes into contact with the calcium carbonate, a chemical reaction occurs that breaks the scale down into water-soluble substances that can be easily flushed away. This process is essential for maintaining a healthy and functional home. Neglecting it leads to appliances that work harder, consume more energy, and ultimately fail sooner. The most critical application for descaling agents is in appliances that heat water. Heating elements are magnets for limescale. As water is heated, the minerals precipitate out of the solution more rapidly, causing them to coat the heating element in a thick, insulating layer. This forces the appliance to use significantly more energy to achieve the same temperature, driving up electricity bills. Over time, the constant overheating can cause the element to burn out completely. This is true for electric kettles, coffee makers, washing machines, and dishwashers. Descaling is not just a cleaning task; it’s preventative maintenance that saves money and extends the life of your investments. There are two primary categories of descaling agents: those you can find in your pantry and those formulated commercially. Both have their place in a comprehensive cleaning routine. Household Descaling Agents For many common descaling tasks, simple, non-toxic household acids are perfectly effective. White Vinegar (Acetic Acid): This is the most well-known and accessible descaling agent. Its acetic acid is strong enough to dissolve light to moderate limescale buildup. It’s inexpensive, readily available, and multi-purpose. However, it has a strong, lingering odor that requires thorough rinsing, and its potency may not be sufficient for very heavy, long-term scale. It is the ideal choice for routine maintenance of kettles, drip coffee makers, and showerheads. Citric Acid: Often sold in powder form in grocery or bulk food stores, citric acid is a step up from vinegar. It is a more powerful acid, allowing it to work faster and more effectively on tougher scale. Its biggest advantage is that it is completely odorless, making it a far superior choice for coffee machines and kettles where a vinegar aftertaste would be unpleasant. Many commercial “eco-friendly” descalers are primarily citric acid-based. It is a highly effective and safe option for most applications. Lemon Juice: Containing a weaker form of citric acid, lemon juice can be used for very light descaling tasks, such as removing water spots and light film from faucets and fixtures. While not powerful enough for heavy buildup inside appliances, it is useful for surface cleaning and leaves a fresh, pleasant scent. Commercial Descaling Agents For more serious buildup or for delicate, high-end appliances, a commercial descaler is often the recommended choice. These products are specifically formulated to work quickly and safely on particular materials. Formic Acid or Sulfamic Acid-Based Descalers: These are more powerful, industrial-strength acids that are common in descalers designed for high-performance espresso machines and other specialized equipment. They work very quickly and are extremely effective at removing heavy scale. However, they are more potent and must be handled with care, strictly following the manufacturer’s instructions regarding dilution, contact time, and safety precautions like wearing gloves. Lactic Acid-Based Descalers: Often marketed as a gentler, plant-derived, and biodegradable option, lactic acid is still highly effective. It is less corrosive than stronger acids, making it a safe choice for a wide range of appliances while still providing excellent descaling power. Practical Descaling Applying the right descaling agent correctly is key to success. Electric Kettles: This is one of the easiest and most satisfying descaling tasks. Fill the kettle about halfway with a solution of equal parts white vinegar and water. Bring it to a boil, then turn it off and let it sit for an hour. Pour out the solution and rinse thoroughly. For an odorless clean, use citric acid: add one to two tablespoons of citric acid powder to a kettle half-full of water, boil, let it sit, and rinse. The scale will have dissolved completely. Drip Coffee Makers: Limescale buildup in a coffee maker slows down the brewing process, affects the water temperature, and can impart a bitter, chalky taste to your coffee. To descale, fill the water reservoir with a solution of equal parts white vinegar and water. Place a clean filter in the basket and run a full brewing cycle. Discard the hot vinegar solution. Run two to three more cycles with plain fresh water to completely rinse out any vinegar residue and taste. Espresso Machines (Single-Serve Pod and Traditional): This is where using the right product is critical. Always consult your user manual. Many manufacturers advise against using vinegar, as its strong acidity can damage sensitive internal components like aluminum parts and rubber seals over time. They will recommend a specific commercial descaler. The process generally involves running the descaling solution through the machine via the water reservoir, followed by extensive rinsing cycles to ensure all traces of the agent are flushed out. Regular descaling is non-negotiable for preserving the taste of your espresso and the health of the machine. Washing Machines and Dishwashers: Hard water affects these appliances by coating the heating elements and leaving a chalky film on the interior drum and spray arms. To descale, run an empty machine on the hottest, longest cycle. For washing machines, add two cups of white vinegar or a

Descaling Agent: Essential Tips On How To Use This Cleaning Product Read More »

Hydrogen Peroxide for cleaning

Understand The Formula For Hydrogen Peroxide And 4 Ways To Use It For Cleaning

In the world of cleaning, few products offer the versatility, affordability, and eco-friendly power of hydrogen peroxide. Often found in a simple brown bottle in the first-aid aisle, this unassuming liquid is a formidable ally in the quest for a truly clean and disinfected home. Its chemical formula, H₂O₂, is just one oxygen atom away from water (H₂O). This extra oxygen atom is what makes it a powerful oxidizer, allowing it to break down stains, kill germs, and deodorize surfaces effectively. When its work is done, it safely decomposes into nothing more than water and oxygen, making it a much gentler choice for your home and the environment compared to harsh chemical cleaners like chlorine bleach. Understanding the humble brown bottle is the first step to unlocking its potential. For household cleaning, the standard 3% solution is all you need. While higher concentrations exist, they can be corrosive and are not intended for general use. The dark bottle is essential because hydrogen peroxide is sensitive to light, which causes it to break down more quickly into water and oxygen, losing its cleaning power. For best results, it’s often helpful to attach a spray nozzle directly to the original bottle. Before you begin, always remember a few key safety rules: wear gloves to protect your skin, ensure good ventilation, and most importantly, never mix hydrogen peroxide with bleach or ammonia, as this can create toxic gases. 1.Hydrogen Peroxide in the Kitchen The kitchen is where hygiene is paramount, and hydrogen peroxide shines as a non-toxic disinfectant and cleaner. Disinfecting Cutting Boards and Countertops: Wooden and plastic cutting boards can harbor dangerous bacteria like Salmonella and E. coli. After washing your cutting board with soap and water, spray it liberally with 3% hydrogen peroxide. Let it sit and bubble for about 10 minutes, this bubbling action is the peroxide working to lift and kill germs from the pores of the surface. Rinse thoroughly with water. The same process can be used on non-porous countertops (avoiding unsealed natural stone like marble) for a food-safe disinfection. Cleaning and Deodorizing the Sink: The kitchen sink is often one of the dirtiest places in the home. To clean and sanitize it, wash it first with soap and water. Then, spray the entire basin and faucet with hydrogen peroxide. Let it sit for 15-20 minutes before rinsing. For tough stains, create a paste of baking soda and hydrogen peroxide, apply it to the stained area, let it sit, and then scrub gently with a non-abrasive sponge. This not only cleans but also eliminates lingering odors. Brightening Stained Cookware: Burnt-on food and stains on baking sheets, pots, and pans can be incredibly stubborn. To tackle them, create a paste of baking soda and hydrogen peroxide. Apply a thick layer to the stained areas, let it sit for several hours or even overnight. The peroxide will work to break down the carbonized food, and the baking soda will act as a gentle abrasive. Scrub with a sponge, and you’ll find much of the staining lifts away with minimal effort. Sanitizing the Refrigerator and Dishwasher: Because hydrogen peroxide is food-safe, it’s perfect for cleaning appliances that handle your food. Wipe down shelves, drawers, and the interior walls of your refrigerator with a cloth dampened with peroxide to disinfect surfaces and eliminate odors. You can also run an empty dishwasher cycle with a cup of hydrogen peroxide in the bottom to help kill mold, mildew, and bacteria that can build up inside the machine. 2.Tackling the Bathroom The bathroom is a constant battleground against germs, mold, and mildew. Hydrogen peroxide is an indispensable tool in this fight. Eliminating Mold and Mildew: In damp environments like showers, mold and mildew are common. To treat affected areas, spray 3% hydrogen peroxide directly onto the mold. Let it sit for at least 30 minutes to an hour. The peroxide will kill the mold spores. After it has sat, use a stiff brush to scrub the area and then rinse with water. This is particularly effective on tile grout, shower curtains, and around fixtures. Disinfecting the Toilet: Hydrogen peroxide is a fantastic toilet bowl cleaner and disinfectant. Pour about half a cup of peroxide into the toilet bowl and let it sit for 30 minutes. The solution will work to break down stains and kill germs. After waiting, scrub the bowl with a toilet brush and flush. You can also spray the exterior, seat, and handle with peroxide and wipe clean for a complete sanitization. Whitening Grout: Grout between tiles can become discolored over time. To restore its brightness, make a thick paste of baking soda and hydrogen peroxide. Apply the paste directly to the grout lines using an old toothbrush or a small brush. Let it sit and bubble for 10-15 minutes, then scrub vigorously. Wipe away the excess paste with a damp cloth. You may need to repeat the process for heavily stained areas, but the results are often dramatic. Sanitizing Toothbrushes and Bath Toys: Items that go in the mouth need regular sanitizing. Soak toothbrushes in a small cup of hydrogen peroxide for about 5-10 minutes once a week to kill bacteria. Similarly, bath toys can be soaked in a solution of warm water and peroxide to eliminate mold and mildew that can grow inside them. Rinse everything thoroughly before use. 3.Around the House The applications of hydrogen peroxide extend far beyond the kitchen and bathroom. Effective Stain Removal in Laundry: Hydrogen peroxide is a mild bleach, making it excellent for removing stubborn stains, especially from white fabrics. It is particularly effective on organic stains like blood, grass, and red wine. For blood stains, apply peroxide directly to the fresh stain (it will bubble as it reacts with an enzyme in blood) and blot with a clean cloth before washing. For general stains, mix two parts hydrogen peroxide with one part dish soap. Apply to the stain, let it sit, and then launder as usual. Important: Always spot-test on a hidden area of colored fabrics first, as it can cause

Understand The Formula For Hydrogen Peroxide And 4 Ways To Use It For Cleaning Read More »

Back to School and Home Clean

Back to School: 7 Effective Ways to Keep Your Home From Turning Into Chaos

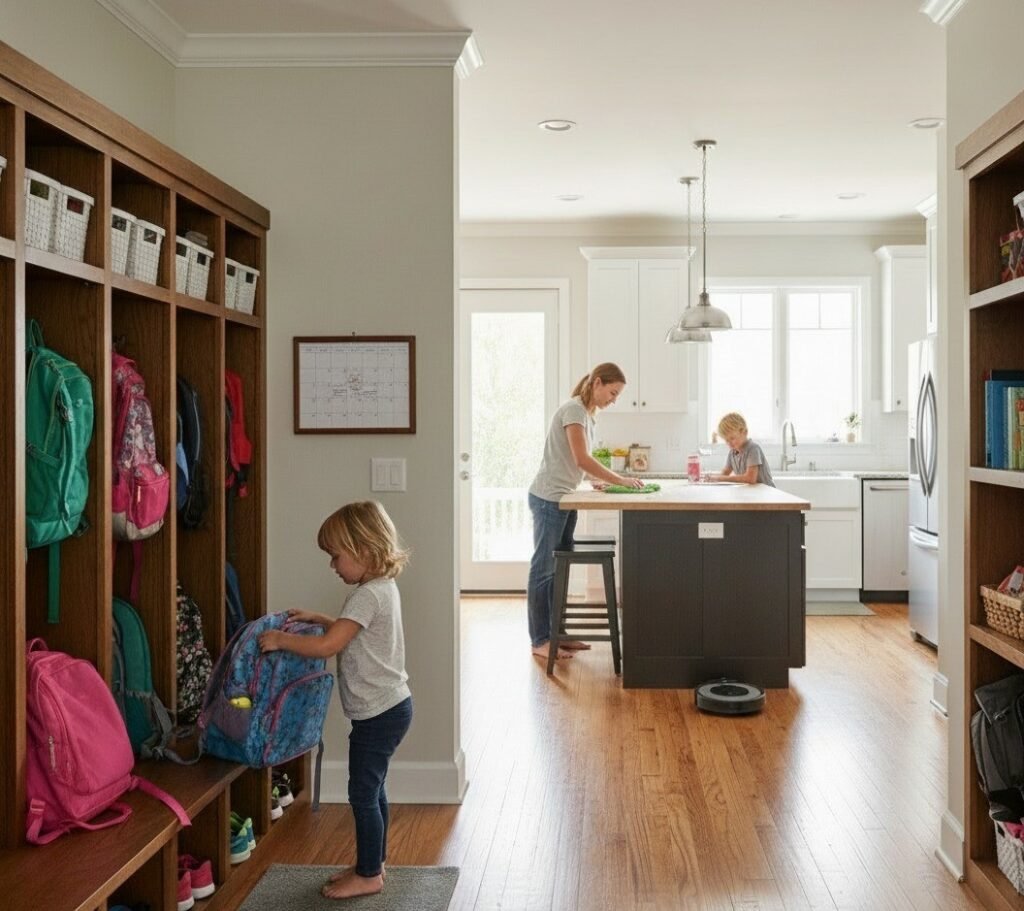
September in Canada is a vibrant month of energy and back to school time. The leaves begin to change color, the air grows crisp, and the country prepares for the autumn season. At the heart of every home, the most significant transition is the much-anticipated Back to School period. Mornings become more hurried, evenings are filled with homework and extracurricular activities, and the constant flow of backpacks, lunchboxes, and outdoor shoes can quickly transform an organized house into chaos. For Canadian families, this Back to School period demands more than just buying school supplies; it requires an adaptation of household routines, especially in cleaning and organizing, to ensure that the home remains a sanctuary of peace and order amidst the bustle of the new Back to School season. A well-managed home during this time is not only more pleasant to live in but also a fundamental pillar for the well-being and productivity of all its members. The Chaos of the Back to School Period The end of summer and the start of the academic year bring with them a host of new challenges for home organization and hygiene. Suddenly, the spaces that once housed summer play now need to accommodate school uniforms, books, art supplies, and gear for countless after-school activities. The increased traffic of children and teenagers entering and leaving the house means more dirt, more germs, and often, more clutter. Backpacks dropped by the entrance, papers scattered across the kitchen table, damp gym clothes on the bedroom floor, these are familiar scenarios for many Canadian families as the Back to School rush begins in September. Furthermore, the school environment is a fertile ground for the spread of germs. Children bring home not only new knowledge but also the viruses and bacteria circulating in classrooms, elevating the importance of cleaning focused on disinfection. Adapting cleaning strategies to face this new rhythm is essential for maintaining health and sanity at home during the Back to School transition. 1.Key Areas of Focus for Back to School Clean-up To combat the chaos of the Back to School season, it’s crucial to concentrate cleaning and organizing efforts in areas most impacted by the school routine: Entrances and Mudrooms: These are the first lines of defense against outdoor dirt. In many Canadian homes, the mudroom or entry area quickly becomes a repository for dirty shoes, coats, backpacks, and lunchboxes as everyone rushes for Back to School. To prevent dirt from spreading throughout the house and to maintain order: Create Designated Zones: Install hooks for coats and backpacks, and trays or shelves for shoes. This prevents items from piling up on the floor. Daily Cleaning: Sweep or vacuum this area daily. In Calgary and other Canadian cities, shoes track in a lot of dirt, especially as the weather begins to change. Regular Disinfection: Wipe down doorknobs and surfaces that hands frequently touch with a disinfectant, vital during Back to School germ season. The Kitchen: The kitchen shifts from a place of relaxed summer meals to a headquarters for lunchbox prep and quick meals, a core part of the Back to School routine. Lunchbox Organization: Dedicate a cupboard or shelf for lunchboxes and water bottles. Wash them immediately after use and allow them to dry. Countertop Cleaning: Wipe and disinfect countertops after each food and snack preparation. Crumbs and spills are inevitable. Refrigerator Organization: With more food being prepared and stored, keep the refrigerator organized and clean up spills immediately. Spotless Sink: Encourage immediate washing of dishes or loading the dishwasher to prevent accumulation. Study Areas and Desks: With homework in full swing, these areas can quickly become disorganized as part of the Back to School workload. Keep It Simple: Encourage a clean and minimalist study space to reduce distractions. Material Storage: Use desk organizers, drawers, and shelves to store pens, papers, books, and school supplies. Regular Cleaning: Dust and wipe down desk surfaces regularly. Encourage children to put away their materials after each study session. Bedrooms: Bedrooms can easily become clutter zones with clothes and personal items, especially with the morning Back to School rush. Make the Bed: The habit of making the bed every day creates a foundation of order for the room. Laundry Hampers: Ensure each bedroom has a laundry hamper to prevent clothes from ending up on the floor. Quick Tidy-Up Routine: Teach children to spend 5-10 minutes before bedtime tidying their rooms, putting away clothes and toys. Bathrooms: With increased exposure to germs at school, bathrooms need extra attention during the Back to School period. Daily Wipe-Down: Quickly wipe down the sink and toilet to remove visible dirt. Frequent Disinfection: Use a disinfectant on doorknobs, faucets, toilets, and light switches several times a week. Clean Towels: Encourage the use of clean face and hand towels daily or every other day. 2.Implementing New Routines The secret to maintaining order during the Back to School season is establishing routines that become habits: Daily Power Clean (15-20 Minutes): At the end of the day, just before the family settles down, do a collective 15-20 minute “power clean.” Each family member can have a task: one tidies the living room, another puts away dishes, another wipes kitchen countertops. This ensures you wake up to a relatively organized home, setting a positive tone for the next day as the Back to School routine begins again. Weekly Zone Cleaning: Instead of trying to clean the entire house in one day, divide the house into “zones” and dedicate one day of the week to each. This approach is highly effective for managing cleaning tasks alongside Back to School schedules. Envolve the Children: Cleaning should not solely be the parents’ responsibility. Assign age-appropriate chores to children. Making cleaning a family effort not only distributes the load but also teaches responsibility and the value of a clean environment, crucial lessons during the Back to School transition. 3.Fighting Back-to-School Germs With increased social interaction at schools, disease prevention becomes a priority. High-Touch Surfaces: Focus on regularly disinfecting doorknobs, light switches, remote controls, cell phones, and other frequently touched surfaces, especially important as children bring home germs during Back to School. Hand Hygiene: Reinforce the habit of frequent handwashing, especially upon returning home from school, before meals, and after using the bathroom. Keep hand sanitizer available in strategic areas. Lunchboxes and Water Bottles: Wash lunchboxes and water

Back to School: 7 Effective Ways to Keep Your Home From Turning Into Chaos Read More »

Cooktop Cleaning

Cooktop Cleaning: The Ultimate Guide for a Sparkling Space

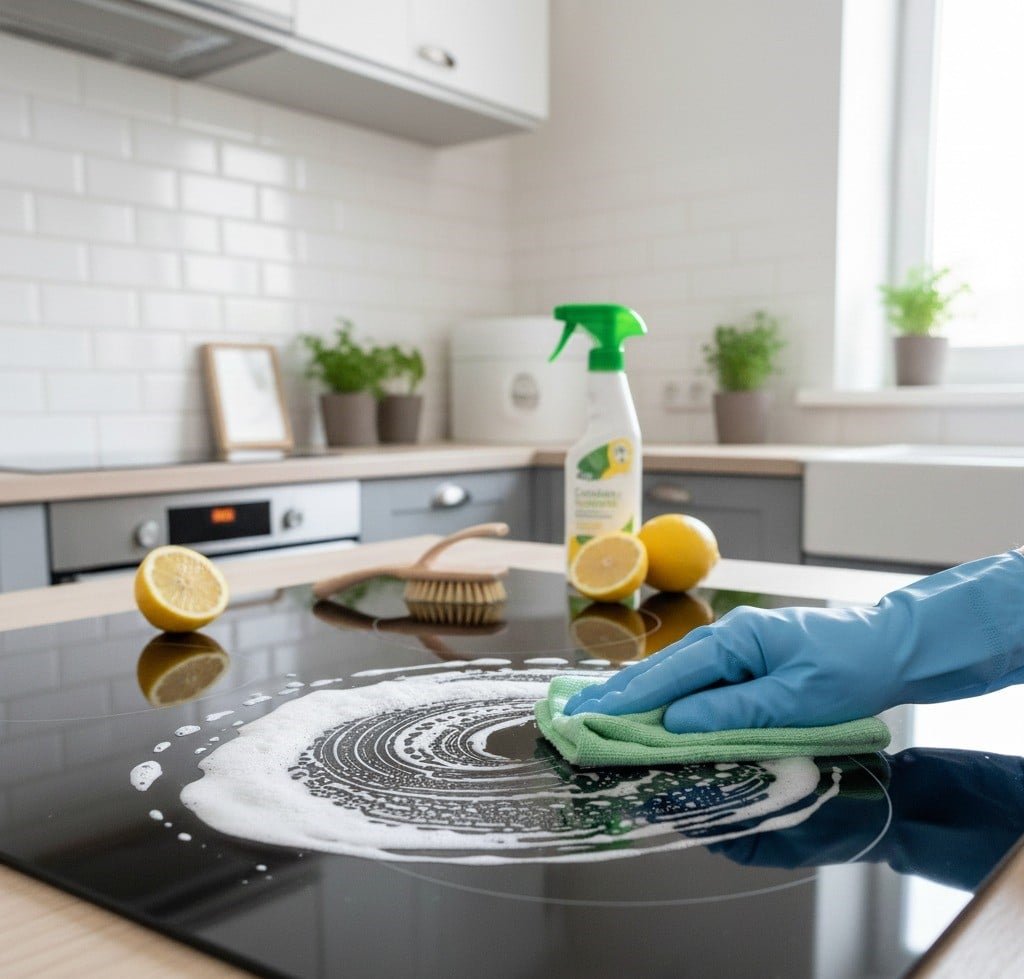
Keeping your cooktop clean is more than just an aesthetic concern; it’s fundamental for kitchen hygiene, food safety, and the longevity of your appliance. The kitchen is the heart of many homes, and the cooktop, invariably, is its focal point. Splattered grease, burnt-on food, and spills can not only compromise its appearance but also create a breeding ground for bacteria and unpleasant odors. Ignoring regular cleaning can turn small stains into stubborn grime, requiring much greater effort in the future and, in some cases, even damaging your equipment’s finish. A systematic approach and the use of the correct products and techniques are key to keeping your stovetop sparkling and functioning perfectly for years to come. Fundamental Principles for Cooktop Cleaning Regardless of the type of stovetop you own, some universal principles should always be followed to ensure effective and safe cleaning. First and foremost, safety is paramount. Before starting any cleaning, always unplug an electric stovetop or turn off the gas supply. This prevents accidental electric shocks or gas leaks. Second, ensure the cooktop is completely cool. Attempting to clean a hot surface is not only dangerous, causing burns, but can also cause residues to burn further onto the surface or damage materials. Third, avoid using abrasive products or tools. Steel wool sponges, scouring pads, and cleaning products with abrasive particles can permanently scratch delicate surfaces like glass, ceramic, and even stainless steel, compromising the cooktop’s aesthetics and functionality. At the end, quick action is a determining factor. Spills and splatters should be cleaned as soon as possible. The longer dirt remains, the more it burns and adheres to the surface, making removal exponentially more difficult. A quick daily wipe after use, combined with a weekly deep clean, forms the basis for an immaculate cooktop. Cleaning Gas Cooktops Gas cooktops are common and feature removable components that require individual attention. The main components are the grates, burner caps, burner heads, and the cooktop surface itself. Daily Cleaning: After each use and once the cooktop is cool, simply wipe the cooktop surface with a damp cloth and a little mild dish soap to remove crumbs and small spills. This prevents dirt from building up. Weekly/Deep Cleaning: Disassembly: Remove the grates and burner caps. Some models also have removable burner heads. Soaking: For the grates and burner caps, it’s best to soak them in warm water with plenty of dish soap. For more persistent dirt and baked-on grease, you can add some white vinegar or a specific degreaser. Let them soak for at least 30 minutes, or for a few hours if the dirt is very heavy. Cleaning Removable Parts: After soaking, scrub the grates and caps with a firm-bristled brush (non-abrasive) or a sponge. Make sure to remove all residues. For the burner heads, check that the gas ports are clear. Use a toothpick or an unfolded paper clip to carefully unclog any blocked holes. Caution: Never use wooden toothpicks that might break and get stuck. Cleaning the Surface: Clean the cooktop surface. If it’s stainless steel, use a stainless steel cleaner and a microfiber cloth to prevent streaks and add shine. For enamel surfaces, an all-purpose cleaner or a paste of baking soda and water can be effective for stain removal. Apply the paste, let it sit for 15-20 minutes, and gently scrub. Rinsing and Drying: Rinse all removable parts and the cooktop surface thoroughly with a clean damp cloth to remove any product residue. Dry completely before reassembling. Residual moisture can cause rust on the grates and make it difficult for the burners to ignite. Reassembly: Place the burner heads, caps, and grates back in their proper positions. Cleaning Electric Coil Cooktops Electric coil cooktops also present their own challenges, mainly with spills falling into the drip pans. Daily Cleaning: Wipe the cooktop surface with a damp cloth and detergent. Prevent dirt from accumulating. Weekly/Deep Cleaning: Disassembly: Ensure the stovetop is unplugged and completely cool. Lift each heating element and pull it out carefully. Remove the drip pans located underneath the heating elements. Cleaning Drip Pans: These pans are often the dirtiest spot. Soak them in very hot water with dish soap. For stubborn dirt, a paste of baking soda and vinegar can be applied: cover the pans with baking soda, spray vinegar, and let it sit for several hours or overnight. Scrub with a brush. In extreme cases, a commercial oven cleaner can be used on the drip pans (follow manufacturer instructions and use in a ventilated area). Cleaning Heating Elements: Never submerge heating elements in water. Simply wipe them with a damp cloth and a little detergent. For burnt-on residue, use a plastic scraper to gently scrape (with the element cold) or apply a baking soda paste, let it sit, and then wipe clean. Cleaning the Surface: Clean the cooktop surface with a damp cloth. Rinsing and Drying: Rinse and thoroughly dry all drip pans before replacing them. Make sure the heating elements are dry as well. Reassembly: Reinsert the drip pans and heating elements, ensuring they are properly seated. Cleaning Glass/Ceramic (Smooth Top) Cooktops These cooktops are elegant but require specific care to avoid scratches and stains. Daily Cleaning: After each use and once the cooktop is cool, clean the surface with a damp cloth and a little mild dish soap. This is crucial to prevent spills from drying and becoming difficult to remove. Weekly/Deep Cleaning: Apply Cleaner: Apply a specific cleaner for glass/ceramic cooktops (usually creamy or liquid) generously over the entire surface, especially on stained areas. Allow Product to Work: Let the product sit for a few minutes (follow manufacturer instructions). Scrubbing: With a non-abrasive sponge (often included with the cleaner) or a microfiber cloth, scrub the surface in circular motions. Removing Burnt-on Food: For burnt-on food or melted sugar (which can cause damage if not removed correctly), use a single-edge razor blade, holding it at a low angle (about 30-45 degrees) to the surface. Scrape very carefully to lift residues, always pushing the dirt away from you and never scraping directly down to avoid scratches. Caution: Never use the blade flat against the surface. Remove Product Residue: Use a

Cooktop Cleaning: The Ultimate Guide for a Sparkling Space Read More »

getting ready for fall cleaning

September Cleaning: 7 Quick And Easy Steps To Get Ready For Fall

September in Canada marks an essential transition, the end of summer and the beginning of preparations for autumn and winter. This period demands a thorough house cleaning, not just to get rid of accumulated dust and clutter from the warmer months, but also to prepare the home for the long periods when we spend more time indoors. An effective September cleanup is the foundation for a healthy, organized, and welcoming environment during the colder seasons, contributing to both physical and mental well-being. The approach should be systematic, starting with planning and decluttering, and moving on to detailed cleaning of each area of the house. 1.Planning Preparation for the September cleanup begins with creating an action plan and decluttering. It is essential to adopt an organized approach to avoid feeling overwhelmed. Start by scheduling specific time blocks for different areas or types of tasks. This transforms what seems like a gigantic chore into manageable steps. Take an inventory of your cleaning supplies. Make sure you have microfiber cloths, a vacuum cleaner with various attachments, a mop, buckets, protective gloves, and a variety of cleaning products such as an all-purpose cleaner, disinfectant, glass cleaner, bathroom cleaner, and floor cleaner. Consider investing in eco-friendly and non-toxic products, especially if there are children, pets, or people with allergies in the home. 2.Three-Box Method Decluttering should be the first step in every room before any cleaning begins. This process is crucial for freeing up space and facilitating deep cleaning. Adopt the “three-box method”: one for items to keep and organize, one for donating or selling, and another for trash or recycling. Start with seasonal summer items, putting away beach gear, garden decorations, and summer clothes. Evaluate clothing, toys, books, and stationery. Getting rid of excess not only organizes the space but also reduces the amount of dust and clutter to clean. In the kitchen, clear out the pantry and refrigerator, discarding expired food and reorganizing the rest. In living areas, collect and categorize papers, magazines, and personal items. In bedrooms, perform a wardrobe rotation, putting away summer clothes and preparing for autumn/winter. Once decluttering is complete, plan to deliver items for donation or recycling. 3.Focus On The Kitchen With decluttering done, cleaning of each room can begin. The kitchen, being a hub of activity, requires special attention. Perform a deep clean of appliances. The oven should be cleaned internally, removing grease and residue. The microwave needs a complete internal and external cleaning. Empty the refrigerator, discard old food, clean shelves and drawers, and wash the interior with mild soap and water. The dishwasher should be run with a vinegar cycle to remove deposits and odors. Clean all cabinets and drawers, both inside and out, and wash countertops and backsplashes. Disinfect the sink and faucets, and pay attention to cleaning the garbage disposal, if you have one. Finish by mopping or steaming the floor. 4.Bathroom In bathrooms, hygiene is paramount. Scrub toilets, showers, and bathtubs, paying attention to tile grout to remove mold and mildew. Wash or replace shower curtains and liners. Clean mirrors, light fixtures, and all contact surfaces, such as faucets, doorknobs, and light switches, with an effective disinfectant. The bathroom floor should be thoroughly washed and disinfected. Organize medicine cabinets and drawers, discarding expired or unused products. In bedrooms, start by washing all bedding (sheets, duvets, blankets) and curtains. Vacuum the mattress and consider flipping or rotating it to extend its lifespan. Dust all surfaces, furniture, light fixtures, and ceiling fans. Vacuum or mop the floor, including under the bed and furniture. Reorganize closets and drawers, taking the opportunity for the seasonal clothing swap prepared during decluttering. 5.Living Room Living and common areas also require detailed cleaning. Dust all furniture, electronics, and decorative items. Vacuum or clean upholstery on sofas and chairs. Clean windows and window treatments, such as blinds and curtains. Vacuum or mop floors. Dedicate time to cleaning high-touch surfaces, such as remote controls, light switches, and doorknobs. Hallways and entryways, which are the first points of contact with the outdoors, need to be kept free of clutter. Clean and organize shoe racks and coat hooks. Wipe down walls to remove any marks or scuffs. Deeply vacuum or mop floors in these areas, removing any salt, mud, or debris that may have been tracked in. 6.Laundry Room In the laundry room, wipe down the exterior of the washing machine and dryer. Clean the dryer’s lint trap thoroughly to ensure efficiency and fire safety. Wash the utility sink, if present, and organize detergents and cleaning supplies. Beyond the main rooms, there are often overlooked areas that need attention during the September cleanup. Windows, both inside and out, should be cleaned to maximize natural light during the darker months. Clean walls and baseboards to remove marks and accumulated dust. Doors and doorframes also accumulate fingerprints and dust, requiring thorough cleaning. Light fixtures and ceiling fans should be dusted and cleaned. A crucial step is cleaning or replacing air filters in heating and air conditioning systems. This significantly improves indoor air quality, which is essential when windows remain closed. Wash and disinfect trash cans in all rooms. Small appliances like toasters, coffee makers, and kettles also deserve a thorough cleaning. Although the focus is internal, a brief outdoor preparation to put away summer items, such as patio furniture and barbecues, is also part of the transition to autumn. 7.Maintenance Maintaining a clean and organized home after the big September cleanup requires implementing long-term maintenance strategies. Reinforce daily “mini-cleaning” habits to prevent dirt accumulation. Create a weekly schedule for deeper cleaning tasks, rotating areas so none are neglected. Conduct seasonal check-ins to plan future cleanups, adapting them to the needs of each season. Invest in smart storage solutions to maintain organization and reduce clutter. Delegate responsibilities among family members so that maintenance is a joint effort. Considering the Canadian lifestyle, with its distinct seasons, the September cleanup is particularly important for preparing the home for colder months. This includes storing summer equipment, such as

September Cleaning: 7 Quick And Easy Steps To Get Ready For Fall Read More »

Home Clean and Organized

Home Clean and Organized: 5 Tips From Cleaning Experts For a Stunning Home

Keeping a clean and organized home is an ongoing process that demands more than just sporadic cleaning sessions. It involves adopting a proactive mindset and integrating simple habits into daily life. An organized home is not just aesthetically pleasing; it contributes significantly to mental well-being, reducing stress and increasing productivity. The physical environment we live in has a direct impact on our mental clarity and energy. When the house is in order, there are fewer distractions, and the sense of control over one’s space translates into greater tranquility and focus in other areas of life. The key to this consistency lies in functional and practical strategies that transform the task of maintaining the home into a habit, rather than an overwhelming burden. 1.Small Continuous Efforts The foundation for an always clean and organized home begins with forming consistent daily habits. Instead of viewing cleaning as a monumental task reserved for a single day of the week, adopt the philosophy of small, continuous efforts. The “one-minute rule” is a fundamental example: if a task takes less than a minute to complete, do it immediately. This could be putting away a book, wiping up a spill, or putting away a cup. These quick actions prevent the accumulation of small messes that, together, become overwhelming. Another essential habit is the “daily reset.” This means dedicating 10-15 minutes at the end of the day to tidy up the main rooms, such as the kitchen and living room. Put away dishes, wipe countertops, arrange sofa cushions. Waking up in a tidy environment sets a positive tone for the day. Involving all household members in this routine is crucial. Assign responsibilities and encourage collaboration. When everyone contributes, the load is shared, and the result is a collective benefit. Having “a place for everything and everything in its place” is the maxim of organization. This means every item in your home should have a designated storage location. When you use something, the natural habit should be to return it to its place, eliminating the accumulation of misplaced objects and reducing the need for large tidying sessions. 2.The Most Important Rooms The kitchen is undoubtedly one of the rooms that requires the most daily attention due to its constant use. After each meal, the routine should include immediately washing dishes and utensils or loading the dishwasher. Wipe countertops with a damp cloth and an all-purpose cleaner to remove crumbs and spills. Quickly sweep or vacuum the floor to pick up debris. Once a week, kitchen cleaning should be more thorough. This includes cleaning the inside and outside of the microwave, the stovetop and oven surface (if necessary), the sink, and faucets, ensuring no grease or food residue accumulates. Check and wipe the exterior of the refrigerator and other appliances, and empty and clean the trash can. Bathrooms also require strict daily and weekly attention. Daily, quickly wipe the sink, mirror, and countertop to remove splashes and stains. A quick scrub of the toilet can prevent dirt buildup. Weekly, perform a thorough cleaning: disinfect the toilet inside and out, clean the shower or bathtub (paying attention to mold and mildew), wash the floor, and wipe all surfaces with an appropriate disinfectant. Wash towels and shower curtains regularly. In living areas and bedrooms, daily organization is key. In the living room, arrange sofa cushions, fold blankets, and put away remote controls, magazines, and other personal items. In bedrooms, the simple act of making the bed every morning already transforms the room’s appearance. Put dirty clothes in the hamper and clean clothes in drawers or the closet. Weekly, vacuum or sweep floors in all living areas and bedrooms. Use a microfiber cloth to dust all surfaces, furniture, shelves, and electronics. Don’t forget to clean mirrors and glass surfaces. 3.High-Traffic Areas Hallways and entryways, often high-traffic areas, need to be kept free of clutter. Ensure shoes, coats, and bags have a designated spot and are put away immediately after use. Sweep or vacuum these areas frequently, as they are the first to accumulate dirt from outside. Decluttering and organization are the pillars of long-term home cleanliness. The “one in, one out” principle is effective: every time you buy a new item, donate, sell, or discard a similar old item. This prevents unnecessary accumulation. Start by categorizing and containing items. Group similar objects and use boxes, baskets, drawer dividers, and organizers to keep them together and accessible. Vertical organization is an excellent way to maximize space, using shelves, wall organizers, and hooks. Labels are simple but powerful tools that ensure everyone in the house knows where each item belongs, facilitating both organization and the return of items to their place. Beyond physical decluttering, digital organization also contributes to mental clarity. Organize files on your computer, clean your email inbox, and get rid of unused apps on your devices. 4.Right tools The correct choice and use of cleaning tools and techniques are crucial for efficiency. Always start from top to bottom: when dusting or cleaning, begin with the highest surfaces and work your way down. This ensures any dust or dirt that falls is cleaned up at the end. Invest in the right tools: microfiber cloths are excellent for capturing dust and polishing surfaces without leaving lint. A good vacuum cleaner with various attachments is indispensable for different floor types and surfaces. Also have an appropriate mop, cleaning brushes, and sponges. Regarding products, an all-purpose cleaner, a glass cleaner, a disinfectant, a floor cleaner, and a bathroom cleaner are essential. Consider eco-friendly and non-toxic options, especially if there are children, pets, or people with allergies in the home. Always wear protective gloves to protect your hands and ensure good ventilation when using chemical products. It is crucial to know your home’s surfaces and use appropriate products to avoid damage. For example, never use abrasive products on delicate surfaces like marble or sealed wood. Addressing specific daily life challenges requires adapted strategies. If you have pets, frequent cleaning is a necessity. Vacuum regularly to

Home Clean and Organized: 5 Tips From Cleaning Experts For a Stunning Home Read More »

House Cleaning Services Calgary

House Cleaning Services Calgary: Have a Spotless Home Today

Modern life in Calgary, with its demands and opportunities, often leaves little time for essential household chores. Residents of the city, whether busy professionals, parents with packed schedules, or outdoor enthusiasts, frequently find themselves seeking solutions to optimize their time and enhance their quality of life. In this scenario, house cleaning services Calgary emerge as a practical and increasingly popular answer. Maintaining a clean and organized home is fundamental for well-being, providing a tranquil and healthy refuge amidst daily hustle. For many in Calgary, delegating cleaning to specialists is not a luxury, but a necessity that allows them to focus on personal and professional priorities, or simply to enjoy more of what the city offers. Professional Cleaning Services The scope of professional cleaning services extends far beyond a simple tidy-up. Specialized companies in Calgary offer a diverse range of options, designed to meet the specific needs of each residence and lifestyle. Regular maintenance cleaning forms the basis for many, including essential tasks like dusting surfaces, vacuuming carpets and floors, mopping, and cleaning countertops and mirrors. The focus here is consistency, ensuring the home always remains in a pleasant and hygienic state, preventing the accumulation of dirt and clutter that could become overwhelming. Many choose house cleaning services Calgary for this consistent upkeep. For times when dirt accumulates or the house needs deeper care, deep cleaning is the solution. This service is more intensive and detailed, targeting areas often neglected in daily routines. This can include interior cleaning of appliances like ovens and refrigerators, scrubbing grout in bathrooms and kitchens, thorough disinfection of toilets and showers, and meticulous attention to baseboards and corners. Deep cleaning revitalizes the environment, eliminating dirt and germs that can compromise the health and comfort of the home. Move-in/move-out Beyond routine and deep cleaning, there are specialized services for transitional moments. Move-in/move-out cleaning is essential for those relocating. For those moving out, it ensures the property is returned in impeccable condition, which can be crucial for security deposit recovery. For those moving in, it prepares the new home for fresh and hygienic occupancy, allowing new residents to start on the right foot. This type of cleaning is exhaustive, covering every inch of the house from top to bottom. The demand for house cleaning services Calgary during moves is significant. Post-renovation cleaning is another vital service in a city where property renovation is common. Renovations leave behind a considerable amount of construction dust and debris, which require specific equipment and techniques for effective and safe removal. Cleaning professionals are equipped to handle this challenge, ensuring the renovated space is ready to be enjoyed without any remnants of the work. Additionally, many service providers in Calgary offer special cleanings such as window washing, steam carpet cleaning, and upholstery cleaning, which can be contracted separately or as complements to standard cleaning packages. Flexibility is a key feature, allowing house cleaning services Calgary to be tailored to meet the individual needs of each client and the particularities of each home. The benefits of hiring professional cleaning services are numerous and positively impact the quality of life. The most evident is recovering time. Instead of spending hours cleaning, Calgary residents can dedicate that time to more enjoyable activities, work, family, hobbies, or simply rest. This freedom is one of the biggest attractions of house cleaning services Calgary. Another significant benefit is consistent cleanliness and hygiene. Professionals are trained to maintain high cleaning standards, using effective products and methods to remove dust, allergens, bacteria, and viruses. This contributes to a healthier home environment, reducing the spread of illnesses and improving indoor air quality, which is especially important for people with allergies or respiratory problems. Professional house cleaning services Calgary ensure this level of consistency. The reduction of stress is an often underestimated impact. The sight of a dirty or disorganized home can generate anxiety and guilt. By delegating this task, residents alleviate this mental burden, fostering a sense of calm and well-being. The home becomes a true sanctuary, free from the worries of daily maintenance, thanks to dedicated house cleaning services Calgary. Trained Team Professional expertise and equipment are also clear advantages. Cleaning companies invest in high-quality industrial tools and effective, safe cleaning products, often unavailable to the average consumer. Furthermore, staff are trained in efficient cleaning techniques, ensuring the work is done thoroughly and without damage to surfaces. This level of professionalism is a hallmark of top house cleaning services Calgary. At the end, the longevity of the home benefits. Regular and proper cleaning protects the materials, surfaces, and appliances in the house. Removing dirt and dust before they become ingrained helps prevent wear and tear and extends the lifespan of floors, furniture, and finishes, representing a form of preventive property maintenance. This is an often-overlooked advantage of house cleaning services Calgary. Calgary itself presents characteristics that make cleaning services particularly relevant. Busy lifestyles are a constant, with many Calgarians engaged in demanding careers, which limits the time available for household chores. As a family-oriented city, Calgary has many families who need to balance work, school, and children’s extracurricular activities, where house cleaning time is often the first to be sacrificed. Moreover, a passion for outdoor activities is a hallmark of Calgary, given its proximity to the Rocky Mountains and numerous parks. This means mud, dust, snow, and other natural elements are frequently tracked indoors, requiring more frequent and robust cleaning. House cleaning services Calgary are well-equipped to manage this. Seasonal Changes Seasonal changes in Calgary also pose specific cleaning challenges. In winter, salt and slush from snow and ice are tracked indoors, demanding constant attention to floors. Spring brings pollen and accumulated winter grime. Summer, with more outdoor activities, increases foot traffic and, consequently, general dirt. Autumn, in turn, introduces leaves and debris. Professional house cleaning services Calgary are equipped to handle these seasonal challenges, offering tailored solutions for each period of the year. All these factors converge to make professional cleaning a practical necessity for many Calgarian homes. When choosing a cleaning service in Calgary, it is crucial to consider several factors to ensure a satisfactory and safe experience. Reputation and reliability are the starting point. Researching online reviews on platforms

House Cleaning Services Calgary: Have a Spotless Home Today Read More »