Kitchen Cleaning

The Dirtiest Places In Your Home

The Dirtiest Places In Your Home Can Be Harmful To Your Health

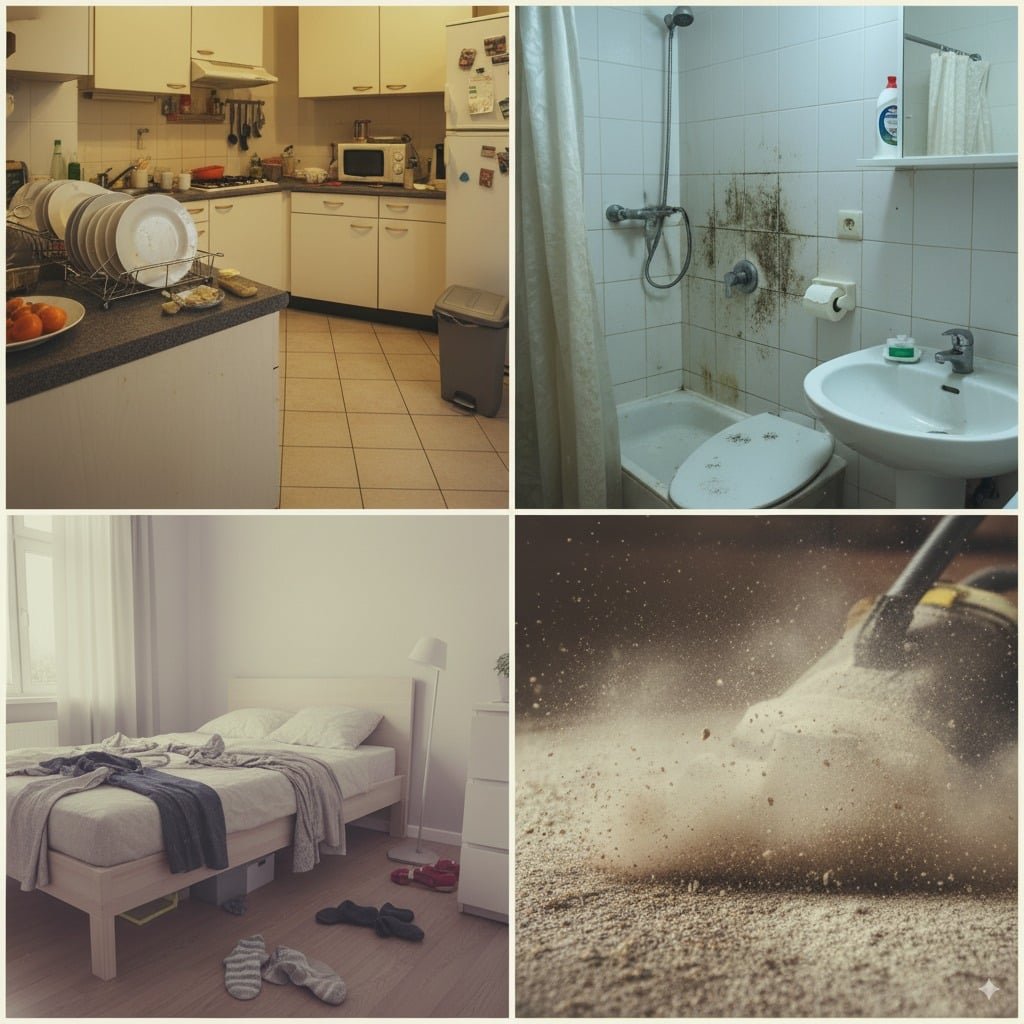
A house is merely a structure until the dirt from the garden, the dust from the road, and the smudges of daily life turn it into a home. Beneath the surface of tidy countertops and vacuumed floors, a complex ecosystem of bacteria, viruses, mold, and fungi thrives, often in the very places we overlook during our routine cleaning. We are conditioned to tackle the visible dirt, the spill on the rug, the smudges on the window, but the most significant threats to our household hygiene are microscopic and insidious. They multiply in the damp, the dark, and on the surfaces we touch most frequently. Understanding this hidden microbial landscape is the key to elevating your cleaning from a superficial chore to a meaningful act of health protection. KITCHEN The kitchen, the very place we prepare our food, is paradoxically the most germ-laden room in the house. Its combination of raw food, moisture, and high-touch surfaces creates a paradise for pathogens. The kitchen sink is ground zero for contamination. Far from being self-cleaning, the sink basin is a repository for food particles rinsed from plates and cutting boards. These particles create a sticky, invisible layer known as a biofilm, a complex community of microorganisms that adheres to the sink surface and drain. This biofilm can host dangerous bacteria like E. coli and Salmonella. Every time you turn on the faucet, water can splash these germs from the basin onto your hands, counters, or clean dishes. The garbage disposal adds another layer of risk, as running it can aerosolize bacteria-laden water droplets into the surrounding air. The faucet handles and the small, damp aerator cap at the end of the spout are also hotspots, collecting both germs from our hands and trapping biofilm within their small components. SPONGES The tools we use to clean the kitchen are often the dirtiest items of all. The kitchen sponge is a notorious microbial incubator. Its porous, absorbent structure remains damp for hours, providing the perfect environment for bacteria to multiply exponentially. A single sponge can harbor billions of bacteria, including Campylobacter, a leading cause of foodborne illness. When you wipe a surface with a contaminated sponge, you are not cleaning; you are performing a microbial transfer, spreading a film of germs across your counters. Dishcloths are no better, as they hold moisture and trap food particles. CUTTING BOARDS Cross-contamination is a constant threat. Cutting boards, particularly those with deep knife grooves, are a major culprit. Bacteria from raw meat and poultry become embedded in these cuts and can survive even vigorous washing, ready to contaminate the salad vegetables you chop next. For this reason, using separate, color-coded boards for raw meats and produce is a critical food safety practice. Appliance handles and knobs, on the refrigerator, microwave, oven, and dishwasher, are the Grand Central Station of household germs. We touch them constantly, often after handling raw foods and before washing our hands. Viruses like influenza can survive on stainless steel surfaces for up to 48 hours, making these handles a primary vector for transmission within a family. Even the coffee maker’s water reservoir, a dark and perpetually damp container, is a prime breeding ground for mold and yeast, which you then brew into your morning cup. The knife block, with its dark, narrow slots, is another forgotten hazard, trapping moisture and debris that can contaminate supposedly clean knives. TOILET In the bathroom, our focus is often misplaced. While the toilet bowl receives regular attention, the surrounding area is frequently ignored. Every flush without the lid down creates a “toilet plume,” an aerosolized mist of microscopic water droplets containing fecal bacteria that can travel up to six feet and settle on every surface, including the floor, countertops, and your toothbrush. The flush handle itself is one of the most contaminated touchpoints. Your toothbrush holder is another cesspool, collecting drips of water and toothpaste that form a murky sludge at the bottom where bacteria like Staphylococcus and mold can flourish, just inches from the toothbrush you put in your mouth. SHOWER AND BATH The shower and bathtub are a battleground against mold and mildew. The primary fuel for this fungal growth is soap scum. This is not just dried soap; it’s a stubborn, waxy compound of soap fats and hard water minerals like calcium and magnesium. It provides a food source and a protective, water-resistant layer for mold to grow underneath. This is where you find the common pink “mold” (actually a bacterium called Serratia marcescens) and more dangerous black molds. The showerhead itself is another hidden danger. Its nozzles can harbor biofilms containing bacteria like Mycobacterium avium, which can cause pulmonary infections, especially in those with compromised immune systems. These bacteria are then aerosolized in the warm shower mist and inhaled directly into the lungs. Damp bath mats, which rarely dry completely, become breeding grounds for mold and bacteria, which are then tracked around the bathroom. EVERYDAY ITEMS Throughout the rest of the house, the primary sources of filth are us. The items we touch the most are often the ones we clean the least. These objects, known as fomites, are inanimate surfaces capable of carrying infectious agents. Remote controls, light switches, doorknobs, and game controllers are handled by everyone, dropped on the floor, and exposed to coughs and sneezes, yet are rarely disinfected. They accumulate a sticky film of skin oils, sweat, and grime that helps germs adhere and thrive. Our personal electronics are even worse. The average mobile phone has been proven to carry more bacteria than a toilet seat, a direct result of being constantly touched and placed on various surfaces. Computer keyboards are a catch-all for crumbs, dead skin, and oils, creating a microbial buffet between the keys. CARPETS Soft surfaces act as giant filters, trapping and holding contaminants. Carpets and upholstery collect dust, pet dander, pollen, tracked-in dirt, and food particles. More insidiously, they are home to colonies of dust mites. These microscopic arachnids don’t bite, but they feast on the 1.5

The Dirtiest Places In Your Home Can Be Harmful To Your Health Read More »
Best Ways To Clean Window Screens And Make Them Look Like New

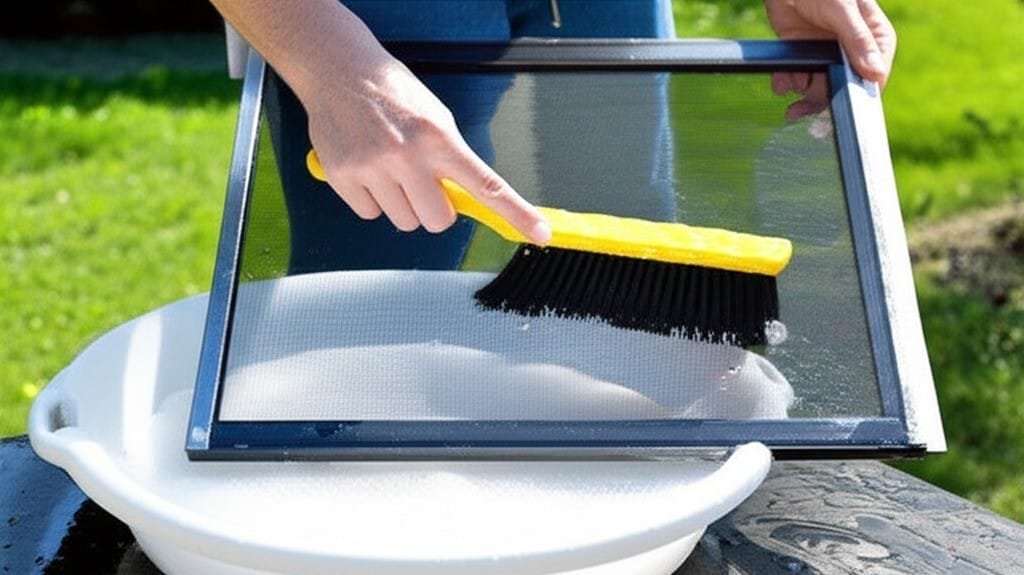
To begin cleaning your window screens, assemble your equipment. Professional results depend on having the right tools on hand. You will need a pair of buckets, a high-quality squeegee fitted with a sharp, flexible rubber blade, a strip applicator, several clean microfiber cloths, a soft-bristled brush, a garden hose with an adjustable spray nozzle, and your preferred cleaning solution. A simple yet highly effective solution can be made by mixing a gallon of cool water with just a few drops of dish soap in one bucket. The aim is for a slightly soapy mixture, not a foam; excessive soap will leave a residue on the glass that proves difficult to remove and subsequently attracts more dirt. The second bucket should contain only clean water for rinsing your tools. For interior work, a spray bottle filled with the same solution is more practical. For stubborn stains like mineral deposits, you might also require distilled white vinegar or a pad of fine #0000 grade steel wool. 1.Remove The Screen The most crucial first step, one that is fundamental to a lasting clean, is to address the window screens. Cleaning the glass first is a futile effort, as reinstalling dirty window screens will instantly coat your pristine windows with a fresh layer of dust and grime. Begin by carefully removing all the window screens from their frames. Take note of their fastening mechanisms; some utilize plunger bolts, while others have tension springs or clips. It is a good practice to label each of the window screens with a small piece of masking tape indicating its specific location (e.g., “Dining Room, Right”) to prevent confusion during reinstallation, as sizes can vary subtly. For window screens that have only a light coating of dust and loose debris, a dry cleaning method is often sufficient. Lay the screen on a flat, protected surface like a drop cloth or lean it securely against a wall. Use a soft-bristled brush or the brush attachment of your vacuum cleaner to gently go over the entire surface. This action will dislodge loose particles from the mesh of the window screens without the need for water. This is the fastest way to refresh window screens that are not heavily soiled. For window screens burdened with caked-on dirt, pollen, or greasy buildup, a wet cleaning is unavoidable. Move the window screens to a suitable outdoor location like a driveway or lawn. Start with a gentle pre-rinse using the garden hose on a low-pressure setting. A powerful jet of water can easily stretch, tear, or otherwise damage the delicate mesh material or even dent the frames of the window screens. In a bucket, mix a solution of warm water and a small amount of mild dish soap. Submerge a soft-bristled brush in this soapy water and gently scrub both sides of the screen. Use light, consistent pressure and work in systematic, overlapping motions. Pay close attention to the frames surrounding the mesh, as these channels are notorious for trapping dirt. After you have thoroughly scrubbed the window screens, rinse them completely with the hose. It is vital to wash away all soap residue, as any lingering film will act as a magnet for new dirt. To check, run a clean finger across the mesh; it should not feel slippery. 2.Dry Completely Once cleaned, the window screens must be dried completely. Lean them against a wall, fence, or outdoor furniture in a location that gets good air circulation and, ideally, some sun. Do not rush this step. Allowing the window screens to air dry thoroughly is critical. Reinstalling damp or wet window screens can trap moisture within the window frame and track, creating an ideal environment for mold and mildew to grow, which can cause damage and potential health issues. The time it takes for your window screens to dry is the perfect opportunity to clean the rest of the window assembly. With the window screens set aside to dry, direct your attention to the window tracks, sills, and frames. This often-neglected area makes a significant impact on the final look and functionality of your windows. Open the window fully to expose the tracks. Use a vacuum cleaner with a crevice tool attachment to suction out all the loose dirt, cobwebs, dead insects, and other accumulated debris. For stubborn, compacted dirt, use a stiff, dry brush or a putty knife to loosen it from the corners and channels before vacuuming. Following the dry removal, perform a wet cleaning. Dip a small, firm brush, like an old toothbrush, into your cleaning solution and scrub the tracks meticulously. Use a microfiber cloth to wipe out the loosened grime and suds. To reach into tight corners, you can wrap the cloth around the tip of a flathead screwdriver. Wipe down the entire window frame and sill, both inside and out, with a damp cloth, and then dry everything thoroughly with a clean, dry cloth.   3.Cleaning The Windows Now, you can proceed to clean the exterior glass. If the windows are exceptionally dirty, a quick rinse with the hose will remove the outermost layer of grit, preventing you from scratching the glass with your applicator. Submerge your strip applicator in the soapy water, wring out the excess, and wash the entire glass surface. Be methodical, working from edge to edge to ensure the entire pane is wet and scrubbed, loosening all the dirt. The squeegee is your tool for a streak-free finish. Before your first pull, use a microfiber cloth to wipe a narrow, one-inch vertical strip down one side of the pane. This “dry edge” allows the squeegee to start on a dry surface, preventing it from skipping. Place the squeegee at the top of the window, overlapping onto this dry strip. Angle the blade at about 30 degrees to the glass, apply light, even pressure, and pull it straight down in one continuous, smooth motion. After every single pull, wipe the rubber blade clean with a cloth. This is not optional; a dirty blade

Best Ways To Clean Window Screens And Make Them Look Like New Read More »

Clean-Looking House vs. Sanitized House

Clean-Looking House vs. Sanitized House: Why It’s More Important Than You Think

What’s the difference between a sanitized house and a clean house? A tidy home can be a deceptive space. Surfaces gleam under the lights, countertops are clean, cushions are fluffed, and the floor is free of visible debris. To the eye, this is the very picture of cleanliness. It brings a sense of calm, of order, and of accomplishment. This is the goal for most people when they embark on their weekly cleaning routine: to restore visual harmony to their environment. This is the clean-looking house. It is an aesthetic achievement, a curated space that feels organized and pleasant to inhabit. The methods used to achieve this look are often focused on speed and appearance. A quick wipe with a damp cloth, a swift pass of the vacuum, the stowing away of objects into closets and drawers. The primary function of this type of cleaning is to manage clutter and remove surface-level dust and dirt. It addresses what is immediately apparent to our senses. A pleasant scent from a candle or air freshener might be employed to complete the illusion, masking any underlying odors and signaling to our brain that the area is fresh and therefore clean. Psychological Benefits This pursuit of a clean-looking house is not without merit. Living in a cluttered, visibly dirty environment can contribute to stress and a feeling of being overwhelmed. The act of tidying and organizing has psychological benefits, creating a space that feels more manageable and restful. However, it is crucial to understand that this visual state of order has very little to do with the actual hygienic condition of the home. The clean-looking house is a stage set for daily life, but it often conceals a microscopic world that is far from pristine. The very tools used to create this appearance can be part of the problem. A sponge used to wipe down the kitchen counter may effectively remove crumbs, but if it is damp and has been used for days, it is simultaneously spreading millions of bacteria across the very surface it is meant to clean. The cloth used to dust the coffee table moves particles around, some of which become airborne, only to settle again later. The vacuum cleaner without a HEPA filter can suck up allergens and dust mites from the carpet and expel them back into the air to be inhaled. The focus is on the macro, the visible, while the micro, the unseen, is allowed to thrive. Intruders In stark contrast to the clean-looking house is the sanitized house. This state of cleanliness is not defined by aesthetics, but by science. A sanitized house is one where the populations of germs, bacteria, viruses, and fungi, have been reduced to levels that are considered safe for human health. It is a space where the invisible threats have been systematically addressed. This requires a completely different mindset, a different set of tools, and a more thorough methodology. The goal is not just to make a surface look clean, but to ensure that what remains on that surface is not a threat to the well-being of the inhabitants. This process goes far beyond a simple wipe-down. It involves understanding the difference between cleaning, sanitizing, and disinfecting, and knowing when and where to apply each process. Cleaning is the foundational step. It is the removal of visible soil, dirt, and organic matter from a surface. You cannot sanitize a dirty surface. The dirt itself provides a place for germs to hide and can neutralize the effectiveness of sanitizing agents. Cleaning is what is done with soap, water, and friction. It is the act of scrubbing the cutting board, washing the dishes, and mopping the floor to lift away the grime. This is an essential first step, and it is where the process for a clean-looking house often ends. Sanitization Sanitizing is the next level. It is a chemical process that lowers the number of microorganisms to a safe level, as judged by public health standards. This means killing 99.9% of specified bacteria in a short period of time. Sanitizing is most critical in areas where food is prepared and in bathrooms. When you use a proper sanitizing spray on a kitchen counter after wiping it clean of crumbs, you are actively working to kill bacteria like E. coli and Salmonella that could cause foodborne illness. Sanitizing the sink, where raw meat juices may have splashed, is another critical step. This is a targeted action, designed to mitigate a specific health risk. Disinfecting is the most potent of the three processes. It involves using chemicals to kill virtually all microorganisms, including hardy viruses and fungi, on a surface. Disinfection is less about daily maintenance and more about targeted intervention. It is what you do after a family member has been sick with the flu, using a disinfectant on doorknobs, light switches, and remote controls to prevent the illness from spreading. It is the process used to treat a toilet bowl or an area contaminated with bodily fluids. A crucial component of both sanitizing and disinfecting that is almost always overlooked in the pursuit of a merely clean-looking home is dwell time. This is the amount of time a chemical product must remain wet on a surface in order to effectively kill the germs it claims to kill. Simply spraying and immediately wiping is often ineffective. The product needs to sit for several minutes-the specific time is always listed on the product label-to do its job. This patient, methodical approach is a hallmark of a truly sanitized environment. Small Details The areas where a clean-looking house most dangerously diverges from a sanitized house are the high-touch surfaces and hidden spots. Think of all the items handled by multiple people throughout the day: doorknobs, cabinet pulls, faucet handles, the refrigerator door, remote controls, keyboards, and cell phones. These items may look perfectly clean. They are not sticky, they have no visible dirt, but they can be teeming with microorganisms transferred from unwashed hands.

Clean-Looking House vs. Sanitized House: Why It’s More Important Than You Think Read More »

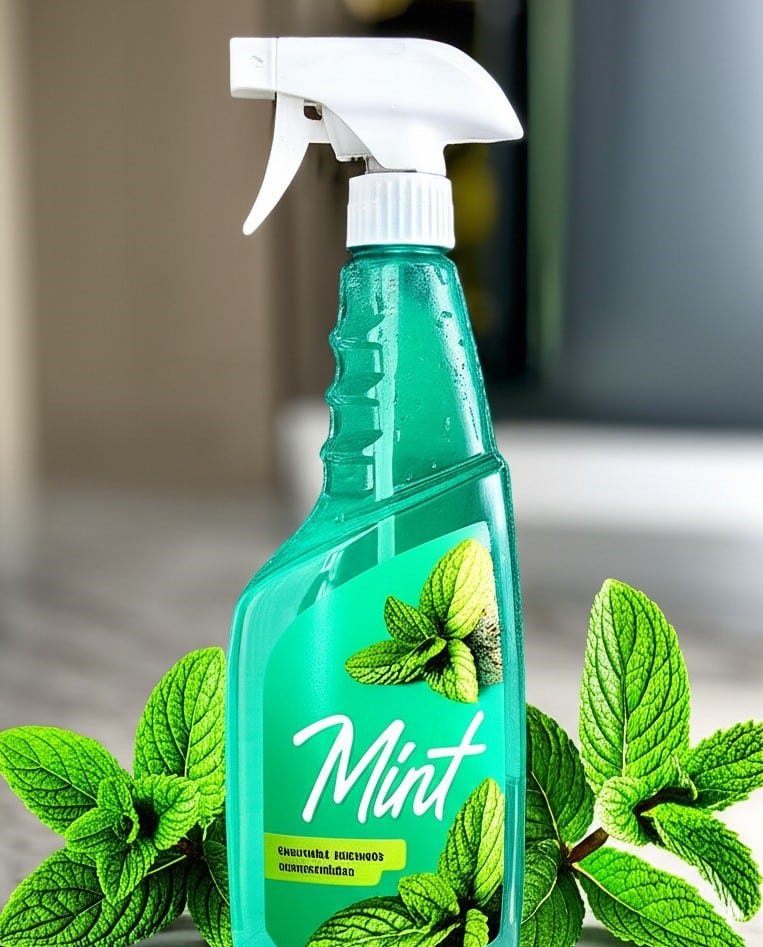
cleaning product mint with mint branch

Mint Cleaning Products: Discover The 6 Benefits of Mint in Cleaning

Using a mint cleaning products transforms the chore of tidying up into a refreshing experience. The sharp, cool scent cuts through stale air, replacing lingering cooking odors or bathroom stuffiness with a crisp aroma that signals true cleanliness. It’s a clean you can smell long after the cloths have been put away. 1.Citrus Note The scent of a clean home is often as important as the visual sparkle. While citrus notes are known for their zesty, energizing effect and lavender provides a sense of calm, mint occupies a unique and powerful space in the world of cleaning. It delivers a crisp, cool, and unmistakably clean fragrance that signifies a truly refreshed environment. The use of mint cleaning products transforms the chore of cleaning into a more invigorating and rewarding sensory experience. The sharp, piercing scent cuts through stale air and lingering odors, leaving behind a feeling of pure, unadulterated freshness that is difficult to replicate with other fragrances. It is a scent that doesn’t just mask odors, but seems to eradicate them, replacing them with an aura of hygienic purity. 2.Kitchen Odors In the kitchen, where grease and food odors present a constant battle, mint cleaning products are exceptionally effective. The natural compounds found in mint, particularly menthol, have a degreasing quality that helps break down oily residues on stovetops, backsplashes, and countertops. After cooking a fragrant meal, the air can feel heavy and saturated. A quick wipe-down of surfaces with a quality mint-based spray not only removes spills and splatters but also neutralizes those stubborn smells of garlic, onion, or fish. The versatility of mint cleaning products is on full display here. The sink, often a source of unpleasant smells, benefits immensely from a scrub with a mint-infused cleaner. It tackles food particles and leaves the basin smelling cool and clean for hours. Even the garbage disposal can be refreshed by using mint cleaning products, sending a plume of invigorating scent up from the drain instead of a whiff of yesterday’s waste. When mopping kitchen floors, a mint-based solution does more than just lift dirt; it leaves the entire room smelling revitalized from the ground up. 3.Mold and Damp in The Bathroom The bathroom is another area where the power of mint cleaning products truly shines. This space demands a high level of hygiene, and the scent of mint is psychologically associated with that very concept. It smells sterile in the best possible way. When used in a toilet bowl cleaner, it provides a powerful clean while effectively deodorizing the entire fixture. For showers and tubs, the challenges are soap scum and the potential for musty, damp smells. A good mint cleaning product cuts through the chalky residue and replaces any mildewy notes with its sharp, clean fragrance. The antimicrobial properties often associated with the essential oils in mint cleaning products make them ideal for this space. Wiping down sinks, faucets, and countertops leaves them gleaming and imbued with a scent that makes the entire room feel like a spa. Even cleaning mirrors and chrome fixtures with a mint-based glass cleaner is a more pleasant task; as you wipe away streaks, you are met with a cool, refreshing aroma rather than the harsh chemical smell of ammonia. 4.Homemade Recipes Creating your own mint cleaning products is a straightforward and cost-effective way to harness this power throughout your home. The satisfaction of making effective mint cleaning products at home is immense. A simple all-purpose spray can be made by combining one part white vinegar with one part water in a spray bottle and adding 15-20 drops of high-quality peppermint or spearmint essential oil. Shake well before each use. This homemade mint cleaning product is perfect for countertops, sinks, and other hard surfaces. It disinfects, deodorizes, and leaves that signature fresh scent. For more abrasive cleaning needs, such as scrubbing a stained sink or a grimy bathtub, a paste can be made from baking soda, a small amount of liquid castile soap, and several drops of mint essential oil. Apply the paste, let it sit for a few minutes, and then scrub with a damp sponge. You now have a powerful, abrasive mint cleaning product that is tough on grime but free from harsh chemicals. A wonderfully effective floor cleaner is just as easy: add a quarter-cup of white vinegar and 10 drops of mint essential oil to a gallon of hot water. This simple solution is one of the most effective DIY mint cleaning products you can make for mopping tile, linoleum, or vinyl floors, leaving them spotless and the air in your home feeling exceptionally clean. 5.Carpets and Rugs The utility of mint cleaning products extends far beyond the kitchen and bathroom. To freshen up carpets and rugs, mix a cup of baking soda with 10-15 drops of peppermint essential oil in a jar. Shake it vigorously, then sprinkle the mixture over the carpet. Let it sit for at least 15 to 20 minutes to absorb odors, then vacuum it up thoroughly. This simple trick is one of the most underrated uses for the components of mint cleaning products, leaving your textiles smelling crisp and new. The inside of a trash can, even when lined with a bag, can develop persistent odors. A quick spray and wipe with a mint-based cleaner after you take out the trash will keep it smelling fresh. For homes with pets, mint cleaning products can be a game-changer for cleaning pet areas, neutralizing odors without overwhelming sensitive noses with artificial perfumes. Stainless steel appliances, which often show every fingerprint and smudge, can be polished to a brilliant shine using a soft cloth and a mint-based cleaner, which helps to cut through greasy marks and leaves a streak-free, aromatic finish. The finish left by certain mint cleaning products on appliances is both visually appealing and olfactorily pleasing. 6.Mental Health The experience of using mint cleaning products goes beyond the physical act of cleaning; it has a noticeable psychological effect. The scent of mint is

Mint Cleaning Products: Discover The 6 Benefits of Mint in Cleaning Read More »

Natural Cleaning Products

Amazing Natural Cleaning Products To Add To Your Daily Routine

The adoption of natural cleaning is a deliberate shift from chemical dependency to a fundamental understanding of household chemistry. It’s the recognition that the most pervasive messes in our homes, grease, mineral deposits, organic stains, and soap scum, are simply chemical compounds that can be broken down, dissolved, or lifted by other, simpler compounds. This isn’t a return to an antiquated past; it’s a sophisticated application of basic science. The core of this effective natural cleaning philosophy rests on the interplay between acids and alkalis, the power of gentle abrasion, and the surfactant properties of true soap. By mastering these principles, you can replace an entire arsenal of specialized, synthetic products with a handful of powerful, safe, and inexpensive staples. 1.White Vinegar The acid-alkali dynamic is the primary engine of natural cleaning. Most cleaning tasks involve using an acid to dissolve an alkaline mess, or vice versa. The undisputed champion on the acidic side is distilled white vinegar. Its power comes from its roughly 5% concentration of acetic acid, which gives it a pH of around 2.5. This acidity is perfect for dissolving alkaline mineral deposits like the calcium and magnesium that constitute hard water stains and limescale. This is why a vinegar solution is so brilliantly effective at making glassware, faucets, and shower doors sparkle. A simple soak in vinegar can de-scale a coffee maker or a showerhead, restoring its function. In the laundry, a cup of vinegar in the rinse cycle acts as a fabric softener by dissolving leftover alkaline detergent residue, leaving fabrics softer without a chemical coating. The foundational rule of this natural cleaning agent is its limitation: its acidity will react with and etch acid-sensitive stones like marble, granite, and travertine, which are made of calcium carbonate. 2.Baking Soda On the opposite end of the pH spectrum is baking soda, or sodium bicarbonate, a mild alkali. Its gentle but consistent abrasive texture makes it the ideal scouring agent for surfaces that could be scratched by harsher powders. It safely scrubs sinks, fiberglass tubs, and stovetops. For a more intensive natural cleaning scrub, its more potent cousin, washing soda (sodium carbonate), can be used. Washing soda is significantly more alkaline (a pH of around 11) and is a phenomenal degreaser and water softener, making it a key ingredient in homemade laundry detergents. When dealing with an acidic mess, like the sour smell from a garbage disposal, an alkaline substance like baking soda neutralizes it. This is the essence of its deodorizing power-it doesn’t mask odors, it chemically balances them. The explosive reaction between vinegar and baking soda is often misunderstood in natural cleaning. When they combine, they create an unstable carbonic acid, which immediately decomposes into carbon dioxide gas and water. The cleaning power here is not in the resulting liquid, which is mostly just salty water, but in the physical agitation of the fizzing gas. This mechanical scrubbing action is fantastic for loosening grime in drains or toilet bowls. The correct technique is to apply the baking soda first, then add the vinegar to trigger the reaction directly on the surface you intend to clean, harnessing the immediate power of that fizzy release. 3.Liquid Castile Soap Beyond the acid-alkali duo, a true soap is essential. Liquid castile soap, made from saponified vegetable oils, is fundamentally different from synthetic detergents. Soap molecules are surfactants, meaning they have a water-loving (hydrophilic) head and an oil-loving (hydrophobic) tail. The tail attaches to grease and dirt, and the head attaches to water, allowing the grime to be encapsulated and washed away. This simple mechanism is incredibly effective. The versatility of castile soap is a cornerstone of natural cleaning; dilution is key. A few drops in a spray bottle of water creates a general surface cleaner. A tablespoon in a bucket of hot water is a perfect floor mopping solution. A one-to-three ratio of soap to water in a foaming pump creates an excellent hand soap. 4.Hydrogen Peroxide For disinfection and whitening, hydrogen peroxide is the natural cleaning alternative to chlorine bleach. The 3% solution is an oxidizer, meaning it works by breaking down organic materials like bacteria, viruses, and mold spores. It’s a powerful disinfectant for kitchen and bathroom surfaces. For a stubborn stain on a white countertop or a discolored grout line, a paste of hydrogen peroxide and baking soda can work wonders. Left to sit for 10-15 minutes, it will bubble as it oxidizes the stain, lifting it from the surface. This combination also creates a potent, non-chlorine “oxygen bleach” that is excellent for whitening and brightening laundry without the harsh fumes and fabric damage associated with chlorine. To elevate these basic ingredients, essential oils add both aromatic and functional properties. Their use transforms natural cleaning from a purely functional task into a sensory experience. The properties vary: Tea Tree Oil: A powerful antiseptic, antifungal, and antibacterial agent. Ideal for adding to sprays for bathrooms or any area prone to mildew. Citrus Oils (Lemon, Orange, Grapefruit): Excellent degreasers due to their d-limonene content. They also have an uplifting, fresh scent. Eucalyptus Oil: A natural disinfectant and decongestant. Mopping the floor with a eucalyptus-infused solution when someone in the house is sick can help freshen the air. Peppermint Oil: A known deterrent for pests like ants and spiders. A few drops on cotton balls placed in corners or entry points can help keep them at bay. Clove Oil: One of the most potent essential oils for inhibiting mold growth. Applying these principles allows for a comprehensive approach to natural cleaning throughout the home. In the kitchen, an oven can be deep-cleaned by making a thick paste of baking soda and water, slathering it on the interior surfaces (avoiding the heating elements), and letting it sit overnight. The next day, the softened, baked-on grease can be easily scraped and wiped away, followed by a final wipe-down with a vinegar spray to neutralize any remaining soda residue. Stainless steel appliances can be cleaned with a vinegar spray and then polished to a streak-free shine

Amazing Natural Cleaning Products To Add To Your Daily Routine Read More »

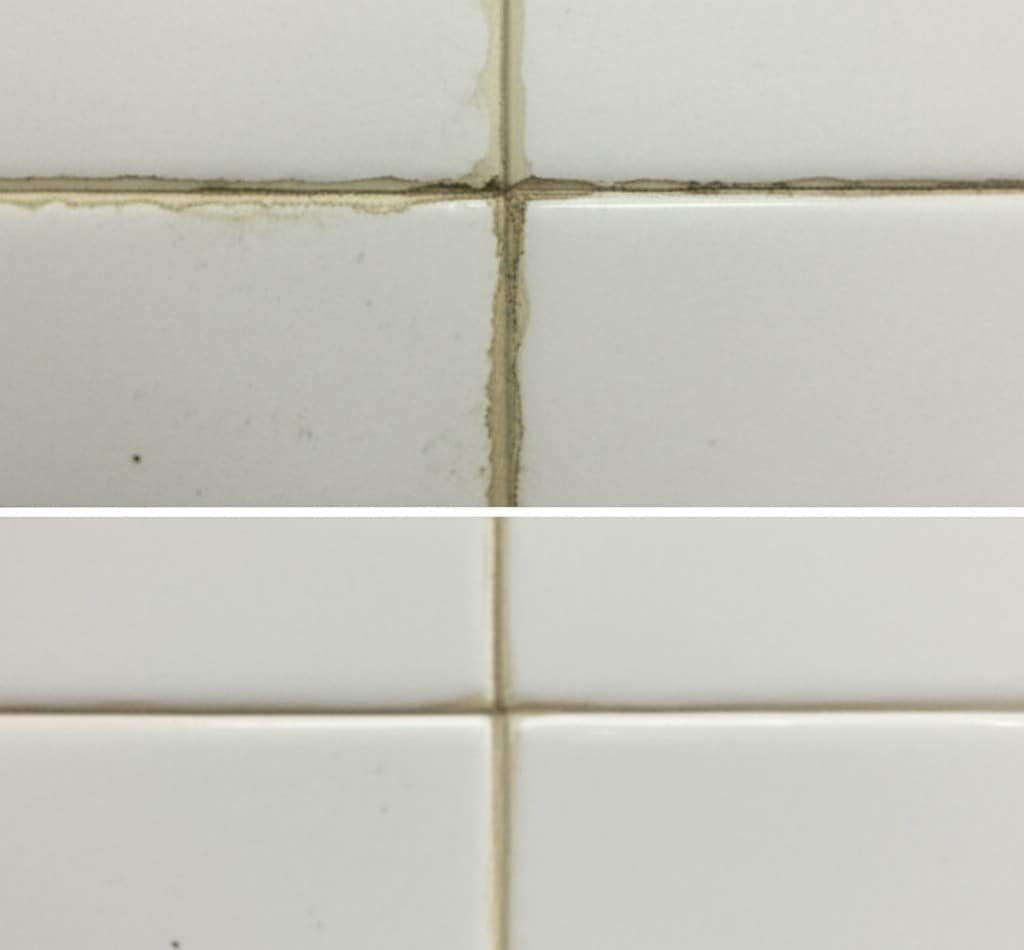
before and after grouting

Grout Cleaning: Essential Products for a Sparkling Home

Grout Cleaning: Essential Products for a Sparkling Home Grout lines lock your tiles in place, but their porous, cement-based composition makes them a magnet for water, dirt, soap scum, and oils. Over time, that absorption causes discoloration, staining, and the growth of mold and mildew. Cleaning grout properly means penetrating those pores to lift embedded grime, and the right products make all the difference. Prepare Before You Clean Before any intensive cleaning, ensure good ventilation by opening windows and doors and using a fan, because commercial cleaners and even vinegar can produce irritating fumes in a confined space. Wear waterproof gloves and safety glasses or goggles to protect your skin and eyes, and good airflow protects indoor air quality. Then clean the tile surface itself: sweep or vacuum loose debris, and mop with warm water and a pH-neutral cleaner, because applying grout cleaner to dirty tiles simply pushes surface dirt into the lines. DIY Grout Cleaning Products For routine maintenance and light discoloration, a baking soda paste is the best starting point. Baking soda is a mild abrasive that scrubs away surface stains without scratching tile or eroding grout. Make a thick paste with water, apply it to the lines, let it sit for 10 to 15 minutes, and scrub with a stiff-bristled grout brush in a circular motion. Never use a wire brush, which is too harsh. For stubborn dirt and soap scum, spray the paste with equal parts white vinegar and water; the fizzing reaction helps dislodge dirt from deep in the pores. Let it bubble for several minutes, then scrub and rinse. Skip vinegar on natural stone tiles like marble, travertine, or limestone, because the acid can etch and dull the surface, and always test in an inconspicuous area first. Hydrogen Peroxide for Mold and Mildew For mold, mildew, or grout that has yellowed, hydrogen peroxide is the more effective agent. Make a paste with baking soda and hydrogen peroxide instead of water, let it sit for at least 15 minutes so the oxidizing action can work, then scrub and rinse. For stronger whitening, apply 3 percent hydrogen peroxide directly to the lines. Unlike chlorine bleach, it is less harsh and does not produce toxic fumes, making it a safer choice for deep cleaning. Mold in damp areas like showers can affect health, and the CDC advises removing mold promptly and preventing moisture buildup. Steam Cleaning A handheld steam cleaner uses high-pressure, high-temperature steam to blast away dirt, kill mold, and sanitize without chemicals. The heat loosens embedded grime and the pressure forces it out of the pores. Move the nozzle slowly along the lines and wipe away the loosened dirt with a clean cloth. Steam is safe for most tile types, including ceramic, porcelain, and granite, but avoid it on loose or crumbling grout, where the pressure could dislodge sections. Commercial Grout Cleaners: Alkaline and Acidic When DIY methods fall short, commercial grout cleaners are formulated for the job. Alkaline cleaners, with a high pH, break down organic stains like grease, soap scum, and grime, and are generally safer for most tile and grout. Acidic cleaners, with a low pH, remove mineral deposits such as rust, efflorescence, and hard water stains, but they are powerful and can severely damage natural stone. Always wear full protective gear, ventilate the room, and never mix an acidic cleaner with an alkaline cleaner or one containing bleach, because the reaction can release toxic gas. Why Chlorine Bleach Is a Bad Idea Chlorine bleach whitens grout temporarily, but it erodes the grout structure, making it more porous and prone to future staining. It can also strip color from colored grout and damage tile glaze, and leftover residue can react with other cleaners later. Oxygenated bleach, a powder activated by water, is a much safer and more effective alternative for whitening. Rinse, Dry, and Seal Rinsing is never optional. Leftover cleaner dries into a sticky film that attracts dirt faster than before, so rinse with a sponge and clean water, changing the water often, then dry completely. Sealing is the single most important step for long-term results. Wait at least 24 hours after cleaning so the grout is fully dry, then apply a penetrating sealer with a brush-tip applicator, tracing the lines carefully and wiping any excess off the tile face. One or two coats are typical, and the sealer needs 24 to 48 hours to cure, during which the area should stay dry and free of traffic. Clean, dry surfaces are also the foundation of good hygiene in bathrooms and kitchens. Essential Grout Cleaning Products Baking soda for a gentle scrubbing paste. White vinegar for extra fizzing power on stubborn soil, never on natural stone. Hydrogen peroxide for mold, mildew, and whitening. A stiff-bristled grout brush, never a wire brush. A handheld steam cleaner for chemical-free deep cleaning. Alkaline and acidic commercial cleaners for tough or mineral-based stains. A penetrating grout sealer to protect your work. Grout Cleaning Products at a Glance Product Best For Caution Baking soda paste Light stains, routine maintenance Use a grout brush, not a wire brush White vinegar Soap scum and stubborn soil Never on marble, travertine, or limestone Hydrogen peroxide Mold, mildew, yellowed grout Test on a hidden area first Steam cleaner Chemical-free deep cleaning Avoid loose or crumbling grout Alkaline cleaner Grease, soap scum, grime Follow dwell time instructions Acidic cleaner Rust, efflorescence, hard water Never mix with bleach or alkaline cleaners Penetrating sealer Long-term protection Wait 24 hours after cleaning, cure 24 to 48 hours Frequently Asked Questions Can I use vinegar to clean grout? Yes, on ceramic or porcelain grout: equal parts white vinegar and water react with a baking soda paste to lift stubborn soil. Do not use vinegar on natural stone tiles like marble, travertine, or limestone, because the acid can etch them. How do I whiten yellowed grout? Make a paste with baking soda and 3 percent hydrogen peroxide, let it sit for at least 15 minutes, scrub

Grout Cleaning: Essential Products for a Sparkling Home Read More »

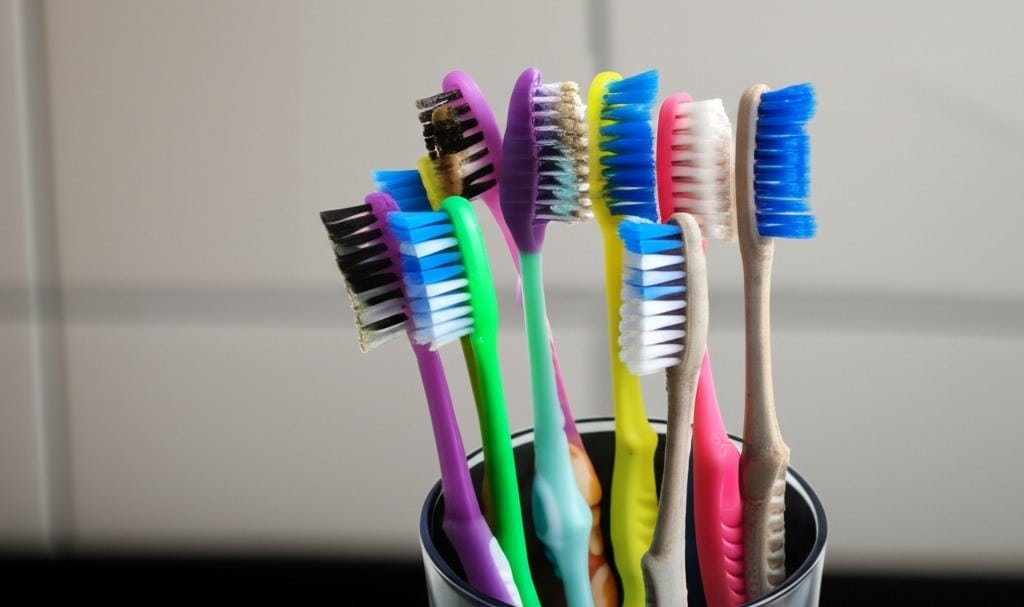
old Toothbrushes For Cleaning services

8 Efficient And Economical Ways To Use Old Toothbrushes For Cleaning

Before you discard that old toothbrush, consider its second life as a precision cleaning instrument. Its small head, firm bristles, and ergonomic handle make it an unparalleled tool for tackling the grime that accumulates in the tightest, most awkward spaces in your home. Its utility extends far beyond the bathroom sink, reaching into every room to restore detail and cleanliness where larger tools cannot. 1.Floor Joints In the kitchen, the toothbrush becomes an indispensable ally. Start with the grout lines on your tiled floor or backsplash. These porous channels are magnets for spilled coffee, sauce splatters, and general kitchen debris. A standard mop or sponge glides over them, but a toothbrush gets right in. Create a paste using baking soda and a small amount of water or, for tougher stains, a bit of hydrogen peroxide. Apply the paste directly to the grout and let it sit for a few minutes. Then, take your old toothbrush and scrub in small, circular motions. The bristles will agitate the paste and lift the embedded grime, restoring the grout to its original color. This same method works wonders on countertop grout where crumbs and food particles become trapped. 2.Sink Move to the kitchen sink. The area around the base of the faucet is a breeding ground for mineral deposits and soap scum. The angled head of a toothbrush can get right up against the fixture, scrubbing away the chalky white residue. Dip the brush in white vinegar to help dissolve hard water stains. Don’t forget the faucet’s aerator; unscrew it and use the toothbrush to scrub the fine mesh screen, clearing any blockages that affect water pressure. The sink drain itself, particularly the rubber splash guard in a garbage disposal, is another target. Lift the rubber flaps and use the toothbrush with a degreasing dish soap to scrub away the slimy, foul-smelling buildup on the underside. It’s a task no one enjoys, but one for which the toothbrush is perfectly designed. 3.Microwave Appliances are filled with nooks that a cloth can’t reach. The control knobs on your stove can be removed and scrubbed individually. The tiny crevice between the cooktop and the counter is a trap for crumbs; a dry toothbrush can flick them out before you wipe the area down. The seal around your microwave or oven door collects grease and food splatter. A toothbrush dipped in a mild cleaning solution can gently scrub this gasket clean without causing damage. The vents on the front of your dishwasher, the control panel buttons, and even the intricate filter system inside can all be detailed with a toothbrush. For small appliances, its use is even more pronounced. The blades of a blender, the cutting gear of a can opener, and the grates of a toaster oven are all easily and safely cleaned with a toothbrush. A particularly clever use is for cleaning a cheese grater. Instead of shredding your sponge, scrub the grater from the inside out with a soapy toothbrush to dislodge every last bit of dried-on cheese. 4.Bathroom The bathroom presents its own set of detailed cleaning challenges. Shower and tub grout is constantly exposed to moisture, soap, and body oils, leading to mildew and soap scum. A toothbrush, paired with a specialized tile cleaner or a potent mixture of vinegar and dish soap, is the ultimate weapon. Its bristles are stiff enough to scour away the grime without scratching the tile. The track for a sliding shower door is notoriously difficult to clean. It’s a narrow channel that collects a disgusting combination of hard water deposits, soap scum, and hair. A dry toothbrush can first be used to loosen and sweep out the dry debris. Follow up by spraying a cleaner into the track and using the toothbrush to scrub it from end to end, reaching into the corners. The result is a smoothly gliding door and a far more hygienic shower environment. Look closely at your bathroom fixtures. The overflow hole in the sink is a dark, damp space that can develop odors and mildew. A toothbrush can be inserted and scrubbed around the opening to clean it thoroughly. The base of the toilet, where it meets the floor, collects dust and other unpleasantries. A dedicated, clearly marked toothbrush can be used to scrub this crevice clean. The most overlooked area is the toilet seat hinges. The complex plastic and metal parts are impossible to clean with a cloth. A toothbrush can get into every single gap, removing the grime that builds up around the bolts and hinges, a detail that makes the entire toilet look and feel cleaner. The jets under the rim of the toilet bowl, often clogged with mineral deposits, can be individually scrubbed with a toothbrush dipped in toilet bowl cleaner to ensure a powerful, effective flush. 5.Windows And Doors Beyond the kitchen and bath, the toothbrush proves its worth throughout the house. Window and sliding door tracks are a prime example. Dust, dirt, dead insects, and outdoor debris collect in these channels. A dry toothbrush works perfectly to loosen and sweep this material into a pile that can be easily vacuumed up with a crevice tool. For caked-on mud, a wet toothbrush will do the job. The delicate fins of heating and air conditioning vents are dust magnets. A dry toothbrush can gently brush the dust off each fin without bending or damaging them. 6.Electronics For electronics, a completely dry, clean toothbrush is essential. Gently brush it over your computer keyboard to dislodge crumbs, dust, and hair from between the keys. Do the same for the ports and vents on a laptop, gaming console, or television. The fine bristles can get into these areas without causing static damage, provided the brush is dry. The intricate patterns on furniture, such as carved wood on a headboard or the detailed legs of an antique table, can also be dusted with a dry toothbrush, which removes dust from crevices a cloth would miss. 7.Clothes Its applications in laundry

8 Efficient And Economical Ways To Use Old Toothbrushes For Cleaning Read More »

cleaning services in Edmonton

Edmonton Move-Out Cleaning: Common Mistakes to Avoid

Edmonton Move-Out Cleaning: The Mistakes That Cost Tenants Their Deposits Moving is a study in controlled chaos: boxes stacked into fortresses, furniture wrapped and disassembled, every day a countdown to a new beginning. In that whirlwind, one critical task looks backward, and it is not your average weekly tidy. A move-out clean is a forensic-level deep clean, the final act of stewardship for a space you once called home, and often the single most important factor in getting your full security deposit back from your Edmonton landlord. Lost deposits trace back to a handful of predictable mistakes. Here is how to avoid every one of them. Mistake 1: Reading “Broom-Swept” Too Literally The rental agreement, signed and filed away, suddenly becomes the most important document in the move. Clauses describing the condition the property must be left in are no longer fine print; they are your departure checklist. The phrase “broom-swept condition” is dangerously misleading. To a tenant, it can sound like a quick vacuum and a wipe of the counters. To a property manager preparing to show the unit to prospective tenants, it means a property that is not just empty but immaculate, as close as possible to the day you moved in. The gap between those interpretations is where deposits are lost. Every move-out clean begins with one mindset shift: you are cleaning for someone else’s inspection, so you need the critical eye of a landlord who is financially motivated to find fault. Mistake 2: Washing the Floors and Missing Everything Else Mistake 2 covers the details landlords actually inspect. Work high to low, and skip nothing on this list. Ceiling corners cleared of cobwebs; light fixtures and fans wiped down, because they are dust magnets. Walls, doors, and doorframes washed: scuffs, switch-plate fingerprints, and smudges visible only in certain light all count. Baseboards on hands and knees, every inch, since they trace every room and collect surprising grit. Windows cleaned inside and out where accessible, with real effort on sills and tracks, where dust and dead insects collect; a brush and vacuum attachment signals a thorough job. Closets fully emptied, with shelving, rods, and walls wiped, then floors vacuumed and mopped. Carpets: a professional steam clean is often stipulated in the lease or simply expected, since a household vacuum cannot lift deep-set dirt, allergens, and odors from a year of foot traffic. Mistake 3: Going Soft on the Kitchen The kitchen is the heart of the move-out challenge: a zone of grease, food splatter, and built-up grime. Every cabinet and drawer gets emptied and cleaned inside out, including interior shelves, drawer bottoms, handles, and cabinet faces, with special attention to the sticky film of aerosolized grease above and around the stove. Then the appliances, the main event. The refrigerator is emptied completely, its shelves and drawers washed separately in warm soapy water, its interior scrubbed, its exterior wiped including the top, and the unit pulled from the wall to clear the forgotten landscape of dust and crumbs behind and beneath it, vacuuming the coils so the next tenant inherits an efficient fridge. The oven draws the most dread: baked-on grease and carbonized food need a powerful cleaner, serious scrubbing, soaked racks, scraped interior walls, and door glass cleaned until transparent. Burners get cleaned, drip pans scrubbed or replaced, and the surface degreased. The range hood is degreased and its filter cleaned or replaced per the manufacturer’s instructions. The dishwasher gets its filter cleared of food debris and a cleaning cycle with a dishwasher-specific product to break down soap scum and hard water deposits. Finally, sink, faucet, countertops, and backsplash are scrubbed, disinfected, and polished to the CDC’s cleaning and disinfecting standard. Mistake 4: Treating the Bathroom as a Five-Minute Wipe-Down Bathrooms are judged on soap scum, hard water stains, and sanitation. The toilet is cleaned and disinfected top to bottom: tank, exterior bowl, seat and its hinges, and the base where it meets the floor, a notorious collection point for dust and grime. The shower and tub need heavy-duty work to lift soap scum from walls and glass doors and mineral deposits from fixtures, and grout lines usually demand a stiff brush and a dedicated cleaner to clear mildew and discoloration. The vanity and sink are cleared out and cleaned inside and out like the kitchen cabinets, the sink and faucet scrubbed and polished free of toothpaste residue and water spots, the mirror cleaned to a streak-free shine, and the exhaust fan cover taken down and washed to remove its thick dust coating. The floor is swept and mopped meticulously, including the corners and behind the toilet. Mistake 5: Assuming DIY Is the Cheap Option Once the checklist above lands, the do-it-yourself question becomes practical. DIY looks cost-effective at first glance, then the hidden costs appear. Hidden cost of DIY What it actually takes Supplies Degreasers, oven cleaner, glass cleaner, grout cleaner, floor polish, and disinfectants, plus cloths, brushes, a good mop, and a powerful vacuum; see Health Canada’s household products guidance before buying chemical cleaners Time One person can easily spend one or two full days of hard physical labour, exactly when your energy belongs to the move itself Inadequacy risk Deposit deductions for missed details can easily exceed the cost of hiring professionals Professionals run this checklist daily. They bring industrial-strength products and efficient systems, they know what landlords look for, they accomplish in a few hours with a team what takes one person a full weekend, and they are insured and often guarantee the work, returning to fix anything flagged at the final walkthrough. Edmonton Move-Out Cleaning FAQ What does “broom-swept condition” really require? In practice, landlords expect a clean close to move-in ready: spotless floors, wiped walls and baseboards, empty and cleaned cabinets and closets, and sanitized appliances. Assume the strict reading, because the lenient one is how deposits get deducted. Do I really need to steam clean the carpets? Check your lease. Steam cleaning is frequently stipulated in writing, and where

Edmonton Move-Out Cleaning: Common Mistakes to Avoid Read More »

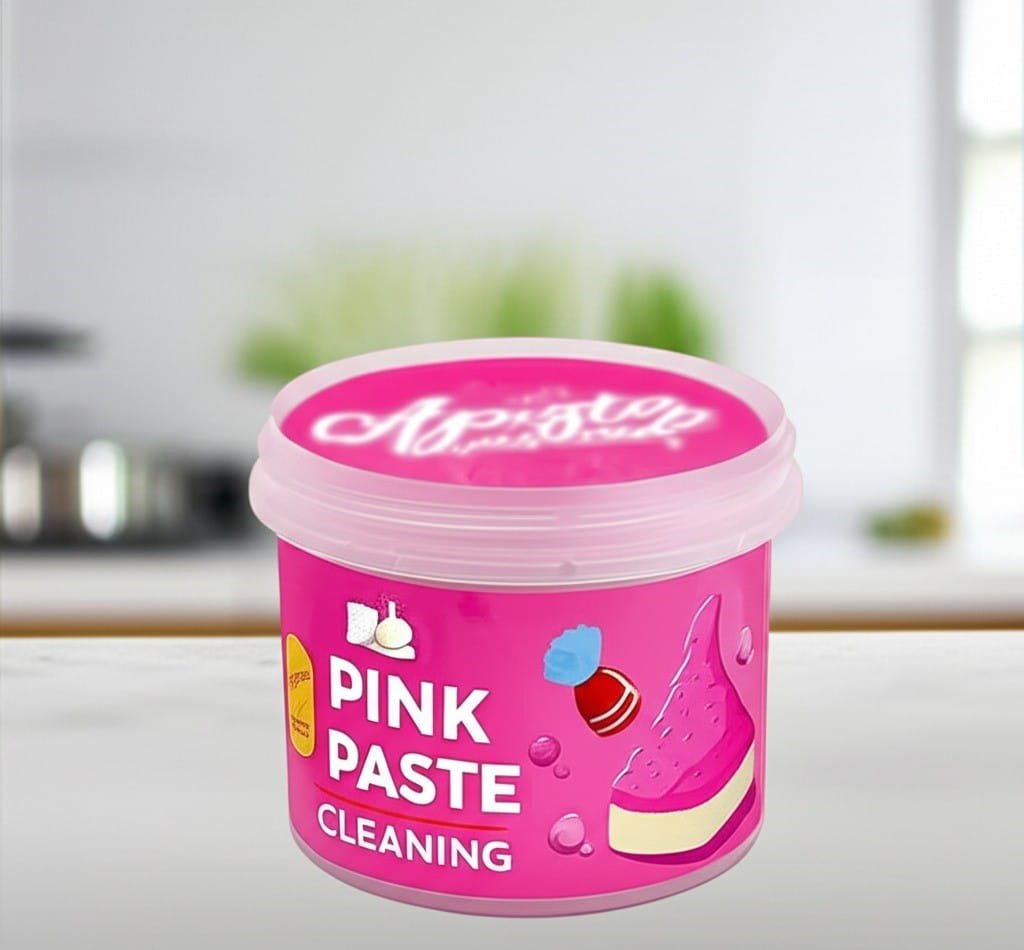
5 Amazing Tips on How to Use Pink Paste Without Causing Harm

The pink paste in the unassuming tub has become a fixture in cleaning arsenals worldwide. Its reputation is built on tackling the kind of grime that other cleaners leave behind. Its utility lies in its composition: a gently abrasive paste that physically scrubs away stubborn dirt without being overly harsh on most durable surfaces. It’s a simple concept, but its application is vast and varied. 1.Get to Work! The fundamental process for using the paste is consistent. You need a small amount of the product, a clean, damp cloth or sponge, and a bit of effort. Scoop a small quantity of the paste onto your applicator. The key is to start with less than you think you need; you can always add more. Apply it directly to the surface you intend to clean, and then, using gentle to moderate pressure, rub in small, circular motions. This mechanical action is what allows the fine abrasive particles in the paste to lift and remove the targeted stain or grime. Once you’ve worked the area, rinse it thoroughly with clean water to remove all residual paste and loosened dirt. Leaving any of the gritty paste behind can result in a chalky film. For a final, perfect finish, especially on shiny surfaces, buff the area dry with a clean, soft cloth. This last step removes water spots and restores the original luster.   2.Test In An Isolated Place In the kitchen, its applications are nearly endless. Start with the stovetop. For glass or ceramic cooktops, it can remove the white, hazy marks from boiled-over water and the stubborn, dark rings around the burners that seem to become part of the glass itself. It is crucial here to use a soft, non-abrasive cloth and very gentle pressure to avoid creating micro-scratches. A patch test in an inconspicuous corner is always wise. For gas stovetops, the heavy, cast-iron grates are a perfect match for the paste’s power. Remove them from the stove, apply the paste with a scouring sponge, and scrub away the baked-on grease and carbonized food. Rinse them well and dry them completely before putting them back. 3.Greasy Glass The oven door is another battlefield. The inside glass often accumulates a translucent, brown film of baked-on grease that oven-cleaning sprays can struggle with. Applying the pink paste and working it with a non-scratch scourer can cut through this film, restoring clarity to the glass. The same applies to the enamel interior of the oven itself, for tackling specific spots of burnt-on food that survive a self-cleaning cycle or a chemical spray treatment. Stainless steel sinks, which often look dull from hard water deposits and soap scum, can be revived. Work the paste all over the basin and around the faucet hardware. It will lift the mineral deposits and light rust spots that can form around the drain. After a thorough rinse and a buff with a dry microfiber cloth, the steel will gleam. This method is equally effective on ceramic or porcelain kitchen sinks that have cutlery marks or stains from coffee and tea. Moving to pots and pans, the paste truly shines on the scorched bottoms of stainless steel or copper cookware. Those rainbow-colored heat stains and black, burnt-on patches can be scrubbed away, restoring the pan to a near-new condition. Use it on the exterior and bottom, but be cautious with non-stick interiors; the abrasive nature of the paste will damage and ruin non-stick coatings. Even the kitchen backsplash, whether tile or laminate, can benefit. It can lift grease splatters from behind the stove and, when used with an old toothbrush or a small grout brush, it can dramatically whiten and brighten discolored grout lines between tiles. 4.Miracle in The Bathroom The bathroom presents its own unique set of challenges that the paste is well-equipped to handle. Soap scum is the primary villain here. On fiberglass tubs, acrylic shower surrounds, and tile walls, the paste cuts through the thick, cloudy layers of soap scum build-up that daily sprays can’t manage. Apply it with a sponge, scrub the entire surface, and rinse with the shower head for a quick and effective deep clean. Glass shower doors, plagued by hard water spots and soap film, can be restored to perfect transparency. Work the paste over the entire glass surface, rinse completely, and then squeegee or buff dry for a streak-free, crystal-clear finish. Sinks and faucets made of chrome or ceramic become dull from toothpaste residue and hard water. The paste gently polishes these surfaces, removing the film and leaving them sparkling. Use it to scrub the basin, the overflow hole, and around the base of the faucet where grime collects. It is particularly effective at removing the green or white crust of mineral deposits that can form at the very tip of the faucet spout. Toilet bowls can develop stubborn rings at the waterline, especially in hard water areas. While liquid bowl cleaners are good for general sanitation, the pink paste can be used to physically scrub away these persistent stains. Turn off the water supply to the toilet and flush to lower the water level in the bowl. Apply the paste directly to the ring and use a toilet brush or a pumice stone to scrub it away. This also works wonders on any stains below the waterline or on the porcelain exterior. 5.Wear Marks Throughout the rest ofthe house, its uses continue. Scuff marks on painted walls, baseboards, and door frames, whether from shoes, furniture, or toys, can often be gently buffed away. Use a very small amount on a damp cloth and rub lightly, as excessive pressure can damage the paint finish. Always perform a spot test first. UPVC window frames and doorsills, both inside and out, collect dirt and can become yellowed or gray over time. The paste cleans this grime away effectively, restoring the bright white finish. It’s also excellent for cleaning the tracks of sliding doors and windows, where dirt becomes compacted and difficult to remove. For

5 Amazing Tips on How to Use Pink Paste Without Causing Harm Read More »

Different Types of Cleaning Cloths

Different Types of Cleaning Cloths: Clean Your Home Without Damaging it

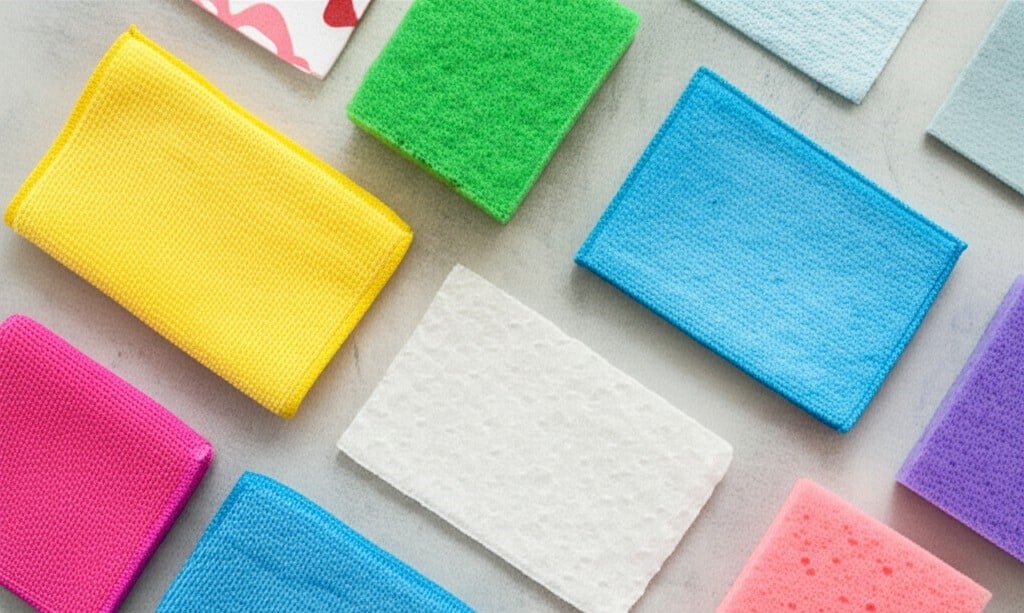
The cleaning cloths is the single most fundamental tool in the arsenal of both the professional and the homeowner. Its importance is often overlooked in favor of powerful chemical solutions or advanced machinery, yet the success of any cleaning task hinges on the material used to wipe, scrub, and polish a surface. The wrong cloth can leave behind lint, create streaks, fail to absorb liquid, or, in the worst-case scenario, scratch and permanently damage the very surface it is meant to clean. A deep understanding of the different types of cleaning cloths is not a minor detail; it is the foundation of effective and efficient cleaning. The market is filled with various cleaning cloths, each designed with a specific purpose in mind. Microfiber Microfiber has revolutionized the cleaning industry over the past few decades, and for good reason. It is not a single type of cloth but a category of textiles made from incredibly fine synthetic fibers, typically a blend of polyester and polyamide. For a fiber to be classified as a microfiber, it must be finer than one denier, which is approximately the diameter of a silk strand. Most cleaning-grade microfibers are significantly finer than that. The true genius of microfiber lies in its manufacturing process. The fibers are split into a star-like or wedge-shaped cross-section. This creates an enormous amount of surface area within the cloth and a network of microscopic hooks that are exceptionally effective at trapping dust, dirt, grime, and microbes. Unlike traditional cotton cleaning cloths, which tend to push larger particles around, a microfiber cloth actively grabs and holds onto debris. Furthermore, the material possesses a natural positive electrostatic charge when dry, which acts like a magnet for negatively charged dust particles. This makes it an unparalleled tool for dusting without the need for chemical sprays. When used damp, microfiber’s effectiveness shifts to its capillary action. The vast network of fibers can absorb between seven and eight times its own weight in liquid. This incredible absorbency allows it to lift and remove dirt and grease with minimal water, often eliminating the need for harsh cleaning chemicals. The fine fibers can penetrate microscopic pores and irregularities on a surface that other cloths simply skim over. However, not all microfiber is created equal; the weave and pile of the cloth dictate its best use, making the selection of specific microfiber cleaning cloths a crucial decision for achieving optimal results. All-Purpose Microfiber: This is the most common and versatile type. It has a looped pile, similar to a traditional terry cloth towel but much finer. This texture is excellent for scrubbing and trapping larger particles of dirt and grime. It’s the workhorse for general cleaning tasks like wiping down countertops, cleaning spills, scrubbing bathrooms, and washing general household surfaces. Its high absorbency makes it effective for both wet and dry applications. Waffle Weave Microfiber: Characterized by a distinctive grid-like pattern of recessed squares, this weave significantly increases the cloth’s surface area. This design is engineered for maximum absorbency and quick drying. Waffle weave cloths are the superior choice for drying tasks. They can absorb large amounts of water without becoming oversaturated quickly, making them perfect for drying dishes, glassware, and especially for automotive detailing, where leaving a streak-free finish on a car’s body is paramount. Glass and Polishing Microfiber: These cloths have a very tight, flat, suede-like weave with no pile. This smooth surface is designed to glide effortlessly over reflective surfaces. Because it lacks the looped fibers of a terry weave, it is virtually lint-free. Its primary purpose is to clean and polish glass, mirrors, windows, stainless steel appliances, and chrome fixtures without leaving behind streaks, smudges, or fibers. For best results, one of these flat-weave cleaning cloths is often used slightly damp to clean, followed by a second, dry one to polish to a perfect shine. High-Pile or Plush Microfiber: These cloths feature long, soft, fluffy fibers. The primary advantage of this design is its ability to trap and hold large quantities of dust deep within its pile, preventing it from being released back into the air. This makes it the ultimate reusable dusting tool, far superior to disposable static cloths. The plushness also makes it ideal for delicate tasks like buffing car wax without scratching the paint or for applying polish to fine furniture. Proper care is essential to maintain microfiber’s unique properties. They should be washed only with other microfiber or non-linting synthetic materials. Washing them with cotton will cause lint to become embedded in the fibers, ruining their effectiveness. Crucially, fabric softener and bleach must never be used. Fabric softener clogs the microscopic gaps in the fibers, destroying their ability to absorb and trap dirt. Bleach degrades the synthetic fibers, causing them to break down. Washing these cleaning cloths correctly ensures they last for hundreds of uses while maintaining their superior cleaning power. Cotton Before the advent of microfiber, cotton was the undisputed king of cleaning cloths. Derived from a natural plant fiber, cotton is known for its softness and high absorbency. It is durable and can withstand harsh chemicals like bleach and high washing temperatures, which can be useful for sanitization when dealing with heavy contamination. Cotton Terry Cloth: These are the familiar towels found in bathrooms and kitchens. Their looped pile is designed for absorbing large volumes of water. While effective for mopping up significant spills or for heavy-duty scrubbing where potential linting is not a concern, these cotton cleaning cloths are not ideal for fine cleaning. They tend to smear dirt more than lift it and often leave behind noticeable lint, especially on glass and dark surfaces. Flour Sack Towels: These are thin, tightly woven cotton cloths, historically made from the sacks used for flour. Their key advantage is that they are virtually lint-free. This makes them an excellent, classic choice for drying glassware and polishing silverware to a brilliant shine. They are less absorbent than terry cloth, but their smooth surface makes them superior finishing cleaning cloths for specific tasks where a perfect, clear finish is required. Cotton Rags: The most economical option is often a repurposed old

Different Types of Cleaning Cloths: Clean Your Home Without Damaging it Read More »