Mental Health

Close-up of a hand holding a water bottle, dressed in casual attire.

How to Prevent Heatstroke with Cleaning: 5 Essential Tips

How to Prevent Heatstroke While Cleaning in Summer Heatstroke is a serious condition caused by your body overheating, usually after prolonged exposure to high temperatures or physical exertion in the heat. Cleaning is real physical work, and on the hottest days it can push your body too far. These five essential tips help you prevent heatstroke while keeping your home spotless, even in a summer heat wave. 1. Clean During the Coolest Hours of the Day Schedule the heaviest chores for early morning, just after sunrise, or late evening, when temperatures are lowest. Midday is the most dangerous window: exertion plus peak heat can quickly lead to dehydration and heat illness. Save lighter indoor tasks for the afternoon, and leave vacuuming, mopping, and whole-room resets for cooler hours. Shifting your cleaning routine by a few hours cuts your heat risk dramatically and keeps you more productive while you work. Your body also needs time to adjust at the start of the season. Health Canada advises easing into activity gradually during the first hot weeks rather than diving straight into a marathon cleaning session, so build up your tolerance before you tackle the big summer jobs. 2. Drink Water Before You Feel Thirsty Your body loses fluids and electrolytes through sweat during active cleaning, and thirst is not a reliable early signal. Keep a water bottle beside you and sip steadily, even if you do not feel dry. Skip caffeinated and alcoholic drinks while cleaning in the heat, since both act as diuretics and speed up dehydration. Adding a slice of lemon or cucumber makes water more appealing, and setting a reminder to pause for a drink every 20 to 30 minutes keeps your intake steady. Plain water is the best choice while you work. Fill a bottle before you start, keep a refill in the fridge, and finish a full glass whenever you take a break rather than waiting until the task is done. If you take daily medication, remember that many medicines can make you more prone to dehydration or overheating on hot days, so plan extra water breaks around them. 3. Wear Lightweight, Light-Coloured Clothing What you wear changes how fast you overheat. Choose loose-fitting cotton or other breathable fabrics that let air circulate, and favour light colours: dark fabric absorbs the sun’s heat, while light fabric reflects it. If you are cleaning outdoors or near sunny windows, add a wide-brimmed hat to shield your face, neck, and shoulders from direct sun and to lower the amount of heat your body absorbs. If your clothes become soaked with sweat, change into a dry layer before you keep going. Wet fabric clings to the skin and stops air from reaching it, which makes it harder for your body to cool itself and speeds up overheating. 4. Keep Air Moving With Fans or Air Conditioning A cool room makes strenuous cleaning far safer. If you have air conditioning, set it to a comfortable level before you start. Without AC, place fans near windows and doorways to pull in cooler air and push warm air out, ideally during the cooler morning and evening hours. Close blinds and curtains over sun-facing windows so direct sunlight cannot turn your workspace into an oven. Night-time helps as well: open windows after sunset to let cooler air in, then close the blinds again before the morning sun climbs. Starting the day with a cooler home means your cleaning session begins safely even if the afternoon turns hot. 5. Take Breaks and Know the Warning Signs Pause often, rest in the coolest room, and rehydrate during every break. A damp cloth or a wrapped ice pack on your forehead, neck, or wrists brings your core temperature down quickly. Most importantly, listen to your body and stop at the first sign of trouble. Headache, dizziness, or lightheadedness Nausea or muscle cramps Heavy sweating followed by cool, clammy skin Weakness or unusual fatigue Pace yourself and rest before you feel exhausted, not after. If you live with or care for older adults or young children, keep an eye on them too: the CDC notes that some people face greater heat risk than others, and checking on family, friends, and neighbours during hot spells is a simple way to keep everyone safe. Heat stroke is a medical emergency. As Health Canada explains in its extreme heat guidance, call 911 immediately if someone has a high body temperature and is confused, unconscious, or has stopped sweating. For everyday prevention, the CDC’s heat and health advice comes down to the same habits: stay cool, drink plenty of fluids, and know the symptoms of overheating. Time of day Why it is safer Best tasks Early morning Coolest air of the day Vacuuming, mopping, laundry Late evening Sun low and heat easing Bathrooms, kitchens, bedrooms Midday Hottest hours Rest, hydrate, light tasks near a fan Heat Safety FAQ What is the difference between heat exhaustion and heat stroke? Heat exhaustion is the milder stage, with heavy sweating, weakness, nausea, and headache. Heat stroke is a life-threatening emergency marked by a very high body temperature, confusion, or a stop in sweating; call 911 right away if you suspect it. Is it safe to clean during a heat warning? Yes, if you clean in the coolest hours, keep sessions short, drink water steadily, and rest in an air-conditioned or shaded spot. When the heat is extreme, let the chores wait and cool down instead. What should I do if I feel dizzy or nauseous mid-clean? Stop immediately, move to a cool place, and drink water. If symptoms worsen or you become confused, have someone call for emergency help while you cool down with damp cloths. Can I still catch up on chores during a heat warning? Yes, but keep sessions short and stick to the coolest hours and the most air-conditioned rooms. When a heat warning is in effect, staying cool matters more than finishing the to-do list. The safest way to get through

How to Prevent Heatstroke with Cleaning: 5 Essential Tips Read More »

Color-coordinated closet with tidy clothes and organized shoe shelves.

How to Organize and Clean Closet in 5 Easy Steps

A clean closet is more than just an organized space-it’s a breath of fresh air every time you get dressed. If your closet has turned into a chaotic mess, don’t worry! With these five easy steps, you’ll transform your cluttered space into a neat and tidy haven. Step 1: Clear Out and Categorize First things first, empty your closet completely. Yes, everything needs to come out! This allows you to see exactly what you have and start fresh with a clean slate. Once everything is out, begin categorizing your items into distinct groups. These groups might include clothes, shoes, accessories, and seasonal items. By categorizing, you create a clear inventory of what you own, which not only helps in organizing but also makes it easier to decide what to keep and what to let go of. As you sort through each item, think about its purpose and place in your wardrobe. Do you have clothes that you wear regularly, or are there pieces that have been pushed to the back for years? Assess your shoes and determine which pairs you actually use versus those that are simply taking up space. For accessories, consider if they still complement your current style or if they could be better utilized by someone else. Seasonal items, such as winter coats or summer swimwear, should be grouped together so they can be stored more efficiently when not in use. This process might feel overwhelming at first, but taking the time to categorize and clear out your closet is an essential step towards achieving a truly clean closet. It provides a moment of reflection on your current wardrobe and helps you make more intentional choices about what you keep. Plus, with everything laid out in front of you, you’ll have a better understanding of what you have and what you might need, making future shopping trips more purposeful and less impulsive.     Step 2: Purge What You Don’t Need Now that you’ve categorized your items, it’s time to dive into the decluttering process to ensure you achieve a truly clean closet. This step involves some tough decision-making, but it’s essential for creating an organized space. Start by examining each item and asking yourself critical questions: Have I worn this in the last year? Does it still fit and flatter me? Is it in good condition? These questions help you assess the true value and utility of each piece in your wardrobe. As you go through your belongings, create three distinct piles. The first pile is for items you want to keep. These are pieces that you love, wear often, and that still look good on you. The second pile is for donations. These items might not work for you anymore, but they are still in good condition and could be useful to someone else. The third pile is for items that need to be tossed. These are the clothes, shoes, or accessories that are too worn out, damaged, or outdated to be worn again. Be honest with yourself during this process. It can be tempting to hold onto items for sentimental reasons or with the hope that they might come back into fashion or fit again someday. However, if you haven’t worn something in a year, it’s likely time to let it go. Holding onto unnecessary items only adds to the clutter and makes it harder to maintain a clean closet. This purging step is crucial because it dramatically reduces the amount of stuff in your closet, making it easier to organize what remains. A clean closet isn’t just about neatness-it’s about efficiency and functionality. By removing what you don’t need, you create space for the items you truly value and wear, making your daily routine smoother and more enjoyable. Step 3: Clean the Closet Space With your closet completely empty, now is the perfect time to give it a thorough cleaning. This step is essential to achieving a truly clean closet. Begin by dusting the shelves to remove any accumulated grime or cobwebs. Wipe down the walls to ensure that no dust or dirt remains, creating a fresh and clean surface for your belongings. Don’t forget to vacuum or sweep the floor, getting into all the nooks and crannies where dust might have settled. Once the major cleaning is done, consider adding a fresh scent to your closet to keep your clothes smelling wonderful. Cedar blocks are a fantastic option, as they not only impart a pleasant aroma but also help repel moths and other pests. You could also use sachets filled with lavender or other natural fragrances to maintain a fresh scent. A clean closet truly begins with a clean space. This deep cleaning step ensures that the environment where you store your clothes and accessories is hygienic and pleasant. It also sets the stage for maintaining a tidy and organized closet in the long term. With everything spotless and fresh, you’ll be motivated to keep your closet neat and orderly, making it a joy to use every day. So, take the time to clean every corner and surface of your closet space. This effort will pay off when you start placing your categorized items back into a pristine, clean closet, ready to be arranged in a way that maximizes both space and functionality.     Step 4: Organize Smartly Now that your closet is clean and your items are categorized, it’s time to put everything back in an organized manner to maintain a clean closet. Start by using uniform hangers for your clothes. This not only gives a tidy and cohesive look but also helps maximize the available space. Uniform hangers allow your clothes to hang at the same level, making it easier to browse through your wardrobe and find what you need quickly. Next, sort your clothes by category and color. Grouping similar items together, such as all shirts in one section and pants in another, makes it much easier to locate specific pieces. Within each category, arrange the items

How to Organize and Clean Closet in 5 Easy Steps Read More »

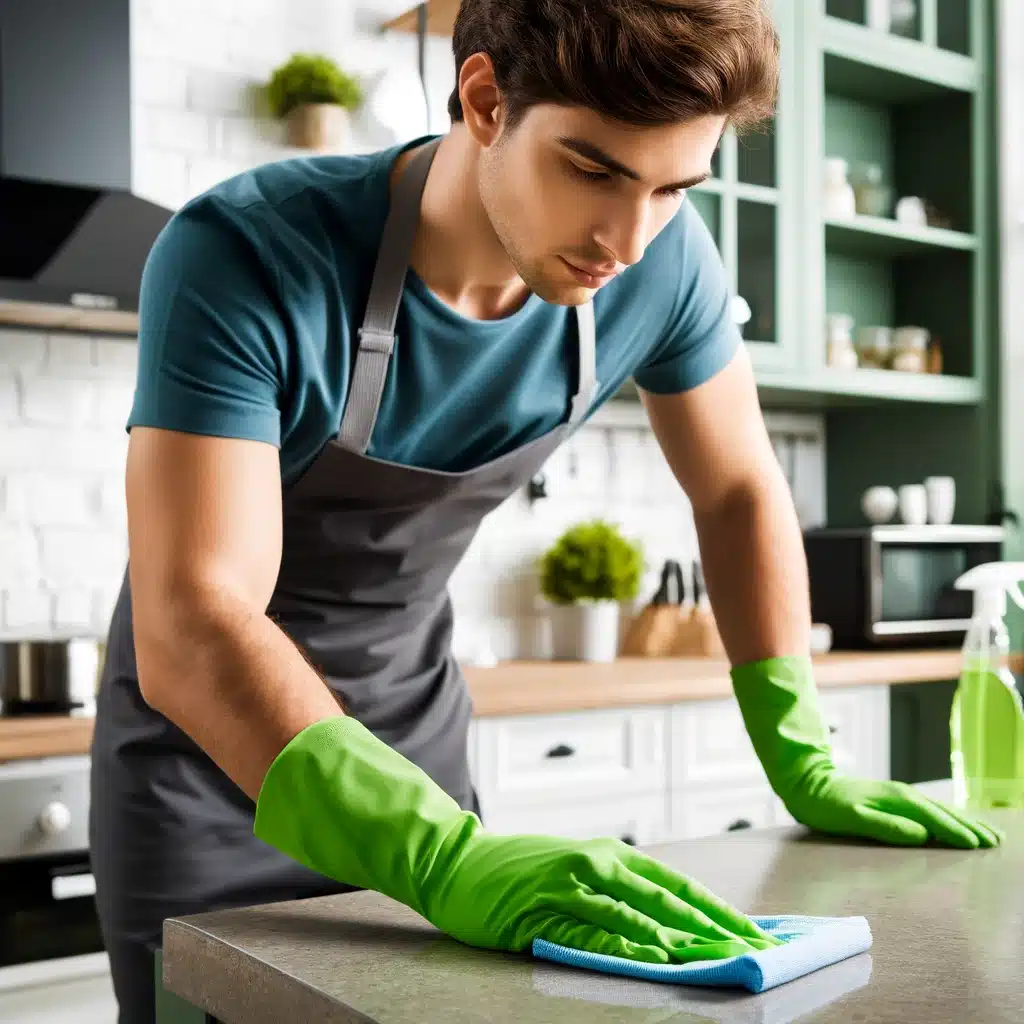
Professional house cleaner in uniform and green gloves sanitizes kitchen countertop.

House Cleaners: 5 Tips for Building a Great Relationship | Toronto Shine Cleaning

Your House Cleaners Are a Partnership, Not a Transaction Keeping a home tidy while living a full, fast Toronto life is hard, which is why so many households bring in professional help. But hiring a cleaner is only the beginning. The households that get the shiniest results year after year are the ones that treat the arrangement as a real partnership. These five habits, plus a note on gratitude, will keep your cleaners motivated, informed, and genuinely invested in your home. 1. Communicate With Total Clarity Set the stage during the very first visit. Tell the crew exactly what you expect: which rooms matter most, whether the kitchen and bathrooms are the priority, and which spaces should stay private and untouched. If you have a preferred method for a certain floor or a special product you want used on delicate surfaces, say so upfront instead of hoping they notice. Clear expectations on day one prevent quiet misunderstandings later. Then keep the dialogue open: if you spot a missed patch or want to shift the focus of a session, mention it early so the team can adapt while the visit is still fresh. Ongoing, friendly honesty is what turns a service into a lasting partnership. 2. Respect Their Time Professional cleaners run tight schedules across several homes a day, and they will remember the clients who make that schedule work. Ten minutes of quick preparation before they arrive pays for itself many times over: Clear floors of toys, clutter, and piles of clothing so vacuuming and mopping start instantly Put away valuables and sentimental items so nobody has to work around them nervously Make sure pathways, parking, and building access are smooth on visit day When life intervenes and you must cancel or reschedule, give as much notice as possible. Advance warning lets the team rearrange appointments or offer the slot to another family, and that courtesy always comes back to you when you are the one who needs a change. 3. Create a Friendly Working Environment Kindness is a cleaning multiplier. A glass of water, a small snack, or a cold drink on a summer afternoon does wonders for comfort and energy mid-shift; cleaning is real physical work, and the CDC’s summary of physical activity benefits is a good reminder of why crews deserve hydration and respect mid-task. A genuine thank you or a compliment on a job well done tells the crew their work is seen, and people who feel valued consistently go further, reaching the corners and details that nobody asked about. A brief, warm chat about their day reinforces that you see them as contributors to your household, not invisible staff, and that respect shows up directly in the quality you get back. 4. Trust Their Expertise You are paying for experience, not just hours. Professional cleaners know which agents suit hardwood, how to treat an upholstery stain before it sets, and which shortcuts quietly damage finishes. If your team recommends a specific product for your floors or a different approach to a recurring problem, they are drawing on successes from hundreds of homes. Trusting that judgment protects your surfaces from harsh chemistry and wrong technique. They also see your home’s rhythm from the inside, so seasonal advice, like boosting frequency during pollen season, is worth weighing rather than dismissing. Autonomy to apply proven methods makes every visit faster and more thorough. 5. Stay Consistent and Loyal The best results come from the same team returning regularly. Each visit, they learn your cabinets, your quirks, and your priorities, so they arrive already calibrated instead of re-learning your home every time. Loyal clients often hear it back: flexible scheduling, priority booking during the holiday rush, and a team that comfortably suggests improvements because trust is already established. If you want to lock in a standing rhythm, the regular house cleaning service is built for exactly this kind of repeat partnership. A Quick Word on Appreciation Gratitude works best when it is tangible. A tip or bonus after an outstanding deep clean or during the holiday season is a direct, concrete thank you that motivates continued high standards. Non-monetary gestures land too: flexible scheduling grace, a comfortable place to set down their gear, a remembered name. Recognition makes cleaners feel respected, and respected professionals protect the homes of the clients who respect them. What This Partnership Costs in Toronto If you are still weighing whether regular help fits your budget, Toronto Shine Cleaning publishes transparent rates: regular cleaning starts from $212.63 for a studio or one-bedroom, $273 for two bedrooms, and $327 for three bedrooms, all before HST, with full details on the pricing page. Every crew is bonded and insured under a $1,000,000 insurance policy with a $10,000 accidental breakage and surety bond, and the studio sits at 140 Yonge St Suite 285, Toronto ON M5C 1X6. If you like letting professionals pick the safest chemistry for your surfaces, Health Canada’s household products page is a useful backdrop on the products entering your home. Habit Effort From You What Comes Back Clear upfront expectations One honest conversation Fewer misunderstandings, faster visits Prepared, accessible space Ten minutes of tidying Deeper clean in the same time slot Kindness and thanks Nearly nothing A team that minds the details Loyalty and routine Standing appointments Priority slots and tuned service Frequently Asked Questions How do I raise a problem without sounding rude? Frame it as a preference, not a complaint: “I would love the baseboards next time” works better than silence followed by resentment. Cleaners expect feedback and almost always adjust on the very next visit. Should I be home during every clean? It is your call. Many clients hand over access and use the hours elsewhere. Being present occasionally, especially early in the relationship, helps align tastes and keeps the communication loop warm. Is tipping expected in Toronto? Not mandatory, but appreciated. Holiday-season bonuses or a tip after an exceptional deep clean are the common gestures, and even small ones

House Cleaners: 5 Tips for Building a Great Relationship | Toronto Shine Cleaning Read More »

deep cleaning toronto

How Cleaning Your Home Can Fuel Your Weight Loss Journey: 6 Surprising Benefits

How Cleaning Your Home Can Fuel Your Weight Loss Journey: 5 Surprising Benefits Weight loss plans usually start at the gym, but your home is a surprisingly effective training partner. Cleaning is real physical activity, and a tidy environment supports the habits that make weight loss stick: better food choices, lower stress, consistent routines, and deeper sleep. Here are five ways your cleaning routine can fuel your weight loss journey. 1. Household Chores Burn Real Calories Vacuuming, scrubbing the bathroom, and mopping are genuine movement. Thirty minutes of active cleaning can burn up to 130 calories, depending on your body weight and how vigorously you work. Heavier tasks like washing windows and deep cleaning the kitchen push your energy use even higher. It is not a replacement for your workout, but it is far better than sitting. You can stack the effort too: squat while loading the dishwasher, lunge while vacuuming, or do calf raises while waiting for the kettle. Small intensity boosts turn routine chores into light training sessions. 2. Cleaning Lowers Stress and Stress Eating High stress triggers comfort eating and can slow your progress, but physical activity, even light activity like tidying, helps regulate stress. A cleaning session gives your mind a single, simple focus, which is calming after a demanding day. Lower stress means fewer stress-driven trips to the pantry. 3. More Movement Throughout the Day For anyone with a desk job, the problem is not the workout you miss, it is the hours of sitting. Bending, stretching, carrying, and walking between rooms all add up. The Public Health Agency of Canada notes that every movement counts toward your physical activity, so breaking up sedentary time with 10 minute cleaning bursts keeps your body engaged all day. Think of these as movement snacks: five minutes here and ten minutes there, spread across the day, without a gym bag in sight. Chore Movement Why It Helps Vacuuming Pushing, lunging, walking Sustained low-intensity cardio Scrubbing floors and tubs Squatting, reaching, pushing Leg and core engagement Laundry and tidying Lifting, bending, climbing stairs Frequent light activity Window washing Reaching, stretching Upper body and balance work 4. A Clean Kitchen Supports Better Food Choices Your environment shapes your decisions. A cluttered kitchen makes it easy to grab processed snacks and hard to find the ingredients for a real meal. When counters are clean and the pantry is organized, cooking at home becomes the path of least resistance, and home-cooked meals tend to be lower in calories and higher in nutrients than takeout. 5. Routine, Discipline, and Better Sleep Regular cleaning builds the same discipline that diet and exercise require. A set cleaning schedule trains you to show up for small commitments, and that muscle carries over to meal prep and workouts. A clean bedroom also improves sleep, and sleep regulates the hormones that control appetite. The NHLBI explains how sleep supports metabolism and overall health, while reducing allergens like dust mites in the bedroom helps you rest more deeply, a topic the National Institute of Environmental Health Sciences covers in its allergens overview. Consistency matters more than intensity: a tidy home kept up daily removes the weekend marathon clean, which is often when motivation runs out. Turn Cleaning into a Mini Workout Play upbeat music and keep moving between tasks. Add squats when you pick up toys or laundry baskets. Set a 20 minute timer and race yourself to finish a room. Use cleaning as your screen break between work calls. Free Up Time for Your Real Workouts Cleaning burns calories, but it cannot replace strength training or a long walk. If deep cleaning eats the hours you would rather spend at the gym or preparing healthy meals, outsource it. Toronto Shine Cleaning provides regular residential cleaning and deep cleaning services across the GTA, with prices starting at $212.63 for a studio or 1 bedroom home and a 15 percent discount on weekly and bi-weekly schedules. We cover Toronto and surrounding areas. Call 647-424-0355 to book, and put your energy into the workouts that move the needle. How many calories does cleaning actually burn? A 30 minute session of active cleaning can burn up to 130 calories, and heavier tasks like scrubbing or window washing burn more. The exact number depends on your weight and intensity, so treat it as a bonus, not your main workout. Does cleaning count as exercise? Cleaning counts as physical activity, and every bit of movement adds up, especially if you sit most of the day. For weight loss, pair it with dedicated cardio and strength training, since cleaning alone is not enough to build fitness. Can a clean kitchen really change what I eat? Yes. When counters are clear and healthy ingredients are visible, cooking at home becomes easier than ordering out. A tidy kitchen removes the friction that pushes you toward processed snacks. How does sleep fit into weight loss? Poor sleep disrupts the hormones that regulate hunger and appetite, which can increase cravings. A clean, calm bedroom supports deeper sleep, and consistent sleep makes consistent healthy eating easier.

How Cleaning Your Home Can Fuel Your Weight Loss Journey: 6 Surprising Benefits Read More »

House cleaner inside a home

7 Innovative Tools Every Home Should Have to Prevent Falls | Toronto Shine Cleaning

Falls Are Predictable. Your Home Can Be Too. A fall at home can change a life in a second, and the people most at risk are the ones we love most: older adults and anyone managing a mobility challenge. The encouraging part is that most household falls are preventable with the right gear in the right places. From invisible floor treatments to alert systems that watch quietly in the background, these seven tools turn an ordinary house into one that actively protects the people inside it. 1. Non-Slip Floor Treatments Slick floors are fall machinery, and non-slip treatments disarm them. Applied to tile, hardwood, or laminate, the treatment adds a microscopic texture you cannot see but your feet absolutely feel, which sharply reduces the chance of a slip, especially when surfaces get wet. Bathrooms and kitchens gain the most because water and spills make those floors chronically treacherous: even after a splash, grip stays reliable. And because the treatment is effectively invisible, your floors keep their look while quietly becoming far safer underfoot. 2. Motion-Sensor Lighting Most people who fall in a hallway simply could not see the problem. Motion-sensor lighting ends that instantly: pathways, staircases, and rooms flood with light the moment someone enters, with no switch-hunting in the dark. That matters most at night, when a quick trip to the bathroom becomes the highest-risk journey in the house. The fixtures are energy efficient, switching themselves off once motion stops, and wiring them into your home security setup adds a bonus: the same lights that steady your steps also discourage intruders around the exterior. 3. Grab Bars and Handrails Some risks need something solid to hold, and modern hardware finally makes that stylish. In bathrooms, sturdy bars beside the tub, shower, and toilet give anyone with balance or mobility challenges a dependable anchor on wet ground. Along stairs and in hallways, handrails support everyone from toddlers mastering steps to grandparents who want extra assurance. Today’s bars and rails come in many finishes and styles, so safety hardware can match your decor instead of making your home look clinical. 4. Smart Floor Mats Smart mats are the newest guardrail for the rooms where falls cluster. Placed beside the bed, in front of favourite seating, or across high-traffic zones, they monitor movement instead of just padding it. If someone falls and stays down, the mat registers the abnormal stillness and can automatically alert a designated phone number or connected medical alert system, so help comes fast and injuries do not compound while nobody knows. They can also flag risky movement patterns, like repeated unsteady steps near the bathroom, giving caregivers a warning before the fall actually happens. 5. Cordless Vacuum Cleaners Cleaning itself causes falls when cords snake across walkways, which makes a cordless vacuum a safety device disguised as a chore tool. With no cable to trip over, keeping floors clean becomes quick and hazard-free, a real win in homes with children, pets, or anyone unsteady on their feet. Being lightweight and easy to steer also cuts the physical strain of vacuuming, helping older adults or people with limited strength cover more floor with less effort, and skipping the constant re-plugging shrinks the window when an accident could happen. 6. Shoe Organizers The humble shoe pile by the door is a genuine trip trap, and an organizer clears it for good. A hanging rack, a slim cabinet, or a simple tray pulls footwear off the floor and out of walkways, keeping busy entryways passable even in tight homes. Clear floors mean safer movement for every resident and every guest, and your shoes stop getting crushed at the bottom of a pile, so the little investment protects both people and footwear. 7. Smart Home Devices Voice control removes the walk you were about to take in the dark. Smart assistants can raise the lights, lock doors, switch the television, and adjust the thermostat on command, which means fewer unsteady crossings of a dim room late at night or first thing in the morning. Asking a device to light the hallway from bed, or to confirm the doors are locked without getting up, cuts exactly the low-light, half-awake moments when trips happen most. Where Each Tool Earns Its Keep Zone Best Tools Primary Hazard Covered Bathroom Non-slip treatment, grab bars, smart mat Wet surfaces and tub transfers Stairs and hallways Handrails, motion-sensor lights Missed steps and dim paths Entryway Shoe organizer, smart mat Clutter trips at the door Living areas Cordless vacuum, smart devices Cords, clutter, dark crossings None of this replaces steady habits: keeping spill-free floors and moving your body regularly both matter. A ten-minute weekly safety sweep catches most new hazards before they claim an ankle: Wipe any wet spot in the bathroom, kitchen, or entryway the moment it appears Re-route or retract cords crossing walkways, including charging cables Straighten rugs and confirm non-slip backing is still gripping the floor Put shoes away in the organizer instead of leaving them by the door Confirm night lights and sensor bulbs are still working along the bedroom-to-bathroom path Beyond habits, moving your body regularly matters too. The CDC’s page on physical activity benefits notes that regular activity keeps muscles and bones strong and supports balance, which is fall prevention from the inside out. A simple tidy-up routine, like the basics in the CDC cleaning and disinfecting guide, keeps wet spots and clutter from ever reaching tripping size. Book recurring floor-and-tidy upkeep through a regular cleaning service so the hazard pile never rebuilds. Frequently Asked Questions Which room should I protect first? Start with the bathroom, where wet surfaces and the tub or toilet concentrate the risk, then do the stairway. Non-slip treatment, a grab bar or two, and a light that turns on by itself cover the biggest dangers fastest. Do smart floor mats need wifi or a subscription? Models vary. Many connect to a phone by bluetooth or wifi and alert a preset contact when they detect a fall or

7 Innovative Tools Every Home Should Have to Prevent Falls | Toronto Shine Cleaning Read More »

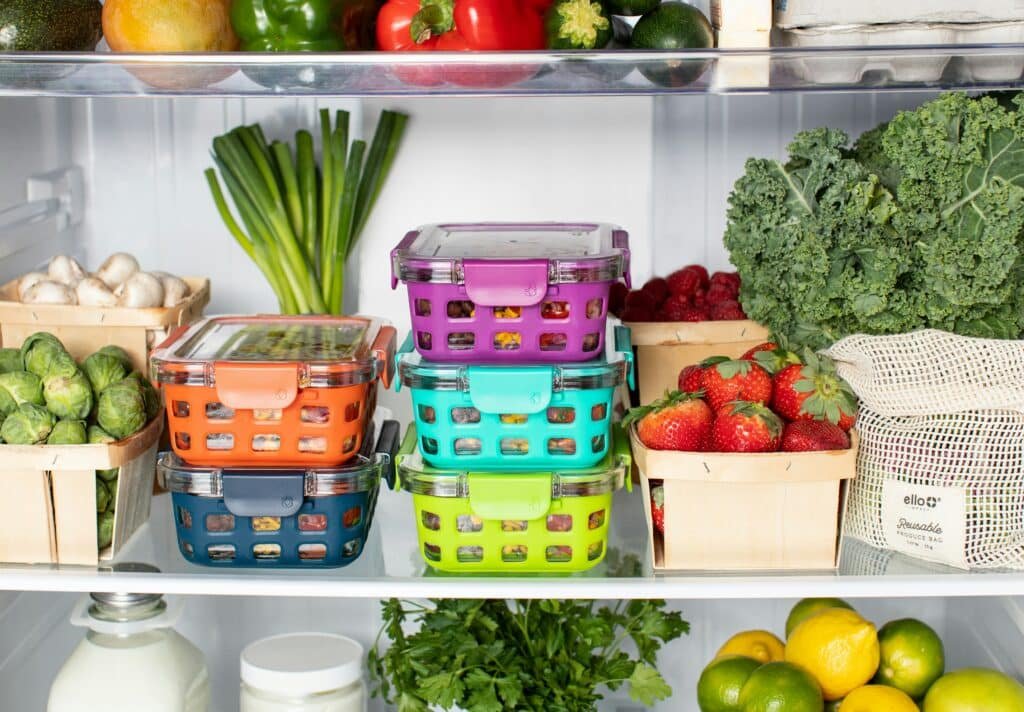
Kitchen refrigerator brimming with fresh veggies and meals.

How to Ensure Your Groceries are Virus-Free: A 7-Step Guide

How to Ensure Your Groceries are Virus-Free: A 7-Step Guide for Toronto Homes The weekly grocery run is one of the most routine errands in a Toronto household, and also one of the most contact-heavy: shared carts, busy checkout lanes, and shelves touched by dozens of shoppers every day. While the likelihood of catching a virus from food packaging is generally low, a few simple habits add real peace of mind, especially when your home includes young children, seniors, or anyone with a weakened immune system. This seven-step guide covers everything from planning your trip to putting the last package away, so you can keep your groceries virus-free from store to pantry. Step 1: Prepare Before You Shop Write your shopping list before you leave the house. Knowing exactly what you need lets you get in and out faster, which means less time in crowded aisles and fewer chances to touch shared surfaces. Pack hand sanitizer and disinfectant wipes for your hands, the cart, and payment screens. Keep a mask handy for busy periods when keeping distance is difficult. Shop during off-peak hours, such as weekday mornings, when stores are quietest. Step 2: Choose Touch-Free Options When Possible Delivery and curbside pickup remove most of the guesswork. Your order is packed by store staff and loaded straight into your car or left at your door, which limits your exposure to public spaces. If you do shop in person, touch only the items you plan to buy, and keep your hands away from your face while you browse. Step 3: Sanitize Your Hands and Cart Wipe the cart handle, basket edges, and child seat with a disinfectant wipe before you start, then apply hand sanitizer after touching door handles and payment terminals. These small steps stop germs from hitching a ride from the cart to your groceries, and then from your groceries to your kitchen. Step 4: Practice Safe Handling in the Aisles Use the produce bags as a barrier when picking loose fruits and vegetables instead of grabbing them with bare hands. Skip items with torn or damaged packaging, and avoid touching your eyes, nose, or mouth while shopping, since those are the easiest entry points for viruses. Step 5: Clean Your Groceries When You Get Home Designate a landing zone near the door or in the kitchen for incoming bags, then treat each item by type. Grocery Type Recommended Cleaning Method Cans, jars, and plastic bottles Wipe each container with a disinfectant wipe and let it air dry before storing. Fresh fruits and vegetables Rinse under running water and rub gently with your hands. Avoid soap or household detergents, which can leave residues that are not safe to eat. Cardboard boxes and bags Wipe the outside, or set them aside for a few hours before putting them away. Frozen items Wipe the packaging, since it has been handled in the store and during delivery. A produce wash is optional: running water and light friction remove most dirt and microbes from the surface. Cleaning physically removes germs while disinfecting kills them, so match the method to the item. The CDC explains both approaches in its food safety and home cleaning and disinfection guidance. Step 6: Designate a Cleaning Area and Tidy It After Keep one zone for groceries that still need attention so clean items and unwashed items never mix. Once everything is stored, wipe down the countertops, the sink area, and any bins or bags that touched the groceries. Wash reusable shopping bags regularly, either in the machine or by hand with warm soapy water. Health Canada’s safe food handling tips are a useful refresher for the whole family. Step 7: Wash Your Hands Thoroughly Finish every grocery session by washing your hands with soap and water for at least 20 seconds, including between your fingers, under your nails, and on the backs of your hands. This one habit is the most effective way to keep viruses from moving from your hands to your face or your food. Keep the Whole Kitchen Virus-Free Groceries are only one link in the chain. Fridge handles, faucets, counters, and cabinet fronts collect germs from everyday use, so wipe them down regularly and give the kitchen a deep clean every few weeks. If you would rather spend Saturday at the farmers market than scrubbing the fridge, Toronto Shine Cleaning provides deep cleaning services in Toronto and regular residential cleaning across the GTA, so your kitchen stays hygienic without eating your weekend. We serve Toronto and surrounding areas, and clients rate us 4.9 out of 5 on Google, as shown on our reviews page. Call 647-424-0355 to book a visit. Seven steps sound like a lot, but most of them take seconds once they become routine. Plan your list, protect your hands, clean by type, and wash up at the end, and your kitchen stays a safe place for everyone in your household. Do I need to disinfect every single package? No, focus on items you will touch frequently, such as cans, jars, bottles, and frozen packages. Fresh produce only needs a rinse under running water, and cardboard can be wiped or set aside briefly before storing. Can I wash fruits and vegetables with dish soap? No, avoid soap, detergent, and bleach on produce. These products can leave residues that are not safe to eat. Running water and gentle rubbing with your hands are enough, and a produce wash is optional. Is grocery delivery safer than shopping in store? Delivery and curbside pickup limit your exposure to shared surfaces like carts and checkout screens, which reduces contact with germs. If you do shop in person, keep your hands away from your face and sanitize after touching shared surfaces. How long should I wash my hands after handling groceries? At least 20 seconds with soap and water, covering between your fingers, under your nails, and the backs of your hands. Do this after unpacking and again before you eat or prepare food.

How to Ensure Your Groceries are Virus-Free: A 7-Step Guide Read More »

Person sneezing indoors as sunlight reveals dust particles in the air.

5 Cleaning Tips to Reduce Asthma Triggers in Your Home | Toronto Shine Cleaning

A Home That Breathes Easy Starts With How You Clean It For someone living with asthma, a house can flip from sanctuary to hazard zone without warning. Dust, pet dander, mold, and strong fumes lurk in plain sight, and each one can escalate a quiet afternoon into an attack. The leverage point is your cleaning routine: done deliberately, it removes the triggers instead of aerosolizing them. These five core tips, plus two deeper dives on soft furnishings and pets, build a home where lungs of every sensitivity can relax. 1. Chase Dust Before It Settles Dust mites are among the most notorious asthma aggravators, so a dust-controlled home is step one. Ditch the feather duster and wipe surfaces with a damp cloth: moisture captures and removes dust rather than launching it back into the air you breathe. Vacuum faithfully with a machine fitted with a HEPA filter, because those filters capture the finest particles instead of puffing them out the exhaust. Then wash bedding weekly in hot water, which kills the mites thriving in warm, fibrous linens and strips out the allergens they leave behind. 2. Keep Humidity Below Fifty Percent Mold and dust mites both throw parties when indoor air turns humid, and both are major asthma escalators. Holding indoor humidity under 50 percent suppresses both at the source. The direct tool is a dehumidifier, which pulls excess moisture from the air and holds the house at a healthier level, ideally checked with a simple hygrometer. Ventilate the wet rooms: exhaust fans in bathrooms and kitchens, or a cracked window, move air before mold and mildew can colonize. Fix every leak the moment you spot it, because damp surfaces are mold’s launchpad, and unchecked mold is exactly the kind of trigger the CDC’s mold health resource warns sensitive airways about. 3. Choose Gentle, Low-Fume Products The cleaner you spray is itself a potential trigger. Many commercial formulas lean on strong fragrances and harsh chemistry that irritate reactive airways, so choose unscented or naturally scented products made for sensitive households. Skip aerosol cans entirely: the fine mist they launch is built for deep inhalation. Liquid concentrates and pump sprays do the same cleaning work with far less airborne payload, and a DIY mix of vinegar and baking soda handles surface grime and bathroom mildew without adding any synthetic trigger to your air. Health Canada’s household products hub is the right reference for reading labels and choosing safer chemistry. If you do reach for bleach occasionally, follow the CDC’s bleach guidance: dilute properly, ventilate hard, and never mix it with other products, because bleach fumes are a textbook asthma trigger. 4. Respect Your Filters Your heating and cooling system circulates whatever its filters fail to catch: pollen, dust, dander, all of it, straight into every room. Change or clean HVAC filters on the manufacturer’s schedule, which protects both your air and the system’s efficiency. Then add a HEPA air purifier in the rooms where you actually spend your hours, especially the bedroom, since you cannot breathe clean air selectively while asleep for eight hours. 5. Declutter Without Mercy Every knickknack, stack, and pile is a dust exhibition with extra surfaces. Clear surfaces shrink the places allergens can camp, which is why regular decluttering sessions, parting with what you no longer use, pay off in easier cleaning all year. Store what stays inside closed containers instead of leaving it open to the air, so dust never accumulates on the things themselves. A starter shopping list for an asthma-focused cupboard: A vacuum sealed with a true HEPA filter for weekly whole-floor sessions A hygrometer and dehumidifier for any basement or damp-prone room Unscented, dye-free surface cleaners and pump sprays instead of aerosols Zip-seal storage bins for off-season clothes, books, and keepsakes Bonus Focus: Soft Furnishings and Carpets Carpets, sofas, and curtains are allergen reservoirs the daily eye never sees. Vacuum carpet with your HEPA machine regularly to drag out embedded dust and dander, and steam clean carpets and upholstery periodically to cook off dust mites and lift what vacuuming misses. If asthma runs severe in the house, trade heavy drapes for washable curtains or blinds, and where you can, trade carpet for hard flooring; each swap permanently shrinks the home’s allergen load. Bonus Focus: Pets and Their Passengers Pets deliver joy and allergens in the same package: dander, fur, and the dust they trail in. Brush them outdoors where possible so loose fur never becomes indoor air, and keep animals off furniture and out of the bedroom so sleeping hours stay low-exposure, which matters because sleep is when airways recover. Vacuum more often in the pet’s favourite zones, run a purifier there too, and wash pet bedding and toys frequently so dander never piles up. Trigger Where It Hides Your Counter-Move Dust mites Bedding, upholstered furniture Hot-water weekly wash, HEPA vacuum Mold spores Bathroom, leaks, humid corners Humidity under 50 percent, fix leaks fast Pet dander Sofas, pet beds, carpets Outdoor grooming, purifier, off the bed Fumes and aerosols Cleaning cupboard Unscented liquids, pump sprays, ventilation Frequently Asked Questions and Answers How often should an asthmatic home be cleaned? Dust and vacuum weekly at minimum, wash bedding weekly in hot water, and deep-clean soft furnishings a few times a year. During pollen season or flare-ups, add sessions rather than stretching them. Are natural cleaners always safe for asthma? Not automatically. Vinegar has strong fumes too, so dilute it, ventilate while using it, and patch-test your reaction. Unscented, dye-free formulas designed for sensitive users remain the safest default. Does a HEPA filter really matter in a vacuum? Yes. Without one, the vacuum exhausts the finest particles straight back into the room air, which is precisely the fraction that reaches deep lungs. Sealed HEPA systems are the standard for allergen households. Can professional cleaning genuinely help? Regular visits keep dust, dander, and clutter from rebuilding between your own sessions, and a seasonal deep clean hits the reservoirs people miss. Toronto Shine Cleaning’s regular service

5 Cleaning Tips to Reduce Asthma Triggers in Your Home | Toronto Shine Cleaning Read More »

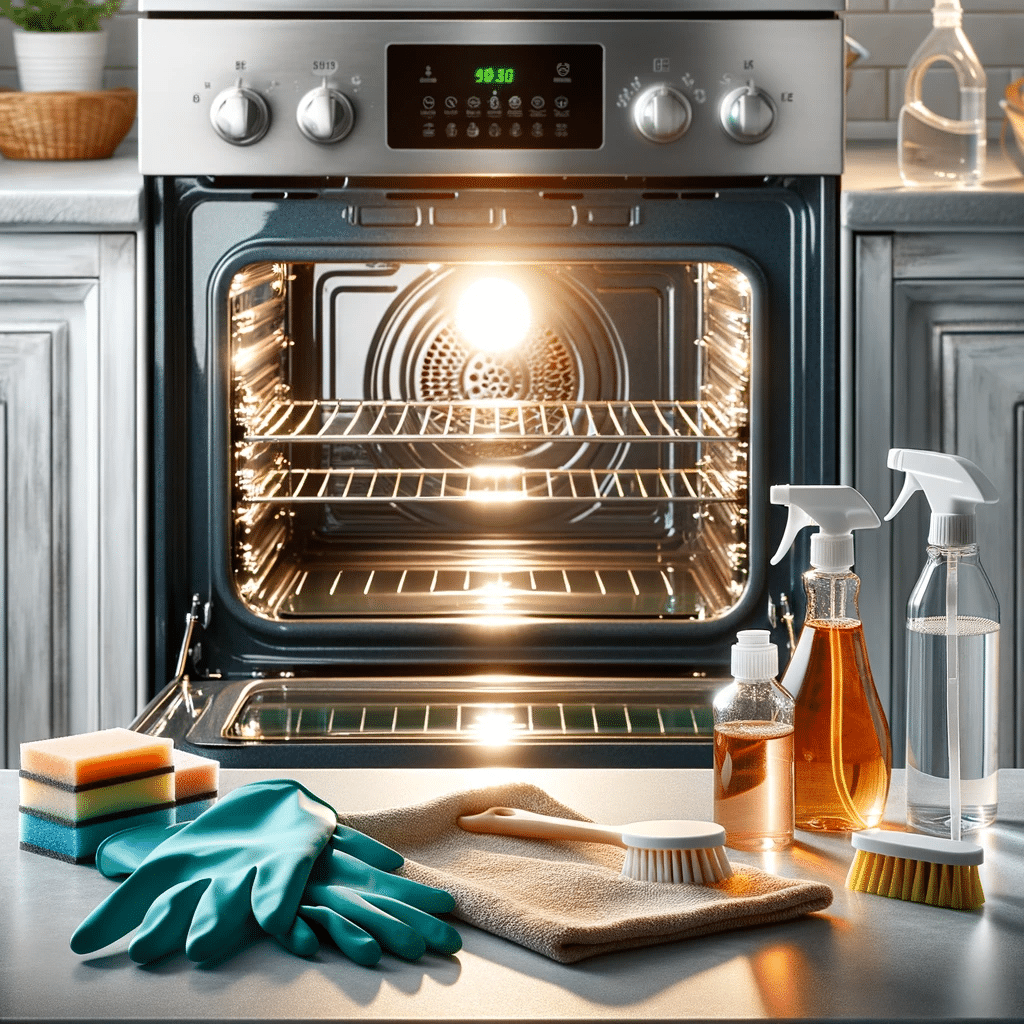
Clean oven, cleaning products, gloves and sponges.

How to Clean Your Oven Quickly and Efficiently: A Step-by-Step Guide

How to Clean Your Oven Quickly and Efficiently: A Step-by-Step Guide An oven hides its mess in plain sight. Every roast, pizza, and pie leaves a thin layer of baked-on grease, and layer by layer it turns into the smoke smell that greets you at preheat. The method below is the low-effort classic: a baking soda paste that works overnight while you sleep, then a fast wipe down the next day. No harsh fumes, no heroic scrubbing, and no commercial cleaner required unless you want one for the racks. Gather Your Supplies First Everything you need fits in one drawer: Half a cup or more of baking soda White vinegar in a spray bottle A damp dishcloth and a few rags A plastic or silicone spatula Rubber gloves, because oven grime is grim Why baking soda instead of a commercial oven cleaner? Those products often contain harsh, caustic chemicals with strong odors that linger in the kitchen. Baking soda is non-toxic, inexpensive, and already in your pantry, which makes it the friendlier choice for households with pets, kids, or sensitive noses. Step 1: Empty the Oven Completely Pull out the racks, pizza stones, baking sheets, and any thermometer so you can reach every surface. Give each item the care it needs: racks do best soaking in soapy water while you work, pizza stones are porous and should just be brushed out and baked dry at high heat, and gadgets stay gentle. Before anything else, sweep out loose crumbs with a dry cloth or handheld vacuum. With the cavity bare, also take a second to inspect for issues such as a worn heating element, which you would rather discover now than mid roast. Step 2: Mix the Paste Start with about half a cup of baking soda and add water gradually until you have a spreadable consistency, something like frosting. Too runny and it slides off the walls; too thick and it will not spread or penetrate. The paste is the perfect medium because it clings to vertical surfaces and stays where you put it, holding the mild abrasive and the alkaline chemistry right against the baked-on grime for hours. Step 3: Coat the Cavity and Wait Gloves on. Spread the paste over every interior surface you can reach, but keep it off the heating elements; baking soda can corrode them, and they rarely need cleaning anyway. Do not be surprised when the paste turns brown as you work. That discoloration is the reaction doing its job, lifting grease and carbonized spills out of the surface. Close the door and leave the paste for at least 12 hours, or overnight. This is the efficient part of the method: the chemistry works for you while you do nothing at all. Step 4: Handle the Racks While the paste sits, deal with the racks. After a couple of hours in hot, soapy water, the grease softens enough that a stiff brush takes it off without much fight; scrub both sides, rinse, and dry. If a rack is truly encrusted, a commercial oven cleaner is an acceptable last resort. Use it in a well-ventilated space with gloves on and follow the label exactly, since those formulas are strong. The same rule applies to any chemical you use for housework: Health Canada’s household chemical safety page is a good pre-job read. Step 5: Wipe It All Down The next day, use a damp cloth to wipe out the dried paste; the moisture rehydrates it, and it comes away carrying the loosened grime with it. For stubborn patches, scrape gently with the plastic or silicone spatula, never metal, which can scratch enamel or protective coatings. Finish by spritzing a little vinegar over any white residue: it fizzes on contact with the baking soda and wipes clean. Give everything a final rinse with a fresh damp cloth and let the cavity dry with the door open. Task Time Effort Empty and sweep the cavity 10 minutes Light Mix and spread the paste 15 minutes Light Wait for the chemistry 12 hours, hands off None Soak and scrub the racks 45 minutes, mostly soaking Moderate Wipe out and vinegar rinse 20 minutes Moderate Oven Cleaning FAQs How often should an oven get this treatment? A deep clean every few months keeps smoke and off smells away in a normal household. If you roast often or notice smoke at preheat, treat it as the sign to mix a fresh batch of paste. Wiping spills once the oven cools stretches the interval nicely. Can I use the self-cleaning function instead? You can, but know what you are signing up for: very high heat, strong odors, and a locked oven for hours. The baking soda method achieves a comparable result with none of that, which is why it remains the go-to for a quick, low-fuss clean. Why keep paste off the heating elements? Baking soda’s alkalinity can corrode exposed elements and shorten their life, and paste caked on them can burn and smell the next time you cook. They also rarely collect grime, so there is no benefit to justify the risk. Wipe around them carefully instead. Is commercial oven cleaner ever the right call? Yes, mainly for racks and heavy carbon that soaking and scrubbing cannot touch. Treat it as a targeted tool: gloves on, windows open, label followed to the letter. The same clean-first mindset health authorities apply to surfaces, as in the CDC’s cleaning guidance, applies here: remove the bulk physically before any chemical does the fine work. Prefer Someone Else Does It? An overnight paste is easy, but a full kitchen reset is a bigger job. Toronto Shine Cleaning’s deep cleaning service takes on kitchens top to bottom, and recurring maid service keeps them that way. A deep studio or one bedroom clean starts at $270.38 before HST, with every option listed on the pricing page. Call (647) 424-0355 and let the oven be our problem.

How to Clean Your Oven Quickly and Efficiently: A Step-by-Step Guide Read More »

Clean kitchen with a plant at the table

How to Organize and Clean Your Kitchen Efficiently

Start With a Clear Slate: Declutter First A kitchen cannot be cleaned efficiently while every surface is buried, so decluttering comes first. Begin with the countertops: remove everything, appliances, jars, and decor, and wipe the bare surface as you go. Warm water with mild dish soap handles most countertop materials, and a baking soda paste, gently applied and wiped away, lifts tougher stains. Then make each item earn its place back: do you use it daily, is it functional, does it even belong in the kitchen? Fewer objects mean faster wipe downs and more room to cook. The cabinet crusade Give your cabinets a proper block of time. Empty them, lay the contents out in view, and keep a box ready for donations and discards. Daily items move to easy reach; occasional items migrate to higher shelves or the back. Wipe the empty interiors with an all purpose cleaner or a vinegar and water mix, and condition wooden cabinets with a wood cleaner. Group like with like as things go back, baking supplies in one zone, pots and pans in another. Clean From the Top Down Dirt falls, so clean in the direction gravity is already working. Start at the highest points: cabinet tops, the refrigerator top, and upper shelves, where dust quietly accumulates. A microfiber cloth or an extendable duster picks dust up instead of scattering it. Near the stove, where grease glues grime to cabinet tops, switch to warm soapy water or a natural one part vinegar to one part water solution. Then descend level by level to shelves and counters, and any debris that dropped earlier still gets swept up in a later pass. Finish with the deep cleaning zones nobody enjoys: under the sink and behind small appliances. Give Every Appliance a Deep Clean Appliances collect grease, food particles, and residue that quietly hurt performance and lifespan. Each one rewards a specific approach: Refrigerator: remove food and shelves, wash the interior with one tablespoon of baking soda per quart of water to clear odors and stains, then clean the rubber door seals and exterior. Oven: apply an oven cleaner per the product instructions, or spread a baking soda and water paste and leave it overnight before wiping. Degrease the stovetop and control panels. Microwave: heat a bowl of water with lemon juice for a few minutes and let the steam loosen hardened grime so it wipes right off. Dishwasher: run it empty with a specialized cleaner or a cup of vinegar to clean and deodorize. Small appliances: unplug toasters, blenders, and coffee makers first, then run a vinegar water mix through the coffee maker and wipe toasters and blenders with a damp cloth. Because kitchens are where food is handled, the CDC food safety prevention tips are a smart companion to appliance cleaning, and Health Canada’s household products guidance covers safe use of the cleaners themselves. Store Smarter With Containers and Labels Containers turn a chaotic pantry into a system. Clear, airtight containers for pasta, rice, and cereal let you see contents without opening anything, keep food fresher, and stack neatly to use vertical space. Choose square or rectangular shapes, which fit together without dead gaps, and pick glass for health and durability or BPA free plastic when weight and breakage matter more. Labeling multiplies the benefit. Write the item name plus the date stored or the expiry date on every container, especially leftovers in the fridge and anything in the freezer, where forgotten food turns into freezer burn and waste. A label maker, a marker, or chalkboard labels all work. Labeled spice jars end the rummage through lookalike containers and add a professional touch. Fridge and Freezer Reset Sweep the fridge and freezer for expired items often, checking dairy, meat, leftovers, and frozen goods; clearing them protects food safety, sharpens meal planning, and cuts waste. Turn the sweep into a wipe down with a water and baking soda mix, and give the freezer a gentle defrost if needed. Then restock by category: a shelf for dairy, crispers for vegetables, the door for condiments, and bins in the freezer grouped by vegetables, meat, and ready meals so nothing gets buried. Stackable containers keep leftovers visible in both. Tame the Small Stuff Utensils and spices are minor objects with major clutter potential. Spread utensils out and sort honestly, keeping what you use, in good condition, and without duplicates, then corral winners in drawer organizers or a countertop holder. For spices, choose alphabetical order or frequency of use, with daily jars out front. Cabinet door racks, tiered shelves, and drawer inserts keep jars visible, and uniform jars beat mismatched packets. The Routine That Holds It Together Frequency Tasks Payoff Daily Dishes, wipe counters and stovetop after cooking, sweep floors Mess never accumulates into a weekend project Weekly Mop, clean microwave and dishwasher inside and out, wipe cabinet fronts, refresh counters and backsplash Grease and grime stay thin and easy Monthly Clean oven, defrost and wipe freezer, organize the pantry, deep clean the fridge, hit cabinet tops and under sink Long term maintenance without a crisis clean Four habits keep the routine alive: be consistent so tasks never balloon, involve the whole household so the load stays light, keep supplies organized and within reach, and stay flexible enough to adapt the schedule when life happens. Add Personal Touches Last A clean kitchen should also feel like yours. Herbs add greenery and snippable flavor, succulents suit anyone without a green thumb, and artwork, family photos, colorful towels, or a distinctive light fixture turn everyday items into decor that fits your theme. Frequently Asked Questions How do I clean laminate or stone countertops safely? Stick to warm water with mild dish soap for routine cleaning and a gentle baking soda paste for stubborn spots. Skip abrasive scrubs and harsh acids, which dull laminate and etch many natural stones. What is the fastest way to clean a smelly fridge? Empty it, wash shelves with one tablespoon of baking soda per quart

How to Organize and Clean Your Kitchen Efficiently Read More »

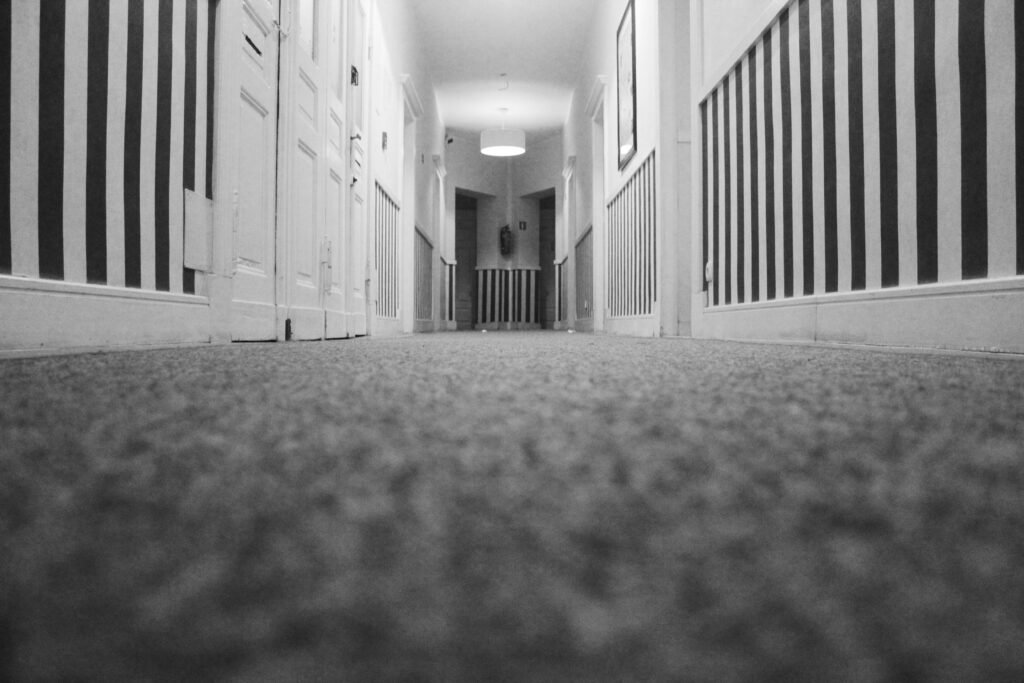
Vision from the ground of a corridor with carpet

How to Keep Your Carpets Looking New: Expert Advice on Carpet Care

How to Keep Your Carpets Looking New: Expert Advice on Carpet Care Carpets add warmth, comfort, and style to a home, but they also collect dust, dirt, and allergens with every step. Without regular care, fibers flatten, colours fade, and stains set in. The good news is that properly maintained carpets can last for years, even decades. This expert guide covers the routines that keep your carpets looking new, from daily habits to periodic deep cleaning. Why Carpet Care Matters Carpet fibers trap dust, pet dander, and other particles that settle into the pile. Left alone, that buildup dulls the look of the carpet and can affect the air you breathe indoors. Health Canada’s overview of indoor air contaminants explains why controlling dust and allergens in the home matters, and regular vacuuming is the single most effective way to keep them from building up in your flooring. Vacuum on a Schedule That Matches Your Household A good vacuum makes all the difference. Look for strong suction and rotating brushes that lift dirt from deep within the fibers. If you have pets, choose a model designed for pet hair and dander, and consider a HEPA filter, which traps fine particles and allergens instead of recirculating them. How often you vacuum depends on your household: Household type High-traffic areas Entire carpet Homes with pets or kids Every couple of days At least once a week Less busy homes As needed Weekly Empty the canister or change the bag regularly, because a full vacuum loses suction and picks up less dirt. Handle Spills by Blotting, Not Rubbing Spills happen, and how you react in the first minutes decides whether a stain sets. Keep a clean, absorbent cloth or paper towels handy, and blot gently. Rubbing pushes the stain deeper into the fibers, so resist the urge to scrub. For tougher stains, use a quality carpet cleaner or spot remover matched to your carpet type, whether that is a pet-stain formula, a heavy-traffic formula, or a gentle option for delicate carpets. Always test the cleaner on a small, inconspicuous area first to make sure it does not cause discolouration, and follow the product instructions. Deep Clean Carpets Periodically Even with diligent vacuuming, embedded dirt accumulates over time. A carpet cleaner machine injects a mix of water and cleaning solution into the fibers, loosens the dirt and grime that have settled deep down, then extracts the dirty water along with the loosened soil. It is an effective way to refresh your carpet at home, provided you choose a solution suitable for your carpet’s material and colour and spot-test first. Professional deep cleaning goes a step further. Powerful equipment and specialized solutions remove deeply embedded dirt and address specific problems like pet odours, tough stains, and delicate fibers. Toronto Shine Cleaning’s deep cleaning services give carpets the thorough treatment they need to stay fresh and last longer. Prevent Wear With Mats, Rugs, and Smart Habits Prevention is cheaper than repair. A few simple habits protect your carpet every day: Place mats and rugs at entrances, hallways, and in front of sofas, where foot traffic is heaviest. Choose durable mats with non-slip backing that are easy to clean. Vacuum the mats regularly, and deep clean them with a mild detergent or carpet cleaner when they get dirty. Spot-test any cleaner in an inconspicuous area before applying it to the full carpet. These first-line defenses absorb the brunt of daily wear so your main carpet stays vibrant underfoot. Build a Carpet Care Routine That Lasts Caring for your carpet is not complicated, but consistency matters. Vacuum on a schedule, blot spills the moment they happen, deep clean periodically, and protect high-traffic zones with mats. The payoff is a carpet that stays soft, colourful, and comfortable for years. If the job feels overwhelming, or you simply prefer to leave it to the professionals, Toronto Shine Cleaning can handle all your carpet care needs. A regular maid cleaning visit keeps daily dust in check, and our pricing page shows transparent base rates before HST. To keep your carpets looking new without lifting a finger, call (647) 424-0355 or browse our customer reviews to see why local homeowners trust us. Health Canada’s healthy living resources are a helpful reminder that a clean, comfortable home supports your family’s well-being, and well-cared-for carpets are part of that picture. Frequently Asked Questions About Carpet Care How often should I vacuum my carpets? In homes with pets or kids, vacuum high-traffic areas every couple of days and the entire carpet at least once a week. In less busy households, a weekly vacuum of the whole carpet usually keeps fibers clean and fresh. Should I rub a spill to clean it up? No. Rubbing pushes the stain deeper into the carpet fibers. Blot gently with a clean, absorbent cloth or paper towel, working from the outside in, and use a carpet cleaner matched to your carpet type for tougher stains. Can I deep clean my carpets myself with a machine? Yes. A carpet cleaner machine injects water and cleaning solution into the fibers, then extracts the dirty water along with loosened dirt. Choose a solution suited to your carpet’s material and colour, and spot-test in an inconspicuous area first. How long do carpets last with proper care? With regular vacuuming, prompt spill treatment, periodic deep cleaning, and protective mats in high-traffic zones, carpets can stay in great shape for years, even decades, instead of wearing out and needing early replacement.

How to Keep Your Carpets Looking New: Expert Advice on Carpet Care Read More »