Mental Health

apartment cleaning oakville

Does Indoor Air Quality Affect Your Health? How to Improve Your Home’s Indoor Air Quality

The Air Inside May Be Dirtier Than You Think Air pollution conjures images of smog and smokestacks, yet the air inside your home can be as polluted as outdoor air, sometimes worse. Carpets, pets, candles, cleaners, and even fresh paint all feed pollutants into the rooms where you sleep and eat. Understanding what floats through your indoor air, and what quietly does damage, is the first honest step toward breathing better at home. Why Indoor Air Quality Matters for Your Health Hidden pollutants in plain sight Your cozy living room hosts a quiet cast of airborne troublemakers. Dust mites flourish in bedding, upholstered furniture, and carpets. Pet dander from beloved animals circulates freely and provokes allergy symptoms. Mold colonizes bathrooms and kitchens wherever moisture lingers, releasing spores that irritate the respiratory system. And volatile organic compounds, or VOCs, given off by paints, finishes, and scented products, evaporate at room temperature and have been linked to headaches, dizziness, and other problems. A round the clock exposure Toronto winters and summers keep us indoors for most of the year, so every waking and sleeping hour is an hour of breathing whatever your indoor air contains. For allergy and asthma sufferers, that constant exposure can mean symptoms that never fully let up, while everyone else may absorb a slow, unnoticed toll. The CDC asthma resources explain how indoor triggers such as dust mites, pet dander, and mold factor into asthma attacks and how reducing them eases daily life. The long term account Poor indoor air rarely announces itself immediately. Years of consistent exposure can worsen respiratory conditions, contribute to chronic respiratory disease, and, as research suggests, even affect cardiovascular health. The air in your home is quietly booking charges against your lungs and heart. Let Fresh Air In Opening windows remains the simplest upgrade available: fresh outdoor air dilutes and displaces pollen, dust, and chemical residues trapped indoors. Pair it with exhaust fans in kitchens and bathrooms, the two humidity and odor hotspots of any house. Cooking releases particles and gases worth ejecting quickly, and steamy bathrooms invite mold and mildew, so running the fan during meals and hot showers cuts moisture and removes harmful cooking byproducts before they settle. The combination costs almost nothing and changes how your rooms feel within an afternoon. Clean in a Way That Helps the Air Cleaning is not only cosmetic; it is air management. Dust carries pet dander, pollen, and dust mite debris, all classic allergy triggers, so regular dusting and vacuuming pull them out before they resuspend. A quality vacuum, preferably fitted with a HEPA filter, matters because fine particles pass straight through weaker machines and blast back into the room. Vacuum carpets, rugs, and upholstery consistently to keep the allergen load low. Your product choice shapes air quality too. Many conventional cleaners release VOCs with every spray, so switching to natural, non toxic options protects the very air you are trying to clean. A vinegar, baking soda, and lemon juice rotation handles most household jobs safely. Health Canada’s page on household chemical safety offers practical guidance on reading labels, ventilating while you clean, and storing products properly. Green It Up, Mind Your Moisture Plants such as spider plants and peace lilies absorb common indoor pollutants, including formaldehyde, benzene, and trichloroethylene, through their leaves and roots, and they photosynthesize away carbon dioxide while releasing oxygen along the way. Both species shrug at neglect, making them realistic companions for busy households rather than guilt trips in pots. Moisture control does the heavier lifting. Dehumidifiers extract excess water from the air, denying mold the damp it needs and making life uncomfortable for dust mites as a bonus, especially in basements, laundry rooms, and bathrooms. Equally critical is fixing leaks the day you find them, whether from pipes, roofs, or window seals, because a small unchecked drip matures into a full mold problem and structural damage. Filter, Purify, and Renovate Wisely Your HVAC system circulates all your indoor air through its filters, where dust, pollen, and dander collect until the filter clogs and effectiveness collapses. Swapping filters on schedule keeps captured pollution out of your lungs. Air purifiers add a second line of defense: units with HEPA filters scrub microscopic particles from the air they cycle, and they earn their keep in bedrooms, where sleep hours add up, and in high traffic living areas. Renovations deserve forethought as well. Traditional paints, adhesives, and finishes off gas VOCs for a long time after the work ends. Choosing low VOC products preserves your indoor environment, and ventilating during the project, with doors and windows open and fans pushing air outward, plus continued airflow afterward, minimizes your exposure while materials cure. Your Indoor Air Action Plan Pollutant or Trigger Where It Hides What To Do Dust mites Bedding, upholstery, carpets Weekly HEPA vacuuming and dusting Pet dander Furniture, soft furnishings, airborne Regular vacuuming plus purifiers in bedrooms Mold spores Bathrooms, kitchens, leak sites, basements Exhaust fans, dehumidifiers, prompt leak repair VOCs Paints, finishes, conventional cleaners Low VOC products, natural cleaners, ventilation Cooking fumes Kitchen air and surfaces Run the exhaust fan whenever you cook Small habits keep the air honest between deep cleans: Open windows on opposite sides for ten minutes a day Run exhaust fans while cooking and showering Vacuum carpets and upholstery weekly with a HEPA filter Dust with a damp cloth so particles do not resuspend Check HVAC filters monthly during heating season Frequently Asked Questions How often should HVAC filters be changed? Check monthly and change at least every few months, more often with pets or during heavy heating and cooling seasons. A clogged filter both stops trapping particles and strains your system. Do houseplants really purify air? Plants such as spider plants and peace lilies absorb pollutants like formaldehyde, benzene, and trichloroethylene through leaves and roots, and they add oxygen through photosynthesis. They help, though they work slowly, so treat them as a pleasant supplement to ventilation and filtration rather than a replacement. What humidity
Does Indoor Air Quality Affect Your Health? How to Improve Your Home’s Indoor Air Quality Read More »

How to Prevent Cold and Flu with Natural Cleaning Solutions

Hey there! To Prevent Cold and Flu with Natural Cleaning, it’s super important to keep our homes clean and germ-free. But, guess what? You don’t need to rely on harsh chemicals to do the trick. Natural cleaning solutions can be just as effective in keeping those pesky germs at bay. Let’s dive into how you can use natural solutions to prevent cold and flu in your cozy nest. Why Go Natural? First and foremost, natural cleaning solutions are kinder to your skin. We’ve all been there – using a strong cleaner only to end up with irritated hands. Natural options, on the other hand, are much gentler. This means you can clean away without worrying about harsh reactions, which is especially great if you have sensitive skin. But it’s not just about you! If you have little ones scampering around or furry friends lounging on your floors, you’ll love that natural cleaners are safer for them too. Kids and pets are often more sensitive to the harsh chemicals found in many standard cleaning products. By switching to natural alternatives, you’re creating a safer environment for the entire family. Imagine your kiddos playing on floors cleaned with gentle ingredients or your pets cozying up on freshly cleaned carpets that don’t have any harsh residues. It’s all about creating a safe and healthy space for everyone. Now, let’s talk about Mother Earth. We all want to do our part in keeping our planet happy and healthy, right? Well, natural cleaning solutions are a great step in that direction. They’re eco-friendly, which means they’re kinder to the environment. When you wash away these natural cleaners, you’re not sending harsh chemicals down the drain and into our water systems. It’s a win-win for your home and the environment. Another cool thing? You probably have most of these natural cleaning superheroes in your kitchen right now! That’s right – items like vinegar, lemon, and baking soda aren’t just for cooking; they’re also powerful cleaning agents. This means you can start your natural cleaning journey without a trip to the store. It’s convenient, effective, and kinder to your wallet too. The Magic of Vinegar So, what makes vinegar so special? It’s all about the acidity. Vinegar is known for its acidic nature, which is a nightmare for germs and viruses. This acidity isn’t just good for adding zing to your salad dressing; it’s also what gives vinegar its germ-killing superpowers. When you use vinegar as a cleaning agent, it works hard to break down grime, cut through grease, and yes, kill those pesky germs that can lead to colds and flu. Now, how do you transform vinegar into a cleaning superhero? It’s super simple. Take equal parts of water and white vinegar, mix them in a spray bottle, and there you have it – a natural disinfectant ready to tackle germs in your home. This mixture can be used on a variety of surfaces where germs love to lurk. Think kitchen counters, bathroom surfaces, doorknobs, and even your smartphone screen. But here’s the best part: it’s so easy to make and use. You don’t need to be a DIY guru to mix water and vinegar. Plus, it’s a cost-effective solution. Vinegar is way cheaper than most store-bought cleaners, and since you’re diluting it with water, a little goes a long way. You’re not only keeping your home clean; you’re also being kind to your wallet. Another bonus? You’re avoiding the strong, sometimes overwhelming scents that come with many commercial cleaners. While vinegar does have a distinct smell, it dissipates quickly, leaving you with a clean, fresh space without any lingering chemical odors.     Lemon: Not Just for Lemonade Why are lemons such a big deal in the cleaning world? It’s all about their high acidity. Just like vinegar, the acidic nature of lemons makes them a natural enemy for germs and viruses. When you’re trying to keep your home free from cold and flu bugs, lemons are your trusty allies. They can kill bacteria and leave your house not just clean, but also smelling fresh and citrusy. So, how do you turn lemons into a cleaning solution? It’s as easy as pie (or should I say, lemon pie?). Squeeze some lemon juice, mix it with a bit of water, and you’ve got yourself a natural disinfectant. This lemon-water mix is perfect for wiping down those areas where germs love to hang out. Think kitchen countertops, where you prepare all your meals, or doorknobs, which everyone touches multiple times a day. Even your bathroom surfaces can benefit from a lemony clean, leaving them not just germ-free but also with a refreshing scent. One of the coolest things about using lemon as a cleaner is the scent factor. Unlike some cleaners that can be harsh on your nose, lemons leave a light, refreshing citrus aroma. This makes cleaning a more pleasant experience and leaves your home smelling naturally fresh. Plus, there’s something incredibly satisfying about knowing you’re using a natural, biodegradable substance to keep your home clean. And let’s not forget, lemons are also great for tackling tough stains and bringing out natural shine. Got a stubborn stain on your countertop? Lemon juice to the rescue! Want to add some sparkle to your faucets or sink? Rub them with a lemon wedge and watch them shine. Essential Oils: Smells Good and Cleans Too! So, why are these particular oils so great for cleaning? Well, it turns out, nature has equipped them with properties that are tough on bacteria and viruses. For instance, tea tree oil is known for its powerful antiseptic properties. It’s like that tough-on-germs cleaner but without the harsh chemicals. Eucalyptus oil, on the other hand, isn’t just for helping you breathe easier when you have a cold; it’s also great for wiping out germs. And then there’s lavender, the all-rounder, known for its calming scent and its ability to fight off bacteria. Now, how do you use these oils in cleaning? It’s pretty

How to Prevent Cold and Flu with Natural Cleaning Solutions Read More »

How to Rejuvenate Your Home After the Holidays: Winter Maintenance Guide

Close the Holidays Out Properly Winter has settled in, the festivities are memories, and your home is quietly asking for a reset. Post holiday cleanup is about more than tidiness: it is how you start the new year with order instead of tinsel in every corner. The guide below moves through decoration storage, tree disposal, room by room deep cleaning, kitchen recovery, and the winter safety checks that keep the rest of the season calm. Un deck the Halls with Care Take the decorations down when you are ready, not when guilt says so. When you do begin, start with small items like ornaments and tinsel, and finish with the lights, which cause the most grief a year later. Wrap each strand around a piece of cardboard before storing it, the simplest trick known for preventing the tangled knot that ambushes you next December. As each item packs away, give it a quick inspection: dead bulbs, chipped ornaments, and tired ribbon are easier to replace now than in a panic on December 20th. Send the Tree Off Well Removing the tree closes the season’s chapter, and in Toronto and surrounding areas, municipal tree recycling programs give it a second life as mulch instead of landfill. Before your tree joins that program, strip it completely: every ornament, every strand of tinsel, every light. Adornments jam the chippers, so set the tree out as bare and natural as the forest made it. Deep Clean the Living Spaces The living room hosted the gift openings and movie marathons, so return its calm deliberately. Vacuum carpets and floors thoroughly, then chase the hiding places: under couch cushions where popcorn kernels and cookie crumbs have taken residence. Dust the shelves and entertainment centre, and wipe down every surface guests touched. The dining area earned the feast, so go past the table and chairs to the room’s corners, sideboards, and serving tables, treating wine and gravy splashes while they are still young, and finish with floors still marked by dropped food and scuffs. The kitchen, command centre of every baking marathon, needs a full scrub: countertops, stovetop, and oven crying out after weeks of use; a fridge cleared of leftovers that overstayed the season, with shelves wiped; and the sink, faucet, and a cleaning cycle on the faithful dishwasher. Freshen Every Floor Vacuuming is the first line of defence, and it deserves a thorough pass: move furniture, work the corners, and reach under the sofa and between cushions for the festive debris. The CDC cleaning guidance supports exactly this order of operations: clean visible messes first, then disinfect high touch zones. Then mop hardwood, tile, and laminate with a cleaner suited to that floor type, lifting sticky spills and restoring the shine celebrations dulled. Carpeted areas reward a deeper intervention: steam cleaning pulls grime and allergens deep from the fibres, lifting stubborn stains and odours, and leaving carpet softer and brighter than a routine vacuum achieves. Tackle the Kitchen Appliances The oven worked hardest, so start there. Built up grease and burnt food are not merely ugly; lingering residue is a fire hazard and a drag on efficiency, so run the self cleaning cycle or apply oven cleaner with elbow grease. Next, empty the refrigerator entirely, wipe the interior, check expiration dates while you handle each item, and reorganise as you restock, which cuts waste and keeps groceries visible. Give the smaller helpers their moments too: descale the coffee maker, wipe the microwave, and run the dishwasher’s cleaning cycle. Finally, clear the pantry, discard anything expired, wipe the shelves, and rearrange staples around how you actually cook. Refresh the Guest Rooms Guests left; their fingerprints on the peace of the room should not. Strip and wash the linens, sheets, pillowcases, and blankets, resetting the room hygienically for whoever sleeps there next. Dust thoroughly, because bedroom dust is an allergen question, and reach past the obvious to nightstands, dressers, window sills, and headboards. Finish with a full vacuum, pulling trapped dust from carpet fibres and leaving those satisfying lines that read as a clean room in one glance. Prepare for the Rest of Winter Post holiday maintenance looks forward as much as back. Icy walkways are a genuine hazard, so stock salt or ice melt now, ready for the next deep freeze, because ice underfoot is a safety issue, not a convenience; Health Canada’s household chemical safety tips also cover keeping these products away from children and pets. Inspect snow tools before you need them; a cracked shovel found mid snowfall is a bad morning. In heavy snow zones, watch the roof, clearing accumulation regularly with a roof rake to avoid damage, and keep gutters clear of ice and debris so water drains instead of forming ice dams that push moisture into the house. Three winter checks worth doing before the next storm: Restock salt and ice melt now, not during the storm Test shovels, roof rakes, and scrapers while it is mild Swap the furnace filter so heated air keeps moving The Post Holiday Checklist Task What It Involves Why Now Decorations down Ornaments, tinsel, cardboard wrapped lights, damage check Prevents tangles and December panic Tree recycling Strip all decorations, set tree out bare Keeps Toronto recycling programs working Floor refresh Vacuum deep, mop hard surfaces, steam clean carpets Remains of feasts and traffic are still fresh Kitchen reset Oven, fridge, dishwasher, descale, pantry Residue is a hazard and wastes food Winter proofing Salt stock, shovel check, roof snow, clear gutters Safety before the next storm, not after Frequently Asked Questions When should holiday lights come down? Anytime the season feels finished, but sooner rather than later if lights stayed up for weeks, since heat and time make bulbs brittle and wires stiff. Wrap each strand around cardboard as it comes down and storage is solved at the same moment. What do I do with a real Christmas tree in Toronto? Use your city’s tree recycling program, common across Toronto and surrounding areas, which turns

How to Rejuvenate Your Home After the Holidays: Winter Maintenance Guide Read More »

Family putting up a Christmas tree

How to Achieve a Sparkling Clean Home this Holiday Season

A Sparkling Clean Home This Holiday Season Holiday prep means lights, gifts, parties, and a home that suddenly looks like real life happened. Instead of scrubbing in a panic the night before guests arrive, a little planning turns the whole project into a series of small, easy wins. Here is how to get your home guest ready without losing your mind, and when it makes sense to hand the messy parts to a deep cleaning service. A clean home in December is not only about impressing company. It is about walking into a calm, uncluttered space after a long day of shopping and cooking. Break the work into manageable chunks, one room per day, and the season stays fun instead of frantic. The goal is not perfection; it is a warm space where memories get made. Countdown: A Week by Week Holiday Cleaning Plan Spreading the work out is the single biggest stress killer. Use this simple timeline. When Focus Time needed Three weeks out Declutter every room, wash windows, dust high and low 2 to 3 hours Two weeks out Deep clean kitchen appliances, bathrooms, and carpets 3 to 4 hours One week out Launder guest bedding, wipe cabinet fronts, polish fixtures 2 hours Day before guests Quick vacuum, fresh towels, scent the kitchen 45 minutes Morning after Clear plates, spot mop, reset the living room 1 hour Declutter Before You Scrub Decluttering sets the stage, like priming a canvas before you paint. Walk into each room with fresh eyes and pull out anything that does not belong in your holiday story: the pile of magazines, the summer clothes still in the closet, the mystery drawer contents. Every item you remove is one less surface for dust to settle on and one less obstacle when you vacuum. Then reorganize what stays. Summer gear moves under the bed or into storage bins, and that junk drawer finally gets a system. Less clutter means decorations shine brighter and cleaning goes faster. Deep Cleaning, Room by Room The kitchen Your kitchen becomes mission control for the season. Start with the appliances: scrub the oven, microwave, and stovetop so they are ready for heavy use. Clear and polish the countertops for food prep, then mop the floors, which will soon see constant traffic between the stove and the table. Because food safety matters most when everyone is cooking together, the CDC food safety guidance on keeping prep areas clean is a good reminder. The living room Dust every shelf, mantel, and corner so decorations take center stage instead of dust bunnies. Clean the windows to let in winter light and the glow of outdoor displays. If you have a fireplace, give it the attention it deserves so it becomes the warm heart of the room. Finish with a thorough vacuum or mop. Bedrooms and bathrooms For overnight guests, fresh linens are a must; they look inviting and smell clean. In the bathroom, aim for five star hotel level: sparkling mirrors, spotless countertops, and a gleaming tub or shower. A quick word on hand hygiene never hurts during party season either, and the CDC clean hands guidance explains why washing beats wiping when it comes to stopping germs. Don’t Skip the Little Details Scent: simmer a pot of water with cinnamon sticks, orange peels, and cloves for a natural holiday fragrance, or layer candles and essential oil diffusers so the aroma feels warm instead of one note. Decorations: ornaments have sat in storage for a year, so dust them gently with a soft cloth or feather duster and wipe down light strings so they shine brighter. Inspection: while unwrapping decor, check for damage and repair or replace anything that cannot be saved. Maintenance: Keeping It Clean Through the Chaos Once the deep clean is done, daily upkeep can stay small and smart. Sweep high traffic floors, wipe kitchen counters and the dining table, and handle spills before they set. After guests leave, do a quick reset: gather plates, glasses, and utensils, run the dishwasher, vacuum where people clustered, and touch up the bathroom. Ten minutes now saves a painful hour the next morning and keeps your home inviting for the next gathering. Get the Whole Family Involved Kids love to help when cleaning feels like a game. Try a toy scavenger hunt: whoever puts away the most toys in a set time gets to choose the evening holiday movie or the bedtime story. A sticker chart for finished tasks, leading to a small weekly reward like a treat or an extra half hour of playtime, keeps momentum going. Assign jobs by strength; the organizer handles closets while the vacuum fan takes the floors. Working side by side turns a chore into memory making. When to Call in the Pros Professional deep cleaning is your holiday rescue team, handling everything from bathrooms and kitchens to carpets, upholstery, and the places you cannot reach. Toronto Shine Cleaning deep cleans start at $270.38 for a studio or 1BR and run to $441 for a 3BR and $527.63 for a 4BR, all before HST; current rates are on our pricing page. If your calendar is packed, regular cleaning keeps the home guest ready all season, with studio and 1BR visits from $212.63 and 2BR at $273. Every visit is bonded and insured under a $1,000,000 policy, and neighbours can vouch for the results on our reviews page. Holiday Cleaning FAQ How many days before the holidays should I deep clean? Start the big work two to three weeks ahead so nothing is rushed. Focus on appliances, bathrooms, floors, and hidden dust early, then save simple touch ups like vacuuming and fresh towels for the final day. This spacing keeps the house sparkling through several gatherings without a second full scrub. What is the fastest way to make my home smell festive? Simmer water with cinnamon sticks, orange peels, and cloves on the stovetop for a natural, layered scent. Follow up with candles or an essential oil diffuser

How to Achieve a Sparkling Clean Home this Holiday Season Read More »

Office window cleaning by men surrounded by plants

Green Cleaning: How to Make an Easy Eco-Friendly Cleaning

Hey there, fellow Green Cleaning freaks! Are you tired of harsh chemicals that leave your home smelling like a science lab? Well, guess what? You can keep your space sparkling clean and be kind to Mother Earth at the same time. Welcome to the world of green cleaning! It’s not just a trend; it’s a lifestyle shift that’s good for you, your home, and the planet. Let’s dive into how to make eco-friendly cleaning a part of your everyday routine. Why Go Green in Your Cleaning Routine? Before we jump into the “how,” let’s talk about the “why.” Traditional cleaning products are often loaded with chemicals that can be harsh on your skin, respiratory system, and the environment. When you use them, they can release volatile organic compounds (VOCs), which contribute to indoor air pollution and can be tough on our lungs. Ever felt a bit dizzy or had a headache after a big clean? Those could be the chemicals talking! But that’s not all. These chemical-laden cleaners can have a lasting impact on our environment too. When they wash down the drain, they can end up in our waterways, affecting aquatic life and even coming back to us in our water supply. Not a pretty picture, right? Switching to green cleaning means you’re choosing products that are safer for you and the planet. These eco-friendly options are usually made with plant-based, biodegradable ingredients that break down harmlessly in the environment. Plus, they’re often free from artificial fragrances and colors, which is great news for those with allergies or sensitivities. And here’s a bonus: green cleaning can be kinder on your wallet in the long run. Many green cleaning products are concentrated, so a little goes a long way. Or, if you’re into DIY solutions, you can whip up effective cleaners with inexpensive, everyday items like vinegar and baking soda. Easy Eco-Friendly Cleaning Swaps When it comes to green cleaning, there are so many simple swaps you can make that have a big impact. Let’s start with DIY cleaners. You might be surprised by the cleaning power of items you already have in your pantry. White vinegar, for example, is a natural disinfectant and great at cutting through grease and grime. Baking soda is another hero in the DIY cleaning world. It’s fantastic for scrubbing and neutralizing odors. And let’s not forget lemon juice, which not only leaves a refreshing scent but also has natural antibacterial properties. You can use these ingredients separately or mix them to create a variety of cleaners for different purposes. Now, if you’re not the DIY type, no worries! The market for eco-friendly cleaning products has exploded in recent years. More and more brands are focusing on creating products that are both effective and kind to the planet. When shopping for these products, look for ones with biodegradable ingredients and packaging. This means they’ll break down naturally without harming the environment. Many of these products also avoid harsh chemicals, making them safer for use around kids and pets. Another swap is replacing your paper towels with microfiber cloths. Microfiber cloths are a game-changer in cleaning. They’re incredibly effective at trapping dirt and dust, and the best part is they’re reusable. Just toss them in the wash and they’re good as new, reducing waste and saving you money in the long run. Essential oils are a great addition to your green cleaning arsenal. They not only add a natural and pleasant scent to your homemade cleaners but also come with their own cleaning benefits. For instance, lavender and citrus oils have natural antibacterial and antiviral properties, making them great for homemade disinfectants. Plus, using essential oils allows you to customize the scent of your cleaners to suit your mood or preference. Lastly, consider your scrubbing tools. Instead of reaching for plastic scrubbers, choose brushes made from natural materials like bamboo or sisal. These materials are sustainable and biodegradable, and they work just as well, if not better, than their plastic counterparts. They’re also more durable, so you won’t have to replace them as often.     Tips for a Successful Green Cleaning Routine Embarking on a green cleaning journey can be both exciting and a bit overwhelming, but don’t worry, I’ve got some more tips to help you along the way. Start Small: You don’t need to do a complete 180 on your cleaning routine overnight. It’s okay to start small. Maybe swap out your all-purpose cleaner or dish soap with a greener alternative and see how it goes. As you get comfortable, you can gradually replace more products. This approach not only eases the transition but also allows you to test what works best for you and your home. Read Labels: When shopping for commercial green cleaning products, reading labels is key. Not all products marketed as “green” or “natural” are created equal. Look for certifications like EcoLogo or Green Seal, as these indicate that the product meets certain environmental standards. Also, be cautious of vague terms like “eco-friendly” or “green” without any specific information, as these can sometimes be misleading marketing tactics. Recycle and Reuse: Green cleaning isn’t just about the products you use; it’s also about reducing waste. Get creative with what you already have. Old t-shirts and towels can be cut into cleaning cloths, and old toothbrushes are perfect for scrubbing grout and other tight spaces. This not only saves you money but also keeps these items out of landfills. Stay Informed: The world of green cleaning is always evolving. New products and methods are constantly being developed. Stay informed about the latest trends and breakthroughs. This could be as simple as following a few eco-friendly blogs, joining online communities, or subscribing to newsletters that focus on sustainable living. Consider the Whole Product Lifecycle: Think about a product’s impact from production to disposal. For example, products with minimal packaging or those made from recycled materials have a lower environmental footprint. Also, consider the energy used in producing the product and whether

Green Cleaning: How to Make an Easy Eco-Friendly Cleaning Read More »

Tesla, Electricity, Future

Revolutionizing Cleanliness: How Technology is Shaping the Cleaning Industry

Revolutionizing Cleanliness: How Technology Is Reshaping Cleaning Cleaning is no longer just mops and buckets. Robot vacuums glide across floors while you sleep, apps schedule whole weeks of chores, and sensors monitor the air you breathe. The industry has shifted from task driven work to technology driven routines, and the payoff is homes that stay cleaner with less effort. Here is what is actually changing, what it does for your health, and how to decide which upgrades earn their place in your Toronto home. Smart Devices Are Already Here Modern robotic vacuums are past the era of bumping into furniture. They map your home, learn the layout over time, and figure out which rooms collect the most dirt. Sensors detect changes in floor type, so the robot adjusts its method on the fly, switching modes between carpet and hardwood. Smart mops follow the same logic with built in water tanks that dispense the right amount of moisture, so floors come out clean without being soaked. Beyond floors, smart air purifiers read air quality in real time and ramp up filtration automatically when dust or pollen spikes, with smartphone integration that lets you check and control the air from anywhere. Companion apps tie it together: they schedule cleaning sessions, remind you to rinse filters or restock supplies, and can act as a single control hub for your whole cleaning arsenal. Eco Friendly Solutions: Green Is the New Clean The green shift is every bit as real as the robot one. Biodegradable, plant based cleaning agents break down naturally instead of sending harsh chemicals down the drain after you cut kitchen grease or bathroom grime. Energy efficient appliances play a role too: vacuums with eco modes draw less power, and washers use less water and energy while still performing. Waste reducing tools like microfiber cloths replace disposable wipes and paper towels because they trap dust effectively and go straight in the wash for repeated use. Water conservation rounds it out, from steam cleaners that need surprisingly little water to smart irrigation that waters garden beds just enough. Before you mix any cleaner at home, Health Canada’s guidance on household chemical safety is worth a skim, even for gentler products. Green upgrades that earn their keep Biodegradable, plant based cleaners that break down without polluting waterways and marine life Reusable microfiber cloths in place of disposable wipes and paper towels Appliances with eco modes that draw less power and water, trimming both your footprint and utility bills Rechargeable, longer-lasting batteries that cut hazardous disposable battery waste AI and Robotics: Not Just Sci-Fi The real change is systems that learn and adapt instead of just following a timer. AI in cleaning devices analyzes patterns in your household, such as which zones dirty fastest or when you prefer quiet, then optimizes schedules around them. Picture a robot that does a quick kitchen sweep after the morning rush and stays out of the living room during your evening wind down. AI also powers personalized tips, maintenance reminders for your gadgets, and restock alerts, making the whole routine more effective and tailored. For anyone who finds traditional cleaning physically taxing, including people with mobility issues, this automation removes the heavy lifting of hefty vacuums and unwieldy mops. Why This Matters for Your Health High tech cleaning reaches microscopic particles that routine methods miss, which matters most for allergy and asthma households. Vacuums with HEPA filters trap the fine particles that trigger symptoms, actively improving the air rather than just moving dust around; the CDC asthma resources cover how allergen control eases symptoms. UV-C light sanitizers, once limited to medical settings, now bring chemical-free disinfection of surfaces, gadgets, and even air into ordinary homes. Smart sensors add a proactive layer, prompting purifiers to boost or flagging high-touch zones for regular sanitizing of doorknobs and countertops. Moisture control completes the picture: dehumidifiers and smart ventilation hold humidity in a range that discourages mold, and the CDC mold health page explains why damp air is a health issue, not a smell issue. Choosing Tech That Earns Its Keep Not every gadget fits every home. Match the tool to your actual friction points. Device What it does Best for Robot vacuum Maps rooms, adapts to floor types, cleans autonomously Pet hair and daily maintenance Smart mop Dispenses measured moisture for sticky messes Hard floors that show every spill Smart air purifier Monitors air quality and adjusts filtration live Allergy and asthma households HEPA vacuum Traps fine particles traditional bags recirculate Carpets, upholstery, deep cleans Steam cleaner Sanitizes with minimal water, no chemicals Eco conscious tile and grout care Where Professionals Fit in a Smart Home Gadgets handle maintenance; people still win at transformation. A pro crew brings commercial-grade tools plus judgement about which surface needs which product, something no app substitutes yet. Toronto Shine Cleaning pairs that expertise with modern equipment for both regular cleaning visits, from $212.63 for a studio or 1BR and $273 for a 2BR, and full deep cleaning projects from $270.38 for a studio or 1BR. See what fits your budget on the pricing page, all rates before HST, backed by a $1,000,000 insurance policy. Cleaning Technology FAQ Do robot vacuums replace a real vacuum? For daily upkeep, largely yes, since they hold floors to a consistent baseline. You will still want a capable upright or stick with a HEPA filter for carpets, edges, upholstery, and the deep passes robots miss. Think of the robot as preventing mess buildup rather than performing deep cleaning. Are HEPA filters worth the extra cost? If anyone in your home has allergies or asthma, usually yes. HEPA filtration traps the fine particles that trigger symptoms instead of exhausting them back into the room, which supports cleaner air between professional visits and daily dusting. Are eco-friendly cleaning products as effective? Modern plant-based formulas handle everyday grease, grime, and soap scum well, and microfiber cloths boost mechanical cleaning with less product. For disinfecting during illness, follow label directions on an approved disinfectant

Revolutionizing Cleanliness: How Technology is Shaping the Cleaning Industry Read More »

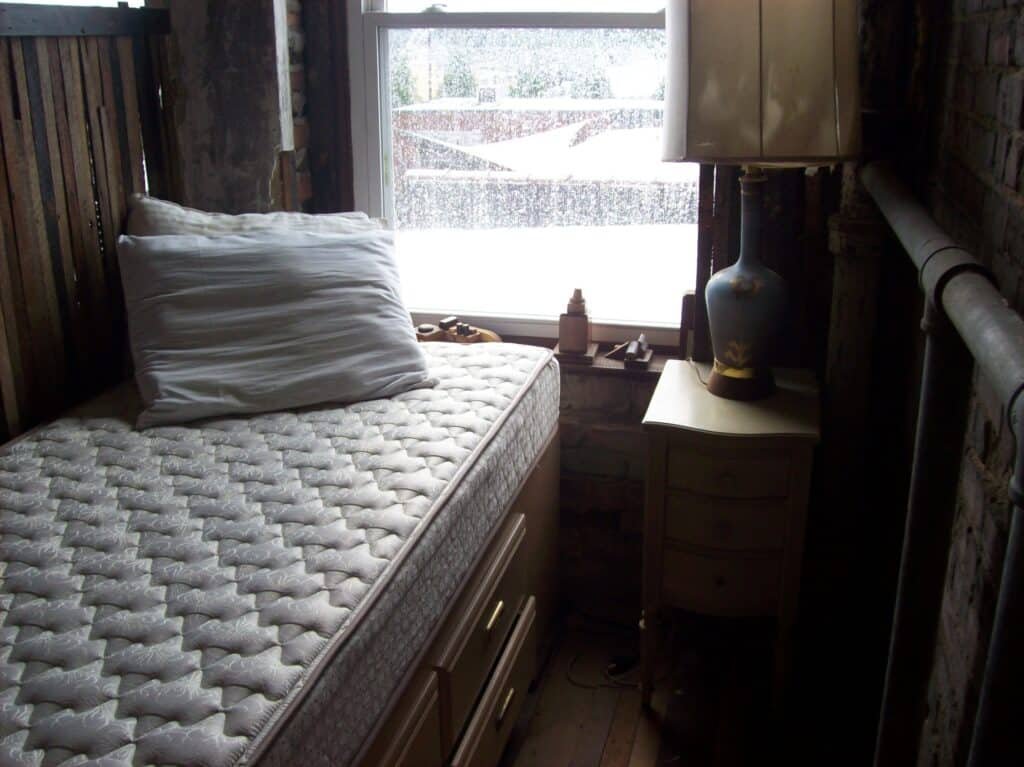
Small bedroom, snowing

How to Deep Clean Your Mattress for a Better Night’s Sleep

How to Deep Clean Your Mattress for a Better Night’s Sleep You spend about a third of your life asleep, and during those hours your mattress collects sweat, body oils, dust, dead skin cells, and the occasional food crumb from a late-night snack. Over time these accumulations turn a comfortable bed into a breeding ground for dust mites and allergens that can disturb your sleep and aggravate respiratory issues. A thorough deep clean every six months changes that, keeping your mattress fresh, extending its life, and helping you fall asleep in a truly clean environment. Why Mattress Deep Cleaning Matters Think of your mattress as a giant sponge. It absorbs whatever comes into contact with it: perspiration, oils, and moisture from the body, plus airborne dust and pollen that settle into the fabric. Dust mites, microscopic creatures that feed on shed skin cells, thrive in this environment, and their presence can trigger allergies and asthma symptoms in sensitive individuals. Health Canada notes that dust mites live in beds, carpets, and upholstered furniture and that keeping dust levels down reduces exposure to potentially harmful substances. Beyond the health angle, a clean mattress simply feels better. The surface stays smooth and odor-free, and you avoid the stale, musty smell that develops when bedding goes too long without attention. What You Need Before You Start Vacuum cleaner with an upholstery attachment Baking soda (a generous box or bag) Mild laundry detergent Cold water in a spray bottle or bowl Clean cloths (microfiber or soft cotton) Optional: a few drops of lavender or eucalyptus essential oil for a relaxing scent Step-by-Step Mattress Deep Clean Step 1: Strip the bed and vacuum Remove all sheets, pillowcases, and mattress protectors and toss them into the wash. With the mattress bare, run the upholstery attachment over the entire surface, paying close attention to seams, crevices, and tufts where dust and debris settle. Go over each area multiple times, especially if you have not cleaned the mattress in a while. A thorough vacuum lifts the bulk of loose dust, skin cells, and allergens before you tackle stains. Step 2: Spot-clean stains with cold water Mix a small amount of mild detergent with cold water. Hot water can set certain stains, making them harder to remove, so stick with cold. Dip a clean cloth into the solution and dab the stain gently. Do not scrub, which pushes the stain deeper into the padding, and do not soak the mattress: excess moisture can lead to mold and mildew growth inside the core. For tougher, stubborn stains, sprinkle a layer of baking soda over the area and let it sit for a few hours. Baking soda acts as a natural absorbent and deodorizer, pulling the stain and odor out of the fabric. The CDC warns that mold grows wherever moisture accumulates, so keeping the mattress as dry as possible during cleaning is essential. Step 3: Deodorize with baking soda Once the stains are treated, sprinkle a generous, even layer of baking soda over the entire mattress surface. If you want a calming scent, add a few drops of lavender or eucalyptus essential oil to the baking soda and mix it through before sprinkling. Let the baking soda rest for several hours, or ideally the whole day. During this time it absorbs lingering odors, residual moisture, and any remaining oils that the vacuum did not lift. Step 4: Vacuum everything off After the baking soda has done its work, vacuum the entire surface again using the upholstery attachment. Every granule of baking soda needs to come off, because any left behind creates a gritty texture that makes the bed uncomfortable. Run the attachment over seams, tufts, and edges where the powder settles. This final pass also lifts any dust or allergens that re-settled during the deodorizing process. Step 5: Air it out in sunlight If your living situation allows it, move the mattress outside to a balcony, patio, or backyard. Direct sunlight acts as a natural disinfectant: UV rays help kill bacteria and microorganisms that survived the cleaning process, and fresh air ventilates the padding to remove the last traces of moisture. Keep an eye on the weather a sudden rain shower can undo your work. If moving the mattress outdoors is not practical, place it in a well-ventilated room near an open window for several hours. Step 6: Add a mattress protector After the mattress is completely dry, cover it with a mattress protector. A fitted-sheet-style cover guards the top surface, while a full-zip encasement wraps the entire mattress for complete protection against spills, dust mites, and allergens. Homes with young children, pets, or allergy sufferers benefit most from full encasement. Wash the protector regularly like your sheets to keep it fresh. Mattress Maintenance at a Glance Task Frequency Benefit Strip and vacuum mattress Every six months with deep clean Removes dust, allergens, and skin cells Spot-clean stains As soon as they appear Prevents permanent marks and odors Deodorize with baking soda Every six months Absorbs odors and residual moisture Air out in sunlight Every six months Natural disinfectant and ventilation Wash mattress protector With regular laundry Keeps the barrier clean and effective Mattress Deep Cleaning FAQ How often should I deep clean my mattress? A full deep clean every six months is the standard recommendation. More frequent cleaning may be needed if you have allergies, asthma, or pets that share the bed. Why should I use cold water instead of hot for stains? Hot water can set certain stains, especially protein-based ones like sweat or blood, locking them into the fabric. Cold water lifts the stain without fixing it. Can I use vinegar or hydrogen peroxide on my mattress? Vinegar and peroxide are sometimes used for stain removal, but they can damage some mattress fabrics or leave a strong smell. The safest method for most mattresses is mild detergent with cold water and baking soda. Is professional deep cleaning worth it for a mattress? A regular at-home clean handles

How to Deep Clean Your Mattress for a Better Night’s Sleep Read More »

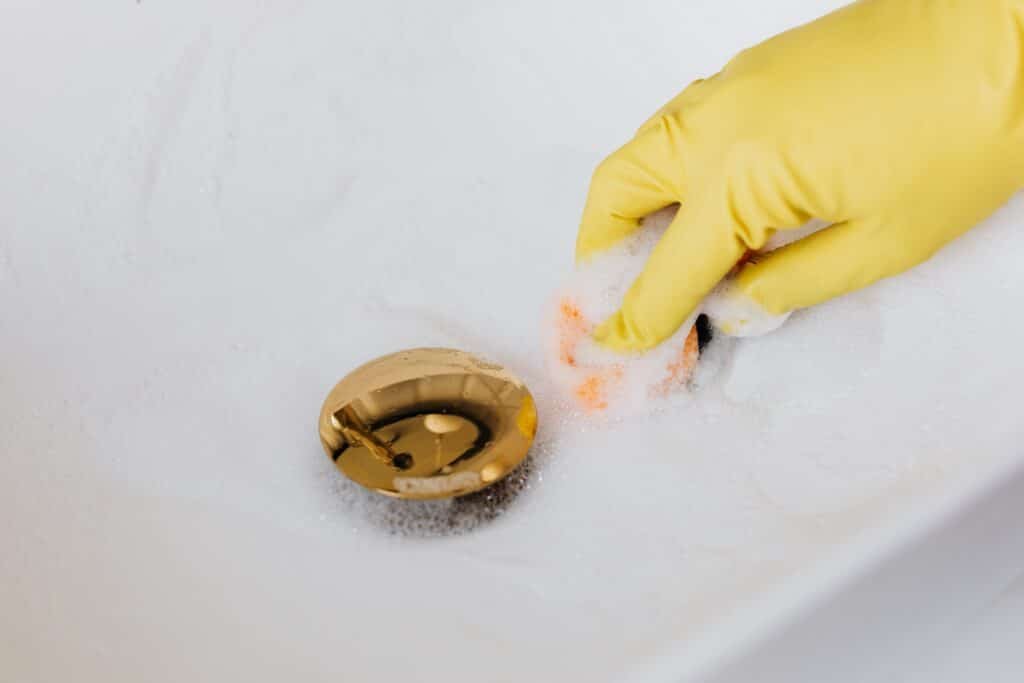
Drain being cleaned, yellow cleaning gloves, foam

Easy Drain Change: DIY Cleaning and Maintenance for Your Sink

Hey there! Let’s dive into the world of DIY Drain Change, specifically focusing on that all-important task – changing and cleaning your drain. Trust me, it’s easier than you think and can save you a lot of hassle (and maybe even a call to the plumber!). So, grab your rubber gloves, and let’s get started! Why Bother with DIY Drain Maintenance? You’re probably thinking, “Why should I fiddle with the drain when I can easily call a professional?” I get it, but hear me out. Tackling drain maintenance yourself is not just about fixing a current issue. It’s about being proactive. Regular maintenance of your sink drain can prevent those dreaded clogs that sneak up on you at the least convenient times. Think about it – no more standing water in the sink when you’re rushing to get dishes done. But it’s not just about clogs. Regularly cleaning and maintaining your sink drain reduces wear and tear. This means your plumbing stays in better shape longer, saving you money in the long run. Plus, let’s not forget about odors. A well-maintained drain means a fresher-smelling kitchen or bathroom, and who doesn’t want that? Beyond the practical benefits, there’s something satisfying about rolling up your sleeves and taking care of your home. It’s empowering to know you can handle these tasks yourself. Plus, it’s a great skill to have – you never know when it’ll come in handy. Whether it’s a simple clean-up or a full drain change, DIY maintenance gives you a sense of accomplishment. You’re not just a homeowner; you’re a home caretaker, and there’s something genuinely rewarding about that. Tools You’ll Need Plunger: Always handy for minor clogs. Pipe Wrench or Pliers: For those tighter fittings. Drain Snake or Wire Hanger: Perfect for fishing out debris. Bucket: To catch any water or gunk. Rubber Gloves: Keep those hands clean! Baking Soda OR Vinegar: The dynamic duo for natural cleaning.   Step-by-Step Guide to Changing Your Sink Drain When it comes to changing your sink drain, it may seem like a task reserved for the pros, but with the right approach, it’s definitely something you can handle yourself. Here’s a more detailed walk-through of each step: Turn Off the Water: This is your first and most crucial step. Before you even touch the drain, ensure the water supply is off. This step is all about safety and preventing any unexpected water flow while you’re working. Locate the valves under your sink and turn them off – this is usually a simple twist. Remove the Old Drain: Next up, it’s time to remove the old drain. This is where your tools come into play. Grab your wrench or pliers, and gently loosen the fittings that hold the drain in place. It’s important to be patient and careful here to avoid damaging your sink. Once everything is loose, lift out the old drain. You might find this step a bit tricky if the old drain is stubborn, but with a bit of elbow grease, it’ll come right out. Clean the Area: Now that the old drain is out, you’ll probably notice some gunk or residue around the sink opening. This is the perfect time to clean it up. Take a cloth and some cleaning solution – you can even use that trusty baking soda and vinegar mix – and thoroughly clean around the area. This ensures that your new drain has a clean, smooth surface to adhere to. Install the New Drain: Here’s where things get a bit more technical, but don’t worry, it’s nothing you can’t handle. Start by applying plumber’s putty around the new drain – this helps create a watertight seal. Then, place the drain into the opening in your sink. From below, you’ll need to tighten it to secure it in place. This might require a bit of contorting under the sink, but think of it as part of the DIY adventure. Reconnect and Test: You’re almost there! Reconnect any pipes that were disconnected during the process. Once everything is snugly in place, it’s time to turn the water back on and test your handiwork. Turn on the tap and watch the water flow. What you’re looking for here is a smooth drain and no leaks. If everything looks good, congratulations – you’ve just successfully changed your sink drain! Through these steps, you not only fix a potential problem but also gain a deeper understanding of how your home works. It’s a great feeling to know you can rely on your own two hands to keep your home in tip-top shape. Cleaning and Unclogging Your Drain Unclogging and cleaning your drain doesn’t always require harsh chemicals or professional help. Here’s a revised approach that swaps out the boiling water solution for something different, yet just as effective: The Plunger Method: Begin with the simplest tool – the plunger. It’s often the most immediate and effective way to deal with a clogged sink. Ensure enough water in the sink to cover the plunger’s head, creating the necessary suction. Press down firmly and then pull up sharply. Repeat this action several times. The pressure created by this movement can dislodge most minor clogs, making the plunger an invaluable tool in your DIY plumbing arsenal. Salt, Baking Soda, and Warm Water: Replace the boiling water with a more gentle warm water solution. Start by mixing half a cup of salt with half a cup of baking soda. This combination creates an abrasive mixture that can break down gunk and grime. Pour this mixture down the clogged drain. Follow it with about two liters of warm water. The warmth helps to dissolve any residues, and the salt and baking soda work together to scrub away the clog. This method is particularly effective for maintenance and for unclogging drains that don’t respond to plunging. Using a Drain Snake or Wire Hanger: For those stubborn clogs that resist other methods, it’s time to get physical. Use a drain snake or a straightened

Easy Drain Change: DIY Cleaning and Maintenance for Your Sink Read More »

Warm and confortable winter, book, christmas

How to Master Winter Cleaning: Essential Tips for a Warm and Welcoming Home

How to Master Winter Cleaning: Tips for a Warm and Welcoming Home Winter brings muddy boots, extra layers, snow day chaos, and far more hours spent indoors. You do not have to put your cleaning routine into hibernation just because it is cold outside. With a few clever strategies, your home can stay as inviting as a warm hug all season. Why Winter Cleaning Matters More Than You Think Winter cleaning is not about tidiness for its own sake. It is about creating a sanctuary where you can escape the cold and actually relax. With windows sealed and everyone indoors, a routine also keeps germs and dust from quietly building up: fewer sick days and a space that feels warm instead of closed in. Start the Season with a Deep Clean The best way to get ahead of winter is one thorough deep clean before the cold fully settles in. Focus on the rooms that carry the season: kitchen, bathrooms, and living spaces. Then hit the spots a normal wipe down skips, because that is where winter grime hides. Under and behind furniture, where dust layers build unnoticed Tops of cabinets and high shelves and corners of rooms Behind appliances, which collect crumbs and pet hair all year Baseboards, doors, and window sills that trap tracked-in dirt If a whole-home scrub feels overwhelming, a professional deep cleaning service handles it fastest; ours start at $270.38 for a studio or 1BR and run to $527.63 for a 4BR, before HST, listed on our pricing page. Build a Regular Schedule You Can Keep Consistency beats heroics. A routine stops chores piling into an overwhelming weekend marathon by splitting work into bite-sized chunks: dusting on Monday, vacuuming on Wednesday, laundry on Sunday. Tailor it to your house; a busy kitchen may need a five minute daily tidy while quieter rooms only need a weekly pass. Day Winter task Minutes Monday Dust surfaces, frames, and reachable corners 20 Wednesday Vacuum entryway, halls, and high traffic rooms 25 Friday Mop kitchen and bathroom floors, wipe appliance handles 20 Sunday Laundry, mail sorting, and a clutter sweep 30 Focus on High Traffic Areas Winter dirt follows the footpaths, so spend effort where boots land. The entrance is your first line of defense: sweep, vacuum, or mop it often, and place a sturdy doormat both outside and inside the door. The living room collects crumbs, pet hair, and dust on coffee tables and media consoles, so a daily quick pass keeps it welcoming. In the kitchen, wipe counters daily, handle spills immediately, and never ignore appliance fronts and handles. Don’t Forget the Windows Clean windows do double duty in winter: they let in more of the season’s scarce natural light, which brightens mood and makes rooms feel warmer, and washing them gives you a chance to inspect. Look for drafts around frames, which signal insulation problems that push up heating bills, and for condensation trapped between panes, a sign of seal failure worth catching early. Use a squeegee or microfiber cloth with a gentle solution and clean both sides. If weather or upper floors make the exterior unsafe, leave that to professionals. Declutter Before the Cabin Fever Sets In More time indoors means mail, magazines, and toys multiply on every surface. Handle mail the moment it arrives, sorting into urgent, later, and recycling. Give reading materials one basket and clear it weekly. For toys, labeled bins and a designated play zone make pickup faster. Clear surfaces also mean dusting and vacuuming take half the time. Protect Your Floors and Your Air Snow, salt, and grit are hard on finishes. Use the dual mat system at every entrance, a scraping mat outside and an absorbent mat inside, and ask everyone to remove shoes at the door. Vacuum and mop regularly to lift the salt that sneaks past, use a cleaner suited to your flooring type so you do not strip finishes, and dry wood floors well after mopping. Sealed windows also trap airborne dust, so air care belongs on the winter list. Dust and vacuum often with a HEPA filter vacuum that captures dander and pollen, run an air purifier sized for your most used room, and change forced-air heating filters before they clog. Counter dry indoor air with a humidifier to ease scratchy throats and static; because damp problem zones invite growth, the CDC mold health guidance is a useful reference for keeping humidity sensible rather than excessive. Choose Products Wisely for Closed-Up Homes With less ventilation in winter, harsh chemical fumes hit harder. Eco-friendly, non-toxic products clean effectively while being gentler on skin, eyes, and airways, which matters in homes with kids, pets, or asthma. Pantry options like vinegar, baking soda, and lemon tackle many tasks for pennies. Match products to surfaces regardless; what suits tile can damage a hardwood finish, and Health Canada’s household chemical safety resources explain label precautions worth following. Handle the Post-Holiday Reset When the festivities end, clean decorations before storage: dust ornaments, wipe decor, and make sure everything is dry. Pack in clear, labeled bins, use wreath containers and ornament dividers for fragile pieces, and wind lights on a reel or cardboard so they never tangle again. Then book a regular cleaning visit to reset the house while you keep the cocoa. Plan for Cozy Finish by layering warmth. Soft, golden light from table lamps, string lights, or dimmers makes rooms feel snugger than overhead brightness. Candles in cinnamon, vanilla, or pine add calm and scent. Fleece, velvet, and chunky knit throws and cushions bring texture and literal warmth to the spaces you just cleaned. Winter Cleaning FAQ How often should I clean during winter? Aim for small daily touches in the kitchen and entryway, a short scheduled task a few times a week, and one fuller session on weekends. That rhythm stops salt, dust, and clutter from compounding and keeps occasional deep cleans short. Why do my windows get condensation in winter? Warm indoor air meets cold glass and

How to Master Winter Cleaning: Essential Tips for a Warm and Welcoming Home Read More »

DIY cleaning with spray and cloth

Regular Cleaning: 6 Tips on How to Maintain a Sparkling Home Easily

Regular Cleaning: How to Maintain a Sparkling Home Easily Tired of weekends disappearing into chores? Regular cleaning is the answer, and it is simpler than it looks. Think of it as basic maintenance, like brushing your teeth: small habits that prevent the big, daunting mess. Here are six proven tips, and when to hand the routine to regular cleaning services. What Regular Cleaning Actually Means Regular cleaning covers the recurring basics: dusting, vacuuming, mopping, wiping surfaces, and tidying. It is more than running a vacuum once a week; it means keeping surfaces free of dust and grime, floors clean, clutter contained, and out-of-sight zones like under beds and atop cabinets in the rotation. Stay current and the occasional deep clean becomes a quick refresh instead of a months-long recovery. It is also health work, not vanity. Dust and crumbs attract pests and hurt air quality, and everyday buildup is a common trigger for allergies and breathing irritation; the CDC asthma resources explain how a low-dust home eases symptoms. There is a mental payoff too: a clean, orderly space lowers background stress, and a set schedule makes the whole system self-sustaining. Tip 1: Create a Cleaning Schedule Divide and conquer. Break tasks into slots so each gets attention without everything colliding into one marathon. Dedicate Monday to dusting surfaces, frames, and reachable corners, Tuesday to vacuuming, and so on. Then bend the plan to your energy: if you are freshest early in the week, schedule bathroom scrubbing and mopping then, and save light tidying for when you are tired. Consistency turns tasks into habits, and habits keep a home sparkling with almost no willpower. A sample weekly rhythm Day Focus Realistic time Monday Dust shelves, frames, and edges 20 minutes Tuesday Vacuum floors, rugs, and upholstery 25 minutes Wednesday Bathroom wipe down and mirror polish 15 minutes Thursday Kitchen surfaces, sink, and appliance fronts 15 minutes Friday Mop hard floors and tidy entryway 20 minutes Weekend Declutter sweep and laundry 30 minutes Tip 2: Declutter with the Five-Minute Rule Fewer items mean fewer things to clean around, and less visual noise. The Five-Minute Rule makes decluttering painless: each day, spend just five minutes on one small zone, a drawer, a countertop section, a shelf. Sort into keep, toss, and donate. Anyone can find five minutes, and you will be surprised what clears in that window. Over weeks the effect compounds, and dusting goes faster when surfaces are already clear. Tip 3: Invest in the Right Tools The right gear cuts time, not just effort. Microfiber cloths: trap dust and dirt better than traditional rags, work dry or damp, and leave surfaces residue free and streak free. A quality vacuum: modern models with attachments reach under furniture and along baseboards, and HEPA filtration captures fine particles that stir up allergies. A floor-matched mop: for homes with lots of hard flooring, a good mop and bucket or a steam mop is invaluable. Compact multi-function tools: ideal for smaller spaces with limited storage. Quality tools cost a little upfront, save money and frustration long term, and make cleaning pleasant enough that you keep the routine. Tip 4: Tidy as You Go Small habits beat big sessions. Make your bed each morning; one act instantly neats the room and sets the tone. Wash dishes right after use instead of letting piles grow. Put things back where they belong the moment you are done. Use dead time cleverly: wipe the counters while the coffee brews, clear the table and sweep crumbs after meals. This works best as a household effort; even young kids can pick up toys or help set the table, spreading the load and teaching life skills. Tip 5: Don’t Forget the Small Stuff The difference between clean and truly clean lives in the details. Touch points, doorknobs, light switches, remote controls, and appliance handles, get handled constantly and collect germs, so wipe them on a regular cycle with a disinfectant; the CDC cleaning and disinfecting guidance helps you decide what to clean versus disinfect. Then the quiet dust traps: room corners, baseboards, tops of doors, windowsills, and picture frames, plus behind and under furniture. An extendable duster and a vacuum nozzle attachment make these areas a two minute job instead of a scavenger hunt. Tip 6: Lean on Natural Cleaning Products Vinegar, baking soda, and lemon carry a shocking amount of the workload, cheaply and without harsh fumes. Vinegar: its acidity cuts grease, removes soap scum and hard water deposits, and cleans glass; diluted with water it becomes a capable all-purpose spray for counters and ceramic tile, and citrus peels or essential oils can infuse it for scent and power. Baking soda: a gentle abrasive for tough stains, grout, and polishing metal; combined with vinegar it helps unclog drains, and as a natural deodorizer it freshens carpets, upholstery, and refrigerators. Lemon juice: natural antibacterial and antiseptic properties for kitchen surfaces, plus stain treating, metal polishing, and brightening laundry whites. Natural options also reduce the risk of skin and respiratory irritation, a real plus in homes with children and pets, and Health Canada’s household products guidance covers safe storage and labeling even for gentler cleaners. When to Hire It Out Six good tips still assume you have the hours. If the schedule keeps slipping, professional maintenance is the honest fix. Toronto Shine Cleaning visits start at $212.63 for a studio or 1BR, $273 for a 2BR, and $327 for a 3BR before HST, with every rate on our pricing page, and a full deep clean available when you want to reset everything at once. We are bonded and insured, with a $1,000,000 policy and $10,000 accidental breakage and surety bond. Regular Cleaning FAQ How long does regular cleaning take each day? With the rhythm above, expect 15 to 30 focused minutes plus five minutes of decluttering. The point is frequency over duration: short daily touches prevent the Saturday marathon entirely, and once habits land, most tasks happen almost mindlessly. Is regular cleaning the

Regular Cleaning: 6 Tips on How to Maintain a Sparkling Home Easily Read More »