Mental Health

organizing child's wardrobe

Organizing Your Child’s Closet – Stop Making These Mistakes

A child’s closet can quickly become a zone of chaos. It starts with a few misplaced shirts and, before you know it, transforms into a jumble of clothes that may or may not fit, single shoes, forgotten toys, and mystery items that defy categorization, all crammed into the child’s closet. Restoring order to a child’s closet is not just about making it look tidy; it’s about creating a functional system that a child can understand and, most importantly, help maintain. The goal is to move from a space that causes daily frustration to one that simplifies routines, from dressing in the morning to cleaning up at night. 1.Empty Everything The first, and often most overwhelming, step is to pull everything out of the child’s closet. Every single item must be removed from the child’s closet and placed in an open area, like the middle of the bedroom floor. This includes every piece of clothing, every shoe, every belt, every long-forgotten stuffed animal, and every piece of sports equipment tucked into a corner of the child’s closet. The initial sight of this pile will likely be daunting. It will look significantly worse before it gets better. This is a necessary part of the process. It allows you to see the true volume of what you’re dealing with and prevents you from simply rearranging clutter. Before you begin, have four distinct containers ready: large bags or boxes labeled Keep, Donate, Trash, and Outgrown. This preparation prevents you from having to make decisions about where things go mid-sort. With the closet completely empty, you can begin the sorting process. This is a critical stage that requires ruthless honesty. Pick up each item one by one and make a decision. For clothing, ask a series of questions. Does it currently fit the child? If the answer is no, it does not belong back in the child’s closet. Is it stained, ripped, or damaged beyond reasonable repair? If so, it belongs in the “Trash” bag. Is it in good condition but simply isn’t worn? Perhaps the fabric is itchy, the style is disliked, or it’s for an occasion that never arises. These items, along with clothes in good condition that are too small, can go in the “Donate” box.   2.Boxes The “Outgrown” box serves a specific purpose for families planning to have more children or who have younger relatives to pass things down to. This is for high-quality items that are too small but are worth saving. Be selective here. Only keep the best of the outgrown items; otherwise, you are simply shifting clutter from one storage area to another. Once this box is full, label it clearly with the sizes and season (e.g., “Boys Clothes, 3T, Summer”) and store it away from the primary closet space, perhaps in the attic, basement, or a storage bin under a bed. Involving the child in this sorting phase can be beneficial, but it must be managed carefully. For a very young child, their involvement might be minimal. For a child old enough to have opinions, their input is valuable for items in the “Keep” pile. You can ask, “Do you still love wearing this shirt?” This gives them a sense of control and ownership over their belongings. However, be prepared to make the final executive decision on items that are clearly too small or damaged. Avoid asking questions like, “Do you want to get rid of this?” as the answer will almost always be no. Frame it differently: “Let’s put this in the donation box so another little boy who needs a coat can stay warm.” This reframes the act from one of loss to one of generosity. Once the sorting is complete and the piles have been dealt with trash taken out, donations placed in the car to be dropped off turn your attention to the now-empty child’s closet. Do not skip this step. This is your chance to create a truly clean slate. Wipe down every surface within the child’s closet: the shelves, the hanging rod, the walls, and the baseboards. Vacuum the floor of the closet thoroughly, getting into the corners. This is also the perfect time to make any small improvements. A fresh coat of light-colored paint can make a small, dark child’s closet feel brighter and larger. Consider adding a battery-operated, motion-sensor puck light if the closet is dim. This small touch makes finding things easier and the space more inviting for a child. Now, with a clean and empty space, you can design the system for the child’s closet. The single most important principle for a child’s closet is accessibility. If a child cannot reach their clothes, they cannot dress themselves independently or put their clothes away. The standard child’s closet configuration with a high shelf and a high hanging rod is designed for adults, not for children. 3.Adjust The Wardrobe Rod The most impactful change you can make in a child’s closet is to adjust the clothing rod. In many a child’s closet, this is a simple fix. If you can, lower the main rod to a height where your child can easily see and reach their hanging clothes. If you cannot move the existing rod, a simple and inexpensive solution is a closet doubler. This is an adjustable second rod that hangs from the top rod, instantly creating a lower, kid-height hanging space. This one change can be revolutionary for a child’s independence. Use this lower rod for their everyday clothes: shirts, dresses, and jackets. The higher, original rod can then be used for out-of-season items, special occasion outfits, or costumes that are used less frequently. Shelving and bins are the next core components for an organized child’s closet. Children are not naturally inclined to create neat, folded stacks of clothes. Bins and baskets bypass this issue by providing a designated “home” for categories of items. Use open-top bins or baskets on the child’s closet shelves or floor for bulky items. Assign one bin for pajamas, one for

Organizing Your Child’s Closet – Stop Making These Mistakes Read More »
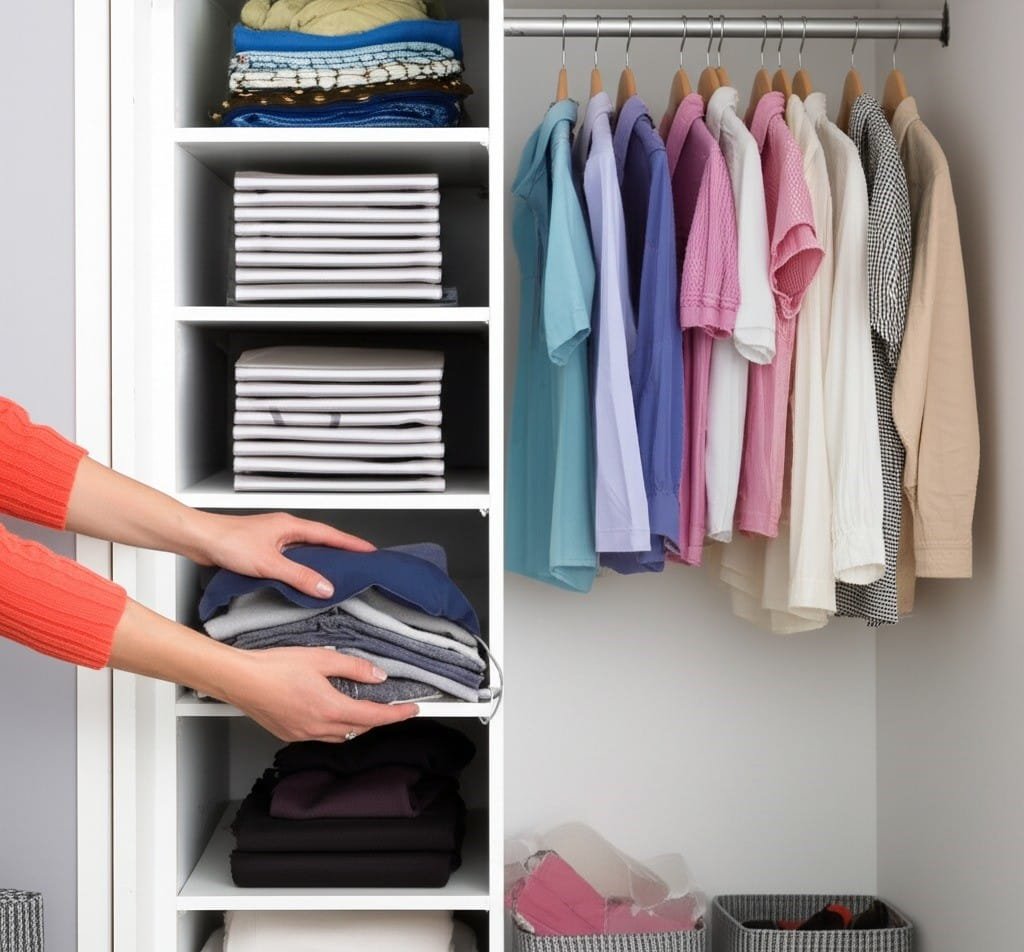
closet

How To Organize Your Closet The Easy Way – 4 Incredible Tips

How to Organize Your Closet the Easy Way: 4 Proven Tips An organized closet is not about buying matching boxes and hangers. It is a simple four-step system: empty the space, screen every item, group what remains, and maintain the result. Each step takes decision-making off your shoulders, and when it is done you will see everything you own at a glance and start each day faster. Here is the easy way to get there. Tip 1: Empty the Closet and Start Clean Set aside a real block of time, a full afternoon for most closets, and gather supplies first: heavy-duty trash bags, donation bags or boxes, a box for items needing repair, microfiber cloths, an all-purpose cleaner, and a vacuum with its crevice and upholstery attachments. Then remove everything, every garment from the rod, every shoe from the floor, every shelf and drawer emptied, and pile it all on the bed. Seeing the full volume of your wardrobe in one place is the honest reality check that makes the next step easier. With the closet bare, deep clean it from top to bottom: dust the shelves and rod, wipe walls and baseboards, vacuum corners and floor with the crevice tool. This is also the moment to inspect for dampness, mould, or pests while everything is visible, because a clean, dry closet is the only foundation worth rebuilding on. Tip 2: Screen Every Item Into Four Piles Work through the mountain one item at a time with no shortcuts, sorting into four piles: keep, donate, trash, and repair. Ask these five questions for each piece: Have I worn it in the last year? Seasonal coats and holiday pieces count, but an everyday shirt untouched for twelve months is unlikely to be worn again Does it fit me right now? Store for the body you have today, not a future size; an aspirational piece you love can live in a separate box, not your main closet Is it in good condition? Permanent stains and irreparable damage mean trash or textile recycling, never donation, while a missing button or small tear goes to the repair pile with a two-week deadline Does it match my current life and style? Jobs, seasons, and tastes change, and the wardrobe should reflect the present How does it make me feel? Clothing that itches, pinches, or makes you self-conscious is not serving you Be ruthless with duplicates, keep the best black t-shirt and the favourite pair of jeans rather than six near-identical versions, and park truly sentimental pieces in a labelled memory box instead of the active wardrobe. When the piles are done, move the trash out immediately and load the donation boxes into the car the same day, before second-guessing starts. Tip 3: Group Like With Like and Assign a Home Sort the keep pile by category, all t-shirts together, all trousers together, all dresses together, and plan the layout around how you get dressed. The eye-level, easy-reach zone is prime real estate and belongs to frequently worn items; formal wear and off-season pieces go higher or further back. Then decide what hangs and what folds. Blouses, button-downs, dresses, skirts, trousers, jackets, and blazers wrinkle easily and belong on hangers. Heavy knit sweaters stretch out when hung, so fold them, along with t-shirts, jeans, and activewear. Switch to uniform slim velvet hangers: they grip clothes that wire and plastic hangers let slip, take far less rod space, and create the clean look that makes each item visible. Hang by category, and within each category from light to dark, for faster outfit choices. For folded items, file folding changes everything. Fold each piece into a rectangle and stand it upright like a file, so every shirt is visible at a glance without digging through a stack. Drawer dividers keep socks and undergarments contained, labelled baskets or clear bins hold scarves, belts, and hats, and transparent shoeboxes and a compact rack keep footwear off the floor. Add an over-the-door organizer for extras and wall hooks for robes, purses, and daily jackets to use every inch of vertical space. Tip 4: Maintain With Simple Daily Rules An organized closet maintains itself with three habits. First, one in, one out: every new purchase means an old item is donated or discarded. Second, a five-minute reset each evening or week that returns clothes, shoes, and accessories to their homes, so nothing piles up on a chair or the floor. Third, seasonal rotation: pack off-season clothing into sealed totes stowed under the bed, on high shelves, or in another dry spot, freeing prime closet space for what you wear now. Health Canada’s dust mite guidance recommends regular washing of clothing and bedding to control allergens, and the CDC’s mould overview notes that sealed storage in dry conditions keeps fabric safe from damp and mildew between seasons. A little weekly upkeep beats another full overhaul next year. Pile Rule of thumb Destination Keep Worn recently, fits now, feels great Back into the organized closet Donate Good condition, just not for you Charity drop-off within days Trash Stained, damaged beyond repair Bin or textile recycling Repair Small fix needed Mended within two weeks Memory box Sentimental, never worn Separate labelled storage Closet Organization FAQs How long does organizing a closet take? Plan for two to four hours for a standard closet, or a full day for a large walk-in. The sorting step takes the longest, so work in focused blocks and finish the donation drop-off the same day to avoid second-guessing. Should I fold or hang my clothes? Hang anything that wrinkles easily, such as blouses, dresses, trousers, jackets, and button-down shirts, and fold heavy knits that stretch on hangers, plus t-shirts, jeans, and activewear. Uniform velvet hangers save space and stop slipping. How do I stop my closet from getting messy again? Adopt one-in-one-out for new purchases, do a five-minute reset when clothes come off, and rotate seasonal items into sealed storage bins. These habits prevent the slow accumulation that created the

How To Organize Your Closet The Easy Way – 4 Incredible Tips Read More »

Labeling Kitchen Items – 4 Easy and Fast Tips

Labeling Kitchen Items: Four Fast Tips for a Safer, Faster Kitchen A label looks like a small thing until its absence causes a big one. In any space where food is prepared, stored, or cleaned, the words on a container decide whether a meal is safe, whether groceries are used or binned, and whether a cleaner helps or harms. Without clear labeling, a kitchen drifts into guesswork, and guesswork is where allergies, spoilage, and chemical mistakes live. These four tips take minutes to set up and pay for themselves the first time someone grabs the right jar without opening it. Tip 1: Label Every Container You Decant, Contents and Allergens Included Packaging labels do the heavy lifting for you while a product is sealed: “contains” and “may contain” statements protect people with allergies to gluten, dairy, soy, peanuts, tree nuts, eggs, fish, and shellfish, and skipping that step can turn a safe meal into a medical emergency. The responsibility does not end when you open the package. Transfer flour into a pretty canister and the gluten question disappears for whoever cooks next. Every decanted container needs its contents named and any relevant allergen noted. Store regular flour and gluten-free flour apart, each labeled, and sugar and salt can never be confused again. For the rules behind those warnings, the CDC’s food safety basics explain how contamination and misidentification put people at risk. Tip 2: Track Dates So Nothing Rots in the Back of the Pantry Expiry and best-before dates are not decorative. Manufacturers set them from product stability data, and eating past an expiry date raises the odds of foodborne illness, from mild digestive upset to infections like salmonella or E. coli. On dairy, meats, and prepared foods, the date marks the window of safest consumption; on shelf-stable goods, a best-before signals peak quality, and ignoring it costs you taste, texture, and nutrients. The trouble is that dates vanish the moment you open the package, so write a fresh one. When you prep homemade sauces, stocks, or chopped vegetables, label them with the contents plus the preparation date. That habit makes a First-In, First-Out rotation possible: older items move forward, spoilage drops, and you stop guessing whether that jar is three weeks or three months old. Bonus Tip: Storage Instructions Belong on the Label “Refrigerate after opening” and “store in a cool, dry place away from direct sunlight” are not suggestions; they reflect how ingredients respond to temperature, light, and air. Copy those conditions onto your own labels so the next person does not have to find the original box. Tip 3: Treat Every Cleaner Bottle Like a Mini Safety Manual Kitchens double as chemical storage, and a cleaning label carries the active ingredients, hazard class (corrosive, irritant, flammable), first-aid steps, required gloves or eye protection, ventilation needs, and compatible surfaces. Mistaking a strong oven cleaner for dish soap can hurt a person and a countertop in the same stroke, and mixing incompatible chemicals can produce toxic fumes. Keep cleaners in their original, labeled containers. If you must decant, label the new bottle with the exact product name and dilution, store it away from food zones, and follow Health Canada’s advice on using household chemicals safely, which also covers storage and disposal. Their wider hub on household product safety lists hazards for common items from cookware to craft materials. Tip 4: Read Nutrition Panels Before You Decide What Goes in the Cart Labels earn their keep at the shopping stage. The nutrition facts panel breaks down calories, fats, carbohydrates, sugars, sodium, and protein, which matters when you manage diabetes, heart disease, or hypertension, and it lists vitamins and minerals that reveal nutrient-dense choices. Ingredient lists support vegans avoiding animal products and anyone dodging specific additives, preservatives, or artificial colors. Governments mandate this disclosure, and manufacturers face penalties and recalls for inaccuracies, so the information is legally enforced and dependable. Knowing the rules were checked for you turns a label into a trust signal. What to Label, Zone by Zone Kitchen zone What gets a label Details to include Pantry Decanted dry goods: flours, grains, spices, baking soda and baking powder Contents plus allergen note; keeps lookalikes apart Fridge and freezer Leftovers, prepped veg, stocks, sauces, opened packages Contents, prep date, use-by window, storage condition Cleaning cupboard Any decanted cleaner or diluted mix Exact product name, dilution ratio, keep-from-food warning Countertop Jars and canisters in daily use Contents so anyone can grab the right one without opening Efficiency follows safety here. When every container states what it holds and when it was made, inventory checks take minutes, prep speeds up, and cross-contamination risks shrink: a baking soda and baking powder mix-up can collapse an entire cake. Clear labeling also spreads responsibility, since everyone in a busy family kitchen can find what they need and use it safely. The habit only takes four seconds per container, and the moments that demand it repeat themselves: Right after decanting a dry good into a new canister Whenever leftovers or prepped ingredients go into the fridge As soon as an opened package hides its printed date inside Every time a cleaner gets diluted into a spray bottle A Well-Labelled Kitchen, Every Week, Without the Labor Labels handle the knowing; cleaning still has to happen. Toronto Shine Cleaning pairs a tidy, labeled kitchen with surfaces that match, through our regular maid service or a seasonal deep clean, with rates on the pricing page. Call (647) 424-0355 to book, or read what other households say on our reviews. Kitchen Labeling FAQ What information should a homemade food label carry? Name the contents, add the preparation date, note any major allergen present, and include a storage instruction such as “refrigerate” or “use within 3 days.” For freezer items, add a best-by estimate so rotation stays honest. Four short lines on masking tape covers everything anyone in the house needs. What is the difference between an expiry date and a best-before date? An expiry date marks the safety

Labeling Kitchen Items – 4 Easy and Fast Tips Read More »

How Mental Health and House Cleaning are Completely Linked

How Mental Health and House Cleaning Are Completely Linked Your home spends most of its hours absorbing your inner weather. When stress, overwhelm, or low mood take hold, mail stacks up on the counter, laundry lingers in the basket, and dust settles on surfaces you no longer have the energy to notice. When you feel calm and in control, the rooms tend to follow. That mirror is not a coincidence; it is a two-way relationship. Cleaning, often dismissed as a chore, is one of the most accessible tools available for managing how you feel, because it is physical work with visible results that feeds back into your mind. Here is the mechanics of that loop. Cleaning Restores a Sense of Control Life is unpredictable at scale. You cannot steer global events, the economy, other people, or the surprises your career and personal life throw at you, and that helplessness feeds anxiety. A home is different: it is a small, manageable universe where your actions land with direct, immediate consequences. You pick the cleaner, you put in the effort, and the floor goes from grimy to gleaming because you decided it would. Sorting a chaotic pantry or closet offers a contained problem with a clear solution, a rare thing in a world of ambiguous ones. That feeling of efficacy does not stay in the kitchen; confidence earned on a small, winnable task ripples outward into bigger challenges. The Repetitive Motion Is an Active Meditation Scrubbing, wiping, sweeping, and folding are rhythmic, and rhythm grounds a racing mind. When anxious thoughts loop over past regrets or future worries, the sensory demands of cleaning pull attention into the present: warm soapy water on your hands, the back-and-forth hum of the vacuum, the scent of lemon polish, a cloth squeaking across glass. This is a core principle of mindfulness, anchoring you in the now and granting a break from mental chatter. Focused activity lets the nervous system settle, lowering cortisol and easing physical stress signs like a rapid heart rate and shallow breathing. Stay with it and you can slip into flow, that state where time fades and you surface feeling refreshed and centered. A Finished Room Is a Dose of Dopamine Brains are wired to enjoy accomplishment. Watching a filthy, cluttered room become an orderly one through your own effort releases dopamine, the neurotransmitter tied to pleasure, motivation, and satisfaction, so the before-and-after is chemically rewarding, not merely Instagram-worthy. It is evidence of your own competence. This is why making your bed each morning shifts an entire day: it is the first completed task, the first small win that sets a precedent. Every cleared counter and polished surface reinforces capability, which cuts directly against the lethargy, apathy, and futility that depression feeds on. Clutter Charges You Rent on Your Attention The flip side is real too. Clutter is excessive sensory input: every object in view sends a signal, and a crowded room bombards the brain. Paper piles whisper about unfinished tasks, an overflowing laundry basket nags about pending chores, and the visual noise drains focus even below conscious awareness. Living like this keeps stress mildly elevated, makes relaxation hard, and steals the cognitive resources you wanted for work, hobbies, or conversation. Decluttering removes the noise and hands your mind clear space. The benefits of moving your body while you do it stack on top, which the CDC documents in its research on the benefits of physical activity, including reduced short-term anxiety and a lower risk of depression and anxiety over time. Public Health Agency of Canada resources on mental health and wellness and being active for your health make the same connection from the Canadian side. What a Tidy Space Does for Focus, Ritual, and Sleep Beyond mood, order supports performance. A desk buried in old mugs and stray papers fractures attention, and minutes vanish hunting for a pen. A clear workspace minimizes distraction and smooths workflow, and the principle travels: a tidy kitchen makes cooking pleasant, a neat living room becomes actual rest rather than low-grade agitation. Cleaning also marks life transitions, which is why spring cleaning persists across cultures as a way to sweep out the old and make room for the new: Scrubbing after a breakup reclaims your space and closes a chapter Cleaning after an illness signals recovery and a fresh start Preparing a nursery or a home office is an act of hope and readiness Finally, there is sleep, which underpins mood regulation and cognitive function. A cluttered, dusty bedroom fights rest, while a clean sanctuary, fresh sheets pulled back, tells the brain the day is over. Waking rested makes stress easier to carry. Small Cleaning Habits and What They Give Back If you feel Try this What it returns Overwhelmed A ten-minute timer on one counter or shelf A finished task and proof you can start Anxious Rhythmic wiping or vacuuming, no phone Present-moment focus and calmer breathing Stuck or flat Make the bed, then one drawer An early dopamine win to build on Distracted Clear the desk you work at Fewer visual signals competing for attention Restless at night Tidy the bedroom before bed A cue that the day is done, better sleep If even the small version feels unreachable this season, that is exactly when outside help works best, because a professional reset removes the backlog so the habit can actually start. Toronto Shine Cleaning offers thorough, judgment-free service: a one-time deep cleaning restores the baseline, and regular maid visits keep it from sliding back, with rates on the pricing page and coverage across every GTA area listed in our locations. Mental Health and Cleaning FAQ Does a messy house mean I have a mental health problem? No. Homes get messy through busy seasons, illness, moves, and plain fatigue, and one messy weekend proves nothing. The connection runs both ways, but diagnosis belongs to professionals. If clutter consistently feels impossible to face and drains your mood for weeks, that is worth discussing with a

How Mental Health and House Cleaning are Completely Linked Read More »

cleaning professional

4 Reasons Why You Should Hire a Cleaning Service

The decision to hire a professional cleaning service is often viewed through a simple lens of cost versus convenience. Yet, the true value extends far beyond that straightforward calculation. It’s an investment in your time, your health, your peace of mind, and the longevity of your home itself. It is about reclaiming a fundamental part of your life that is quietly consumed by the endless cycle of upkeep. 1.Your Time is Precious A home is more than just a structure; it’s a sanctuary, a place of rest and reprieve from the demands of the outside world. However, the responsibility of maintaining that sanctuary can become a significant source of stress and a relentless chore. The hours spent each week scrubbing, dusting, vacuuming, and mopping are hours that are permanently lost. This is time that could be dedicated to family, personal passions, professional development, or simply the vital act of resting and recharging. When you delegate the task of cleaning, you aren’t just paying for clean floors; you are purchasing time, the single most finite and precious commodity we possess. Think of the weekend not as two days to catch up on household labor, but as two full days to live. Beyond the reclamation of time, there is the undeniable element of quality. A professional cleaner brings a level of expertise and efficiency that is difficult for the average homeowner to replicate. They operate with a systematic approach, honed over hundreds of hours in countless homes. They understand the science of cleaning which products work on which surfaces, the most effective way to remove stubborn soap scum without damaging tile, and the precise technique for leaving windows streak-free. They see the details that are often overlooked in a hurried weekly wipe-down: the dust accumulating on baseboards, the grime building up on cabinet doors, the fingerprints on light switch plates, and the forgotten corners behind furniture. 2.Trust the Cleaning Professional This professional standard is supported by professional-grade tools and supplies. While a homeowner might have a domestic vacuum and a handful of all-purpose sprays, a cleaning service arrives with a specialized arsenal. They utilize high-filtration vacuums that capture fine dust particles and allergens rather than redistributing them into the air. They use a system of color-coded microfiber cloths to prevent cross-contamination between the bathroom and the kitchen. Their cleaning solutions are often more effective and formulated for specific tasks, allowing them to work more efficiently and produce a superior result. This eliminates the need for you to research, purchase, and store a dozen different bottles of chemicals, many of which may be used infrequently or prove ineffective. This leads directly to one of the most compelling reasons to hire a service: the impact on your health. A home that looks clean and a home that is hygienically clean are two different things. Dust is not just an unsightly layer on your furniture; it’s a complex matrix of skin cells, fabric fibers, pollen, pet dander, and microscopic dust mites, all of which are common triggers for allergies and asthma. A thorough, professional dusting and vacuuming routine significantly reduces the level of these airborne irritants, contributing to better indoor air quality and easier breathing. The kitchen and bathroom are particular areas of concern. These spaces can be breeding grounds for bacteria, mold, and mildew. A professional service doesn’t just wipe down counters; they sanitize them. They have the knowledge and products to effectively disinfect toilets, sinks, and showers, tackling the invisible germs that can contribute to illness. They can identify and address areas of potential mold growth before they become a more significant problem. A consistently clean home is a healthier environment, reducing the occupants’ exposure to allergens and pathogens on a daily basis. 3.Take Care of Your Mental Health The mental health benefits are just as profound. Living in a cluttered or dirty environment has been shown to increase levels of the stress hormone cortisol. The persistent, low-grade anxiety of knowing there are chores waiting to be done can weigh heavily on the mind. Walking into a home that is consistently clean and orderly provides an immediate sense of calm and control. It removes a major source of friction and mental clutter, allowing your home to function as a true space for relaxation. The burden of the task is lifted, not just for the few hours of the cleaning itself, but permanently. You no longer have to spend your evenings thinking about when you’ll find the time to scrub the floors or clean the bathrooms. That mental energy is freed up for more important or enjoyable pursuits. For many households, cleaning is also a source of domestic conflict. Disagreements over whose turn it is to do a particular chore or differing standards of what “clean” means can create unnecessary tension between partners or family members. Outsourcing this labor removes it as a point of contention entirely. It becomes a neutral, scheduled service that maintains a consistent standard for everyone, fostering a more harmonious living environment. 4.Avoid Conflicts Furthermore, a professional service provides a level of consistency that is difficult to maintain on your own. Life gets busy. Work projects, family obligations, or simple fatigue can lead to cleaning being postponed. A week of neglect can quickly turn into two, allowing dirt and grime to become more deeply embedded and harder to remove. With a scheduled service, your home is brought back to a baseline level of clean on a regular basis-whether it’s weekly, bi-weekly, or monthly. This regular maintenance prevents the deep buildup of dirt, making the home easier to manage between professional visits and preserving the condition of your floors, fixtures, and surfaces over the long term. This proactive care can save you money on costly restoration or replacement projects down the road. There are also specific life stages and events where a cleaning service transitions from a luxury to a near-necessity. When moving into a new home, a deep clean ensures you are starting with a completely fresh, sanitized slate.

4 Reasons Why You Should Hire a Cleaning Service Read More »

preparing for the July cleaning

How to Prepare for July Cleaning: 4 Steps Fast and Easy

July Cleaning brings a unique set of circumstances to our living spaces. The longer days, increased outdoor activity, and potential for more guests mean our homes need a different kind of attention. Preparing for a thorough July Cleaning is not merely about having supplies on hand; it is a systematic approach to ensuring efficiency and effectiveness, laying the groundwork so the actual cleaning process becomes smoother and more impactful. Without proper preparation, cleaning can feel overwhelming and incomplete, like trying to build a house without first pouring a solid foundation. 1.Preparing The Mind Start by mentally preparing yourself for the task ahead. This involves more than just setting aside time; it means adopting a mindset focused on systematic action rather than sporadic effort. Acknowledge that a significant clean requires energy and focus. Break down the entire house into manageable zones or rooms. Avoid the trap of trying to tackle everything at once, which often leads to burnout and a sense of defeat. Instead, visualize the clean, organized space you aim to achieve, and let that vision guide your planning. Consider creating a simple, unwritten mental checklist or a rough written outline of areas you want to address. This helps in prioritizing tasks and ensures nothing important is overlooked. Think about who else might be able to contribute, even small tasks, as collaboration can significantly lighten the load. Hydrate well, ensure you have comfortable clothing, and think about playing some uplifting music to keep spirits high. The mental readiness is the first, often underestimated, step towards a successful July Cleaning. 2.One Room At a Time Once your mind is aligned, the next crucial step is comprehensive decluttering. This isn’t just tidying; it’s a strategic removal of anything that obstructs access or impedes effective cleaning. Clutter acts as a barrier, trapping dust, hiding spills, and making it impossible to properly wipe surfaces or vacuum floors during your July Cleaning efforts. Begin by focusing on one area at a time, perhaps starting with the most heavily used spaces like the kitchen or living room. In the kitchen, this means clearing every countertop. Move small appliances like toasters, coffee makers, and blenders. Don’t just push them aside; truly lift them, wipe the counter beneath them, and consider if they need a quick wipe-down themselves. Empty the sink of all dirty dishes and load them into the dishwasher, or wash them immediately. Go through any papers or mail that have accumulated on kitchen surfaces, sorting them into immediate action, filing, or recycling piles. Check the pantry and refrigerator for expired food items, disposing of anything that’s past its prime to prevent future messes and odors. This creates clear, unobstructed surfaces, allowing your cleaning tools to reach every corner and crevice effectively for your July Cleaning. 3.Supplies And Tools With decluttering underway, the next phase is gathering all your cleaning supplies and tools. There’s nothing more frustrating than starting a task only to realize you’re missing a crucial item or that a bottle is empty. Take an inventory of your cleaning arsenal for your July Cleaning. Do you have a sufficient supply of all-purpose cleaner, glass cleaner, bathroom cleaner, and floor cleaner suitable for your specific flooring types? Check the levels of your dish soap and hand soap. Ensure you have plenty of clean microfiber cloths for dusting and wiping, a separate set for glass, and another for bathrooms to prevent cross-contamination. Sponges, scrub brushes for tough grime, a toilet brush, and a squeegee for windows or shower doors are essential. Check the condition of your mop and bucket; do they need to be cleaned or replaced? Ensure your vacuum cleaner bags are empty or the canister is cleared, and that all attachments are readily available and free of blockages. A good dustpan and brush are also invaluable. Don’t forget protective gloves to safeguard your hands from harsh chemicals and dirty water. Have a designated cleaning caddy or bucket where you can neatly organize and transport these items from room to room, minimizing trips back and forth to the supply closet. This foresight saves valuable time and maintains momentum once the actual July Cleaning begins. Before the deep cleaning commences, there are a few immediate pre-cleaning actions that make a significant difference. First and foremost, empty all trash cans throughout the house. This prevents new odors from developing and clears the way for wiping down the bins themselves. Next, address any obvious large debris or major spills. If there’s a pile of dirt by the entryway, sweep it up. If there’s a visible spill on the kitchen floor, wipe it up immediately rather than waiting for the floor cleaning. These seemingly small actions prevent tracking dirt into other areas and save you from having to clean over existing messes during your July Cleaning. For bathrooms, consider pre-treating stubborn stains in the toilet bowl or shower with a specialized cleaner; allowing it to soak for some time will significantly reduce scrubbing effort later. In the kitchen, if your oven racks are greasy, remove them and soak them in a tub with hot, soapy water. Opening windows and doors, if the weather permits, is also an excellent preliminary step, especially in July, for an effective July Cleaning. This not only ventilates the house, dispelling stale air and potential cleaning fumes, but also helps to dry surfaces more quickly after they’ve been cleaned, which is particularly useful in humid summer conditions. Now, let’s refine the room-by-room preparation, ensuring every space is primed for optimal July Cleaning. 4.Remove Items In the kitchen, beyond clearing countertops and dealing with dishes, think about items typically stored inside cupboards or drawers that might benefit from a quick re-organization or wipe-down of their exterior. Pull out the toaster crumb tray and empty it. If your microwave is splattered, a quick pre-wipe with a damp cloth or a bowl of water steamed inside for a few minutes will loosen grime significantly, aiding your July Cleaning. Ensure the area around your sink is completely clear, moving soap dispensers, sponge holders, and dish racks. If you have a small

How to Prepare for July Cleaning: 4 Steps Fast and Easy Read More »

protective items for cleaning the house

Why do You Need Protection To Clean Your House? – 6 Essential Items

Cleaning your home without protection can be dangerous. It’s a battle against dust, dirt, germs, and clutter. In this battle, we arm ourselves with an arsenal of tools: powerful chemical sprays, abrasive sponges, powerful vacuum cleaners, and microfiber cloths. However, amidst the focus on eliminating dirt from our surroundings, one critical element is often overlooked: protecting the combatant. The cleaning process exposes individuals to a variety of occupational hazards, ranging from the seemingly minor, such as dry skin, to the extremely serious, such as chemical burns, respiratory distress, and lasting physical injuries. Wearing a full complement of protective gear is not a sign of over-meticulousness; it’s the hallmark of a smart, safe, and professional approach to a task that involves direct contact with chemicals, biological contaminants, and significant physical exertion. 1.Gloves The most immediate and constant point of contact in any cleaning endeavor is the hands. They are the primary instruments, manipulating cloths, holding spray bottles, and scrubbing surfaces. The skin, our body’s largest organ, provides a remarkable natural barrier, but it is a barrier with limits. Continuous exposure to water, a universal solvent, systematically strips away the skin’s protective layer of sebum, leading to dehydration, redness, painful cracking, and a compromised ability to defend against infection. Introduce cleaning chemicals into this equation, and the risks escalate dramatically. Detergents, degreasers, disinfectants, and acidic or alkaline solutions can induce contact dermatitis, trigger severe allergic reactions, and, in the case of concentrated agents like oven cleaners or drain unblockers, inflict serious chemical burns. Therefore, gloves are not an optional accessory; they are an indispensable piece of personal protective equipment. A truly prepared cleaning kit contains multiple types of gloves for different applications. For light-duty tasks requiring high dexterity, such as wiping down countertops, polishing fixtures, or handling soiled laundry, disposable gloves are the superior choice. Nitrile gloves are often preferred over latex due to their superior chemical resistance and the prevalence of latex allergies. They provide a reliable shield against germs and chemicals for short-term use and can be discarded immediately, which is a crucial step in preventing cross-contamination between different areas of the home, like the kitchen and the bathroom. For more demanding jobs, a pair of heavy-duty, reusable gloves is required. Tasks like washing dishes in very hot water, scrubbing floors with strong detergents, or cleaning a mold-affected area call for the robust protection of thick rubber or PVC gloves. These are more durable, less prone to tearing, and often feature longer cuffs that extend up the forearm, providing a crucial defense against splashes. Opting for a pair with a flock lining can significantly increase comfort by absorbing perspiration, allowing them to be worn for longer periods without discomfort. Proper care extends the life and safety of these gloves. After each use, they must be rinsed thoroughly while still on the hands, washed with soap and water, then removed and allowed to air dry completely, both inside and out, to inhibit the growth of bacteria and mold within them. 2.Ventilation As we move from contact hazards to airborne ones, the protection of the respiratory system becomes paramount. Many of the most effective cleaning products achieve their results through chemical reactions that release fumes and volatile organic compounds (VOCs) into the air. When a cleaner is sprayed, it is aerosolized, creating a fine mist of chemical droplets that are easily inhaled. The acrid scent of bleach, the sharp, pungent odor of ammonia-based glass cleaners, or the powerful fumes from a self-cleaning oven cycle are all indicators of airborne chemicals that can irritate the delicate mucous membranes of the nose, throat, and lungs. For individuals with asthma, allergies, or other respiratory sensitivities, this exposure can trigger wheezing, coughing, and shortness of breath. Even for those without pre-existing conditions, chronic, long-term inhalation of these fumes can contribute to a range of health problems. The first line of defense is always ventilation. Opening windows and doors to create a cross-breeze and using an exhaust fan can significantly dilute the concentration of airborne chemicals. However, ventilation alone is not always sufficient, especially in enclosed spaces like small bathrooms or when dealing with particularly potent substances or large amounts of particulates. In these cases, respiratory protection is essential. For tasks that kick up a lot of dust, pet dander, or debris, such as sweeping a dusty garage, deep-cleaning carpets, or clearing out a long-neglected storage area a well-fitting N95 respirator is the appropriate choice. Unlike a simple dust mask, an N95 is certified to filter out at least 95 percent of fine airborne particles, providing meaningful protection against allergens and irritants that can penetrate deep into the lungs. When working with aggressive chemicals known to produce harmful vapors, such as certain solvents, paint strippers, or heavy-duty oven cleaners, a more advanced respirator is warranted. An elastomeric half-mask respirator with interchangeable cartridges designed to filter organic vapors offers a much higher level of protection. It is also a vital piece of safety knowledge that mixing certain household cleaners can create lethal gases. The most infamous combination, bleach and ammonia, produces toxic chloramine gas, while mixing bleach with acidic cleaners can release chlorine gas. Proper respiratory protection, coupled with unwavering adherence to the rule of never mixing cleaning products, is a foundational principle of household safety. 3.Safety Glasses The eyes, with their delicate and irreplaceable tissues, are uniquely vulnerable to cleaning-related injuries. A single misdirected splash of a chemical cleaner can cause immediate, intense pain and has the potential to inflict permanent corneal damage and vision loss. These incidents can happen with surprising ease: a toilet brush flicking contaminated water upwards, an aerosol spray nozzle sputtering unexpectedly, or gravity pulling droplets down as you clean a surface overhead, like a showerhead or a ceiling fan. Standard eyeglasses or sunglasses offer minimal protection, as splashes can easily enter from the sides, top, or bottom. The gold standard for eye protection during cleaning is a pair of safety goggles. Goggles are designed to form a seal around the eye

Why do You Need Protection To Clean Your House? – 6 Essential Items Read More »

disorganized home

Why Hiring A Professional Organizer Is Important – 5 Key Factors

Thinking about hiring a professional organizer? Then we will help you. The sheer weight of accumulated belongings can become a quiet, pervasive burden in any home. It starts subtly, an item here, a stack there, until spaces that once felt open and functional begin to feel constricted, heavy. This isn’t just about untidiness; it’s about the way clutter can insidiously affect daily life, breeding a sense of low-grade stress, making simple tasks feel more complicated, and, critically, turning the act of cleaning into a monumental, often futile, effort. When surfaces are obscured and floors are pathways through obstacles, true cleanliness remains elusive. Dust settles not just on shelves, but within an environment of disorder, making it harder to breathe easy, both literally and figuratively. Many find that no matter how much they wipe, scrub, or vacuum, the underlying disarray prevents a feeling of genuine, lasting cleanliness. This is often the point where the realization dawns that something more fundamental than cleaning is required; a strategic approach to the items themselves. This is where the expertise of a professional organizer becomes invaluable. These individuals are more than just people who like to tidy; they are specialists in creating order from chaos, developing sustainable systems, and transforming living spaces into environments that support, rather than hinder, daily life. Their work is a methodical process, beginning with an in-depth consultation. This initial step involves understanding your specific challenges, how you use your space, what your frustrations are, and what your vision is for a more functional home. They assess the scope of the clutter, the types of items involved, and the underlying habits or circumstances that may have contributed to the situation. It’s a non-judgmental exploration designed to tailor a plan that aligns with your lifestyle and goals. 1.Do You Need All The Objects? The heart of the organizing process, and often the most daunting phase for homeowners, is decluttering. A professional organizer acts as a calm, objective guide through this potentially emotional journey. They help you confront your possessions, item by item or category by category, and make decisions about what stays and what goes. This isn’t about indiscriminately throwing things away; it’s about thoughtful evaluation. Questions like “Do I use this?”, “Do I love this?”, “Do I need this?” become central. For sentimental items, which often carry the heaviest emotional weight, organizers provide strategies for honoring memories without being overwhelmed by physical objects. They might suggest digitizing photos or letters, or creating a dedicated, contained memory box. For general household clutter, from overflowing kitchen cabinets to jumbled linen closets, they bring a systematic approach, helping you to see your belongings with fresh eyes and make choices that serve your current life, not a past or imagined future one. They also assist with the responsible disposal of unwanted items, coordinating donations to charities, identifying items for sale, or ensuring proper recycling and waste removal.   2.Sorting And Categorizing Once the excess is cleared, the next stage involves sorting and categorizing what remains. Items are grouped logically, all baking supplies together, all office stationery in one area, all cleaning products consolidated. This “like with like” principle is fundamental to creating intuitive systems. It might sound simple, but in a home where items have migrated and been stashed haphazardly over years, this step alone can be revealing, showing you exactly what you own and highlighting redundancies. With items sorted, the professional organizer then moves into space planning and system implementation. This is where their strategic thinking truly shines. They analyze the available space, closets, cabinets, shelves, drawers, even vertical space and design solutions to store items efficiently and accessibly. In a kitchen, this might involve reconfiguring pantry shelves, introducing clear, stackable containers for dry goods, implementing a first-in-first-out system to reduce food waste, using drawer dividers for utensils and gadgets, or finding clever solutions for awkward items like pot lids or baking sheets. The goal is to create a workflow that makes cooking and cleaning smoother. 3.Closets In closets, organizers might introduce uniform hangers to save space and create visual calm, demonstrate effective folding techniques that maximize drawer capacity, suggest shoe storage solutions that keep pairs together and visible, and implement systems for accessories like scarves, belts, and jewelry. They often help with seasonal wardrobe rotation, ensuring that out-of-season clothes are stored properly and easily retrieved when needed. For home offices, the focus is on creating an environment conducive to productivity. This can involve setting up effective paper management systems (e.g., action files, reference files, archives), advising on digital organization strategies, optimizing desk layout for ergonomic comfort, and ensuring essential supplies are within easy reach. Children’s playrooms and bedrooms benefit immensely from an organizer’s touch. Systems are designed to make it easier for children to find their toys and, crucially, to put them away. This often involves clear bins, picture labels for younger children, and strategies for toy rotation to prevent overwhelm and keep engagement high. Even daunting spaces like garages, basements, or attics are tackled methodically. Organizers can help install heavy-duty shelving, utilize clear, durable storage bins, and create designated zones for tools, sporting equipment, holiday decorations, and long-term storage, transforming these areas from dumping grounds into functional extensions of the home. 4.Labeling A critical component of any organizing system is labeling. Clear, consistent, and easy-to-read labels are the signposts that help everyone in the household understand where things belong. This simple step is vital for the long-term maintenance of order, preventing items from slowly migrating back into disorganized piles. The professional organizer doesn’t just set up these systems and leave; a key part of their service often involves coaching on how to maintain them. They understand that lasting organization requires a shift in habits. They might provide tips for quick daily or weekly resets, help establish routines for managing incoming mail or putting away groceries, and sometimes offer follow-up sessions to tweak systems as needs evolve or to provide a refresher. The benefits of engaging a professional organizer extend far beyond

Why Hiring A Professional Organizer Is Important – 5 Key Factors Read More »

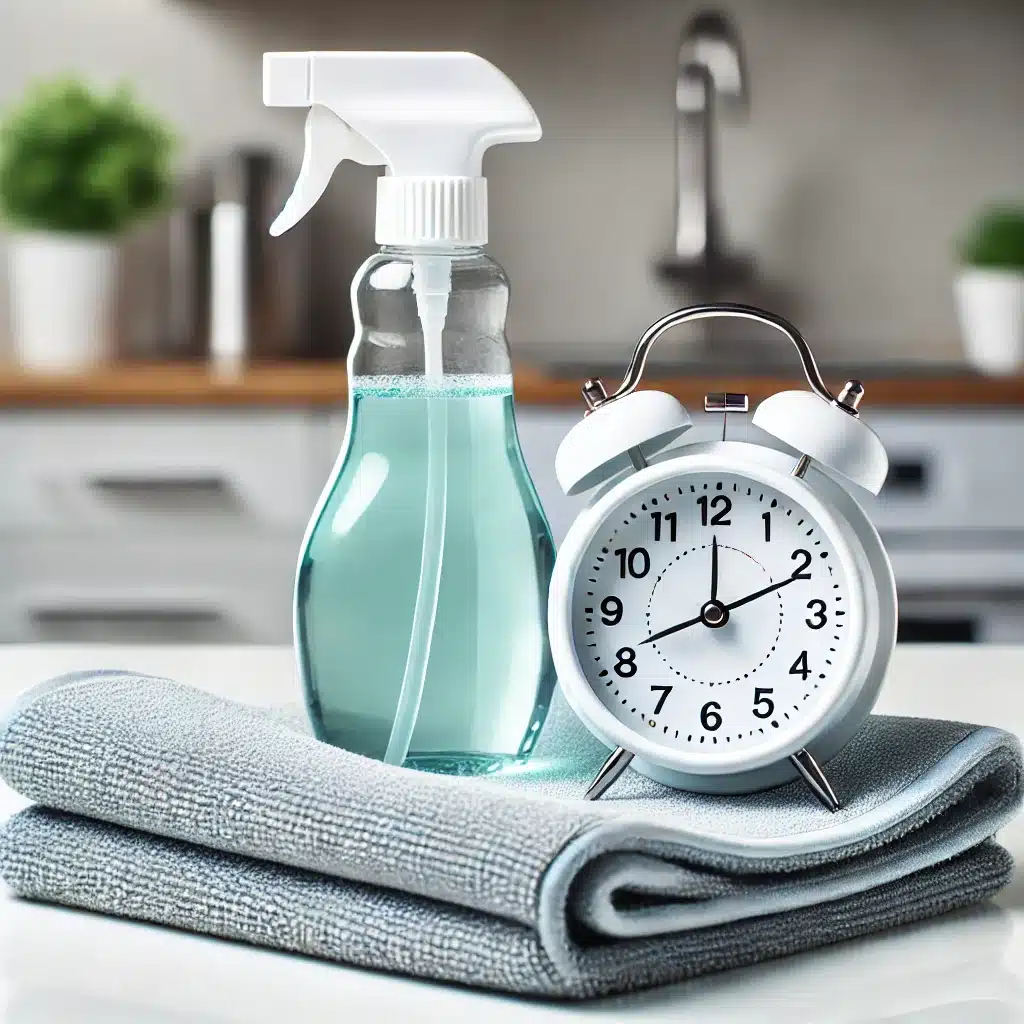
microfiber cloth, cleaning spray and a timer

A Fast Home Cleaning Guide for Busy People

A Fast Home Cleaning Guide for People With Zero Free Time Keeping a home tidy while working long hours, parenting, or commuting across Toronto feels impossible when you picture cleaning as a Saturday marathon. It is not. Fast home cleaning is a set of small, ruthless habits: clear the clutter first, work in minutes instead of hours, and let smart technique do what extra elbow grease used to. The seven routines below keep a home genuinely spotless with a fraction of the effort, and each one fits inside a coffee break. 1. Declutter Before You Clean Spend five minutes in each room removing what does not belong before any cloth comes out. Clear counters, tables, and floors, and carry loose items off in a single basket or bin. A clutter-free surface wipes in one pass instead of ten, and a room with fewer stray objects instantly looks more spacious and calm. Then protect that win: take a few minutes most evenings returning items to their designated places so clutter never reaccumulates and you never need another recovery weekend. 2. Speed Up Dusting and Wiping Microfiber cloths trap dust instead of scattering it, which keeps it off the air you breathe; Health Canada’s guide to indoor air contaminants makes the case for controlling household dust in the first place. Work top to bottom, shelves and cabinets first, tables and counters last, so falling dust never lands on finished surfaces. A damp cloth with a drop of mild dish soap handles kitchen counters and bathroom sinks, and an anti-static spray slows the next round of settling. Keep disinfectant wipes where messes happen and give surfaces a quick pass after meals and wash-ups, because frequent tiny cleanups are what make big ones unnecessary. For touch points such as switches and remotes, the CDC’s guide on when and how to clean and disinfect your home is the reference we follow for kill-time and technique. 3. Optimize Vacuuming and Sweeping Don’t vacuum everything every day. Hit the high-traffic lanes, hallways, living room, and kitchen floor, every other day, and the home stays fresh while allergens stay low. Households with pets should vacuum a little more often, since pet hair and dander are exactly what makes a clean house feel dirty again. Use the right attachment: a crevice tool for edges and corners, a brush head for upholstery and drapes. A cordless vacuum saves real minutes by removing the plug-unplug shuffle between rooms. On hard floors, follow sweeping with a damp mop, or grab a spray mop with built-in cleaner when the clock is truly against you. 4. Clean As You Go The fastest cleaning is the kind you never schedule. Wipe spills the moment they happen, load the dishwasher as soon as a meal ends, fold laundry while the next batch spins. While cooking, wash utensils and cutting boards as you finish with them; after brushing your teeth, give the bathroom sink a thirty-second wipe. Tie small tasks to moments you already have: a five-minute tidy in the morning, another before bed. Messes handled in increments never grow into projects. 5. Trust a Few Multipurpose Products One good all-purpose cleaner can cover kitchen counters, bathroom tiles, and doorknobs, which means fewer bottles, faster decisions, and a tidier supply closet. Look for one that is safe across wood, glass, and metal, or choose an enzyme-based formula that breaks down grease without harsh fumes. A refillable spray bottle with warm water and mild dish soap handles most everyday surfaces for pennies. Park a bottle in the kitchen and the bathroom so touch-ups are always within arm’s reach. 6. Focus on High-Impact Areas Short on time? Clean what people actually see. Squeaky mirrors, clear kitchen counters, and a made bed sell a tidy home even when the skirting boards waited another week. Give the entryway and living space the same attention, because that is where guests land: sweep the porch or vestibule, fluff the couch cushions, straighten the throw blankets. Keeping a mental priority list of the most visible messes means even your busiest day ends with a home that looks welcoming. Once the dusting pass is done, add a “before guests” routine: wipe the fridge door, the kitchen faucet, and every switch plate in the main hallway. If the day got away from you, the quickest visible win is clearing the entryway table, since guests always land there first. Make the beds before breakfast; it takes ninety seconds and reframes the whole day. Keep one caddy with a cleaner and cloths ready at all times, never packed away. When the phone rings, do one timed task while you talk instead of sitting down. 7. Set a Timer and Sprint A 10-15 minute timed session, one per day, does more for a busy household than any weekend blitz. Pick one task before the timer starts, appliances, the bathroom sink, a single shelf, and stop when it rings. The limit keeps you off your phone, prevents fatigue, and makes every task feel small enough to actually begin. The Busy Person’s Quick Clean, Timed Minutes Available Do This Result 5 Declutter sweep of shared rooms with one basket Floors and counters clear 10 Dust top to bottom, then wipe visible surfaces Living areas look brighter 15 Kitchen counters and sink, or bathroom mirror, sink, and toilet The two rooms everyone judges, reset 30 Vacuum traffic lanes and damp mop Fresh floors through the whole main floor Fast Home Cleaning Questions Answered How can I keep my house clean with a busy schedule? Rely on micro-habits: a five-minute nightly reset, cleaning as you go, and one 10-15 minute sprint each day. Small consistent effort beats rare marathons. What should I clean first when I only have a few minutes? Declutter the busiest surfaces, then hit the rooms guests see first: entryway, living room, kitchen counters, and a wiped bathroom sink and mirror. Does dusting really need to happen weekly? Once a week is a good floor for most homes, with

A Fast Home Cleaning Guide for Busy People Read More »

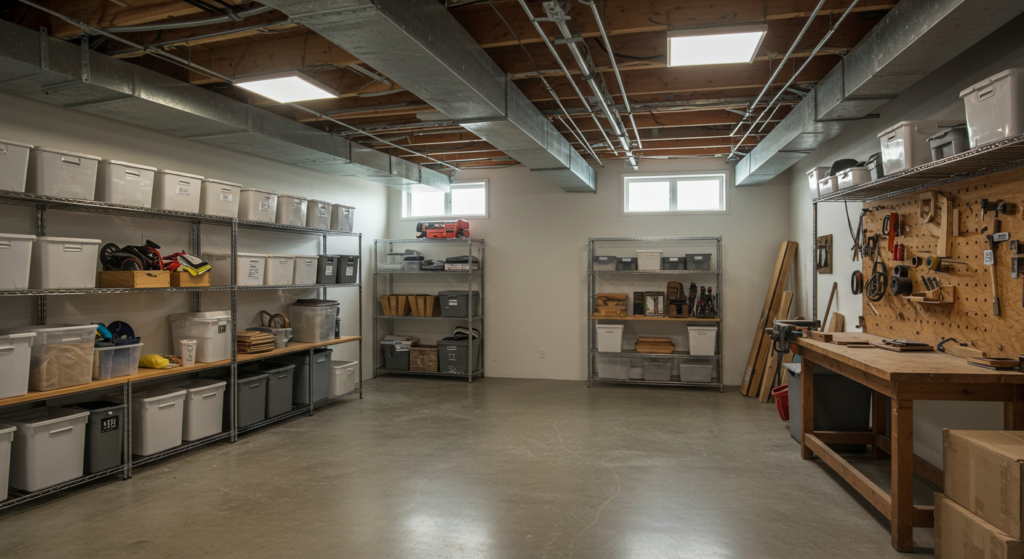
A clean basement with a loot of shelves and tools

How to Clean Basement: 6 Best Methods for a Dust-Free Space

How to Clean a Basement: 6 Best Methods for a Dust-Free Space A clean basement matters more than most homeowners realize. Basements collect dust, clutter, and moisture, which drags down indoor air quality and can aggravate allergies across the whole house. Regular cleaning keeps allergens, odors, and humidity in check and turns the lowest level into a safer, more useful space. These six proven methods will get your basement dust-free and keep it that way. Method 1: Declutter and Organize Before You Clean Basements become a dumping ground for unused items, and every box becomes another dust trap. Sort through storage boxes, old furniture, and miscellaneous belongings, and donate or discard anything not used in the past year. Removing clutter instantly reduces the surface area where dust can settle. Store what remains in plastic bins instead of cardboard boxes, which attract moisture and dust. Shelving keeps items off the floor, and labeled containers let you find things without disturbing the whole space. Once decluttering is done, vacuum and dust quickly before returning anything, so loose particles stirred up during the sort never resettle. Method 2: Vacuum and Dust Every Surface Basement dust settles on floors, walls, shelves, exposed pipes, and ceiling beams, so cleaning has to go beyond the obvious. Use a vacuum with a HEPA filter to trap fine particles instead of recirculating them, and reach awkward spots with an extendable duster or a microfiber cloth. Dust mites and allergens hide in household dust, and Health Canada explains how keeping dust levels down reduces exposure on its dust and dust mites page. Pay extra attention to corners, behind large furniture, and other areas that collect dust unnoticed. Finish with a pass of a damp microfiber cloth over every surface to capture the residue the duster loosened. Method 3: Clean and Seal Concrete Floors Unsealed concrete sheds fine dust continuously, which is why basement floors never look clean for long. Start by sweeping the floor, then vacuum to capture the remaining particles. Mop with a pH-neutral cleaner to remove grime and stains while avoiding excess water, since basements already retain moisture. Once the floor is fully dry, apply a concrete sealer to lock dust out for good. A sealed floor is dramatically easier to keep clean. For basements finished with tile or vinyl, a regular sweep followed by a mop with the right product for that flooring keeps things just as dust-free. Method 4: Keep Air Moving and Humidity Low A dust-free basement needs good airflow, and most basements have very little. Open windows when weather allows, run an exhaust fan, and consider a dehumidifier to hold moisture below 50 percent, because high humidity encourages both dust buildup and mold growth. An air purifier with a HEPA filter traps airborne dust, while Health Canada’s overview of indoor air contaminants is a useful reference for common basement air problems. Clean HVAC vents and swap filters on schedule so the furnace does not spread basement dust through the rest of the house. Method 5: Stop Mold and Mildew Early Damp basements invite mold, which shows up as black spots on walls, ceilings, and corners and announces itself with a musty smell. Check these areas regularly. To remove mold, apply hydrogen peroxide or a commercial mold remover, allow the product a few minutes to work, then scrub the area with a brush. Skip bleach, which does not penetrate deeply enough to kill the spores. The CDC notes that mold grows wherever moisture collects and explains the health concerns on its mold information page. Prevent regrowth by fixing leaks, sealing cracks in the foundation, and keeping humidity in check. Method 6: Maintain Monthly and Deep Clean Twice a Year Consistency beats marathon cleaning sessions. Put the basement on a schedule: Monthly: vacuum floors, dust shelves and pipes, and check for moisture or musty smells. Twice a year: wash windows, sanitize storage containers, and wipe down walls. Seasonally: steam clean basement carpets or rugs to remove embedded allergens. Yearly: inspect HVAC ducts so they do not circulate basement dust upstairs. If the basement doubles as a living space, choose washable area rugs over wall-to-wall carpeting; they clean up faster and stay fresher. A well-kept basement improves household air quality and adds real value to your home. Basement Cleaning Schedule Task Frequency Why It Matters Vacuum and dust surfaces Monthly Stops dust and allergens from building up Check humidity and leaks Monthly Catches moisture before mold starts Steam clean carpets or rugs Twice a year Removes deeply embedded dirt Wash windows and sanitize bins Twice a year Keeps stored items and light sources clean Basement Cleaning FAQ Why does my basement collect so much dust? Unsealed concrete sheds fine particles, poor airflow lets dust hang in the air, and clutter gives dust more surfaces to land on; sealing the floor, decluttering, and ventilating all reduce the load. Is bleach effective for basement mold? No. Bleach does not penetrate porous surfaces deeply enough to kill mold spores, so hydrogen peroxide or a commercial mold remover scrubbed in with a brush is the better choice. What humidity level prevents basement mold? Keep moisture below 50 percent with a dehumidifier, especially in summer, because mold and mildew thrive in damp, poorly ventilated spaces. Should basement carpets be steam cleaned? Twice a year is a good rhythm for carpets and rugs in a basement, since embedded dirt and allergens collect even when the surface looks clean. Professional Basement Cleaning in Toronto A truly clean basement takes time, especially after dust, mold, and clutter have accumulated for years. Toronto Shine Cleaning specializes in deep basement cleaning, using professional equipment to remove dust and grime and restore freshness. Our team covers Toronto and the GTA, and we offer regular maid service as well as one-time deep cleaning visits with transparent pricing. Call (647) 424-0355 today and let us make your basement healthier and dust-free.

How to Clean Basement: 6 Best Methods for a Dust-Free Space Read More »