Ensure your air conditioner is completely disconnected from its power source before you begin any cleaning. For window units, this means unplugging it from the wall outlet. For split and central air conditioning systems, you must switch off the corresponding circuit breaker in your home’s main electrical panel. Outdoor condenser units often have an additional disconnect switch located near the unit itself; turn this off as well. Gather your supplies: a vacuum cleaner with a soft brush attachment, screwdrivers if needed for panel removal, a fin comb, specialized air conditioner coil cleaner (check if it’s for evaporator or condenser coils, and if it’s a no-rinse formula), a spray bottle, mild detergent, several clean cloths, gloves, and protective eyewear.
Window Air Conditioner
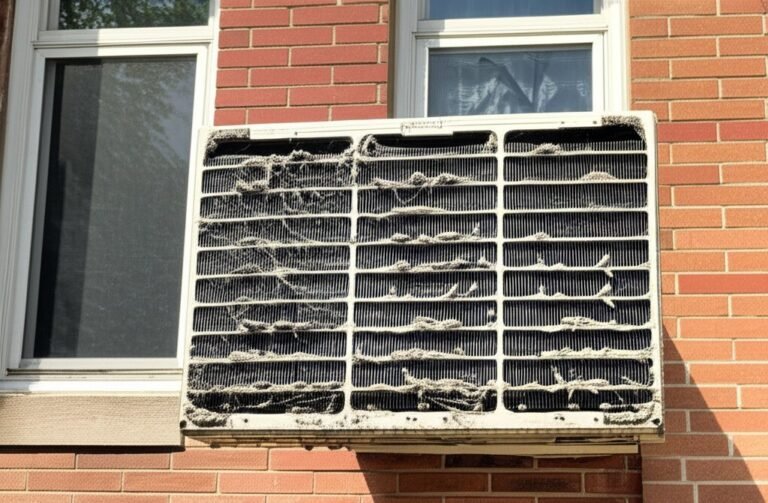
Once unplugged, you can begin cleaning your window air conditioner. If possible, removing the unit from the window and placing it on a stable, practical surface outdoors will allow for a more thorough cleaning, especially of the outer frame and rear condenser coils. If removal is not practical, proceed to clean the accessible parts while the unit is installed.
Start by removing the front panel or grille. This usually comes off or may be held in place by a few screws. Consult your unit’s manual if you are unsure. Behind this panel, you will find the air filter. Slide the filter out. Most window air conditioner filters are washable. Use a vacuum cleaner with the brush attachment to remove loose dust and debris. For more stubborn dirt, wash the filter gently with warm water and a mild soap solution. Rinse it thoroughly under running water and allow it to air dry completely before reinstalling. A damp filter can encourage mold and mildew growth in your air conditioner.
With the filter removed, you will see the evaporator coils. These are thin metal fins that cool the air. They can collect a significant amount of dust. Use the soft brush attachment on your vacuum cleaner to gently clean these coils. Always vacuum in the direction of the fins (usually up and down) to avoid bending them. If you notice any bent fins, a fin comb can be used to gently straighten them. Bent fins restrict airflow and reduce the efficiency of the unit. For a deeper clean, apply a non-acidic, foaming coil cleaner specifically designed for evaporator coils. Spray the cleaner evenly over the coils and let it sit for the time recommended by the manufacturer. The foam will usually break down and carry the dirt away, often dripping into the drain pan. Some cleansers do not require rinsing, while others may suggest a light rinse if possible.
If you have removed the unit from the window, you can now access the condenser coils located at the back of the unit. These coils release heat to the outside and are prone to collecting leaves, grass, and other outdoor debris. Use a stiffer brush to remove larger debris, then vacuum carefully. You can also gently spray these coils with a garden hose, directing the water from the inside of the unit outwards, if possible, to push dirt out rather than further in. Avoid using high pressure, which could damage the fins. Apply a condenser coil cleaner if needed, following product instructions, and rinse if required.
Locate the drain pan at the bottom of the unit. It collects condensation. Clean any accumulated slime or mold from the pan using a cloth and a mild detergent solution or a diluted bleach solution. Ensure the drain port or tube is clear of any blockages. A pipe cleaner or a small, flexible wire can be used to dislodge obstructions.
Carefully wipe down any accessible fan blades, as these can also collect dust. Clean the interior surfaces of the AC casing with a damp cloth.
Once all parts are clean and thoroughly dry, reassemble the air conditioner. Reinstall the dry filter, attach the front panel, and if you removed the unit, carefully place it back in the window, ensuring it is securely installed and properly sealed around the edges to prevent air leaks.
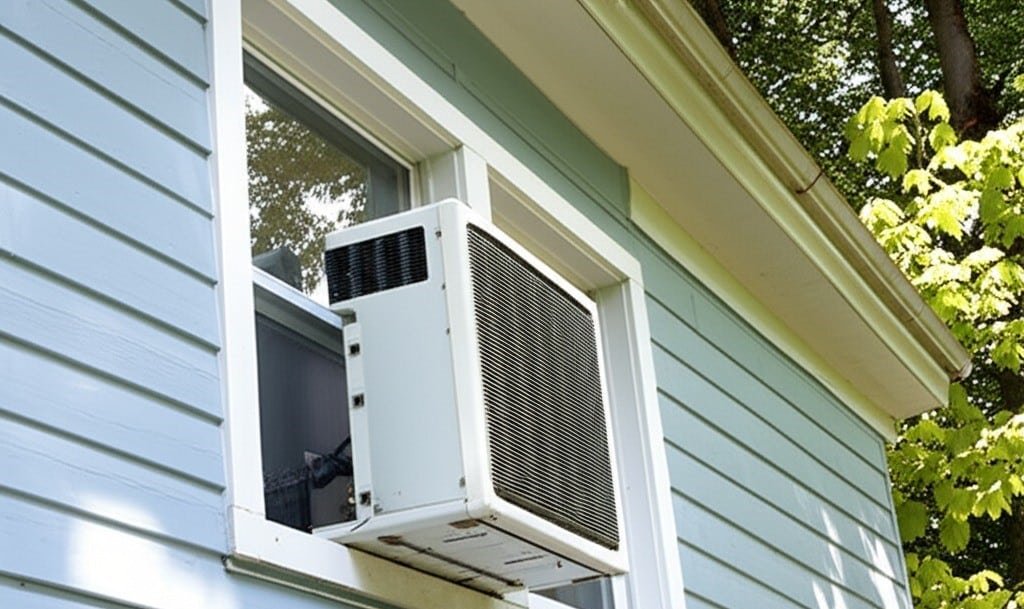
Split Air Conditioner (Ductless Mini-Split)
Split air conditioners consist of an indoor unit (evaporator) and an outdoor unit (condenser), both of which require regular cleaning.
Indoor Unit:
Make sure the entire system is turned off at the circuit breaker. Open the front panel of the indoor unit; this panel usually opens upward. You can clean the outer plastic housing of the air conditioner with a soft, damp cloth.
The air filters are located directly below the front panel. Most units have two or more filter screens. Unclip or slide them out carefully. These filters are usually reusable. Vacuum them thoroughly on both sides. If they are greasy or very dirty, wash them in warm water with a mild detergent. Rinse them thoroughly and allow them to air dry completely. Never operate the unit without the filters installed, as this allows dust to directly clog the evaporator coils and fan rotor.
Behind the filters are the evaporator coils. These delicate fins can be gently vacuumed with a soft brush attachment. Move the brush toward the edges. For a more thorough cleaning, use a no-rinse evaporator coil cleaner spray designed for indoor use. Apply it evenly over the entire surface of the coil. The cleaner will usually foam, dissolve dirt and grime, and then condense and drain with normal condensation the next time the unit is used. Straighten any bent edges of your air conditioner with a fine-toothed comb.
The blower wheel, or drum fan, is located deep inside the indoor unit, behind the evaporator coils. This component is crucial for air circulation, but it is prone to accumulating a thick layer of dust, mold, and grime, which can significantly reduce airflow and air quality, as well as cause imbalances and noise. Cleaning the blower wheel can be challenging without disassembling it. For light surface cleaning, you can reach parts of the blower wheel with a long, thin brush or a specialized flexible cleaning brush, slowly rotating the wheel by hand (with the power off). Some specialized air conditioning cleaning kits include a bag that fits around the indoor unit to collect runoff, allowing for more aggressive cleaning of the blower wheel. However, for a thorough and safe cleaning of a very dirty blower wheel, professional maintenance is often the best option, as improper cleaning can damage the component or nearby electronics.
The condensate drain line carries moisture from the indoor unit to the outside or to a suitable drainage point. This line can become clogged with algae, slime, or debris, causing water to leak from the indoor unit. Locate the drain line outlet. You can try to clear small clogs by using a specialized drain line cleaning solution, a very dilute bleach or vinegar solution (check the compatibility with the materials in your unit), or by using a wet/dry vacuum at the end of the outlet to remove any blockages. Regular flushing can help prevent clogs.
Once all cleaned parts are dry, especially the filters, reinstall them, and close the front panel of the indoor unit.
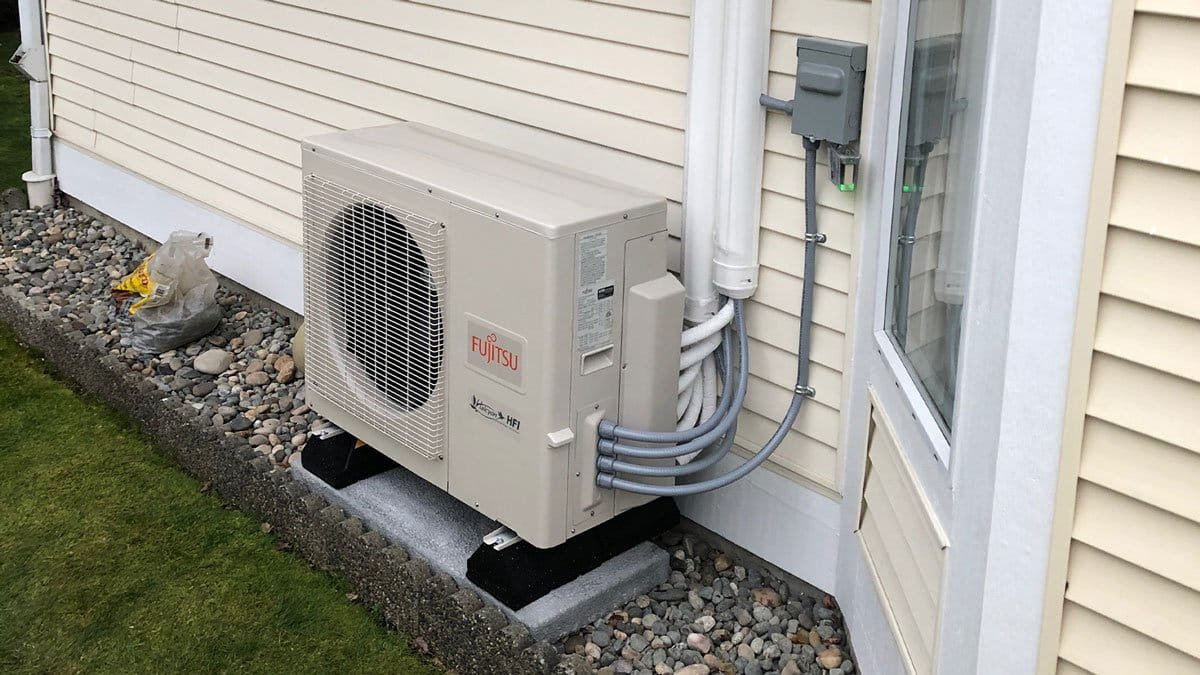
Outdoor Unit (Condenser):
Ensure the power is off at the main circuit breaker and at the outdoor disconnect switch near the unit.
Clear away any leaves, grass clippings, weeds, branches, or other debris that has accumulated around the outdoor condenser unit. Maintain at least two to three feet of clear space on all sides and above the unit to ensure unrestricted airflow. Trim back any bushes or plants encroaching on the unit.
Wipe down the exterior casing of the condenser.
The primary components to clean on the outdoor unit are the condenser coils. These fins wrap around the unit, usually on two or three sides, and are often protected by a grille or casing. If the protective grilles are easily removable without disturbing wiring, take them off for better access.
First, use a soft brush to gently remove loose debris from the exterior of the fins. Then, using a garden hose with a spray nozzle, direct water through the fins from the inside of the unit outwards. This method effectively pushes dirt and debris out, rather than driving it deeper into the coil. If accessing the inside is difficult, spray from the outside at an angle, working your way from top to bottom. Use moderate water pressure; a high-pressure jet can bend or damage the delicate fins.
For heavily soiled coils, you can use a dedicated condenser coil cleaner. These are often stronger than evaporator coil cleaners. Spray the cleaner onto the coils, allow it to sit for the recommended duration (it will often foam and lift dirt), and then rinse thoroughly with the hose, again preferably from the inside out, or as directed by the product label.
Inspect the coil fins for any bends or damage. Carefully use a fin comb to straighten any bent fins to restore proper airflow.
Check the fan on top of the unit. Ensure the fan blades are clean and free of obstructions. You can wipe the blades with a damp cloth if they are dirty and easily accessible (ensure power is definitively off).
Make sure the condenser unit is sitting level on its concrete pad. If it has tilted, it may need to be professionally re-leveled to ensure proper operation and drainage.
Reinstall any grilles or panels that were removed.
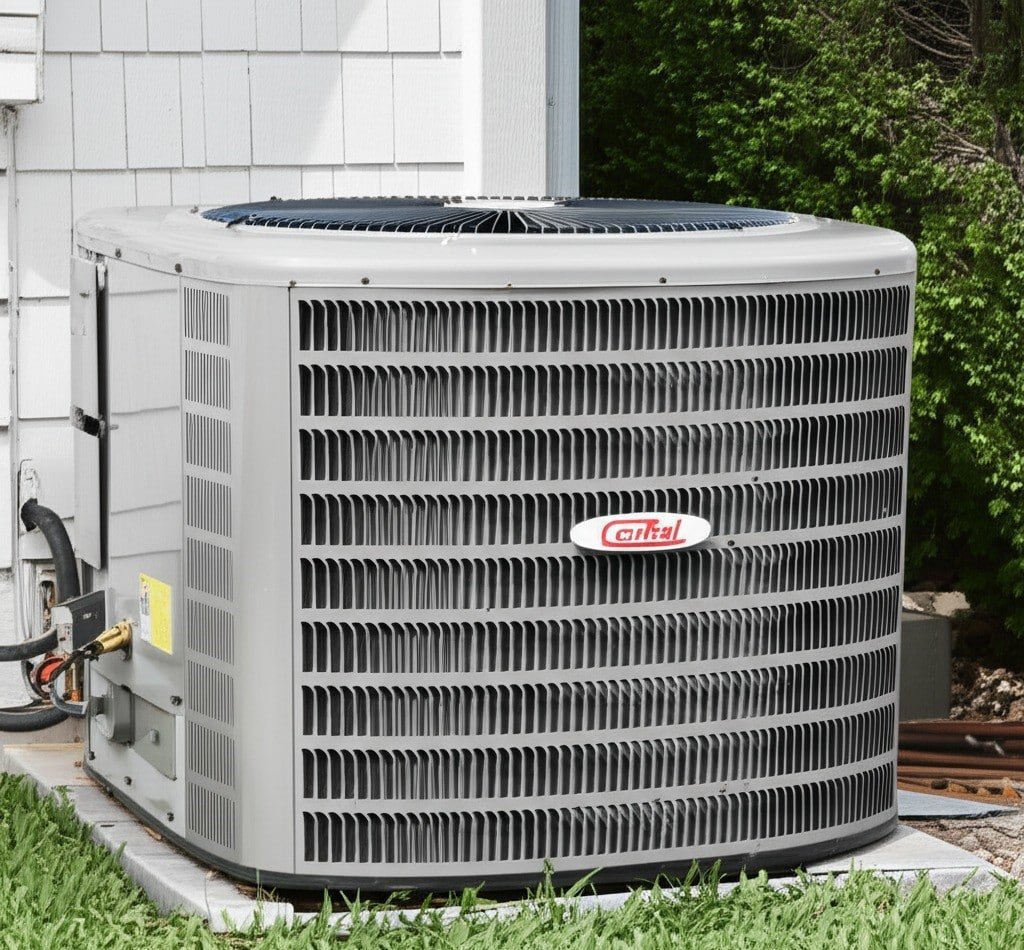
Central Air Conditioner
A central air conditioning system involves an indoor air handler (usually part of your furnace) and an outdoor condensing unit. Both require attention.
Indoor Unit (Air Handler/Furnace):
Turn off all power to the air handler/furnace at the circuit breaker.
The most critical and frequent task is replacing or cleaning the air filter. This filter is usually located in a slot in the return air duct or directly on the air handler cabinet. Note the size printed on the existing filter and the airflow direction arrow. If you use disposable filters, remove the old one and insert a new one of the correct size, making sure the airflow arrow points toward the air handler/furnace. These filters should typically be replaced every 1 to 3 months, or more frequently if you have pets or allergies. If your air conditioner uses a permanent, washable filter, remove it and clean it according to the manufacturer’s instructions, which usually involves vacuuming and rinsing with water. Make sure it is completely dry before reinstalling.
The evaporator coil (or A-coil) is located inside the air handler plenum, usually above the blower in an upflow system or below it in a downflow system. Accessing it usually requires removing an access panel (make sure the power is off before doing this). These coils can become dirty if the filter is not maintained. If accessible, you can gently vacuum the coils with a soft brush attachment. For more stubborn dirt, a no-rinse evaporator coil cleaner can be used. However, the evaporator coils in central systems can be difficult to access and clean thoroughly without specialized tools. If they look very dirty or difficult to reach, it is best to have them cleaned by a professional HVAC technician to keep your air conditioner looking pristine.
Outdoor Unit (Condenser):
The cleaning process for the outdoor condenser unit of a central air conditioning system is identical to that described for the outdoor unit of a split system. Make sure the circuit breaker and external disconnect are turned off. Remove debris from around the unit. Clean the external housing. Thoroughly clean the condenser coils using a hose (preferably from the inside out) and a coil cleaner, if necessary. Straighten any bent ends with a fine-tooth comb. Check for obstructions and that the fan is clean. Make sure the unit is level so that you don’t have headaches later when the air conditioner starts.
General Maintenance Considerations
Regular cleaning of your air conditioner is essential to its efficiency, longevity, and the quality of the air it circulates. The air filters on all types of units should be inspected monthly and cleaned or replaced every 1 to 3 months. A more thorough cleaning of the coils, drain pans, and drain lines should ideally be performed annually, typically before the start of the main cooling season. In areas with high dust levels or for units with heavy use, a semi-annual deep cleaning of your air conditioner may be beneficial.
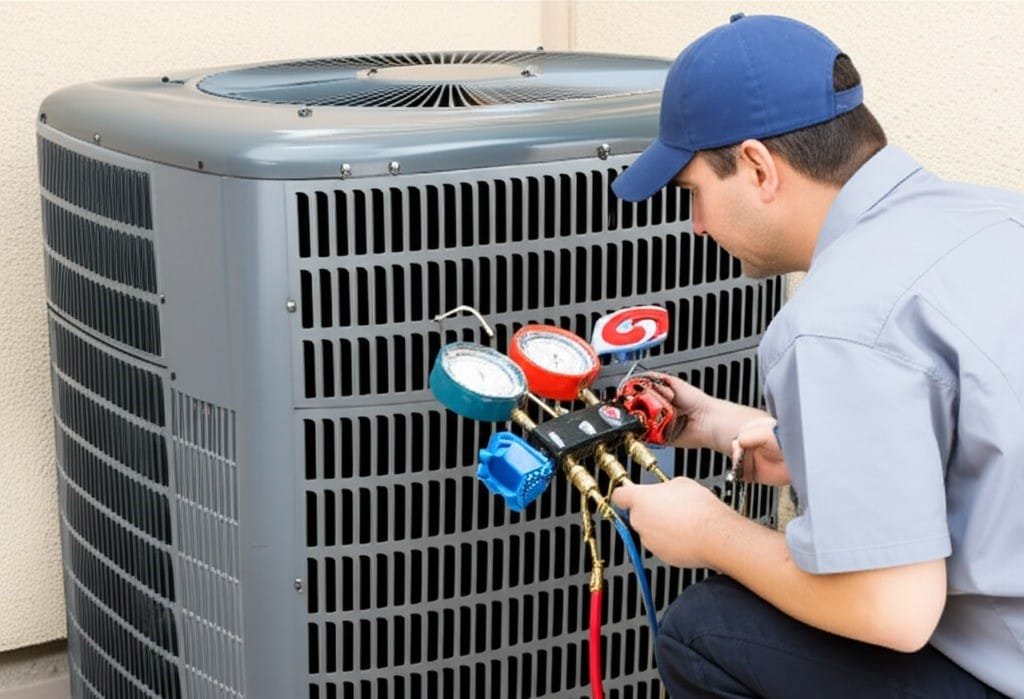
While these procedures cover many aspects of home air conditioning cleaning, there are times when professional intervention is advisable. If you notice heavy mold growth deep inside the unit, if the system is not cooling effectively (which could indicate a refrigerant problem, a problem that only a certified technician can resolve), if you hear persistent unusual noises, or if components such as the blower wheel in a split system or the evaporator coil in a central system are very dirty and difficult to access, it is best to contact a qualified HVAC professional. They have the specialized tools, diagnostic equipment, and experience to perform thorough cleaning, system checks, and repairs as needed. Consistent and proper cleaning not only increases energy efficiency and reduces utility bills, it also contributes to healthier indoor air and can significantly extend the life of your air conditioning equipment.
Keeping your air conditioner’s filters, coils, and drain ducts clean is crucial to its efficient operation, energy conservation, and promotion of healthy indoor air. Whether it’s routine filter maintenance or a more thorough cleaning of your window, split or central air conditioner’s coils, these steps will help ensure your system is performing efficiently. For professional, comprehensive cleaning services in Toronto, Toronto Shine Cleaning can help keep your home clean and functional, and with these tips on how to clean an air conditioner, your home will be spotless!