AirBnB Cleaning

Cleaning Quartz Countertops: How to Clean Efficiently and Quickly

Quartz countertops have become a hallmark of the modern kitchen and bathroom, celebrated for their stunning aesthetics, vast range of colours, and remarkable durability. But what truly sets quartz apart from natural stones like granite or marble is its engineering. A quartz countertop is a composite material, typically made of about 90-95% ground natural quartz crystals bound together with a polymer resin and pigments. This manufacturing process creates a surface that is non-porous, a crucial feature that lies at the heart of its easy maintenance and superior hygiene. Unlike natural stone, which has microscopic pores that can absorb liquids and harbor bacteria, the resin in quartz seals the surface completely. This means spills are less likely to cause permanent stains, and germs have nowhere to hide. However, this engineered perfection does not mean quartz is indestructible. The very resin that provides its non-porous shield is also the component most vulnerable to damage from improper cleaning methods. Understanding how to care for your quartz countertops is essential to preserving their beauty and ensuring they last a lifetime. The Golden Rules of Quartz Care Before diving into specific cleaning methods, it’s vital to internalize a few fundamental principles. These rules are designed to protect the resin that binds the quartz together, which is the key to its longevity. Be Gentle: Your primary cleaning tools should be soft. Abrasive scrubbers and harsh chemicals are the enemies of a quartz surface. Act Fast: The non-porous nature of quartz gives you a grace period, but it’s not infinite. Wiping up spills, especially acidic or highly pigmented ones, as soon as they happen is the best way to prevent potential staining. Use a Simple Solution: For the vast majority of cleaning tasks, a simple solution of mild dish soap and warm water is all you will ever need. Avoid Extreme Heat: The resin used in quartz countertops can be damaged by sudden and extreme temperature changes (thermal shock). Always use trivets or hot pads for pots and pans coming directly from the stove or oven. Your Daily Cleaning Routine The beauty of quartz is that its daily maintenance is incredibly straightforward. A few minutes each day is all it takes to keep your countertops looking pristine. You Will Need: A soft sponge or microfiber cloth Mild dish soap A spray bottle with warm water A clean, dry microfiber cloth The Process: Clear the Surface: Remove any crumbs, food particles, and debris from the countertop with a soft, dry cloth or a soft-bristled brush. Create Your Cleaning Solution: In your spray bottle, mix warm water with a few drops of a gentle, pH-neutral dish soap. You don’t need a lot of soap; too much will leave a hazy film. Spray and Wipe: Lightly mist the entire surface of the countertop with the soap and water solution. Using your soft sponge or microfiber cloth, wipe down the entire area in gentle, circular motions. Rinse (If Necessary): If you used a bit too much soap, you may need to rinse the surface. Wipe the countertop with a separate cloth dampened with plain water to remove any soap residue. Dry and Buff: This is a crucial step that many people skip. Using your clean, dry microfiber cloth, thoroughly dry the entire countertop. This not only prevents water spots and streaks but also buffs the surface to a beautiful, lustrous shine. Tackling Tougher Spills and Stains Even with diligent daily cleaning, stubborn spots and spills are bound to happen. The non-porous surface of quartz gives you an advantage, but some substances require a bit more effort. Dried-On Food: If you encounter hardened food, resist the urge to scrape it off with a metal knife or scour pad. Instead, spray the spot with your water and soap solution and let it sit for 5-10 minutes to soften the residue. Then, gently lift the food away using a flexible plastic putty knife or a plastic pan scraper. Once the gunk is removed, clean the area as usual. Grease and Oil: Quartz is highly resistant to grease stains, but splatters can leave a film. For greasy spots, a good degreasing dish soap is your best friend. Apply a small amount directly to the greasy area, add a little water, and work it into a lather with a soft sponge. Wipe away the residue and rinse thoroughly to ensure no soap film is left behind. Stubborn Stains (Wine, Coffee, Tea, Permanent Marker): For more persistent stains that don’t lift with soap and water, you have a few safe options. Isopropyl Alcohol: Dampen a soft cloth with isopropyl (rubbing) alcohol and apply it to the stain. Let it sit for a minute, then rub gently in a circular motion. The alcohol acts as a solvent that can break down many stubborn pigments. Once the stain is gone, rinse the area with plain water and dry. Baking Soda Paste: For a gentle abrasive option, create a paste of baking soda and a small amount of water. Apply the paste to the stain and let it sit for a few minutes. Using a soft sponge, gently scrub the area. The baking soda provides a very fine grit that can help lift stains without scratching the resin. Rinse thoroughly and dry. Hard Water Stains: If you live in an area with hard water, you may notice a chalky film or mineral deposits, especially around the faucet. For this, white vinegar can be used-but with extreme caution. While quartz is generally resistant to acid, prolonged exposure can potentially dull the finish of the resin. Spray a small amount of a 50/50 vinegar and water solution onto the hard water spot, let it sit for no more than one minute, then immediately rinse the area thoroughly with plain water and dry completely. What to AVOID Protecting your investment is just as much about what you don’t do as what you do. Using the wrong product can cause irreversible damage to the resin, leading to discoloration, dulling, and a breakdown of the surface. NEVER Use Harsh or Abrasive Chemicals: This is the most important rule. Keep the following far

Cleaning Quartz Countertops: How to Clean Efficiently and Quickly Read More »
Cooktop Cleaning

Cooktop Cleaning: The Ultimate Guide for a Sparkling Space

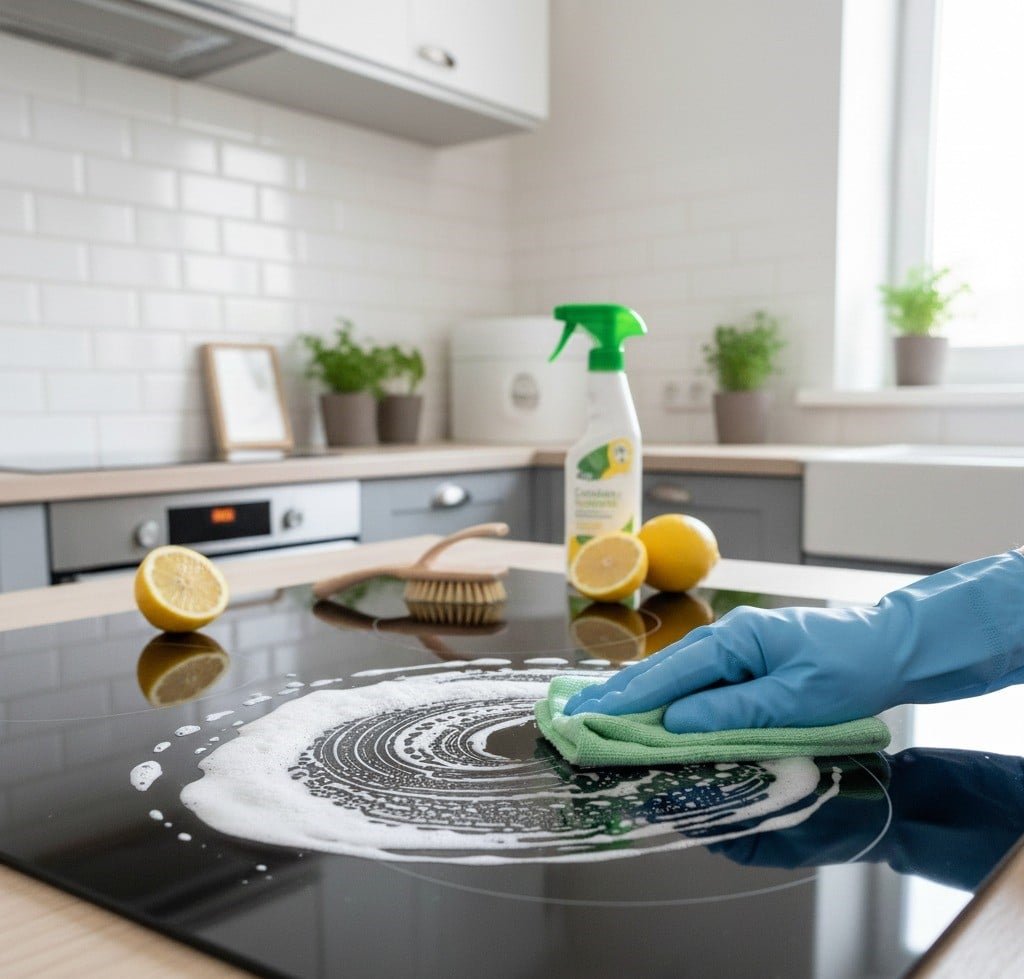
Why Cooktop Cleaning Matters Beyond Looks The cooktop sits at the centre of the kitchen, so it collects the most splatter in the house. Burnt-on food, grease film, and boiled-over sauces do more than dull the finish: they host bacteria, release odours, and slowly damage the surface itself. A spill that waits a week turns into grime that takes an hour of scrubbing, and harsh attempts to remove it can scar glass or stainless for good. The practical answer is a system: quick daily wipes, a weekly clean matched to your cooktop type, and the right tools so nothing scratches. Work through this guide and the stovetop stays sanitary and sharp-looking for years. Four Rules That Apply to Every Cooktop Cut the power or gas first. Unplug an electric stovetop or shut off the gas supply before you start, so there is no risk of shock or a leak. Wait for it to cool. Cleaning a hot surface burns you and bakes residue harder onto the finish. Keep abrasives away. Steel wool, scouring pads, and powders with grit can permanently scratch glass, ceramic, and even stainless steel. Act fast. The longer grease sits, the harder it bonds. A quick wipe after each use plus one weekly deep clean prevents almost every tough-job scenario. For product safety around the kitchen, Health Canada’s page on using household chemicals safely is a good reminder to wear gloves and keep strong cleaners away from children. Cleaning a Gas Cooktop Gas units come apart, so clean the pieces and the surface separately. Every day, once the surface is cool, run a damp cloth with a drop of mild dish soap over it to lift crumbs and small spills. Once a week, take a deeper route: Remove the grates and burner caps; some models also lift out the burner heads. Soak grates and caps in warm water with plenty of dish soap for at least 30 minutes, or a few hours for baked-on grease, adding white vinegar or a degreaser for stubborn grime. Scrub the soaked parts with a firm, non-abrasive brush or sponge. Check the burner head ports and clear any clog with a toothpick or an unfolded paper clip. Never use a wooden toothpick that can snap off inside a hole. Treat the surface by material: stainless steel cleaner and a microfiber cloth on steel, an all-purpose cleaner or a baking soda paste left for 15-20 minutes on enamel. Rinse every part with a clean damp cloth and dry completely before reassembly, since leftover moisture rusts grates and keeps burners from igniting. Cleaning an Electric Coil Cooktop Coil stoves hide their worst mess in the drip pans beneath the elements. With the stove unplugged and cool, lift each heating element out and remove its pan. Soak the pans in very hot water with dish soap. For heavy buildup, cover them with baking soda, spray with vinegar, and let the mixture work for several hours or overnight before scrubbing; a commercial oven cleaner, used exactly as the label directs in a ventilated space, handles extreme cases. Never submerge the elements: wipe them with a damp cloth and a little detergent, then lift stuck-on residue with a plastic scraper while cold, or apply a baking soda paste, let it sit, and wipe it off. Rinse and dry the pans fully, seat the elements properly, and wipe the surrounding surface. Cleaning a Glass or Ceramic Smooth-Top Smooth tops are elegant but unforgiving, so daily care matters most: once the surface is cool, wipe it with a damp cloth and mild dish soap so spills never dry on. For the weekly clean, apply a creamy or liquid cooktop cleaner made for glass ceramic generously, especially over stained zones, let it dwell as the product instructs, and work it in circles with a non-abrasive sponge or microfiber cloth. Melted sugar and hardened food need a single-edge razor blade held at a low 30-45 degree angle, always pushing debris away from you and never pressing the blade flat, which scratches the glass. Wipe away all product residue with a clean damp cloth, then polish with a dry microfiber cloth for a streak-free shine. Cleaning an Induction Cooktop Induction surfaces are glass ceramic, so follow the smooth-top routine above. The advantage is physics: only the pan bottom gets hot, so spills burn on far less often and you will rarely reach for the blade. Flat, smooth-bottomed pans keep the surface marked-free, and a silicone mat made for induction adds protection without blocking the magnetic field. Troubleshooting the Usual Cooktop Problems Problem Best fix by cooktop type Burnt-on food Gas and coil: thick baking soda paste left 15-30 minutes to soften. Glass and induction: dedicated cooktop cleaner, then a razor blade at a low angle. Grease buildup Commercial degreaser or hot water with strong dish soap, left to sit; grates do best soaked. Streaks and scratches Streaks disappear with a dry microfiber polish. Scratches usually stay, so prevention means no abrasive pads or scouring powders. Water spots and limescale Spray white vinegar, let it sit a few minutes, and wipe clean. The Cooktop Cleaning Kit Worth Keeping Keep these items under the sink and the weekly clean takes minutes: microfiber cloths for wiping and polishing without scratching, non-abrasive sponges, a firm-bristled brush for grates, a plastic scraper or single-edge razor for glass tops, mild dish soap, baking soda for pastes and deodorizing, white vinegar as a natural disinfectant and limescale cutter, an all-purpose cleaner, a specific glass-ceramic cooktop cleaner, stainless steel cleaner for steel finishes, and protective gloves for every chemical step. Health Canada’s overview of household product safety covers storing these products properly between uses. Prevention beats recovery: wipe spills while they are fresh, use lids to cut splatter, avoid overfilling pots, keep cast iron off unprotected glass, and hold a regular deep-clean schedule. Cooktop Cleaning FAQ How often should a cooktop be deep cleaned? Wipe the surface after every cooking session and deep clean once a week. Gas grates

Cooktop Cleaning: The Ultimate Guide for a Sparkling Space Read More »

getting ready for fall cleaning

September Cleaning: 7 Quick And Easy Steps To Get Ready For Fall

Why September Is the Month to Reset Your Home In Canada, September closes out summer and opens the long indoor season. The house needs more than a dust-off: it needs a cleanout that removes the clutter and grime of the warm months and readies every room for the weeks when windows stay shut and family time moves inside. A systematic September cleaning pays off twice, once in a healthier, calmer home right away and again in easier living all winter. Work in order, from planning and decluttering through room-by-room detail, and the whole project becomes manageable instead of overwhelming. Plan the Project Before You Spray Anything Start by scheduling time blocks for each area or task type, which turns a mountain into a list of afternoon-sized steps. Then take inventory of your supplies so you are never hunting for a bottle mid-task. Microfiber cloths, a vacuum with attachments, a mop, buckets, and protective gloves All-purpose cleaner, disinfectant, glass cleaner, bathroom cleaner, and floor cleaner Eco-friendly, non-toxic products if children, pets, or allergy sufferers live in the house Declutter First With the Three-Box Method Every room gets sorted before any cleaning starts, using three boxes: keep and organize, donate or sell, and trash or recycling. Begin with summer gear, so beach equipment, garden decorations, and warm-weather clothes get packed away. Work through clothing, toys, books, and stationery; clear the pantry and refrigerator of expired food and regroup what stays; gather papers and magazines into categories; and rotate the wardrobe so autumn layers sit at the front. Fewer objects means less dust to chase and fewer surfaces to wipe. When you finish, deliver the donation box the same week so it does not become clutter again. Kitchen Deep Clean for the Season The kitchen earns the most attention because it feeds everyone. Clean the oven interior and its grease and residue, wash the microwave inside and out, and empty the refrigerator fully, wiping shelves and drawers with mild soap and water. Run the dishwasher on a vinegar cycle to clear deposits and odours. Wipe cabinets and drawers inside and out, scrub countertops and backsplashes, disinfect the sink and faucets, and freshen the garbage disposal. Finish by mopping or steaming the floor. Bathrooms, Bedrooms, and Living Areas Bathrooms Scrub toilets, showers, and tubs, and attack the tile grout where mold and mildew settle. Wash or replace the shower curtain and liner, clean mirrors and light fixtures, disinfect every contact point from faucets to doorknobs and switches, then wash and disinfect the floor. Toss expired products from the medicine cabinet while you are in there. Excess moisture is what invites bathroom mold in the first place, and Health Canada’s advice on reducing humidity, moisture, and mould is worth applying to every damp room before winter closes the house up. Bedrooms Launder all sheets, duvets, and blankets along with the curtains. Vacuum the mattress and flip or rotate it to extend its life. Dust furniture, light fixtures, and ceiling fans, vacuum or mop including under the bed, and rebuild the closets with the seasonal clothing swap you prepped during decluttering. Living spaces Dust every piece of furniture, electronic, and decorative item, vacuum or shampoo the upholstery, clean the windows and the blinds or curtains covering them, and refresh the floors. Give extra passes to remote controls, light switches, and doorknobs, the surfaces everyone touches and nobody cleans. Entryways, Laundry Room, and the Spots Everyone Forgets Hallways and entryways take the first hit from outdoors, so clear shoe racks and coat hooks, wipe scuff marks off the walls, and vacuum or mop deeply to lift tracked-in mud and debris. In the laundry room, wipe the washer and dryer exteriors, scrub the dryer lint trap thoroughly for efficiency and fire safety, wash the utility sink, and organize detergents. Then walk the house for the overlooked list: Area September task Why it matters before winter Windows Clean inside and out Maximizes the weak natural light of the darker months HVAC filters Clean or replace Indoor air quality suffers once windows stay closed, and Health Canada’s overview of indoor air contaminants explains the health stakes Walls, baseboards, doors, and frames Wash away marks and dust Trapped grime ages fast under winter heating Light fixtures and ceiling fans Dust and wash Dull fixtures dim every room Trash cans and small appliances Disinfect bins; wash toaster, coffee maker, kettle Odours build quickly in closed-up houses Patio furniture, barbecue, bikes, garden tools Clean, then store Protects equipment through freeze-thaw weather Carpets and rugs Deep clean Removes summer grit before winter traffic grinds it in Maintenance: Keep the Reset From Slipping The September clean buys you a fresh baseline; daily habits defend it. Reinforce quick mini-cleaning sessions after dinner, hold a weekly schedule that rotates deeper tasks room by room, and do a seasonal check-in each quarter to adjust for what the new weather demands. Smart storage solutions protect your organization gains, and delegating tasks among household members keeps the workload shared instead of dumped on one person. September Cleaning FAQ How long does a full September cleanup take? Most homes need several sessions across one or two weekends once you plan, declutter, and clean room by room. Time-blocking the rooms in advance keeps any single day from feeling impossible. Should carpets really be cleaned in the fall? Yes. Summer drags in dirt and allergens that settle deep into pile, and a clean carpet improves indoor air for the months when windows barely open and foot traffic moves indoors. What is the one step people skip most? Replacing heating and air conditioning filters. It is quick, cheap, and it does more for winter air quality than any surface scrub. When should I outsource the whole project? If the season’s cleanout lands in one packed weekend, a professional deep clean handles the rooms and details while you handle everything else. Pair it with a move-in or move-out service if the fall also brings a lease change. Treat the September reset as an investment

September Cleaning: 7 Quick And Easy Steps To Get Ready For Fall Read More »

Home Clean and Organized

Home Clean and Organized: 5 Tips From Cleaning Experts For a Stunning Home

A Clean, Organized Home Is a Habit, Not an Event Keeping a home clean and organized takes more than heroic weekend sessions. It works best as a set of small habits wired into daily life, because the physical environment shapes how the mind feels: an orderly space lowers stress, sharpens focus, and builds a sense of control that carries into everything else. When surfaces are clear and objects have homes, there are fewer distractions and less to clean later. The strategies below turn upkeep into an automatic routine instead of a recurring crisis. Build the Daily Habits That Do the Heavy Lifting The one-minute rule: if a task takes under a minute, do it on the spot. Hang the book, wipe the spill, put the mug away. Tiny actions stop small messes from combining into an overwhelming one. The daily reset: spend 10-15 minutes at day’s end tidying the kitchen and living room. Wash dishes, wipe counters, straighten cushions. Waking up to a tidy space sets the tone for the next day. Shared responsibility: assign roles to every household member. When the load is distributed, upkeep stops being one person’s burden. A place for everything: give each item a designated spot, and the habit of returning it removes the drift that forces giant tidying sessions. Room-by-Room Routines That Actually Stick Room Daily habit Weekly habit Kitchen Wash dishes or load the dishwasher after each meal, wipe countertops, quick sweep of the floor Clean the microwave inside and out, scrub the stovetop and oven front, freshen the sink and faucets, wipe appliance exteriors including the fridge, empty and scrub the trash can Bathrooms Wipe sink, mirror, and counter; quick scrub of the toilet bowl Disinfect the toilet inside and out, clean shower or tub before mold and mildew take hold, wash the floor, launder towels and the shower curtain Living room and bedrooms Arrange cushions, fold blankets, return remotes and magazines; make the bed every morning; clothes into hamper or drawers Vacuum or sweep all floors, dust furniture, shelves, and electronics with a microfiber cloth, clean mirrors and glass Entryway and hallways Shoes, coats, and bags go to their designated spot on arrival Sweep or vacuum frequently, since these paths carry the outdoors inside Decluttering Rules That Keep the Clutter Out Organization is the other half of cleanliness, and it starts with honest culling. The “one in, one out” principle keeps volume constant: every new item bought means a similar old one gets donated, sold, or recycled. Inside the cupboards, group similar objects together and contain them with boxes, baskets, drawer dividers, and organizers. Think vertically with shelves, wall racks, and hooks to free up surfaces. Labels look trivial but work: everyone in the house can see where each thing belongs, so things go back without negotiation. Do not ignore the digital clutter either, because a clear inbox, organized files, and deleted apps lighten the mind the same way a clear counter does. The CDC’s basics on when and how to clean and disinfect your home make a good pairing with these habits: clean visibly dirty surfaces first, then disinfect the high-touch ones. Use the Right Tools, Top to Bottom Technique decides how much effort a clean costs. Always dust from the highest surfaces downward so falling dirt gets collected in the final pass instead of landing on freshly wiped shelves. Microfiber cloths trap dust and polish without lint; a vacuum with attachments, a proper mop, brushes, and sponges round out the kit. Stock the five essential products (all-purpose cleaner, glass cleaner, disinfectant, floor cleaner, bathroom cleaner) and check labels carefully, since the surface dictates what is safe. Never put abrasive products on marble or sealed wood. Wear gloves and open a window whenever chemicals are out; Health Canada’s tips for using household chemicals safely are worth a skim before stocking a cleaning caddy. If children, pets, or allergies share the house, lean toward eco-friendly, non-toxic formulas. Adapting to Real Life Every household has its own friction points, and each has a workaround. Pets: vacuum often for hair, keep lint rollers and upholstery tools handy, store supplies neatly, and wash food and water bowls daily. Children: define play zones, use toy boxes and low shelves kids can reach, and invite them to tidy early so responsibility becomes normal. Packed schedules: never try to clean everything at once. A focused 15-20 minute block per day in one area prevents buildup and keeps cleaning un-intimidating. Dust and allergies: dust with microfiber, vacuum with a HEPA filter, and change heating and air conditioning filters on schedule. Staying Motivated, and Knowing When to Delegate Motivation is a system too. Set realistic goals, since no home is perfect daily; celebrate small wins; break large tasks into steps; reward yourself after big jobs; and take before-and-after photos for proof of progress. Music or a podcast makes the time pass differently. A steady routine eventually runs on autopilot, which is the point. For the heavy categories, professionals are the smart shortcut: steam carpet cleaning, exterior window washing, and post-renovation dust demand equipment most homes lack, and life events such as moving, a big party, or a newborn make outside help an investment in sanity rather than a luxury. A scheduled regular cleaning visit locks in the maintenance, and a periodic deep clean resets whatever winter piled up. Home Organization FAQ What is the fastest way to start if my home feels chaotic? Stop trying to fix everything at once. Pick the kitchen counter and the entryway first, apply the one-minute rule for one week, and add a 10-minute daily reset once those stick. How often should a whole house be really cleaned? Daily habits handle surfaces, weekly sessions handle floors and bathrooms, and a thorough room-by-room deep clean belongs on the calendar a few times a year or whenever the reset is due. Does decluttering really reduce cleaning time? Directly. Every object on a surface is a pause while dusting, every pile is a place dirt hides.

Home Clean and Organized: 5 Tips From Cleaning Experts For a Stunning Home Read More »

Clean-Looking House vs. Sanitized House

Clean-Looking House vs. Sanitized House: Why It’s More Important Than You Think

Clean-Looking House vs. Sanitized House: Why the Difference Matters A tidy home can be a deceptive space. Countertops gleam, cushions are fluffed, and floors show no visible debris, which is exactly the picture most of us aim for during a weekly clean. Yet this visual order has little to do with the true hygienic condition of the home. That tidy look is an aesthetic victory built for optics: damp cloth swipes over counters, one fast vacuum pass, clutter hurried into closets before guests arrive. A sanitized house, by contrast, is defined by science rather than looks, with germs, bacteria, viruses, and fungi reduced to levels considered safe for human health. Understanding the gap between the two is the first step toward a home that genuinely protects your family. The Limits of a Clean-Looking Home Chasing a visibly tidy space is not pointless. Living in cluttered, visibly dirty surroundings contributes to stress, while tidying and organizing have real psychological benefits and create a calmer, more restful home. The problem is that the very tools used to create that look can spread the unseen world. A damp sponge that has been used for days removes crumbs while spreading millions of bacteria across the counter it is meant to clean. A dust cloth moves particles around, some of which float into the air and settle again later. A vacuum without a HEPA filter can suck allergens from the carpet and blast them back out of the exhaust. Appearance-based cleaning manages the macro while the micro is left to thrive. Cleaning, Sanitizing, and Disinfecting Are Not the Same These three words are often used as synonyms, but they describe different levels of action, and each has its place. Process What It Does Where It Matters Cleaning Removes visible soil, dirt, and organic matter with soap, water, and friction Everywhere; it is the required first step before any chemical treatment Sanitizing Lowers germs to a safe public-health level, killing 99.9% of specified bacteria in a short time Kitchen counters and sinks after food prep, and bathrooms Disinfecting Kills virtually all microorganisms, including hardy viruses and fungi Doorknobs, light switches, and remotes after illness; toilet bowls You cannot sanitize a dirty surface: soil gives germs a place to hide and can neutralize the chemicals, which is why the CDC’s home cleaning guidance says to clean first and disinfect when needed. Sanitizing a counter after wiping away crumbs actively targets bacteria like E. coli and Salmonella that cause foodborne illness, and sanitizing the sink where raw meat juices splashed is just as critical. Disinfection is more of a targeted intervention, such as treating surfaces after a family member has had the flu. The most overlooked ingredient in both is dwell time: the product must stay wet on the surface for the minutes listed on its label. Spraying and immediately wiping is often ineffective. Hotspots Where Appearance Hides Risk High-touch surfaces can look perfectly clean while carrying germs transferred from unwashed hands. Give regular attention to: Doorknobs, cabinet pulls, faucet handles, and the refrigerator door. Remote controls, keyboards, and cell phones. Kitchen details: the sink drain, faucet aerator, microwave handle, coffee maker buttons, and stove knobs. Bathroom details: the toilet base, toothbrush holder, and shower curtain or door. A polished stainless sink still hides biofilm in the drain, and a rinsed wooden cutting board can harbor bacteria in its knife grooves, risking cross-contamination between raw meat and fresh vegetables. In the bathroom, moisture at the toilet base and in the toothbrush holder fosters bacterial growth, while shower curtains and doors are prime spots for mold and mildew, which release spores that can affect respiratory health. Soft Surfaces and the Air You Breathe A truly sanitized home also includes what you cannot see: carpets, upholstery, and curtains act as giant filters that trap dust, pollen, pet dander, and microscopic organisms. A standard vacuum may lack the filtration to remove deep-down grit, so choose a HEPA-filtered model whose trapped particles are never recirculated, and every so often bring in professionals for hot water extraction or steam cleaning, whose heat kills dust mites, bacteria, and other deeply embedded allergens. Cleaning methods affect air quality too: harsh chemical cleaners release volatile organic compounds, while dry dusting sends allergens airborne. The healthier approach is damp-wiping with microfiber cloths, ventilating during and after cleaning, and using a HEPA air purifier where needed. For safe handling of any product you do use, Health Canada’s household chemical safety advice covers buying, storing, and disposing of cleaners correctly. Building a Sanitized Home Without Going Overboard Moving from a clean-looking house to a sanitized one is a shift in perspective: from reactive and appearance-based to proactive and health-based. It means reading labels, respecting dwell times, and focusing on hotspots rather than broad visible surfaces. A germ-free bubble is not the goal: full sterility is neither achievable nor desirable in a family home. The aim is smart management of the microbial world so your living space actively supports your well-being. Toronto Shine Cleaning specializes in exactly this gap between tidy and truly clean, with a deep cleaning service that reaches the hotspots above and regular maintenance cleanings that keep them that way. See our pricing, browse client reviews, or call (647) 424-0355 to book a healthier home. Frequently Asked Questions About Sanitizing Your Home What is the difference between cleaning and sanitizing? Cleaning removes visible dirt and organic matter with soap, water, and friction. Sanitizing is a chemical step that lowers remaining germs to a safe public-health level, killing 99.9% of specified bacteria in a short contact time. How long should a disinfectant stay on a surface? Long enough to stay wet for the dwell time printed on the product label, often several minutes. Wiping it away immediately defeats the purpose, so let the product sit before you dry the surface. Which surfaces should I sanitize most often? Food preparation areas, sinks, and bathrooms carry the highest risk, and high-touch spots like doorknobs, light switches, remotes, and phones

Clean-Looking House vs. Sanitized House: Why It’s More Important Than You Think Read More »

Carpets Cleaning: 12 Mistakes You Need to Stop Making

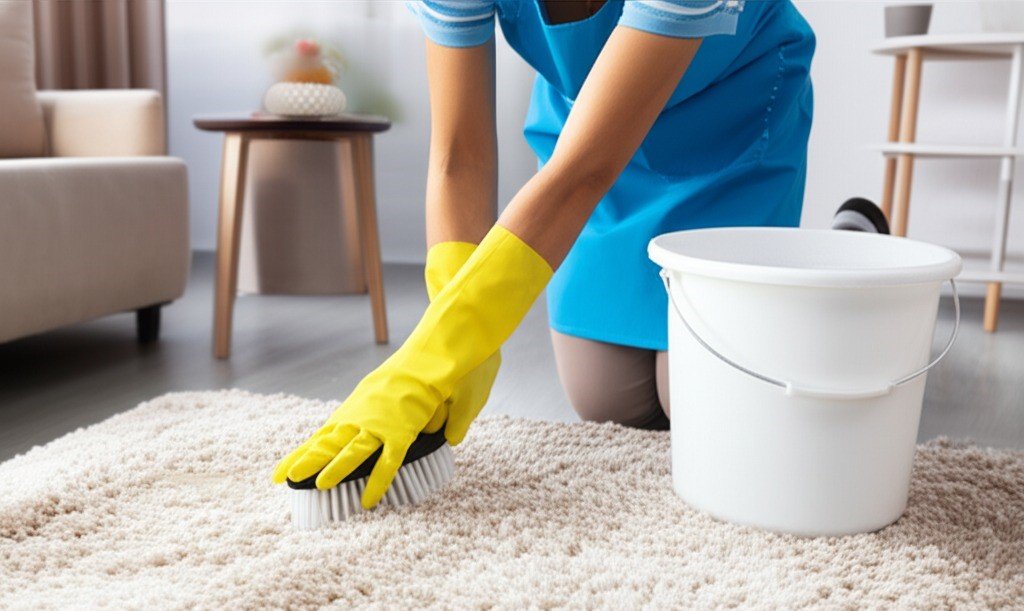
Carpet Cleaning: 12 Mistakes You Need to Stop Making Your carpet is a textile made of specific fibers, dyes, and backings, not a surface for any cleaner you grab from under the sink. Many household cleaners contain bleach that can permanently strip color, while others are so alkaline or acidic they can burn synthetic fibers or dissolve natural ones like wool. Dish soap is a frequent culprit: it cuts grease but leaves a sticky residue that attracts dirt faster than the surrounding carpet. The twelve mistakes below quietly destroy carpets, and all of them are avoidable. Mistakes That Damage Carpet Fibers Rubbing a stain is the most natural, and most destructive, impulse. Vigorous scrubbing pushes the spill deeper into the fibers and the padding beneath, can create a breeding ground for mildew, and frays the fibers so they look fuzzy and worn forever. Always blot with a clean, white cloth, working from the outside of the spill inward. Never apply cleaning solution directly to the carpet, either: pouring it on oversaturates the area, spreads the stain under the surface, and risks water damage to your subfloor. Instead, apply a small amount of solution to a cloth and blot with that. Excess water is the most damaging mistake of all, especially with rented machines, where multiple wet passes are tempting. Overwetting can dissolve the glue between the carpet backings, causing ripples and buckling, and it can trigger wicking, where old stains rise back to the surface as the carpet dries. A properly cleaned carpet should feel only slightly damp and dry within 6 to 12 hours; if it stays wet for 24 hours or more, it has been overwetted, and damp carpet and padding can grow mold. Mistakes That Make Stains Permanent Waiting too long turns a minor spill into a permanent stain, because dyes and acids in wine, coffee, juice, and pet urine chemically bond with the fibers over time. The golden rule is to act immediately: blot the excess, identify the stain, and treat it right away. Never skip the spot test. Even a reputable product can react unpredictably with your carpet’s specific dyes, so test any cleaner on a hidden area such as inside a closet or under a large piece of furniture before treating a visible stain. And always rinse. Any solution left in the fibers dries into a sticky, stiff residue that acts like flypaper for dirt, which is why spots darken and reappear shortly after cleaning. After blotting a stain, mist the area with clean water and blot again with a dry cloth. Mistakes That Wear Carpets Out Early Infrequent vacuuming is the silent destroyer of carpets. Fine, abrasive grit settles deep in the pile, and every footstep grinds it against the fibers like sandpaper, dulling them and creating traffic lanes. Vacuum high-traffic areas at least twice a week and the rest of the home at least once. Use a beater bar or rotating brush for cut-pile carpets, a suction-only vacuum for loop-pile styles like Berber to avoid snagging, and keep the bag or canister no more than two-thirds full for maximum suction. Deodorizing powders are another well-intentioned mistake: they coat fibers with fragrance, and most household vacuums cannot fully remove the fine powder, which builds into a paste-like layer at the base of the pile and can clog your vacuum. Fix odors at the source with proper cleaning, and remember that a cleaner home means better indoor air quality for everyone in it. Mistakes That Undo Your Hard Work Walking on a wet carpet crushes the weakened pile, leaving matted footprints, and shoe soles transfer dirt and oils onto freshly cleaned fibers. Stay off the carpet until it is completely dry, and speed drying with fans, a dehumidifier, or the HVAC system. Ignoring the padding is another costly error: the pad acts like a sponge, and liquid from spills or pet accidents wicks back up to the surface for weeks, returning stains and odors no matter how well you clean the surface. Significant spills often need professional subsurface extraction to flush the pad. Be careful with homemade solutions, too. Vinegar is an acid that can damage natural fiber carpets like wool or silk, baking soda is a fine particulate that builds up over time, and mixing vinegar with a bleach-containing cleaner can release toxic chlorine gas. Commercial carpet cleaners are pH-balanced and formulated with surfactants and rinsing agents that rinse away cleanly. Mistakes in Maintenance Planning Waiting until the carpet looks visibly filthy is the costliest mistake of all, because by then it holds pounds of deep-seated abrasive grit that is actively wearing down the fibers. Schedule professional cleanings as preventative care: for a typical household, an annual professional cleaning is recommended, with more frequent cleanings for homes with pets, children, or high traffic. Keeping up with cleaning routines is part of the everyday hygiene practices that protect your family’s health. The 12 Carpet Cleaning Mistakes at a Glance Mistake Consequence Fix Using the wrong product Color loss, burned fibers, sticky residue Use carpet-specific, fiber-appropriate cleaners Rubbing stains Frayed fibers, stain pushed deeper Blot from the outside in Applying products directly Oversaturation, subfloor damage Apply to a cloth, then blot Using too much water Buckling, mold, wicking Dry within 6 to 12 hours Not rinsing Residue attracts dirt Rinse with clean water and blot dry Vacuuming too rarely Abrasive grit wears fibers down Vacuum high-traffic areas twice a week Skipping professional cleanings Embedded soil becomes permanent Book an annual deep cleaning Frequently Asked Questions How long should carpet take to dry after cleaning? A properly cleaned carpet should feel only slightly damp and dry completely within 6 to 12 hours. If it remains wet for 24 hours or more, it has been overwetted, which risks mold and mildew in the padding. How often should I vacuum my carpets? Vacuum high-traffic areas at least twice a week and the rest of the home at least once a week. Frequent vacuuming removes the abrasive grit

Carpets Cleaning: 12 Mistakes You Need to Stop Making Read More »

Cleaning services in laval

House Cleaning Services in Laval: Get a Fascinating Home Today!

Reputable cleaning services in Laval have become a go-to solution for those who prioritize a spotless environment but lack the capacity to achieve it themselves. They provide the necessary expertise and dedicated time to handle the exhaustive requirements of deep cleaning and regular maintenance, ensuring spaces are not just tidy, but truly clean. The benefit extends beyond aesthetics; it contributes to a healthier indoor air quality and a more pleasant atmosphere for everyone. The necessity of maintaining a pristine environment in Laval is a fundamental aspect of modern living. For residents and business owners alike, the challenge lies in balancing a demanding schedule with the ongoing need for a clean, sanitary, and welcoming space. The very pace of life can relegate deep cleaning to a secondary priority, yet its importance for health and well-being remains paramount. This is precisely the gap that professional cleaning services fill, offering a systematic and reliable solution. The demand for high-quality cleaning services in Laval is a direct reflection of a community that values both its time and the quality of its surroundings. A truly effective cleaning regimen is built on a foundation of consistent, meticulous tasks. It begins with the universal battle against dust, which accumulates on every horizontal and vertical surface. A professional approach ensures that nothing is overlooked, from the tops of shelves and doorframes to the often-neglected baseboards and window sills. This process is more than a quick wipe; it involves using the correct tools and techniques to capture and remove dust, not just redistribute it. Following this, floors are given comprehensive attention. Carpets and area rugs are vacuumed thoroughly, edge to edge, with equipment powerful enough to lift dirt, allergens, and pet dander from deep within the fibers. For hard surfaces like wood, tile, or laminate, mopping is performed with pH-neutral solutions that sanitize without causing damage, leaving floors spotless and free of residue. This baseline of care, when performed regularly, is what separates a superficially tidy space from a genuinely clean one. The reliability of professional cleaning services in Laval ensures this standard is consistently met. The kitchen, as the hub of culinary activity, requires an even more rigorous standard of hygiene. Professional cleaning services in Laval address this with a detailed, multi-point process. Countertops are cleared and disinfected to eliminate bacteria and food particles. The exteriors of all appliances, refrigerator, oven, dishwasher, and microwave, are wiped down and polished, removing fingerprints and smudges to restore their intended finish. The stovetop, a frequent site of grease and food spatter, is thoroughly degreased and scrubbed. Sinks are scoured and faucets polished to a high shine, preventing the buildup of limescale and mildew. Cabinet fronts are wiped clean of drips and fingerprints, and the kitchen floor is given a final, meticulous sweep and mop. Similarly, bathrooms demand a clinical level of sanitation. Expert cleaning services in Laval execute a top-to-bottom disinfection. The toilet is cleaned and sanitized inside and out. Sinks and countertops are scrubbed free of soap residue and germs. Mirrors are polished to a streak-free shine. The most labor-intensive area, the shower and bathtub, is given special focus. Tile walls, grout lines, and glass doors are painstakingly scrubbed to remove soap scum, hard water stains, and any trace of mold or mildew. This task alone highlights the value of professional help, as it requires significant physical effort and specialized products to achieve a truly hygienic result. Emptying wastebaskets and sanitizing the floor complete the process, leaving the bathroom fresh and immaculate. The market for cleaning services in Laval has grown because residents understand the importance of this level of professional care. Beyond regular maintenance, there are times when a more intensive approach is necessary. A deep clean is a comprehensive, whole-home service that addresses the accumulated grime that standard cleaning may not reach. It encompasses all the tasks of a regular clean but expands upon them significantly. This includes washing interior windows and cleaning out the tracks and sills. Light fixtures, ceiling fans, and vents are carefully dusted. One of the defining features of a deep clean is the attention paid to the interior of appliances. Ovens are degreased, refrigerators are emptied and sanitized, and microwaves are cleaned inside and out. It’s a service that redefines what many people expect from cleaning services in Laval. This exhaustive process often involves washing down doors, doorframes, and baseboards throughout the entire property. Blinds may be individually wiped down, and furniture may be moved to clean the spaces underneath and behind it. This is the kind of transformative work that makes a home feel new again. People often schedule a deep clean seasonally, before hosting a major holiday or event, or simply when they feel their home needs a complete reset. The thoroughness offered by these types of cleaning services in Laval is unparalleled. Certain life events necessitate even more specialized cleaning solutions. Moving is a primary example. Whether you are a tenant aiming to secure a full security deposit or a homeowner preparing a property for sale, a move-out clean is critical. This is arguably the most intensive service offered by cleaning services in Laval. It involves deep cleaning an empty residence from top to bottom, including the insides of all cabinets, drawers, and closets. Walls are often spot-cleaned, and every fixture is polished. The goal is to leave the property in pristine condition for its next occupants. A move-in clean offers the opposite benefit: ensuring your new home is completely sanitized and free of the previous residents’ dust and dirt before you begin to unpack. Post-construction or post-renovation cleaning is another highly specialized field. Construction projects generate an immense amount of fine dust-from drywall, wood, and other materials-that permeates every surface and crevice. This is not ordinary dust; it is pervasive and requires specific equipment to remove safely and effectively. Professional cleaning services in Laval utilize industrial-strength vacuums with HEPA filters to capture these fine particles from the air and from surfaces. The process is multi-phased, often requiring several rounds of dusting and wiping to ensure all residue is gone. This is essential not

House Cleaning Services in Laval: Get a Fascinating Home Today! Read More »

Airbnb Cleaning Service

How to Choose The Best Airbnb Cleaning Services in Toronto: 5 Key Factors

Airbnb Cleaning Services in Toronto: 5 Key Factors for a Five-Star Turnover A successful short-term rental lives or dies by one process: the turnover. This is not a simple tidy-up; it is a complete, systematic reset of the guest experience. In a world-class city the standards are exceptionally high, and the smallest oversight, a stray hair or a sticky spot on the counter, can compromise an entire stay. If you are choosing between companies offering Airbnb cleaning services in Toronto, here are the five factors that separate a professional reset from a rushed wipe-down. Factor 1: A Systematic Process That Starts at Checkout The moment a guest departs, the clock begins. The first action is ventilation: all windows and balcony doors open to flush out stale air and lingering odors from cooking or fragrances, creating a neutral, fresh canvas while the space airs out. During this window, a professional crew runs a preliminary walkthrough for assessment, not cleaning, scanning each room for new damage such as scuffs on walls, carpet stains, or broken items. Issues are documented immediately with clear, time-stamped photographs and reported to the host, standard operating procedure for any reliable service. Beds are stripped completely, and all towels, bathmats, and kitchen cloths go into laundry bags to prevent cross-contamination. Factor 2: Bedroom and Bathroom Detail Work The bedroom is a guest’s sanctuary, and its cleanliness must be absolute. After the linens come off, the mattress protector and pillows are inspected for staining and laundered or replaced as needed, and the mattress itself is vacuumed with an upholstery attachment to lift dust, allergens, and skin cells. Fresh linens go back on with intent: taut sheets, hotel-style corners, and a wrinkle-free duvet, because the bed is a presentation. Headboards, nightstands, and dressers are wiped down, drawers and closets are opened and checked for items left behind, and picture frames, lamps, and window sills are dusted before the floor is vacuumed under the bed and behind furniture. Nowhere is cleanliness scrutinized more intensely than the bathroom. A quality disinfectant goes on the shower, bathtub, toilet, and sink, then sits for several minutes to dissolve soap scum, grime, and bacteria, following the CDC’s logic for cleaning and disinfecting surfaces at home. The shower and tub are scrubbed wall to wall with special brushes for grout lines and drains, and glass doors are squeegeed to a streak-free finish. The toilet is disinfected inside and out, from bowl and seat to tank and the entire base down to the floor. Once sanitized, the space is restocked: ample toilet paper, fresh hand soap, full shampoo, conditioner, and body wash bottles, and three freshly laundered towels per guest, a bath towel, hand towel, and washcloth, folded neatly. The floor is mopped last, and light switches, door handles, and the exhaust fan cover get a final wipe. Factor 3: Kitchen Disinfection and Restocking The kitchen is where guest trust is won or lost. Turnover cleaning starts by emptying the refrigerator and freezer of any food left behind, then wiping every interior shelf, drawer, and door seal with a food-safe disinfectant. Appliance exteriors and handles are polished, the microwave is cleared of splatters, the oven is inspected for spills, and the stovetop is degreased until it shines. Countertop items like the coffee maker and toaster are lifted so the surfaces underneath can be fully sanitized. The sink is scoured, the faucet polished, and cupboards and drawers spot-checked, with all provided dinnerware, glassware, and cutlery inspected. When it is a DIY job, follow Health Canada’s advice on using household chemicals safely; a professional crew handles those products for you. Restocking is part of the service: fresh paper towels, a new sponge, dish soap, dishwasher pods, a cleaned and full coffee station, and bins emptied, wiped, and relined before the floor is swept and mopped. Factor 4: Living Areas and the Extra-Mile Details The living room is where first impressions form, so every surface from coffee tables to the television stand and bookshelves is dusted. Upholstery is vacuumed with cushions removed to clean the frame beneath, cushions are fluffed and arranged, and throw blankets are folded. Books and magazines are organized, rugs are straightened and vacuumed, and the floor is finished with attention to corners and baseboards. Then come the details that elevate a clean from standard to exceptional: Baseboards wiped down to remove scuffs and dust. Door frames, doorknobs, and light switches sanitized as high-touch points. Interior windows checked for fingerprints and smudges. Every light bulb checked so none are burnt out for the arriving guest. Factor 5: The Final Walkthrough and Handoff The last step is quality control with fresh eyes: a supervisor or the cleaner tours the property as a newly arriving guest would, checking that pillows are perfectly arranged, the welcome mat is straight, and the air smells neutrally clean. The thermostat is set to a comfortable temperature, blinds are adjusted to a uniform position, and only then is the property securely locked and a confirmation message sent to the host. For hosts aiming for Superhost status, this level of turnover is not a luxury; it is a strategic necessity. Toronto Shine Cleaning serves properties across the city and the GTA, which you can confirm on our locations page. The Turnover at a Glance Area Reset essentials Restocking and checks Bedroom Vacuumed mattress, hotel-style bed-making, wiped surfaces Fresh linens, lost-item sweep of drawers Bathroom Disinfected and scrubbed tub, shower, toilet; squeegeed glass Three fresh towels per guest, soap and TP stocked Kitchen Disinfected fridge, degreased stove, scoured sink Coffee station, dish supplies, relined bins Living areas Dusted surfaces, vacuumed upholstery, finished floors Bulbs, blinds, thermostat, final walkthrough Airbnb Cleaning FAQs How quickly can a turnover crew reset my unit? Professional crews work from a fixed checklist and arrive fully equipped, built around tight turnover windows between late checkouts and evening arrivals. Book a company that treats those windows as non-negotiable and confirms completion after every visit. Do Airbnb cleaners handle laundry as well? A

How to Choose The Best Airbnb Cleaning Services in Toronto: 5 Key Factors Read More »

housekeeper deep cleaning

Deep Cleaning Services in Toronto, We Do It Right!

Deep Cleaning Services in Toronto: The Complete Reset Your Home Needs A regular cleaning keeps surfaces tidy, but the grime that accumulates below the surface quietly builds up over the months. That is the domain of specialized deep cleaning services in Toronto. Unlike standard housekeeping, a deep clean is a comprehensive, methodical process that tackles dirt in every often-overlooked, hidden corner of your home: a fundamental reset that restores your space to a truly pristine state. What Makes a Deep Clean Different? Professional deep cleaning focuses on a thorough, top-to-bottom reset of every room, targeting buildup that routine visits simply do not reach. It goes far beyond the surface and into the details: grease on cabinet fronts, dust in air vents, limescale on fixtures, and grime in grout lines. The scope demands expertise and specialized equipment, and more and more Toronto homeowners and businesses are investing in it, whether for a spring reset or as part of ongoing maintenance. For a fuller breakdown of what a session covers, see our guide to deep cleaning services in Toronto. Kitchen Deep Cleaning: Degreasing and Appliance Interiors In kitchens, the work is all about degreasing and disinfecting, starting inside your cupboards. Crews empty cupboards and pantries to inspect for spills, sticky residue, forgotten food, and signs of pests, then degrease and sanitize every interior surface. Handles and cabinet fronts get attention too, because repeated hand contact leaves a sticky film. Appliances receive treatment they almost never get at home: Oven: racks soaked, interior carbon buildup scrubbed, door glass cleaned for a like-new view. Stovetop: grates and burner caps removed and cleaned, boiled-over residue scrubbed from the surface. Range: pulled out so the sides, the floor behind it, and the wall are reached and wiped clean. Refrigerator and freezer: emptied, shelves and drawers washed, door gaskets detailed with a small brush, condenser coils vacuumed of dust to support efficiency and lifespan. Small appliances: toaster crumb trays emptied, coffee makers and kettles descaled, microwave interiors scrubbed, including the often-splattered ceiling. Bathroom Deep Cleaning: Soap Scum, Limescale, and Grout Bathrooms are scrubbed and sanitized top to bottom, dissolving soap scum and body residue from tubs and showers with specialized agents made for stubborn film. Shower doors and glass enclosures are cleaned until streak-free, the tracks at the base are cleared of accumulated gunk, and tiles and grout lines are meticulously scrubbed to lift mildew and dirt from porous grout. Stubborn mold and mildew in damp bathrooms are common culprits, and the CDC’s guidance on mold and your health explains why proper removal matters. Health Canada also recommends keeping indoor humidity low and fixing moisture sources so mould cannot take hold in the first place. Fixtures get their shine back as limescale and mineral deposits are removed from faucets and showerheads, and chrome is polished. Toilets are cleaned inside the bowl and across the entire exterior, from the tank lid and handle to the seat, hinges, base, and surrounding floor, plus the often-ignored overflow hole inside the tank, flushed clean with disinfectant. Vanity and medicine cabinets are emptied and wiped inside, and exhaust fan covers are removed and washed, because a dusty fan cannot ventilate properly and traps the humidity that leads to mildew. Living Areas and Bedrooms: A Top-to-Bottom Reset Crews work from the ceiling down to the floor in every room. Cobwebs are removed from corners and ceiling edges, light fixtures and ceiling fan blades are dusted, and the tops of bookcases, wardrobes, and cabinets are reached. Walls are spot-cleaned of scuffs and splatters, and baseboards, door frames, window frames, and switch plates are hand-wiped one by one. The process continues behind and beneath the obvious. Furniture is moved so the floors underneath are reached, and upholstery is vacuumed with crevice tools to extract dust, skin cells, and allergens from fabric. Wood furniture is polished, lampshades and blinds are dusted, and the air system itself is addressed: vents and grilles are vacuumed and wiped, and HVAC return air covers are pulled and dusted out. Professional crews rely on HEPA-filter vacuums that capture microscopic allergens rather than recirculating them, and steam cleaners that sanitize without harsh chemicals. When Toronto Homes Need a Deep Clean Most Deep cleaning requests tend to follow life events: Moving into or out of a home, when deposits and first impressions are at stake. Post-renovation cleanup after the construction dust settles in every crack. Seasonal refreshes, especially the annual spring clean. Before hosting an event or gathering, such as a wedding at home or the holidays. Preparing a space for a new baby or toddler who will crawl across every floor. Allergy season, when dust, dander, and pollen accumulate indoors. How to Choose a Professional Deep Cleaning Company Not all services are created equal, so choose carefully. Look for a company that offers a range of deep cleaning options with a detailed, transparent list of what each package includes. Prioritize experienced, trained professionals who understand the right products and techniques for different surfaces, and verify that the company is insured and bonded to protect your home and belongings. What to check Why it matters Transparent scope and checklist You can compare packages and know what is covered before booking. Trained, vetted crew Correct products and techniques protect finishes instead of damaging them. Insurance and bonding Toronto Shine carries a $1,000,000 insurance policy and a $10,000 accidental breakage and surety bond. Flat, upfront pricing Our deep clean starts at $270.38 before HST for a studio or one-bedroom, shown on our pricing page. Deep Cleaning Service FAQs What is included in a deep cleaning service in Toronto? A full reset of each room: kitchen cabinets and appliances inside and out, bathrooms degreased and descaled with grout scrubbed, walls spot-cleaned, baseboards and switch plates wiped, vents dusted, furniture moved, and floors and carpets thoroughly cleaned. How is deep cleaning different from regular housekeeping? Regular visits maintain cleanliness on visible surfaces. A deep clean restores the areas maintenance skips, which is why many homes pair

Deep Cleaning Services in Toronto, We Do It Right! Read More »

Pristine marble kitchen countertop gleaming in natural sunlight.

7 Tips for Keeping Your Apartment Clean: A Comprehensive Guide | Toronto Shine Cleaning

A Realistic System for a Spotless Apartment Keeping an apartment clean stops being daunting the moment you replace heroic weekends with a system. Small spaces actually work in your favor, because a few smart routines cover the whole home in minutes rather than hours. These seven tips, refined for apartment living, turn chores into habits you barely notice, whether you are juggling a busy schedule or simply refuse to spend Saturdays scrubbing. 1. Build a Cleaning Schedule You Can Keep A schedule is the foundation. Split tasks into daily, weekly, and monthly buckets and commit to each one. Handle dishes right after dinner and wipe kitchen counters every evening so crumbs and spills never pile up, which keeps the kitchen inviting for cooking. Assign fixed days to weekly work, for example vacuuming on Saturday and dusting on Sunday, and the chores become predictable instead of looming. Then reserve monthly slots for bathroom deep work, closet organization, and clearing out the refrigerator. Scheduled tasks never snowball into a terrifying marathon, because upkeep arrives in small pieces. 2. Declutter as a Habit, Not an Event Clutter makes even a clean apartment feel messy, because it multiplies the surfaces dust lands on. Spend a few minutes daily returning items to their homes and accumulation never gets a head start. A minimalist mindset accelerates this: keep what you need or love, and the fewer objects you own, the fewer you dust, wash, and move around before cleaning a surface. Treat decluttering as an ongoing commitment rather than a one-time project, and the space stays open, calm, and much easier to maintain. 3. Buy the Right Tools Once Good tools cut the time and effort of every session. The apartment starter kit is short: Microfiber cloths that trap dust and grime without streaks or lint, on counters and glass alike A reliable vacuum matched to your floors, powerful on carpet yet gentle on hardwood, compact enough for small storage An extendable duster for ceilings and corners A squeegee for shower doors and tiles, which prevents water marks and mildew Quality rubber gloves to protect hands and grip slippery items Product choice matters as much as equipment. Eco-friendly, non-toxic cleaners keep the air safe for you, your family, and pets while still handling real grime, and Health Canada’s household products guidance explains how to choose and use consumer cleaning chemicals responsibly. 4. Let One Cleaner Do Many Jobs A capable multi-purpose cleaner replaces a shelf of single-use bottles. One product that moves from countertops to bathroom tiles declutters your storage, trims your shopping list, and keeps you from switching solutions mid-task. Modern eco-friendly formulas are gentle on surfaces yet tough on dirt, and concentrated versions stretch further, since you dilute to the strength each job needs. Fewer bottles, less packaging waste, and a lighter monthly bill, all without sacrificing results. 5. Prioritize the Rooms That Wear Out First High-traffic areas collect the most dirt because they see the most life. The living room is where guests look first and where dust settles into sofas and curtains, so regular dusting, vacuuming, and spot cleaning keep it welcoming. The kitchen absorbs spills, crumbs, and grease that attract pests if ignored, so wipe counters, stove tops, and appliance faces daily and give them a deeper pass weekly. The bathroom sees constant moisture and use, so squeegee the shower after bathing and disinfect fixtures weekly. If household members touch shared surfaces constantly, the CDC cleaning and disinfecting recommendations are a sensible baseline. And if you notice fuzzy patches or a musty smell in the shower or behind the toilet, treat bathroom mold as a health topic, not a cosmetic one, using the CDC mold and health guidance to handle it safely. 6. Sweep In Clean: A No-Shoes Policy Most apartment filth walks in on shoes. A bowl of slippers by the door and a good floor mat keep street grit, melted salt, and tracked-in grime outside, which lightens vacuuming and protects floors. Guests happily accept the trade when the alternative is obvious. 7. Close the Day With a Ten-Minute Reset Before bed, run one timer for ten minutes: dishes into the dishwasher, clothes off the floor, surfaces cleared, and a fast sweep of the main living area. Waking up to a reset apartment removes the visual noise that makes mornings stressful, and the habit makes daily upkeep almost automatic. The Seven Tips at a Glance Tip Cadence Effort per session Daily, weekly, monthly schedule Fixed days Varied, planned Declutter as you go Daily A few minutes Right tools and products Buy once Upfront cost, saved time Multi-tasking cleaners Every clean Fewer bottles, fewer steps High-traffic focus Daily plus weekly Targeted attention No-shoes entry Always Zero Nightly reset Every evening Ten minutes Apartment Upkeep, Shared or Rented Systems beat intensity, but every apartment eventually rewards professional help. A regular cleaner covers the routine, a deep clean resets stuck-in grime, and a move out service protects deposits when the lease ends. Toronto Shine Cleaning covers neighborhoods across the city, listed on the locations page. Frequently Asked Questions How often should I deep clean my apartment? Work through one deep-clean zone each month, such as the bathroom, fridge, or closets, while daily and weekly habits handle the rest. Renters often schedule a full deep clean before moving out. What is the best vacuum for a small apartment? A compact upright or stick model with strong suction and a soft-floor setting. Lightweight matters more than tank size when storage is limited, and a good filter helps with dust and pet hair on upholstery. Are eco-friendly cleaners strong enough for kitchens and baths? Modern non-toxic formulas handle everyday grease and soap scum well. Let them dwell on the surface for a minute or two, then wipe. Concentrates let you mix stronger solutions for stubborn jobs. Do I need a cleaning schedule if I clean whenever I notice mess? Reacting to visible mess misses slow accumulation: dust in corners, grease behind the stove, mildew building

7 Tips for Keeping Your Apartment Clean: A Comprehensive Guide | Toronto Shine Cleaning Read More »