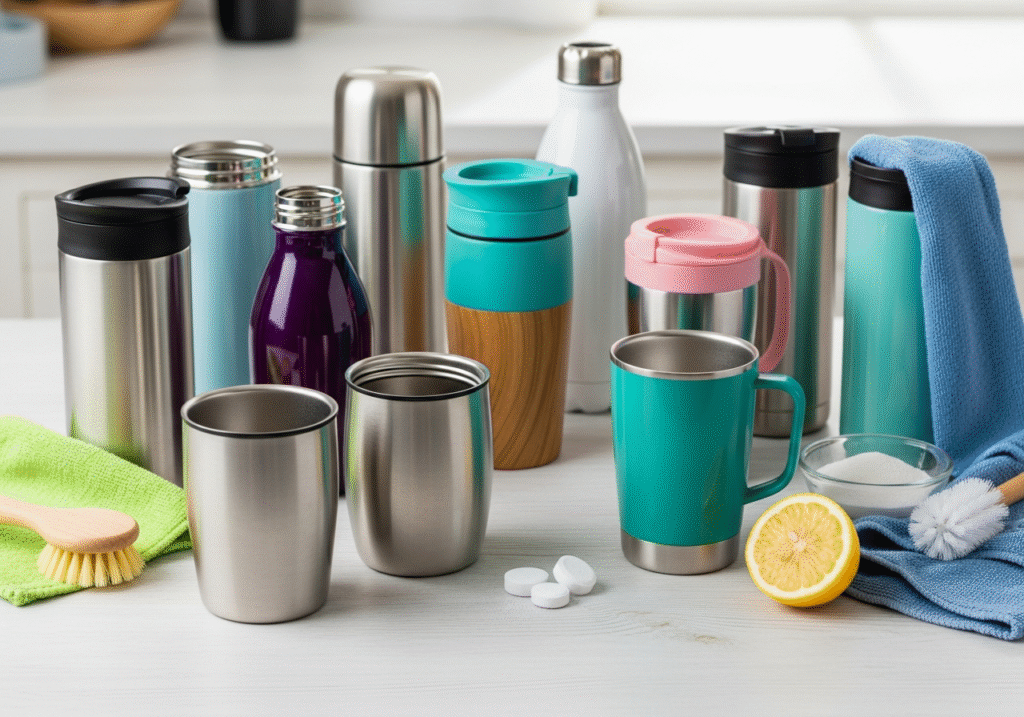
Blog

5 Key Areas to Deep Clean Before Winter Sets In

5 Key Areas to Deep Clean Before Winter Sets In

As the days grow shorter and a distinct chill settles in the air, winter is coming, and our homes begin a subtle transformation. Windows are closed, thermostats are turned up, and we instinctively prepare to spend more time within our own four walls. This seasonal shift from the open-air freedom of summer to the enclosed comfort of winter calls for a specific kind of cleaning, a deliberate preparation of our indoor environment. It is more than just a routine tidying; it is a process of ensuring the space we will inhabit so intensely for the next several months is not only clean and orderly but also healthy, efficient, and truly comfortable. This preparation is a foundational act of creating a sanctuary for the colder season ahead. 1.Quality of the air The most critical aspect of winterizing a home’s interior is addressing the quality of the air we will be breathing. For months, the heating system has lain dormant, accumulating a fine layer of dust, pollen, pet dander, and other microscopic particles within the ductwork. When the furnace kicks on for the first time, it blasts this accumulation directly into your living space, which can aggravate allergies and respiratory issues. The first step, therefore, should be to turn off your HVAC system at the thermostat and address the registers and vents in every room. Using the brush attachment on your vacuum cleaner, go over each vent cover, pulling away the surface dust. For a more thorough job, unscrew the covers and wash them in a sink of warm, soapy water, using a small brush to get into the grilles. Before replacing them, use the vacuum’s crevice tool to reach as far into the duct opening as possible to remove any loose debris. The single most impactful task for indoor air quality is to replace the furnace filter. A clogged, dirty filter not only fails to trap airborne particles but also forces your heating system to work harder, increasing energy consumption and a risk of malfunction. A fresh filter is an inexpensive and simple measure that pays significant dividends in both health and efficiency all winter long. 2.Natural Light With the air quality addressed, the next focus should be on maximizing the limited natural light of the season. Dirty windows can significantly reduce the amount of light that enters a room, contributing to a gloomy indoor atmosphere. This is the perfect time to remove and clean your window screens. Lay them on a flat surface outdoors and gently scrub them with a soft-bristled brush and a solution of mild soap and water, then rinse them thoroughly and allow them to dry completely. Storing screens in a garage or basement during the winter not only lets in more light but also protects them from being damaged by snow and ice. With the screens removed, give the interior of your windows a meticulous cleaning. A simple solution of warm water with a few drops of dish soap can cut through grime effectively. Using a high-quality squeegee is the key to a professional, streak-free finish. Do not neglect the window tracks and sills, which are notorious for collecting an unpleasant mix of dirt, dust, and dead insects. A vacuum’s crevice tool is ideal for clearing out the loose debris, followed by a detailed wipe-down with a damp cloth and an old toothbrush for the tight corners. Clean windows make a remarkable difference, making rooms feel brighter, larger, and more cheerful during the darker months. 3.Sanitized fabrics As we prepare to get cozy, the textiles in our home require special attention. The heavy comforters, flannel sheets, wool throws, and decorative blankets that have been packed away in closets or storage chests for half a year need to be properly freshened. Even when stored cleanly, fabrics can absorb a stale, musty odor over time. Launder everything according to its care label before putting it on your bed or draping it over your sofa. This ensures your cozy essentials are fresh, clean, and free of dust mites. This is also the ideal time to deep clean the fabrics that are out year-round but see much more use in the winter. Curtains and drapes are silent collectors of an astonishing amount of household dust. Use your vacuum’s upholstery attachment to go over them from top to bottom. For more durable fabrics, a steam cleaner can be used to sanitize and release wrinkles. If they are machine washable, taking them down for a thorough cleaning will dramatically reduce airborne allergens. Upholstered furniture, from the family sofa to the favorite armchair, should be given a similar treatment. Remove all cushions and use a crevice tool to vacuum every seam, crack, and corner where crumbs, dust, and pet hair accumulate. A thorough vacuuming of the entire piece will refresh it and prepare it for many long winter evenings. 4.Fireplace and Floors The hearth and the floor are central to the feeling of winter comfort. If you have a fireplace, its surrounding area needs to be prepared before its first use of the season. The mantel, hearth, and fireplace tools should be completely cleared and wiped down to remove all settled dust. While the interior of the chimney requires a professional sweep for safety, cleaning the immediate exterior prevents that first fire from sending a plume of dust into the room. With the fireplace ready, turn your attention to the floors. Carpets and area rugs will become the primary surfaces for playing, relaxing, and gathering. A standard, quick vacuuming is not sufficient for a seasonal deep clean. To truly remove the embedded dirt, allergens, and microscopic grit that wears down fibers, you must vacuum slowly and methodically. Make multiple passes over the same area, moving in overlapping, perpendicular directions to agitate the carpet pile from all angles and allow the vacuum’s suction to work most effectively. If possible, move furniture to clean the areas underneath, which are often the dustiest parts of a room. This level of deep vacuuming not only cleans

5 Key Areas to Deep Clean Before Winter Sets In Read More »

organized kitchen pantry

How to Perform a Complete Pantry Reset for Lasting Order

The kitchen pantry, whether it’s a grand walk-in closet or a simple cabinet, is the heart of a home’s food supply. It is meant to be a resource, a well-stocked library of ingredients and staples that supports daily meals and culinary creativity. Yet for many, the pantry becomes a source of stress and disorganization. It can quickly devolve into a chaotic jumble of half-used bags of pasta, precariously stacked cans, forgotten spices, and stale crackers. An untamed pantry is more than just an eyesore; it’s an inefficient system that leads to food waste, duplicate purchases, and a frustrating cooking experience. Taking control of this space is a transformative act that streamlines your kitchen, saves you money, and brings a sense of calm and order to the daily routine of feeding yourself and your family. Reorganization The first step in taming a chaotic pantry, and perhaps the most cathartic, is a complete reset. This requires pulling every single item out. Every can, every box, every bag must be removed from the shelves and placed on a countertop or table. This may seem like a daunting task, but it is non-negotiable. It is impossible to truly understand what you have or to properly clean the space with items still in the way. As you remove each item, begin the process of sorting. Create broad categories on your work surface: grains and pasta, canned goods, baking supplies, oils and vinegars, snacks, breakfast items, spices, and so on. This initial sort will immediately begin to reveal the state of your inventory. You will likely find three half-empty boxes of the same cereal, a collection of expired canned soups, and that jar of specialty chutney you bought for a dinner party two years ago. With everything out and sorted, the crucial purge begins. Pick up each item and inspect it, paying close attention to the expiration or best-by date. Be ruthless. Discard anything that is past its date. For items without a clear date, like a bag of flour secured with a twist-tie, use your best judgment. If it smells off, looks discolored, or you have no memory of when you bought it, it is best to let it go. This is not just about clearing clutter; it is about food safety and quality. Beyond expired items, consider the food you simply will not use. That bag of quinoa you bought with the best of intentions but have never cooked, or the tin of smoked oysters from a well-meaning relative. If an item has been sitting untouched for over a year, it is unlikely you will ever use it. If it is still in date and unopened, consider donating it to a local food bank. This process declutters your pantry of aspirational purchases and aligns it with the reality of how you and your family actually eat. Complete Cleaning Once the shelves are completely bare, the next step is a thorough cleaning. Pantries are notorious for accumulating a fine layer of dust, sticky spills, and a cascade of crumbs. Begin by vacuuming every shelf, starting from the top and working your way down. Use a crevice tool to get into the corners and along the edges where debris loves to hide. After vacuuming, wipe down all surfaces with a cloth dampened with warm water and a gentle all-purpose cleaner. Pay special attention to any sticky spots from leaked honey or syrup. Wipe down the walls and the baseboards as well. Finally, sweep and mop the floor. Starting with a truly clean, empty space is a psychological reset that provides a blank canvas for creating a new, functional system. With the space clean and your inventory edited down to only the items you will actually use, the process of thoughtful reorganization can begin. The guiding principles are visibility and accessibility. The goal is to be able to see what you have at a glance and to easily reach it. The most effective way to achieve this is through containment and zoning. Decant dry goods from their original, often bulky and flimsy, packaging into clear, airtight containers. Items like flour, sugar, rice, pasta, oats, and cereal are perfect candidates for this. Clear containers allow you to see instantly how much of an item you have left, preventing you from running out mid-recipe. They also protect your food from pests and keep it fresher for longer. Opt for square or rectangular containers over round ones, as they make much more efficient use of shelf space, fitting together without any wasted gaps. Most importantly, label every single container. Use a simple label maker or a chalk marker to clearly identify the contents and, if you wish, the expiration date. This step eliminates guesswork and prevents a costly mix-up between baking soda and baking powder. Establish Places Next, establish zones within your pantry for each food category. Think of your pantry shelves as real estate, with the most accessible spots being the most valuable. The shelf at eye level is your prime real estate. This is where you should store the items you reach for most often: everyday snacks, cereals, cooking oils, and your go-to grains. Heavier items, such as bulk bags of pet food, large jars of sauce, or cases of beverages, should be stored on the lower shelves or the floor to avoid having to lift them from overhead. The top shelf is best reserved for lighter, less frequently used items, like backup paper towels, specialty baking ingredients, or seasonal items. By assigning a permanent home for each category, you create a logical map of your pantry. You will always know where to find the pasta and where to put it away after a grocery trip. To maximize visibility within these zones, use organizational tools. Tiered risers are a game-changer for canned goods. By placing cans on a stepped shelf, you can see the label of every single can, not just the ones in the front row. This simple tool prevents cans from getting lost and forgotten

How to Perform a Complete Pantry Reset for Lasting Order Read More »

5 Reasons Why Hiring a Cleaning Service is the Best Form of Self-Care

Why hire a specialized cleaning service? The modern home is a hub of activity, a place of work, rest, and family life. Yet, maintaining its cleanliness can feel like a relentless, never-ending task. The dust settles almost as soon as it’s wiped away, the floors seem to attract dirt, and the kitchen and bathrooms demand constant attention. For many, the weekend, which should be a time for relaxation and recharging, is instead consumed by a long list of chores. This constant cycle of cleaning can become a significant source of stress and a drain on our most valuable resource: time. It is in this gap between the desire for a clean, peaceful environment and the reality of a busy life that a residential house cleaning service finds its purpose, offering not just a service, but a solution to a pervasive modern problem. 1.Quality of Life Hiring a professional cleaning service is often viewed as a luxury, but it is more accurately described as an investment in your quality of life. Consider the hours spent each week sweeping, mopping, scrubbing, and dusting. For a moderately sized home, this can easily add up to four, five, or even more hours. A professional service reclaims those hours for you, handing them back to be spent on what truly matters. This could mean more time with family, pursuing a hobby, exercising, or simply enjoying a well-deserved rest. The cumulative effect of this reclaimed time is profound, reducing burnout and allowing for a better work-life balance. It transforms the home from a place of constant obligation into a true sanctuary, a space you can enter after a long day and immediately feel at ease, rather than being confronted with a list of tasks that need doing. 2.Quality of Cleanliness Beyond the gift of time, there is the undeniable difference in the quality of the clean itself. A professional cleaner brings a level of expertise and efficiency that is difficult for the average homeowner to replicate. They are trained in the most effective methods and understand the specific needs of different surfaces. They know which products to use on natural stone versus laminate, how to clean stainless steel without leaving streaks, and the best techniques for removing stubborn soap scum from glass shower doors. This knowledge prevents costly damage that can result from using the wrong chemical or an abrasive sponge on a delicate surface. Furthermore, professional services come equipped with commercial-grade tools and supplies that are often more powerful and effective than standard consumer products. Their high-powered vacuums with HEPA filters can capture a significantly higher percentage of dust, allergens, and pet dander, leading to improved indoor air quality. This is particularly beneficial for households with allergy sufferers, asthmatics, children, or pets. The result is not just a home that looks clean, but one that feels and is, on a microscopic level, healthier. The process of a professional clean is systematic and thorough. Cleaners typically work with a detailed checklist, ensuring that no area is overlooked. They employ methodical strategies, such as cleaning from top to bottom to ensure dust and debris fall downwards before the floors are addressed, and working from one side of a room to the other. This structured approach guarantees consistency and completeness. A standard recurring clean will typically involve a comprehensive dusting of all surfaces, including furniture, shelves, and window sills; cleaning and disinfecting kitchen countertops, sinks, and appliance exteriors; scrubbing toilets, showers, tubs, and bathroom vanities; and vacuuming carpets and mopping hard floors. This regular maintenance keeps the home at a consistent level of cleanliness, preventing the deep buildup of grime. 3.Deep Cleaning For homes that have gone some time without a thorough cleaning or for clients new to a service, a deep clean is often recommended. This is a far more intensive and detailed service that addresses the areas often missed in a regular routine. A deep clean will include all the tasks of a standard clean but will go much further. It can involve washing baseboards and trim, cleaning light fixtures and ceiling fans, wiping down doors and door frames, cleaning behind and underneath furniture and appliances, scrubbing grout lines, and cleaning the interior of windows. This is the reset button for your home, tackling the accumulated dirt and dust in every nook and cranny, and establishing a new baseline of clean that makes subsequent maintenance easier. Specialized services like move-in and move-out cleanings are another critical offering. Preparing a home for sale or ensuring a new home is pristine before you unpack is an enormous task on top of the already stressful process of moving. A move-out clean is designed to leave the property in immaculate condition for the next occupants, often a requirement for retrieving a security deposit. This is the most exhaustive clean of all, performed on an empty home. Every interior surface is addressed, including the inside of all cabinets, drawers, closets, the oven, and the refrigerator. It ensures the home is presented in its best possible light, which can be a significant factor for real estate agents and potential buyers. Conversely, a move-in clean provides immense peace of mind, sanitizing the space and ensuring you are starting your new chapter in a fresh, thoroughly cleaned environment. 4.Trust and Security One of the most significant barriers for people considering a cleaning service is the idea of trust and security. Inviting someone into your personal space requires confidence in their professionalism and integrity. This is why reputable cleaning companies place such a high emphasis on their hiring and training processes. They conduct background checks on their employees and ensure they are thoroughly vetted. Furthermore, professional services are bonded and insured. Bonding provides protection against theft, while insurance covers any accidental damage that might occur to your property during the cleaning process. This comprehensive protection offers homeowners the peace of mind that they are working with a trustworthy organization that stands behind its work and its people. The relationship with a cleaning service is

5 Reasons Why Hiring a Cleaning Service is the Best Form of Self-Care Read More »

The Power of Citric Acid

The Power of Citric Acid: Your Solution for Limescale and Grime

In the world of cleaning, there’s citric acid, and countless products that promise miraculous results, often based on complex chemical formulations and strong scents. Yet, hiding in plain sight, often in the baking aisle of the grocery store, is a simple, effective, and remarkably versatile compound: citric acid. This white crystalline powder, derived naturally from citrus fruits like lemons and limes, is a powerhouse cleaner that can tackle some of the most stubborn household problems, particularly those related to mineral deposits and hard water. Its strength lies in its chemical nature as a weak organic acid, which allows it to dissolve grime, limescale, and soap scum without the corrosive intensity of stronger mineral acids. Chelation The primary mechanism that makes citric acid so effective is a process called chelation. In areas with hard water, the water is rich in dissolved minerals, primarily calcium and magnesium. When this water evaporates, it leaves behind a chalky, crusty residue known as limescale. This is the buildup you see inside your kettle, on your showerheads, and as a cloudy film on your glassware. Citric acid works by binding to these mineral ions, forming a compound called a chelate. This new compound is water-soluble, meaning the stubborn, stuck-on mineral deposit is transformed into something that can be easily rinsed away. This is a far more effective approach than simply trying to scrub the deposit off, which is often a losing battle and can damage the surface underneath. Kettle One of the most satisfying applications for citric acid is restoring a kettle caked with mineral deposits. Over time, the inside of a kettle can become layered with a thick, white scale that not only looks unpleasant but can also impair its heating efficiency and flake off into your water. To effortlessly clean it, simply fill the kettle about halfway with water, add one to two tablespoons of citric acid powder, and bring it to a boil. Once it has boiled, turn it off and let the solution sit for twenty to thirty minutes. You will often be able to see the limescale fizzing and dissolving. After the waiting period, pour out the solution and rinse the kettle thoroughly with fresh water a few times. The interior will be left sparkling clean, looking almost new, with no scrubbing required. This same principle applies perfectly to automatic coffee makers, which also suffer from internal mineral buildup that can slow down the brewing process and affect the taste of your coffee. To descale a coffee machine, fill the water reservoir with your normal amount of water and dissolve a tablespoon or two of citric acid into it. Run a full brewing cycle with this solution (without any coffee grounds). Afterwards, run at least two more full cycles with only fresh, plain water to ensure all traces of the acid are rinsed out of the machine’s internal components. Dishwasher This descaling power extends to the workhorse of the kitchen, the dishwasher. A dishwasher in a hard water area can quickly become inefficient as its spray arms, filter, and interior walls get coated in a film of limescale and soap scum. This not only looks grimy but can prevent the machine from cleaning your dishes properly, leaving them spotty and cloudy. To deep clean your dishwasher, ensure it is completely empty. Pour about half a cup of citric acid powder into the bottom of the machine, or place it in the main detergent dispenser. Then, run the dishwasher on its hottest, longest cycle. The hot water will activate the acid, which will circulate throughout the entire system, dissolving mineral deposits from the jets, pipes, and walls, leaving the stainless steel interior gleaming and helping the appliance run more efficiently. Beyond descaling appliances, citric acid makes an excellent all-purpose cleaning spray for various kitchen surfaces. To create a general cleaning solution, dissolve one to two tablespoons of citric acid powder in about a liter of warm water in a spray bottle. Shake it well until the crystals are fully dissolved. This spray is fantastic for cutting through grease and grime on countertops, cleaning sinks, and shining up stainless steel faucets and appliances. It effectively removes water spots and leaves a streak-free shine. It can also be used to disinfect and deodorize cutting boards. Simply sprinkle a small amount of the powder onto a damp board, scrub with a sponge, let it sit for a few minutes, and then rinse thoroughly. However, a critical word of caution is necessary here: because it is an acid, this solution should never be used on natural stone surfaces like marble, granite, or travertine. The acid will react with the calcium carbonate in the stone, causing permanent etching and dulling the finish. Bathroom Moving from the kitchen to the bathroom, citric acid proves its worth against the relentless duo of soap scum and limescale. Soap scum, the grimy film that builds up on shower doors, tiles, and bathtubs, is formed when the fatty acids in soap react with the mineral ions in hard water. Citric acid is uniquely suited to tackle both components of this problem. Using your prepared spray solution, generously coat the affected surfaces. Let it sit for ten to fifteen minutes to allow the acid time to break down the deposits. Then, scrub with a non-abrasive sponge or brush and rinse well with water. For shower doors plagued by cloudy water spots, this method will restore clarity and shine. Showerheads are another common casualty of hard water, becoming clogged with limescale until the water sprays out in uneven, weak jets. To clean a clogged showerhead without removing it, fill a plastic bag with your citric acid and water solution, submerge the showerhead completely in the liquid, and secure the bag in place with a rubber band or twist tie. Leave it to soak for at least an hour, or even overnight for severe buildup. After soaking, remove the bag and run the shower on hot for a minute to flush out any remaining

The Power of Citric Acid: Your Solution for Limescale and Grime Read More »

The Pan Care Guide: The Best Tips For Cleaning 7 Different Types of Pans

A well-cared-for pan is an essential tool in any kitchen, a reliable partner in countless meals. Yet, the path to a long and productive life for your cookware is paved with proper cleaning, a process that varies dramatically from one material to another. Using the wrong technique can lead to scratched surfaces, stripped seasoning, or permanent stains, effectively ruining a perfectly good piece of equipment. Understanding the unique needs of each type of pan is not just about aesthetics; it’s about performance, longevity, and even the taste of your food 1.The Non-Stick Let’s begin with the most common pan in modern kitchens: the non-stick. Whether it’s a traditional PTFE-based coating or a newer ceramic one, the guiding principle is gentleness. The non-stick surface is a delicate layer applied over a metal base, and its integrity is paramount. After cooking, always allow the pan to cool down for at least a few minutes. Plunging a hot pan into cold water can cause thermal shock, which may lead to warping over time and can degrade the non-stick coating. Once it’s cool enough to handle, use a soft sponge or a cloth with a small amount of mild dish soap and warm water. Never use steel wool, abrasive scouring pads, or harsh cleaners like comet, as these will scratch and erode the surface, rendering the non-stick properties useless. For stubborn, stuck-on food particles, resist the urge to scrape with a metal utensil. Instead, fill the pan with an inch of water, add a drop of dish soap, and gently heat it on the stove for a few minutes. This will loosen the residue, which can then be easily wiped away. A common issue with non-stick pans is the gradual buildup of a brownish, sticky film from cooking oils and sprays. To tackle this, create a paste of baking soda and water. Apply this paste to the affected areas, let it sit for about twenty minutes, and then gently scrub with a non-abrasive sponge. Rinse thoroughly. To preserve your non-stick cookware, always use wooden, silicone, or nylon utensils, avoid excessively high heat which can release fumes and break down the coating, and consider hand washing even if the pan is labeled “dishwasher safe,” as the high heat and harsh detergents in a dishwasher can shorten its lifespan significantly. 2.Stainless Steel Stainless steel pans are the workhorses of many kitchens, prized for their durability and even heat distribution. They can withstand more vigorous cleaning than non-stick pans, but they have their own set of challenges, namely burnt-on food and a peculiar rainbow-like discoloration. For daily cleaning, soap, water, and a standard kitchen sponge are perfectly adequate. If you have food firmly stuck to the bottom right after cooking, you can deglaze the pan while it’s still hot. Carefully pour in a small amount of water or broth; it will sizzle and steam, lifting most of the browned bits right off the surface. For more serious, burnt-on messes, fill the pan with enough water to cover the grime, add a tablespoon of baking soda, and bring it to a boil. Let it simmer for several minutes, then turn off the heat and let it cool. The burnt food should soften and become much easier to scrape off with a wooden spoon or a spatula. For the most stubborn, blackened-on carbon, a powdered cleanser like Bar Keepers Friend is invaluable. Create a paste with the powder and a little water, apply it to the pan, and scrub with a sponge or a non-scratch scouring pad. The oxalic acid in the cleanser is remarkably effective at breaking down these tough stains. The other common issue is heat tint, that iridescent, rainbow-like pattern that appears on the surface. This is a harmless oxidation layer caused by overheating. To remove it, you need a mild acid. Pour a small amount of white vinegar into the pan, just enough to cover the bottom, and let it sit for about ten to fifteen minutes. You can also gently heat the vinegar for a more potent effect. Afterwards, simply wash the pan as usual with soap and water, and the rainbow stains should be gone, restoring the steel’s brilliant shine. 3.Cast Iron The cast iron skillet is a cherished heirloom in many families, and its care is more a ritual than a chore. The goal with cast iron is not to achieve a sterile, gleaming surface but to build and maintain a layer of “seasoning.” This seasoning is simply oil that has been baked onto the pan, creating a natural, rust-resistant, and remarkably non-stick surface. After cooking, the best practice is to clean the pan while it is still warm. Use hot water and a stiff-bristled brush or a dedicated pan scraper to remove any food particles. For truly stubborn bits, a chainmail scrubber is an excellent tool that removes debris without harming the seasoning. A common point of debate is the use of soap. On a very well-seasoned pan, a tiny drop of mild dish soap is generally acceptable, but many purists avoid it entirely as it can begin to break down the precious oil layer. The most critical step in cast iron care is drying. Never let a cast iron pan air dry, as this will inevitably lead to rust. After rinsing, place the pan back on the stove over low heat for a few minutes until every last drop of moisture has evaporated. Once it’s bone dry, pour a half-teaspoon of a neutral oil—like canola, grapeseed, or flaxseed oil—into the pan. Use a paper towel to rub this thin layer of oil all over the entire interior surface. Continue to heat the pan until the oil just begins to smoke, then turn off the heat and let it cool completely. This process of a “maintenance season” after each wash reinforces the protective layer. If you do encounter rust, do not despair. It is completely fixable. Scrub the rust away with steel wool and some soapy water until you are

The Pan Care Guide: The Best Tips For Cleaning 7 Different Types of Pans Read More »

cleaning exhaust

How to Clean Your Kitchen Exhaust Fan: A Complete Guide

It is a silent collector of the unseen byproducts of every meal you cook. The exhaust fan, a silent, humming guardian against smoke, steam and odors.. It is the kitchen exhaust fan, or range hood, and it is one of the most hardworking and underappreciated appliances in the entire home. Its job is to perform a crucial act of ventilation, pulling the airborne grease, moisture, and cooking fumes out of your kitchen, improving your indoor air quality and preventing a sticky, grimy film from settling on every surface. But in performing this duty, the exhaust system itself becomes a trap, a hidden reservoir of highly flammable and deeply unpleasant grime. Cleaning the kitchen exhaust is not a simple cosmetic task like wiping down a countertop. It is a fundamental maintenance procedure that is directly linked to the safety and functionality of your kitchen. To neglect this appliance is to invite a host of problems, the most serious of which is a profound fire risk. Understanding what happens inside that metal hood is the first step toward appreciating the critical importance of keeping it clean. The Main Filter in a Kitchen Every time you cook, especially when you pan-fry, sear, or roast, microscopic droplets of grease become aerosolized, creating a vapor. The exhaust fan is designed to suck up this greasy air. As the warm, vapor-laden air is pulled into the cooler metal of the hood, the grease condenses and solidifies, clinging to the first surfaces it touches. This is primarily the filter, but it also coats the fan blades, the interior of the hood, and the ductwork that leads outside. This process repeats with every meal, building up layer by sticky layer, creating a thick, gummy, and often rancid coating. The most immediate and dangerous consequence of this neglect is the profound fire risk it creates. This accumulated grease is not just dirty; it is fuel. It is a highly concentrated, flammable substance. All it takes is a small kitchen flare-up on the stovetop—a splash of oil that ignites or a piece of food that catches fire—for flames to be sucked directly into the grease-laden exhaust system. The fire can then travel through the hood and into the ductwork within your walls, spreading with terrifying speed throughout your home. A clean exhaust system provides a safe path for smoke to escape; a dirty one provides a fuel-laden fuse leading directly into the structure of your house. Inefficient Beyond the alarming safety issue, a clogged exhaust system is simply an inefficient one. The first component to become saturated with grease is the filter. Whether it is a metal mesh or a baffle-style filter, its job is to trap as much of that airborne grease as possible. As it becomes clogged, air can no longer pass through it freely. This drastically reduces the fan’s ability to suck air, rendering it almost useless. You will notice that cooking smells linger in the house long after a meal, and smoke from a simple searing job will set off your smoke alarms. The fan will be humming, but it will not be doing its job. This inefficiency also puts a strain on the appliance itself. The fan motor must work much harder to try and pull air through the clogged filter and past the heavy, greasy blades. This can lead to the motor overheating and burning out, resulting in a costly repair or a full replacement of the unit. The sticky buildup can also attract unwanted pests, as old, rancid grease is a food source for insects and rodents. The process of cleaning a kitchen exhaust system is a greasy, satisfying job that can be broken down into a methodical, step-by-step process. Before you begin, you must prepare your workspace to contain the mess and ensure your safety. The first and most critical step is to turn off the power to the range hood at your home’s circuit breaker. Do not simply turn off the fan switch; you must cut the electrical supply completely to avoid any risk of the fan accidentally turning on while you are working. Next, cover your stovetop with an old towel or a layer of newspaper. You will be dislodging greasy grime, and you do not want it falling onto and hardening on your cooktop. At the end, gather your cleaning supplies. You will need a strong degreaser, a non-abrasive scrub brush, rubber gloves, and a bucket of very hot water. Discover Your Filter With your area prepped, you can begin by removing the filters. These are usually held in place by a simple latch or a sliding mechanism. There are two main types of filters, and it is crucial to know which one you have. Most homes with a duct that vents to the outside will have reusable metal mesh or baffle filters. If your range hood does not vent outside and simply recirculates air back into the kitchen, it will have a disposable charcoal filter in addition to, or instead of, a metal one. If you have metal filters, the cleaning process is straightforward. Fill a sink or a large bucket with the hottest water your tap can produce. Add a generous squirt of a strong, degreasing dish soap and about half a cup of baking soda. This creates a powerful, alkaline solution that is excellent at dissolving grease. Submerge the filters in this solution and let them soak for at least 20 to 30 minutes, or longer for very heavy buildup. After the soak, you should see the grease begin to loosen. Take your scrub brush and scrub both sides of the filters thoroughly, paying attention to the small crevices of the mesh. Once you have scrubbed them clean, rinse them with hot water and set them upright in a dish rack to dry completely. They must be totally dry before you reinstall them. If you have a charcoal filter, the process is much simpler: you must replace it. These filters are not designed to be

How to Clean Your Kitchen Exhaust Fan: A Complete Guide Read More »

Perfect Cleaning Schedule

Cleaning Schedule: A Room-by-Room Guide to Your Perfect Cleaning Schedule

For many, cleaning a house is a cycle of chaos and control, and having a daily cleaning schedule becomes essential. It exists in the extremes: either a frantic, multi-hour marathon of scrubbing and scouring in a desperate attempt to reclaim a space that has descended into disarray, or a state of blissful ignorance where the dust bunnies multiply in the corners and the sticky film on the kitchen counter becomes an accepted part of the landscape. We clean in a panic before guests arrive, we clean in a fit of frustration when we can no longer stand the mess, and we clean on the first sunny day of spring with a burst of ambitious energy that quickly fades. This reactive approach to cleaning is exhausting, inefficient, and ultimately, a losing battle. The secret to a consistently clean, calm, and functional home does not lie in more powerful chemicals or more aggressive scrubbing. It lies in a simple, transformative tool: a cleaning schedule. Proactive Maintenance The very idea of a cleaning schedule can feel restrictive, conjuring images of a rigid, joyless routine. But in reality, a schedule is the opposite of a restriction; it is a form of freedom. It is the freedom from the overwhelming feeling of not knowing where to start. It is the freedom from the guilt of a messy home and the freedom from having to sacrifice an entire weekend to a cleaning binge. A schedule transforms the monumental task of “cleaning the house” into a series of small, manageable, and predictable habits. It is the difference between facing a mountain and climbing a single step each day. It is about proactive maintenance, not reactive disaster control. Creating a schedule that works is about understanding the different rhythms of your home and the tasks required to maintain it. These tasks can be broken down into different frequencies: daily, weekly, monthly, and seasonal. By assigning tasks to these categories, you create a system that ensures everything gets done in its own time, preventing the kind of deep-seated grime that requires a marathon session to remove. The daily tasks are the bedrock of the system, the small habits that take no more than fifteen to twenty minutes but have the greatest impact on the daily sense of order in your home. These are the actions that prevent chaos from ever taking root. This includes making the bed each morning, an act that takes less than two minutes but instantly makes an entire room feel more put-together. It means wiping down the kitchen counters and sink after every meal. This simple wipe prevents the buildup of sticky spills and crumbs that become harder to clean the longer they sit. A quick sweep of the kitchen floor at the end of the day catches the daily debris and stops it from being tracked throughout the rest of the house. Another cornerstone of the daily routine is the “one-load” rule for laundry. By doing a single load of laundry from start to finish each day—washing, drying, folding, and putting away—you prevent the dreaded mountain of clothes from ever forming. Cleaning Day From these high-impact daily habits, we move to the weekly core clean. This is the more traditional “cleaning day,” but when broken down and performed consistently, it becomes a much less daunting task. You can choose to tackle all of these tasks on a single day, or you can assign one or two rooms to different days of the week, a method often called “zone cleaning.” The weekly routine is about a more thorough reset of the main living areas. The bathrooms are a primary focus of the weekly clean. This is a matter of hygiene as much as appearance. This means a thorough scrubbing of the toilet, inside and out. It involves cleaning the shower or bathtub, scrubbing away the beginnings of soap scum before it can become a thick, stubborn film. The bathroom sink and countertops should be scrubbed and disinfected, and the mirror should be wiped to a streak-free shine. Finally, the bathroom floor should be swept and mopped. The kitchen, the heart of the home, also requires a weekly deep dive. This goes beyond the daily counter wipe. It means wiping down the exterior of all your appliances—the refrigerator, the dishwasher, the microwave, and the stovetop—to remove fingerprints and splatters. It involves cleaning the inside of the microwave, a task made simple by heating a bowl of water and vinegar to loosen the grime. The kitchen floor, which sees the most traffic and spills, needs to be thoroughly mopped. The rest of the home requires a focus on the universal enemy: dust. The weekly routine should include a thorough dusting of all surfaces in the living areas and bedrooms. This includes furniture, shelves, and any decorative items. Following the dusting, a comprehensive vacuuming of all floors is essential. This includes carpets, rugs, and hard surfaces. Regular vacuuming not only keeps floors looking clean but also improves indoor air quality by removing dust, dander, and other allergens. Deep Cleaning Beyond the weekly routine lies the monthly deep dive, the set of tasks that addresses the slow, creeping grime that is often overlooked. These are the details that separate a tidy house from a truly clean one. This is the time to wipe down all the baseboards in your home, which are magnets for dust and scuffs. Clean your light fixtures and ceiling fans, carefully wiping away the dust that accumulates on bulbs and blades. This is also the time to deep clean some of your hardworking appliances. Run a cleaning cycle on your washing machine to prevent the buildup of soap scum and mildew. Clean the filter in your dishwasher to improve its performance. This is also a good opportunity to clean your window sills and the tracks of your sliding doors, which are notorious for trapping dirt and insects. At the end, we have the seasonal, or quarterly, tasks. These are the major projects, the whole-home

Cleaning Schedule: A Room-by-Room Guide to Your Perfect Cleaning Schedule Read More »

woman preparing the house for Halloween

Halloween Cleaning: The Secret to a Stress-Free Halloween? A Pre-Holiday Clean.

October arrives with Halloween, a distinct change in the air, a freshness that signals a change in seasons and a turn toward festive preparations. For many, this means a flurry of activity centered around one of the year’s most anticipated celebrations: Halloween. The focus naturally falls on costumes, candy, and decorations, on carving pumpkins and creating a perfectly spooky ambiance. But beneath all this excitement lies a foundational step that is often overlooked in the rush, a preparatory ritual that is not just about tidiness, but about safety, functionality, and creating the perfect canvas for the holiday. This is the pre-Halloween cleaning, a comprehensive effort that readies your home for the ghosts, goblins, and guests to come. The Walkway of Your House This is not a typical weekly clean. It is a targeted, purposeful project that addresses your home from the outside in. The primary focus must begin where the Halloween experience itself begins: the exterior of your home. Your walkway, porch, and front door will be the stage for the entire evening’s events, the first and most important point of contact for every trick-or-treater who visits. Its condition sets the tone for the night and, more importantly, ensures the safety of your guests. Start with the path leading to your door. In October, this walkway is likely covered in a slick carpet of fallen leaves, twigs, and other natural debris. When damp, these leaves create a significant slipping hazard, especially for small children in bulky costumes who are excitedly running from house to house in the dark. The first and most critical task is to perform a thorough sweep. Clear the entire walkway, from the sidewalk to your front steps, of all leaves and debris. Follow this with a quick but powerful spray from a garden hose to wash away any residual mud or grime. This single act immediately makes your home safer and more welcoming. Once the path is clear, your attention must turn to the porch or stoop itself. This is the main stage, and it needs to be cleared for action. Remove any lingering summer items—empty planters, forgotten garden tools, or worn-out summer mats. Give the entire surface a comprehensive sweep, paying close attention to the corners where dust and spiderwebs accumulate. While some might consider real spiderwebs to be thematic, they often just look dirty and neglected, detracting from the intentional, spooky atmosphere you plan to create with carefully placed fake webbing. Remove the real ones to make way for the decorative ones. The Front Door With the porch floor clear, focus on the vertical surfaces. The front door will be the centerpiece of the evening. Give it a thorough wipe-down with a damp cloth and a simple solution of warm water and a few drops of dish soap. Clean off the fingerprints, smudges, and accumulated dust from the late summer months. A clean door provides a much better backdrop for a festive wreath or any other decorations you plan to hang. While you are there, wipe down the door handle and any hardware. Next, address the windows that flank your entryway. These windows are prime real estate for spooky silhouettes, window clings, or dramatic lighting effects. They will have a much greater impact if the glass is clean and free of streaks and grime. A simple solution of equal parts white vinegar and water in a spray bottle, wiped away with a squeegee or a clean microfiber cloth, will ensure your ghouls and ghosts are seen in perfect, terrifying clarity. Do not neglect the details of the porch. Wipe down railings and handrails, not just for appearance, but because they will be used by parents and children navigating your steps in the dark. Look up and address the exterior light fixtures. These lights are essential for both safety and atmosphere on Halloween night. A thick layer of dust and dead insects can significantly dim their glow. A careful wipe-down of the glass or plastic covers will ensure they shine as brightly as possible, illuminating the path and highlighting your best decorations. This is also a good time to check that the bulbs are working, replacing them if necessary. Inside the House With the exterior prepared, the focus shifts inward, beginning with the area that will bear the brunt of the evening’s traffic: the entryway. This space acts as an airlock between the autumn chill and the warmth of your home, and on Halloween night, it will see a constant stream of opening and closing doors. It is the buffer zone that helps to contain the dirt and leaves that will inevitably be tracked in. First, clear any clutter. Shoes, bags, and mail that have accumulated by the door should be put away to create a clear, wide path. A cluttered entryway is a tripping hazard, especially for a group of excited children. The floor in this area is the most important surface. Remove your doormat and give it a thorough cleaning. If it is a durable outdoor-style mat, take it outside, scrub it with soap and water, and let it dry completely. If it is an indoor mat, a vigorous vacuuming should suffice. Clean the floor underneath the mat, a spot that often traps a surprising amount of grit. This is the perfect time to place a heavy-duty boot tray by the door. While you may not see snow yet in October, it is the beginning of the wet season, and a boot tray provides a designated, contained space for wet or muddy footwear for the months ahead. Entryway From the entryway, move to the main living areas, the rooms that are visible from the front door. A pre-Halloween clean in these spaces is about creating a clean, dust-free environment before you begin adding the clutter of decorations. A thorough dusting of all surfaces is essential. Dust the mantelpiece where you might place a spooky candelabra, the bookshelves that might soon be draped in cobwebs, and the coffee and end tables that will

Halloween Cleaning: The Secret to a Stress-Free Halloween? A Pre-Holiday Clean. Read More »

humidifier being effective

Humidifier Cleaning: The Hidden Danger in Your Humidifier (And How to Prevent It)

A humidifier is essential because it’s the invisible antagonist of the Canadian winter, an adversary that arrives not with a blizzard, but with the first click of the heater. It’s dry air, and its effects are as predictable as the fall of leaves in October. It manifests as a persistent tickle in the throat, a morning voice that sounds raspy and strained. It is the reason our skin feels tight and itchy, our lips chap, and our knuckles crack. It is the culprit behind the surprising, sharp zap of a static shock from a doorknob and the reason our wooden furniture can creak and even crack over time. In our quest to create warm, sealed sanctuaries against the cold, we inadvertently strip our indoor environment of its most essential atmospheric component: moisture. The Solution The solution to this pervasive dryness is a simple, yet profoundly effective, appliance: the humidifier. It is a machine dedicated to the straightforward task of reintroducing water vapor into the air, and in doing so, it can transform a harsh, uncomfortable indoor climate into a healthy, comfortable, and pleasant one. But a humidifier is not a passive appliance. It is an active participant in the quality of the air you breathe, and its ownership comes with a critical responsibility. A clean, well-maintained humidifier is a powerful tool for health and wellness. A neglected one can become the exact opposite, a device that disperses not soothing moisture, but a plume of microscopic contaminants. To appreciate the importance of a humidifier, one must first understand the concept of relative humidity. This is a measure of the amount of water vapor in the air, expressed as a percentage of the maximum amount the air could hold at a given temperature. Health experts generally agree that the ideal indoor relative humidity for human comfort and health is between 30 and 50 percent. During a cold winter, the air outside holds very little moisture. When we bring that air into our homes and heat it, its relative humidity plummets, often falling into the single digits, creating an environment that is drier than a desert. This parched air acts like a sponge, drawing moisture from every available source. It pulls it from our skin, leading to dryness and exacerbating conditions like eczema. It pulls it from the delicate mucous membranes lining our respiratory tract, from our nose and throat down to our lungs. This can dry them out, impairing their ability to trap viruses and bacteria, which is one reason colds and sinus infections can feel so much worse in the winter. Proper humidity keeps these membranes moist and healthy. It can also help soothe a cough and relieve congestion, making a humidifier an indispensable tool during cold and flu season. The Right Choice The most fundamental choice you will make is the type of humidifier that best suits your needs, and each operates on a different principle. The most common and traditional type is the evaporative humidifier. This device works on a simple principle, using a fan to blow air through a wet, absorbent filter, often called a wick. The water evaporates from the wick and is released into the room as a fine, invisible cool mist. These models are often self-regulating; as the humidity in the room increases, the rate of evaporation from the wick naturally slows down. Their main drawback is that the wick is a consumable item. It must be replaced regularly, as it can become clogged with mineral deposits and can potentially harbor mold if not maintained. A more modern and increasingly popular option is the ultrasonic humidifier. These machines are known for being exceptionally quiet. They use a small, vibrating diaphragm, a nebulizer, that moves at an ultrasonic frequency. These high-frequency vibrations break the water in the reservoir into microscopic droplets, which are then released into the air as a visible, cool mist. A major advantage of ultrasonic models is that they do not use a filter, reducing ongoing replacement costs. However, they have one significant potential downside that is directly tied to your water source, which we will address later. Vaporizer For those who prefer a warm mist, there is the vaporizer, or steam humidifier. This type of machine is the simplest of all. It contains a heating element that boils the water, creating steam that is then released into the room. The primary advantage of a vaporizer is that the boiling process kills any bacteria, mold, or other microorganisms that might be present in the water, ensuring the mist it produces is sterile. This warm mist can be particularly soothing for coughs and congestion. The trade-offs are that these models consume more electricity to heat the water, and they present a potential burn risk, making them a less ideal choice for homes with small children. At the end, there is the whole-house, or central, humidifier. This is not a portable appliance, but a system that is integrated directly into your home’s forced-air heating and cooling system. It automatically adds moisture to the air as it is being heated and distributed throughout your home, maintaining a consistent, pre-set level of humidity in every room. While this is the most convenient and hands-off solution, it is also the most expensive and typically requires professional installation and maintenance. Regardless of which type of humidifier you choose, one non-negotiable truth unites them all: they must be kept scrupulously clean. A humidifier’s reservoir of still, room-temperature water is the perfect environment for the growth of mold, mildew, and bacteria. If the machine is not cleaned regularly, it will aerosolize these contaminants along with the water vapor, broadcasting a plume of potentially harmful microorganisms directly into the air you breathe. This can trigger allergies, and in some cases, lead to a respiratory illness sometimes called “humidifier fever.” Cleaning The cleaning routine is a simple but critical two-part process of descaling and disinfecting. The first step, which should be done weekly, is descaling. This addresses the mineral buildup, or limescale,

Humidifier Cleaning: The Hidden Danger in Your Humidifier (And How to Prevent It) Read More »

Hot Tub Cleaning: Get Perfectly Balanced Hot Tub Water Every Time

The hot tub is a unique and cherished feature of a home, a vessel of relaxation and hydrotherapy that promises to melt away the stresses of the day. It is a place of quiet solitude under the stars or a centerpiece for social gatherings with friends and family. But this luxury comes with a non-negotiable responsibility. A hot tub is not a “set it and forget it” appliance like a refrigerator or a dishwasher. It is a small, self-contained, and highly active body of water, a delicate ecosystem that requires consistent, diligent maintenance to remain a source of pleasure and not become a source of murky, unsanitary, and potentially hazardous problems. The Chemistry of Water To own a hot tub is to become a part-time water chemist. The warm, bubbling environment that is so inviting to us is also the perfect breeding ground for bacteria, algae, and other microorganisms. The key to a clean, safe, and enjoyable hot tub experience is not about performing a massive, hours-long cleaning session once a year. It is about a regular, simple, and consistent routine of testing, balancing, and sanitizing. Understanding the fundamentals of this routine is the most important aspect of hot tub ownership. The foundation of hot tub care is water chemistry, and the three most important pillars of that chemistry are alkalinity, pH, and the sanitizer level. These three elements are interconnected, and a problem with one will inevitably affect the others. The first step for any hot tub owner is to get comfortable with testing the water, which should be done at least two or three times a week, or more often with heavy use. The most common method is with test strips, which are simple, color-coded strips of paper that you dip into the water for a few seconds. The first level you should check and adjust is the total alkalinity. Alkalinity is the water’s ability to resist changes in pH. It acts as a buffer, a stabilizing force that prevents the pH level from swinging wildly. The ideal range for total alkalinity in a hot tub is typically between 80 and 120 parts per million (ppm). If your alkalinity is too low, the pH will be unstable and can drop suddenly, making the water corrosive. If it is too high, it can cause the pH to drift upward, leading to cloudy water and scale formation. You can raise the alkalinity with a product often called “Alkalinity Increaser” (sodium bicarbonate) and lower it with a pH decreaser (sodium bisulfate). Always adjust the alkalinity first, before you address the pH. Alkalinity Once your alkalinity is in the correct range, you can adjust the pH. The pH is the measure of how acidic or basic your water is, on a scale of 0 to 14. A pH of 7 is neutral. The ideal range for a hot tub is between 7.4 and 7.6. This is not an arbitrary number; it is slightly alkaline to match the natural pH of the human eye, which is why it is the most comfortable for bathers. If the pH is too low (acidic), the water can be corrosive to the hot tub’s components, like the heater and the pump seals, and it can be irritating to the skin. If the pH is too high (basic), it will cause the sanitizer to become sluggish and ineffective, lead to cloudy water, and promote the formation of scale on the shell and in the plumbing. You can raise the pH with a “pH Increaser” (sodium carbonate) and lower it with a “pH Decreaser” (sodium bisulfate). Only after both the alkalinity and pH are properly balanced can you effectively manage the sanitizer. The sanitizer is the chemical that actively kills bacteria and other harmful microorganisms in the water. The two most common types of sanitizer are chlorine and bromine. Chlorine is fast-acting and a powerful oxidizer, but it can have a stronger chemical smell and is less stable in the hot, high-pH environment of a spa. Bromine is more stable at higher temperatures and has a less noticeable odor, making it a very popular choice for hot tubs. It also has the unique ability to be reactivated by “shocking” the water. The ideal level for chlorine is between 1 and 3 ppm, and for bromine, it is between 3 and 5 ppm. You must maintain these levels at all times to ensure the water is safe for bathing. Hot Tub Filters Even with a perfectly maintained sanitizer level, the water will accumulate other unwanted waste products over time. Soaps, lotions, deodorants, and organic matter from bathers build up in the water, creating a food source for bacteria and making the water cloudy and unpleasant. To combat this, you need to “shock” your hot tub on a regular basis, typically once a week. Shocking is the practice of adding a large dose of an oxidizer to the water. This does several things: it breaks down all the organic waste, it kills any resistant bacteria, and in a bromine spa, it reactivates the used bromine ions, turning them back into effective sanitizer. Always shock the spa with the cover off and the jets running to allow it to circulate properly and to let the gasses vent. Beyond the daily and weekly chemical maintenance, the hot tub has other physical components that require regular attention. The most important of these is the filter. The filter is the kidney of your hot tub, constantly working to remove small particles, hair, and debris from the water. A dirty, clogged filter cannot do its job, which will result in cloudy water and will put a strain on your pump. The filter cartridges should be removed and rinsed with a garden hose at least once a week. The goal is to spray the debris out from between the pleats of the filter. Every few months, the filter needs a deep clean. This involves soaking it overnight in a specialized filter cleaning solution to break down

Hot Tub Cleaning: Get Perfectly Balanced Hot Tub Water Every Time Read More »