Green Cleaning

Washing Machine Cycles: 4 Tips Everyone Should Know For Spotless Fabrics

Stop Guessing at the Laundry Room Dial A modern washing machine is a marvel of convenience, yet its panel of cryptic dials and symbols can look like an airplane cockpit. Most people default to Normal for nearly every load and hope for the best. That habit shortchanges your clothes, your utility bills, and the machine itself: each named cycle is a calibrated recipe of temperature, agitation, and time for particular fabrics and soil levels. Reading those recipes turns laundry from guesswork into fabric care, deciding whether garments last for years or fade, shrink, and wear out early. The Three Variables Behind Every Cycle Every button adjusts one of three fundamentals, and once you see them, no dial is mysterious. Water Temperature Hot, typically 130 F (54 C) and above, is the most powerful cleaner: it attacks heavy grime, kills germs and dust mites, and lifts oily, greasy stains. The costs are energy, color fading, and real shrinkage in natural fibers like cotton and wool, so save it for sturdy, colorfast loads: whites, cotton underwear and socks, bed linens, and grime-caked work clothes. Warm, near 90 F (32 C), balances cleaning against care, handling everyday soils with less fading or shrinking, ideal for colors, synthetics, and moderately dirty loads. Cold, from 60 to 80 F (15 to 27 C), is the gentlest and most efficient setting: perfect for bleeding darks and brights, plus delicate silk, lace, and anything shrink-prone. Modern cold-water detergents close much of the cleaning gap, though heavy grease still needs heat. Spin Speed Measured in revolutions per minute, spin controls how much water the drum extracts at the end of the cycle. A high spin, 1000 to 1400 RPM or more, removes the most moisture, cutting drying time and energy on sturdy cottons and denim, but it can set deep wrinkles and punish delicates. Medium is the all-purpose compromise, often paired with Permanent Press to limit creasing in synthetics. Slow leaves clothes damp but protects hand-washable items and loosely woven sweaters, and no-spin exists for garments that should feel no centrifugal force at all. Agitation and Tumble This is the machine’s scrubbing action: the agitator’s speed and intensity on a top-loader, the drum’s tumbling pattern on a front-loader. High agitation adds friction and cleaning power for durable fabrics; low agitation swishes gently to shield fragile fibers. The Four Cycles You Will Use Most Normal (Cotton or Regular). The workhorse for everyday cotton, linen, and durable synthetics: high agitation, high spin, usually a warm default you can adjust. Its home is t-shirts, jeans, socks, underwear, towels, and sheets. Skip it for delicates and anything prone to shrinking or wrinkles. Heavy Duty. Longer wash time, stronger agitation, hot water by default, built for sturdy fabrics with serious grime: beach towels with set-in dirt, kids’ play clothes, work clothes caked in mud, durable bedding. Using it on normal loads causes needless wear, and it is far too aggressive for anything heat- or movement-sensitive. Delicates (Hand Wash). The machine imitating your hands: low agitation, short wash, slow spin, almost always cold. Lingerie, silk, lace, sheers, and loose sweaters belong here, each inside a mesh laundry bag. This gentle action will not fully clean heavily soiled items. Permanent Press (Wrinkle Control or Casual). The most useful misunderstood setting, designed for wrinkling synthetics and blends like polyester, rayon, and knits. It washes warm to relax fibers and release creases, then switches to a cool rinse and slower spin so new wrinkles never set. Use it for dress shirts, blouses, and slacks; leave aggressive cleaning jobs and true delicates alone. Specialty Cycles Worth Knowing Cycle What it does When to use it Bulky (Sheets or Bedding) Extra water saturates and rinses large items; reduced spin keeps the machine balanced. Comforters, blankets, sleeping bags, pillows. Whites A supercharged Normal: hottest water, long aggressive wash, built to pair with the bleach dispenser. Colorfast white loads that need brightening. Quick Wash (Speed or Express) Shortened wash and rinse plus a fast spin to cut drying time. Small, lightly soiled loads in a hurry. It freshens; it cannot handle stained or genuinely dirty clothes. Rinse and Spin Skips the main wash, simply rinsing the load and spinning out water. Hand-washed items needing water extraction, or stored clothes needing a rinse. Sanitize Hottest water possible, often with an internal heater, reaching temperatures that kill 99.9 percent of common household bacteria. Long and energy-intensive. When germs matter: baby clothing, cloth diapers, any bedding used during an illness, and allergen concerns. Steam Steam loosens tough stains for deep cleaning, or refreshes dry items without a full wash. Heavily soiled loads, plus de-wrinkling and deodorizing between washes. A Four-Question System for Every Load What are the fabrics? Care labels are the primary guide: mostly cottons and durable material means Normal or Heavy Duty is safe; delicates go to the Delicates cycle. How dirty is it? Everyday wear suits Normal; mud, grease, and heavy grime need Heavy Duty. A soil-level setting on many machines extends wash time within a cycle for dirtier loads. What are the colors? Whites take hot water, mixed colors prefer warm, and darks or brights need cold to prevent fading. Do wrinkles matter? Synthetic dress clothes call for Permanent Press. Mastering the dial means understanding how temperature, spin, and agitation combine and applying them on purpose: garments live longer, utility use drops, and results beat any one-size-fits-all default. Detergent choices deserve equal care: Health Canada’s page on household product safety covers laundry detergents and packets, including keeping pods away from children. And for germ control, the CDC’s guide to when and how to clean and disinfect your home explains why thorough cleaning always comes before disinfecting. Washing Machine Cycle FAQ What counts as hot water in a washing machine? Typically 130 F (54 C) and above. That range lifts oily stains and defeats germs and dust mites, which is why the Whites and Sanitize cycles lean on it. Why does Permanent Press change temperatures mid-cycle? Warm water relaxes synthetic

Washing Machine Cycles: 4 Tips Everyone Should Know For Spotless Fabrics Read More »

How to Tackle Tough Stains on Clothes: 5 Proven Methods

How to Tackle Tough Stains on Clothes: 5 Proven Methods Coffee on a white shirt, red wine at a dinner party, grass stains after a park afternoon: stains are universal, but panic is optional. The difference between a saved garment and a casualty is rarely luck. It is speed, technique, and knowing which family a stain belongs to. Here is the complete playbook, organized by stain type, with the household tools that do the work. Three Rules Before Any Treatment Act fast: a fresh stain is a temporary problem, while a set-in stain bonds with the fibers and becomes a long-term challenge. Blot, never rub: rubbing grinds particles deeper, spreads the stain wider, and frays the fabric; use a clean white cloth and work from the outside edges inward. Test first: try any solution on an inside seam or hem to rule out discoloration. And the rule that saves the most clothes: never put a stained garment in the dryer, because heat permanently sets most stains. Air dry until the stain is verifiably gone, and repeat treatment if even a faint trace remains. Your Stain Removal Toolkit No cabinet of specialty products required: Cold water, the first response for unknown and protein-based stains Clear dish soap, without bleach, the gentle degreaser for oil-based stains White vinegar, the mild acid that breaks down tannins like coffee, tea, and juice Baking soda, the gentle abrasive and deodorizer that forms a lifting paste 3% hydrogen peroxide, a mild oxygen bleach for blood and grass, test on colors first Rubbing alcohol, the solvent for ink and some dye stains Enzyme cleaner, built for protein stains like blood, sweat, and dairy Whatever you reach for, read the label and keep products in their lane; Health Canada’s household products guidance is the reference for using any cleaner safely, and its chemical safety page explains why products should never be mixed on a whim. Method 1: Tannin Stains, the Plant-Based Family Coffee, tea, red wine, juice, berries, and grass are all plant dyes. For coffee and tea, blot immediately and flush cold water from the back of the fabric to push the stain out, then apply equal parts white vinegar and water for 10 to 15 minutes, followed by a baking soda paste and a soft brush if needed. For red wine, speed is everything: blot thoroughly, cover the stain completely with salt, and let it draw the wine out for at least an hour before scraping and rinsing cold. Treat any residue with a paste of hydrogen peroxide and dish soap for 30 minutes. Grass stains respond to dish soap or enzyme cleaner worked in for 15 minutes, with rubbing alcohol dabbed on stubborn spots before a cold rinse. Method 2: Oil-Based Stains, the Greasy Family Cooking oil, butter, salad dressing, grease, and most makeup will not budge with water alone. Cover the fresh stain with an absorbent powder, baking soda, cornstarch, or talcum, and let it sit at least 30 minutes to draw oil out of the fibers, then scrape it off. Work clear dish soap directly into the spot and let it sit 10 to 15 minutes, then wash in the hottest water the fabric tolerates. For foundation and lipstick, scrape off the excess first, apply dish soap or an oil-free makeup remover, and use a dab of rubbing alcohol to break down waxy components. Method 3: Protein Stains, Always Cold Blood, sweat, dairy, egg, and mud share one non-negotiable rule: cold water only. Hot water cooks the protein and sets it permanently. Flush fresh blood with cold running water from the back of the fabric, soak set-in traces in cold salt water for an hour, then apply 3% hydrogen peroxide directly and watch it bubble as it lifts the stain. Yellow underarm marks come from antiperspirant reacting with body oils; scrub them with one part dish soap to two parts hydrogen peroxide, sprinkle baking soda over, and let it work for an hour. Mud is the counterintuitive one: let it dry completely, brush off the solids, then treat the residue with detergent for 15 minutes and wash cold. Method 4: Dye Stains, the Toughest Family Ink and mustard are pigment problems. For ballpoint ink, place a paper towel under the fabric to absorb what gets lifted, then dab with rubbing alcohol using a clean cloth; the ink should transfer to the cloth in stages, refreshing the cloth section as you go, before a thorough cold rinse. Mustard’s turmeric is a potent dye: scrape, flush cold, apply vinegar, then treat remaining yellowing with dish soap and hydrogen peroxide and, if possible, let the garment sit in direct sunlight, which naturally bleaches the stain. Method 5: The Overnight Rescue for Old Stains Set-in stains reward patience. Soak the garment in an oxygen-based bleach solution, mixed per the product directions in the warmest water the fabric safely tolerates, for several hours or overnight; enzyme cleaners handle old protein stains the same way. After the soak, treat any survivor with the matching method above and launder. Delicates like silk and wool sit outside all of this: no hot water, no harsh scrubbing, mild detergent and gentle hand washing only, or a professional dry cleaner when the item is precious. Stain Family Fastest Fix Coffee or tea Tannin Cold flush, then vinegar and water, 10 to 15 minutes Red wine Tannin Salt blanket for an hour, then peroxide paste Cooking oil Oil-based Absorbent powder, then dish soap, hot wash Blood Protein Cold water only, then 3% hydrogen peroxide Ink Dye Alcohol dabbing over an absorbent towel Stain Removal FAQs Why does the dryer ruin my chances? Heat permanently bonds stains to fibers, which is why the check before drying matters more than any product. If the stain is fully gone, dry normally; if not, re-treat and re-wash, and keep air drying until it disappears. Can hydrogen peroxide go on any fabric? It is safe on most whites and colorfast fabrics but can lift dye, so always test

How to Tackle Tough Stains on Clothes: 5 Proven Methods Read More »

getting ready for fall cleaning

September Cleaning: 7 Quick And Easy Steps To Get Ready For Fall

Why September Is the Month to Reset Your Home In Canada, September closes out summer and opens the long indoor season. The house needs more than a dust-off: it needs a cleanout that removes the clutter and grime of the warm months and readies every room for the weeks when windows stay shut and family time moves inside. A systematic September cleaning pays off twice, once in a healthier, calmer home right away and again in easier living all winter. Work in order, from planning and decluttering through room-by-room detail, and the whole project becomes manageable instead of overwhelming. Plan the Project Before You Spray Anything Start by scheduling time blocks for each area or task type, which turns a mountain into a list of afternoon-sized steps. Then take inventory of your supplies so you are never hunting for a bottle mid-task. Microfiber cloths, a vacuum with attachments, a mop, buckets, and protective gloves All-purpose cleaner, disinfectant, glass cleaner, bathroom cleaner, and floor cleaner Eco-friendly, non-toxic products if children, pets, or allergy sufferers live in the house Declutter First With the Three-Box Method Every room gets sorted before any cleaning starts, using three boxes: keep and organize, donate or sell, and trash or recycling. Begin with summer gear, so beach equipment, garden decorations, and warm-weather clothes get packed away. Work through clothing, toys, books, and stationery; clear the pantry and refrigerator of expired food and regroup what stays; gather papers and magazines into categories; and rotate the wardrobe so autumn layers sit at the front. Fewer objects means less dust to chase and fewer surfaces to wipe. When you finish, deliver the donation box the same week so it does not become clutter again. Kitchen Deep Clean for the Season The kitchen earns the most attention because it feeds everyone. Clean the oven interior and its grease and residue, wash the microwave inside and out, and empty the refrigerator fully, wiping shelves and drawers with mild soap and water. Run the dishwasher on a vinegar cycle to clear deposits and odours. Wipe cabinets and drawers inside and out, scrub countertops and backsplashes, disinfect the sink and faucets, and freshen the garbage disposal. Finish by mopping or steaming the floor. Bathrooms, Bedrooms, and Living Areas Bathrooms Scrub toilets, showers, and tubs, and attack the tile grout where mold and mildew settle. Wash or replace the shower curtain and liner, clean mirrors and light fixtures, disinfect every contact point from faucets to doorknobs and switches, then wash and disinfect the floor. Toss expired products from the medicine cabinet while you are in there. Excess moisture is what invites bathroom mold in the first place, and Health Canada’s advice on reducing humidity, moisture, and mould is worth applying to every damp room before winter closes the house up. Bedrooms Launder all sheets, duvets, and blankets along with the curtains. Vacuum the mattress and flip or rotate it to extend its life. Dust furniture, light fixtures, and ceiling fans, vacuum or mop including under the bed, and rebuild the closets with the seasonal clothing swap you prepped during decluttering. Living spaces Dust every piece of furniture, electronic, and decorative item, vacuum or shampoo the upholstery, clean the windows and the blinds or curtains covering them, and refresh the floors. Give extra passes to remote controls, light switches, and doorknobs, the surfaces everyone touches and nobody cleans. Entryways, Laundry Room, and the Spots Everyone Forgets Hallways and entryways take the first hit from outdoors, so clear shoe racks and coat hooks, wipe scuff marks off the walls, and vacuum or mop deeply to lift tracked-in mud and debris. In the laundry room, wipe the washer and dryer exteriors, scrub the dryer lint trap thoroughly for efficiency and fire safety, wash the utility sink, and organize detergents. Then walk the house for the overlooked list: Area September task Why it matters before winter Windows Clean inside and out Maximizes the weak natural light of the darker months HVAC filters Clean or replace Indoor air quality suffers once windows stay closed, and Health Canada’s overview of indoor air contaminants explains the health stakes Walls, baseboards, doors, and frames Wash away marks and dust Trapped grime ages fast under winter heating Light fixtures and ceiling fans Dust and wash Dull fixtures dim every room Trash cans and small appliances Disinfect bins; wash toaster, coffee maker, kettle Odours build quickly in closed-up houses Patio furniture, barbecue, bikes, garden tools Clean, then store Protects equipment through freeze-thaw weather Carpets and rugs Deep clean Removes summer grit before winter traffic grinds it in Maintenance: Keep the Reset From Slipping The September clean buys you a fresh baseline; daily habits defend it. Reinforce quick mini-cleaning sessions after dinner, hold a weekly schedule that rotates deeper tasks room by room, and do a seasonal check-in each quarter to adjust for what the new weather demands. Smart storage solutions protect your organization gains, and delegating tasks among household members keeps the workload shared instead of dumped on one person. September Cleaning FAQ How long does a full September cleanup take? Most homes need several sessions across one or two weekends once you plan, declutter, and clean room by room. Time-blocking the rooms in advance keeps any single day from feeling impossible. Should carpets really be cleaned in the fall? Yes. Summer drags in dirt and allergens that settle deep into pile, and a clean carpet improves indoor air for the months when windows barely open and foot traffic moves indoors. What is the one step people skip most? Replacing heating and air conditioning filters. It is quick, cheap, and it does more for winter air quality than any surface scrub. When should I outsource the whole project? If the season’s cleanout lands in one packed weekend, a professional deep clean handles the rooms and details while you handle everything else. Pair it with a move-in or move-out service if the fall also brings a lease change. Treat the September reset as an investment

September Cleaning: 7 Quick And Easy Steps To Get Ready For Fall Read More »

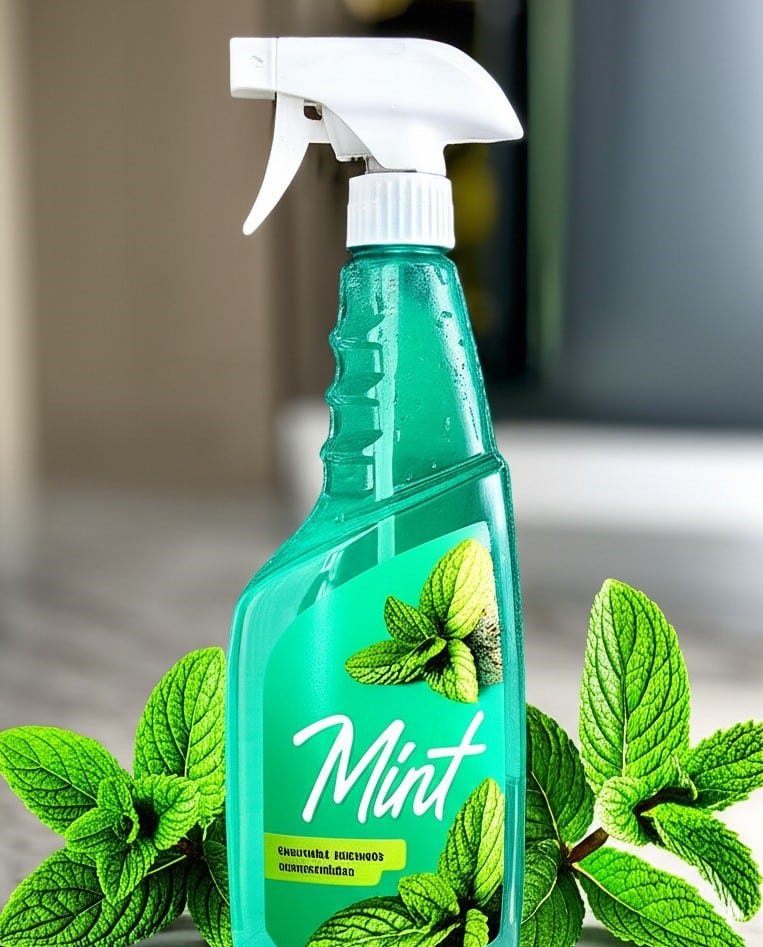
cleaning product mint with mint branch

Mint Cleaning Products: Discover The 6 Benefits of Mint in Cleaning

Using a mint cleaning products transforms the chore of tidying up into a refreshing experience. The sharp, cool scent cuts through stale air, replacing lingering cooking odors or bathroom stuffiness with a crisp aroma that signals true cleanliness. It’s a clean you can smell long after the cloths have been put away. 1.Citrus Note The scent of a clean home is often as important as the visual sparkle. While citrus notes are known for their zesty, energizing effect and lavender provides a sense of calm, mint occupies a unique and powerful space in the world of cleaning. It delivers a crisp, cool, and unmistakably clean fragrance that signifies a truly refreshed environment. The use of mint cleaning products transforms the chore of cleaning into a more invigorating and rewarding sensory experience. The sharp, piercing scent cuts through stale air and lingering odors, leaving behind a feeling of pure, unadulterated freshness that is difficult to replicate with other fragrances. It is a scent that doesn’t just mask odors, but seems to eradicate them, replacing them with an aura of hygienic purity. 2.Kitchen Odors In the kitchen, where grease and food odors present a constant battle, mint cleaning products are exceptionally effective. The natural compounds found in mint, particularly menthol, have a degreasing quality that helps break down oily residues on stovetops, backsplashes, and countertops. After cooking a fragrant meal, the air can feel heavy and saturated. A quick wipe-down of surfaces with a quality mint-based spray not only removes spills and splatters but also neutralizes those stubborn smells of garlic, onion, or fish. The versatility of mint cleaning products is on full display here. The sink, often a source of unpleasant smells, benefits immensely from a scrub with a mint-infused cleaner. It tackles food particles and leaves the basin smelling cool and clean for hours. Even the garbage disposal can be refreshed by using mint cleaning products, sending a plume of invigorating scent up from the drain instead of a whiff of yesterday’s waste. When mopping kitchen floors, a mint-based solution does more than just lift dirt; it leaves the entire room smelling revitalized from the ground up. 3.Mold and Damp in The Bathroom The bathroom is another area where the power of mint cleaning products truly shines. This space demands a high level of hygiene, and the scent of mint is psychologically associated with that very concept. It smells sterile in the best possible way. When used in a toilet bowl cleaner, it provides a powerful clean while effectively deodorizing the entire fixture. For showers and tubs, the challenges are soap scum and the potential for musty, damp smells. A good mint cleaning product cuts through the chalky residue and replaces any mildewy notes with its sharp, clean fragrance. The antimicrobial properties often associated with the essential oils in mint cleaning products make them ideal for this space. Wiping down sinks, faucets, and countertops leaves them gleaming and imbued with a scent that makes the entire room feel like a spa. Even cleaning mirrors and chrome fixtures with a mint-based glass cleaner is a more pleasant task; as you wipe away streaks, you are met with a cool, refreshing aroma rather than the harsh chemical smell of ammonia. 4.Homemade Recipes Creating your own mint cleaning products is a straightforward and cost-effective way to harness this power throughout your home. The satisfaction of making effective mint cleaning products at home is immense. A simple all-purpose spray can be made by combining one part white vinegar with one part water in a spray bottle and adding 15-20 drops of high-quality peppermint or spearmint essential oil. Shake well before each use. This homemade mint cleaning product is perfect for countertops, sinks, and other hard surfaces. It disinfects, deodorizes, and leaves that signature fresh scent. For more abrasive cleaning needs, such as scrubbing a stained sink or a grimy bathtub, a paste can be made from baking soda, a small amount of liquid castile soap, and several drops of mint essential oil. Apply the paste, let it sit for a few minutes, and then scrub with a damp sponge. You now have a powerful, abrasive mint cleaning product that is tough on grime but free from harsh chemicals. A wonderfully effective floor cleaner is just as easy: add a quarter-cup of white vinegar and 10 drops of mint essential oil to a gallon of hot water. This simple solution is one of the most effective DIY mint cleaning products you can make for mopping tile, linoleum, or vinyl floors, leaving them spotless and the air in your home feeling exceptionally clean. 5.Carpets and Rugs The utility of mint cleaning products extends far beyond the kitchen and bathroom. To freshen up carpets and rugs, mix a cup of baking soda with 10-15 drops of peppermint essential oil in a jar. Shake it vigorously, then sprinkle the mixture over the carpet. Let it sit for at least 15 to 20 minutes to absorb odors, then vacuum it up thoroughly. This simple trick is one of the most underrated uses for the components of mint cleaning products, leaving your textiles smelling crisp and new. The inside of a trash can, even when lined with a bag, can develop persistent odors. A quick spray and wipe with a mint-based cleaner after you take out the trash will keep it smelling fresh. For homes with pets, mint cleaning products can be a game-changer for cleaning pet areas, neutralizing odors without overwhelming sensitive noses with artificial perfumes. Stainless steel appliances, which often show every fingerprint and smudge, can be polished to a brilliant shine using a soft cloth and a mint-based cleaner, which helps to cut through greasy marks and leaves a streak-free, aromatic finish. The finish left by certain mint cleaning products on appliances is both visually appealing and olfactorily pleasing. 6.Mental Health The experience of using mint cleaning products goes beyond the physical act of cleaning; it has a noticeable psychological effect. The scent of mint is

Mint Cleaning Products: Discover The 6 Benefits of Mint in Cleaning Read More »

Natural Cleaning Products

Amazing Natural Cleaning Products To Add To Your Daily Routine

Amazing Natural Cleaning Products to Add to Your Daily Routine Switching to natural cleaning is not a step backward into grandma’s pantry; it is a practical application of basic chemistry. Most messes in a home, grease, mineral deposits, organic stains, and soap scum, are chemical compounds that simpler ingredients can dissolve or lift away. Once you grasp the acid-alkali interplay, gentle abrasion, and the surfactant power of true soap, a few inexpensive staples replace a whole shelf of specialized products. Distilled White Vinegar: The Acid Workhorse The acid-alkali dynamic drives most natural cleaning: use an acid to dissolve an alkaline mess, or an alkali to neutralize an acidic one. On the acidic side, distilled white vinegar is the champion. Its roughly 5% acetic acid gives it a pH of about 2.5, perfect for dissolving the mineral deposits behind hard water stains and limescale. A vinegar solution makes glassware, faucets, and shower doors sparkle, and a soak can descale a coffee maker or showerhead and restore its flow. A cup of vinegar in the rinse cycle also acts as a fabric softener by dissolving leftover alkaline detergent residue. The hard rule: vinegar’s acidity etches acid-sensitive stone such as marble, granite, and travertine, so keep it off them. Baking Soda and Washing Soda: Gentle but Powerful Scrubs On the alkaline end sits baking soda, or sodium bicarbonate, a mild alkali whose fine, consistent abrasive texture makes it the ideal scouring agent for sinks, fiberglass tubs, and stovetops that harsher powders would scratch. Its stronger cousin, washing soda, or sodium carbonate, runs at a pH around 11 and is a powerful degreaser and water softener that anchors homemade detergent recipes. Baking soda also deodorizes by chemistry, not masking: an alkaline substance neutralizes acidic, sour odors like garbage disposal smells. The fizzy vinegar-and-baking-soda reaction is widely misunderstood: the two form unstable carbonic acid that instantly decomposes into carbon dioxide gas and water. The real power is the agitation of the bubbles, which loosens grime in drains and toilet bowls. Apply the baking soda first, then the vinegar, so the reaction happens on the surface you are cleaning. Liquid Castile Soap: A True Soap for Every Room Castile soap, made from saponified vegetable oils, behaves differently from synthetic detergents. Its molecules are surfactants with a water-loving head and an oil-loving tail: the tail grabs grease and dirt while the head clings to water, so grime gets encapsulated and rinsed away. Dilution makes it endlessly adaptable: shake a couple of drops into a water-filled spray bottle for an everyday all-purpose mist, stir one tablespoon into a pail of hot water for a floor-washing solution, or mix one part soap with three parts water in a foaming dispenser for gentle hand soap. Hydrogen Peroxide: Whitening and Disinfecting Without Chlorine For disinfection and whitening, 3% hydrogen peroxide is the natural alternative to chlorine bleach. As an oxidizer, it breaks down organic material such as bacteria, viruses, and mold spores, which makes it a strong disinfectant for kitchen and bathroom surfaces. A paste of hydrogen peroxide and baking soda works wonders on stubborn white countertop stains and discolored grout: let it sit for 10-15 minutes while it bubbles, then scrub and rinse. The same combination makes a non-chlorine oxygen bleach that brightens laundry without chlorine’s harsh fumes and fabric damage; for comparison, the CDC explains how chlorine bleach disinfects and how to handle it safely. Staple Main Strength Top Uses Distilled white vinegar Acid that dissolves mineral scale Glass, faucets, shower doors, coffee makers Baking soda Mild abrasive alkali Sinks, tubs, stovetops, odor control Castile soap True soap surfactant All-purpose mist, floors, hand soap Hydrogen peroxide Oxidizer and disinfectant Counters, grout, laundry brightening Essential Oils That Earn Their Place Beyond the core staples, essential oils add function, not just fragrance. The properties that matter most for cleaning include: Tea tree oil: antiseptic, antifungal, and antibacterial, ideal for bathroom sprays and mildew-prone areas. Citrus oils from lemon, orange, or grapefruit: excellent degreasers thanks to their d-limonene content, with a fresh uplifting scent. Eucalyptus oil: a natural disinfectant and decongestant; add it to mopping water when someone in the house is sick. Peppermint oil: deters pests like ants and spiders when a few drops sit on cotton balls in corners or entry points. Clove oil: a top choice for slowing mold growth. Putting Natural Cleaning to Work, Room by Room In the kitchen, coat the oven interior, avoiding the heating elements, with a thick paste of baking soda and water and leave it overnight; the softened grease wipes away the next day, and a final vinegar spray neutralizes any soda residue. For stainless steel, mist on vinegar, then polish with a microfiber cloth and one tiny drop of olive oil. In the bathroom, spritz the shower walls after every use with a light blend of water, vinegar, and tea tree oil drops, which stops soap scum and mildew from building up; for discolored grout, work a hydrogen peroxide and baking soda paste into the lines with an old toothbrush, wait about 15 minutes while it bubbles, then scrub and rinse. In the laundry room, pretreat stains with equal parts water and hydrogen peroxide plus a squirt of castile soap, rub castile soap into grease spots, and let hydrogen peroxide handle organic stains like grass or blood. To refresh towels and sheets that have lost absorbency, soak them in hot water with washing soda or borax and a little detergent to pull out built-up residue. Natural Cleaning Tips: Dwell Time and Tools Natural solutions reward patience: most benefit from a few minutes of dwell time to break down grime before you wipe. Tools matter too: microfiber cloths grab dust with static charge far better than cotton rags, stiff and soft brushes cover most scrubbing, and glass spray bottles beat plastic, which some essential oils can degrade over time. Toronto Shine Cleaning brings this health-conscious, eco-friendly approach to every corner of your home through our regular cleaning service and deep cleaning plans.

Amazing Natural Cleaning Products To Add To Your Daily Routine Read More »

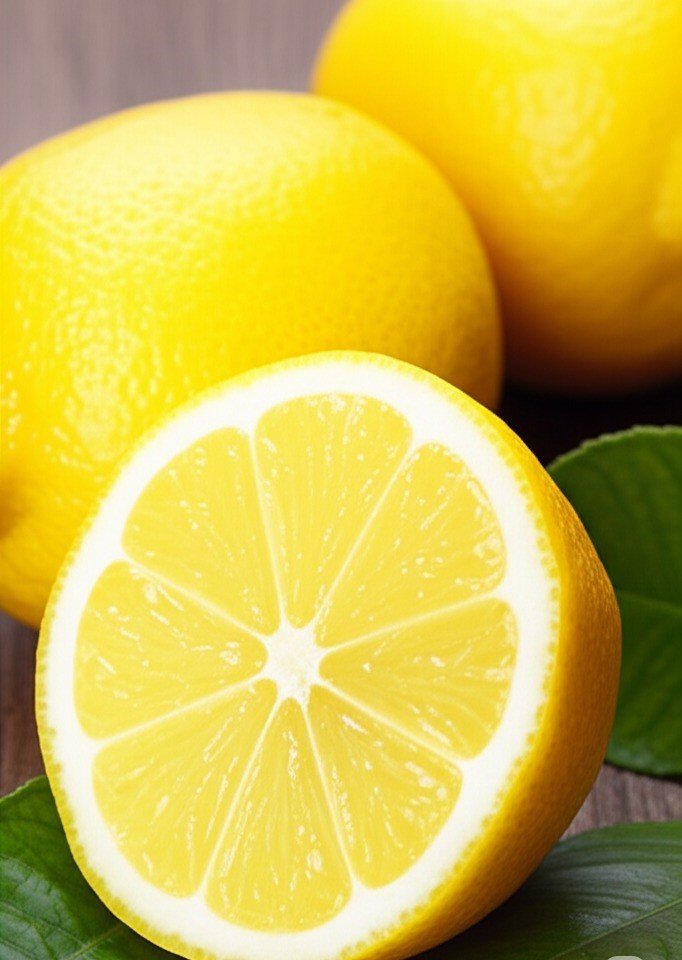
lemon

Lemon For Cleaning – 4 Best Tips On How To Use It

Lemons are a testament to nature’s ingenuity in providing effective cleaning solutions, offering a powerful yet fundamentally gentle alternative to many commercial synthetic products. Their remarkable cleaning ability is no accident; it comes from a sophisticated combination of natural compounds, most notably their high concentration of citric acid. This organic acid is the star of the show, with its characteristic acidity and, crucial to cleaning, its formidable ability to chemically break down and dissolve common household enemies such as grease, stubborn dirt, hard water mineral deposits and alkaline substances such as soap scum. The inherently low pH environment created by the juice, typically ranging from 2 to 3, proves inhospitable to the growth of many common household bacteria and various types of mold, and gives it significant natural disinfectant qualities. Scientific understanding suggests that this acidic environment can disrupt the cellular integrity of certain microbes, inhibiting their growth and activity. 1.The Benefits Of Lemon In addition to its strong acidity, it is also rich in other beneficial compounds. Lemon oil, predominantly found in the peel, contains d-limonene, a powerful natural solvent. Limonene contributes significantly to the degreasing capacity, helping to remove oily residues that water alone cannot remove. Furthermore, the universally appealing fresh, clean scent of lemon is not just a pleasant masking agent. The volatile organic compounds present in lemon actively interact with many malodorous molecules, particularly those of an alkaline nature, neutralizing them, leading to genuine odor elimination rather than just a temporary masking. This synergistic combination of potent acidity to dissolve and disinfect, solvent action to degrease, and inherent aromatic compounds to deodorize makes lemon an exceptionally versatile, effective, and sensorially pleasing cleaning agent for a multitude of household tasks. The kitchen, the heart of the home where food preparation demands the highest standards of hygiene and cleanliness, is one of the main areas where this citrus fruit demonstrates its multiple cleaning capabilities. Consider the humble cutting board, whether made of traditional wood or modern plastic. These surfaces are continually exposed to raw meats, spicy vegetables like onions and garlic, and a variety of other foods, making them potential breeding grounds for bacteria and lingering odors. When a cut lemon half is methodically rubbed across the surface of the board, the citric acid goes to work. It penetrates the microscopic grooves and knife cuts, where its low pH helps neutralize bacteria and break down residual organic matter. Visually, a subtle lightening of food stains can be observed, and aromatically, the strong, clean aroma of lemon gradually overwhelms and replaces any lingering food odors, leaving the board feeling refreshed and more hygienic. Greasy stovetops, oven doors and kitchen panels, often coated with a stubborn film of polymerized cooking oils, present another challenge perfectly suited to the degreasing nature of this critical fruit. Limonene in lemon peel, combined with citric acid, works to emulsify these fats. Whether applied directly by rubbing with a lemon wedge, or sprayed as a diluted solution, the juice begins to loosen the stubborn grip of grease. After a short contact time, the greasy layer becomes noticeably easier to clean, revealing the clean surface beneath without the need for harsh chemical solvents. Even the inside of a microwave, often plagued by dried-on, caked-on food splatters that seem to resist all but the most vigorous scrubbing, yields to the gentle power of lemon-infused steam. By heating a bowl of water and generous amounts of slices (or a few tablespoons of juice) to a rolling boil and filling the microwave cavity with steam, dried-on food particles are effectively softened and rehydrated. The acidic, aromatic steam not only loosens the grime, but also helps deodorize the interior. The subsequent cleaning process becomes remarkably easy, turning a frustrating task into a breeze, leaving behind a fresh citrus scent instead of the smell of stale food. 2.Lemon Juice Sinks and faucets, especially those made of stainless steel or chrome, often have unsightly marks from hard water deposits and soap scum build-up. Lemon juice, with its ability to dissolve these mineral build-ups, acts as a natural polish. Applying a slice directly to these surfaces, followed by gentle rubbing and thorough rinsing, can visibly restore their original shine, making them shine like new, free of cloudy films and water spots. The notorious garbage disposal, a common source of unpleasant kitchen odors, can be effectively cleaned and deodorized by grinding a few lemon peels (or a whole, cut lemon) into it. As the blades pulverize the peel, the abrasive action of the peel itself, along with the released oils and juice, cleans the grinding chamber, while the potent citrus fragrance powerfully neutralizes unpleasant odors emanating from trapped food particles. Similarly, the often-stained surfaces of stainless steel appliances, from refrigerators to dishwashers, can be restored to their sleek, pristine appearance. Wiping them down with a cloth dampened with lemon juice, followed by buffing with a clean, dry cloth, can remove fingerprints and smudges, leaving a polished, streak-free shine. Even stubborn food stains and lingering odors that have built up on plastic food storage containers can be significantly reduced. Soaking the container in a solution of lemon juice and water, or rubbing the inside of the container with a sliced lemon and letting it sit for a while before washing as usual, can lighten the discoloration and neutralize accumulated odors, extending the life of these containers. The bathroom environment, with its constant humidity and specific types of soiling, presents a distinct set of cleaning challenges, most notably persistent soap scum, dulling hard water stains, and the potential for mildew growth. Lemon, with its characteristic acidity and fresh scent, is remarkably well-equipped to address these issues effectively. Glass shower doors, ceramic tiles, and porcelain bathtubs frequently develop a tenacious, cloudy film of soap scum, which is an alkaline residue formed from the reaction of soap with hard water minerals. The citric acid in lemon directly counteracts and dissolves this alkaline buildup. Applying lemon juice liberally to these surfaces, either by spraying a solution or rubbing

Lemon For Cleaning – 4 Best Tips On How To Use It Read More »

person with allergies to cleaning products

4 Best Tips For Allergy Sufferers That You Need To Know

Does allergy make it difficult to clean the house? Many conventional cleaning products are formulated with chemicals that can trigger allergic reactions, leading to discomfort, respiratory distress, skin problems, and other health issues. A thorough understanding of these potential triggers, combined with informed choices about safer cleaning methods and alternatives, is essential to creating a clean living environment that promotes well-being rather than harms it. 1.Fragance Free The root of adverse reactions to cleaning products often lies in their complex chemical composition. Fragrances, whether synthetically produced or derived from natural essential oils, are the main culprits. Designed to impart a pleasant scent or mask chemical odors, these fragrances release volatile organic compounds (VOCs) into the air. VOCs are a broad category of chemicals that evaporate easily at room temperature, and many of the common compounds found in cleaning agents, such as limonene (a citrus scent), pinene (a pine scent), and various aldehydes, can act as potential respiratory irritants. They can trigger asthma attacks, aggravate existing respiratory conditions, cause headaches, induce nausea, and lead to contact dermatitis or other skin reactions. It is important to note that even products marketed as “unscented” may contain masking fragrances to neutralize the inherent scent of other ingredients; these can be just as problematic as perfumes with overt fragrances. Looking for products explicitly labeled “fragrance-free” is a more reliable approach for sensitive or allergy-prone individuals. Beyond fragrances, a host of other ingredients in common cleaning supplies are known to cause issues. Preservatives like methylisothiazolinone (MI) and methylchloroisothiazolinone (MCI) are notorious contact allergens, frequently implicated in allergic contact dermatitis, which can manifest as itchy, red, and blistering skin, even from rinse-off products like dish soap or laundry detergents. Dyes, added primarily for aesthetic appeal and brand recognition, offer no cleaning efficacy and can be another source of skin irritation or allergic sensitization. Harsh chemicals such as ammonia and chlorine bleach, while powerful disinfectants, release strong, acrid fumes. These fumes can severely irritate the mucous membranes of the eyes, nose, throat, and lungs. For individuals with pre-existing respiratory conditions like asthma, chronic bronchitis, or COPD, exposure can lead to acute exacerbations. Furthermore, mixing products containing bleach with those containing ammonia or acids (like vinegar) can produce highly toxic chloramine or chlorine gas, posing serious health risks. Surfactants, the workhorse ingredients that enable products to lift dirt, oil, and grease, can also strip the skin of its natural protective oils, leading to dryness, cracking, and irritation, particularly with frequent exposure. Some individuals may also develop allergic reactions to specific surfactant molecules. 2.Allergy The symptoms triggered by cleaning products can vary significantly in type and severity from person to person. Respiratory symptoms are common and may include coughing, wheezing, shortness of breath, chest tightness, or a persistently runny or stuffy nose. Skin contact can lead to immediate redness, itching, and hives, or delayed reactions such as eczematous rashes characterized by dryness, scaling, and blistering. Eye irritation, manifesting as redness, watering, and a burning sensation, is also frequent. Systemic symptoms like headaches, migraines, dizziness, and fatigue can occur, particularly with prolonged exposure or in poorly ventilated spaces. Pinpointing the exact ingredient responsible for a reaction can be difficult due to the complexity of product formulations, the potential for delayed reactions, and the fact that manufacturers are not always mandated to disclose every single component, especially fragrance constituents which are often protected as “trade secrets.” Developing the habit of carefully reading ingredient labels is essential to managing allergies related to cleaning products. While complete transparency is not always guaranteed, consumers should actively look for mentions of common irritants such as “fragrance,” “parfum,” specific dyes (often listed as CI numbers), or chemical names known to cause sensitivities such as MI/MCI, formaldehyde-releasing preservatives (e.g., DMDM hydantoin, quaternium-15), or harsh solvents. In general, products with shorter, simpler ingredient lists consisting of more recognizable substances may pose a lower allergy risk. When selecting cleaning products, choosing those specifically formulated and marketed for sensitive individuals can be advantageous. Look for clear labeling such as “hypoallergenic,” “fragrance-free,” “dye-free,” or “for sensitive skin.” It is important to understand, however, that the term “hypoallergenic” is not strictly regulated by agencies like the FDA or EPA. It generally implies that the manufacturer has omitted common allergens or formulated the product to minimize allergenic potential, but it does not constitute a guarantee that no reaction will occur. Third-party certifications from reputable organizations can offer a more reliable guide. The U.S. Environmental Protection Agency’s (EPA) “Safer Choice” label, for instance, signifies that the product’s chemical ingredients have been reviewed against stringent human health and environmental criteria. Products bearing this label contain safer ingredients without compromising performance. Similarly, the “Asthma and Allergy Friendly” certification, often administered by national asthma and allergy foundations, indicates that a product has undergone independent testing and met standards proving it is less likely to trigger asthma or allergic reactions. These certifications provide an added measure of confidence for consumers navigating product choices. 3.Green Washing Caution is also advised regarding “greenwashing,” where products are marketed with terms like “natural,” “eco-friendly,” “botanical,” or “plant-based” without necessarily being safer for allergy sufferers. Many natural ingredients, including common essential oils like tea tree, lavender, eucalyptus, and citrus oils (limonene, linalool), are known allergens and can also release VOCs. The term “natural” does not equate to “non-allergenic.” Always scrutinize the full ingredient list, even for products that appear environmentally benign. In addition to carefully selecting commercial products, modifying cleaning practices can substantially reduce allergy exposure. Adequate ventilation is essential. When cleaning, especially with products that have a detectable odor or chemical content, open windows wide and use exhaust fans (in bathrooms and kitchens) to promote air circulation. This helps dilute and remove irritants, volatile organic compounds (VOCs), and airborne particles, improving indoor air quality during and after cleaning tasks. Employing the principle of “less is more” can also be beneficial. Often, more product is used than is necessary for effective cleaning. Adhering strictly to label instructions for dilution ratios and application amounts

4 Best Tips For Allergy Sufferers That You Need To Know Read More »

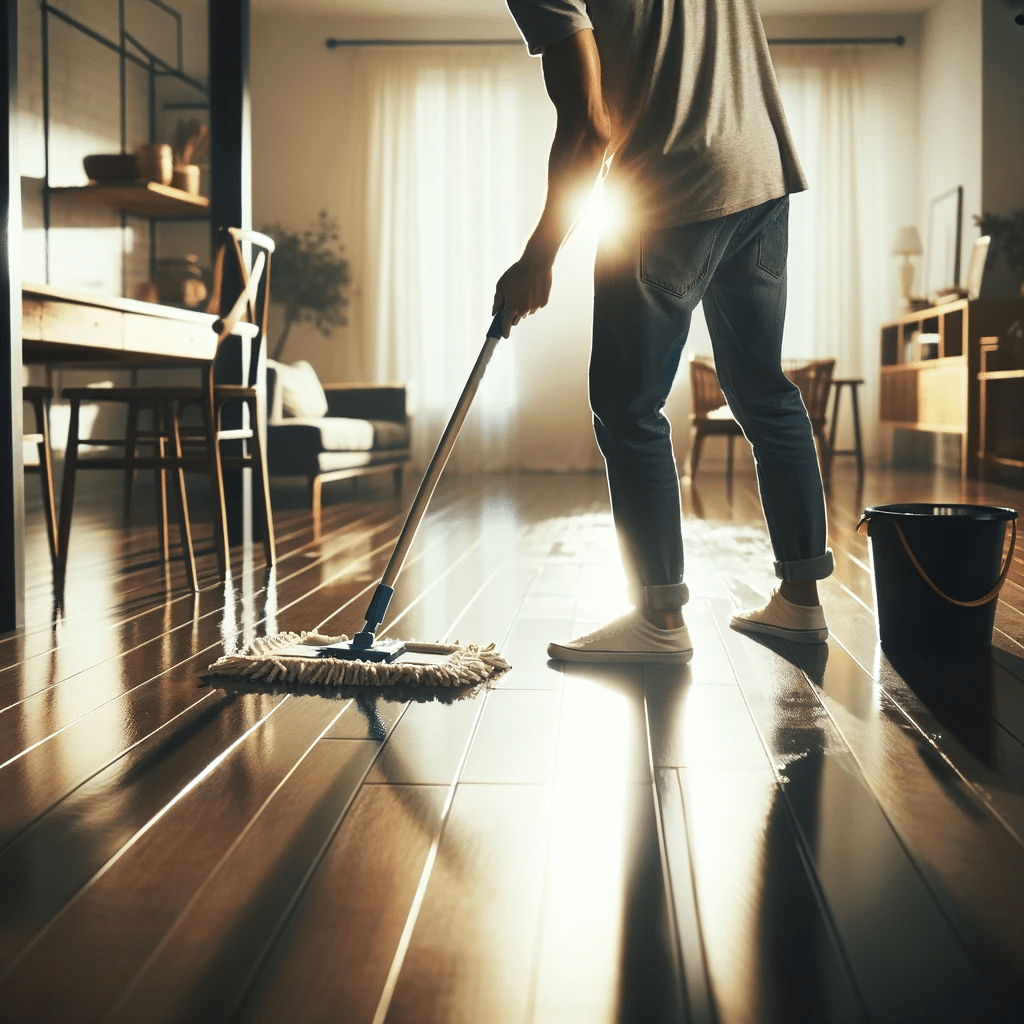
Mopping floor with organized cleaning supplies.

5 Innovative Ways to Clean Floors: Save Time and Effort

Oh, the dreaded clean floors! It’s like the endless battle against dirt, dust, and mysterious sticky spots. But what if I told you there are innovative ways to turn this daunting chore into a breeze? Let’s dive into five groundbreaking methods that promise to save you time, effort, and maybe even turn cleaning into a less dreaded task. So, grab your mops, folks-it’s time to make those floors sparkle with minimal fuss! 1. Robotic Vacuum Cleaners & Mops This is where technology meets housekeeping, offering us a glimpse into a future where floor cleaning doesn’t have to be a back-breaking task. Picture this: you’re lounging on your sofa, enjoying a peaceful morning, and in the background, there’s a quiet hum of a robot diligently making its way around your home. It’s not just picking up crumbs and pet hair; it’s also mopping up those accidental coffee drips and muddy paw prints, thanks to its built-in mopping function. These devices are marvels of modern engineering, equipped with sensors to navigate around furniture and avoid stairs, ensuring they clean efficiently without requiring your constant supervision. Some are even smart enough to return to their charging stations when their batteries are low, so they’re always ready for their next cleaning session. And with the advent of app connectivity, you can control these robotic helpers from anywhere, scheduling cleaning sessions while you’re out and about, so you return to a clean home. The beauty of these robotic vacuum cleaners and mops lies not just in their functionality but also in their adaptability. They can handle a variety of floor types, from hardwood and tile to low-pile carpets, making them a versatile addition to any cleaning arsenal. Plus, for those concerned about allergens, many models come equipped with HEPA filters to ensure that the air in your home remains as clean as your floors.     2. Microfiber Mop Slippers As you glide, shuffle, and twirl across the room, the high-performance microfiber material on the bottom of these slippers picks up dust, hair, and dirt with surprising efficiency. It’s like your floors are getting a spa treatment, all while you’re breaking a sweat to your favorite beats. But the magic of microfiber mop slippers extends beyond just their cleaning capabilities. They embody a shift in how we perceive household chores. No longer must cleaning be a tedious, solitary task. With these slippers, it becomes a family affair or a personal challenge. Who can slide the farthest? Who can dance the longest? It’s an opportunity to engage kids in cleaning activities, teaching them the value of cleanliness in the most playful manner imaginable. Moreover, these slippers are not just about adding a fun twist to cleaning; they’re also about accessibility and ease. There’s no need for buckets, no wringing out mops, no back-and-forth to the sink. Just slip them on and go. They’re especially perfect for those quick clean-ups, maintaining a clean floor between deeper cleaning sessions. And when they’ve done their duty, a simple toss into the washing machine gets them ready for the next round. 3. Eco-Friendly, Reusable Mop Pads Expanding on the topic of eco-friendly, reusable mop pads, it’s clear that these items represent more than just a cleaning tool; they’re part of a growing movement towards sustainability and mindfulness in our daily routines. The beauty of these reusable mop pads lies in their simplicity and their profound impact on how we approach cleaning and environmental stewardship. Constructed from durable, high-quality microfiber, these pads are designed to last through countless washes, reducing the need for single-use, disposable cleaning products that contribute to landfill waste. The microfiber’s tightly woven fibers are engineered to pick up and hold onto dirt, dust, and spills more effectively than traditional cotton mops or disposable pads, making them a powerhouse of cleanliness. This means you can achieve a deeper clean with less effort and fewer resources-just water in many cases, eliminating the need for harsh chemicals. The use of these mop pads is a small but meaningful step towards reducing your household’s carbon footprint. By choosing reusable options, you’re not only conserving resources but also reducing the amount of plastic and waste generated from conventional cleaning products. It’s a direct action towards a healthier planet, encouraging a cycle of use and reuse that aligns with principles of zero waste and sustainable living. Pairing these eco-friendly mop pads with natural cleaning solutions, such as vinegar and water or essential oil blends, enhances the eco-conscious approach to cleaning. It allows you to avoid the toxins often found in commercial cleaners, ensuring a safer environment for your family and pets. Plus, crafting your own cleaning solutions can be a rewarding experience, giving you control over the scents and ingredients used in your home.     4. Steam Mops These innovative tools use the simple power of heated steam to tackle dirt, grime, and germs on hard flooring surfaces, elevating the cleaning experience to new heights of efficiency and hygiene. The genius of steam mops lies in their ability to clean deeply and thoroughly without the use of chemical cleaners. By heating water to a high temperature, they produce steam capable of loosening even the most stubborn stains, spills, and sticky residues. This method is not only effective but also incredibly eco-friendly, reducing the need for disposable cleaning pads and chemical solutions that can harm the environment and pose health risks to humans and pets. Moreover, the sanitizing power of steam is unparalleled. The high temperature of the steam is capable of killing a wide range of bacteria, viruses, and other pathogens, making steam mops an excellent choice for households looking to maintain a healthy living environment. This aspect is particularly beneficial in times of cold and flu season or when allergens are a concern, as the steam mop leaves behind a sanitized surface that’s safer for everyone, especially those with allergies or immune sensitivities. Another remarkable advantage of steam mops is their quick-drying capability. Unlike traditional mopping, which can leave floors

5 Innovative Ways to Clean Floors: Save Time and Effort Read More »

Powerful eco-friendly symbol with green elements for sustainability.

5 Easy How-To Eco-Friendly Tips for Making Your Cleaning Routine More Green

Oh, who doesn’t love a Eco-Friendly Tips for a sparkling clean home? Making your cleaning routine eco-friendly isn’t just good for the planet; it can also be gentle on your wallet and health. Whether you’re in Toronto, Mississauga, or anywhere else in the GTA, these eco-friendly tips will help you make your cleaning routine more sustainable. Let’s dive into these green cleaning strategies that are as easy on the Earth as they are effective! 1. Embrace DIY Cleaning Solutions A simple mix of vinegar and water is indeed a powerhouse cleaner, effective for shining up glass surfaces and leaving them streak-free. But did you know that the same mixture can help in removing soap scum from your bathroom tiles and fixtures? That’s right! For tougher grime, heating the vinegar before mixing it with water can boost its cleaning power. Just be sure to let it cool a bit before you start scrubbing away. Baking soda, on the other hand, is a mild abrasive, making it perfect for tackling tough stains on hard surfaces. But its talents don’t end there. Mixed into a paste with a bit of water, it can brighten up dull stainless steel sinks and cookware. Even more, sprinkle it on your carpets before vacuuming to neutralize pet odors and freshen up the room. Now, let’s talk about essential oils. Adding a few drops of essential oils like lavender, lemon, or tea tree to your DIY cleaners isn’t just about leaving behind a pleasant scent. These oils have natural antibacterial and antifungal properties, boosting the cleaning power of your homemade concoctions. Imagine disinfecting your surfaces and air with the soothing aroma of lavender or the refreshing scent of lemon – it’s like giving your home a spa day! Experimenting with these basic ingredients can lead to a variety of cleaning solutions for different purposes around your house. For example, combining lemon juice with salt creates a gentle abrasive paste perfect for removing rust stains or reviving brass fixtures. Or, for a natural fabric softener, add a cup of white vinegar to your laundry rinse cycle; it softens clothes and removes any soap residue without the need for synthetic chemicals. The beauty of DIY cleaning solutions is in their simplicity and versatility. With just a handful of ingredients, you can create a suite of products that are safe for your family, gentle on the environment, and effective in keeping your home clean. 2. Say Goodbye to Single-Use Plastics Making the switch to reusable spray bottles and concentrated cleaning solutions is a fantastic step toward a more sustainable lifestyle. But the advantages of this simple change extend far beyond just reducing plastic waste. By investing in durable, reusable spray bottles, you’re not only cutting down on the amount of plastic that could end up in landfills and oceans, but you’re also embracing a more minimalist approach to your household products. Reusable bottles can be refilled countless times, which means you’ll be buying less and saving more in the long run. This move away from single-use plastics aligns perfectly with a zero-waste lifestyle, where the goal is to minimize our environmental impact through mindful consumption and sustainable practices. The switch to concentrated cleaning solutions is equally impactful. These concentrates often come in smaller, more eco-friendly packaging, significantly reducing the amount of plastic used compared to traditional cleaning products. Furthermore, because you’re adding water at home, these concentrates are lighter and more efficient to transport, leading to lower carbon emissions during shipping. This not only helps in reducing your carbon footprint but also supports a more sustainable global logistics system. Another aspect of this approach is the quality and composition of the concentrated solutions themselves. Eco-conscious companies are not only focused on reducing packaging but also on creating products that are free from harmful chemicals and safe for your family and pets. These concentrated solutions often use natural and plant-based ingredients that are gentler on the environment without sacrificing cleaning power. Embracing reusable containers and concentrated solutions encourages a more conscious approach to shopping, too. It prompts us to seek out brands that prioritize sustainability, both in their products and their practices. This consumer demand for eco-friendly products can drive more companies to consider their environmental impact and work towards greener solutions. This shift can spark creativity and a do-it-yourself spirit. Some eco-warriors go one step further by using their reusable bottles to mix their own homemade cleaning solutions, combining the best of both worlds-reducing plastic waste and controlling the ingredients that go into their cleaners.     3. Choose Eco-Friendly Cleaning Tools Washable microfiber cloths, are not only more absorbent than their disposable counterparts but also have a longer lifespan. This means you’ll be purchasing fewer products over time, which is both cost-effective and environmentally friendly. Microfiber cloths can be used for a variety of tasks, from dusting and wiping surfaces to cleaning windows and polishing furniture, making them a versatile addition to your cleaning arsenal. And since they can be washed and reused hundreds of times, their impact on the environment is significantly lower than that of paper towels. When it comes to sweeping and dusting, tools made from sustainable materials like bamboo or recycled plastic offer a win-win situation. Bamboo is a highly renewable resource, growing quickly with minimal water and no pesticides. It’s also naturally antimicrobial, making it an excellent material for cleaning tools. On the other hand, products made from recycled plastic give a second life to materials that might otherwise end up in landfills, oceans, or incinerators. By choosing tools made from these materials, you’re supporting industries that prioritize sustainability and innovation in product design. But the commitment to eco-friendly cleaning tools doesn’t stop at the materials they’re made from. It’s also about their design and functionality. Many eco-friendly tools are designed to be more effective, requiring less effort and fewer cleaning products to get the job done. For example, high-quality dusters made from natural fibers can attract and hold dust better than synthetic versions,

5 Easy How-To Eco-Friendly Tips for Making Your Cleaning Routine More Green Read More »

Person cleaning a sparkling white bathtub in a bright, airy bathroom.

7 Natural and Effective Ways to Clean Your Bathtub

Ready to sparkling Clean Your Bathtub without the harsh chemicals? You’re in the right place! Whether you’re tackling soap scum, hard water stains, or just giving your tub a regular refresh, natural solutions can be surprisingly effective and much kinder to the environment. Let’s dive into seven natural and effective ways to get your bathtub looking brand new. 1. Baking Soda Paste Baking soda, also known as sodium bicarbonate, is a versatile ingredient that shines beyond the kitchen. When it comes to cleaning, particularly your bathtub, it stands out for its gentle yet effective abrasive properties. The magic begins when you create a simple paste by mixing baking soda with a bit of water. This unassuming mixture transforms into a mighty cleaning agent that can tackle various issues, from everyday grime to more stubborn spots. Applying this paste directly onto the surface of your bathtub allows it to work its magic, particularly on soap scum and light stains that can dull the appearance of your bathroom centerpiece. The paste’s texture provides just the right amount of abrasiveness to scrub away these nuisances without scratching or damaging the tub’s surface. It’s a delicate balance that baking soda strikes perfectly, offering a safe and effective way to maintain the cleanliness and shine of your bathtub. After letting the paste sit on the surface for about 15 to 20 minutes, the baking soda has ample time to penetrate and break down the grime. This waiting period is crucial as it allows the natural chemical reaction of baking soda with the stains to loosen their grip on the tub’s surface. When it’s time to scrub, using a sponge or a soft brush ensures that you can effectively remove the softened grime without exerting too much force or causing any harm. The final step of rinsing the tub thoroughly is satisfying, as you wash away the residue and reveal a cleaner, more inviting bathtub. The beauty of this method lies in its simplicity and the fact that it relies on a non-toxic, environmentally friendly ingredient. It’s a testament to the power of natural cleaning solutions and their place in our homes for maintaining cleanliness in a safer, more sustainable manner.     2. Vinegar and Dish Soap Solution The simple act of mixing equal parts white vinegar and dish soap creates a potent cleaning solution that harnesses the strengths of both ingredients. The vinegar, known for its acidic properties, is a natural descaler and disinfectant. It effortlessly cuts through tough grime, dissolving the bonds that hold dirt and soap scum to your bathtub’s surface. On the other hand, dish soap brings its grease-fighting power to the mix. It’s designed to break down oils and fats, which makes it incredibly effective at tackling the oily residues that can accumulate in a bathtub from body washes, shampoos, and conditioners. When combined, these two household staples form a cleaning solution that’s not only easy to make but also hard on grime and gentle on your tub’s finish. Applying this solution is just as straightforward as making it. By storing it in a spray bottle, you’re equipped with a convenient and efficient tool for coating the bathtub’s surface evenly. This ensures that every nook and cranny is covered, allowing the solution to work its magic uniformly. Letting it sit for about an hour is crucial. This dwell time gives the acidic vinegar and the surfactants in the dish soap enough time to penetrate and break down the grime and soap scum. It’s this waiting period that really leverages the chemical capabilities of your solution, making the scrubbing process that follows much less laborious. When it’s time to scrub, the grime that once clung stubbornly to your bathtub’s surface will now be loosened and much easier to remove. A brush, especially one with stiff bristles, becomes an effective tool for this task, allowing you to target even the most persistent areas of buildup without damaging the tub. Rinsing away the solution after scrubbing reveals a clean, revitalized surface, often with minimal effort compared to conventional cleaning methods. This vinegar and dish soap solution stands out not only for its cleaning prowess but also for its accessibility and environmental friendliness. Almost every household has vinegar and dish soap, making this method cost-effective and easy to adopt. Additionally, it’s a more health-conscious choice, avoiding the harsh chemicals found in many commercial cleaners. 3. Lemon and Salt Scrub Using a lemon, a fruit celebrated for its high citric acid content, is key to this approach. Citric acid is a natural chelating agent, which means it’s capable of binding with minerals in the hard water stains, effectively loosening their grip on the surfaces of your bathtub. This action makes the stains much easier to remove without the need for harsh chemicals. By cutting a lemon in half, you directly apply these natural acids onto the stained areas, maximizing the lemon’s cleaning potential. Sprinkling salt onto the cut side of the lemon before scrubbing introduces a gentle abrasive element to this cleaning duo. Salt, being granular and somewhat coarse, works excellently in conjunction with the lemon’s acidity to physically break down and scrub away the stain particles. This combination ensures that you’re not just chemically loosening the stains but also physically removing them from the surface. Moreover, the lemon and salt scrub is a delightfully fragrant way to clean. Unlike the overpowering or chemical smells associated with traditional cleaners, this method leaves behind a fresh, citrusy scent that can make your bathroom feel cleaner and more inviting. It’s a natural deodorizer, ensuring that not only does your bathtub get a thorough clean, but your entire bathroom benefits from a fresher atmosphere. This approach is especially appealing for those seeking sustainable and non-toxic cleaning solutions. Lemons and salt, common kitchen staples, are readily biodegradable and safe for most surfaces, making this method a responsible choice for the environment and a safer option for homes with children or pets. In addition to its effectiveness and eco-friendliness,

7 Natural and Effective Ways to Clean Your Bathtub Read More »