Green Cleaning

Clean Living Room with Playful Dog and Cat

5 Cleaning Hacks for Pet Owners: How to Save Time and Effort

Hey pet lovers! Welcome to our guide on “Cleaning Hacks for Pet Owners.” If you’ve got a furry friend at home, you’re familiar with the endless joy and laughter they bring. But let’s face it, they also come with their own set of messes, from shedding fur to the occasional unexpected accident. Maintaining a clean home with pets around can feel like a full-time job, but fear not! I’ve gathered some innovative cleaning hacks designed specifically to make life easier for pet owners. These hacks are set to save you both time and effort. So, let’s dive into these life-saving tips: 1. The Magic of Rubber Gloves The secret behind rubber gloves’ effectiveness lies in the material’s natural ability to create static electricity when rubbed against surfaces like carpets, upholstery, and clothes. This static charge acts like a magnet for pet hair, pulling it away from the fabric and onto the gloves. Unlike traditional lint rollers or vacuum cleaners that might miss fine hairs, rubber gloves can get into every nook and cranny, ensuring a more thorough clean. Another great advantage of using rubber gloves is their reusability. Unlike single-use adhesive sheets on lint rollers, rubber gloves can be used repeatedly, making them an eco-friendly option for pet owners conscious about their environmental footprint. Plus, when the gloves get dirty, you can simply wash them with soap and water, and they’re good as new, ready for the next cleaning session. For those hard-to-reach places or delicate surfaces, you can also use your fingers to gently target the area. The flexibility of the gloves allows for precise cleaning around buttons on upholstered furniture, corners of cushions, or even the intricate patterns of decorative pillows. This level of detail ensures that no pet hair is left behind, keeping your home clean and allergen-free. 2. Baking Soda: The Odor Buster Baking soda, also known as sodium bicarbonate, is a powerhouse when it comes to neutralizing odors. Its ability to absorb and eliminate unpleasant smells rather than just masking them makes it a go-to solution for pet owners. This is because baking soda undergoes a chemical reaction when it comes into contact with odors, changing the pH level of the odorous substance and effectively neutralizing it. This reaction ensures that the smells are not just covered up but are genuinely removed from the environment. What makes baking soda particularly appealing for tackling pet odors is its versatility. Besides carpets and furniture, you can use it on a wide range of materials and surfaces, including pet bedding, litter boxes, and even in your pet’s grooming routine. A little sprinkle of baking soda in the litter box between cleanings can help control odors, making the environment more pleasant for both you and your pet. For a deeper clean, especially on pet bedding or fabric toys, you can mix baking soda with water to create a paste. Apply this paste directly to the soiled area, let it dry, and then brush or vacuum it off. This method is especially effective for removing stubborn smells that have had time to set into the fabric. Another great tip is to add a cup of baking soda to your laundry when washing pet bedding or other washable items. This helps to boost your detergent’s cleaning power and eliminates odors, leaving items smelling fresh and clean. It’s a simple yet effective way to ensure that every part of your pet’s environment contributes to a fresher-smelling home. Baking soda is not only effective but also safe for use around pets. Unlike many commercial odor eliminators that contain chemicals which could be harmful if ingested or inhaled by pets, baking soda is non-toxic. However, it’s always a good idea to ensure your pet doesn’t ingest large amounts of baking soda directly, as it can be harmful in large quantities.     3. DIY Pet-Safe Floor Cleaner The combination of water, white vinegar, and liquid dish soap creates a cleaning powerhouse that can tackle even the toughest of grime without the use of harsh chemicals found in many commercial cleaners. Vinegar, known for its disinfecting properties, works effectively against bacteria and viruses, ensuring your floors are not only clean but also hygienic. The acidity of vinegar helps dissolve dirt, soap scum, and hard water deposits, making it particularly effective for bathroom and kitchen floors. Adding a few drops of liquid dish soap to the mix enhances the cleaning solution’s ability to cut through grease and stubborn stains. Dish soap is designed to break down oils, making it a perfect addition to your floor cleaning solution for areas that are prone to spills or have accumulated grime. Incorporating a lemon peel into the mix not only imparts a fresh, clean scent but also adds a natural antibacterial and antifungal boost to your cleaning solution. The citrus oils in the lemon peel can help to further disinfect surfaces, leaving your floors sparkling clean and smelling great. Plus, this natural fragrance is much safer for your pets than synthetic fragrances found in many store-bought cleaners, which can be irritating or harmful to their sensitive noses. When using this DIY pet-safe floor cleaner, it’s important to spray it lightly on tile or linoleum floors and mop as usual. The beauty of this solution is that it leaves no toxic residues behind, ensuring that your pets can safely walk on the floors shortly after cleaning, without the risk of ingesting harmful substances. When it comes to cleaning hardwood floors, the acidic nature of vinegar can potentially damage the finish over time. For these surfaces, it’s best to either use a diluted vinegar solution (with more water than vinegar) for occasional deep cleaning or opt for a cleaning product recommended by the flooring manufacturer that is safe for pets and hardwood floors alike.     4. Lint Roller: Your Secret Weapon The lint roller’s stickiness is perfect for picking up pet hair that clings stubbornly to fabrics. Its design allows for a level of precision and convenience that bulky

5 Cleaning Hacks for Pet Owners: How to Save Time and Effort Read More »

Pristine Home Exterior on Sunny Spring Day 2023

10 Essential Spring Cleaning Hacks to Refresh Your Home

10 Essential Spring Cleaning Hacks to Refresh Your Home Spring is here, and it is time to refresh your living space. Spring cleaning does not need to feel overwhelming. With the right approach and a few smart hacks, you can transform your home efficiently. Whether you live in Toronto, Mississauga, or anywhere across the GTA, these tips will help you clean smarter, not harder. A quick recap of the hacks covered below: Declutter before you clean to reduce obstacles Use natural cleaners like vinegar and baking soda Work from top to bottom in every room Reach hidden spots like air vents and window tracks Refresh bedding and organize as you go Declutter First for a Faster Clean Clearing out clutter before you start cleaning makes every step easier. Sort through your belongings and set aside items you no longer use. The one-year rule works well: if you have not used something in the past year and it does not spark joy or serve a purpose, consider donating or discarding it. A clutter-free home is not only easier to clean but also promotes a calmer mindset. Use Natural Cleaning Solutions Common pantry staples like vinegar, baking soda, and lemon are powerful natural cleaners. Vinegar cuts through grease and grime on glass and faucets. Baking soda acts as a gentle abrasive that lifts stains from sinks and bathtubs without scratching. Lemon brings natural acidity and antibacterial properties to countertops and cutting boards. These ingredients are economical, eco-friendly, and safer for households with pets and children. For more guidance on using household products safely, visit Health Canada’s chemical safety page. Work Top to Bottom Start with ceiling fans, light fixtures, and the tops of cabinets. Dust and debris that fall during cleaning will land on areas you have not yet cleaned, saving you from redoing work. Move to walls, windows, and furniture next. Finish with floors last. This methodical approach prevents resettling dust and makes your cleaning routine flow naturally. Use Microfiber Cloths Microfiber cloths attract and trap dust particles using static electricity rather than pushing them around. Use them dry for dusting electronics and delicate surfaces, or dampen them for grease splatters and soap scum. Unlike paper towels, microfiber cloths are reusable and reduce waste. They often require only water, cutting down on the need for chemical cleaners. Learn more about cleaning and disinfecting at CDC’s cleaning guidelines. Clean Air Vents Regularly Air vents collect dust and debris that can circulate allergens and reduce HVAC efficiency. Wrap a butter knife in a cloth to reach between slats, then vacuum the vent cover with a brush attachment. Clean vents improve indoor air quality, which is especially important for household members with allergies or asthma. Refresh Your Mattress Sprinkle baking soda over your mattress, add a few drops of lavender or citrus essential oil, and let it sit for one hour. The baking soda absorbs odors and moisture while the essential oil leaves a pleasant scent. Vacuum thoroughly afterward to remove dust mites and allergens. This simple hack keeps your bed fresh and hygienic between deep cleans. Hack Benefit Time Required Declutter first Faster cleaning, less stress 30-60 min Natural cleaners Safer, eco-friendly, cheaper Ongoing Top-to-bottom method No re-cleaning needed All-day clean Microfiber cloths Better dust removal Ongoing Mattress refresh Better sleep hygiene 1 hour Clean Window Tracks with Vinegar Window tracks collect dirt and grime that can interfere with operation. Dip a cotton swab or an old toothbrush in vinegar and scrub the crevices. The natural acidity breaks down buildup without harsh chemicals. This prevents mold growth and keeps windows sliding smoothly. Deodorize the Garbage Disposal with Lemon Cut lemon rinds into small pieces and run them through the garbage disposal with cold water. The natural acidity breaks down food residue while the citrus scent neutralizes odors. Run cold water afterward to flush loosened debris through the system. Do Not Forget Efficient Vacuuming Change your vacuum filter and empty the bag before a deep clean session. A well-maintained vacuum performs better and improves indoor air quality by capturing fine particles. Use attachments like the crevice tool for baseboards and upholstery for furniture. Proper vacuum care extends the life of your machine and saves time. Organize as You Go While cleaning, sort items into keep, donate, and discard piles. Use drawer dividers and storage boxes to assign a home for everything. This approach prevents clutter from returning and helps maintain the order you create. An organized home reduces daily stress and makes future cleaning sessions faster. Frequently Asked Questions How often should I do spring cleaning? Most homes benefit from a thorough spring cleaning once a year, though high-traffic homes may need a seasonal refresh. Can I use vinegar on all surfaces? Vinegar is safe for glass, tile, and stainless steel but should not be used on natural stone like granite or marble. What is the best order for cleaning a room? Always work top to bottom: ceiling fans and light fixtures first, then walls and windows, furniture, and floors last. Do I need professional help for spring cleaning? If your schedule is tight or the task feels overwhelming, consider hiring Toronto Shine Cleaning’s deep cleaning service. They handle every corner of your home so you can enjoy the season. Spring cleaning does not have to be a chore. With these hacks, you can refresh your home efficiently. For homes that need extra attention, Toronto Shine Cleaning offers regular cleaning services across the GTA. Check our pricing and see what our customers say. Call us at (647) 424-0355 to book your spring clean today.

10 Essential Spring Cleaning Hacks to Refresh Your Home Read More »

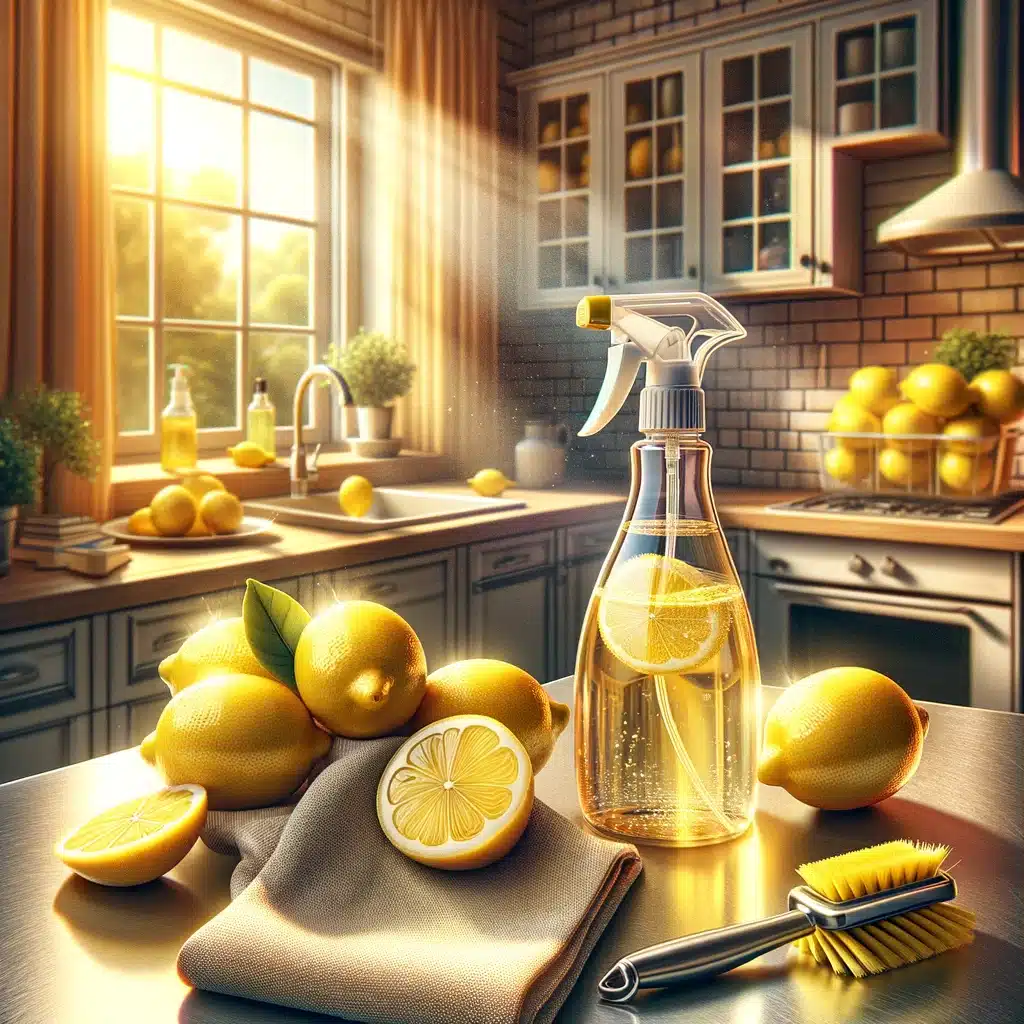
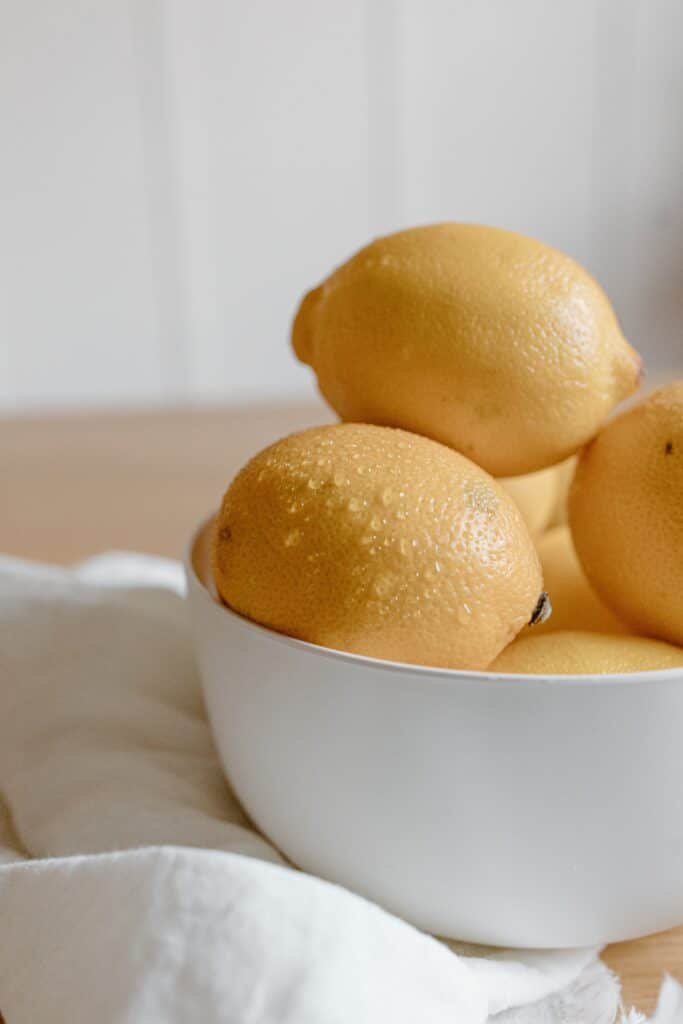
Fresh lemon used as a natural kitchen cleaner.

How to Use Lemon in 5 Surprising Ways for a Sparkling Clean Home

Lemons: they’re not just for lemonade anymore! Use lemons with this citrus wonder is a powerhouse, offering a refreshing scent and natural acidity that can tackle grime in ways that might just surprise you. Whether you’re a tidy enthusiast or someone just looking to spruce up your space with eco-friendly options, lemons are your go-to. Here’s how to use lemon in 5 surprising ways to get your home sparkling clean: 1. Freshen Up the Garbage Disposal Here’s a deeper dive into how to use lemons to freshen up your garbage disposal. The process is as simple as it is effective. Start by taking a lemon-any size will do, though a larger lemon means more citrusy goodness to combat odors and grime. Cut the lemon into small, manageable pieces. This increases the surface area that will come in contact with the disposal’s blades and interior surfaces, ensuring a thorough clean. Once your lemon is prepped, toss the pieces into the disposal. Go ahead and run the disposal, adding a moderate stream of water to facilitate the process. The water helps to move the lemon pieces around, ensuring they touch all parts of the disposal. As the disposal works its magic, the lemon is pulverized, releasing its natural acids and oils. These natural cleaners do double duty: the acid helps to break down any lingering food particles or grease, while the oils release a clean, refreshing scent that neutralizes bad odors.     2. Revitalize Cutting Boards Over time, cutting boards, whether they’re made of wood, plastic, or bamboo, can become a breeding ground for bacteria and a canvas for stains from various foods. This is where the humble lemon steps in, offering a natural and effective solution for cleaning and deodorizing these essential kitchen tools. When you cut a lemon in half and rub it across the surface of your cutting board, you’re harnessing the power of citric acid. This natural disinfectant goes to work on the bacteria lurking in the nooks and crannies, especially those left behind after cutting raw meat or slicing brightly colored vegetables and fruits. The acid’s antibacterial properties are effective yet gentle, ensuring that your cutting board is sanitized without the need for harsh, potentially harmful chemicals. But lemons don’t stop at just sanitizing. They’re also fantastic at tackling those stubborn stains that seem to permanently mark your board. The natural acidity of the lemon juice acts as a mild bleach, lightening stains without damaging the surface of your cutting board. It’s a simple yet effective way to keep your boards looking newer for longer. For those particularly tough stains or grooves that have seen better days, introducing coarse salt into the mix can elevate the cleaning power of the lemon. By sprinkling a generous amount of salt over the board before you start rubbing with the lemon half, you create a natural abrasive cleaner. This combination works wonders on the deeper stains and can help smooth out rough patches, leaving your cutting board not only cleaner but also smoother to the touch. This method of cleaning and revitalizing your cutting boards with lemon and salt is not just effective; it’s also eco-friendly and safe. You’re avoiding the use of synthetic chemicals, reducing the risk of contaminating your food with substances you’d rather not ingest. Plus, it leaves behind a fresh, citrus scent that makes your kitchen smell clean and inviting. 3. Shine Your Faucets The problem of water spots and lime buildup is all too common, resulting from hard water that leaves behind minerals on your fixtures. These deposits can be stubborn, making your faucets look dull and neglected, even in the cleanest of homes. However, the solution is as close as your fruit basket. Lemons, with their high citric acid content, are natural warriors against the grime that accumulates on faucets. When you cut a lemon in half and rub it directly onto the metal, the acid immediately begins to interact with the buildup, breaking it down and making it easier to wipe away. This method is gentle on your fixtures, avoiding the abrasiveness or chemical reaction that some cleaners might cause. But the benefits of using lemon don’t stop at just cleaning. The natural oils found in the lemon peel play a crucial role in polishing the metal surfaces. These oils coat the faucet, providing a protective barrier that not only brings out the shine but also repels water to a degree, helping to prevent future spots and buildup. It’s a dual-action approach that cleans and polishes in one go. After you’ve given your faucets a good rub-down with the lemon, the next steps are simple. Rinse the area with water to wash away any lemon residue and dissolved grime. Then, take a soft cloth and dry the faucets thoroughly. This step is vital as it removes any lingering water that could leave new spots, and it buffs the metal to a bright shine. The result is faucets that look as though they’ve just been installed, gleaming and free of any grimy buildup or water spots.     4. Natural Microwave Cleaner Traditional cleaning methods can be cumbersome, involving scrubbing and the use of chemical cleaners that might not be desirable for an appliance used to heat your food. This is where the humble lemon, paired with a bit of water, offers a brilliantly simple and natural cleaning solution. By combining the juice of one lemon with half a cup of water in a microwave-safe bowl, you create a natural cleaning agent that’s ready to tackle even the toughest microwave messes. The citric acid in the lemon works to break down the grime, while the boiling water helps the lemon’s essence to disperse evenly throughout the microwave as steam. This steam condensation is the key to loosening the particles and stains that have hardened onto the microwave’s interior surfaces. When you microwave this mixture on high for three minutes, you’re not just creating steam; you’re essentially giving your microwave a lemon-scented sauna.

How to Use Lemon in 5 Surprising Ways for a Sparkling Clean Home Read More »

Baking soda in wooden shaker by kitchen window

5 Easy Miraculous Uses of Baking Soda for Cleaning

Do you want to know the best Uses of Baking Soda? It’s affordable, widely available, and, best of all, incredibly effective for a myriad of tasks around the house. Let’s dive into five miraculous ways you can use baking soda to spruce up your space, proving that sometimes, the simplest solutions are right in our pantry. 1. Freshen Up Your Carpets and Rugs Freshening up your carpets and rugs with baking soda is one of those cleaning hacks that sounds almost too good to be true, but it really works wonders. The beauty of this method lies in its simplicity and the fact that it uses something you likely already have in your kitchen. When you sprinkle baking soda over your carpets and rugs, you’re using a natural odor neutralizer. Baking soda doesn’t just mask odors; it absorbs them, which is why it’s so effective. This is particularly handy for pet owners or anyone dealing with stubborn smells that seem to linger in the fibers of their floor coverings. For those tougher odors or stains, you might want to add a bit more elbow grease to the process. After you’ve let the baking soda sit, you can gently work it into the carpet with a soft-bristled brush. This helps the baking soda penetrate deeper into the fibers, tackling those deep-set odors head-on. Just be sure to vacuum thoroughly afterward to remove all traces of the baking soda. Another tip is to mix a few drops of your favorite essential oil with the baking soda before you sprinkle it on the carpets. This not only helps with odor absorption but also leaves a pleasant, subtle scent in the room. Lavender, lemon, or peppermint oils are great choices for a fresh, clean aroma. This approach to cleaning your carpets and rugs is not only effective but also safe for homes with children and pets. Unlike some commercial carpet deodorizers, baking soda is non-toxic and environmentally friendly. Plus, it’s a fraction of the cost of other cleaning solutions, making it a win-win for your home and your wallet. 2. Unclog Drains with Ease Unclogging drains doesn’t have to involve reaching for those harsh, often expensive chemical cleaners that can be harsh on your pipes and the environment. Instead, a simple and effective alternative involves just baking soda and hot water. This method is gentle, yet surprisingly effective for tackling those pesky drain clogs that can disrupt your daily routine. Start by boiling a pot of water and carefully pouring it down the clogged drain. The heat from the boiling water begins the process by softening the clog, making it more susceptible to treatment. After the initial pour, follow up with a generous half cup of baking soda directly into the drain. The baking soda serves as a natural cleaning agent that can help dislodge the particles that are causing the blockage. Allow the baking soda to sit and work its magic for a few minutes; this waiting period is crucial as it gives time for the baking soda to penetrate and break down the materials in the clog. Once the baking soda has had time to act, boil another pot of water and pour it down the drain again. This second round of boiling water will help flush away the loosened debris, clearing your pipes of clogs. This method is not only easy on your plumbing but also on your wallet, utilizing common household items to achieve professional-level results. Plus, it’s an environmentally friendly solution that avoids introducing harsh chemicals into your home and the water system. By opting for this natural approach, you’re choosing a safer, yet effective way to maintain clear and flowing drains.     3. Sparkling Clean Kitchen Surfaces When mixed with water to create a paste, baking soda becomes a powerhouse cleaner capable of tackling even the most stubborn kitchen messes. This method’s beauty lies not just in its simplicity but also in its versatility and safety for a wide range of surfaces. The paste’s consistency is key to its effectiveness. When you spread it over greasy spots or dried food residues, it adheres to the surface, allowing the baking soda’s natural cleaning properties to penetrate and lift the grime. This adherence is crucial for working on vertical surfaces, such as the backsplash behind your stove or the front of your refrigerator, where liquids might run off before they have a chance to clean. Baking soda’s gentle abrasive nature is another factor that makes it so effective. It’s strong enough to tackle tough stains and baked-on food but soft enough not to leave scratches on delicate surfaces like stainless steel or your kitchen countertops, whether they’re made of granite, marble, or laminate. This makes it an ideal solution for areas that require regular cleaning but are prone to damage from harsher chemicals or scrubbers. For those particularly challenging areas, like the inside of an oven, letting the baking soda paste sit longer can enhance its cleaning power. An overnight soak can do wonders for lifting away grease and burnt-on food, making it easier to scrub away the mess the next day. Plus, there’s the added benefit of avoiding the harsh chemicals found in many oven cleaners, which can fill your kitchen with fumes and leave a residue that’s tough to remove. Incorporating baking soda into your kitchen cleaning routine also speaks to a larger trend towards eco-friendly and health-conscious living. Many people are turning away from chemical cleaners in search of safer, more natural alternatives. Baking soda fits this bill perfectly, offering a way to maintain a clean, hygienic kitchen without compromising on safety or environmental responsibility. Finally, the cost-effectiveness of baking soda cannot be overstated. Compared to specialty kitchen cleaners, baking soda is a fraction of the price and can be used in so many different ways. From deodorizing your refrigerator to shining stainless steel sinks, its versatility means you can buy one product for multiple cleaning tasks, simplifying your shopping list and saving money. 4.

5 Easy Miraculous Uses of Baking Soda for Cleaning Read More »

Ajax Green Cleaning, A lot of builds and green cleaners

How Ajax Residents Can Easy Benefit from Eco-Friendly Cleaning Services

Are you living in Ajax and pondering how to spruce up your living space while being kind to the environment? Eco-friendly cleaning services are the answer to keeping your home sparkling clean without the guilt of harming our planet. In this blog post, we’ll explore the myriad benefits that residents of Ajax can reap from choosing green cleaning services, highlighting how it’s not just a clean home you’re getting, but a healthier environment and community too. Looking for professional house cleaning in Ajax? Toronto Shine Cleaning provides regular, deep, and move-in or move-out cleaning across Ajax and the GTA. Why Go Green with Your Cleaning? The importance of a healthy home environment cannot be overstated. With the rise in allergies, asthma, and other respiratory conditions, the choice of cleaning products becomes crucial. Traditional cleaning agents are laden with chemicals like ammonia, chlorine, and phthalates, which can trigger allergic reactions, respiratory issues, and other health problems. Eco-friendly cleaning services opt for products derived from natural, renewable resources that are free from these harsh chemicals. This switch can drastically reduce the risk of health issues for everyone in the home, including those with pre-existing health conditions, by maintaining an environment that supports well-being. The environmental benefits of eco-friendly cleaning services extend well beyond your front door. Traditional cleaning products contribute to water pollution, are hazardous to wildlife, and add to the problem of non-biodegradable waste. Green cleaning services combat these issues head-on by using products that are biodegradable and safe for the environment. This approach helps in preserving our waterways, protecting wildlife, and reducing the overall ecological footprint. When you choose eco-friendly cleaning, you’re participating in a global movement towards sustainability and showing a commitment to the well-being of future generations. Dispelling the myth that green cleaning products are less effective than their chemical counterparts is crucial. Thanks to advancements in eco-friendly technology, natural cleaning products now possess powerful cleaning capabilities without compromising on safety. These products effectively tackle dirt, grime, and bacteria, leaving your home spotlessly clean. Moreover, eco-friendly cleaning services in Ajax are equipped with the latest in green cleaning techniques, ensuring that your home is not just clean, but also maintains its aesthetic and structural integrity over time. Choosing eco-friendly cleaning services often means partnering with local businesses that are committed to making a positive impact in the community. These businesses are typically more invested in their clients’ well-being and the local environment, striving to create a sustainable future for the community they serve. By supporting them, you’re fostering a local economy that thrives on principles of sustainability and ethical business practices. It’s a way to keep the community strong, connected, and moving forward towards a greener future. The economic advantages of eco-friendly cleaning are often overlooked. While it’s true that some green products might come with a higher price tag upfront, the long-term savings are significant. Natural cleaning products tend to be more concentrated, requiring less product per use, and are gentler on household surfaces, reducing wear and tear. This means your belongings last longer, and you’ll spend less on replacements and repairs over time. Additionally, reducing exposure to toxic chemicals can lead to fewer health-related expenses, contributing to overall savings for your family.     How Ajax Residents Can Make the Switch Embarking on your green journey starts with a bit of homework. Dive into the world of eco-friendly cleaning services in Ajax by searching online for companies that spotlight their commitment to green practices. A good green cleaning service will often discuss its use of eco-friendly products and sustainable methods right on its website. Look for services that have positive reviews and testimonials that specifically mention their green cleaning effectiveness and ethics. Social media platforms and local forums can also be excellent resources to gauge the reputation and reliability of these services. Once you’ve shortlisted a few promising eco-friendly cleaning services, it’s time to dig a little deeper. Reach out to these services and ask them about the specific eco-friendly products they use and their cleaning methodologies. An authentic green cleaning service will be transparent and eager to share details about their products, such as their ingredients and eco-certifications, and how they ensure their cleaning practices are sustainable. This step is crucial for ensuring that the service aligns with your environmental values and expectations for a healthy home. When exploring eco-friendly cleaning services, assess the range of cleaning options they offer. It’s beneficial to choose a service that provides a wide array of green cleaning solutions, from regular household cleaning to deep cleaning, and even specialized services like post-construction cleaning. Opting for a service that covers all your cleaning needs with eco-friendly options ensures consistency in the quality and sustainability of the cleaning process across different scenarios. After you’ve experienced the advantages of eco-friendly cleaning firsthand, become an advocate for green cleaning within the Ajax community. Sharing your positive experience with eco-friendly cleaning services can inspire others to consider making the switch. Word-of-mouth is a powerful tool; by recommending eco-friendly cleaning options to your friends, family, and neighbors, you contribute to a larger movement towards sustainability in Ajax. Your endorsement can help spread awareness and encourage a community-wide shift towards more environmentally responsible choices. Quality and Effectiveness The science behind green cleaning products has come a long way. Companies specializing in eco-friendly cleaning have invested heavily in research and development to create solutions that work just as well, if not better, than traditional cleaners. These products harness the power of natural substances like vinegar, baking soda, and essential oils, which have been used for centuries for their cleaning properties. They’re tough on dirt and gentle on surfaces, leaving everything from your kitchen countertops to your bathroom tiles gleaming. Professional eco-friendly cleaning services bring a wealth of knowledge and experience to the table. They’re trained in the most effective green cleaning techniques and know exactly how to use these products to get the best results. Whether it’s knowing the right pH balance for cleaning different surfaces

How Ajax Residents Can Easy Benefit from Eco-Friendly Cleaning Services Read More »

Wet shower tiles in bathroom

5 Quick and Easy Ways to Remove Soap Scum from Shower Tiles

How to Remove Soap Scum from Shower Tiles: 5 Quick and Easy Ways Soap scum is the cloudy, streaky film that builds up on shower tiles when soap mixes with hard water minerals and body oils. It is one of the most common bathroom frustrations in Toronto, where hard water makes the buildup worse. The good news: you do not need harsh chemicals to beat it. These five methods use things you probably already own, plus a few store-bought options, to leave your tiles sparkling. Whichever method you choose, test it on a small, hidden section of tile first. 1. White Vinegar and Water Mix equal parts white vinegar and water in a spray bottle. Spray the tiles generously and let the solution sit for about 10 minutes so the acid can break down the scum. Scrub lightly with a non-abrasive brush or sponge, then rinse with water. The difference is immediate, and the solution is gentle on tile finishes. For stubborn rings along the waterline, spray the vinegar solution onto a cloth, wrap it around the area, and let it sit for a few minutes before scrubbing. 2. Baking Soda Paste Mix baking soda with a little water until it forms a thick, frosting-like paste. Spread it over the tiles, scrub gently in circular motions with a soft brush or sponge, and rinse. Baking soda’s fine grit lifts the scum without scratching, and it is a great option if you want to avoid chemical smells entirely. 3. Commercial Shower Cleaners Store-bought bathroom cleaners are formulated to dissolve soap scum quickly. Spray, follow the label’s dwell time, and rinse. Two safety rules matter: Keep the bathroom ventilated: open a window or run the exhaust fan while you clean. Never mix cleaning products. The Canadian Centre for Occupational Health and Safety warns that mixing bleach with other cleaners can produce toxic gases, and Health Canada’s household chemical safety guide gives the same warning: never mix bleach with other products. 4. Lemon Oil for a Streak-Free Finish After cleaning with any method, put a few drops of lemon oil on a soft cloth and wipe the tiles down. The oil cuts through remaining water marks and streaks, leaves a light citrus scent, and adds a subtle sheen that makes the whole bathroom feel fresh. 5. Dish Soap and Warm Water Dish soap is designed to cut grease, and soap scum is exactly that: oily residue. Mix a few drops of dish soap with warm water in a spray bottle, spray the tiles, let it sit for a few minutes, scrub gently, and rinse. This method is mild, safe for all tile types, and leaves no harsh chemical smell. Warm water helps the soap dissolve evenly, and the same mix works on glass shower doors, not just tiles. Method Supplies Best For Vinegar and water Spray bottle, white vinegar Everyday buildup on glazed tiles Baking soda paste Baking soda, water Stubborn spots, chemical-free households Commercial cleaner Store-bought spray Quick results on heavy scum Lemon oil Soft cloth, lemon oil Streaks and finishing shine Dish soap and water Dish soap, spray bottle Gentle regular maintenance Stop Soap Scum Before It Starts Prevention beats scrubbing: Squeegee the tiles after every shower, it takes 20 seconds. Run the exhaust fan during and after showers to lower humidity. Use liquid soap instead of bar soap, which leaves more residue. Clean the shower weekly so buildup never gets a chance to set. Give the tiles a quick 30 second rinse after each shower to wash away fresh soap residue before it dries into film. Keeping moisture in check matters beyond looks: the CDC notes that mould grows wherever there is moisture, so a well-ventilated bathroom protects your health as well as your tiles. When to Bring in the Pros If scum has built up for months, or you are moving out of a Toronto rental and need the bathroom to pass inspection, professional help saves the day. Toronto Shine Cleaning offers deep cleaning services that tackle showers, grout, and tile, move-in and move-out cleaning for tenants and landlords, and regular residential cleaning to keep bathrooms fresh between deep cleans. Clients rate us 4.9 out of 5 on Google, as you can see on our reviews page. Call 647-424-0355 to book. Is vinegar safe on all shower tiles? Vinegar is safe on glazed ceramic and porcelain tile, but avoid it on natural stone like marble, limestone, and travertine, since acid can etch the surface. Use dish soap or a stone-safe cleaner on those materials. Why does soap scum keep coming back? Soap scum returns because soap residue combines with hard water minerals every time you shower. Daily squeegeeing, weekly cleaning, and running the exhaust fan all slow the buildup significantly. Can I mix vinegar and baking soda for soap scum? Mixing them creates foam but mostly neutralizes both, so the cleaning power is weaker than using either one alone. Use them separately: vinegar first, then a baking soda paste for stubborn spots. How often should I clean my shower tiles? A quick wipe or squeegee daily, plus one weekly clean with your preferred method, keeps scum from building up. Monthly deep cleaning of grout and corners prevents the toughest buildup.

5 Quick and Easy Ways to Remove Soap Scum from Shower Tiles Read More »

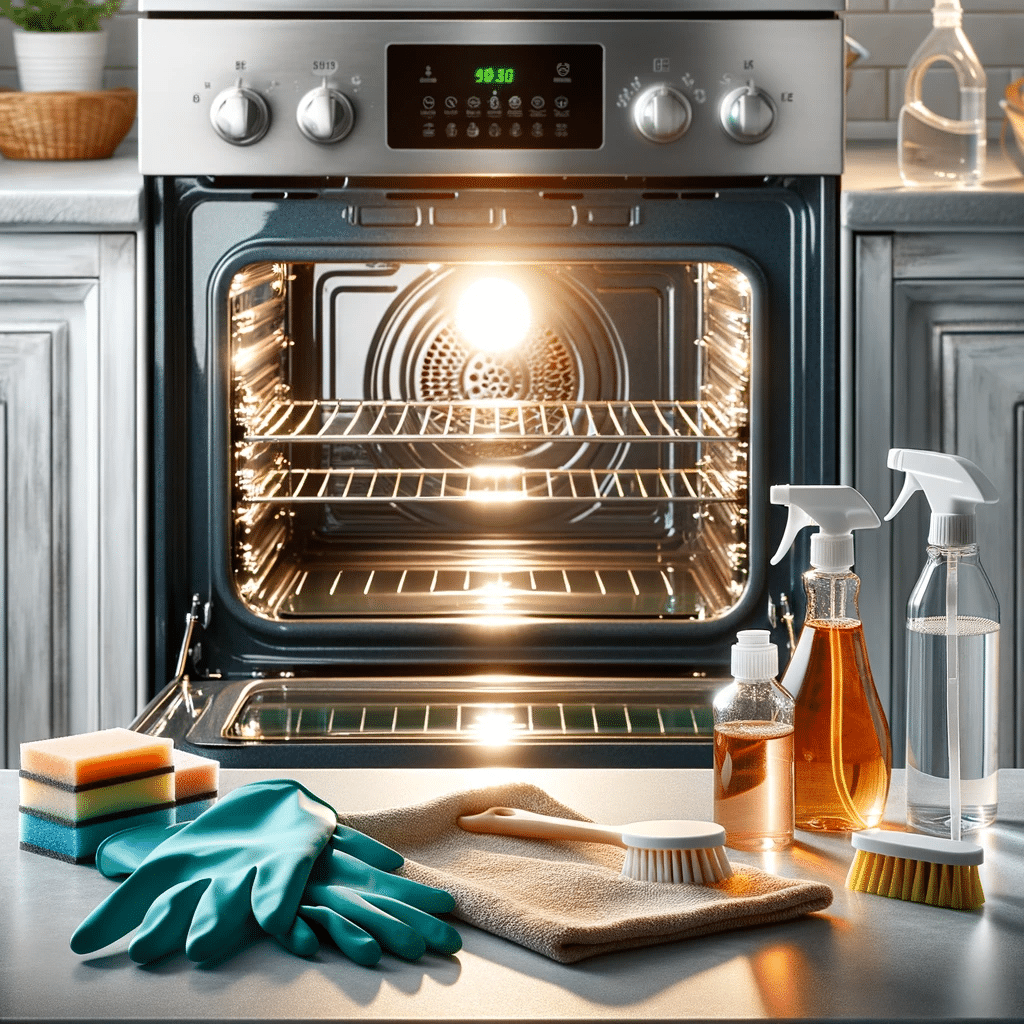
Clean oven, cleaning products, gloves and sponges.

How to Clean Your Oven Quickly and Efficiently: A Step-by-Step Guide

How to Clean Your Oven Quickly and Efficiently: A Step-by-Step Guide An oven hides its mess in plain sight. Every roast, pizza, and pie leaves a thin layer of baked-on grease, and layer by layer it turns into the smoke smell that greets you at preheat. The method below is the low-effort classic: a baking soda paste that works overnight while you sleep, then a fast wipe down the next day. No harsh fumes, no heroic scrubbing, and no commercial cleaner required unless you want one for the racks. Gather Your Supplies First Everything you need fits in one drawer: Half a cup or more of baking soda White vinegar in a spray bottle A damp dishcloth and a few rags A plastic or silicone spatula Rubber gloves, because oven grime is grim Why baking soda instead of a commercial oven cleaner? Those products often contain harsh, caustic chemicals with strong odors that linger in the kitchen. Baking soda is non-toxic, inexpensive, and already in your pantry, which makes it the friendlier choice for households with pets, kids, or sensitive noses. Step 1: Empty the Oven Completely Pull out the racks, pizza stones, baking sheets, and any thermometer so you can reach every surface. Give each item the care it needs: racks do best soaking in soapy water while you work, pizza stones are porous and should just be brushed out and baked dry at high heat, and gadgets stay gentle. Before anything else, sweep out loose crumbs with a dry cloth or handheld vacuum. With the cavity bare, also take a second to inspect for issues such as a worn heating element, which you would rather discover now than mid roast. Step 2: Mix the Paste Start with about half a cup of baking soda and add water gradually until you have a spreadable consistency, something like frosting. Too runny and it slides off the walls; too thick and it will not spread or penetrate. The paste is the perfect medium because it clings to vertical surfaces and stays where you put it, holding the mild abrasive and the alkaline chemistry right against the baked-on grime for hours. Step 3: Coat the Cavity and Wait Gloves on. Spread the paste over every interior surface you can reach, but keep it off the heating elements; baking soda can corrode them, and they rarely need cleaning anyway. Do not be surprised when the paste turns brown as you work. That discoloration is the reaction doing its job, lifting grease and carbonized spills out of the surface. Close the door and leave the paste for at least 12 hours, or overnight. This is the efficient part of the method: the chemistry works for you while you do nothing at all. Step 4: Handle the Racks While the paste sits, deal with the racks. After a couple of hours in hot, soapy water, the grease softens enough that a stiff brush takes it off without much fight; scrub both sides, rinse, and dry. If a rack is truly encrusted, a commercial oven cleaner is an acceptable last resort. Use it in a well-ventilated space with gloves on and follow the label exactly, since those formulas are strong. The same rule applies to any chemical you use for housework: Health Canada’s household chemical safety page is a good pre-job read. Step 5: Wipe It All Down The next day, use a damp cloth to wipe out the dried paste; the moisture rehydrates it, and it comes away carrying the loosened grime with it. For stubborn patches, scrape gently with the plastic or silicone spatula, never metal, which can scratch enamel or protective coatings. Finish by spritzing a little vinegar over any white residue: it fizzes on contact with the baking soda and wipes clean. Give everything a final rinse with a fresh damp cloth and let the cavity dry with the door open. Task Time Effort Empty and sweep the cavity 10 minutes Light Mix and spread the paste 15 minutes Light Wait for the chemistry 12 hours, hands off None Soak and scrub the racks 45 minutes, mostly soaking Moderate Wipe out and vinegar rinse 20 minutes Moderate Oven Cleaning FAQs How often should an oven get this treatment? A deep clean every few months keeps smoke and off smells away in a normal household. If you roast often or notice smoke at preheat, treat it as the sign to mix a fresh batch of paste. Wiping spills once the oven cools stretches the interval nicely. Can I use the self-cleaning function instead? You can, but know what you are signing up for: very high heat, strong odors, and a locked oven for hours. The baking soda method achieves a comparable result with none of that, which is why it remains the go-to for a quick, low-fuss clean. Why keep paste off the heating elements? Baking soda’s alkalinity can corrode exposed elements and shorten their life, and paste caked on them can burn and smell the next time you cook. They also rarely collect grime, so there is no benefit to justify the risk. Wipe around them carefully instead. Is commercial oven cleaner ever the right call? Yes, mainly for racks and heavy carbon that soaking and scrubbing cannot touch. Treat it as a targeted tool: gloves on, windows open, label followed to the letter. The same clean-first mindset health authorities apply to surfaces, as in the CDC’s cleaning guidance, applies here: remove the bulk physically before any chemical does the fine work. Prefer Someone Else Does It? An overnight paste is easy, but a full kitchen reset is a bigger job. Toronto Shine Cleaning’s deep cleaning service takes on kitchens top to bottom, and recurring maid service keeps them that way. A deep studio or one bedroom clean starts at $270.38 before HST, with every option listed on the pricing page. Call (647) 424-0355 and let the oven be our problem.

How to Clean Your Oven Quickly and Efficiently: A Step-by-Step Guide Read More »

apartment cleaning oakville

Does Indoor Air Quality Affect Your Health? How to Improve Your Home’s Indoor Air Quality

Hey, folks! Let’s chat about something we often take for granted: Indoor Air Quality Affect Your Health? Ever wonder if it really impacts your health? Spoiler alert: It absolutely does! Indoor air quality plays a massive role in our well-being. Let’s break down why it’s important and how you can make it better. Why Indoor Air Quality is a Big Deal for Your Health When we think of air pollution, our minds often jump to smoggy city streets or industrial smokestacks. But what about the air inside our homes? Surprisingly, it can be just as polluted, if not more so, than outdoor air. Our homes, the places where we should feel safest, can be teeming with airborne enemies that we’re not even aware of. Hidden Nasties – Think about all the things in your home right now. Cozy, right? But lurking within this comfort are unseen dangers. Your fluffy carpet, your beloved pet, even your favorite scented candles can be sources of indoor pollutants. Dust mites, a common household allergen, thrive in bedding, upholstered furniture, and carpets. Pet dander, a trigger for allergy sufferers, circulates freely in the air. Mold, a result of excess moisture, can grow in bathrooms and kitchens, releasing spores that can cause respiratory issues. These VOCs can evaporate into the air at room temperature, potentially causing headaches, dizziness, and other health problems. 24/7 Exposure – Here in Toronto, with our chilly winters and hot summers, we spend a lot of time indoors. This means we’re constantly exposed to whatever is in our indoor air. Whether we’re sleeping, working, or just hanging out, we’re breathing in whatever’s floating around in our home. For those with allergies or asthma, this constant exposure can mean a never-ending cycle of symptoms. And for the rest of us, it could mean a gradual impact on our health without us even realizing it. Long-Term Impact – The effects of poor indoor air quality aren’t always immediate. They can creep up on us over time, leading to more serious health issues down the road. Consistent exposure to pollutants can exacerbate respiratory conditions like asthma and can even lead to the development of chronic respiratory diseases. But it’s not just our lungs that are at risk. Studies have shown that long-term exposure to certain air pollutants can have cardiovascular effects as well. This means that the air in our homes could potentially be affecting our heart health. Embrace Fresh Air Opening Windows: One of the simplest yet most effective ways to improve indoor air quality is by opening your windows. This straightforward action invites a natural flow of fresh air into your home, diluting and displacing indoor air pollutants. Whether it’s pollen, dust, or chemical residues from household cleaners, opening windows helps to flush these out, replacing stale, contaminated air with cleaner, outdoor air. Using Exhaust Fans: Now, let’s talk about the role of exhaust fans, particularly in kitchens and bathrooms. These areas of your home are hotspots for moisture and odors. Cooking, for example, releases a variety of particles and gases into the air, some of which can be harmful if inhaled in large quantities. Similarly, bathrooms are prone to mold and mildew growth due to high humidity levels. Exhaust fans come into play by effectively removing moist air, odors, and airborne pollutants from these rooms. When you cook or take a hot shower, turning on the exhaust fan helps in reducing the potential for mold growth and ensures that any harmful byproducts of cooking are quickly removed from your indoor environment. Why This Matters: The combined approach of opening windows and using exhaust fans is a proactive way to maintain good air quality inside your home. By doing so, you’re not just making the air in your home more pleasant to breathe; you’re also contributing to a healthier living environment. Reducing the levels of indoor pollutants can have a significant impact on your overall health, especially for those with respiratory issues or allergies. Plus, it’s a cost-effective and easy-to-implement solution that can make a big difference in the feel and safety of your home environment.     Keep It Clean Regular cleaning is more than just about keeping your place looking neat; it plays a pivotal role in the quality of air you breathe indoors. Dusting and vacuuming are key activities in this routine. Dust accumulates a variety of allergens like pet dander, pollen, and dust mites, which can trigger allergic reactions and respiratory issues. For those with pets, it’s even more critical. Pet hair and dander can easily become airborne and contribute to indoor air pollution. Vacuuming with a good-quality vacuum cleaner, preferably one with a HEPA filter, is vital. These filters are designed to trap very fine particles that other vacuums might recirculate back into the air. By regularly vacuuming carpets, rugs, and even upholstery, you significantly reduce the amount of dust and allergens in your home. The choice of cleaning products is equally important. Many conventional cleaning products contain harsh chemicals that can release volatile organic compounds (VOCs) into your indoor air. These compounds can be harmful when inhaled and contribute to indoor air pollution. Opting for natural, non-toxic cleaning products is a healthier choice. These products are made from ingredients that are less likely to degrade your indoor air quality. You can even make your own cleaning solutions using everyday household items like vinegar, baking soda, and lemon juice. These natural ingredients are effective at cleaning and are much safer for your indoor air. Green It Up with Plants Certain plants, like spider plants and peace lilies, are celebrated for their air-purifying abilities. These plants do more than just add a touch of greenery; they actively work to cleanse the air. How? They absorb common indoor pollutants through their leaves and roots. These pollutants, such as formaldehyde, benzene, and trichloroethylene, are commonly found in household items and can be harmful over time. Plants like the spider plant and peace lily have been shown to effectively reduce these

Does Indoor Air Quality Affect Your Health? How to Improve Your Home’s Indoor Air Quality Read More »

How to Prevent Cold and Flu with Natural Cleaning Solutions

Hey there! To Prevent Cold and Flu with Natural Cleaning, it’s super important to keep our homes clean and germ-free. But, guess what? You don’t need to rely on harsh chemicals to do the trick. Natural cleaning solutions can be just as effective in keeping those pesky germs at bay. Let’s dive into how you can use natural solutions to prevent cold and flu in your cozy nest. Why Go Natural? First and foremost, natural cleaning solutions are kinder to your skin. We’ve all been there – using a strong cleaner only to end up with irritated hands. Natural options, on the other hand, are much gentler. This means you can clean away without worrying about harsh reactions, which is especially great if you have sensitive skin. But it’s not just about you! If you have little ones scampering around or furry friends lounging on your floors, you’ll love that natural cleaners are safer for them too. Kids and pets are often more sensitive to the harsh chemicals found in many standard cleaning products. By switching to natural alternatives, you’re creating a safer environment for the entire family. Imagine your kiddos playing on floors cleaned with gentle ingredients or your pets cozying up on freshly cleaned carpets that don’t have any harsh residues. It’s all about creating a safe and healthy space for everyone. Now, let’s talk about Mother Earth. We all want to do our part in keeping our planet happy and healthy, right? Well, natural cleaning solutions are a great step in that direction. They’re eco-friendly, which means they’re kinder to the environment. When you wash away these natural cleaners, you’re not sending harsh chemicals down the drain and into our water systems. It’s a win-win for your home and the environment. Another cool thing? You probably have most of these natural cleaning superheroes in your kitchen right now! That’s right – items like vinegar, lemon, and baking soda aren’t just for cooking; they’re also powerful cleaning agents. This means you can start your natural cleaning journey without a trip to the store. It’s convenient, effective, and kinder to your wallet too. The Magic of Vinegar So, what makes vinegar so special? It’s all about the acidity. Vinegar is known for its acidic nature, which is a nightmare for germs and viruses. This acidity isn’t just good for adding zing to your salad dressing; it’s also what gives vinegar its germ-killing superpowers. When you use vinegar as a cleaning agent, it works hard to break down grime, cut through grease, and yes, kill those pesky germs that can lead to colds and flu. Now, how do you transform vinegar into a cleaning superhero? It’s super simple. Take equal parts of water and white vinegar, mix them in a spray bottle, and there you have it – a natural disinfectant ready to tackle germs in your home. This mixture can be used on a variety of surfaces where germs love to lurk. Think kitchen counters, bathroom surfaces, doorknobs, and even your smartphone screen. But here’s the best part: it’s so easy to make and use. You don’t need to be a DIY guru to mix water and vinegar. Plus, it’s a cost-effective solution. Vinegar is way cheaper than most store-bought cleaners, and since you’re diluting it with water, a little goes a long way. You’re not only keeping your home clean; you’re also being kind to your wallet. Another bonus? You’re avoiding the strong, sometimes overwhelming scents that come with many commercial cleaners. While vinegar does have a distinct smell, it dissipates quickly, leaving you with a clean, fresh space without any lingering chemical odors.     Lemon: Not Just for Lemonade Why are lemons such a big deal in the cleaning world? It’s all about their high acidity. Just like vinegar, the acidic nature of lemons makes them a natural enemy for germs and viruses. When you’re trying to keep your home free from cold and flu bugs, lemons are your trusty allies. They can kill bacteria and leave your house not just clean, but also smelling fresh and citrusy. So, how do you turn lemons into a cleaning solution? It’s as easy as pie (or should I say, lemon pie?). Squeeze some lemon juice, mix it with a bit of water, and you’ve got yourself a natural disinfectant. This lemon-water mix is perfect for wiping down those areas where germs love to hang out. Think kitchen countertops, where you prepare all your meals, or doorknobs, which everyone touches multiple times a day. Even your bathroom surfaces can benefit from a lemony clean, leaving them not just germ-free but also with a refreshing scent. One of the coolest things about using lemon as a cleaner is the scent factor. Unlike some cleaners that can be harsh on your nose, lemons leave a light, refreshing citrus aroma. This makes cleaning a more pleasant experience and leaves your home smelling naturally fresh. Plus, there’s something incredibly satisfying about knowing you’re using a natural, biodegradable substance to keep your home clean. And let’s not forget, lemons are also great for tackling tough stains and bringing out natural shine. Got a stubborn stain on your countertop? Lemon juice to the rescue! Want to add some sparkle to your faucets or sink? Rub them with a lemon wedge and watch them shine. Essential Oils: Smells Good and Cleans Too! So, why are these particular oils so great for cleaning? Well, it turns out, nature has equipped them with properties that are tough on bacteria and viruses. For instance, tea tree oil is known for its powerful antiseptic properties. It’s like that tough-on-germs cleaner but without the harsh chemicals. Eucalyptus oil, on the other hand, isn’t just for helping you breathe easier when you have a cold; it’s also great for wiping out germs. And then there’s lavender, the all-rounder, known for its calming scent and its ability to fight off bacteria. Now, how do you use these oils in cleaning? It’s pretty

How to Prevent Cold and Flu with Natural Cleaning Solutions Read More »

Office window cleaning by men surrounded by plants

Green Cleaning: How to Make an Easy Eco-Friendly Cleaning

Hey there, fellow Green Cleaning freaks! Are you tired of harsh chemicals that leave your home smelling like a science lab? Well, guess what? You can keep your space sparkling clean and be kind to Mother Earth at the same time. Welcome to the world of green cleaning! It’s not just a trend; it’s a lifestyle shift that’s good for you, your home, and the planet. Let’s dive into how to make eco-friendly cleaning a part of your everyday routine. Why Go Green in Your Cleaning Routine? Before we jump into the “how,” let’s talk about the “why.” Traditional cleaning products are often loaded with chemicals that can be harsh on your skin, respiratory system, and the environment. When you use them, they can release volatile organic compounds (VOCs), which contribute to indoor air pollution and can be tough on our lungs. Ever felt a bit dizzy or had a headache after a big clean? Those could be the chemicals talking! But that’s not all. These chemical-laden cleaners can have a lasting impact on our environment too. When they wash down the drain, they can end up in our waterways, affecting aquatic life and even coming back to us in our water supply. Not a pretty picture, right? Switching to green cleaning means you’re choosing products that are safer for you and the planet. These eco-friendly options are usually made with plant-based, biodegradable ingredients that break down harmlessly in the environment. Plus, they’re often free from artificial fragrances and colors, which is great news for those with allergies or sensitivities. And here’s a bonus: green cleaning can be kinder on your wallet in the long run. Many green cleaning products are concentrated, so a little goes a long way. Or, if you’re into DIY solutions, you can whip up effective cleaners with inexpensive, everyday items like vinegar and baking soda. Easy Eco-Friendly Cleaning Swaps When it comes to green cleaning, there are so many simple swaps you can make that have a big impact. Let’s start with DIY cleaners. You might be surprised by the cleaning power of items you already have in your pantry. White vinegar, for example, is a natural disinfectant and great at cutting through grease and grime. Baking soda is another hero in the DIY cleaning world. It’s fantastic for scrubbing and neutralizing odors. And let’s not forget lemon juice, which not only leaves a refreshing scent but also has natural antibacterial properties. You can use these ingredients separately or mix them to create a variety of cleaners for different purposes. Now, if you’re not the DIY type, no worries! The market for eco-friendly cleaning products has exploded in recent years. More and more brands are focusing on creating products that are both effective and kind to the planet. When shopping for these products, look for ones with biodegradable ingredients and packaging. This means they’ll break down naturally without harming the environment. Many of these products also avoid harsh chemicals, making them safer for use around kids and pets. Another swap is replacing your paper towels with microfiber cloths. Microfiber cloths are a game-changer in cleaning. They’re incredibly effective at trapping dirt and dust, and the best part is they’re reusable. Just toss them in the wash and they’re good as new, reducing waste and saving you money in the long run. Essential oils are a great addition to your green cleaning arsenal. They not only add a natural and pleasant scent to your homemade cleaners but also come with their own cleaning benefits. For instance, lavender and citrus oils have natural antibacterial and antiviral properties, making them great for homemade disinfectants. Plus, using essential oils allows you to customize the scent of your cleaners to suit your mood or preference. Lastly, consider your scrubbing tools. Instead of reaching for plastic scrubbers, choose brushes made from natural materials like bamboo or sisal. These materials are sustainable and biodegradable, and they work just as well, if not better, than their plastic counterparts. They’re also more durable, so you won’t have to replace them as often.     Tips for a Successful Green Cleaning Routine Embarking on a green cleaning journey can be both exciting and a bit overwhelming, but don’t worry, I’ve got some more tips to help you along the way. Start Small: You don’t need to do a complete 180 on your cleaning routine overnight. It’s okay to start small. Maybe swap out your all-purpose cleaner or dish soap with a greener alternative and see how it goes. As you get comfortable, you can gradually replace more products. This approach not only eases the transition but also allows you to test what works best for you and your home. Read Labels: When shopping for commercial green cleaning products, reading labels is key. Not all products marketed as “green” or “natural” are created equal. Look for certifications like EcoLogo or Green Seal, as these indicate that the product meets certain environmental standards. Also, be cautious of vague terms like “eco-friendly” or “green” without any specific information, as these can sometimes be misleading marketing tactics. Recycle and Reuse: Green cleaning isn’t just about the products you use; it’s also about reducing waste. Get creative with what you already have. Old t-shirts and towels can be cut into cleaning cloths, and old toothbrushes are perfect for scrubbing grout and other tight spaces. This not only saves you money but also keeps these items out of landfills. Stay Informed: The world of green cleaning is always evolving. New products and methods are constantly being developed. Stay informed about the latest trends and breakthroughs. This could be as simple as following a few eco-friendly blogs, joining online communities, or subscribing to newsletters that focus on sustainable living. Consider the Whole Product Lifecycle: Think about a product’s impact from production to disposal. For example, products with minimal packaging or those made from recycled materials have a lower environmental footprint. Also, consider the energy used in producing the product and whether

Green Cleaning: How to Make an Easy Eco-Friendly Cleaning Read More »