Home Disinfecting

5 Amazing Tips on How to Use Pink Paste Without Causing Harm

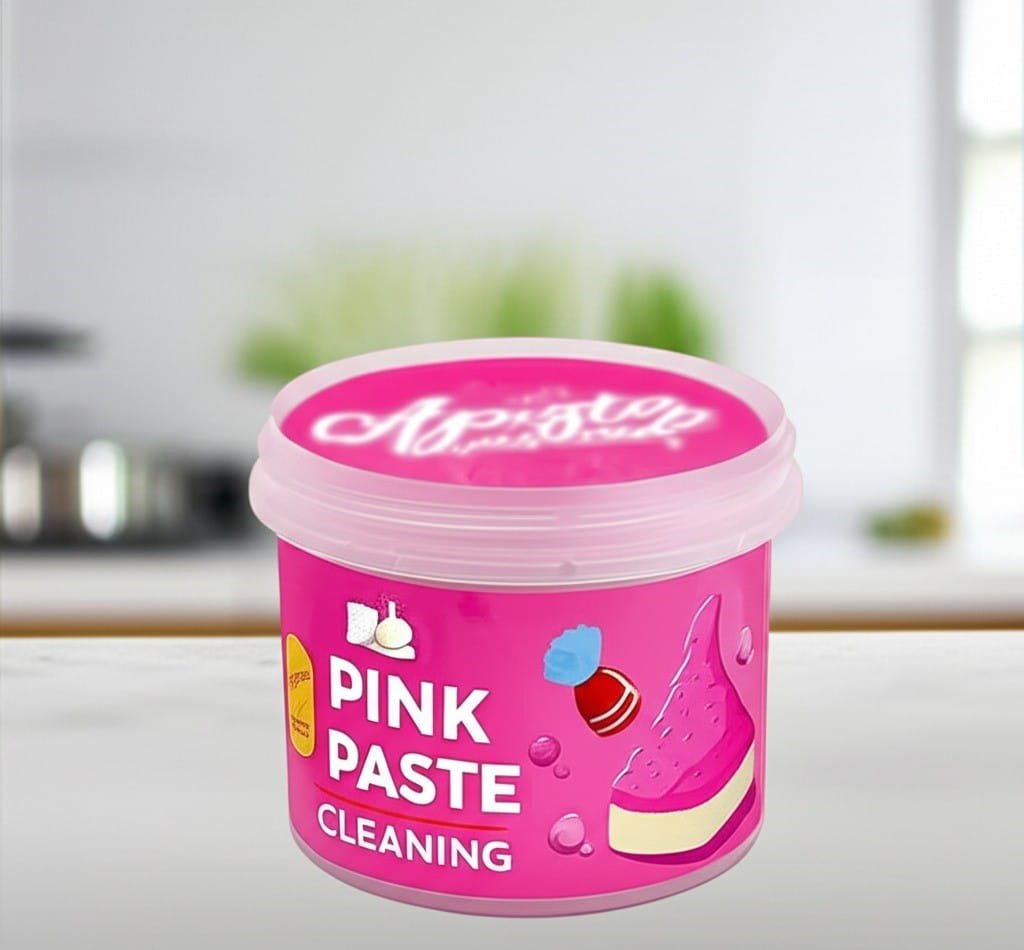
5 Amazing Ways to Use Pink Paste Without Causing Harm Pink paste is the specialist of the cleaning cupboard. Its fine abrasive particles physically lift cooked-on grease, soap scum, and hard water film that everyday sprays cannot shift, and it does the job without harsh chemical fumes. The catch is that abrasion is exactly what ruins delicate finishes when the paste is misused. Follow these five ground rules and you can put pink paste to work on the toughest spots in your home without damaging a thing. Tip 1: Start With Less and Work in Circles You need far less paste than you expect: a small scoop on a clean, damp cloth or sponge is enough to start. Spread it over the stained area and rub in small circular motions with gentle to moderate pressure; the abrasive particles lift the grime, so you never need to bear down hard. Rinse thoroughly with clean water once the mark is gone, because paste left to dry forms a chalky film. Finish by buffing with a soft dry cloth to bring back the shine on glossy surfaces. Always let stovetops, ovens, and pans cool completely before cleaning, and never use the paste on a hot surface. Tip 2: Patch Test an Invisible Corner First Before you tackle a visible area, press a dab of paste into an inconspicuous spot, scrub gently, rinse, and inspect. If you see scratching, dulling, or a colour change, stop and switch to a gentler product. The test matters most on polished finishes: glass cooktops, enamel, stainless steel, and coated fixtures usually respond beautifully, but unsealed natural stone such as marble or granite will etch, high-gloss plastic will haze, and gold or silver plated fittings can lose their thin plating. Store every cleaner out of reach of children and follow the label; Health Canada’s household chemical safety guidance covers safe handling and storage. Also remember the paste scrubs but does not disinfect, so check the CDC’s cleaning and disinfecting advice when you need to sanitize a surface afterward. Tip 3: Win the Kitchen Battles In the kitchen, pink paste earns its keep on four fronts. On glass or ceramic cooktops it removes the white haze from boiled-over water and the dark rings around burners; use a soft cloth and very light pressure. On gas stoves, lift the cast-iron grates, scrub the baked-on grease with a scouring sponge, then rinse and dry them completely before they go back. On stainless steel or porcelain sinks it revives dull basins by lifting hard water film, soap residue, and the light rust specks that form near the drain; rinse well and buff dry with a microfiber cloth. It also cuts through the brown grease film on oven door glass and scrubs scorched stainless or copper pan bases back toward new. Keep it away from non-stick interiors, where abrasion destroys the coating, and use an old toothbrush on discoloured grout lines to brighten them dramatically. Tip 4: Reclaim the Bathroom Soap scum is where pink paste feels like magic. On fiberglass tubs, acrylic shower surrounds, and tiled walls, apply it with a sponge, scrub the cloudy buildup away, and rinse with the shower head for a satisfying deep clean. Glass shower doors covered in hard water spots return to full transparency when scrubbed, rinsed, and squeegeed or buffed dry. Chrome and ceramic faucets and basins lose their toothpaste film and mineral crust, including the green or white deposit that forms at the tip of the spout. For stubborn toilet bowl rings in hard water areas, shut off the supply valve and flush out most of the bowl water, then apply the paste to the ring and scrub with a toilet brush or pumice stone; the same method lifts stains on the porcelain exterior. Tip 5: Take It Around the House and Outdoors Painted walls and baseboards shed scuff marks, while door frames come clean quickly too, when you work a tiny amount of paste over them with a damp cloth and light pressure. Yellowed UPVC window frames and door sills brighten back to white, and sliding door tracks scrub clean where dirt compacts. Soot on tile or brick fireplace surrounds comes up with a stiff-bristled brush. Outdoors, barbecue grates respond to a generous coat of paste worked with a wire brush, rusted garden tools and weathered metal patio furniture are revived, and scuffed white sneaker soles look new again when scrubbed with an old toothbrush and wiped clean. Know When to Put the Tub Away Understanding the paste’s limits prevents costly mistakes. Never use it on these surfaces: Unsealed marble, granite, travertine, and other natural stone: the abrasives etch the polish Non-stick cookware interiors: the coating scratches and eventually peels High-gloss plastics and acrylic: fine scratches dull the finish Gold, silver, or chrome plated fittings: the thin plating can wear through Any surface still warm from cooking or baking Surface Pink paste excels at Extra caution Glass or ceramic cooktop White boiled-over marks and burner rings Soft cloth, light pressure Cast-iron stove grates Baked-on grease and carbon Dry fully before replacing Stainless or porcelain sink Hard water film and rust specks Rinse well, buff dry Oven door glass Brown baked-on grease film Use a non-scratch scourer Tile grout Discoloured, dull grout lines Old toothbrush or grout brush Porcelain toilet Stubborn waterline rings Toilet brush or pumice stone Pink Paste Questions, Answered Is pink paste safe on every surface? No. It is abrasive by design, so it suits durable, hard surfaces such as stainless steel, enamel, glass, tile, and glazed porcelain. Keep it off unsealed stone, non-stick coatings, high-gloss plastic, and plated fittings, and always patch test an unseen corner first. Do I have to rinse pink paste off? Yes. The paste contains fine abrasive particles that leave a chalky film if allowed to dry on the surface. Rinse with clean water after scrubbing, then buff dry with a soft cloth for the best finish. Can pink paste replace my regular cleaner? Think of

5 Amazing Tips on How to Use Pink Paste Without Causing Harm Read More »

Cleaning services in laval

House Cleaning Services in Laval: Get a Fascinating Home Today!

Reputable cleaning services in Laval have become a go-to solution for those who prioritize a spotless environment but lack the capacity to achieve it themselves. They provide the necessary expertise and dedicated time to handle the exhaustive requirements of deep cleaning and regular maintenance, ensuring spaces are not just tidy, but truly clean. The benefit extends beyond aesthetics; it contributes to a healthier indoor air quality and a more pleasant atmosphere for everyone. The necessity of maintaining a pristine environment in Laval is a fundamental aspect of modern living. For residents and business owners alike, the challenge lies in balancing a demanding schedule with the ongoing need for a clean, sanitary, and welcoming space. The very pace of life can relegate deep cleaning to a secondary priority, yet its importance for health and well-being remains paramount. This is precisely the gap that professional cleaning services fill, offering a systematic and reliable solution. The demand for high-quality cleaning services in Laval is a direct reflection of a community that values both its time and the quality of its surroundings. A truly effective cleaning regimen is built on a foundation of consistent, meticulous tasks. It begins with the universal battle against dust, which accumulates on every horizontal and vertical surface. A professional approach ensures that nothing is overlooked, from the tops of shelves and doorframes to the often-neglected baseboards and window sills. This process is more than a quick wipe; it involves using the correct tools and techniques to capture and remove dust, not just redistribute it. Following this, floors are given comprehensive attention. Carpets and area rugs are vacuumed thoroughly, edge to edge, with equipment powerful enough to lift dirt, allergens, and pet dander from deep within the fibers. For hard surfaces like wood, tile, or laminate, mopping is performed with pH-neutral solutions that sanitize without causing damage, leaving floors spotless and free of residue. This baseline of care, when performed regularly, is what separates a superficially tidy space from a genuinely clean one. The reliability of professional cleaning services in Laval ensures this standard is consistently met. The kitchen, as the hub of culinary activity, requires an even more rigorous standard of hygiene. Professional cleaning services in Laval address this with a detailed, multi-point process. Countertops are cleared and disinfected to eliminate bacteria and food particles. The exteriors of all appliances, refrigerator, oven, dishwasher, and microwave, are wiped down and polished, removing fingerprints and smudges to restore their intended finish. The stovetop, a frequent site of grease and food spatter, is thoroughly degreased and scrubbed. Sinks are scoured and faucets polished to a high shine, preventing the buildup of limescale and mildew. Cabinet fronts are wiped clean of drips and fingerprints, and the kitchen floor is given a final, meticulous sweep and mop. Similarly, bathrooms demand a clinical level of sanitation. Expert cleaning services in Laval execute a top-to-bottom disinfection. The toilet is cleaned and sanitized inside and out. Sinks and countertops are scrubbed free of soap residue and germs. Mirrors are polished to a streak-free shine. The most labor-intensive area, the shower and bathtub, is given special focus. Tile walls, grout lines, and glass doors are painstakingly scrubbed to remove soap scum, hard water stains, and any trace of mold or mildew. This task alone highlights the value of professional help, as it requires significant physical effort and specialized products to achieve a truly hygienic result. Emptying wastebaskets and sanitizing the floor complete the process, leaving the bathroom fresh and immaculate. The market for cleaning services in Laval has grown because residents understand the importance of this level of professional care. Beyond regular maintenance, there are times when a more intensive approach is necessary. A deep clean is a comprehensive, whole-home service that addresses the accumulated grime that standard cleaning may not reach. It encompasses all the tasks of a regular clean but expands upon them significantly. This includes washing interior windows and cleaning out the tracks and sills. Light fixtures, ceiling fans, and vents are carefully dusted. One of the defining features of a deep clean is the attention paid to the interior of appliances. Ovens are degreased, refrigerators are emptied and sanitized, and microwaves are cleaned inside and out. It’s a service that redefines what many people expect from cleaning services in Laval. This exhaustive process often involves washing down doors, doorframes, and baseboards throughout the entire property. Blinds may be individually wiped down, and furniture may be moved to clean the spaces underneath and behind it. This is the kind of transformative work that makes a home feel new again. People often schedule a deep clean seasonally, before hosting a major holiday or event, or simply when they feel their home needs a complete reset. The thoroughness offered by these types of cleaning services in Laval is unparalleled. Certain life events necessitate even more specialized cleaning solutions. Moving is a primary example. Whether you are a tenant aiming to secure a full security deposit or a homeowner preparing a property for sale, a move-out clean is critical. This is arguably the most intensive service offered by cleaning services in Laval. It involves deep cleaning an empty residence from top to bottom, including the insides of all cabinets, drawers, and closets. Walls are often spot-cleaned, and every fixture is polished. The goal is to leave the property in pristine condition for its next occupants. A move-in clean offers the opposite benefit: ensuring your new home is completely sanitized and free of the previous residents’ dust and dirt before you begin to unpack. Post-construction or post-renovation cleaning is another highly specialized field. Construction projects generate an immense amount of fine dust-from drywall, wood, and other materials-that permeates every surface and crevice. This is not ordinary dust; it is pervasive and requires specific equipment to remove safely and effectively. Professional cleaning services in Laval utilize industrial-strength vacuums with HEPA filters to capture these fine particles from the air and from surfaces. The process is multi-phased, often requiring several rounds of dusting and wiping to ensure all residue is gone. This is essential not

House Cleaning Services in Laval: Get a Fascinating Home Today! Read More »

Airbnb Cleaning Service

How to Choose The Best Airbnb Cleaning Services in Toronto: 5 Key Factors

Airbnb Cleaning Services in Toronto: 5 Key Factors for a Five-Star Turnover A successful short-term rental lives or dies by one process: the turnover. This is not a simple tidy-up; it is a complete, systematic reset of the guest experience. In a world-class city the standards are exceptionally high, and the smallest oversight, a stray hair or a sticky spot on the counter, can compromise an entire stay. If you are choosing between companies offering Airbnb cleaning services in Toronto, here are the five factors that separate a professional reset from a rushed wipe-down. Factor 1: A Systematic Process That Starts at Checkout The moment a guest departs, the clock begins. The first action is ventilation: all windows and balcony doors open to flush out stale air and lingering odors from cooking or fragrances, creating a neutral, fresh canvas while the space airs out. During this window, a professional crew runs a preliminary walkthrough for assessment, not cleaning, scanning each room for new damage such as scuffs on walls, carpet stains, or broken items. Issues are documented immediately with clear, time-stamped photographs and reported to the host, standard operating procedure for any reliable service. Beds are stripped completely, and all towels, bathmats, and kitchen cloths go into laundry bags to prevent cross-contamination. Factor 2: Bedroom and Bathroom Detail Work The bedroom is a guest’s sanctuary, and its cleanliness must be absolute. After the linens come off, the mattress protector and pillows are inspected for staining and laundered or replaced as needed, and the mattress itself is vacuumed with an upholstery attachment to lift dust, allergens, and skin cells. Fresh linens go back on with intent: taut sheets, hotel-style corners, and a wrinkle-free duvet, because the bed is a presentation. Headboards, nightstands, and dressers are wiped down, drawers and closets are opened and checked for items left behind, and picture frames, lamps, and window sills are dusted before the floor is vacuumed under the bed and behind furniture. Nowhere is cleanliness scrutinized more intensely than the bathroom. A quality disinfectant goes on the shower, bathtub, toilet, and sink, then sits for several minutes to dissolve soap scum, grime, and bacteria, following the CDC’s logic for cleaning and disinfecting surfaces at home. The shower and tub are scrubbed wall to wall with special brushes for grout lines and drains, and glass doors are squeegeed to a streak-free finish. The toilet is disinfected inside and out, from bowl and seat to tank and the entire base down to the floor. Once sanitized, the space is restocked: ample toilet paper, fresh hand soap, full shampoo, conditioner, and body wash bottles, and three freshly laundered towels per guest, a bath towel, hand towel, and washcloth, folded neatly. The floor is mopped last, and light switches, door handles, and the exhaust fan cover get a final wipe. Factor 3: Kitchen Disinfection and Restocking The kitchen is where guest trust is won or lost. Turnover cleaning starts by emptying the refrigerator and freezer of any food left behind, then wiping every interior shelf, drawer, and door seal with a food-safe disinfectant. Appliance exteriors and handles are polished, the microwave is cleared of splatters, the oven is inspected for spills, and the stovetop is degreased until it shines. Countertop items like the coffee maker and toaster are lifted so the surfaces underneath can be fully sanitized. The sink is scoured, the faucet polished, and cupboards and drawers spot-checked, with all provided dinnerware, glassware, and cutlery inspected. When it is a DIY job, follow Health Canada’s advice on using household chemicals safely; a professional crew handles those products for you. Restocking is part of the service: fresh paper towels, a new sponge, dish soap, dishwasher pods, a cleaned and full coffee station, and bins emptied, wiped, and relined before the floor is swept and mopped. Factor 4: Living Areas and the Extra-Mile Details The living room is where first impressions form, so every surface from coffee tables to the television stand and bookshelves is dusted. Upholstery is vacuumed with cushions removed to clean the frame beneath, cushions are fluffed and arranged, and throw blankets are folded. Books and magazines are organized, rugs are straightened and vacuumed, and the floor is finished with attention to corners and baseboards. Then come the details that elevate a clean from standard to exceptional: Baseboards wiped down to remove scuffs and dust. Door frames, doorknobs, and light switches sanitized as high-touch points. Interior windows checked for fingerprints and smudges. Every light bulb checked so none are burnt out for the arriving guest. Factor 5: The Final Walkthrough and Handoff The last step is quality control with fresh eyes: a supervisor or the cleaner tours the property as a newly arriving guest would, checking that pillows are perfectly arranged, the welcome mat is straight, and the air smells neutrally clean. The thermostat is set to a comfortable temperature, blinds are adjusted to a uniform position, and only then is the property securely locked and a confirmation message sent to the host. For hosts aiming for Superhost status, this level of turnover is not a luxury; it is a strategic necessity. Toronto Shine Cleaning serves properties across the city and the GTA, which you can confirm on our locations page. The Turnover at a Glance Area Reset essentials Restocking and checks Bedroom Vacuumed mattress, hotel-style bed-making, wiped surfaces Fresh linens, lost-item sweep of drawers Bathroom Disinfected and scrubbed tub, shower, toilet; squeegeed glass Three fresh towels per guest, soap and TP stocked Kitchen Disinfected fridge, degreased stove, scoured sink Coffee station, dish supplies, relined bins Living areas Dusted surfaces, vacuumed upholstery, finished floors Bulbs, blinds, thermostat, final walkthrough Airbnb Cleaning FAQs How quickly can a turnover crew reset my unit? Professional crews work from a fixed checklist and arrive fully equipped, built around tight turnover windows between late checkouts and evening arrivals. Book a company that treats those windows as non-negotiable and confirms completion after every visit. Do Airbnb cleaners handle laundry as well? A

How to Choose The Best Airbnb Cleaning Services in Toronto: 5 Key Factors Read More »

housekeeper deep cleaning

Deep Cleaning Services in Toronto, We Do It Right!

Deep Cleaning Services in Toronto: The Complete Reset Your Home Needs A regular cleaning keeps surfaces tidy, but the grime that accumulates below the surface quietly builds up over the months. That is the domain of specialized deep cleaning services in Toronto. Unlike standard housekeeping, a deep clean is a comprehensive, methodical process that tackles dirt in every often-overlooked, hidden corner of your home: a fundamental reset that restores your space to a truly pristine state. What Makes a Deep Clean Different? Professional deep cleaning focuses on a thorough, top-to-bottom reset of every room, targeting buildup that routine visits simply do not reach. It goes far beyond the surface and into the details: grease on cabinet fronts, dust in air vents, limescale on fixtures, and grime in grout lines. The scope demands expertise and specialized equipment, and more and more Toronto homeowners and businesses are investing in it, whether for a spring reset or as part of ongoing maintenance. For a fuller breakdown of what a session covers, see our guide to deep cleaning services in Toronto. Kitchen Deep Cleaning: Degreasing and Appliance Interiors In kitchens, the work is all about degreasing and disinfecting, starting inside your cupboards. Crews empty cupboards and pantries to inspect for spills, sticky residue, forgotten food, and signs of pests, then degrease and sanitize every interior surface. Handles and cabinet fronts get attention too, because repeated hand contact leaves a sticky film. Appliances receive treatment they almost never get at home: Oven: racks soaked, interior carbon buildup scrubbed, door glass cleaned for a like-new view. Stovetop: grates and burner caps removed and cleaned, boiled-over residue scrubbed from the surface. Range: pulled out so the sides, the floor behind it, and the wall are reached and wiped clean. Refrigerator and freezer: emptied, shelves and drawers washed, door gaskets detailed with a small brush, condenser coils vacuumed of dust to support efficiency and lifespan. Small appliances: toaster crumb trays emptied, coffee makers and kettles descaled, microwave interiors scrubbed, including the often-splattered ceiling. Bathroom Deep Cleaning: Soap Scum, Limescale, and Grout Bathrooms are scrubbed and sanitized top to bottom, dissolving soap scum and body residue from tubs and showers with specialized agents made for stubborn film. Shower doors and glass enclosures are cleaned until streak-free, the tracks at the base are cleared of accumulated gunk, and tiles and grout lines are meticulously scrubbed to lift mildew and dirt from porous grout. Stubborn mold and mildew in damp bathrooms are common culprits, and the CDC’s guidance on mold and your health explains why proper removal matters. Health Canada also recommends keeping indoor humidity low and fixing moisture sources so mould cannot take hold in the first place. Fixtures get their shine back as limescale and mineral deposits are removed from faucets and showerheads, and chrome is polished. Toilets are cleaned inside the bowl and across the entire exterior, from the tank lid and handle to the seat, hinges, base, and surrounding floor, plus the often-ignored overflow hole inside the tank, flushed clean with disinfectant. Vanity and medicine cabinets are emptied and wiped inside, and exhaust fan covers are removed and washed, because a dusty fan cannot ventilate properly and traps the humidity that leads to mildew. Living Areas and Bedrooms: A Top-to-Bottom Reset Crews work from the ceiling down to the floor in every room. Cobwebs are removed from corners and ceiling edges, light fixtures and ceiling fan blades are dusted, and the tops of bookcases, wardrobes, and cabinets are reached. Walls are spot-cleaned of scuffs and splatters, and baseboards, door frames, window frames, and switch plates are hand-wiped one by one. The process continues behind and beneath the obvious. Furniture is moved so the floors underneath are reached, and upholstery is vacuumed with crevice tools to extract dust, skin cells, and allergens from fabric. Wood furniture is polished, lampshades and blinds are dusted, and the air system itself is addressed: vents and grilles are vacuumed and wiped, and HVAC return air covers are pulled and dusted out. Professional crews rely on HEPA-filter vacuums that capture microscopic allergens rather than recirculating them, and steam cleaners that sanitize without harsh chemicals. When Toronto Homes Need a Deep Clean Most Deep cleaning requests tend to follow life events: Moving into or out of a home, when deposits and first impressions are at stake. Post-renovation cleanup after the construction dust settles in every crack. Seasonal refreshes, especially the annual spring clean. Before hosting an event or gathering, such as a wedding at home or the holidays. Preparing a space for a new baby or toddler who will crawl across every floor. Allergy season, when dust, dander, and pollen accumulate indoors. How to Choose a Professional Deep Cleaning Company Not all services are created equal, so choose carefully. Look for a company that offers a range of deep cleaning options with a detailed, transparent list of what each package includes. Prioritize experienced, trained professionals who understand the right products and techniques for different surfaces, and verify that the company is insured and bonded to protect your home and belongings. What to check Why it matters Transparent scope and checklist You can compare packages and know what is covered before booking. Trained, vetted crew Correct products and techniques protect finishes instead of damaging them. Insurance and bonding Toronto Shine carries a $1,000,000 insurance policy and a $10,000 accidental breakage and surety bond. Flat, upfront pricing Our deep clean starts at $270.38 before HST for a studio or one-bedroom, shown on our pricing page. Deep Cleaning Service FAQs What is included in a deep cleaning service in Toronto? A full reset of each room: kitchen cabinets and appliances inside and out, bathrooms degreased and descaled with grout scrubbed, walls spot-cleaned, baseboards and switch plates wiped, vents dusted, furniture moved, and floors and carpets thoroughly cleaned. How is deep cleaning different from regular housekeeping? Regular visits maintain cleanliness on visible surfaces. A deep clean restores the areas maintenance skips, which is why many homes pair

Deep Cleaning Services in Toronto, We Do It Right! Read More »

Cleaning vinegar vs regular vinegar

Cleaning Vinegar vs Regular Vinegar: Which One Should You Use?

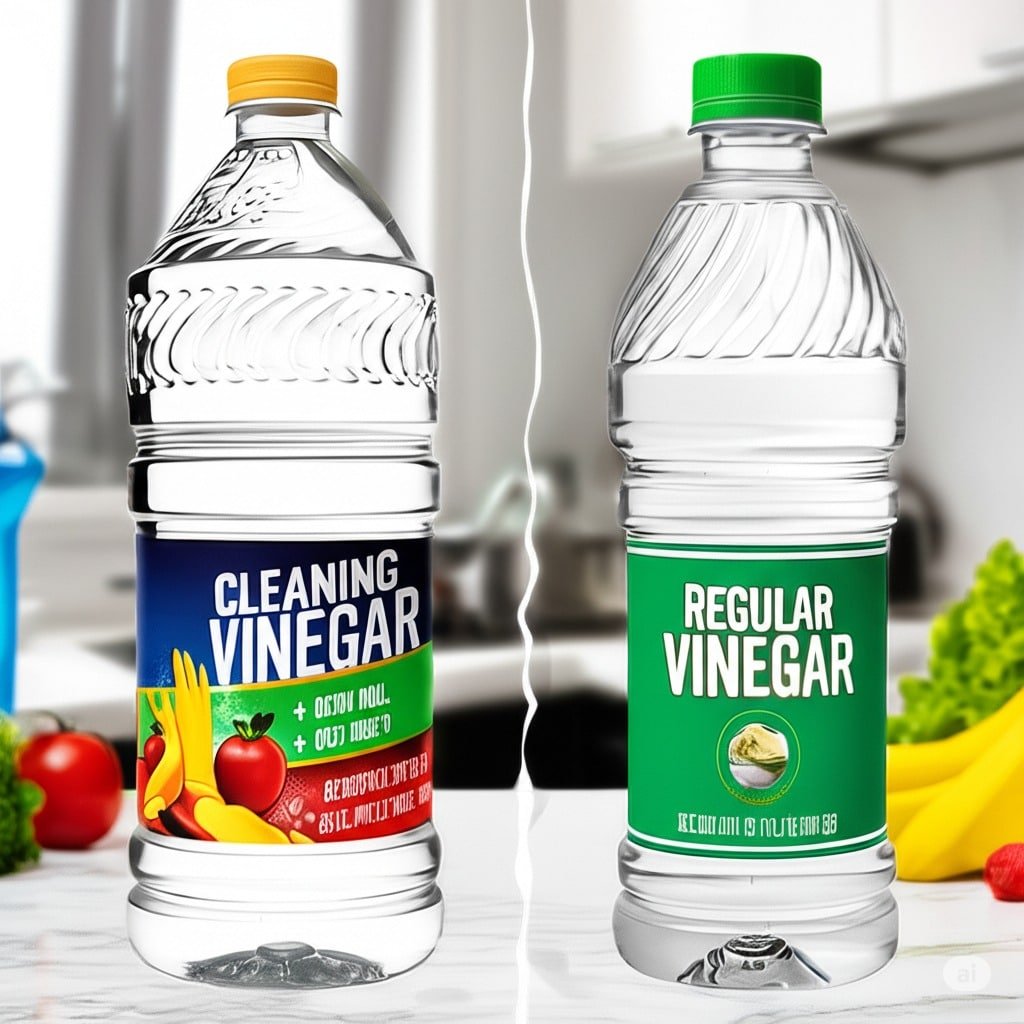
Walking down the cleaning aisle, you see it: a jug labeled “Cleaning Vinegar.” It sits near the all-purpose sprays and scouring powders, looking distinctly more industrial than its culinary cousin in the condiment aisle. The question arises naturally: is this just a marketing gimmick, or is there a real, functional difference between the vinegar you put on your salad and the one you use on your shower door? The answer is simple and significant. Yes, there is a difference, and understanding it is key to using this powerful natural cleaner safely and effectively. 1.Fermentation Process At its core, all vinegar is a solution of acetic acid and water. This acid is the active ingredient responsible for vinegar’s cleaning power. It’s created through a two-step fermentation process. First, yeast converts sugars from a plant source, like corn, apples, grapes, or grains, into alcohol. Then, a specific type of bacteria, Acetobacter, converts that alcohol into acetic acid. The final concentration of this acid is what separates one type of vinegar from another. Let’s first consider the familiar bottle of regular distilled white vinegar, a staple in pantries everywhere. This is the product most people grab when a cleaning recipe calls for vinegar. Standard white vinegar sold for culinary purposes in North America has a strictly regulated acidity level, typically containing 5% acetic acid. This percentage is not arbitrary; it’s a balance that makes it palatable and safe for consumption while still being effective for pickling, marinading, and creating salad dressings. Because it’s food-grade, it offers a distinct peace of mind when used for cleaning in kitchen environments. You can descale your coffee maker with it and know that any residue left behind is harmless. You can wipe down your countertops or clean your microwave, confident that you aren’t introducing harsh, inedible chemicals where you prepare your food. The 5% acidity of regular white vinegar is potent enough for a vast range of household cleaning tasks. Its acidic nature is excellent at breaking down and dissolving mineral deposits, which is why it works so well against hard water stains and scale buildup. When you run a cycle of vinegar and water through your coffee machine or kettle, the acetic acid goes to work on the calcium and magnesium deposits, dissolving them and flushing them away, improving the machine’s performance and the taste of your beverage. The same principle applies to cleaning shower heads clogged with scale or removing the white, chalky film that hard water leaves on glass shower doors and faucets. 2.Degreaser and Deodorizer Furthermore, regular vinegar is an effective degreaser and deodorizer. It cuts through light grease on stovetops and backsplashes. Its ability to neutralize alkaline odors makes it a fantastic solution for eliminating smells from garbage disposals, refrigerators, or musty laundry. A small bowl of vinegar left on a counter can absorb and neutralize unpleasant cooking odors overnight. As a rinse aid in the dishwasher, it helps break down soap residue and leaves glassware sparkling and spot-free. When used in laundry, a cup in the rinse cycle can act as a natural fabric softener, breaking down detergent buildup and leaving clothes feeling softer without a waxy coating. Its applications are broad, making it a true multi-purpose workhorse for general, everyday cleaning. Now, let’s turn our attention to the jug labeled “Cleaning Vinegar.” At first glance, it looks the same, a clear liquid, just like its culinary counterpart. The crucial difference, however, lies in its strength. Cleaning vinegar is formulated with a higher concentration of acetic acid, typically around 6% to 8%. While a jump from 5% to 6% might seem insignificant, it represents a 20% increase in acidic strength. This boost in potency makes it a more formidable opponent against tougher, more stubborn messes where regular vinegar might require more time or more scrubbing to be effective. This increased acidity means cleaning vinegar excels at heavy-duty jobs. It cuts through thick, caked-on soap scum in bathtubs and showers with noticeably more ease. It tackles severe hard water stains on glass and fixtures that have been building up for months. For homes with very hard water, cleaning vinegar can be the difference between a frustrating scrub session and a quick, satisfying wipe-down. It’s also more effective at cleaning neglected tile grout, its higher acidity helping to lift deep-set grime and mildew stains. Some people even use it as a more natural alternative to chemical herbicides for killing weeds that pop up in the cracks of driveways and sidewalks, as the stronger acid is more effective at desiccating the plant life. 3.Not For Consumption However, this increased power comes with important caveats, primarily concerning safety and surface compatibility. The most critical distinction is that cleaning vinegar is not produced to be food-safe. It is not intended for consumption, and it should never be used in cooking or food preparation. Its production is not regulated by food safety standards, and it may contain impurities not present in distilled white vinegar. The label will almost always include a warning: “Not for consumption.” The stronger concentration also means it releases more potent fumes. When using cleaning vinegar, especially in enclosed spaces like a bathroom, proper ventilation is not just recommended, it’s essential. Opening a window or running an exhaust fan helps to dissipate the strong acidic smell and prevents irritation to the respiratory system. For individuals with sensitivities, the fumes from cleaning vinegar can be overwhelming. It’s also more likely to cause skin and eye irritation upon direct contact. Wearing gloves is a wise precaution to protect your hands, and care should be taken to avoid splashing it into your eyes. The heightened acidity also increases the risk of damaging certain surfaces. While all vinegar should be used with caution on sensitive materials, cleaning vinegar requires even greater care. It should never be used on natural stone surfaces like marble, granite, travertine, or limestone. The acid, even when diluted, will etch and dull the surface, causing permanent damage. It’s also too harsh for unsealed

Cleaning Vinegar vs Regular Vinegar: Which One Should You Use? Read More »

August cleaning preparation

How To Prepare For August Cleaning: 7 Steps Fast and Easy

August cleaning is a specific kind of reset, the air in Toronto during August carries a distinct weight. This is the month where summer hits its peak just before beginning its slow retreat. Inside your home, the evidence of a season lived to its fullest is everywhere. Preparing for the August cleaning isn’t just about tidying; it’s about resetting the home after months of high activity and preparing it for the shift into autumn. The purpose of a dedicated August cleaning is to systematically remove the specific grime of summer and create a clean foundation for the indoor months to come. 1.HVAC A critical first step in any thorough August cleaning is addressing the air your family breathes. With windows open for weeks, allergens, city dust, and pollen have infiltrated every room. Your HVAC system has been in constant use, and its filter is the first line of defense. Changing it is a non-negotiable starting point for your August cleaning. A clogged, grey filter is not only inefficient but also circulates the very particles you want to remove. Once replaced, use a vacuum with a brush attachment to clean all intake and outtake vents. This foundational task sets the stage for the rest of your August cleaning, ensuring the air moving through your home is as clean as possible. 2.Windows and Doors Now, turn your attention to the windows and doors. The screens have been interceptors of bugs, leaves, and dirt all summer. A proper August cleaning demands they be removed and washed. A soft brush, mild soap, and a gentle spray from a garden hose will dislodge the grime. While they dry, focus on the window tracks and sills. These channels are graveyards for dust and insects. Vacuum the loose debris and use an old toothbrush to scrub the caked-on dirt. This level of detail is a hallmark of a successful August cleaning. Washing the glass, inside and out, on an overcast day will prevent streaking and let pristine light into your newly refreshed space. Completing this part of the August cleaning makes an immediate, visible difference to the brightness of your home. 3.The Floors The floors hold the story of summer. Sand from The Beaches, soil from the garden, and grass from the park have been ground into every surface. A deep floor treatment is non-negotiable for a proper August cleaning. For hard floors, a thorough mopping, perhaps even twice in high-traffic areas, is required to lift the settled-in dirt. For carpets and area rugs, this is the time for a deep extraction clean. Renting or owning a carpet cleaner is essential for this part of the August cleaning, as it pulls out the deep-set allergens and grit that a standard vacuum cannot reach. The murky water you dispose of is proof of the effectiveness of this task. Moving furniture to clean underneath is a vital step in a comprehensive August cleaning; the dust and lost items accumulated over three months need to be addressed. This aspect of the August cleaning removes the literal grit of the season from your home. 4.Fat in the Kitchen The kitchen August cleaning is a project in itself. The refrigerator has been a revolving door of summer treats and barbecue ingredients. Empty it completely. Wash all shelves and drawers in warm, soapy water. Wipe the interior with a food-safe cleaner, checking expiration dates as you go. The exterior and handles, covered in fingerprints, also need attention. Summer cooking often involves more frying and grilling, leaving a sticky film of grease on cabinets, the backsplash, and especially the range hood. A good degreaser is your best tool for this part of the August cleaning. Spray it on, let it work for a few minutes, then wipe clean. Don’t forget the hidden areas during your August cleaning; pull out the oven and stove to clean the sides and the floor underneath, which are magnets for crumbs and grease. This part of the August cleaning is about health as much as it is about aesthetics. 5.Sofa Cushion Your living room August cleaning should focus on soft surfaces where dust and dander settle. If your sofa cushion covers are machine-washable, now is the time to launder them. For all other upholstery, a meticulous vacuuming with the correct attachment is key. Go into every seam and crevice. For a deeper refresh, sprinkling baking soda over the fabric, letting it sit to absorb odors, and then vacuuming it up is a great technique to include in your August cleaning schedule. All throw blankets and pillows should be washed or cleaned according to their care tags. Dusting is another crucial element. Use a damp microfiber cloth to trap dust, not just move it. The goal of this August cleaning is to touch every surface, including the tops of picture frames, ceiling fan blades, and lamp shades. This comprehensive dusting is what makes an August cleaning so effective. Think of this as resetting the comfort zones of your home with your August cleaning. 6.Bathroom The bathroom August cleaning targets the buildup from summer humidity and increased traffic. Go beyond the basic wipe-down and scrub the grout lines on the floor and in the shower where soap scum and mineral deposits have accumulated. A paste of baking soda and vinegar is an effective, natural solution. Wash the shower curtain and its liner. The exhaust fan cover, likely caked with dust, should be removed and cleaned to ensure it can effectively pull moisture from the air. A successful August cleaning restores these high-use spaces to a state of hygienic freshness. Take the time to empty and wipe out medicine cabinets and vanities, organizing the contents as you go. 7.The Summer Gear A key part of the August cleaning process is managing the transition of seasonal items. The summer gear pool toys, beach chairs, inflatable rafts needs to be cleaned, deflated, and stored properly to protect it for next year. The barbecue grill deserves a deep clean after a season of heavy

How To Prepare For August Cleaning: 7 Steps Fast and Easy Read More »

housekeeper

What Is A Housekeeper – 3 Reasons Why You Should Hire

A housekeeper is far more than just someone who cleans your home. While the primary image that comes to mind might be someone with a vacuum or a dust cloth, the reality of a professional housekeeper’s role is much broader, encompassing a comprehensive approach to home management and the overall well-being of a living space. They are individuals entrusted with maintaining the order, cleanliness, and functionality of a household, often serving as a crucial backbone for busy individuals and families. It’s about creating and sustaining an environment where you can truly thrive, not just exist. Think of a housekeeper not as a visitor who performs a single task, but as a dedicated manager of your domestic environment. Their responsibilities extend well beyond surface-level tidiness. They delve into the intricate details of what makes a house feel like a home  a place of comfort, peace, and efficiency. This often includes a wide array of duties that can be customized to suit specific household needs, but generally covers everything from meticulous cleaning to organizational tasks and even light household management. They are experts in ensuring that every corner of your home is not just clean, but cared for, reflecting an understanding of proper maintenance and the nuances of different materials and surfaces. 1.Light and Heavy Cleaning For instance, their cleaning duties are exhaustive. This isn’t just a quick sweep or a superficial wipe-down. A professional housekeeper engages in deep cleaning protocols for kitchens and bathrooms, sanitizing surfaces, scrubbing grout, polishing fixtures, and ensuring these critical areas are hygienic and sparkling. They handle floor care with precision, knowing the right methods for hardwood, tile, carpet, or laminate, ensuring longevity and shine. Dusting isn’t limited to visible surfaces; it extends to baseboards, light fixtures, ceiling fans, blinds, and intricate decor, preventing the buildup of allergens and maintaining a fresh atmosphere. Vacuuming and mopping are performed thoroughly, reaching under furniture and into corners that are often overlooked in daily tidying. Laundry management is also a common duty, involving washing, drying, folding, ironing, and putting away clothes, linens, and towels, ensuring that your wardrobe and household textiles are always fresh and ready. They make beds with an eye for detail, turning a simple chore into an act of creating a welcoming sanctuary. Beyond the immediate act of cleaning, a housekeeper is also an organizational wizard. They help in reducing clutter, creating systems for storage, and maintaining order in common areas, closets, and pantries. This proactive approach to organization means less time spent searching for items and more time enjoying a harmonious living space. They might assist with tidying up children’s play areas, ensuring toys are stored properly, or organizing bookshelves and filing systems. It’s about creating a flow in the home that makes daily living smoother and less stressful. This often involves an intuitive understanding of how a household operates and anticipating what areas might become disorganized, intervening before chaos takes hold. Furthermore, a housekeeper often takes on light household management responsibilities. This can include managing household supplies, ensuring that cleaning products, toiletries, and even certain pantry staples are always stocked. They might run light errands, such as dropping off dry cleaning or picking up groceries. For homes with pets, they might assist with basic pet care, like feeding or tidying up pet areas. They can also oversee plant care, ensuring your indoor greenery thrives. In some cases, especially in larger homes, a housekeeper might coordinate with other service providers, such as plumbers, electricians, or gardeners, ensuring maintenance schedules are met and issues are addressed promptly. They act as a central point of contact, ensuring the home functions like a well-oiled machine, even when you are not present to manage every detail yourself. The distinction between a “cleaner” and a “housekeeper” is critical. A cleaner typically comes for a few hours, performs specific cleaning tasks, and then leaves. Their focus is solely on the immediate cleanliness of the space. A housekeeper, on the other hand, often has a more encompassing and ongoing relationship with the household. They are involved in the continuous upkeep, proactive organization, and management of the home’s daily rhythm. They build an intimate understanding of the home’s needs, its inhabitants’ preferences, and the specific routines that keep everything running smoothly. This level of dedication and involvement fosters a deeper sense of trust and partnership, where the housekeeper becomes an invaluable asset to the household’s operational efficiency and overall peace. 2.Making Up For Lost Time So, why should you consider hiring a housekeeper? The reasons are multifaceted and profoundly impactful on your daily life. Primarily, it’s about reclaiming your time. In today’s fast-paced world, time is arguably our most precious commodity. Juggling demanding careers, family responsibilities, social obligations, and personal pursuits leaves very little room for the arduous and often relentless demands of household chores. The hours spent on cleaning, organizing, and maintaining a home can quickly accumulate, eating into weekends, evenings, and any potential moments of relaxation. Hiring a housekeeper liberates these hours, allowing you to dedicate them to activities that genuinely enrich your life – spending quality time with loved ones, pursuing hobbies, engaging in personal development, exercising, or simply enjoying uninterrupted rest. Imagine coming home after a long day not to a list of chores, but to a clean, organized, and welcoming sanctuary, ready for you to unwind. This isn’t just about saving time; it’s about investing in your personal well-being and life satisfaction. Beyond time, hiring a housekeeper significantly reduces stress and mental load. The burden of an untidy or disorganized home can weigh heavily on one’s mind, creating a constant hum of anxiety and guilt. The mental energy expended on planning cleaning schedules, remembering what needs to be done, or feeling overwhelmed by accumulated mess is immense. A housekeeper takes this entire burden off your shoulders. The peace of mind that comes from knowing your home is being professionally cared for, consistently and thoroughly, is immeasurable. It eliminates potential arguments or frustrations over chore distribution in shared living spaces and

What Is A Housekeeper – 3 Reasons Why You Should Hire Read More »

Island Cleaning Supplies: The Ultimate Guide for a Sparkling Space

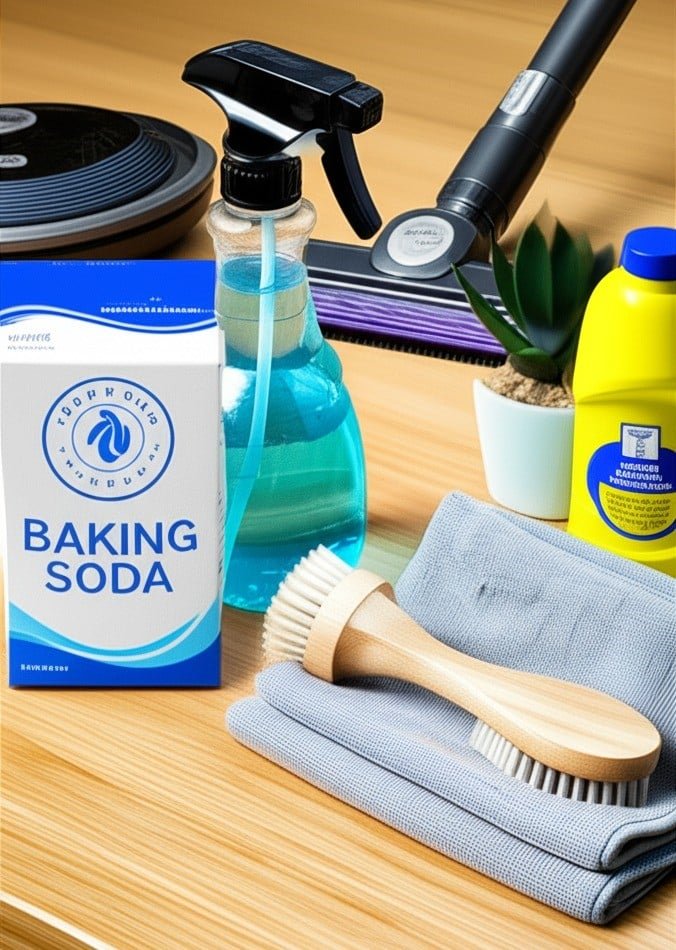
Island Cleaning Supplies: Build the Ultimate Portable Kit Island cleaning is a simple idea with powerful results: keep a compact, portable caddy stocked with versatile tools and multi-purpose products so you can handle any mess wherever it appears, without repeated trips to a supply closet. This approach saves space, time, and money by favouring a lean arsenal of proven products over a collection of single-use bottles. Here is what belongs in an island cleaning kit, and why each piece earns its place. The Microfiber Foundation No chemical outperforms a high-quality microfiber cloth. Millions of fine split fibres create an immense surface area that traps dust, grime, and bacteria instead of pushing them around like cotton rags do, and each cloth can absorb moisture equal to about seven times its own weight, drying surfaces without streaks or lint. Stock several types: general-purpose cloths for daily wiping, a tighter-weave glass and polishing cloth for mirrors and chrome, and waffle-weave cloths for spills and dish drying. Buy a dozen or more and colour-code them, blue for glass, green for the kitchen, red for the bathroom, so germs never travel from room to room. Bottles, Brushes, and Squeegees A professional-grade spray bottle with an adjustable nozzle gives you real control: a fine mist for damp dusting or a concentrated stream for grout lines, which flimsy dollar-store triggers cannot deliver. Alongside it, keep a palm-sized dish brush with nylon bristles for sinks and counters and a narrow, stiff-bristled grout brush for tile lines, tracks, and corners. A high-quality squeegee belongs in the kit too. Its best job is preventive: a 30-second wipe-down of shower glass and tile after every shower removes the water that soap scum and mildew need to form, drastically cutting future deep scrubbing. The Liquid Trio Three humble liquids cover nearly every cleaning need in the home: White distilled vinegar: its acetic acid dissolves hard water mineral deposits on faucets and shower heads and inside coffee makers, and diluted with water it becomes a streak-free glass cleaner and a natural deodorizer. Never use it on marble, granite, or travertine, where the acid etches the surface permanently Dish soap: a surfactant that breaks water’s surface tension so it can lift oils and grease. A few drops in a spray bottle of warm water make a safe all-purpose cleaner for counters, cabinets, painted walls, and sealed wood floors, and a thin coat left on a greasy stovetop for 10-15 minutes softens caked-on grime Isopropyl alcohol at 70% concentration: a fast-evaporating solvent and disinfectant. Sprayed 50/50 with water and wiped with microfiber, it leaves stainless steel fingerprint-free and gleaming, and it safely cleans electronics such as keyboards, remotes, and phones without moisture damage The Powders: Gentle and Heavy Duty Baking soda is the gentle abrasive: a mild alkali whose fine grit lifts stuck-on stains from porcelain, fiberglass, and enamel alike without scratching a thing. Sprinkled on a damp sponge, or mixed with water into a paste for burnt-on oven spills, it scrubs hard; an open box in the fridge absorbs odours, and a sprinkle on carpets before vacuuming neutralizes trapped smells. For jobs baking soda cannot touch, a powdered cleanser such as Bar Keepers Friend brings heavier artillery. Its active ingredient, oxalic acid, removes rust spots and tarnish from copper and brass, cutlery scuffs in sinks, and the dull film on stainless steel. Always wear gloves, work in a ventilated area, and never mix it with other cleaners, following the safe-use rules Health Canada sets out in its household chemical safety guide and its overview of household product hazards. The Machine That Makes It Work A vacuum with a HEPA filter and a full set of attachments is the engine of the system. A HEPA filter traps microscopic dust and allergens instead of blowing them back into the air, which matters for allergy sufferers. The attachments unlock the machine’s range: a crevice tool reaches corners and baseboards, a soft dusting brush handles blinds and lampshades, and an upholstery tool cleans fabric furniture. Vacuuming is always the first step of any deep clean, because dry soil left in place turns to mud the moment a liquid cleaner touches it. Kit item Primary job Watch out Microfiber cloths Traps dust, dries streak-free Colour-code by room White vinegar Dissolves hard water film Never on natural stone Dish soap Cuts grease anywhere Rinse food-contact surfaces Isopropyl alcohol 70% Streak-free shine, electronics Keep away from flames Baking soda Gentle scrubbing and odours Rinse thoroughly Bar Keepers Friend Rust, tarnish, set-in stains Gloves and ventilation Squeegee Prevents soap scum buildup Use after every shower HEPA vacuum Removes dust before wet cleaning Check filter regularly Island Cleaning Supplies FAQs What is island cleaning? It is the practice of keeping a self-contained portable caddy of versatile tools and products, so you can clean any room without returning to a central supply closet. The approach reduces clutter, saves time, and cuts the number of single-purpose products you buy. Which island cleaning products are truly essential? Start with microfiber cloths, an adjustable spray bottle, dish soap, white vinegar, baking soda, and a HEPA vacuum. Add 70% isopropyl alcohol, a grout brush, a squeegee, and a powdered cleanser for rust and tarnish as your needs grow. Is vinegar safe on all surfaces? No. Its acidity dissolves mineral deposits beautifully, but it etches natural stone such as marble, granite, and travertine. Test any unfamiliar surface in a hidden spot first, and dilute vinegar with water for most jobs. How do I clean safely with multiple products? Never mix cleaning products, especially bleach with anything acidic or ammonia-based, because the combination can release toxic gas. Read labels, use gloves where advised, and keep products out of children’s reach; Health Canada’s chemical safety pages explain the details. Your Kit, Plus a Professional Finish Building an island cleaning kit simplifies everyday maintenance, and when the whole home needs more than a caddy can deliver, a professional clean fills the gap. Toronto Shine Cleaning’s regular cleaning service and deep cleaning

Island Cleaning Supplies: The Ultimate Guide for a Sparkling Space Read More »

Organizing a Small Kitchen

Organizing a Small Kitchen in 5 Easy Steps

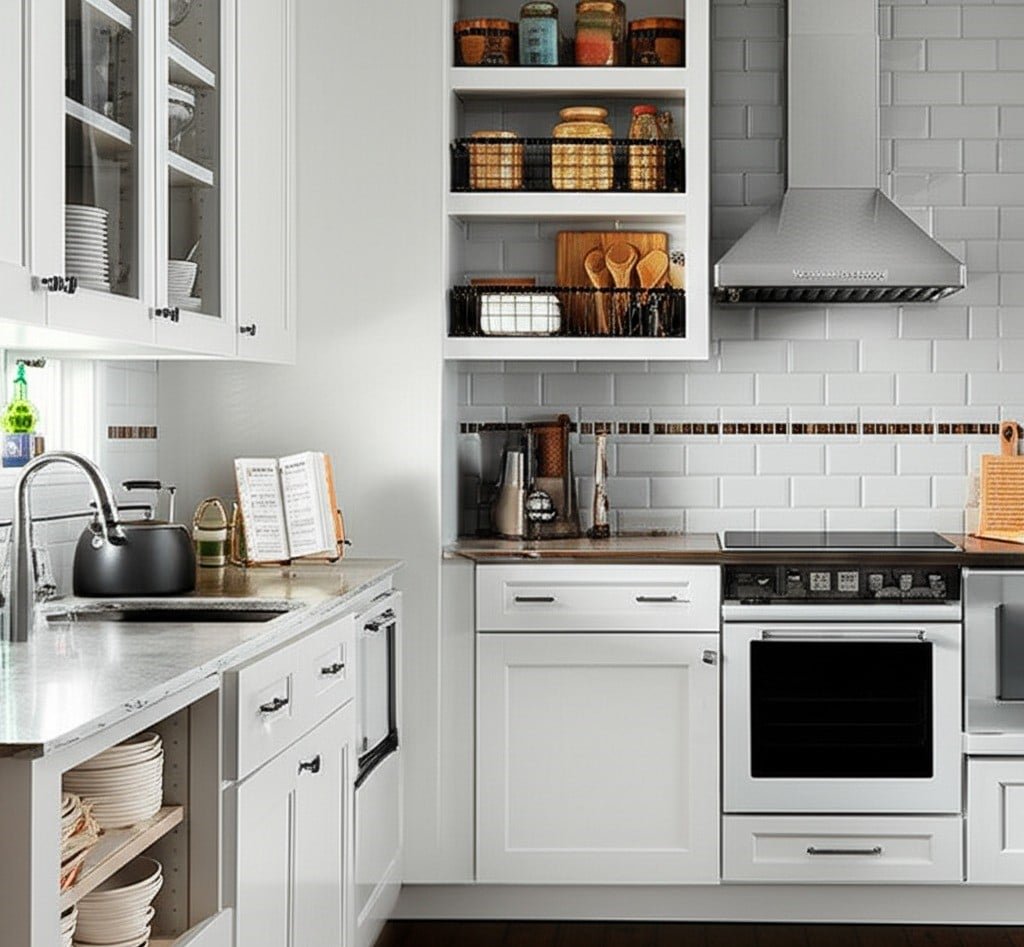
Organizing a Small Kitchen in 5 Easy Steps A small kitchen is not a problem to solve so much as a space to design. When every item has a logical home and the counters stay clear, even a tiny galley feels roomy and works fast. The secret is a five-step sequence: clear, purge, zone, store vertically, and maintain. Follow it once and your kitchen will stay organized for years. Step 1: Clear the Counters Counter space is the most valuable real estate in a small kitchen, so it cannot double as storage. Remove every appliance, crock, and decoration, then wash the surfaces thoroughly. Only items used multiple times a day earn their spot back: for most households that means a coffee maker or electric kettle and possibly a knife block. The toaster, blender, and stand mixer, used weekly, belong in an easy-to-reach cabinet, while monthly or occasional appliances go on a higher shelf or out of the kitchen entirely. A clear counter becomes your baseline, and returning to it after every cooking session keeps the kitchen feeling open. Step 2: Purge Cabinet by Cabinet Empty one cabinet completely onto the counter and sort everything by type, all the mugs together, all the glasses together, all the plates together. The duplicates become obvious fast: with two or three people in the home, twenty mugs make no sense, so keep the best six to eight and donate the rest. Apply the same logic to plates, bowls, and glassware, and discard anything chipped, cracked, or stained, because every item in a small kitchen must earn its space. In the drawers, keep one or two of each essential tool and let go of single-purpose gadgets you have not touched in six months. Then work through the pantry the same way. Check every expiry date and toss anything past it, and donate unopened in-date food you know you will never eat. Decant grains, pasta, cereal, sugar, and flour into clear, airtight, stackable containers with labels showing contents and dates. You will see your inventory at a glance, keep food fresher, and free up the bulky packaging space. The CDC’s food safety basics reinforce why checking dates and storing dry goods properly protects your household, and the CDC’s handwashing guidance is a good reminder to wash up before handling food in your newly organized kitchen. Step 3: Create Workflow Zones With the purge done, arrange cabinets by how you cook rather than by habit. The cabinets beside the stove hold pots, pans, baking sheets, oils, and the spices you reach for daily: that is the cooking zone. Under the sink, the cleaning zone, live dish soap, sponges, dishwasher detergent, and trash bags. The longest clear stretch of counter becomes the preparation zone, so the drawers and cabinets beneath it should hold cutting boards, mixing bowls, measuring cups, and knives. Finally, keep everyday dishes and cutlery closest to the dishwasher or draining board so putting them away takes seconds. A kitchen arranged this way feels intuitive because everything sits where you use it. Zone Where it lives What it stores Cooking Cabinets beside the stove Pots, pans, oils, daily spices Cleaning Under the sink Dish soap, sponges, trash bags Preparation Near the open counter Boards, bowls, knives, measures Everyday dishes Near dishwasher or drying rack Plates, glasses, cutlery Step 4: Think Vertically and Use Every Gap Small kitchens win by stacking. Inside cabinets, these tricks multiply every shelf and drawer: Under-shelf baskets create a second tier, and shelf risers double the usable height of each shelf A multi-tier lazy Susan rescues deep corner cabinets, and pull-out sliding shelves make the back row visible Vertical file sorters or tension rods store baking sheets, muffin tins, and cutting boards on their side, easy to grab On the walls, a magnetic knife strip empties a whole drawer, a rail with S-hooks holds utensils and mugs, and floating shelves display everyday dishes Under the sink, a tension rod across the cabinet top hangs spray bottles by their triggers and frees the floor for stackable bins The refrigerator sides take magnetic hooks, a paper towel holder, or a spice rack, and a slim rolling cart slides into the gap beside the fridge for bulk paper goods Step 5: Maintain the System Daily Organization lasts only as long as the return habit. After every use, wash an item and put it straight back in its designated home; never let clean dishes or appliances rest on the counter overnight. Keep the under-sink bin and pantry labels current, and once a month do a quick sweep for items that crept in without a home. This five-minute daily discipline is what keeps a small kitchen feeling dramatically larger and keeps you from ever needing a full reorganization again. Small Kitchen Organization FAQs How do I organize a small kitchen with no pantry? Convert one tall cabinet into pantry space using pull-out shelves or risers, decant dry goods into uniform clear containers, and store rarely used appliances elsewhere in the home. A slim rolling cart adds pantry storage in any gap. What should I keep on a small kitchen counter? Only items used several times a day, typically a coffee maker or kettle and a knife block. Everything else, including toasters and mixers, belongs in cabinets so the counter stays clear and the room feels larger. How many dishes does a small kitchen need? Keep six to eight of each everyday item when two or three people live in the home, plus a few serving pieces. Excess dishes and mugs are the fastest way to fill limited cabinets, so donate what you do not genuinely use. How do I keep my small kitchen organized once it is done? Return every item to its home immediately after use, clear the counters each evening, and label pantry containers. A few minutes of daily maintenance prevents the slow buildup that forces another full reorganization. A Sparkling Kitchen, Minus the Grime Once your small kitchen is organized, professional cleaning lifts

Organizing a Small Kitchen in 5 Easy Steps Read More »

summer deep cleaning

Why Summer Is The Best Season To Do a Deep Cleaning At Home

Why Summer Is the Best Season for Home Deep Cleaning Summer brings longer days, warmer temperatures, and a natural opportunity to refresh your home. A home deep cleaning in summer is easier, faster, and more effective than at any other time of year. Open windows create cross-breezes, bright sunlight reveals grime that stayed hidden all winter, and warm air dries carpets and upholstery quickly. If you have been putting off a thorough clean, these summer advantages make now the right moment to start. 1. Better Ventilation Dries Surfaces Faster Ventilation is the biggest advantage of summer deep cleaning. When windows and doors stay open, fresh air quickly clears the fumes from cleaning products, so the process is more comfortable and safer. Moisture from mopping floors, steam cleaning carpets, or washing upholstery dries fast, and rapid drying prevents mold and mildew, which thrive in damp, stagnant spaces. The CDC’s mold prevention guidance stresses controlling moisture, and summer airflow makes that much easier than in winter, when closed windows trap dampness. 2. Sunlight and Warmth Boost Cleaning Power Sunlight is a natural disinfectant. Its ultraviolet rays kill bacteria and other microorganisms on surfaces, which is especially useful after months of closed-up rooms. Bright summer light also shows dirt that stays invisible in dim conditions: window streaks, wall smudges, and dust in corners all become obvious, so you clean more thoroughly. Warm temperatures help cleaning solutions break down grease and grime with less scrubbing, which means less product and less effort. The CDC’s cleaning and disinfecting guidance is a useful reference for building a healthy routine around these conditions. 3. Take Cleaning Outdoors Summer lets you extend the cleaning zone beyond the house. Rugs can be beaten and aired in the sun, cushions scrubbed and left to dry quickly, and mattresses refreshed with a few hours of sun exposure. Patios, decks, outdoor furniture, and BBQ grills collect grime all year, and warm water plus a hose makes them manageable now. Cleaning these spaces flows naturally into a deeper clean of the indoor areas beside them, creating a seamless reset from the interior to the exterior of your home. 4. Tackle Basements, Garages, and Closets Attics, basements, garages, and closets are less inviting in cold months. Summer warmth makes it comfortable to sort, declutter, and clean them, and items can be carried outside for cleaning or disposal. Clothing can be aired out, seasonal items laundered and stored, and closet shelves wiped down and organized without the rush of cooler weather. 5. Improve Indoor Air Quality Before Fall After a long, closed-up winter, dust, allergens, and stagnant air accumulate in the home. A comprehensive summer deep clean removes dust mites, pet dander, and other pollutants, which supports healthier indoor air quality as the cooler months approach and windows are sealed again. Health Canada notes that indoor air can hold contaminants that build up in tightly closed homes, so a seasonal reset makes a real difference. A practical summer deep cleaning plan covers the tasks that benefit most from warm, dry weather: Wash windows and screens, and let them dry in the sun Steam clean carpets and upholstery with windows open and fans running Scrub patio furniture, decks, and BBQ grills with a hose Beat and air rugs, cushions, and mattresses outdoors Declutter and wipe down the basement, garage, and closets Dust air conditioning units and vents while the weather is dry Task Why Summer Helps Windows and screens Streaks dry clear and screens dry fast in the sun Carpets and upholstery Open windows and fans speed drying and prevent musty odors Patio and deck Warm water and a hose make grime easy to remove Basement and garage Comfortable to work in, and items can be aired outside AC units and vents Dry weather suits dusting and maintenance When to Call a Professional Deep Cleaning Service Even with perfect summer conditions, a full home deep cleaning takes hours of strenuous work. Toronto Shine Cleaning handles the job with trained cleaners, professional equipment, and a systematic checklist, and the company is bonded and insured. Book a home deep cleaning for a thorough refresh, add regular maid service to keep it that way, review cleaning prices, or check whether we serve your neighbourhood in the GTA. Call (647) 424-0355 to book. Why is summer better than spring for deep cleaning? Summer offers longer daylight, warmer temperatures, and the ability to open windows wide. Moisture dries faster, cleaning products work better in warmth, and you can move rugs, cushions, and furniture outdoors. Spring often stays cool and damp, which slows drying and can leave carpets and upholstery at risk of mildew. Can sunlight really disinfect surfaces? Yes. The ultraviolet rays in sunlight kill bacteria and other microorganisms on surfaces, which is why airing rugs, cushions, and mattresses in direct sun is a traditional and effective practice. Sunlight also reveals dirt and streaks that are hard to see in dim winter light. How do I prevent mold after cleaning with water? Dry everything quickly. Open windows and doors for a cross-breeze, run fans, and use a dehumidifier in damp areas like basements. The CDC recommends controlling moisture to prevent mold, and summer ventilation makes that much easier than in winter. Does Toronto Shine Cleaning offer summer deep cleaning? Yes. Toronto Shine Cleaning provides professional deep cleaning across the GTA, and summer is a great time to book because windows can stay open while the team works. Call (647) 424-0355 or request a quote online, and the team brings all supplies and equipment.

Why Summer Is The Best Season To Do a Deep Cleaning At Home Read More »