Mold Removal

clean shower walls

How to Keep Your Shower Walls Shining – 5 Best Tips You Need to Know

Dealing with dirty shower walls is a common household challenge. Over time, these surfaces accumulate a variety of residues, from soap scum and hard water minerals to mold and mildew, diminishing the overall cleanliness and appeal of your bathroom. Understanding what causes these issues and how to address them effectively can transform your shower from a source of frustration into a sparkling clean space. 1.Mold and Mildew The main culprits for dirty shower walls are soap scum, hard water stains, and biological growths like mold and mildew. Soap scum is a reaction between the fatty acids in bar soap and minerals in tap water, such as calcium and magnesium. This reaction forms an insoluble, sticky, and often grayish or whitish film that adheres tightly to shower surfaces. If left untreated, layers of soap scum can build up on shower walls, becoming increasingly difficult to remove. Hard water stains, on the other hand, are mineral deposits left behind as water evaporates. They usually appear as chalky white spots or a cloudy film, particularly noticeable on darker tiles or glass. Calcium carbonate and magnesium carbonate are the main components of these deposits. Mold and mildew are fungi that thrive in warm, humid environments with poor air circulation, making showers an ideal breeding ground for them. Mold usually appears as a superficial, powdery growth, while mildew can penetrate deeper and present as black, green, or even pink spots, often in grout lines or corners. These spots are not only unsightly, but can also cause health problems for some people. Before beginning the cleaning process, proper preparation is essential for both effectiveness and safety. Start by clearing the shower area of all items. Remove shampoo bottles, conditioner, body wash, loofahs, razors, and any other accessories. This gives you unobstructed access to all wall surfaces. Next, gather your cleaning supplies. You will need a suitable cleaning solution, which could be a homemade mixture or a commercial product, contained in a spray bottle if it’s a liquid. Arm yourself with appropriate tools for scrubbing, such as non-abrasive sponges, soft cloths, microfiber towels, or scrub brushes with varying bristle stiffness depending on your wall material. An old toothbrush or a specialized grout brush is invaluable for cleaning grout lines. For rinsing, your showerhead will suffice, or you can use a bucket of water. Protecting yourself is also crucial. Wear waterproof gloves to shield your hands from cleaning agents and grime. Consider safety glasses to protect your eyes from splashes, especially when using spray cleaners or dealing with strong chemicals. Ensure good ventilation in the bathroom by turning on the exhaust fan, opening a window, or both. This helps to dissipate fumes from cleaning products and aids in drying. Choosing the right cleaner depends on the type of grime you are tackling and the material of your shower walls. For general cleaning and tackling soap scum and mild hard water stains, a solution of equal parts white vinegar and warm water is often effective. The acetic acid in vinegar helps to dissolve soap scum and mineral deposits. For more scrubbing power, particularly on tougher soap scum, a paste made from baking soda and a small amount of water can be used as a mild abrasive. Another popular homemade option involves mixing white vinegar with a squirt of liquid dish soap; the dish soap helps to cut through grease and allows the vinegar to cling better to vertical surfaces. For mold and mildew, hydrogen peroxide can be sprayed directly onto affected areas and allowed to sit. 2.Specific Products For Shower Walls If you opt for commercial cleaners, many products are available, formulated specifically for bathrooms. There are cleaners designed to target soap scum, others for hard water stains, and some that focus on killing mold and mildew. All-purpose bathroom cleaners can also be effective for regular maintenance. Always read the product label carefully, paying attention to the instructions for use, recommended dwell times, and any safety warnings. It is particularly important to check if a commercial cleaner is safe for your specific shower wall material. The material of your shower walls determines the types of cleaning products and tools you can safely use. Ceramic and porcelain tiles are generally very durable and can withstand most cleaning agents and vigorous scrubbing. However, the grout between tiles is porous and can stain or corrode if repeatedly treated with harsh or acidic cleaners. Fiberglass and acrylic shower surrounds are more sensitive; they can be scratched by abrasive cleaners or harsh cleaning tools, such as steel wool or stiff-bristled brushes. For these surfaces, opt for non-abrasive cleaners and soft sponges or cloths. Natural stone tiles, such as marble, granite, limestone or travertine, require special care. These materials are often porous and can be corroded or damaged by acidic cleaners, such as vinegar or lemon juice, as well as harsh alkaline cleaners, such as bleach. For natural stone, it is best to use pH-neutral cleaners that are specifically designed for stone surfaces. Always test any new cleaning product on a small, inconspicuous area first to ensure it won’t damage or discolor the material on your shower walls. 3.Timing The Time Once prepared and with your chosen cleaner ready, you can begin the cleaning process. Start by wetting the shower walls with warm water using the showerhead or a cup. This initial rinse helps to loosen surface dirt and allows the cleaner to adhere more effectively. Next, apply your cleaning solution. If using a spray, apply it generously to all wall surfaces, starting from the top and working your way down. This method prevents streaks and ensures that dirty solution doesn’t run over already cleaned areas. Allow the cleaner to dwell on the walls for the recommended time – this is a critical step. For mild cleaning, 5-10 minutes might be sufficient, but for heavy soap scum or mildew, you may need to let the cleaner sit for 15-30 minutes, or even longer for some commercial products. Dwell time allows the active ingredients in

How to Keep Your Shower Walls Shining – 5 Best Tips You Need to Know Read More »
4 Easy Home Deep Cleaning Tips You Need to Try

4 Easy Home Deep Cleaning Tips You Need to Try Home deep cleaning goes far beyond routine tidying. Where regular cleaning maintains surface-level order, deep cleaning removes accumulated dirt, stubborn grime, bacteria, and hidden allergens that build up over time in every part of a home. It is a methodical, top-to-bottom process that restores a home to its best hygienic condition, and these four tips make it manageable. 1. Deep Clean the Kitchen From Top to Bottom The kitchen needs the most intensive work because grease, food particles, and bacteria collect there. Clean the interior and exterior of major appliances: degrease ovens inside and out, including racks and doors, clean microwaves internally and externally, wipe refrigerator and dishwasher exteriors, and degrease range hoods and their filters. Wipe cabinet exteriors to remove fingerprints and splatters, descale and polish sinks, faucets, and fixtures, sanitize countertops and backsplashes with attention to grout lines, and scrub floors including edges, corners, and under movable appliances. 2. Say No to Mold, Hard Water, and Dust in Bathrooms Bathrooms are high-moisture areas prone to mold, mildew, and soap scum. Scrub showers and bathtubs, including walls, doors, and tracks, to remove soap scum, hard water deposits, and signs of mildew. Disinfect toilets thoroughly, both inside the bowl and on all exterior surfaces, including the base and surrounding floor. Clean and polish sinks, vanities, countertops, and mirrors, and scrub tiles and grout on floors and walls to restore brightness. Dust light fixtures, exhaust fans, and vents, and descale chrome faucets and showerheads. 3. Dust High, Clean Low, and Don’t Skip the Details Work from top to bottom so dust falls onto surfaces you have not cleaned yet. Dust ceiling fans, light fixtures, picture rails, and curtain rods, then move to baseboards, skirting boards, and electrical outlet covers. Vacuum furniture, including under cushions, and move pieces where possible to clean underneath and behind. Wipe window sills, ledges, tracks, and frames, remove cobwebs from ceilings and corners, and clean interior windows and mirrors. Finish with floors: vacuum carpets thoroughly, including edges and high-traffic areas with spot treatment for stains, and mop hard floors with a suitable cleaning solution, paying attention to corners. 4. Call a Professional Home Deep Cleaning Service Professional cleaners bring training, industrial-grade equipment, and specialized solutions that most homes do not have. They work from a detailed checklist so every agreed area is covered consistently, and a full house deep clean can take many hours or even days of strenuous work when done alone. Reputable companies are insured and bonded: Toronto Shine Cleaning carries a $1,000,000 insurance policy plus a $10,000 accidental breakage and surety bond. The process starts with a consultation to define the scope and finishes with a walk-through so you can confirm the results. The CDC’s cleaning and disinfecting guidance explains why removing dirt before disinfecting matters, and Health Canada’s indoor air quality information covers the allergens a deep clean removes. For mold-prone areas, the CDC’s mold resources explain why moisture control is essential. Signs it is time for a home deep cleaning: Persistent musty odors despite regular cleaning Visible dust build-up in corners or on less-disturbed surfaces Grease build-up in the kitchen or hard water stains in the bathroom Allergy symptoms that worsen indoors A big event, move, sale, or renovation on the calendar Room Deep Cleaning Focus Tools That Help Kitchen Appliances, range hood, cabinets, grout, floors Degreaser, microfiber cloths, scrub brush Bathroom Shower, toilet, tiles, grout, fixtures Disinfectant, descaler, grout brush Living areas and bedrooms Ceiling fans, baseboards, furniture, windows Vacuum attachments, extendable duster Whole home Vents, door frames, switches, floors Vacuum, mop, step ladder Make Deep Cleaning a Seasonal Habit Spring and autumn are natural triggers, and many homeowners book an annual or semi-annual deep clean to maintain a consistently high standard, especially before hosting events or after renovations. Once the professionals finish, ongoing regular maid service keeps the baseline high, while a professional home deep cleaning resets the whole house. Review pricing or find your GTA location, then call (647) 424-0355 to book. How often should I deep clean my home? Many homes benefit from a deep clean once or twice a year, typically in spring and autumn. You may want one more often before or after events, when moving in or out, before selling or renting a property, or after renovations. How long does a professional deep clean take? It depends on the size of the home, its initial condition, and the tasks involved. A full house deep clean can take many hours or even days of work, which is why professional teams working from a checklist are faster and more consistent. Is a professional deep cleaning service insured? Reputable companies are insured and bonded. Toronto Shine Cleaning carries a $1,000,000 insurance policy and a $10,000 accidental breakage and surety bond, so you are protected against accidental damage or liability. What is the difference between regular and deep cleaning? Regular cleaning maintains surface-level order: dusting, wiping counters, and tidying. Deep cleaning removes accumulated grease, soap scum, limescale, dust, and allergens from hard-to-reach places such as behind appliances, inside ovens, and along baseboards, and it sanitizes areas that routine cleaning misses.

4 Easy Home Deep Cleaning Tips You Need to Try Read More »

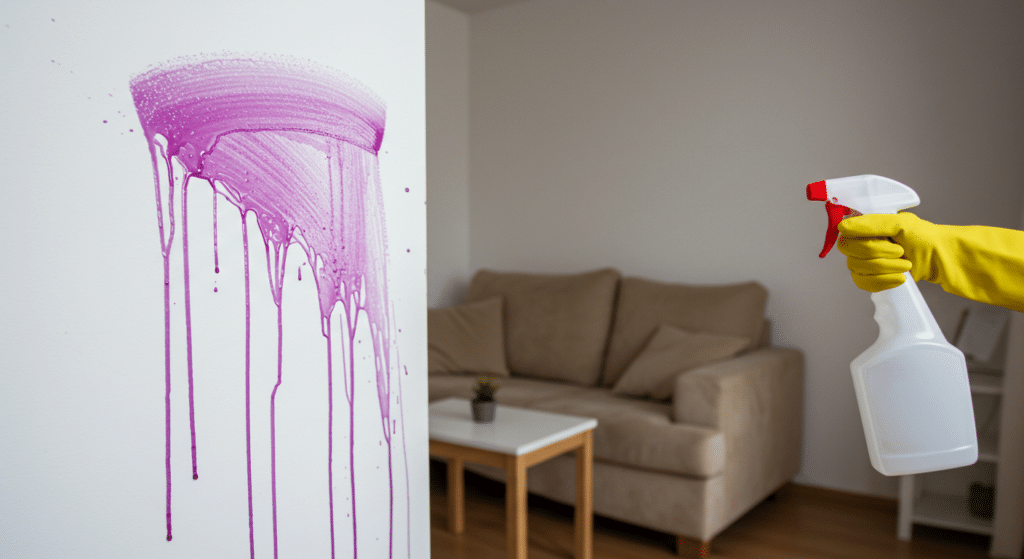
Apartment cleaning mistake, cleaning purple paint spraying a cleaner

7 Common Apartment Cleaning Mistakes and How to Avoid Them

Keeping your apartment clean is essential for a healthy and comfortable living space. However, many people make simple apartment cleaning mistakes that can make the job harder, less effective, or even damaging to surfaces. Here are seven of the most common apartment cleaning mistakes and how to avoid them to keep your home fresh and spotless. 1. Using the Wrong Cleaning Products One of the biggest apartment cleaning mistakes people make is using the wrong products for specific surfaces. Not all cleaners are universal, and using a harsh chemical on delicate materials like wood or marble can cause permanent damage. For example, bleach-based cleaners can discolor granite countertops, while ammonia can strip the finish off wooden furniture. Always read the labels and ensure the cleaner is safe for the surface you are using it on. Another issue with the wrong cleaning products is that some cleaners may leave behind residue that attracts more dirt rather than removing it. Many multi-purpose sprays work well for quick cleans, but they might not be suitable for deep cleaning certain materials. Investing in high-quality, specialized cleaners can make a huge difference in the longevity and cleanliness of your apartment. For a more eco-friendly approach, look for non-toxic cleaners that are safe for both your home and the environment. Many commercial brands now offer plant-based options that effectively clean without harmful chemicals. Choosing the right product ensures your apartment remains fresh without unnecessary wear and tear on your belongings. 2. Skipping High-Touch Areas When cleaning, many people focus on visible areas like floors, countertops, and bathrooms but forget about high-touch surfaces. These areas include light switches, doorknobs, remote controls, and refrigerator handles. Since these spots are used frequently, they accumulate bacteria and germs quickly, making them a hotspot for potential illness. Ignoring these spots is a common apartment cleaning mistake that can compromise your home’s hygiene. To keep your apartment truly clean, make a habit of disinfecting these areas regularly. A simple wipe-down with a disinfectant cloth or spray can go a long way in maintaining a hygienic home. If you’re using reusable cloths, make sure to wash them frequently to prevent bacteria buildup. Especially during flu season or when guests come over, high-touch areas should be cleaned even more often. These small cleaning habits can significantly improve the overall cleanliness of your home and help prevent the spread of germs.     3. Forgetting to Dust Before Vacuuming Many people vacuum first and then dust, thinking they are being efficient. However, dusting after vacuuming can undo all your hard work by allowing dust particles to settle back onto freshly cleaned floors. Dust accumulates on surfaces like shelves, blinds, and furniture, and when disturbed, it becomes airborne, eventually settling on the floor again. This is a common apartment cleaning mistake that leads to more dust buildup. To clean effectively, always dust before you vacuum. Start with higher surfaces, like ceiling fans and shelves, then work your way down. Use a microfiber cloth or a duster that traps dust rather than just spreading it around. This method ensures that any dust that falls to the floor is picked up when you vacuum. In addition to dusting surfaces, don’t forget about vents and baseboards. These areas are often neglected but collect a surprising amount of dust over time. A regular dusting and vacuuming routine will keep your apartment looking fresh and help maintain good air quality. 4. Overloading the Dishwasher Cramming too many dishes into the dishwasher may seem like a time-saver, but it can actually prevent your dishes from getting properly cleaned. When dishes are packed too tightly, water and detergent can’t reach all surfaces, leaving behind food residue and soap buildup. This means you’ll have to rewash items, wasting both time and water. Overloading the dishwasher is another common apartment cleaning mistake that reduces efficiency. Instead, load your dishwasher efficiently by giving dishes enough space for water to circulate. Place larger items on the bottom rack and smaller, more delicate items on the top. If necessary, run two smaller loads instead of overloading one. Additionally, make sure to clean your dishwasher regularly. Food particles and grease can build up over time, reducing efficiency. Running a cleaning cycle with a dishwasher cleaner once a month will help keep it running smoothly and ensure your dishes come out sparkling clean.     5. Using Too Much Cleaning Product It’s common to think that using more cleaning product will make your apartment cleaner, but this is not the case. Overusing cleaning products can leave behind a sticky residue that attracts dirt and dust, making surfaces feel grimy faster than they should. This is one of the most overlooked apartment cleaning mistakes that can actually make your space dirtier. To avoid this mistake, always follow the recommended amount on the product label. Using too much can also make rinsing and wiping more difficult, leading to streaks and buildup. A little goes a long way when it comes to most cleaning solutions. If you notice streaks on glass, floors, or countertops, it may be a sign that you’re using too much product. Try using less and see if it makes a difference in the cleanliness of your space. 6. Ignoring Hidden Areas It’s easy to focus on visible areas like countertops and floors, but hidden spots often accumulate the most dirt. Under furniture, behind appliances, and inside cabinets are some of the most neglected areas in apartment cleaning mistakes. Dust, crumbs, and even mold can build up over time if these areas are ignored. Skipping these hidden areas is a major apartment cleaning mistake that can lead to long-term hygiene issues. Make it a habit to move furniture occasionally and vacuum or sweep underneath. Similarly, clean behind your stove and fridge at least once every few months to prevent grease and food debris from accumulating. Closets and storage areas should also be checked regularly. These spaces can collect dust and clutter, making them harder to clean later. A little

7 Common Apartment Cleaning Mistakes and How to Avoid Them Read More »

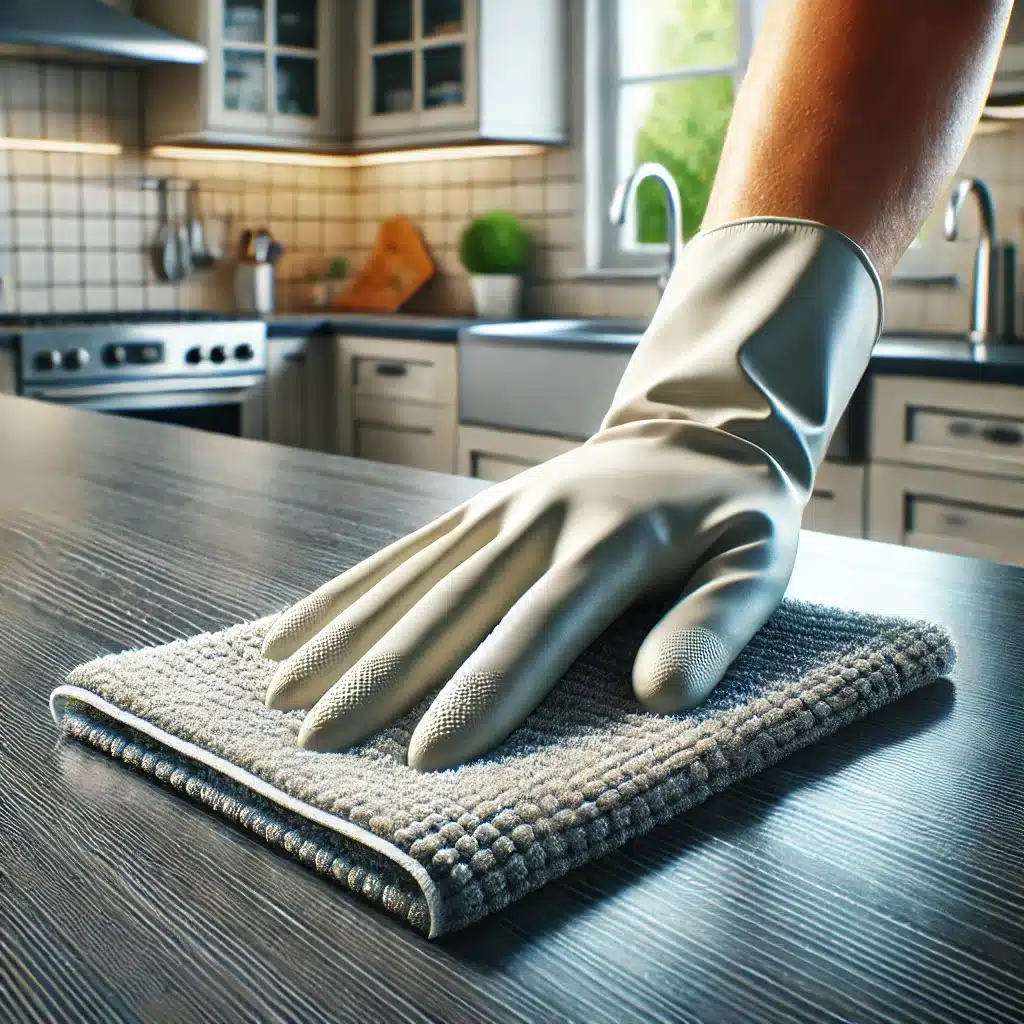
Cleaning countertop from germs with microfiber cloths wearing gloves

Germ-Free Home: 6 Top Cleaning Hacks

Keeping your home germ-free is essential for a healthy living environment. With the right cleaning hacks, you can eliminate bacteria and viruses while maintaining a fresh and spotless home. Here are six top cleaning hacks to keep your space germ-free and hygienic. 1. Disinfect High-Touch Surfaces Daily High-touch surfaces like doorknobs, light switches, countertops, and remote controls harbor germs. Use a disinfectant spray or wipes with at least 70% alcohol to kill bacteria and viruses effectively. Wipe down these surfaces daily to minimize the spread of germs, especially during flu season. Regular disinfection of these areas can significantly reduce the presence of harmful pathogens in your germ-free home. Additionally, consider using disposable wipes or a microfiber cloth designated only for high-touch areas to prevent cross-contamination. Keeping a small bottle of disinfectant near entry points can remind household members to clean surfaces frequently. Be mindful of electronics, using a disinfectant safe for screens when cleaning devices like phones and tablets. Another effective method is incorporating UV sanitizers for objects that are frequently touched but difficult to clean, such as keys and wallets. UV light has been proven to eliminate bacteria and viruses effectively, providing an extra layer of protection for your germ-free household. 2. Use Hydrogen Peroxide for Deep Cleaning Hydrogen peroxide is an excellent disinfectant that eliminates bacteria, mold, and viruses. Pour some into a spray bottle and use it to sanitize kitchen counters, bathroom sinks, and cutting boards. Let it sit for a few minutes before wiping clean for maximum effectiveness. Unlike harsh chemical cleaners, hydrogen peroxide is a safer, non-toxic alternative that is just as effective in maintaining a germ-free home. Besides sanitizing surfaces, hydrogen peroxide is also great for tackling stains and eliminating mildew. It can be used to remove tough stains on white fabrics, clean tile grout, and even disinfect toothbrushes. Simply soak your toothbrush in a small cup of hydrogen peroxide overnight to kill bacteria and ensure a germ-free start every morning. For an added boost, mix hydrogen peroxide with baking soda to create a powerful paste that helps scrub away stubborn grime in the kitchen and bathroom. This combination is highly effective for breaking down grease, whitening surfaces, and leaving your home sparkling clean and germ-free. 3. Steam Clean Your Upholstery and Carpets Soft surfaces like carpets, curtains, and sofas can trap dust, dirt, and bacteria. A steam cleaner helps kill germs and allergens without harsh chemicals. Use steam cleaning regularly to maintain a fresh and germ-free home environment, particularly if you have pets or allergies. The high temperature of steam effectively removes hidden bacteria and dust mites, reducing allergens in your living space. Additionally, using a steam cleaner can help refresh upholstery, making it look and smell new. Steam penetrates deep into fibers, lifting out embedded dirt and neutralizing odors. This is particularly beneficial in homes with pets, as it removes pet dander and eliminates lingering smells while keeping your space germ-free. For an extra layer of protection, consider using a HEPA-filtered vacuum before steam cleaning to remove surface dirt. This ensures that your steam cleaner can focus on deeper sanitation rather than just lifting superficial debris, providing a more thorough and germ-free clean.     4. Keep Your Sponges and Cleaning Cloths Bacteria-Free Kitchen sponges and cleaning cloths can harbor harmful bacteria if not properly maintained. Disinfect sponges by microwaving them for a minute or soaking them in hydrogen peroxide. Wash cleaning cloths frequently in hot water with detergent to keep them germ-free. Using disposable alternatives, such as biodegradable wipes, can also help reduce the risk of spreading germs and maintaining a germ-free home. It’s also a good practice to replace sponges regularly, as they tend to accumulate bacteria over time despite frequent disinfection. Instead of traditional sponges, consider using silicone scrubbers, which are more resistant to bacteria buildup and easier to clean, ensuring a germ-free kitchen. Furthermore, store sponges in a well-ventilated area to dry between uses. A constantly damp sponge is a breeding ground for bacteria, so ensuring proper drying can significantly reduce germ accumulation and keep your cleaning tools effective for longer, helping to maintain a germ-free environment. 5. Sanitize Your Bathroom Regularly Bathrooms are breeding grounds for bacteria and mold. Use a disinfecting cleaner on sinks, toilets, and shower surfaces to prevent germ buildup. Scrub grout with a paste of baking soda and water to remove mold and mildew effectively. Keep your bathroom well-ventilated to reduce moisture buildup, as humidity encourages bacterial growth and makes it harder to maintain a germ-free space. For added protection, consider using a squeegee on shower walls after each use to minimize soap scum and mildew formation. Regularly replace bath mats and towels, washing them in hot water to eliminate germs. Maintaining a clean shower curtain or glass door by wiping it down weekly can also help reduce mold growth and maintain a germ-free bathroom. Using a toilet brush with a built-in disinfecting solution can make cleaning easier and more effective. Consider applying a toilet bowl cleaner that contains bleach to kill bacteria and prevent stains. Small daily efforts can prevent your bathroom from becoming a hotspot for harmful microbes, keeping it fresh and germ-free.     6. Wash Bedding and Towels Frequently Bedding, pillowcases, and towels collect sweat, dead skin, and bacteria over time. Wash them weekly in hot water to kill germs and allergens. Using a high-quality laundry detergent with antibacterial properties ensures your linens stay fresh and germ-free. Adding an extra rinse cycle can help remove any remaining detergent and potential irritants. Pillows and mattresses also need occasional deep cleaning. Using a vacuum with a HEPA filter on your mattress helps remove dust mites and allergens. Additionally, consider using mattress protectors that are machine-washable to reduce exposure to bacteria and ensure a germ-free sleeping environment. For an extra layer of freshness, line-drying your bedding in the sun can naturally kill bacteria and dust mites. The UV rays from the sun have disinfecting properties, making air-drying an effective, chemical-free way

Germ-Free Home: 6 Top Cleaning Hacks Read More »

Elegant room interior with gleaming, sparkling plywood floors.

How to Keep Your Home Comfortable: Controlling Humidity from Basement to Attic 101

Keep Your Home Comfortable isn’t just about adjusting the thermostat; it involves maintaining the right balance of humidity throughout your home, from the basement to the attic. Too much moisture can make your home feel stuffy and can lead to mold and mildew issues, while too little can cause dry skin and respiratory problems. Let’s dive into how you can control humidity levels across different areas of your home, ensuring a comfortable living environment year-round. In the Basement: Combat Moisture at Its Source Basements often bear the brunt of humidity issues in a home due to their below-ground location, making them inherently prone to dampness and mustiness. Addressing humidity in the basement is crucial not only for the comfort and usability of the space itself but also for the overall air quality and structural integrity of your entire home. Here are some effective strategies to keep your basement dry and comfortable: Deploying a Dehumidifier is among the most direct and effective methods to manage moisture levels in your basement. A high-quality dehumidifier can significantly reduce humidity, making the air feel cooler and more comfortable while also preventing the growth of mold and mildew, which thrive in moist environments. It’s important to choose a dehumidifier that is appropriately sized for your basement area and to empty the collected water regularly to ensure it continues to operate efficiently. Sealing Leaks plays a pivotal role in moisture control. Basements are particularly vulnerable to water seepage due to their proximity to the ground. This moisture can enter through cracks in the foundation walls or floor, contributing to the overall humidity level of the space. Regular inspections can help identify any new cracks or leaks early on. Once found, these should be sealed with appropriate waterproofing materials. Not only does this prevent moisture from entering, but it also contributes to the structural health of your home. Improving Drainage around your property is essential to divert water away from your foundation, preventing it from collecting around your home and eventually finding its way into your basement. This might involve regrading the soil around your home’s foundation to slope away from the house, ensuring that downspouts extend several feet from the house, and keeping gutters clean and free of debris. These measures help to ensure that rainwater and melting snow are directed away from your home, reducing the likelihood of it seeping into the basement. Additionally, Ventilating the Space effectively can aid in reducing moisture levels. If your basement has windows, opening them during dry, sunny days can help lower humidity by allowing fresh air to circulate. For basements without windows, installing a ventilation system or using fans can help move air through the space, preventing it from becoming stagnant and moist. Finally, consider the Use of Waterproofing Paints and Sealants on interior basement walls and floors. These products can provide an additional layer of protection against moisture, preventing it from seeping through the porous concrete and into your basement. While not a solution for major leaks or flooding, they can be effective for controlling dampness and condensation.     On the Main Floors: Maintain a Balanced Environment Maintaining a balanced environment in the living areas of your home, where humidity levels are kept between 30% and 50%, is vital for both comfort and health. Achieving this balance involves a combination of techniques that manage moisture and ensure a pleasant living space. Ventilating your space effectively is key. Kitchens and bathrooms are hotspots for humidity, thanks to activities like cooking, dishwashing, and showering. Utilizing exhaust fans in these areas can significantly help in mitigating moisture accumulation. These fans work by pulling the humid air out of your home, preventing it from circulating and settling in your living spaces. Ensuring that these fans vent outside and not just into your attic or another room is crucial for this strategy to be effective. Incorporating houseplants into your decor can also play a role in humidity control. Certain plants have the natural ability to absorb moisture from the air through a process known as transpiration. By placing these plants around your home, you can harness this natural process to help regulate indoor humidity levels. Not only do these plants help in controlling moisture, but they also add to the aesthetic appeal of your space and improve air quality by removing toxins. Leveraging your air conditioning system is another effective way to manage humidity. Air conditioners don’t just cool the air; they also remove moisture as part of the cooling process. Running your air conditioning system during hot, humid days can help maintain a comfortable indoor climate, reducing humidity levels. It’s important to keep your air conditioning unit well-maintained, ensuring that filters are clean and the system is functioning efficiently for optimal moisture removal. Furthermore, strategic use of fans can assist in maintaining a balanced environment. Ceiling fans or standing fans improve air circulation, helping to distribute and mix the air evenly throughout your living spaces. This doesn’t directly reduce humidity but can make the environment feel cooler and more comfortable by facilitating the evaporation of moisture on the skin. Regular maintenance of indoor fabrics also contributes to a balanced humidity level. Upholstery, drapes, and carpets can absorb moisture, affecting the overall humidity level of your home. Cleaning and vacuuming these materials regularly can help minimize their moisture retention, contributing to a more balanced indoor environment. Managing activities that produce moisture is crucial. Simple changes like covering pots while cooking to reduce steam, taking shorter showers, and drying clothes outdoors or in a well-ventilated area can significantly reduce indoor humidity levels. In the Attic: Prevent Excess Moisture Build-Up The attic is a critical area in your home when it comes to controlling temperature and humidity. Due to its location, the attic is subject to wide fluctuations in both, which can significantly impact the overall comfort and air quality of your living spaces below. Managing humidity in the attic is essential for preventing structural damage, mold growth, and inefficient energy use

How to Keep Your Home Comfortable: Controlling Humidity from Basement to Attic 101 Read More »

Homemade natural cleaning solutions displayed on a sunny kitchen countertop.

How to Refresh Your Home: 5 Essential Oil Recipes for Natural Cleaning

Hey there! Ready to give your home that Essential Oil Recipes for Natural Cleaning? inviting vibe without resorting to harsh chemicals? Let’s dive into the world of essential oils and whip up some natural cleaning solutions that not only cleanse but also leave your space smelling divine. Essential oils are not just about the aroma; they come packed with powerful cleaning properties too. Here are 5 essential oil recipes to refresh your home naturally: 1. All-Purpose Lemon Lavender Cleaner Let’s expand further on the All-Purpose Lemon Lavender Cleaner with a detailed breakdown that highlights each component and step in the process, providing you with a deeper understanding and appreciation for this natural, aromatic cleaner: 1 cup of water: Acts as the base for the cleaner, diluting the vinegar and essential oils to make them safe for use on various surfaces. Water helps in spreading the cleaning solution evenly. 1 cup of white vinegar: A powerful natural disinfectant, vinegar cuts through grease, grime, and dirt with ease. Its acidic nature makes it effective against bacteria and viruses, ensuring your surfaces are not just clean but sanitized. 15 drops of lemon essential oil: Known for its refreshing scent and strong antibacterial properties, lemon essential oil is a key ingredient in combating kitchen messes and brightening surfaces. It leaves behind a clean, invigorating aroma that uplifts the mood. 15 drops of lavender essential oil: Adds a calming, floral scent to the mix, transforming cleaning into a more pleasant, stress-free experience. Lavender’s natural antiseptic properties complement the lemon and vinegar, enhancing the cleaner’s effectiveness. A spray bottle: The perfect container for your homemade cleaner, making it easy to mix, store, and use. A spray bottle allows for convenient application, ensuring you cover the desired areas with just the right amount of cleaner. How to Make It: Begin by pouring water, vinegar, and the carefully measured drops of essential oils directly into your spray bottle. This method ensures that the blend achieves a harmonious balance, maximizing both the cleaning capabilities and the aromatic benefits of the ingredients. Given the natural tendency of essential oils to separate from the vinegar and water mixture, it’s crucial to give the bottle a good shake prior to each use. This step guarantees that the oils are evenly dispersed throughout the solution, allowing for consistent application and effectiveness. When it comes to using this cleaner, its versatility truly shines. Designed for hard, non-porous surfaces, it works wonders on countertops, kitchen tables, appliances, and bathroom fixtures. The application process couldn’t be simpler: just spray the mixture onto the surface in question and wipe it down with a cloth or sponge to achieve a clean and shining finish. The benefits of this homemade cleaner extend far beyond its surface-cleaning prowess. The lemon essential oil and vinegar join forces to offer robust antibacterial and antiviral properties, forming a formidable barrier against the spread of common household germs. Meanwhile, the lavender essential oil envelops your space in its calming scent, transforming routine cleaning into a more pleasant and stress-relieving activity. This concoction is not only effective but also non-toxic and eco-friendly, ensuring it’s a safe choice for homes with children, pets, and a preference for green living solutions. 2. Peppermint Window and Mirror Cleaner Diving into the Peppermint Window and Mirror Cleaner, let’s unfold each element and the crafting process that combines to form a sparkling, pest-repellent marvel for your glass surfaces: 1 ½ cups of water: Serves as the foundation of this cleaner, effectively diluting the vinegar and essential oil to ensure they’re gentle yet effective on glass surfaces. Water facilitates the even distribution of the cleaning mixture, ensuring a streak-free shine. ½ cup of white vinegar: This ingredient is a cleaning powerhouse, renowned for its ability to dissolve grime, combat streaks, and leave a crystal-clear finish. Its natural acidity is hostile to germs, making it an excellent disinfectant for windows and mirrors. 10 drops of peppermint essential oil: Far more than a fresh scent, peppermint oil is a natural deterrent against spiders and ants. Its inclusion turns this cleaner into a dual-threat against dirt and unwanted critters, leaving behind a refreshing minty aroma that revitalizes your home environment. A spray bottle: An essential tool for this homemade concoction, the spray bottle ensures easy mixing, storage, and application. It allows for a fine mist that evenly coats windows and mirrors without over-saturating them, making your cleaning efforts more efficient and effective. How to Make It: Initiate the process by combining the water and white vinegar in your spray bottle, followed by the peppermint essential oil. This preparation strategy ensures a well-balanced mix, leveraging the cleaning strength and aromatic benefits of the components in equal measure. Because essential oils can separate from their water and vinegar base, a vigorous shake before use is imperative. This action guarantees the essential oil’s thorough integration, offering consistent cleaning power and fragrance with every spray. In application, the Peppermint Window and Mirror Cleaner shines with versatility. It’s specifically formulated for use on glass, making it your go-to for leaving windows and mirrors without smudges or streaks. Simply spray a light coating on the glass surface and wipe away with a cloth or sponge for an immediate gleam. But the advantages of this homemade cleaner go beyond mere aesthetics. The peppermint essential oil’s inclusion serves a dual purpose, not only imparting a clean, uplifting scent but also acting as a natural repellant against common household pests like spiders and ants. Additionally, the non-toxic and environmentally friendly nature of this cleaner makes it a safe and responsible choice for households, ensuring cleanliness doesn’t come at the cost of health or the planet. Equally effective in enhancing the ambiance of your living space, the Peppermint Window and Mirror Cleaner introduces a minty freshness that can energize and refresh. This blend doesn’t just clean; it transforms the act of cleaning into an enjoyable, beneficial task. Its utility extends across the home, from living room windows to bathroom mirrors, making it an

How to Refresh Your Home: 5 Essential Oil Recipes for Natural Cleaning Read More »

Sparkling clean bathroom drain amid glossy tiles.

7 Easy Tips for Keeping Your Bathroom Drain Sparkling Clean

A Bathroom Drain Sparkling Clean: that unsung hero of plumbing that we only notice when it’s too late and we’re standing in an unexpected puddle during our shower. Keeping it sparkling clean not only saves us from waterlogged feet but also keeps our bathroom smelling fresh and functioning well. Here are seven simple, yet super effective tips to keep your bathroom drain not just clear, but sparkling clean! 1. Boiling Water This simple yet powerful cleaning hack doesn’t require any fancy equipment or harsh chemicals, making it an eco-friendly choice for those of us looking to maintain our homes in a more sustainable way. To get the most out of this method, consider making it a regular part of your weekly bathroom maintenance. For instance, you could choose a specific day of the week to “boil the troubles away.” However, it’s important to exercise caution with this method, especially around bathroom fixtures made of delicate materials like porcelain. These can be susceptible to damage from sudden temperature changes. To mitigate this risk, you can pour the boiling water directly into the drain rather than letting it splash over the surrounding areas. Alternatively, if your sink or tub is particularly sensitive, consider using very hot water from the tap instead of boiling water to avoid any potential damage. For those hard-to-reach areas or stubborn buildup, you might follow up the boiling water with a plunger or a plumber’s snake to ensure everything is flowing smoothly. This one-two punch is often enough to keep your drains clear and functional without resorting to harsh chemicals or professional intervention. 2. Daily Flushing with Cold Water While it may seem counterintuitive, especially after discussing the benefits of boiling water, flushing your bathroom drain with cold water on a daily basis can also contribute significantly to keeping it clear and clean. Cold water, especially after using the sink or shower, can help solidify and flush away any residual oils or products that have been used. These substances, which might include hair conditioners, body oils, or shaving creams, often cling to the sides of pipes when they’re in their warmer, more viscous state. By running cold water through the drain for a minute or so, you’re essentially helping to harden these residues. This practice is particularly useful after shaving or washing hair in the sink, as it helps ensure that loose hairs are fully flushed away rather than getting caught in the drain. Over time, this can reduce the likelihood of clogs forming, maintaining a smoother flow of water through your pipes. Incorporating this simple step into your daily routine requires minimal effort but can have a meaningful impact on the maintenance of your bathroom’s plumbing. It’s an easy, yet effective strategy to complement the more intensive cleaning measures, ensuring that your bathroom drain remains as clear and functional as possible. 3. Old Toothbrush Beyond just the practicality, repurposing old toothbrushes for cleaning tasks is a nod towards environmental sustainability. Instead of contributing to landfill waste by throwing them away, you’re giving them a second life. This approach aligns with eco-friendly cleaning practices, emphasizing reuse and reducing waste without compromising on cleanliness. To effectively use an old toothbrush for cleaning your drain, start by dipping it in a cleaning solution. The liquid will help dissolve the grime, while the mechanical action of the toothbrush bristles works to scrub it away. For tougher buildup, consider using the toothbrush in conjunction with a plunger or drain snake for a comprehensive clean. The toothbrush’s design, initially intended for meticulous dental hygiene, translates well to meticulous home hygiene. Its handle offers a comfortable grip for sustained scrubbing sessions, while the varied bristle lengths typically found on toothbrushes can reach uneven surfaces within the drain area. Regular use of an old toothbrush for cleaning around the drain cover and inside visible parts of the drain can significantly reduce the likelihood of clogs forming. By incorporating this simple tool into your cleaning arsenal, you’re not just taking care of your home in an effective manner; you’re also doing your part for the planet by reusing and recycling what might otherwise be considered waste.     4. Hair Catcher This straightforward yet effective device is designed to fit snugly over the drain, trapping hair, soap scum, and any other debris that could potentially lead to blockages. By capturing these elements before they have a chance to enter your plumbing system, a hair catcher significantly reduces the risk of clogs forming deep within the pipes. The beauty of using a hair catcher lies in its simplicity and ease of use. Installation typically requires no tools or plumbing expertise; you simply place it over or inside your drain. Despite its simple design, the impact on your drain’s health and functionality is profound. With this guardian in place, water continues to flow freely, and the need for chemical cleaners or professional plumbing services can be drastically reduced. Regular maintenance of your hair catcher is crucial to ensure its effectiveness. This involves a simple routine of removing the catcher, discarding the collected debris, and giving it a quick clean. Depending on your household’s needs, this could be a weekly task, ensuring that the catcher remains efficient at trapping debris without impeding water flow. For an even deeper clean, soaking the hair catcher in a vinegar solution can help dissolve any soap residue or buildup, keeping it in top condition. Investing in a hair catcher is a proactive step towards sustainable home maintenance. Not only does it save you the hassle and expense of dealing with clogs, but it also reduces the need for potentially harmful chemical drain cleaners, aligning with eco-friendly cleaning practices. Moreover, the hair catcher’s longevity and reusability make it an economical choice, offering lasting protection for your drains with minimal environmental impact. 5. Professional Drain Cleaner The chemical composition of many professional drain cleaners allows them to power through tough blockages, but this potency also means they can be quite harsh on your plumbing

7 Easy Tips for Keeping Your Bathroom Drain Sparkling Clean Read More »

5 Surprising Ways How Bleach Can Transform Your Cleaning Routine

Curius about how bleach can transform your cleaning routine? Bleach it’s the trusty old friend in the cleaning cupboard that’s been zapping germs and brightening whites longer than we can remember. But there’s more to this household staple than meets the eye. Let’s dive into 5 surprising ways bleach can revolutionize your cleaning routine, making your home sparkle and keeping it germ-free. Get ready to give your cleaning regimen a bleach boost! 1. Sanitizing Cutting Boards and Countertops Using bleach isn’t just about maintaining cleanliness; it’s about safeguarding your family’s health. A simple solution of bleach diluted in water transforms into a potent weapon against the spread of foodborne illnesses. It’s effective, easy to make, and incredibly cost-efficient. Plus, this method isn’t just limited to your cutting boards and countertops. You can extend this cleaning routine to other areas of your kitchen, such as appliance handles, sink faucets, and even the interior of your refrigerator, where spills and contaminants can also reside. Moreover, the peace of mind that comes from knowing your kitchen surfaces are truly clean is invaluable. After preparing a meal, especially with raw ingredients, giving your countertops and cutting boards a quick cleanse with the bleach solution can make all the difference. It’s a simple step that integrates seamlessly into your cleanup routine but has a profound impact on the overall hygiene of your cooking space. The key to effective disinfection is in the details-allowing the bleach solution to sit for a few minutes maximizes its germ-killing power. However, it’s crucial to rinse the surfaces thoroughly with water afterward to ensure no bleach residue is left behind, especially on areas that will come into contact with food. 2. Reviving Old Grout Grout, being porous, can absorb dirt and grime over time, leading to a dull and discolored appearance that can really make your tiles look tired and worn out. This is where bleach, with its potent whitening and disinfecting properties, combined with the gentle abrasive action of baking soda, comes into play, offering a perfect solution to this common problem. When you apply this bleach-based paste to the grout, it begins a deep-cleaning process that not only tackles the surface grime but also penetrates slightly to lift out the deeper, stubborn stains. This is particularly effective in areas prone to moisture, like bathrooms and kitchens, where mold and mildew can also take hold. The bleach works to kill these spores, preventing their return, while the baking soda scrubs away the last traces of dirt, restoring the grout’s original color. The process of reviving your grout with this method is not only satisfying but also significantly cost-effective compared to professional cleaning services or the daunting task of re-grouting. Plus, it offers an immediate lift to the entire room, making your tiles pop and giving the space a cleaner, more inviting appearance. For those concerned about using bleach, it’s worth noting that when used responsibly and in the correct dilutions, it’s a safe and highly effective cleaning agent. Always ensure the room is well-ventilated and wear gloves to protect your hands during the process. After applying the paste and allowing it to sit, scrubbing with a brush provides the manual action needed to break up and lift away the years of dirt accumulation. This step is crucial, as the physical action of scrubbing works in tandem with the chemical cleaning properties of the paste to ensure your grout is thoroughly cleansed. Rinsing well after scrubbing is just as important to ensure that no residue is left behind. This final step not only removes any leftover cleaning solution but also any loosened grime, revealing the true beauty of your grout. It’s like peeling back a layer of time to reveal the fresh, clean lines that once defined your tiled surfaces.     3. Disinfecting Trash Cans The moist environment of a garbage bin, combined with organic waste, creates the perfect conditions for germs to thrive and multiply. This not only poses a health risk but can also make your home or workspace feel less clean and welcoming. Utilizing a bleach solution to clean your bins is an efficient way to tackle these issues head-on. Bleach, known for its powerful disinfecting properties, annihilates bacteria, viruses, and fungi, ensuring that your trash cans are not just visually clean but hygienically clean as well. This method goes beyond surface cleaning by providing a deep cleanse that regular soap and water can’t achieve, effectively reducing the risk of contamination and illness in your home. The deodorizing effect of bleach is another significant advantage. Odors in trash cans are often the result of bacterial decomposition of organic waste. By killing these bacteria, bleach directly targets the source of the smell, rather than just masking it. This leaves your bins with a neutral scent, contributing to a cleaner and more pleasant environment around your home or office. The process itself is simple yet requires attention to safety and effectiveness. Diluting bleach with water in the right proportions is crucial to ensure it is strong enough to disinfect but not so potent that it damages your bins or poses a risk to your health. Always wearing gloves and ensuring good ventilation during the process protects you from the harsh effects of bleach on skin and lungs. After treating the bins with the bleach solution, allowing them to air dry is a critical step. This drying process helps to evaporate any remaining bleach solution, minimizing residue and ensuring that the disinfectant has time to act thoroughly. Plus, the sun’s UV rays can aid in the disinfection process, offering an additional natural sanitizing effect. 4. Deep-Cleaning Mold and Mildew Mold and mildew aren’t just unsightly; they can also cause health problems, especially for those with allergies, asthma, or other respiratory issues. These fungi thrive in damp, warm environments, making bathrooms, kitchens, and basements their favorite haunts. By using bleach to clean these areas, you’re not just removing the visible signs of mold and mildew; you’re also killing the

5 Surprising Ways How Bleach Can Transform Your Cleaning Routine Read More »

Wet shower tiles in bathroom

5 Quick and Easy Ways to Remove Soap Scum from Shower Tiles

How to Remove Soap Scum from Shower Tiles: 5 Quick and Easy Ways Soap scum is the cloudy, streaky film that builds up on shower tiles when soap mixes with hard water minerals and body oils. It is one of the most common bathroom frustrations in Toronto, where hard water makes the buildup worse. The good news: you do not need harsh chemicals to beat it. These five methods use things you probably already own, plus a few store-bought options, to leave your tiles sparkling. Whichever method you choose, test it on a small, hidden section of tile first. 1. White Vinegar and Water Mix equal parts white vinegar and water in a spray bottle. Spray the tiles generously and let the solution sit for about 10 minutes so the acid can break down the scum. Scrub lightly with a non-abrasive brush or sponge, then rinse with water. The difference is immediate, and the solution is gentle on tile finishes. For stubborn rings along the waterline, spray the vinegar solution onto a cloth, wrap it around the area, and let it sit for a few minutes before scrubbing. 2. Baking Soda Paste Mix baking soda with a little water until it forms a thick, frosting-like paste. Spread it over the tiles, scrub gently in circular motions with a soft brush or sponge, and rinse. Baking soda’s fine grit lifts the scum without scratching, and it is a great option if you want to avoid chemical smells entirely. 3. Commercial Shower Cleaners Store-bought bathroom cleaners are formulated to dissolve soap scum quickly. Spray, follow the label’s dwell time, and rinse. Two safety rules matter: Keep the bathroom ventilated: open a window or run the exhaust fan while you clean. Never mix cleaning products. The Canadian Centre for Occupational Health and Safety warns that mixing bleach with other cleaners can produce toxic gases, and Health Canada’s household chemical safety guide gives the same warning: never mix bleach with other products. 4. Lemon Oil for a Streak-Free Finish After cleaning with any method, put a few drops of lemon oil on a soft cloth and wipe the tiles down. The oil cuts through remaining water marks and streaks, leaves a light citrus scent, and adds a subtle sheen that makes the whole bathroom feel fresh. 5. Dish Soap and Warm Water Dish soap is designed to cut grease, and soap scum is exactly that: oily residue. Mix a few drops of dish soap with warm water in a spray bottle, spray the tiles, let it sit for a few minutes, scrub gently, and rinse. This method is mild, safe for all tile types, and leaves no harsh chemical smell. Warm water helps the soap dissolve evenly, and the same mix works on glass shower doors, not just tiles. Method Supplies Best For Vinegar and water Spray bottle, white vinegar Everyday buildup on glazed tiles Baking soda paste Baking soda, water Stubborn spots, chemical-free households Commercial cleaner Store-bought spray Quick results on heavy scum Lemon oil Soft cloth, lemon oil Streaks and finishing shine Dish soap and water Dish soap, spray bottle Gentle regular maintenance Stop Soap Scum Before It Starts Prevention beats scrubbing: Squeegee the tiles after every shower, it takes 20 seconds. Run the exhaust fan during and after showers to lower humidity. Use liquid soap instead of bar soap, which leaves more residue. Clean the shower weekly so buildup never gets a chance to set. Give the tiles a quick 30 second rinse after each shower to wash away fresh soap residue before it dries into film. Keeping moisture in check matters beyond looks: the CDC notes that mould grows wherever there is moisture, so a well-ventilated bathroom protects your health as well as your tiles. When to Bring in the Pros If scum has built up for months, or you are moving out of a Toronto rental and need the bathroom to pass inspection, professional help saves the day. Toronto Shine Cleaning offers deep cleaning services that tackle showers, grout, and tile, move-in and move-out cleaning for tenants and landlords, and regular residential cleaning to keep bathrooms fresh between deep cleans. Clients rate us 4.9 out of 5 on Google, as you can see on our reviews page. Call 647-424-0355 to book. Is vinegar safe on all shower tiles? Vinegar is safe on glazed ceramic and porcelain tile, but avoid it on natural stone like marble, limestone, and travertine, since acid can etch the surface. Use dish soap or a stone-safe cleaner on those materials. Why does soap scum keep coming back? Soap scum returns because soap residue combines with hard water minerals every time you shower. Daily squeegeeing, weekly cleaning, and running the exhaust fan all slow the buildup significantly. Can I mix vinegar and baking soda for soap scum? Mixing them creates foam but mostly neutralizes both, so the cleaning power is weaker than using either one alone. Use them separately: vinegar first, then a baking soda paste for stubborn spots. How often should I clean my shower tiles? A quick wipe or squeegee daily, plus one weekly clean with your preferred method, keeps scum from building up. Monthly deep cleaning of grout and corners prevents the toughest buildup.

5 Quick and Easy Ways to Remove Soap Scum from Shower Tiles Read More »

Brick grout, wall grout

5 Easy How-To Tips for Effectively Cleaning Grout

5 Easy How-To Tips for Effectively Cleaning Grout Grout has a way of aging a whole room. The tile may be spotless, but dark, grimy lines make a bathroom or kitchen floor look tired no matter how much you mop. Because grout is porous, it absorbs whatever touches it: soap scum, hard water minerals, grease, and moisture that feeds mildew. The five methods below move from gentle to heavy duty, and together they cover almost every grout problem a Toronto home can throw at you. Your Grout Cleaning Kit Everything on this list is inexpensive, and most of it is already in your home: An old toothbrush or small scrub brush with stiff bristles Baking soda and white vinegar A bottle of hydrogen peroxide A spray bottle and a few microfiber cloths Rubber gloves to protect your hands Tip 1: Start with a Baking Soda Paste Baking soda is slightly abrasive, so it scrubs away surface stains without scratching the tile, and it doubles as a natural deodorizer for musty smells. Mix a few tablespoons with just enough water to make a thick paste, then apply it along the grout lines with gloved fingers, a small spatula, or the toothbrush. Let it sit for at least 10 minutes, or up to an hour for stubborn grime, so it can penetrate the pores and draw the dirt out. Scrub in a circular motion, spritzing a little water if the paste dries out, then rinse. It is safe for homes with kids, pets, or anyone sensitive to strong products. Tip 2: Spray Vinegar on Soap Scum and Hard Water Vinegar’s natural acidity breaks down the set-in film that makes grout look aged, especially soap scum and hard water stains. Combine equal parts white vinegar and warm water in a spray bottle, coat the lines generously, and give it a few minutes of dwell time, up to 10 minutes on tough spots. Scrub back and forth with the brush, rinse with clean water, and the grout should look noticeably brighter. One caution: never combine vinegar with bleach or chlorine products, and keep bleach-based cleaners strictly separate. Mixing them produces toxic gas, which is exactly the kind of hazard Health Canada covers in its household chemical safety guidance. Tip 3: Bring In Hydrogen Peroxide for Stains and Mildew For discoloration that survives vinegar, hydrogen peroxide is the stain buster. Its bleaching and disinfecting action works directly on mold and mildew in damp areas. Pour or spray it straight onto the lines for general discoloration, or mix it with baking soda into a fizzy paste for the stubborn cases; the reaction helps lift the stain while the soda adds gentle abrasion. Let it work for several minutes, up to 30 for deep stains, then scrub and rinse thoroughly so no residue remains to attract fresh dirt. A second application usually finishes what the first one started. Tip 4: Steam the Grout Clean Steam cleaning is the chemical free option that also sanitizes. High temperature steam penetrates deep into the porous surface, loosening embedded grime, and it kills most bacteria, mold, and mildew on contact. Since water is the only ingredient, it is a smart choice for households worried about indoor air quality or chemical residues, which can actually attract more dirt over time. Most machines sell grout attachments that direct the steam along the lines; move slowly, then wipe the loosened dirt away as you go. Tip 5: Seal the Grout So It Stays Clean Sealer is the step most people skip, and it is the reason grout gets dirty again so fast. A quality sealer forms a protective barrier that repels spills, steam, and foot traffic instead of letting them soak in. Start with grout that is completely clean and dry, since anything trapped under the sealer causes problems later. Choose a water based or solvent based formula that suits your tile and the room’s moisture level, apply it along the lines with a small brush, roller, or applicator bottle, and keep it off the tile faces. Let it dry per the manufacturer’s instructions, and plan on a second coat for showers and other high moisture areas. Method Best For Dwell Time Baking soda paste Surface dirt and light stains 10 to 60 minutes Vinegar spray Soap scum and hard water marks 5 to 10 minutes Hydrogen peroxide Mold, mildew, deep stains Up to 30 minutes Steam Sanitizing without chemicals Pass by pass, then wipe Sealer Preventing the next round of stains Dry per label, cure before use Grout Cleaning FAQs Why does grout get so much dirtier than tile? Tile surface is dense and glassy, while grout is porous, so it absorbs spills, oils, and moisture instead of letting them wipe away. That is why the same spill beads on tile but stains the line beside it, and why sealing makes such a difference. How often should I clean my grout? Wipe the lines with your regular bathroom or kitchen routine weekly, and run a baking soda or vinegar treatment monthly in wet areas. Deep treatments and resealing are worth doing a couple of times a year, or whenever the lines start darkening again. If I use bleach on moldy grout, anything to know? Yes: ventilate the room, wear gloves, follow the label, and never let bleach meet vinegar, ammonia, or other cleaners. Health Canada’s guidance above and the CDC’s bleach safety page both stress that combination risks. Used carefully, bleach products can disinfect, but they are rarely necessary after peroxide. When is professional grout cleaning worth it? When stains survive all five methods, when mildew keeps returning despite real effort, or when the area is simply too large to tackle on your hands and knees. Professionals bring commercial steam equipment and the right sealers, which resets the surface completely. Fresh Lines Without the Weekend Lost These five tips will handle the majority of grout problems, but some jobs deserve professional gear and hands. Toronto Shine Cleaning’s deep cleaning service restores tiles

5 Easy How-To Tips for Effectively Cleaning Grout Read More »