Pet cleaning

4 Easy Home Deep Cleaning Tips You Need to Try

4 Easy Home Deep Cleaning Tips You Need to Try Home deep cleaning goes far beyond routine tidying. Where regular cleaning maintains surface-level order, deep cleaning removes accumulated dirt, stubborn grime, bacteria, and hidden allergens that build up over time in every part of a home. It is a methodical, top-to-bottom process that restores a home to its best hygienic condition, and these four tips make it manageable. 1. Deep Clean the Kitchen From Top to Bottom The kitchen needs the most intensive work because grease, food particles, and bacteria collect there. Clean the interior and exterior of major appliances: degrease ovens inside and out, including racks and doors, clean microwaves internally and externally, wipe refrigerator and dishwasher exteriors, and degrease range hoods and their filters. Wipe cabinet exteriors to remove fingerprints and splatters, descale and polish sinks, faucets, and fixtures, sanitize countertops and backsplashes with attention to grout lines, and scrub floors including edges, corners, and under movable appliances. 2. Say No to Mold, Hard Water, and Dust in Bathrooms Bathrooms are high-moisture areas prone to mold, mildew, and soap scum. Scrub showers and bathtubs, including walls, doors, and tracks, to remove soap scum, hard water deposits, and signs of mildew. Disinfect toilets thoroughly, both inside the bowl and on all exterior surfaces, including the base and surrounding floor. Clean and polish sinks, vanities, countertops, and mirrors, and scrub tiles and grout on floors and walls to restore brightness. Dust light fixtures, exhaust fans, and vents, and descale chrome faucets and showerheads. 3. Dust High, Clean Low, and Don’t Skip the Details Work from top to bottom so dust falls onto surfaces you have not cleaned yet. Dust ceiling fans, light fixtures, picture rails, and curtain rods, then move to baseboards, skirting boards, and electrical outlet covers. Vacuum furniture, including under cushions, and move pieces where possible to clean underneath and behind. Wipe window sills, ledges, tracks, and frames, remove cobwebs from ceilings and corners, and clean interior windows and mirrors. Finish with floors: vacuum carpets thoroughly, including edges and high-traffic areas with spot treatment for stains, and mop hard floors with a suitable cleaning solution, paying attention to corners. 4. Call a Professional Home Deep Cleaning Service Professional cleaners bring training, industrial-grade equipment, and specialized solutions that most homes do not have. They work from a detailed checklist so every agreed area is covered consistently, and a full house deep clean can take many hours or even days of strenuous work when done alone. Reputable companies are insured and bonded: Toronto Shine Cleaning carries a $1,000,000 insurance policy plus a $10,000 accidental breakage and surety bond. The process starts with a consultation to define the scope and finishes with a walk-through so you can confirm the results. The CDC’s cleaning and disinfecting guidance explains why removing dirt before disinfecting matters, and Health Canada’s indoor air quality information covers the allergens a deep clean removes. For mold-prone areas, the CDC’s mold resources explain why moisture control is essential. Signs it is time for a home deep cleaning: Persistent musty odors despite regular cleaning Visible dust build-up in corners or on less-disturbed surfaces Grease build-up in the kitchen or hard water stains in the bathroom Allergy symptoms that worsen indoors A big event, move, sale, or renovation on the calendar Room Deep Cleaning Focus Tools That Help Kitchen Appliances, range hood, cabinets, grout, floors Degreaser, microfiber cloths, scrub brush Bathroom Shower, toilet, tiles, grout, fixtures Disinfectant, descaler, grout brush Living areas and bedrooms Ceiling fans, baseboards, furniture, windows Vacuum attachments, extendable duster Whole home Vents, door frames, switches, floors Vacuum, mop, step ladder Make Deep Cleaning a Seasonal Habit Spring and autumn are natural triggers, and many homeowners book an annual or semi-annual deep clean to maintain a consistently high standard, especially before hosting events or after renovations. Once the professionals finish, ongoing regular maid service keeps the baseline high, while a professional home deep cleaning resets the whole house. Review pricing or find your GTA location, then call (647) 424-0355 to book. How often should I deep clean my home? Many homes benefit from a deep clean once or twice a year, typically in spring and autumn. You may want one more often before or after events, when moving in or out, before selling or renting a property, or after renovations. How long does a professional deep clean take? It depends on the size of the home, its initial condition, and the tasks involved. A full house deep clean can take many hours or even days of work, which is why professional teams working from a checklist are faster and more consistent. Is a professional deep cleaning service insured? Reputable companies are insured and bonded. Toronto Shine Cleaning carries a $1,000,000 insurance policy and a $10,000 accidental breakage and surety bond, so you are protected against accidental damage or liability. What is the difference between regular and deep cleaning? Regular cleaning maintains surface-level order: dusting, wiping counters, and tidying. Deep cleaning removes accumulated grease, soap scum, limescale, dust, and allergens from hard-to-reach places such as behind appliances, inside ovens, and along baseboards, and it sanitizes areas that routine cleaning misses.
4 Easy Home Deep Cleaning Tips You Need to Try Read More »

5 Best Tips To Keep Your Pet’s Area Clean And Odor-Free

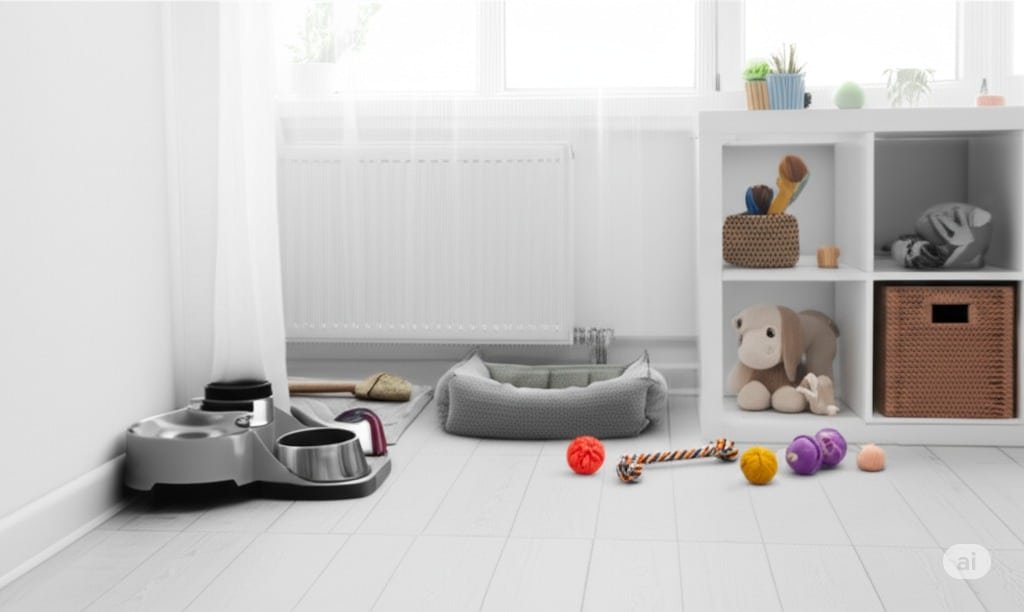
5 Best Tips To Keep Your Pet’s Area Clean And Odor-Free Pets bring companionship, energy, and plenty of love, and they also bring fur, paw prints, and messes around their feeding and bathroom zones. Keeping their area fresh is not just about appearances: it protects your family’s health and your pet’s comfort too. A clean environment means fewer allergens, fewer odors, and fewer chances for bacteria to spread between bowls, bedding, and litter boxes. You do not need elaborate equipment, just consistent routines and the right habits. These five tips cover every pet zone, from the food station to the carpet, so two-legged and four-legged family members can enjoy a fresh space. Tip 1: Set Up Routines and Designated Pet Zones Pets thrive on predictability, and so does your cleaning schedule. Daily tasks keep messes from compounding: sweep or vacuum high-traffic areas, wipe the perimeter around food bowls, and scoop the litter box every day for cats. Weekly, wash pet bedding, vacuum under furniture where fur collects, and give food and water bowls a thorough cleaning. Monthly, add the heavier jobs such as deep-cleaning carpets or washing pet toys. Pair this schedule with dedicated zones: a set spot for feeding, a comfortable sleeping corner, and a consistent elimination area. Choose bedding with removable, machine-washable covers, non-porous stainless steel or ceramic bowls, and an easy-scrub litter box. Daily: sweep or vacuum pet traffic areas, wipe bowl perimeters, scoop the litter box Weekly: wash bedding, vacuum under furniture, deep-clean food and water bowls Monthly: shampoo carpets or steam-clean upholstery, wash toys, launder crate pads Tip 2: Manage Fur, Dander, and Paw Prints Pet hair and dander are constant companions for animal owners, but the right tools keep them under control. Vacuum regularly with strong suction, and choose a model with a HEPA filter if you can, since it captures fine dander particles as well as visible hair and helps allergy sufferers breathe easier. Go slowly with overlapping passes so hair is pulled up rather than pushed down, use the right attachment on hard floors so fur does not scatter, and do not skip the sofa, a favorite lounging spot. Lint rollers handle quick touch-ups on clothing and furniture, and a slightly damp rubber glove wiped across fabric gathers embedded fur into easy-to-remove clumps. Microfiber cloths trap dust on hard surfaces instead of pushing it around. Regular grooming removes loose fur before it reaches your floors, and a mat and towel by entry points catch muddy paws. Tip 3: Keep Food and Water Stations Hygienic The feeding area matters for your pet’s health, not just your floors. Wash food and water bowls daily in warm, soapy water, scrub away food residue and biofilm, and rinse well so no soap remains. Stainless steel, ceramic, and glass bowls resist bacteria better than plastic, which develops scratches that harbor germs. Slide an easy-to-clean placemat or shallow tray under the bowls to catch stray kibble and splashes, and wipe it down regularly. Deal with spills promptly, since dried food attracts ants and other pests and feeds lingering odors. Store dry kibble in an airtight container to keep it fresh and pest-free, cover and refrigerate opened wet food, and throw out uneaten portions quickly. Wash your own hands after handling pet bowls and waste, following the CDC’s hand hygiene guidance. Tip 4: Stay on Top of the Litter Box and Potty Areas Elimination areas decide how your whole home smells. For cats, scoop the litter box daily: it cuts odor, keeps the box inviting so accidents stay unlikely, and lets you notice changes in your cat’s habits. Choose a litter that suits your cat, clumping clay, silica gel, or natural pine or corn options, and do a complete change and box wash weekly or bi-weekly depending on the number of cats. Scrub with mild soap and hot water, avoid ammonia products, which cats dislike, rinse fully, and dry completely before refilling. A textured mat at the entrance traps litter scatter. For dogs, remove used potty pads promptly, clean any seepage, and handle accidents fast: blot the liquid, then treat with an enzymatic cleaner that breaks down urine compounds and neutralizes the scent so your dog is not drawn back. Avoid ammonia cleaners, whose smell can mimic urine. Scoop dog waste from the yard regularly to cut odors and limit parasites. Tip 5: Deodorize and Deep Clean on a Cycle Daily habits prevent most smells, but a deeper cycle keeps pet areas truly fresh. Wash bedding in hot water with a pet-safe detergent when the fabric allows, which helps control bacteria and dust mites, and dry it completely before returning it, since dampness breeds mildew. Clean toys by material: hard plastic and rubber toys wash in hot soapy water or on the dishwasher’s top rack, while plush toys usually survive a machine wash. Once or twice a year, have carpets and upholstered furniture steam cleaned professionally, or rent a machine, to lift deep-set dirt and allergens. For everyday odor control, open windows for ventilation, leave open boxes of baking soda in pet rooms or sprinkle it on carpets before vacuuming, and only use air fresheners labeled pet-safe. A HEPA air purifier in main living areas removes odor-carrying particles and dander; the CDC’s healthy pets information offers more on keeping animals and households well together. Pet zone Core task Frequency Food and water bowls Wash in warm soapy water, rinse, dry Daily Pet bedding Machine wash with pet-safe detergent, dry fully Weekly Litter box Scoop daily; full change and scrub Weekly to bi-weekly Toys Wash by material in soapy water or machine Monthly Carpets and upholstery Professional steam cleaning Once or twice a year Frequently Asked Questions About Pet Area Cleaning How often should I wash my pet’s food and water bowls? Daily is best: warm, soapy water removes residue and biofilm, followed by a thorough rinse so no soap remains. How often should I completely change the litter? Most homes do a full change and box scrub weekly

5 Best Tips To Keep Your Pet’s Area Clean And Odor-Free Read More »

oil diffusers and flowers

6 Expert Tips For Getting Rid Of Odors In Your Home

6 Expert Tips For Getting Rid Of Odors In Your Home A fresh-smelling home is more than a pleasure: it signals cleanliness, comfort, and care to everyone who walks through the door. The secret is not masking smells with sprays but removing their causes and keeping the air moving. Most odors start with something simple, a bin of food scraps, a damp towel, a litter box, or a pile of laundry, and they build when those sources are neglected. These six expert tips give you a complete system for getting rid of odors at the source, refreshing the air, and keeping your home consistently welcoming. Tip 1: Eliminate Odor Sources Before Adding Fragrance Fragrance cannot fix a home that has not been cleaned, so start by removing whatever creates the smell. Empty kitchen waste bins daily, especially when they hold food scraps, and wash the bins periodically. Deal with spills on countertops, stovetops, and floors immediately, because decomposing food particles are prime odor culprits. Flush and clean kitchen and bathroom sink drains regularly so trapped debris does not ferment, and keep bathroom moisture in check by running the vent fan and letting towels dry completely between uses. Think of this as creating a clean slate before adding anything good; Health Canada’s information on indoor air contaminants explains what can build up in household air. Tip 2: Ventilate Daily to Swap Stale Air for Fresh Clean homes still smell stale if the air never changes, so make ventilation a daily habit. Open windows whenever the weather allows, even briefly, to exchange odor-laden indoor air for fresh outdoor air. Cooking smells, household stuffiness, and fine airborne particles all dissipate faster with a real air current, so open windows on facing sides of a room or across the house to create a steady flow. Bathrooms and kitchens benefit most, since they generate moisture and odors, but every room deserves regular airing. Tip 3: Refresh Fabrics That Trap Household Smells Carpets, upholstered furniture, curtains, bedding, and clothing act like sponges for cooking smells, pet odors, and everyday life. Vacuum carpets and upholstery regularly to lift odor-carrying particles along with visible dirt, and launder bed linens frequently. Do not let dirty laundry pile up, especially damp towels and sportswear, and dry everything fully before storage, since damp fabric breeds mildew. For deeper odors in carpets or large upholstered pieces, schedule a professional steam cleaning once or twice a year, or use a fabric refresher, preferably a natural or unscented formula, to neutralize trapped smells rather than cover them. Tip 4: Target the Hotspots That Breed Odors Some zones generate smells continuously and need dedicated attention. Pet areas top the list: groom animals regularly, wash their bedding often, scoop litter boxes daily, change the litter on schedule, and treat accidents immediately with an enzymatic cleaner that breaks down the odor-causing proteins. High-moisture areas are next: bathrooms, poorly ventilated laundry rooms, and basements stay musty without good airflow, so ventilate them, repair leaks promptly, and run a dehumidifier if needed; the CDC’s mould health and cleanup guidance explains why dry air is healthier air. The refrigerator belongs on the list too: clear out old food and wipe the interior so it never becomes a hidden odor source. Kitchen bin and recycling: empty daily, wash weekly Sink drains: flush with hot water weekly Pet bedding and litter box: wash and scoop on schedule Bathroom towels and mats: wash often, dry fully Refrigerator: clear expired food and wipe shelves weekly Tip 5: Add Subtle Natural Fragrances as a Finishing Layer Once the sources are gone and the air moves freely, a light natural fragrance makes a home feel finished: a delicate layer of scent that complements genuine cleanliness. Place fresh flowers or a bowl of citrus in living areas, or simmer a pot of water with cinnamon sticks, cloves, and citrus peels for a gentle perfume during cooler months. Essential oil diffusers with quality oils such as lavender, citrus, or eucalyptus let you customize each room’s scent, and candles made from natural waxes scented with essential oils work well when burned safely with adequate ventilation. Tip 6: Lock In Freshness With Maintenance Habits The final tip ties everything together: consistency beats occasional marathons. Small daily habits stop odors before they start: wipe kitchen counters after every meal, sweep or vacuum high-traffic kitchen floors, keep the sink free of dirty dishes overnight, and give the bathroom sink a quick clean each evening. Weekly, vacuum and dust every room, change bed linens, clean bathroom fixtures thoroughly, and mop floors. Breaking the work into manageable pieces prevents buildup and beats a draining once-a-month marathon. These habits become the backbone of a home that smells as fresh as it looks. Area Daily habit Weekly habit Kitchen Wipe counters, clear the sink, empty food scraps Wash the bin, flush drains, wipe the fridge shelves Bathroom Quick sink wipe, hang towels to dry fully Scrub fixtures, wash towels and bath mats Floors and carpets Sweep or vacuum high-traffic areas Vacuum all rooms, mop hard floors Bedding and laundry Never leave damp clothes piled up Change linens, launder and dry everything fully Pet zones Scoop litter, spot-clean accidents Wash bedding, refresh the litter box Frequently Asked Questions About Household Odors Why does my home smell musty even though I clean it? Musty smells usually come from moisture: check for damp towels, poor ventilation, leaky pipes, or humid basements, since reducing humidity is the real cure for mildew odors. Do air fresheners actually remove odors? Most only mask them; lasting freshness requires removing the odor source first, then using natural scents or ventilating to keep the air genuinely clean. How can I get pet odors out of my carpet? Treat fresh accidents with an enzymatic cleaner, vacuum regularly, sprinkle baking soda before vacuuming for ongoing freshness, and steam clean carpets once or twice a year. How often should I wash bedding to keep bedrooms fresh? Weekly washing of sheets and pillowcases removes the body oils, skin

6 Expert Tips For Getting Rid Of Odors In Your Home Read More »

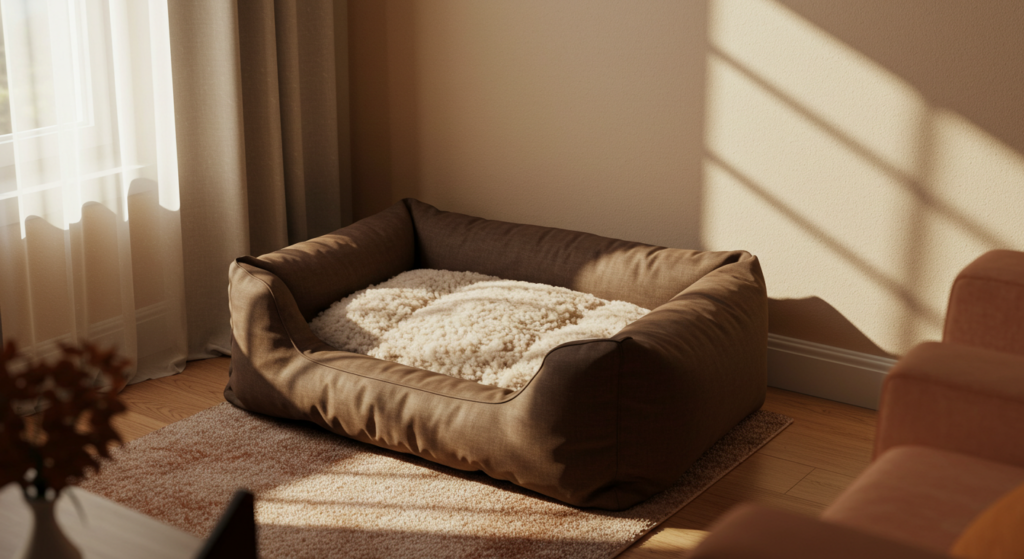
Brown dog bed inside a house

5 Easy Steps to Clean Dog Beds Without Harsh Chemicals

If your dog’s bed smells like drool, dirt, and fur, it’s time for a serious refresh. But reaching for harsh cleaning products isn’t the safest choice for your pup. Dogs lie, chew, and nap on their beds for hours-so how you clean their bed matters. Let’s talk about simple ways to clean dog beds without harsh chemicals that still get results and keep your furry friend comfortable. We’ll walk through five easy and pet-safe ways to clean dog beds naturally. These tips use things you probably already have at home, and they work without leaving behind strong smells or toxic residue. They’re perfect for dog owners who want a cleaner home without compromising their dog’s health. By following these steps, you’ll be able to keep your dog’s bed fresh and odor-free while avoiding ingredients that could irritate their skin or paws. Here’s how to clean a dog bed the safe way. 1. Vacuum the Dog Bed Weekly A simple way to clean a dog bed is by vacuuming it regularly. Pet hair, dried dirt, and dander build up fast, and if you don’t stay on top of it, your dog bed becomes a smell trap. Use a handheld vacuum or a brush attachment to get into seams and corners, where gunk tends to hide. This helps prevent odor and keeps allergens to a minimum. Vacuuming once a week is a great routine to help clean dog beds without much effort. It won’t remove deep grime, but it takes care of the surface mess and keeps the bed looking tidy. Think of it as preventative maintenance. The cleaner you keep the surface, the easier it is to deep clean later on. Plus, vacuuming helps extend the life of the dog bed. Dirt and fur trapped in the fabric can wear it out faster. So a quick vacuum doesn’t just help you clean the dog bed-it helps preserve it, too. 2. Wash with Mild, Fragrance-Free Detergent The best way to clean a dog bed thoroughly is by washing it with a mild, fragrance-free detergent. Many standard laundry products are loaded with perfumes and chemicals that can irritate your dog’s skin. Look for something gentle-something you’d use for a baby or someone with allergies. If the Clean Dog Bed has a removable cover, take it off and throw it in the washer. If the whole bed is machine washable, even better. Wash on a warm cycle to kill bacteria and remove grime. This is a super effective way to clean dog beds while keeping your home pet-friendly. When drying, use low heat or hang the bed to air dry. High heat can damage the fabric or shrink the bed. Washing is one of the easiest and most effective methods to clean a dog bed without using anything harsh-and it’ll leave your pup’s space smelling fresh and feeling comfy. 3. Sprinkle Baking Soda to Deodorize Sometimes, you don’t need to do a full wash to clean a dog bed-you just need to get rid of that smell. Baking soda is a natural deodorizer that’s totally safe for pets. Sprinkle a good layer over the bed and let it sit for 30 minutes or more. It soaks up bad odors and freshens things up without any fragrance or chemicals. After it sits, just vacuum it up. You’ll notice the Clean Dog Bed smells cleaner and feels fresher. This trick is perfect between washes, especially if your dog tracks in dirt or has a habit of rolling in questionable things. It’s a fast, easy way to clean dog beds naturally. You can do this weekly or anytime the bed starts smelling off. Baking soda is cheap, safe, and works wonders-plus, it gives your vacuuming routine a little boost. It’s one of the best low-effort ways to clean a dog bed without needing detergent or special tools. 4. Spot Clean with Castile Soap and Water Some messes don’t need a full wash-just a spot clean. To clean a dog bed after a small spill or muddy paw print, mix a little warm water with unscented castile soap. It’s gentle, plant-based, and doesn’t leave behind any harsh residue. Perfect for sensitive pups. Dab the stained area with a cloth dipped in the soap solution. Gently blot-don’t rub-to avoid spreading the mess or pushing it deeper into the fabric. Once the stain is lifted, use a damp cloth to rinse the area, then pat dry with a clean towel. This is a simple way to clean dog beds without tossing the whole thing in the wash. Spot cleaning is great for quick touch-ups in between regular washes. You can stay on top of little accidents, and your dog’s bed stays cleaner overall. If you’re trying to clean a dog bed without harsh chemicals, castile soap is a safe, pet-friendly staple to keep on hand. 5. Use a Steam Cleaner for Deep Cleaning A steam cleaner is an excellent tool when you need to clean a dog bed deep down. The high temperature lifts dirt, kills germs, and refreshes fabric-all without any cleaning products. It’s perfect for Clean Dog Beds that can’t go in the washer or for homes with dogs who have allergies. Start by vacuuming the bed to remove loose dirt. Then, slowly pass the steam cleaner over the entire surface. The heat will sanitize and help remove embedded smells and bacteria. This is one of the most effective ways to clean dog beds without introducing any chemicals at all. Let the bed dry fully before letting your dog back on it. Steam cleaning is powerful, safe, and doesn’t require any special soaps. If you’re serious about finding ways to clean a dog bed naturally and effectively, this is one method worth trying regularly. Need Help Keeping Things Clean? Call Toronto Shine Cleaning It’s easier than you think to clean dog beds without harsh chemicals. Whether you’re vacuuming weekly, washing with gentle detergent, or using natural deodorizers like baking soda, your dog’s bed can stay fresh without

5 Easy Steps to Clean Dog Beds Without Harsh Chemicals Read More »

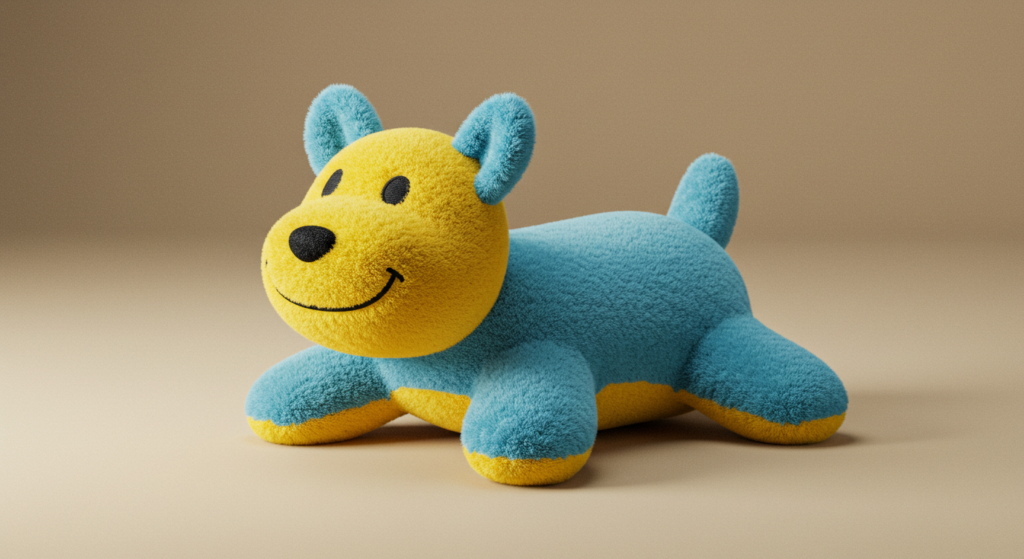
Plush animal toy yellow and blue for dogs

How to Clean Dog Toys Safely and Naturally

Dog toys get gross fast – and if you don’t clean dog toys regularly, they can collect bacteria, mold, and bad smells. Learning how to clean dog toys safely and naturally helps protect your pet’s health and keeps your home fresher. Most dogs chew, lick, and drag their toys everywhere, so they need frequent cleaning to stay safe. Using natural methods to clean dog toy collections avoids exposing your pup to harsh chemicals. You don’t need to overcomplicate things. The best way to clean dog toy surfaces is with hot water and a bit of gentle soap. Whether it’s a plush squeaky or a tough rubber chew, you can clean every type of dog toy using simple, safe ingredients. This guide breaks it down by toy type and helps you create a routine that’s easy to stick to – and your pup will thank you for it. Let’s go over how to clean dog toys step-by-step, using natural methods that work without leaving any harmful residue behind. Clean Plush Dog Toys in the Washing Machine If your dog loves soft, plush toys, you’ll want to know how to clean dog toy fabric safely. Most plush dog toys can be tossed right in the washing machine. Use a gentle cycle with warm water and skip the harsh detergents. Stick with a pet-safe laundry soap or something like Castile soap to avoid any irritating chemicals. For extra protection, place the toys in a laundry bag or pillowcase before washing. This helps prevent damage, especially if your dog’s favorite toy has a squeaker or delicate stitching. After the wash, always inspect the toy to make sure it hasn’t torn open. The last thing you want is your dog chewing on loose stuffing or a broken squeaker. Dry the toy thoroughly before giving it back to your pup. You can air-dry it or use a dryer on low heat. Drying is key – moisture inside a plush toy can cause mildew. By washing and drying regularly, you’ll clean dog toys effectively and help them last longer. Wash Rubber and Hard Dog Toys with Hot Water and Soap Rubber, nylon, and plastic dog toys get just as dirty – especially the ones your pup uses for fetch or food. To clean dog toy surfaces like these, soak them in hot water with a small amount of pet-safe dish soap. Let them sit for about 10 to 15 minutes to loosen drool, dirt, and any sticky food bits. After soaking, use a brush or sponge to scrub every groove and surface. This step is super important for puzzle toys or treat dispensers. You’d be surprised how much grime builds up. Rinse each toy well under warm water to remove all traces of soap before giving it back to your dog. That’s a simple and safe way to clean dog toys without using anything harmful. Let the toys dry completely before letting your dog play with them again. Air drying works best. Making this a weekly habit helps maintain your dog’s health and keeps your home from smelling like old chew toys. Regularly cleaning dog toys also cuts down on bacteria and allergens. Use a Toothbrush for Hard-to-Reach Spots Some toys have tricky grooves, holes, or raised textures that need more attention. If you want to really clean dog toys thoroughly, an old toothbrush is your best tool. Dip it in warm soapy water and use it to scrub those hard-to-reach areas where dirt and drool love to hide. This is perfect for toys with ridges or built-in treat holders. Focus on textured surfaces or spots where food might get stuck. Take your time and make sure to get into every corner. A quick toothbrush scrub can make a huge difference when you’re trying to completely clean dog toy surfaces without leaving behind germs. It’s also a good moment to check the toy for cracks or signs of wear. Once you’re done scrubbing, rinse the toy under warm water until it’s squeaky clean. Let it dry all the way before your dog gets it back. Doing this every week or so is a smart way to keep toys safe, clean, and fun for your pup. Skip the Bleach and Harsh Disinfectants If you’re tempted to use bleach or strong cleaners, don’t! These are not safe when you’re trying to clean dog toys – even a small leftover amount can make your dog sick. Your pet chews, licks, and carries their toys around, so anything left behind from cleaning goes straight into their system. Stick with gentle, pet-safe cleaners that do the job without the risks. Many common cleaners are packed with artificial scents and chemicals that are way too harsh for anything your dog touches. Even “green” cleaners aren’t always safe for pets. That’s why we always recommend warm water, mild soap, or Castile soap when you clean dog toys. It’s safer, cheaper, and gets the job done just as well. If you want an extra-deep clean, you can boil certain rubber toys – but make sure they’re heat-safe first. Check the packaging or manufacturer’s website. Boiling is a great chemical-free way to sanitize. Whatever method you choose, always think pet-safe first when you need to clean dog toy collections. Make Cleaning Dog Toys Part of Your Routine Just like washing dishes or vacuuming pet hair, taking time to clean dog toys should be part of your weekly routine. Toys collect bacteria, dirt, and even allergens. If your dog drags them around the house, those germs get everywhere. Regular cleaning not only helps your dog stay healthy but also keeps your home fresher. You don’t have to clean everything at once. Rotate toys – while some are being cleaned, others can stay in the toy bin. Focus on the ones your dog plays with the most. Weekly washing keeps the grime from building up too much. Once you get in the habit, it only takes a few minutes to clean dog toys every week. Clean toys

How to Clean Dog Toys Safely and Naturally Read More »

Person sneezing indoors as sunlight reveals dust particles in the air.

5 Cleaning Tips to Reduce Asthma Triggers in Your Home | Toronto Shine Cleaning

A Home That Breathes Easy Starts With How You Clean It For someone living with asthma, a house can flip from sanctuary to hazard zone without warning. Dust, pet dander, mold, and strong fumes lurk in plain sight, and each one can escalate a quiet afternoon into an attack. The leverage point is your cleaning routine: done deliberately, it removes the triggers instead of aerosolizing them. These five core tips, plus two deeper dives on soft furnishings and pets, build a home where lungs of every sensitivity can relax. 1. Chase Dust Before It Settles Dust mites are among the most notorious asthma aggravators, so a dust-controlled home is step one. Ditch the feather duster and wipe surfaces with a damp cloth: moisture captures and removes dust rather than launching it back into the air you breathe. Vacuum faithfully with a machine fitted with a HEPA filter, because those filters capture the finest particles instead of puffing them out the exhaust. Then wash bedding weekly in hot water, which kills the mites thriving in warm, fibrous linens and strips out the allergens they leave behind. 2. Keep Humidity Below Fifty Percent Mold and dust mites both throw parties when indoor air turns humid, and both are major asthma escalators. Holding indoor humidity under 50 percent suppresses both at the source. The direct tool is a dehumidifier, which pulls excess moisture from the air and holds the house at a healthier level, ideally checked with a simple hygrometer. Ventilate the wet rooms: exhaust fans in bathrooms and kitchens, or a cracked window, move air before mold and mildew can colonize. Fix every leak the moment you spot it, because damp surfaces are mold’s launchpad, and unchecked mold is exactly the kind of trigger the CDC’s mold health resource warns sensitive airways about. 3. Choose Gentle, Low-Fume Products The cleaner you spray is itself a potential trigger. Many commercial formulas lean on strong fragrances and harsh chemistry that irritate reactive airways, so choose unscented or naturally scented products made for sensitive households. Skip aerosol cans entirely: the fine mist they launch is built for deep inhalation. Liquid concentrates and pump sprays do the same cleaning work with far less airborne payload, and a DIY mix of vinegar and baking soda handles surface grime and bathroom mildew without adding any synthetic trigger to your air. Health Canada’s household products hub is the right reference for reading labels and choosing safer chemistry. If you do reach for bleach occasionally, follow the CDC’s bleach guidance: dilute properly, ventilate hard, and never mix it with other products, because bleach fumes are a textbook asthma trigger. 4. Respect Your Filters Your heating and cooling system circulates whatever its filters fail to catch: pollen, dust, dander, all of it, straight into every room. Change or clean HVAC filters on the manufacturer’s schedule, which protects both your air and the system’s efficiency. Then add a HEPA air purifier in the rooms where you actually spend your hours, especially the bedroom, since you cannot breathe clean air selectively while asleep for eight hours. 5. Declutter Without Mercy Every knickknack, stack, and pile is a dust exhibition with extra surfaces. Clear surfaces shrink the places allergens can camp, which is why regular decluttering sessions, parting with what you no longer use, pay off in easier cleaning all year. Store what stays inside closed containers instead of leaving it open to the air, so dust never accumulates on the things themselves. A starter shopping list for an asthma-focused cupboard: A vacuum sealed with a true HEPA filter for weekly whole-floor sessions A hygrometer and dehumidifier for any basement or damp-prone room Unscented, dye-free surface cleaners and pump sprays instead of aerosols Zip-seal storage bins for off-season clothes, books, and keepsakes Bonus Focus: Soft Furnishings and Carpets Carpets, sofas, and curtains are allergen reservoirs the daily eye never sees. Vacuum carpet with your HEPA machine regularly to drag out embedded dust and dander, and steam clean carpets and upholstery periodically to cook off dust mites and lift what vacuuming misses. If asthma runs severe in the house, trade heavy drapes for washable curtains or blinds, and where you can, trade carpet for hard flooring; each swap permanently shrinks the home’s allergen load. Bonus Focus: Pets and Their Passengers Pets deliver joy and allergens in the same package: dander, fur, and the dust they trail in. Brush them outdoors where possible so loose fur never becomes indoor air, and keep animals off furniture and out of the bedroom so sleeping hours stay low-exposure, which matters because sleep is when airways recover. Vacuum more often in the pet’s favourite zones, run a purifier there too, and wash pet bedding and toys frequently so dander never piles up. Trigger Where It Hides Your Counter-Move Dust mites Bedding, upholstered furniture Hot-water weekly wash, HEPA vacuum Mold spores Bathroom, leaks, humid corners Humidity under 50 percent, fix leaks fast Pet dander Sofas, pet beds, carpets Outdoor grooming, purifier, off the bed Fumes and aerosols Cleaning cupboard Unscented liquids, pump sprays, ventilation Frequently Asked Questions and Answers How often should an asthmatic home be cleaned? Dust and vacuum weekly at minimum, wash bedding weekly in hot water, and deep-clean soft furnishings a few times a year. During pollen season or flare-ups, add sessions rather than stretching them. Are natural cleaners always safe for asthma? Not automatically. Vinegar has strong fumes too, so dilute it, ventilate while using it, and patch-test your reaction. Unscented, dye-free formulas designed for sensitive users remain the safest default. Does a HEPA filter really matter in a vacuum? Yes. Without one, the vacuum exhausts the finest particles straight back into the room air, which is precisely the fraction that reaches deep lungs. Sealed HEPA systems are the standard for allergen households. Can professional cleaning genuinely help? Regular visits keep dust, dander, and clutter from rebuilding between your own sessions, and a seasonal deep clean hits the reservoirs people miss. Toronto Shine Cleaning’s regular service

5 Cleaning Tips to Reduce Asthma Triggers in Your Home | Toronto Shine Cleaning Read More »

Toronto apartment cleaning

How to Tackle Allergens in Your Home with 6 Simple Changes | Toronto Shine Cleaning

How to Tackle Allergens in Your Home with 6 Simple Changes Sneezing the moment you sit on the sofa, itchy eyes after bed, a nose that runs all winter: indoor allergies rarely come from nowhere. Dust mites, pet dander, pollen, and mold spores settle into fabric, floors, and still corners, and every one of them has a fix. These six changes cut the allergen load in your home without turning cleaning into a full-time job. 1. Dust Top to Bottom, Then Vacuum Everything Fabric Dust mites burrow into fabric and upholstery, so moving a duster across a shelf only shifts them around. Work from the top of each room downward, ceiling fans, bookshelf tops, and picture frames first, so falling dust does not land on surfaces you have already cleaned. The CDC’s home cleaning guidance makes the same case for regular cleaning: remove dirt and allergens before they build up, and surfaces become much easier to keep clean. Vacuuming earns its place in every room, not just over carpet. Floors, sofas, and curtains all hold dander and mite waste, and the attachments exist for the seams and corners where it gathers. Plan at least one pass a week, more in busy rooms or homes with pets, and do not skip under the bed or behind furniture. A HEPA filter captures particles as small as 0.3 microns, well under the size of a dust mite, but only while it is maintained: clean or replace it on the manufacturer’s schedule, because a clogged filter stops trapping allergens and drags the vacuum’s suction down with it. 2. Keep Windows Shut When Pollen Is High Pollen seasons run through spring, summer, and fall, and each one sends tree, grass, or weed grains drifting on the air. An open window invites them in, where they settle onto surfaces and linger for hours. Air conditioning is the practical alternative, keeping the house comfortable while its filters capture pollen, provided you clean or replace those filters as the maker advises. A clogged filter cuts cooling efficiency and can become a source of indoor pollution itself. 3. Choose Allergen-Proof Bedding and Wash It Hot You spend a third of your life in bed, which makes bedding prime mite territory. Zippered covers woven tightly enough that mites and their allergens cannot pass through, fitted over the mattress, pillows, and duvet, lock them out of the soft habitat they prefer. The covers protect the core, but sheets, pillowcases, and duvet covers still collect allergens, so wash them weekly in water of at least 130 F (54 C) to kill mites and rinse the residue away. Where allergies hit hardest, smooth-surfaced furniture and hard flooring beat upholstery and wall-to-wall carpet, and a HEPA purifier keeps working while you sleep. 4. Hold Indoor Humidity Between 30% and 50% Dust mites and mold both need moisture, and humidity between 30% and 50% leaves them least comfortable. A dehumidifier handles basements, crawl spaces, and ground floor rooms that run damp; empty the tank on a schedule. Where humidity is a year-round problem, a whole-home dehumidifier ties into the HVAC system and treats the entire house at once. Ventilation covers the rest: run exhaust fans while you cook or shower, keep them on long enough to clear the steam, and confirm the clothes dryer vents outside. The CDC’s guidance on mold is blunt about why it matters: mold grows wherever moisture lingers, including on wood, fabric, and household dust. 5. Declutter So Allergens Have Fewer Hiding Places Every knickknack is a landing strip for dust, and every crowded shelf is a spot the vacuum cannot reach. Decluttering is not about an empty house; it is about keeping what serves a purpose or earns its place, which cuts both the surfaces that collect allergens and the time you spend cleaning around them. Start with one zone at a time, clear counters, coffee tables, and desks first, and add storage that keeps things off the floor. 6. Groom Pets and Give Them Boundaries Pets bring dander indoors, and their coats ferry in pollen, mold, and dust from outside. Regular baths and brushing remove much of it, though over-bathing dries the skin and produces more dander, so ask your veterinarian what schedule suits your pet’s coat. Boundaries help too: keep pets out of bedrooms and off upholstered furniture so part of the home stays low-allergen, and wash pet bedding and toys regularly. Managing pet allergens is about reduction, not elimination, and consistent habits get you most of the way. Allergen Hotspots at a Glance Hotspot What collects there The fix Bedding and pillows Dust mites and their allergens Allergen-proof covers and weekly hot washes at 130 F (54 C) Carpets, rugs, upholstery Dander, mite waste, tracked-in pollen HEPA vacuuming weekly or more, plus periodic deep cleaning Bathrooms and basements Mold spores in damp air Exhaust fans and dehumidifiers; humidity at 30%-50% Cluttered surfaces Settled dust that vacuuming misses Decluttering plus storage that frees open surfaces A Weekly Allergen Checklist Dust top to bottom with a microfiber cloth. Vacuum floors, sofas, curtains, under beds, and behind furniture. Wash bedding in water of at least 130 F (54 C). Check that humidity sits between 30% and 50%. Brush pets and keep them out of the bedroom. Frequently Asked Questions How often should I vacuum to control allergens? Once a week is the floor, not the target. Sensitive households and homes with pets do better with two or more passes in busy rooms, plus attention under furniture and along baseboards. Do I really need to wash bedding in hot water? Yes, if dust mites are a concern. Water of at least 130 F (54 C) kills mites and removes the allergens they leave behind. Allergen-proof covers protect the mattress and pillows, but sheets, pillowcases, and duvet covers still need a weekly hot wash. Can professional cleaning help with allergies? It can, because the biggest gains come from the spots people skip: under beds, behind furniture, along baseboards, and around vents.

How to Tackle Allergens in Your Home with 6 Simple Changes | Toronto Shine Cleaning Read More »

Clean Living Room with Playful Dog and Cat

5 Cleaning Hacks for Pet Owners: How to Save Time and Effort

Cleaning With Pets Should Not Be a Full-Time Job Dogs and cats hand out endless joy, then quietly hand you a side of shedding, muddy paw tracks, and the mystery stain you find an hour later. Keeping a home fresh with pets around takes strategy more than elbow grease. The five hacks below target the exact messes pet owners face: floating fur, set-in odors, floor grime, and the dander that no surface wipe really removes. Each one saves minutes every day, and together they turn pet cleanup from constant crisis management into a short, boring routine. Hack 1: Rubber Gloves Magnetize Pet Hair Rubber gloves work because the material builds static electricity as it rubs across carpets, upholstery, and clothing, and that charge pulls pet hair off the fabric like a magnet. Where lint rollers and vacuums can miss fine hairs, a gloved hand reaches into seams, corners, and textured weave for a more complete grab. The gloves are reusable too: rinse them with soap and water and they are ready for the next session, unlike single-use adhesive sheets. For delicate spots, run gloved fingers around sofa buttons, cushion corners, and the patterns on decorative pillows so no clump survives. Hack 2: Baking Soda Neutralizes Odors Instead of Masking Them Sodium bicarbonate absorbs and eliminates smells rather than covering them, because it reacts with odorous substances and changes their pH so the odor is genuinely removed from the environment. Sprinkle it on carpets and upholstery, let it sit, then vacuum. Between litter box cleanings, a light sprinkle controls ammonia smell for both you and the cat. For set-in smells on bedding or fabric toys, mix baking soda with water into a paste, work it onto the soiled area, let it dry, and brush or vacuum it off. In the wash, a cup of baking soda added with your detergent boosts cleaning power on pet blankets. Baking soda is non-toxic, which is exactly what you want around curious noses, though you should still keep pets from ingesting large amounts directly. Hack 3: Mix a DIY Pet-Safe Floor Cleaner The whole recipe fits one spray bottle: Water plus white vinegar, whose acidity dissolves dirt, soap scum, and hard water deposits A few drops of liquid dish soap to cut grease and paw-track grime An optional lemon peel for a fresh scent and natural antibacterial and antifungal boost Beyond the bottle, the chemistry matters: vinegar works against bacteria and viruses, which is why the mix shines on kitchen and bathroom tile, while the dish soap handles the grease that paw pads track in. Spray lightly on tile or linoleum and mop as usual; no toxic residue is left behind, so paws can walk the floor soon after. One caution: vinegar’s acid can damage hardwood finishes over time, so on wood floors use a heavily diluted solution for occasional deep cleans or stick to a manufacturer-recommended, pet-safe product. Hack 4: Keep a Lint Roller in Every Room The lint roller is the fast-response tool bulky vacuums cannot match. Company is twenty minutes out and the favourite chair is a fur coat? A quick pass makes it guest-ready in seconds. The sticky sheets also work on lampshades, soft toys, car interior nooks, and even dry spills like scattered cat litter or kibble around feeding stations. Get the most from each sheet by rolling in multiple directions so hair is lifted from every angle, then peel to a fresh layer. Keep a mini roller in your bag or car to de-fur your coat before meetings, no outlet or batteries required. Hack 5: Vacuum Like Allergens Depend On It Strong suction is the foundation: it drags embedded hair and dirt from deep in carpet and upholstery, protecting both cleanliness and the lifespan of your furnishings. Motorized brush heads and specialized pet hair attachments agitate fur out of stairs, drapes, and couch weave where plain nozzles struggle. HEPA filtration matters most for the air you breathe, trapping 99.97% of particles at 0.3 microns, including dander, dust, pollen, and mold that drift airborne the moment your pet sheds. That is a genuine win for allergy-prone family members, and the CDC’s asthma resources point to cleaner indoor air as a core way to reduce flare-ups. Vacuum a few times a week to stay ahead of constant shedding, which also gives you a read on your pet’s coat health. Convenience features like cordless bodies, easy-empty dustbins, low noise, and app scheduling make the habit easier to keep. For deeper guidance on safe handling of pet waste and hygiene around animals, see the CDC’s healthy pets, healthy people page. Which Hack Handles Which Mess Mess Best hack How often Fur on sofas and beds Rubber glove pass, then lint roller finish As needed, weekly deep pass Carpet and litter box odors Baking soda sprinkle, sit, and vacuum Weekly, plus between scoops Muddy paw tracks on tile Vinegar, soap, and water mop solution As needed, no residue worries Airborne dander HEPA vacuum with motorized brush A few times per week Fur on coats and car seats Mini lint roller on the spot Daily, out the door Pet Cleaning Questions From Toronto Homes Is baking soda really safe around cats and dogs? Yes, it is non-toxic, which makes it a gentler option than many commercial deodorizers. The only sensible precaution is keeping pets off the area while it sits and is vacuumed, since inhaling or eating large quantities directly can upset them. Can I use vinegar on every floor in my home? Tile, linoleum, and vinyl handle a vinegar-and-dish-soap solution well. Hardwood is the exception: the acid can dull or damage the finish over time, so dilute heavily for rare deep cleans or use the cleaner your flooring manufacturer recommends. How often should I vacuum with a shedding pet? A few times a week is the working answer, hitting high-traffic zones daily if the shedding is seasonal. A HEPA filter keeps the fine dander you stir up from simply recirculating into the room

5 Cleaning Hacks for Pet Owners: How to Save Time and Effort Read More »